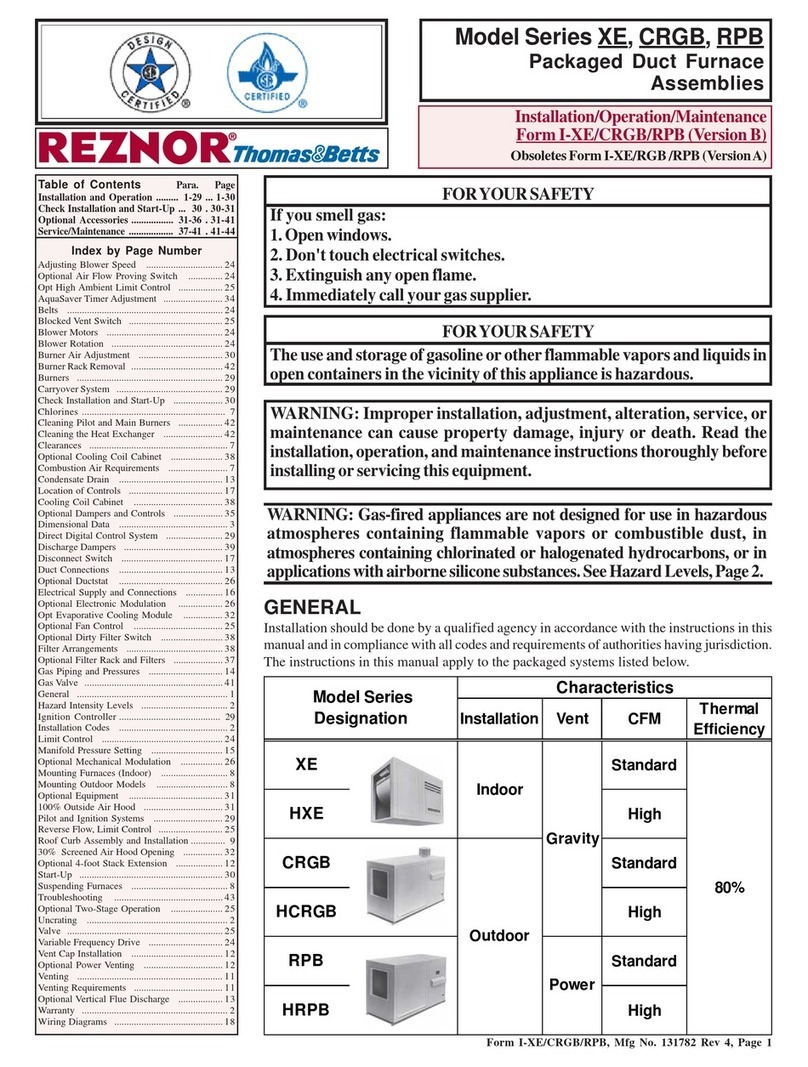
Ecoer MGH96 User manual

�-
t
.
•· , I
Ecoer
96% AFUE Gas Furnace MGH96 Model
Condensing Gas Furnace
Installation, Operation, and Maintenance Manual
•
lntertek
3124627
�1 CERTIFIED®

2
| Ecoer 96% AFUE Gas Furnace Installation, Operation & Maintenance
07-2020| Ecoer Inc..
Data subject to change

Installation, Operation & Maintenance Manual Ecoer 96% AFUE Gas Furnace | 3
Ecoer Inc. | 07-2021 Data subject to change
Table of Contents
1 Key to Symbols and Safety Instructions 4
1.2 Safety 4
2 Dimensions 7
3 Introduction 8
4 Codes and Standards 9
4.1 Safety 9
4.2 General Installation 9
4.3 Combustion and Ventilation Air 10
4.4 Duct Systems 10
4.5 Acoustical Lining and Fibrous Glass Duct 10
4.6 Gas Piping and Gas Pipe Pressure Testing 10
4.7 Electrical Connections 10
4.8 Electrical Power Supply 10
4.9 Venting 10
5 Electrostatic Discharge (ESD) Precautions Procedure 10
6 Location 11
6.1 General 11
7 Installation 13
7.1 Upflow Installation 13
7.2 Horizontal Installation 14
7.3 Condensate Line and Over Flow Pressure Switch 17
7.4 Filter Arrangement 22
7.5 Air Ducts 23
8 Combustion Air and Vent System 26
8.1 Combustion Air and Vent Safety 26
8.2 Combustion Air/Vent Pipe Sizing 26
8.3 Comnustion Air And Vent Piping Assembly 28
8.4 Combustion Air / Venting 29
8.5 Vent System 30
8.6 Combustion & Ventilation Air Requirements 31
8.7 Vent and Supply (Outside) Air Safety Check Procedure 34
9 Gas Supply and Piping 35
9.1 General 35
9.2 High Altitude Derate 36
9.3 Propane Gas (LP) Conversion 37
9.4 Gas Piping Connections 37
9.5 Gas Piping Checks 38
10 Electrical Connections 39
10.1 115V Wiring 39
10.2 Electrical Connection to J-box 40
10.3 Power Cord Installation in Furnace J-box 40
10.4 BX Cable Installation in Furnace J-box 40
10.5 24-V Wiring 40
10.6 Accessories (Field Supplied) 40
10.7 Grounding 40
11 Start-Up, Adjustment, and Safety Check 43
11.1 General 43
11.2 Start-Up Procedures 43
11.3 Furnace Start-Up 43
11.4 Sequence of Operation 44
44
11.5 Gas Manifold Pressure Measurement and Adjustment 45
11.6 Gas Input Rate Measurement (Natural Gas Only) 46
11.7 Temperature Rise Adjustment 46
11.8 Circulator Blower Speed Adjustment 47
12 Operational Checks 48
13 Safety Circuit Description 48
13.1 General 48
13.2 Integrated Control Module 48
13.3 Chamber Limit Switch - Fixed 48
13.4 Fan Mounted Limit Switch 48
13.5 Rollout Switch - Resettable 48
13.6 Overflow Protection Pressure Switch (Overflow Switch) 48
13.7 Pressure Switches 48
13.8 Flame Sensor 48
14 Troubleshooting 49
14.1 Electrostatic Discharge (ESD) Precautions 49
14.2 Resetting From Lockout 49
14.3 Troubleshooting Chart 49
15 Service and Maintenance Procedures 52
15.1 Annual Inspection 52
15.2 Filters 52
15.3 Induced Draft And Circulating Blower Motors 52
15.4 Flame Sensor (Qualified Service Technicians Only) 52
15.5 Ignitor (Qualified Service Technicians Only) 53
15.6 Burners 53
15.7 Inspecting the Heat Exchanger (Qualified Service Technicians Only) 53
15.8 Condensate Drain 53
15.9 Repair and Replacement Parts 53
16 Before Leaving Installation 53
17 Wiring Diagram 55

4 |
E
coer 96%
A
F
UE
Gas Furnace
Installation, Operation & Maintenance
07-2021 | Ecoer Inc.
Data subject to change
1 Key to Symbols and Safety Instructions
1.1 Key to Symbols
Warnings
Warnings in this document are identified by a
warning triangle printed against a grey background.
Keywords at the start of a warning indicate the type and seriousness
of the ensuing risk if measures to prevent the risk are not taken.
The following keywords are defined and can be used in this document:
DANGER indicates a hazardous situation which, if not avoided, will
result in death or serious injury.
WARNING indicates a hazardous situation which, if not avoided, could
result in death or serious injury.
CAUTION indicates a hazardous situation which, if not avoided, could
result in minor to moderate injury.
NOTICE is used to address practices not related to personal injury.
Important information
This symbol indicates important information where
there is no risk to people or property.
1.2 Safety
Please read all instruction in the manual and retain all manuals for future reference.
INSTALLER: Use the information in this booklet to install the appliance
and affix this booklet adjacent to the appliance after installation.
USER: Keep this booklet of information for future reference. Refer to the
User's Information Manual for more information.
SERVICER: Use the information in this booklet to service the appliance
and affix the booklet adjacent to the appliance after servicing.
WARNING: FIRE OR EXPLOSION HAZARD
Do not store or use gasoline or other flammable vapors and
liquids in the vicinity of this or any other appliance.
WHAT TO DO IF YOU SMELL GAS:
—Do not try to light any appliance.
—Do not touch any electrical switch; do not use any
phone in your building.
—Leave the building immediately.
—Immediately call your gas supplier from a neighbor’s
phone. Follow the gas supplier’s instructions.
—If you cannot reach your gas supplier, call the fire
department.
Installation and service must be performed by a qualified
installer, service agency, or the gas supplier.
WARNING: FIRE OR EXPLOSION HAZARD
Do not use this furnace if any part has been under water. A
flood-damaged furnace is extremely dangerous. Attempts
to use the furnace can result in fire or explosion. A qualified
service agency should be contacted to inspect the furnace
and to replace all gas controls, control system parts,
and electrical parts that have been wet, or the furnace if
deemed necessary.
WARNING: FIRE OR EXPLOSION HAZARD
The furnace is designed and approved for use with Natural
Gas and (LP) Propane Gas ONLY.
DO NOT BURN ANY LIQUID FUEL OR SOLID FUEL IN THIS
FURNACE.
Burning any unapproved fuel will result in damage to
the furnace's heat exchanger, which could result in Fire,
Personal Injury, and/or Property Damage.

Installation, Operation & Maintenance Manual Ecoer 96% AFUE Gas Furnace | 5
Ecoer Inc. | 07-2021 Data subject to change
WARNING: FOLLOW ALL SAFETY CODES
Wear safety glasses, protective clothing, and work gloves.
Have a fire extinguisher available. Read these instructions
thoroughly and follow all warnings or cautions included in
literature and attached to the unit. Consult local building
codes as well asthe current editions of the National Fuel
Gas Code (NFGC) NFPA 54/ANSI Z223.1 and the National
Electrical Code (NEC) NFPA 70.
WARNING: FIRE, EXPLOSION, ELECTRICAL SHOCK, AND
CARBON MONOXIDE POISONING HAZARD
Failure to follow this warning could result in dangerous
operation, serious injury, death,or property damage.
Improper installation,adjustment,alteration,maintenance,
or use could cause carbon monoxide poisoning,explosion,
fire,electrical shock,or other conditions which may cause
personal injury or property damage. Consult a qualified
service agency,local gas supplier, or your distributor for
information or assistance.
CAUTION: CUT HAZARD
Failure to follow this caution may result in personal injury.
Sheet metal parts may have sharp edges or burrs. Use care
and wear appropriate protective clothing, safety glasses
and gloves when handling parts and servicing furnaces.
CAUTION: INSTALLATION REQUIREMENTS
Use only with type of gas approved for this furnace. Refer to
the furnace rating plate.
Install this furnace only in a location and position as
specified in Section 6 "Location" of these instructions.
Provide adequate combustion and ventilation air to the
furnace space as specified in Section 8.4 "Combustion Air
/ Venting".
Combustion products must be discharged outdoors.
Connect this furnace to an approved vent system only, as
specified in Section 8.5 "Vent System" of this manual.
When a furnace is installed so that supply ducts carry
air circulated by the furnace to areas outside the space
containing the furnace, the return air shall also be handled
by duct(s) sealed to the furnace cabinet and terminating
outside the space containing the furnace. See Section 7.5
"Air Ducts".
A gas-fired furnace for installation in a residential garage
must be installed as specified in the warning box in Section
6 "Location".
The furnace may be used for construction heat provided
that the furnace installation and operation complies with the
first CAUTION in Section 6 "Location" of these instructions.
WARNING: FIRE HAZARD
Always install furnace to operate within the furnace's
intended temperature-rise range with a duct system which
has an external static pressure within the allowable range,
as specified in Section 11 "Start-Up, Adjustments, and
Safety Check" or the furnace rating plate.
WARNING: FIRE HAZARD
The furnaces must be kept free and clear of insulating
materials. Inspect surrounding area to ensure insulation
material is at a safe distance when installing furnaces or
adding insulation materials. Insulation materials may be
combustible.
See Section 3, Fig. 3 for required clearances to combustible
construction.
Maintain a 1 in. clearance from combustible materials to
supply air ductwork for a distance of 36 in. horizontally
from the furnace. See NFPA 90B or local code for further
requirements.
These furnaces SHALL NOT be installed directly on
carpeting, tile, or any other combustible material other than
wood flooring. This furnace SHALL NOT be installed in the
downflow orientation.
NOTICE: FURNACE RELIABILITY HAZARD
Improper installation or misapplication of furnace may
require excessive servicing or cause premature component
failure. Application of this furnace should be indoors with
special attention given to vent sizing and material, gas
input rate, air temperature rise, unit leveling, and unit
sizing.
WARNING: FIRE, EXPLOSION
Check entire gas assembly for leaks after lighting this
appliance.
Never test for gas leaks with an open flame. Use a
commercially available soap solution made specifically
for the detection of leaks to check all connections, as
specified in Section 9 "Gas Supply and Piping" section.
NOTICE:
The condensate from this unit is acidic, ensure that all
local and national codes are adhered to when draining
condensate. If proper procedures are not followed, this
may lead to property damage.

6 | Ecoer 96% AFUE Gas Furnace Installation, Operation & Maintenance
07-2021 | Ecoer Inc.
Data subject to change
CAUTION:
Before heating season begins, examine the furnace to
ensure that:
1. All flue gas carrying areas external to the furnace
(i.e. chimney, vent connector) are clear and free of
obstructions.
2. The vent connector is in place, slopes upward and is
physically sound without holes or exccessive corrosion.
3. The return-air duct connection(s) is physically sound,
is sealed to the furnace cabinet, and terminates outside
the space containing the furnace.
4. The physical support of the furnace is sound without
sagging, cracks, gaps, etc around the base so as to
provide a seal between the support and the base.
5. There are no obvious signs of deterioration of the
furnace.
6. The burner flames are positioned correctly by
comparing with pictorial sketches of the main burner
flame (see Section 12, Fig 42).
Instructions for lighting/shutdown operation:
FOR YOUR SAFETY
“WHAT TO DO IF YOU SMELL GAS”
If you do not follow these instructions exactly, a fire or explosion
may result causing property damage, personal injury or loss of life.
Use only your hand to push the gas control switch.
Never use tools. If the switch will not move by hand,
don’t try to repair it; call a qualified service technician.
Force or attempted repair may result in a fire or
explosion.
Do not use this appliance if any part has been under
water. Immediately call a qualified service technician
to inspect the appliance and to replace any part of the
control system and any gas control which has been
under water.
• Do not try to light any appliance.
• Do not touch any electrical switch; do not use
any phone in your building.
• Immediately call your gas supplier from a
neighbor’s phone. Follow the gas supplier’s
instructions.
• If you cannot reach your gas supplier, call the
fire department.
This appliance does not have a pilot, it is equipped
with an ignition device which automatically lights the
burner. Do not try to light the burner by hand.
BEFORE OPERATING smell all around the
appliance area for gas. Be sure to smell next to the
floor because some gas is heavier than air and will
settle to the floor.
WARNING
A.
C.
D.
B.
1. STOP! Read the safety information above on this
label.
2. Set the thermostat to lowest setting.
3. Turn off all electric power to the appliance.
4. This appliance is equipped with an ignition device
which automatically lights the burner. Do not try to
light the burner by hand.
1. Set the thermostat to lowest setting.
2. Turn off all electric power to the appliance if
service is to be performed.
3. Remove access panels.
4. Push gas control switch to “OFF”.
5. Replace access panels.
5. Remove access panels.
6. Push gas control switch to “OFF”.
7. Wait five (5) minutes to clear out any gas. Then
smell for gas, including near the floor. If you smell
gas, STOP! Follow “B” in the safety information
above on this label. If you don’t smell gas, go to
the next step.
8. Push gas control switch to “ON”.
9. Replace access panels.
10. Turn on all electric power to the appliance.
11. Set thermostat to desired setting
12. If the appliance will not operate, follow the
instructions “To Turn Off Gas To Appliance” and
call your service technician or gas supplier.
FOR YOUR SAFETY READ BEFORE OPERATING
OPERATING INSTRUCTIONS
TO TURN OFF GAS TO APPLIANCE
SWITCH SHOWN IN
THE “OFF” POSITION
202082290022
WARNING: FIRE, EXPLOSION
See instructions for lighting/shutdown operation (as
shown at the bottom of this page, as well as on a sticker
directly on the inside of the furnace panel). Should the gas
supply fail to shut off or if overheating occurs, shut off the
gas valve to the furnace before shutting off the electrical
supply.
WARNING: CARBON MONOXIDE POISONING HAZARD
Furnace operation requires air for combustion and
ventilation. Do not block or obstruct air openings on
furnace or spacing around furnace required for supplying
sufficient combustion air and ventilation.
WARNING:
This product can expose you to chemicals including Lead
and Lead components, which are known to the State
of California to cause cancer and birth defects or other
reproductive harm. For more information go to www.
P65Warnings.ca.gov.

Installation, Operation & Maintenance Manual Ecoer 96% AFUE Gas Furnace | 7
Ecoer Inc. | 07-2021 Data subject to change
2 Dimensions
Figure 1
(Right)
(Front)(Left)
)devomerlenaphtiwmottoB()poT(
LEFT SIDE RETURN AIR
22-13/16”(580mm)
14”(355mm)
Combustion Air Inlet
Gas Pipe Entry
Electrical Entry
Condensate Drain
Thermostat Wiring
33-3/4”(857mm)
28-3/4”(730mm)
19-1/2”(495mm)
RIGHT SIDE RETURN AIR
Combustion Air Inlet
Gas Pipe Entry
Electrical Entry
Condensate Drain
Thermostat Wiring
24”(610mm)
26-1/2”(672mm) 25-3/4”(655mm)
Combustion Air Inlet Vent Outlet
Dimensions
Furnace Model "A" Cabinet Width
In. (mm)"
"D" Supply- Air Width
In. (mm)"
"E" Return- Air Width
In. (mm)"
Shipping Weight
lbs (kgs)
MGH96M060B3A 17.5 (445) 16 (406) 15-27/32 (402) 162.5 (73.7)
MGH96M080B3A 17.5 (445) 16 (406) 15-27/32 (402) 168.5 (76.4)
MGH96M080C4A 21 (533) 19.5 (495) 19-13/32 (493) 184.6 (83.7)
MGH96M100C5A 21 (533) 19.5 (495) 19-13/32 (493) 194.6 (88.3)
MGH96M100D5A 24.5 (622) 23 (584) 22-27/32 (580) 205.1 (93.0)
MGH96M120D5A 24.5 (622) 23 (584) 22-27/32 (580) 209.5 (95.0)
Table 1 Dimensions & Weight

8 |Ecoer 96% AFUE Gas Furnace Installation, Operation & Maintenance
07-2021 | Ecoer Inc..
Data subject to change
3 Introduction
This 3-way Multipoise Category IV Fan-assisted furnace is AHRI and ETL design-
certified. A Category IV Fan-assisted furnace is an appliance equipped with an
integral mechanical means to either draw or force products of combustion through
the combustion chamber and/or heat exchangers. This furnace is factory-shipped
for use with natural gas.
This furnace is not approved for installation in mobile homes, recreational
vehicles, or outdoors. This furnace is designed for minimum continuous return-air
temperature of 60°F (16°C) (DBT) or intermittent operation down to 55°F (13°C)
(DBT) such as when used with a night setback thermostat. Return-air temperature
must not exceed 85°F (29°C) (DBT). Failure to follow these return-air temperature
limits may affect reliability of heat exchangers, motors, and controls. (See Section
4.1, Fig. ).
For accessory installation details, refer to the applicable instruction literature.
A Natural Gas to LP conversion kit, supplied by the manufacturer with every furnace
unit, shall be used to convert to propane gas (LP).
This furnace is for indoor installation in a building constructed on-site.
This furnace may be installed on combustible flooring in alcove or closet at
minimum clearance as indicated by Figure 3.
This furnace requires a special venting system. Refer to Section 8, "Vent System"
of this manual for installation instructions related to venting. In the US this furnace
is for use with schedule-40 PVC, PVC-DWV, CPVC, or ABS-DWV pipe, and must not
be vented in common with other gas-fired appliances. For installations in Canada,
refer to Section 8.4, "Combustion Air/Venting" of this manual. Construction
through which vent/air intake pipes may be installed is maximum 24 inches (610
mm), minimum 3/4 inches (19 mm) thickness (including roofing materials).
Remove all shipping brackets and materials before operating the furnace.
WARNING: FIRE, EXPLOSION, ASPHYXIATION HAZARD
Improper adjustment, alteration, service, maintenance, or
installation can cause serious injury or death.
Read and follow instructions and precautions in User's
Information Manual provided with this furnace. Installation
and service must be performed by a qualified service agency
or the gas supplier.
This product is not to be sold or installed in the State of California in
the South Coast Air Quality Management District or San Joaquin Valley
Air Basin territory.
CAUTION:
INSTALLATION
1. This furnace must be installed in accordance with
the manufacturer's instructions and local codes. In
the absence of local codes, follow the National Fuel
Gas Code ANSI Z223.1/ NFPA54.
2. This furnace must be installed so there are
provisions for combustion and ventilation air. See
manufacturer's installation information provided
with this appliance.
OPERATION
This furnace is equipped with manual reset limit switch(es)
in burner compartment to protect against overheat
conditions that can result from inadequate combustion air
supply or blocked vent conditions.
1. Do not bypass limit switches.
2. If a limit opens, call a quallified service technician
to correct the condition and reset the limit switch.
This furnace is approved for UPFLOW and HORIZONTAL installations.
WARNING: FIRE HAZARD
Do not install the furnace on its front or back. See Figure 2.
Figure 2
Front Back

Installation, Operation & Maintenance Manual Ecoer 96% AFUE Gas Furnace | 9
Ecoer Inc. 7-2021 Data subject to change
Figure 3
Clearance arrows do not change with furnace orientation
1’’
TOP/PLENUM
0’’ BACK
0’’ SIDE
SIDE
MOTTOB
0’’
0’’
3’’
FRONT
Ø
SIDES* FRONT BACK TOP
(PLENUM)
0"3"0"1"
Minimum clearance from combustible construction
When the unit is installed in the horizontal orientation, there must be 7"
clearance in order to install the externally mounted drain trap.
If installed in an alcove or closet
24 inches is required for service and maintenance.
Horizontal installation in attic or crawl space
Indicates supply or return sides when furnace is in the horizontal position. Line
contact only permissible between lines formed by intersections of the side and
back of the furnace cabinet and building joists, studs or frame.
Horizontal applications require a solid, supportive structure for installation
(refer to Section 7.2 “Horizontal Installation”).
For upflow and horizontal applications, the furnace must be pitched a minimum of
1/2" (12.7 mm) to a maximum of 3/4" (19 mm) forward for proper drainage.
See Section 7, "Installation" of this manual for more information.
Figure 4
1/2”~3/4”
1/2”~3/4”
4 Codes and Standards
Follow all national and local codes and standards in addition to these instructions.
The installation must comply with regulations of the serving gas supplier, local
building, heating, plumbing, and other codes. In absence of local codes, the
installation must comply with the national codes listed below and all authorities
having jurisdiction. Follow all codes and standards for the following:
4.1 Safety
US: National Fuel Gas Code (NFGC) NFPA 54-Latest/ANSI Z223.1-
latest edition and the Installation Standards, Warm Air Heating and Air
Conditioning Systems ANSI/NFPA 90B
CANADA: National Standard of Canada Natural Gas and Propane
Installation Codes (CAN/CSA-B149.1-05)
Figure 5
Max 85°F/29°C
Min 60°F/16°C
OUTLET
AIR
FRONT
Return Air Temperature
4.2 General Installation
US: Current edition of the NFGC and the NFPA 90B. For copies, contact
the National Fire Protection Association Inc., 1 Batterymarch Park,
Quincy, MA 02169; (www.NFPA.org) or for only the NFGC, contact the
American Gas Association, 400 North Capital Street, NW, Suite 450,
Washington, DC 20001 (www.AGA.org)
CANADA: NSCNGPIC.For a copy,contact Standard Sales, CSA
International,178 Rexdale Boulevard, Etobicoke (Toronto),
Ontario,M9W 1R3 Canada

10 |Ecoer 96% AFUE Gas Furnace Installation, Operation & Maintenance
07-2021 | Ecoer Inc.
Data subject to change
4.3 Combustion and Ventilation Air
US: Section 9.3 of the NFGC, NFPA 54/ANSI Z223.1-latest edition Air
for Combustion and Ventilation
CANADA:Part 8 of CAN/CSA-B149.1-05,Venting Systems and Air
Supply for Appliances.
4.4 Duct Systems
US and CANADA: Air Conditioning Contractors Association (ACCA)
Manual D, Sheet Metal and Air Conditioning Contractors National
Association (SMACNA), or American Society of Heating, Refrigeration,
and Air Conditioning Engineers (ASHRAE) 2001 Fundamentals
Handbook Chapter 34 or 2000 HVAC Systems and Equipment
Handbook Chapters 9 and 16
4.5 Acoustical Lining and Fibrous Glass Duct
US and CANADA: Current edition of SMACNA and NFPA 90B as tested
by UL Standard 181 for Class I Rigid Air Ducts
4.6 Gas Piping and Gas Pipe Pressure Testing
US: NFPA 54/ANSI Z223.1-latest edition Chapters 5,6, 7, and 8 and
National Plumbing Codes
CANADA: CAN/CSA-B149.1-05 Parts 4,5 and 6 and Appendices
A,B,E,and H.
4.7 Electrical Connections
US: National Electrical Code (NEC) ANSI/NFPA 70-latest edition
CANADA: Canadian Electrical Codes CSA C22.1.
4.8 Electrical Power Supply
Voltage: ANSI C84.1- latest edition (104-127 volt)
4.9 Venting
US: NFGC NFPA 54/ANSI Z223.1-latest edition; Chapters 12 and 13
CANADA: CAN/CSA-B149.1-05 Part 8 and Appendix C.
5 Electrostatic Discharge (ESD) Precautions Procedure
NOTICE: FURNACE RELIABILITY HAZARD
Improper installation or service of furnace may cause
premature furnace component failure.
Electrostatic discharge can affect electronic components.
Follow the electrostatic discharge precautions procedure
listed below during furnace installation and servicing to
protect the furnace electronic control. Precautions will
prevent electrostatic discharges from personnel and
hand tools which are held during the procedure. These
precautions will help to avoid exposing the control board to
electrostatic discharge by putting the furnace, the control
board, and the person at the same electrostatic potential.
1. Disconnect all power to the furnace. Multiple disconnects maybe required.
DO NOT TOUCH THE CONTROL OR ANY WIRE CONNECTED TO THE
CONTROL PRIOR TO DISCHARGING YOUR BODY'S ELECTROSTATIC
CHARGE TO GROUND.
2. To discharge your body's electrostatic charge to ground, firmly touch the
clean, unpainted, metal surface of the furnace chassis which is close to
the control board.Tools held in a person's hand during grounding will be
satisfactorily discharged.
3. After touching the chassis, you may proceed to service the control board or
connecting wires as long as you do nothing to recharge your body with static
electricity (for example; DO NOT move or shuffle your feet, do not touch
ungrounded objects, etc.).
4. If you touch ungrounded objects (and recharge your body with static
electricity), firmly touch a clean, unpainted metal surface of the furnace
again before touching control board or wires.
Use this procedure for installed and uninstalled (ungrounded) furnaces. In the case
of control board replacement, before removing the replacement control board from
its packaging, discharge your body's electrostatic charge to ground to protect the
control from damage. If the control is to be installed in a furnace, follow steps 1
through 4 before bringing the control board or yourself in contact with the furnace.
Put all used and new control boards into containers before touching ungrounded
objects.
An ESD service kit (field supplied) may also be used to prevent ESD damage.

Installation, Operation & Maintenance Manual Ecoer 96% AFUE Gas Furnace | 11
Ecoer Inc. | 07-2021 Data subject to change
6 Location
6.1 General
This multipoise furnace is shipped in packaged configuration. Some
assembly and modifications are required when used in any of the
three applications . This furnace must:
Be installed so the electrical components are protected from water.
Not be installed directly on any combustible material other than wood
flooring. Refer to Section 3 Fig 3. for required clearances.
Horizontal installation in attics and crawl spaces have additional
requirements. Refer to Section 7.
Be located close to the chimney or vent and attached to an air
distribution system. Refer to Section 7.5 "Air Ducts".
Be provided ample space for servicing and cleaning. Always comply
with minimum fire protection clearances shown on the furnace
clearance to combustible label. Refer to Section 3, Fig 3.
The following types of furnace installations may require OUTDOOR AIR for
combustion due to chemical exposures:
Commercial buildings
Buildings with indoor pools
Laundry rooms
Hobby or craft rooms, and
Chemical storage areas
WARNING: CARBON MONOXIDE POISONING HAZARD
Failure to follow this warning could result in personal injury
or death, and unit component damage.
Corrosive or contaminated air may cause failure of parts
containing flue gas, which could leak into the living space.
Air for combustion must not be contaminated by halogen
compounds, which include fluoride, chloride, bromide, and
iodide. These elements can corrode heat exchangers and
shorten furnace life. Air contaminants are found in aerosol
sprays, detergents, bleaches, cleaning solvents, salts, air
fresheners, and other household products. Do not install
furnace in a corrosive or contaminated atmosphere. Make
sure all combustion and circulating air requirements are
met, in addition to all local codes and ordinances.
If air is exposed to the following substances, it should not be used for combustion
air, and outdoor air may be required for combustion:
Permanent wave solutions
Chlorinated waxes and cleaners
Chlorine based swimming pool chemicals
Water softening chemicals
De-icing salts or chemicals
Carbon tetrachloride
Halogen type refrigerants
Cleaning solvents (such as perchloroethylene)
Printing inks, paint removers, varnishes, etc.
Hydrochloric acid
Cements and glues
Antistatic fabric softeners for clothes dryers
Masonry acid washing materials
All fuel-burning equipment must be supplied with air for fuel combustion. Sufficient
air must be provided to avoid negative pressure in the equipment room or space. A
positive seal must be made between the furnace cabinet and the return-air duct to
prevent pulling air from the burner area and from draft safeguard opening. Also see
Section 7.5 "Air Ducts".
Figure 6
18-IN.
MINIMUM TO BURNERS
Installation in a garage

12 |Ecoer 96% AFUE Gas Furnace Installation, Operation & Maintenance
07-2021 | Ecoer Inc.
Data subject to change
WARNING: FIRE, INJURY OR DEATH HAZARD
When the furnace is installed in a residential garage, the
burners and ignition sources must be located at least 18
inches above the floor. The furnace must be located or
protected to avoid damage by vehicles. When the furnace is
installed in a public garage, airplane hangar, or other building
having a hazardous atmosphere, the furnace must be
installed in accordance with the NFGC. (See Fig. 6).
CAUTION: INJURY AND/OR PROPERTY DAMAGE HAZARD
Improper use or installation of this furnace may cause
premature furnace component failure. This gas furnace may
be used for heating buildings under construction provided
that:
—The furnace is permanently installed with all electrical
wiring, piping, venting and ducting installed according
to these installation instructions. A return air duct
is provided, sealed to the furnace cabinet, and
terminated outside the space containing the furnace.
This prevents a negative pressure condition as
created by the circulating air blower, causing a flame
rollout and/or drawing combustion products into the
structure.
—The furnace is controlled by a thermostat. It may not
be "hot wired" to provide heat continuously to the
structure without thermostatic control.
—Clean outside air is provided for combustion. This is
to minimize the corrosive effects of adhesives, sealers
and other construction materials. It also prevents the
entrainment of drywall dust into combustion air, which
can cause fouling and plugging of furnace components.
—The temperature of the return air to the furnace is
maintained between 60°F (16°C) and 85°F (29°C),
with no evening setback or shutdown.
—The use of the furnace while the structure is under
construction is deemed to be intermittent operation
per our installation instructions.
—The air temperature rise is within the rated rise range
on the furnace rating plate, and the gas input rate has
been set to the nameplate value.
—The filters used to clean the circulating air during
the construction process must be either changed or
thoroughly cleaned prior to occupancy.
—The furnace, ductwork and filters are cleaned as
necessary to remove drywall dust and construction
debris from all HVAC system components after
construction is completed.
—Verify proper furnace operating conditions including
ignition, gas input rate, air temperature rise, and

Installation, Operation & Maintenance Manual Ecoer 96% AFUE Gas Furnace | 13
Ecoer Inc. | 07-2021 Data subject to change
7 Installation
This furnace can be installed in upflow or horizontal orientations.
(see Section 7.3, Fig 13-18).
7.1 Upflow Installation
Bottom return air inlet
These furnaces are shipped with the bottom closure panel installed in bottom
return-air opening. Remove and discard this panel when bottom return air is used.
To remove bottom closure panel, perform the following:
1. Tilt or raise furnace and remove the screw holding bottom filler panel. (See
Fig. 7.)
2. Remove bottom closure panel.
Figure 7
BOTTOM CLOSURE PANEL
BOTTOM FILLER
PANEL SCREW
SCREW
Removing bottom closure panel
Figure 8
Upflow Installation
Tilt the unit slightly (minimum 1/2 (12.7 mm) to maximum of 3/4 (19 mm))
from back to front to aid in the draining of the heat exchanger.
1/2”~3/4”
WEIVEDISWEIVTNORF
Upflow Application-Setting Equipment
Side return air inlet
These furnaces are shipped with bottom closure panel installed in bottom return-air
opening. This panel MUST be in place if only side return air is used.
Depending on the installation requirements, side return-air openings can
be used in UPFLOW and most HORIZONTAL configurations.
These furnaces come standard with knockout holes to aid in right/left
return configurations. To do this, knockout the holes and cut the sheet
metal and insulation accordingly.

14 Ecoer 96% AFUE Gas Furnace Installation, Operation & Maintenance
07-2021 | Ecoer Inc.
Data subject to change
7.2 Horizontal Installation
WARNING: FIRE, EXPLOSION, AND CARBON MONOXIDE
POISONING HAZARD
Failure to follow this warning could result in personal
injury, death, and/or property damage. Do not install
the furnace on its back or hang furnace with control
compartment facing downward. Safety control operation
will be adversely affected. Never connect return-air ducts
to the back of the furnace.
The furnace can be installed horizontally in an attic or crawl space on bottom or
either the left-hand (LH) or right-hand (RH) side (See Figure 9). The furnace can be
hung from floor joists, rafters or trusses or installed on a non-combustible platform,
blocks, bricks or pad.
7.2.1 Furnace Suspension
If suspending the furnace from rafters or joists, use 3/8" threaded rod and
2”x2”x1/8” angle iron as shown in Figure 10. The length of rod will depend on the
application and the clearances necessary. (See Fig. 10 and 11)
Figure 9
Horizontal Left-Hand Side Installation
Horizontal Right-Hand Side Installation
1/2”~3/4”
1/2”~3/4”
FRONT VIEW
FRONT VIEW
SIDE VIEW
SIDE VIEW
Tilt the unit slightly (minimum 1/2" (12.7 mm) to maximum of 3/4" (19 mm))
from back to front to aid in the draining of the heat exchanger.
Horizontal Application-Setting Equipment

Installation, Operation & Maintenance Manual Ecoer 96% AFUE Gas Furnace |15
Ecoer Inc. | 07-2021 Data subject to change
7.2.2 Horizontal Applications
Horizontal applications, in particular, may dictate many of the installation’s
specifics such as airflow direction, ductwork connections, flue and combustion
air pipe connections, etc. The basic application of this furnace as a horizontal
furnace differs only slightly from an upright installation. When installing a furnace
horizontally, additional consideration must be given to the following:
Drain Trap and Lines
In horizontal applications the condensate drain trap is secured to the furnace side
panel, suspending it below the furnace.
A minimum clearance of 7 inches below the furnace must be provided
for the drain trap.
Additionally, the appropriate downward piping slope must be maintained from the
drain trap to the drain location. Refer to Section “Condensate Drain Line & Drain
Trap”.
NOTICE:
If the drain trap and drain line will be exposed to
temperatures near or below freezing, adequate measures
must be taken to prevent condensate from freezing. In this
scenario, it is recommended to add foam insulation around
the drain line, and heat tracing may also be necessary
based on the application.
Leveling
Leveling ensures proper condensate drainage from the heat exchanger and induced
draft blower. For proper flue pipe drainage, the furnace must be level lengthwise
from end to end. The furnace should also have a slight tilt with the access doors
downhill ((minimum 1/2(12.7 mm) to maximum of 3/4(19 mm)) from the back
panel. The slight tilt allows the heat exchanger condensate, generated in the
recuperator coil, to flow forward to the recuperator coil front cover.
Refer to Figure 9.
Alternate Electrical And Gas Line Connections
This furnace has provisions allowing for electrical and gas line connections through
either side panel. In horizontal applications the connections can be made either
through the “top” or “bottom” of the furnace.
Drain Pan
A drain pan must be provided if the furnace is installed above a conditioned area.
The drain pan must cover the entire area under the furnace (and air conditioning
coil if applicable).
Furnace Suspension
If the furnace is installed in a crawl space it must be suspended from the floor joist
or supported by a concrete pad. Never install the furnace on the ground or allow it
to be exposed to water. See Furnace Suspension for further details (See Fig. 10).

16 |Ecoer
9
6% AFUE Gas Furnace Installation, Operation & Maintenance
07-2021 | Ecoer Inc.
Data subject to change
Figure 10
PROVIDE 8" MINMUM CLEARANCE BETWEEN
CENTER ROD AND FURNACE CABINET
TO ALLOW FOR CIRCULATOR BLOWER REMOVAL
3/8" DIAMETER
THREADED ROD
(6 PLACES)
SUPPORT NUTS
2"X2"X1/8" ANGLE IRON
(3 PLACES)
POSITION AS CLOSE AS POSSIBLE
TO BLOWER DECK TO ALLOW FOR
CIRCULATOR BLOWER REMOVAL
ASSURE FURNACE IS LEVEL FROM
END TO END AND HAS A SLIGHT
FORWARD TILT WITH THE FRONT
OF THE FURNACE 3/4"
BELOW THE BACK OF THE FURNACE
TILT OUTWARD TO ALLOW FOR
DOOR AND CIRCULATOR BLOWER
REMOVAL
HOLD DOWN NUTS
Horizontal Installation
Figure 11
FURNACE MUST BE LEVEL
FROM END TO END. FURNACE MUST BE SLIGHTLY TILTED
FORWARD WITH THE DOORS 1/2”~3/4”
BELOW THE BACK PANEL.
7” MINIMUM DRAIN
TRAP CLEARANCE
DRAIN PAN
GAS LINE WITH DRIP
LEG (3” MINIMUM)
DRAIN LINE WITH 1/4” PER
FOOT DOWNWARD SLOPE
36” MINIMUM SERVICE
CLEARANCE REQUIRED
FURNACE MUST BE SUPPORTED
AT BOTH ENDS AND MIDDLE
Horizontal Installation

Installation, Operation & Maintenance Manual Ecoer 96% AFUE Gas Furnace |17
Ecoer Inc. | 07-2021 Data subject to change
7.3 Condensate Line and Over Flow Pressure Switch
NOTICE
For horizontal left hand installation (air discharge to the
left), condensate overflow pressure switch hoses need to
be rerouted (see Figure 17).
To achieve higher energy efficiency than non-condensing furnaces, condensing
furnaces will generate a significant amount of condensate water from combustion
to recover latent heat in the flue. Condensate generated from the flue must be
collected and discharged to the drain line. For some venting directions and
furnace installations, rerouting of the condensate and/or overflow pressure switch
hoses may be required. Follow the instructions below and Figures 13-17 for each
installation.
Follow the information listed below when installing the drain system. Refer to the
following sections for specific details concerning furnace drain trap installation and
drain hose hook ups.
The drain trap supplied with the furnace must be used.
The drain line between furnace and drain location must be constructed
of 3/4” PVC or CPVC.
Ensure that the condensate hose connections between the pressure
switches/inducer drain port and the condensate trap are sloped
downward toward the drain to allow for proper drainage.
The drain line between furnace and drain location must maintain a 1/4"
per foot downward slope toward the drain.
Do not trap the drain line in any other location than at the drain trap
supplied with the furnace.
Do not route the drain line outside where it may freeze.
7.3.1 Standard Right-Hand or Left-Hand Side Drain Hose Connections
Figure 12
DRAIN TRAP
MOUNTING
BRACKET
Ф16 mm HOSE
Ф14 mm HOSE
Optional Ф14 mm ELBOW
Optional Ф16 mm ELBOW
DRAIN TRAP Ф21 mm
HOSE
CLAMPS
Ф18 mm
HOSE
CLAMPS
INCOMING
GAS PIPE
RUBBER GASKET
Included Accessories for Condensate Drain Trap Installation
* Only used when exhaust pipe is vented out of the side of the furnace's cabinet
(regardless of installation orientation).
If the drain line is routed through an area which may see
temperatures near or below freezing, precautions must be taken
to prevent condensate from freezing within the drain line. In this
scenario, it is recommended to add foam insulation around the
drain line, and heat tracing may also be necessary based on the
application.
If an air conditioning coil is installed with the furnace, a common drain
may be used. An open tee must be installed in the drain line, near the
cooling coil, to relieve positive air pressure from the coil’s plenum.
This is necessary to prohibit any interference with the function of the
furnace’s drain trap.
NOTICE
The condensate from this unit is acidic, adhere to all local
and national codes when draining condensate. If proper
procedures are not followed, this may lead to property
damage.
NOTICE
Condensate trap at furnace must be PRIMED for proper
draining may not occur. The condensate trap can ONLY
be primed by pouring water into the inducer drain side of
condensate trap.

18 |Ecoer 96% AFUE Gas Furnace Installation, Operation & Maintenance
07-2021 Ecoer Inc.
Data subject to change
7.3.2 For Upflow Installation
Top venting (see Fig. 14)
1. Connect vent pipe and air intake pipe (if applicable) to the couplers on the
furnace top panel.
2. Use filed supplied straight 2'' diameter pipe. If 3'' pipes are used, use a field
supplied transition.
3. Depending on which side the condensate trap is mounted, remove 2 caps
on the side where trap is mounted. Mount trap with manufacturer provided
screws.
4. Remove cap from the inducer drain port (see Fig. 13).
Figure 13
5. Connect Φ16 mm hose between condensate collector box and drain trap
and connect Φ14 mm hose between inducer drain port and drain trap. (see
Fig. 14).
6. Cut the excess hoses as needed.
7. Secure and tighten all hoses using manufacturer provided hose clamps.
Figure 14
DRAIN TRAP
14 mm HOSE
HOSE CLAMP
HOSE
CLAMP
EXHAUST COUPLER
AIR INLET
COUPLER
16 mm HOSE
HIGH/LOW
FIRE
PRESSURE
SWITCH
METAL
HOSE CLAMPS
CONDENSATE
COLLECTOR BOX
Upflow Installation, Top Venting

Installation, Operation & Maintenance Manual Ecoer 96% AFUE Gas Furnace | 19
Ecoer Inc. | 07-2021 Data subject to change
7.3.3 For Horizontal Installations
For installations with right air discharge and venting outlet through furnace
top panel (see Figure 15).
1. Remove cap from left side panel of furnace and cut the insulation
accordingly.
2. Remove 3 screws securing air inlet coupler on top panel and remove
coupler.
3. Mount air inlet coupler to the left side of the furnace cabinet using the same
screws saved from last step. Connect air inlet pipe to air inlet coupler.
4. Seal the top panel air intake hole using the caps removed from side panel.
5. Use field supplied elbow and metal hose clamps to make flue vertical.
Elbows should be as close to the furnace as possible. Connect the vent
outlet pipe. Use filed supplied straight 2'' diameter pipe. If 3'' diameter
pipes are used, use a field supplied transition.
6. Use provided or field supplied (if applicable) mounting bracket to mount
drain trap to the proper location on right side panel .
7. Screws for mounting bracket should not interfere with any components
inside the furnace.
8. Cut and remove 1/4" from the end of the inducer drain port. Reference
Figure 13.
9. Connect (using hose clamps) 16 mm hose between condensate collector
box and drain trap.
10. Connect (using hose clamps) 14 mm hose between the drain port and drain
trap.
11. Cut the excess hose as needed.
12. Secure and tighten all hoses
Figure 15
Φ16 mm HOSE
Φ14 mm HOSE
HOSE CLAMP
VENT OUTLET
AIR INLET
DRAIN
TRAP
HIGH/LOW FIRE
PRESSURE SWITCH
Φ14/16 mm
ELBOW (optional)
AIR INLET
COUPLER
FIELD
SUPPLIED
ELBOW
CONDENSATE
COLLECTOR
BOX
FRONT
INDUCER
DRAIN
PORT
DRAIN TRAP
MOUNTING
BRACKET
JUNCTION
BOX
BOTTOM INDUCER
DRAIN PORT
Horizontal Right-Hand Side Installation

20 |Ecoer 96% AFUE Gas Furnace Installation, Operation & Maintenance
07-2021 Ecoer Inc.
Data subject to change
For installations with left air discharge and venting outlet through furnace
top panel (see Figures 16 and 17).
NOTICE:
In this installation, hoses connecting between ports of
overflow protection pressure switch (overflow switch)
and pressure tabs on the condensate collector box MUST
be switched. The overflow switch has two ports, which is
different from two other regular pressure switches that
have only one port. Make sure that black port (positive)
is connected to the lower position tap on condensate
collector box and gray port (negative) to higher tap of
condensate box. Connecting incorrectly will result in
failure to protect condensate overflow.
NOTICE:
Two pressure switches (one port type switches) should
be relocated to other side of furnace side panel to ensure
pressure switches are above water tap of condensate
collector box.
1. Remove cap from left side panel of furnace and cut the insulation
accordingly.
2. Remove 3 screws securing air inlet coupler on top panel and remove
coupler.
3. Mount coupler to the right side using the same screws saved from last step.
Connect air inlet pipe to air inlet coupler.
4. Seal the top panel air intake hole using the caps removed from side panel.
5. Use field supplied elbow and metal hose clamp to make flue vertical. Elbows
should be as close to the furnace as possible. Connect the vent outlet pipe.
6. Use provided or field supplied (if applicable) mounting bracket to mount
condensate trap on the proper location of the left side panel.
Figure 16
VENT OUTLET
AIR INLET
HOSE
CLAMP
HOSE CLAMP
Φ16 mm HOSE
DRAIN TRAP DRAIN TRAP MOUNTING BRACKET
14mm HOSE
HIGH/LOW FIRE
PRESSURE
SWITCHES
Φ14/16 mm ELBOW (optional)
JUNCTION
BOX
FIELD
SUPPLIED
ELBOW
CONDENSATE COLLECTOR
BOX
AIR
INLET
COUPLER
Horizontal Left Side Installation, Vent Through Top Panel
7. Screws for mounting bracket should not interfere with any components
inside the furnace.
8. Connect 16 mm hose between condensate collector box and drain trap. Cut
the excess hose to correct length prior to connection.
9. Connect 14 mm hose between the side inducer drain port (remove black
rubber plug to connect hose) and drain trap. Refer to Figure 16.
10. Plug both holes on inducer elbow using provided plugs.
11. Cut the excess hoses as needed.
12. Secure and tighten all hoses.
13. Relocate junction box to the other side of cabinet if necessary.
14. Relocate the High/Low Fire Pressure Switches (2) to the opposite side of
the cabinet (as shown in Figure 16 and 17). Screws for mounting these
switches should not interfere with any components inside the furnace.
Figure 17
Upright
Overflow
Pressure Switch
High/Low Fire
Pressure Switch
Ensure condensate
hose is connected to
side inducer drain port
on inducer as shown.
Pressure Switch Position
This manual suits for next models
6
Table of contents
Popular Furnace manuals by other brands
Lennox
Lennox Elite O25 Brochure & specs
Carrier
Carrier 050-135 Series 120 manual
Johnson Controls
Johnson Controls LP9C C User's information manual

Ingersoll-Rand
Ingersoll-Rand A951X040BU3SAA Installer's guide
Carrier
Carrier 58MCA Users information manual for the operation and maintenance
SummerAire
SummerAire SBB Installation and owner's operating instructions
VERDER
VERDER CARBOLITE GERO E Series manual
ICP
ICP FLO115DABR-A Installation Instructions and Use & Care Guide
Newmac
Newmac WAO E Installation, operating and service manual

vita
vita vacumat 4000 premium t operating manual
Amana
Amana GMS8 Service instructions
Lennox
Lennox GSR21Q Series User's information manual

