Edco The Big Stick Datasheet

Printed in USA
©1999
Page 1
E-ALRBS-IP-11/99
INSTRUCTIONS AND PARTS LIST MANUAL
Model ALR-BS
Revised Starting Serial # 26400
Chisel Scaler
Go to Discount-Equipment.com to order your parts

Discount-Equipment.com is your online resource for quality parts & equipment.
Florida: 561-964-4949 Outside Florida TOLL FREE: 877-690-3101
Need parts?
Click on this link: http://www.discount-equipment.com/category/5443-parts/ and
choose one of the options to help get the right parts and equipment you are looking
for. Please have the machine model and serial number available in order to help us
get you the correct parts. If you don’t find the part on the website or on one of the
online manuals, please fill out the request form and one of our experienced staff
members will get back to you with a quote for the right part that your machine needs.
We sell worldwide for the brands: Genie, Terex, JLG, MultiQuip, Mikasa, Essick, Whiteman,
Mayco, Toro Stone, Diamond Products, Generac Magnum, Airman, Haulotte, Barreto,
Power Blanket, Nifty Lift, Atlas Copco, Chicago Pneumatic, Allmand, Miller Curber, Skyjack,
Lull, Skytrak, Tsurumi, Husquvarna Target, Stow, Wacker, Sakai, Mi-T-M, Sullair, Basic,
Dynapac, MBW, Weber, Bartell, Bennar Newman, Haulotte, Ditch Runner, Menegotti,
Morrison, Contec, Buddy, Crown, Edco, Wyco, Bomag, Laymor, EZ Trench, Bil-Jax, F.S.
Curtis, Gehl Pavers, Heli, Honda, ICS/PowerGrit, IHI, Partner, Imer, Clipper, MMD, Koshin,
Rice, CH&E, General Equipment ,Amida, Coleman, NAC, Gradall, Square Shooter, Kent,
Stanley, Tamco, Toku, Hatz, Kohler, Robin, Wisconsin, Northrock, Oztec, Toker TK, Rol-Air,
APT, Wylie, Ingersoll Rand / Doosan, Innovatech, Con X, Ammann, Mecalac, Makinex, Smith
Surface Prep,Small Line, Wanco, Yanmar

Printed in USA
©1999
Page 2
E-ALRBS-IP-11/99
READ AND UNDERSTAND THE OPERATORS INSTRUCTION MANUAL THOROUGHLY BEFORE ATTEMPTING
TO OPERATE THIS EQUIPMENT. Death or serious injury could occur if this machine is used improperly.
EDCO AIR–RAM LONG REACH CHISEL SCALER - MODEL ALR-BS
OPERATORS INSTRUCTIONS
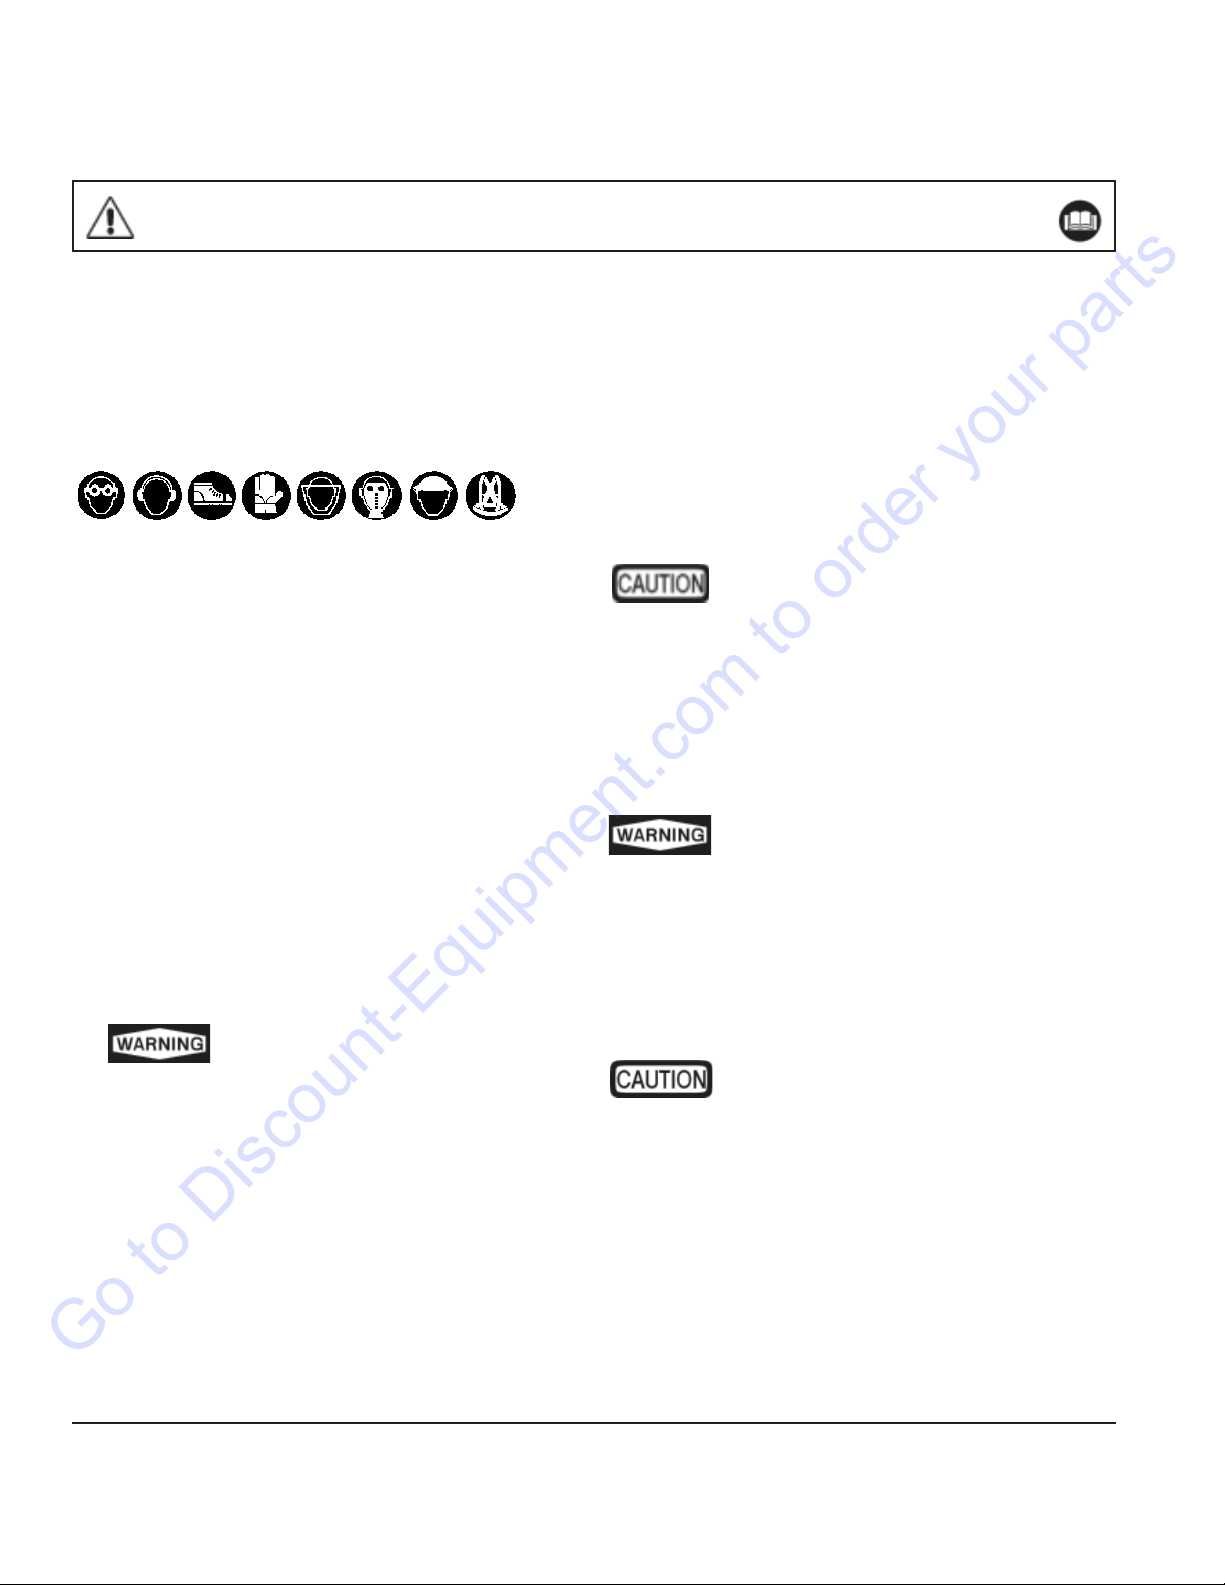
1When operating this equipment, the operator must
wear approved job related safety attire. Eye and
hearing protection must be worn at all times while
equipment is in use as sound levels exceed 92 dBA.
Steeltoe safety shoes should be worn. Head pro-
tection is required if work is performed overhead.
Wear proper dust mask based on material being
removed.
2Use the correct size air hose for the tool, ½ diam-
eter (minimum). Hose and fittings must be rated for
safe handling in excess of 100 PSI pressure. The
working pressure of this tool is 80-90 PSI and should
never be allowed to exceed 100 PSI.
3Limit the hose length to 30 feet (10 meters) maxi-
mum. Note: The pressure drop of ½” diameter hose
is approximately 1 PSI per 90 linear feet.
4A filter/water separator must be provided on the air
source to afford an adequate supply of clean, dry air
to this tool. A lubricator should also be used. If a
lubricator is unavailable, lubricate the tool daily by
putting 6 to 7 drops of lightweight machine oil in the
hose connector opening prior to connecting the air
supply. In cold weather, use graphite oil for lubrica-
tion.
5Disconnect the air supply before re-
moving or installing a chisel or ac-
cessory. Squeeze the hand lever to release all com-
pressed air from the tool. Use only genuine EDCO
chisels and accessories with this equipment. Fail-
ure to do so may result in serious bodily injury or
death.
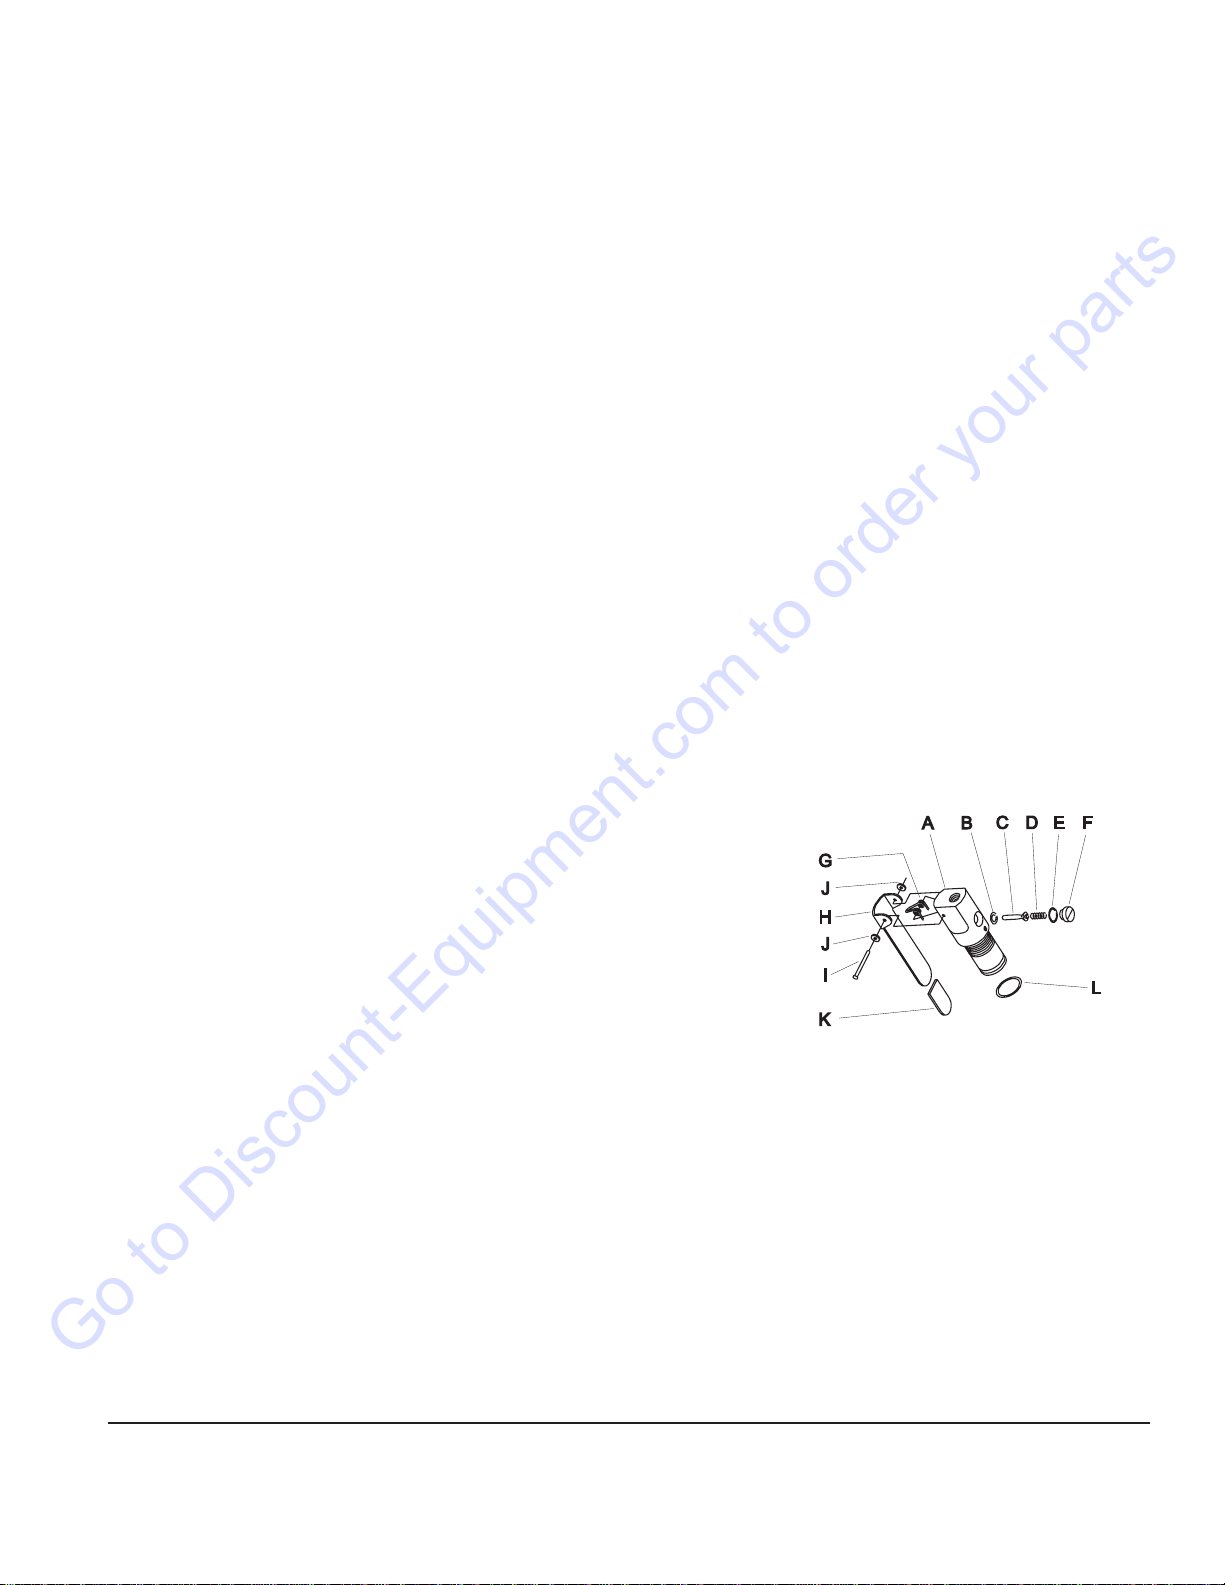
6To install or remove chisel: Disconnect the air sup-
ply. Squeeze the hand lever to release all com-
pressed air. Pull back on the spring loaded locking
collar and hold while removing the chisel. Hold back
on the spring loaded locking collar while firmly seat-
ing the new chisel in the holder. Release collar to
retain the chisel.
7 The appropriate accessory must be used for the job at
hand. DONOT force the tool into the work. The ham-
mering action of the tool will perform the work for you.
NEVERUSETHETOOLASAPRYBAR. Damage to
the equipment will result. If the tool does not seem to
perform the work to your specifications, try another
accessory or Contact Discount-equipment
8To activate tool, attach the air source, firmly grip the
tool then squeeze the hand lever on the air valve.
9After releasing the air valve hand lever,
the tool will continue to operate for
up to 15 seconds. This is a normal result of
stored pressure in the tool casing being re-
leased gradually. Be sure to firmly grip the tool
until ALL air leaves the chamber.
10 Remove the air source from the tool when not in
use.
11 This equipment will create dust from
the material being removed. That dust
may contain a chemical known to the state of Califor-
nia to cause cancer and/or birth defects or other re-
productive harm.As an example, paints and concrete
contain chemicals known to the state of California to
cause cancer and/or birth defects or other reproduc-
tive harm. Check the chemical properties of the ma-
terials to be removed.
12 It is the operator’s responsibility to keep
other people (workers, pedestrians, by-
standers, etc.) away during operation. Block off the
work area in all directions with roping, safety netting,
etc. for a safe distance. Failure to do so may result
in others being injured by flying debris or exposing
them to harmful dust and noise.
Go to Discount-Equipment.com to order your parts

Printed in USA
©1999
Page 3
E-ALRBS-IP-11/99
ALR-BS Chisel Scaler
Maintenance Instructions
1. Remove air source and chisel accessory from tool before performing any maintenance.
2. Clean tool daily and keep it clean and lubricated. If a lubricator is provided with the air source, it
should be adequate. If you are unsure or no lubricator is provided, lubricate the tool daily before
use by putting 6 to 7 drops of lightweight machine oil in the hose connector opening. If tool is
operated in cold weather (near or below freezing), use a graphite oil instead of the lightweight
machine oil as described above.
3. After every 100 hours of use, flush the tool thoroughly with an environmentally safe,nonflammable
and non-caustic solvent to clean out any oil/residue buildup in the tool. Oil tool immediately after
flushing.
4. Replace any damaged parts immediately. Use only genuine EDCO parts.
SPECIFICATIONS
Weight....................................................................................................... 22lb. (9.8kg)w/o chisel
Length....................................................................................................... 65.5 in. Assembled
Blows per minute...................................................................................... 3500 (approximate)
Stroke........................................................................................................ 1.595 in (40.5mm)
Bore........................................................................................................... 1.902 in (48.3mm)
Air Flow Rate............................................................................................. 12-15 CFM @ 90 PSI
Working Pressure...................................................................................... 80-90 PSI (5.5-6.2 BAR)
100 PSI max.
Noise Level During Operation................................................................... Exceeds 92 dB (A)
Hearing Protection Must Be Worn!
CAUTION.................................................................................................... Approximately 15 seconds pres-
sure is stored in the case after air
valve is released.
NOTE.......................................................................................................... Specifications are subject to
change at any time.
Go to Discount-Equipment.com to order your parts

)0-
-0
24
Printed in USA
©1999
Page 4
/
Go to Discount-Equipment.com to order your parts

11
w/
w/
X
*NOTE:
Printed in USA
©19
Page 5
Go to Discount-Equipment.com to order your parts

Printed in USA
©1999
Page 6
E-ALRBS-IP-11/99 PARTS LISTING - ILLUSTRATION # 2
ITEM PART# DESCRIPTION QTY.
2-A 27002 VALVE BODY 1
2-B 27038 O-RING, #112,3/32 x 1/2”ID 1
2-C 27003 VALVE STEM 1
2-D C10607 SPRING, VALVE STEM 1
2-E 27039 O-RING, 2 x 18mm 1
2-F 27004 VALVESTEM RETAINER 1
2-G C10607 SPRING, DOUBLE TORSION 1
2-H 27027 LEVER, AIR VALVE 6-1/2” 1
2-I 11556 RIVET, 1/8x1-1/2 OVAL HEAD 1
2-J 11557 WASHER,RIVET 1/8”IDx3/8”OD 2
2-K C10569 GRIP, FLAT RED .125x.75x1.5L 1
2-L 27020 O-RING, 2 x 30mm 1
ITEM PART# DESCRIPTION QTY.
18 27013 PISTON (HAMMER) 1
19 27012 CYLINDER 1
20 27021 O-RING 2 x 52mm 1
21 27022 O-RING 2 x 55mm 1
ITEM # 2 27001
VALVE BODY ASSEMBLY ITEM # 17 27028
PISTON & CYLINDERASSEMBLY
ITEM # 16 27008
CYLINDER HOUSINGASSEMBLY
ITEM # 22 27014
CHISEL HOLDER ASSEMBLY
ITEM PART# DESCRIPTION QTY.
16-A 27011 CYLINDER HOUSING CAP 1
16-B 27010 CYLINDER HOUSING SLEEVE 1
16-C 27009 CYLINDER HOUSING MAIN
BODY 1
16-D 27020 O-RING 2 x 30mm 1
16-E 27023 O-RING 2 x 65mm 1
16-F 27024 O-RING 2 x 67mm 1
ITEM PART# DESCRIPTION QTY.
22-A 27015 CHUCK BODY 1
22-B 27017 BALL, CHROME 3/8” 1
22-C 27018 SPRING, COMP. 1.906”OD x
1.41”FL 1
22-D 27016 COLLAR, KNURLED, BALL
LOCKING 1
22-E 27019 RETAINING RING, EXT. 1-1/2” 1
22-F 27029 SCREW, CAP 3/8-16 x 1-3/4 1
22-G 10025 WASHER, FLAT 3/8 1
22-H* 10810 NUT, LOCK 3/8-16 1
*NOTE: Item H is used as a Jam Nut to prevent the Cap
Screw (F) from loosening during operation.
18
19
20
21
A
B
E
D
F
C
F
G
H
A
B
C
D
E
Go to Discount-Equipment.com to order your parts

Printed in USA
©1999
Page 7
E-ALRBS-IP-11/99
TO DISASSEMBLE THE EDCO BIG STICK CHISEL SCALER MODEL ALR – BS
NOTE: Items #2, #16, #17 and #22 can be replaced as assemblies.
NOTE: All threaded parts are standard right-hand threads.
1. Place Cylinder Housing (#16) in a vice and clamp on the flat ends.
2. To remove Chisel Holder Chuck (#22), loosen Lock Nut (#22-H) and Capscrew (#22-F)
then unscrew the Chisel Holder from the Cylinder (#19).
3. Unscrew Piston & CylinderAssembly (#17) from Cylinder Housing (#16). Cylinder (#19)
contains the Piston (#18). Piston is removed by gently tapping on the small end and lifting
Piston (#18) up and out of the Cylinder (#19).
4. Cylinder Housing (#16) is not an operating part and rarely needs to be removed. If an air
leak is detected, the “ O “ rings (#5, D, E & F) may need to be replaced.
5. Casing (#7) if damaged, may be unscrewed from the Cylinder Housing (#16) and Valve
Assembly (#2). There are no moving parts in the Casing (#7).
6. To remove the ValveAssembly (#2) simply unthread from the upper end of the Casing (#7).
7. To replace Rubber Hand Grip (#6), remove Air ValveAssembly (#2), moisten grip with
water and slide to a comfortable position on Casing (#7).
STEPS TO DISASSEMBLE THE AIRVALVE BODY ASSEMBLY (#2):
1. To remove Internal Valve Parts:E – ”O” ring
D – Compression Spring
C – Valve Stem
B – “O” Ring
First remove the Capping Screw (F). Note that the Valve Stem (C) should be replaced if it is
worn and loose in Valve Body (A).
2. The “ O “ Ring for the Valve Stem (B) may become unseated due to excess air pressure.
Check this item if tool fails to stop running when valve handle is released.
3. The Valve Lever (H) is held in place by the Rivet (I) and two Washers (J).
The “ O “ Ring (L) must be in place on Valve Assembly (A) to prevent air leaks when assembly
is threaded into casing (#7).
NOTE: All “O” Rings should be inspected and replaced if air leakage or damage is detected.
Go to Discount-Equipment.com to order your parts

Discount-Equipment.com is your online resource for quality parts & equipment.
Florida: 561-964-4949 Outside Florida TOLL FREE: 877-690-3101
Need parts?
Click on this link: http://www.discount-equipment.com/category/5443-parts/ and
choose one of the options to help get the right parts and equipment you are looking
for. Please have the machine model and serial number available in order to help us
get you the correct parts. If you don’t find the part on the website or on one of the
online manuals, please fill out the request form and one of our experienced staff
members will get back to you with a quote for the right part that your machine needs.
We sell worldwide for the brands: Genie, Terex, JLG, MultiQuip, Mikasa, Essick, Whiteman,
Mayco, Toro Stone, Diamond Products, Generac Magnum, Airman, Haulotte, Barreto,
Power Blanket, Nifty Lift, Atlas Copco, Chicago Pneumatic, Allmand, Miller Curber, Skyjack,
Lull, Skytrak, Tsurumi, Husquvarna Target, Stow, Wacker, Sakai, Mi-T-M, Sullair, Basic,
Dynapac, MBW, Weber, Bartell, Bennar Newman, Haulotte, Ditch Runner, Menegotti,
Morrison, Contec, Buddy, Crown, Edco, Wyco, Bomag, Laymor, EZ Trench, Bil-Jax, F.S.
Curtis, Gehl Pavers, Heli, Honda, ICS/PowerGrit, IHI, Partner, Imer, Clipper, MMD, Koshin,
Rice, CH&E, General Equipment ,Amida, Coleman, NAC, Gradall, Square Shooter, Kent,
Stanley, Tamco, Toku, Hatz, Kohler, Robin, Wisconsin, Northrock, Oztec, Toker TK, Rol-Air,
APT, Wylie, Ingersoll Rand / Doosan, Innovatech, Con X, Ammann, Mecalac, Makinex, Smith
Surface Prep,Small Line, Wanco, Yanmar
This manual suits for next models
1
Table of contents
Other Edco Drill manuals