Edmund Scientific Astroscan User manual

Contents
Introduction................................................................................................................................................................ 2
Assembly................................................................................................................................................................... 3
What’s an Astroscan? ............................................................................................................................................... 4
Optical Specifications............................................................................................................................................ 5
Basic Operation and Viewing Hints ........................................................................................................................... 7
Discovering the Solar System ................................................................................................................................... 11
Sun........................................................................................................................................................................ 11
Moon ..................................................................................................................................................................... 11
Planets .................................................................................................................................................................. 14
Comets.................................................................................................................................................................. 17
Discovering the Deep-Sky......................................................................................................................................... 18
Single Stars and Star Colors................................................................................................................................. 18
Double and Multiple Stars..................................................................................................................................... 19
Star Clusters and Asterisms.................................................................................................................................. 20
Nebulae................................................................................................................................................................. 21
Galaxies ................................................................................................................................................................ 22
Milky Way.............................................................................................................................................................. 23
Terrestrial Use ........................................................................................................................................................... 24
Care and Maintenance .............................................................................................................................................. 27
Accessories ............................................................................................................................................................... 28
Warranty .................................................................................................................................................................... 28
ASTROSCAN USER’S GUIDE
1
About the Author
James Mullaney is an astronomy writer, lecturer and consultant who has published more than 700
articles and eight books on observing the wonders of the heavens, and logged over 25,000 hours
of stargazing time with the unaided eye, binoculars, and telescopes. Formerly Curator of the Buhl
Planetarium in Pittsburgh and Director of the DuPont Planetarium, he served as staff astronomer at
the University of Pittsburgh’s Allegheny Observatory, and as an editor for Sky & Telescope magazine.
A contributor to Carl Sagan’s award-winning Cosmos PBS-Television series, Mr. Mullaney's 50-
year mission has been to “Celebrate the Universe!” – to get others to look up at the majesty of the
heavens and to personally experience the joys of stargazing. In February of 2005, Mr. Mullaney was
elected a Fellow of the prestigious Royal Astronomical Society of London.
To request a catalog, shop for products, or get more information,
visit us online at: www.scienticsonline.com
OR call toll free: 800-728-6999
The wonders of our universe have always intrigued
humankind. Ever since that long-forgotten primordial
dawn when man first walked upright and raised his eyes
to the sky, he has been enthralled by the majesty of the
heavens. It seems only yesterday that he learned to fly.
Today, there are human footprints on the Moon and the
sands of Mars are being analyzed for signs of life. We can
only speculate what the future will bring. In our ongoing
search for knowledge, many tools have been used
over the centuries, yet only one has unveiled the silent
wonders of the night sky. Only the telescope has enabled
us to see what’s actually out there: the mountains and
craters and valleys of the Moon, the four bright orbiting
satellites of Jupiter discovered by Galileo, the amazing
ice-rings of Saturn, and beyond the solar system, the
vast realm of the stars and galaxies that makes up our
universe including the awe-inspiring beauty of our Milky
Way Galaxy. All are there as they were that first dawn,
waiting for you to see and study and contemplate.
Your new Edmund Scientific Astroscan®telescope is
your tool for exploring these cosmic wonders – your
personal window on creation! This instrument is the
result of one of the most intensive development efforts
ever undertaken by the Edmund Scientific Company.
It was designed, engineered and built to provide the
novice stargazer with some of the widest, brightest
and clearest astronomical views available. Its simplicity
of design provides a portability and ease of use rarely
found in typical astronomical telescopes. With proper
care, your new Astroscan will bring you many years
of exciting celestial exploration, opening a whole new
and unsuspected universe to you and your family! But
realize that it is a precision optical instrument, not a
toy. It should be treated with the same care given an
expensive camera or other fine optical system. This
guide was written to acquaint you with all aspects of
your new telescope including its care and use. Study it
carefully – you’ll be glad you did!
Introduction
Warning!
DO NOT ever point the Astroscan or
any other optical instrument at the
Sun. Concentrated direct sunlight
can cause eye damage and blind
you in seconds!
2
3
2. Next, place the rubber base mat on any secure level
surface.
3. Now remove the telescope and attached base from
its protective plastic bag and place it onto the mat.
Inspect it both externally and internally (uncapping
it and looking into and down through the optical
window) for any obvious signs of shipping damage.
If the shipping container itself is crushed or torn
open at any place, this step is especially critical. If
damage should be found, contact Edmund Scientific
Customer Service at 1-800-728-6999 and then return
the telescope as instructed in the warranty box on
page 1.
4. Remove the red plastic plug from the focuser
drawtube, then uncap and insert the low-power
(28 mm) eyepiece into the tube. Note that the
sanded portion of the drawtube and the two tabs
face upward. The right tab is designed to put slight
tension on the eyepiece to keep it from sliding out.
The left tab is bent slightly upward to prevent the
drawtube from being turned too far in and dropping
onto the telescope’s main mirror!
Assembly
Your new Astroscan telescope is essentially ready for
use right out of the box, but there are a few simple
steps you need to perform before you can actually look
through it.
1. First, locate and identify the following items:
• the telescope itself!
• mounting base (attached to telescope)
• dew/light shield (see photo on page 10)
• shoulder strap
• rubber base mat
• two Plossl eyepieces (28 mm -16X and 15 mm - 30X)
• eyepiece cap
• rubber eyeguard
• reflex-sight finder (see photo on page 9)
• dust cap for front of telescope
• extra base bearing pads (pack of three)
• Astroscan User’s Guide
• The Edmund Sky Guide
• Scientifics’ Star and Planet Locator
5. Attach the finder by sliding it into the grooved mounting
bracket (with the tube portion facing forward) located
to the right of the focuser, and tighten the two Phillips-
head screws to secure it in place.
6. Attach the dew/light shield to the front of the telescope
by placing the two notched-out sections in their
corresponding places at the top of the tube.
7. Unlock the ¼-20 threaded thumbscrew located
under the base by turning its knob clockwise. This
will release the telescope from its mounting and allow
it to be moved about on its three red supporting pads
(one on top of each of the three legs) or lifted off the
base entirely.
8. Your new Astroscan is now ready for use! However,
it is strongly recommended that you read this
remainder of this guide before proceeding, especially
the section on “Basic Operation and Viewing Hints”
(beginning on page 7), which explains, among many
other useful things, how to align and use the reflex-
sight finder to aid in pointing the telescope.

4
What’s an Astroscan?
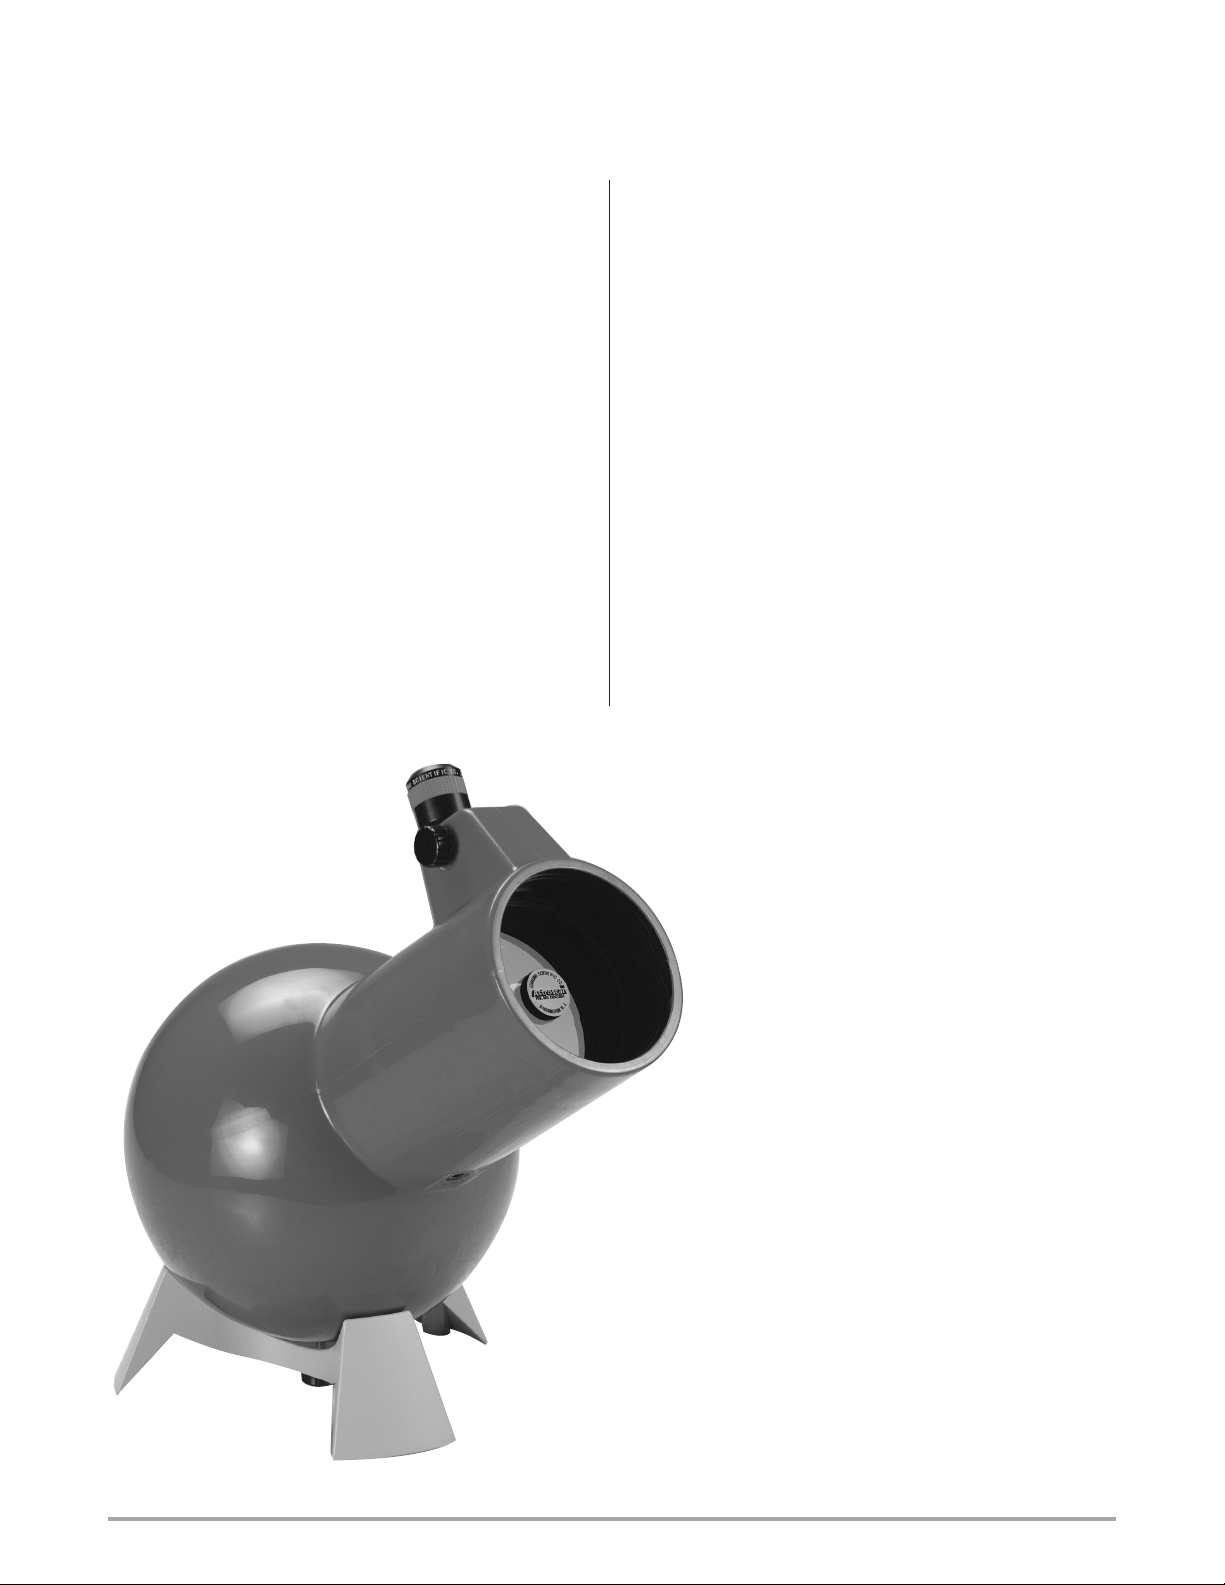
Your new Edmund Scientific Astroscan is a classic
Newtonian reflecting telescope housed within a
sphere. Utilizing a 41∕8-inch (105 mm) diameter clear-
aperture precision parabolic primary mirror combined
with a flat diagonal mirror, unique optical window and
a 28 mm Edmund Plossl (16X) eyepiece, it provides
a spectacularly wide, bright field of view. Its fast f/4.2
focal ratio and resulting short focal length of 17.5
inches (445 mm) qualifies it as a “rich-field telescope”
(or RFT), which shows the greatest possible number
of stars in a single view. Ordinary telescopes with their
higher magnifications typically have a maximum field of
view of 1.5 degrees of sky, while standard binoculars
cover an average field of 7 degrees. The Astroscan lies
between these extremes, offering a full 3-degree-wide
actual field of view with the supplied low-power 28 mm
(16X) eyepiece. For comparison, the Moon is about 0.5
degree in apparent size, so that’s an amazing six full-
Moon diameters of sky coverage!
The low magnifications and wide fields of view of RFTs
produce bright sharp images of extended objects like
comets, wide colorful double stars, big star clusters,
expansive nebulae, the Milky Way starclouds and the
larger galaxies like those in Andromeda. Even at their
lowestmagnification,theMoonandplanetssuchasJupiter
with its satellites seem suspended three-dimensionally in
the vastness of space, while higher power magnifications
can still provide fascinating closer-up detail.And because
of their low magnification, instruments like the Astroscan
are relatively unaffected by the atmospheric turbulence
that plagues conventional higher-power scopes on many
nights, ruining their definition.
The Astroscan’s precision optical system is factory-
collimated for precise alignment and should never require
adjustment with normal use. Enhancing the telescope’s
care-free performance, the diagonal mirror assembly
Field of View (Relative Scale)
Wide-Angle Telescope
3°
Conventional Telescope
11⁄4°
Standard Binoculars
7°
(which directs the light out the side of the tube and into
the eyepiece) is mounted directly onto an antireflective-
coated optical window. This provides protection from
possible damage to the primary mirror, and from moisture
and dust settling onto its surface. Only 21.5" long (with
the dew/light shield and base attached; the telescope
itself is 17") and weighing just over 12 pounds with its
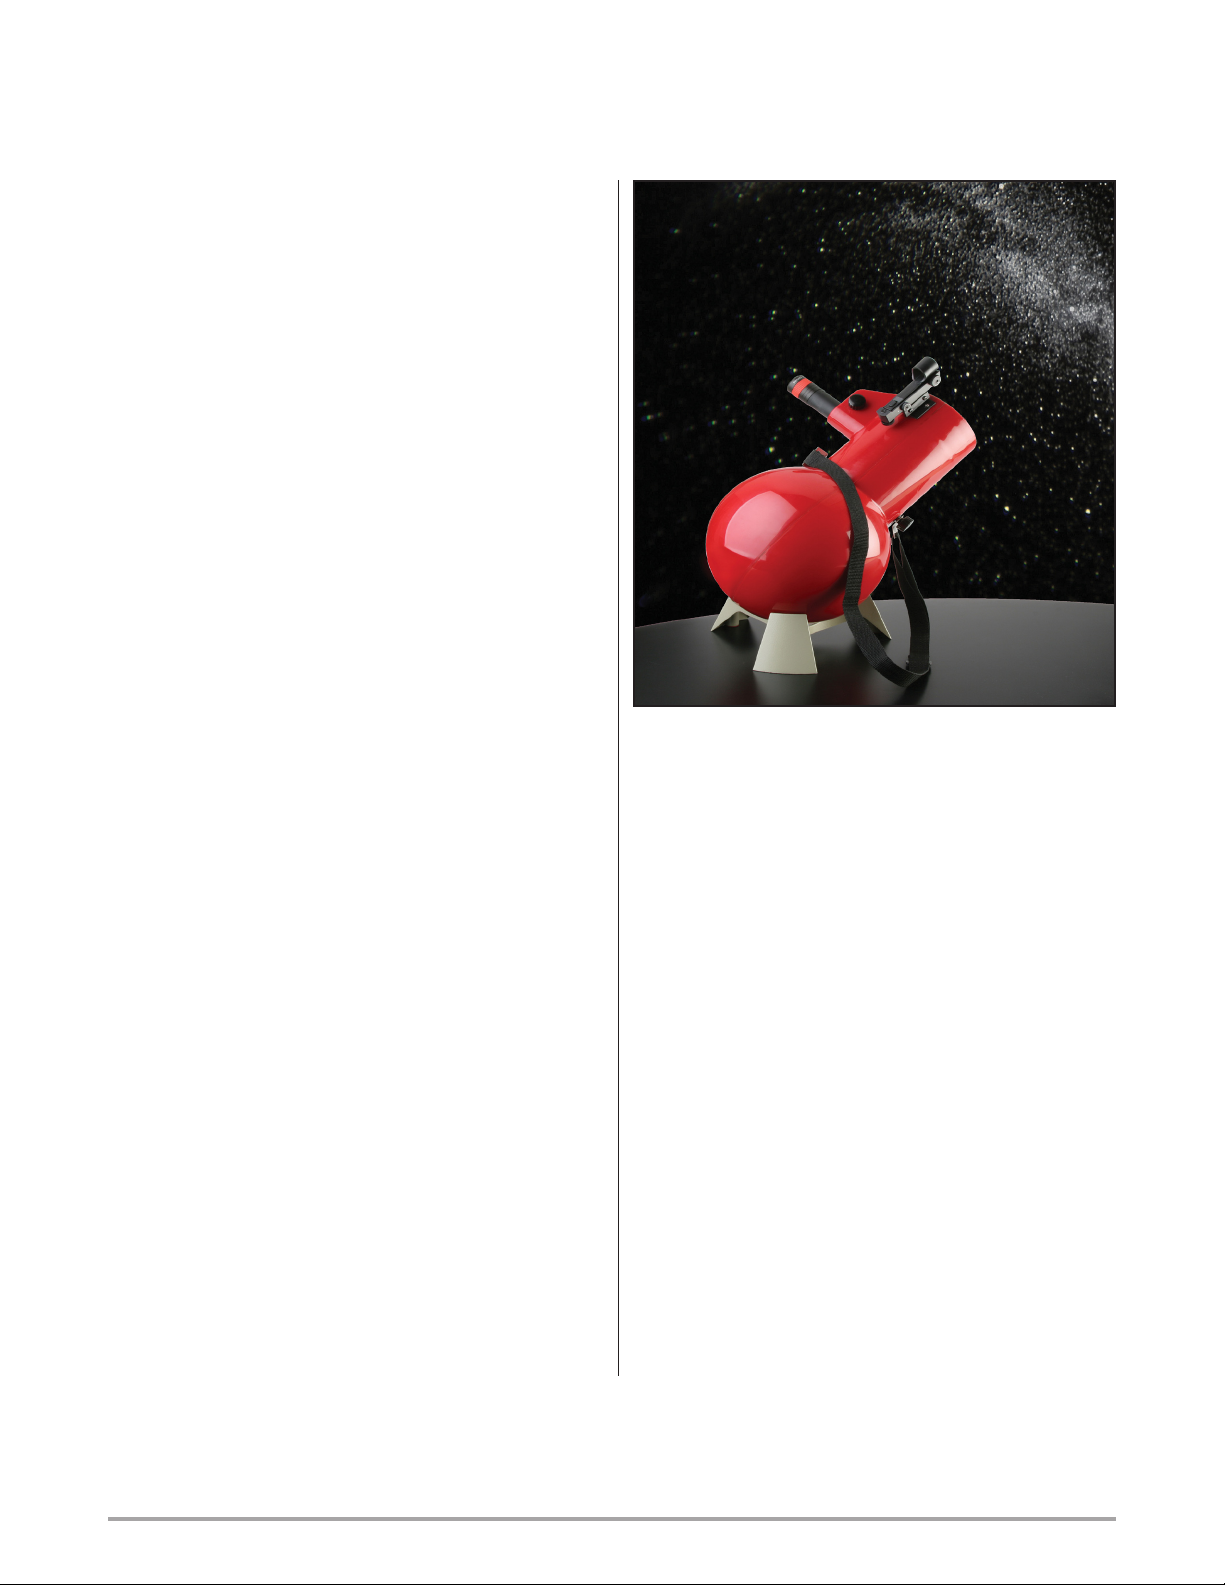
removable cast-aluminum base, its shoulder carrying
strap and unique spherical-shaped design allow you to
take your Astroscan anywhere and have it ready for use
at a moment’s notice.
Molded from high-impact plastic for rugged durability, the
body is an attractive red in color to prevent impairment
of night vision from surrounding light hitting it and being
reflected into your eye. When the telescope is placed on
its base, the advantages of its design are immediately
apparent. Aside from the bulk and complexity of
traditional mountings being eliminated, simple fingertip
pressure and a natural point-and-move motion are
all that’s needed to easily direct the telescope to any
desired part of the sky. It can also be lifted from its base
and cradled in the arms to scan about both the night sky
and daytime landscape, as described later.
All things considered, the Astroscan is one of the
best buys in a quality beginner’s telescope on the
astronomy market today. Its simple easy-to-use design
makes it the perfect first choice for anyone who has
never owned a telescope before. It also serves as an
excellent, highly portable second instrument for those
more experienced observers who already possess
larger telescopes. There’s a well-known adage that “the
smaller (more portable) the telescope, the more often
it will be used.” You’ll find your new Astroscan to be a
wonderful example of this sage advice. It’s a telescope
that can go anywhere with you – and one that’s capable
of providing a lifetime of viewing pleasure!
5
Optical Specications
This section is primarily intended
for the more curious or technically
minded who may want to know just
what makes the Astroscan “tick” on
the inside. However, it also covers the
related matters of how magnification
and field of view are determined, which
should be of interest to most users. As
already mentioned, the Astroscan is
a classical Newtonian reflector. The
other two basic types of telescope
in addition to reflectors (or mirror
type) are refractors (or lens type) and
catadioptrics (or compound lens-mirror
type). Edmund Scientific markets all
three forms but is perhaps best known
for its innovative Astroscan.
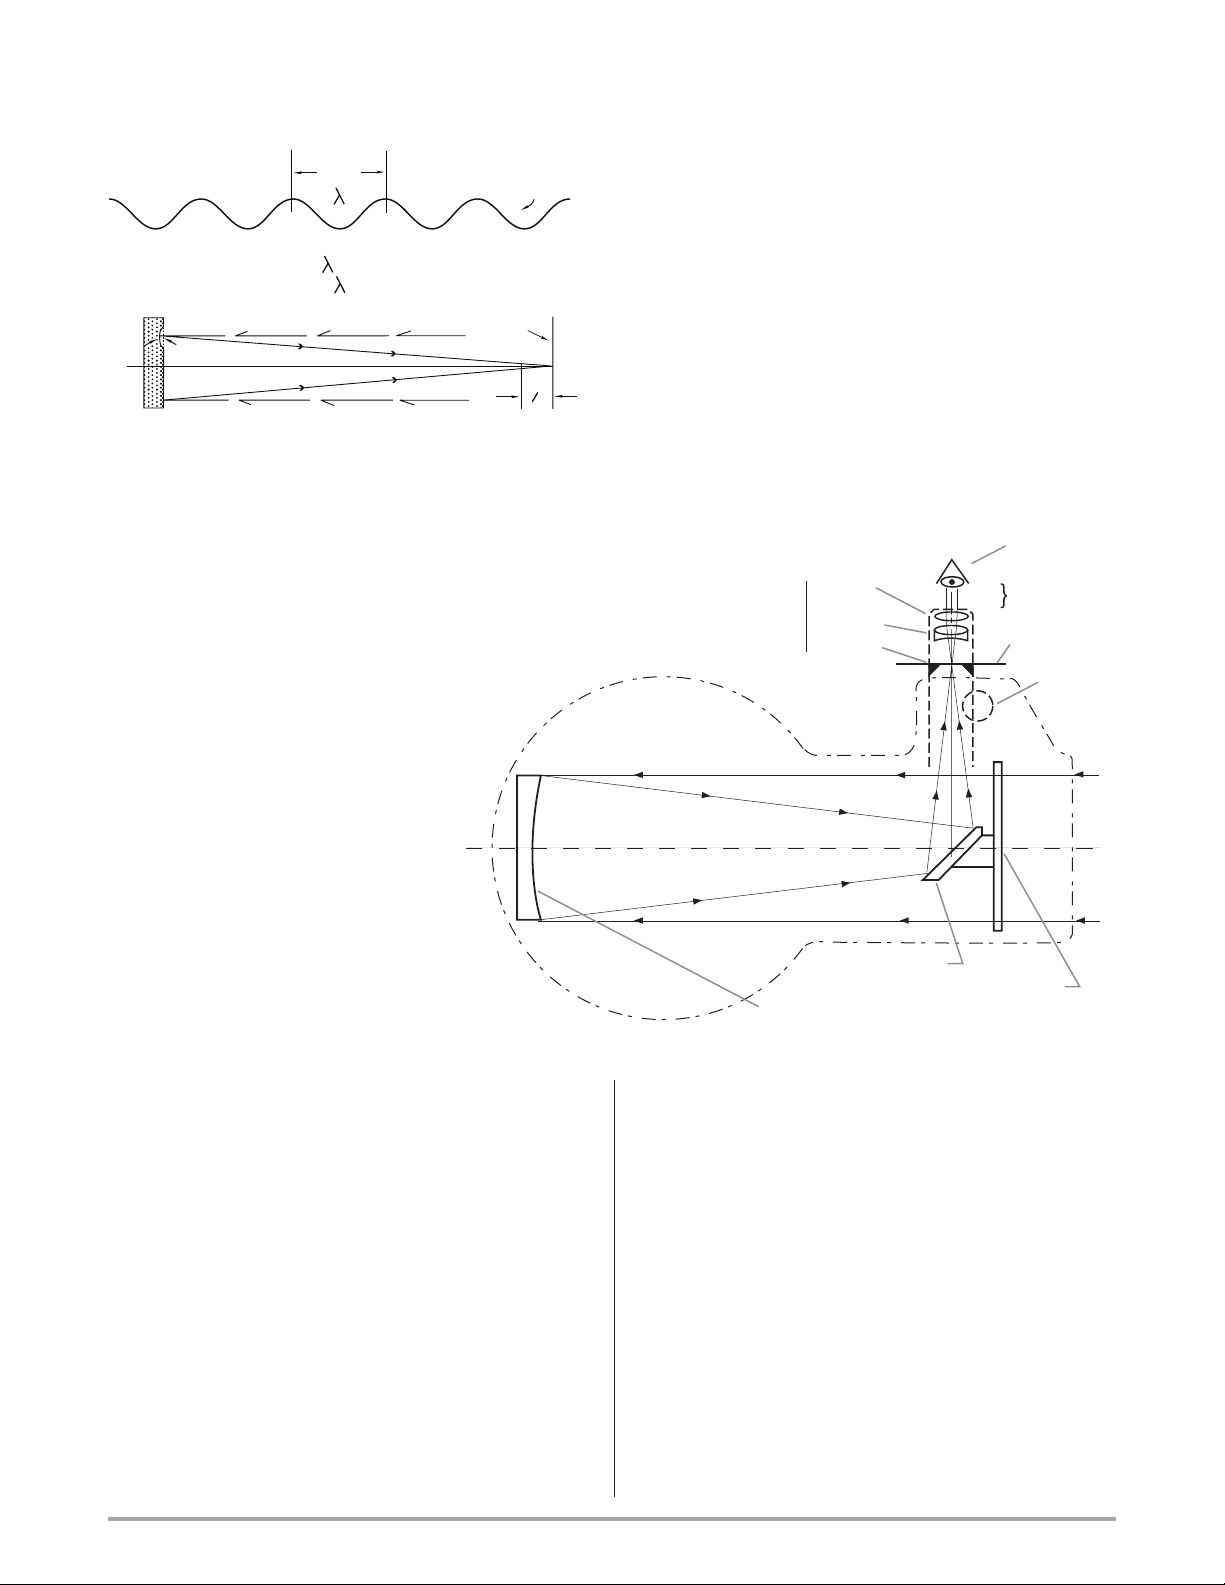
The accompanying diagram shows the position and
relationship of the Astroscan’s four primary optical
components. The heart of the system is the 41∕8-inch
(105 mm) clear-aperture primary mirror at the bottom
of the surrounding spherical housing. (The mirror itself
actually has a 41∕4-inch diameter but a small portion of its
outer edge is contained within the mirror cell mounting.
Thus the term “clear aperture.”) Its focal ratio is f/4.2,
resulting in a focal length of 17.5 inches (445 mm), and
its aluminized and overcoated reflective front surface is
parabolic to an accuracy of 1∕8wave – or to within just
a few millionths of an inch of being optically perfect!
(Those wishing to delve into the matter of optical
accuracy should consult the diagram above, entitled
“1∕8th Wave Optics.”)
The usual tolerance for high-precision optics is one-quarter of the
wavelength of light – no part of the glass surface must depart more than
1∕4wave or 51∕2millionths of an inch from the specified shape. Compare
this with a sheet of paper, which has a thickness of about 200 waves! The
Edmund Scientific Astroscan betters this tolerance with optics of 1∕8wave.
In the case of a telescope mirror where light transverses the distance twice,
a 1∕8wave defect on the mirror will result in a 1∕4wave error at the image
plane as shown. This gives nearly perfect imagery. Further narrowing of the
tolerance to 1∕10 wave or less is more in the nature of advertising claims than
any appreciable gain in definition.
ONE
WAVE LIGHT
WAVE
( )
GREEN
LIGHT
ONE WAVE = .00022" (22 millionths)
1/8 WAVE = .000027" ( 2 3/4 millionths)
{( )
(1/8 )
NORMAL
IMAGE
PLANE
TELESCOPE MIRROR
1/8 WAVE DEFECT
1/4 - WAVE ERROR
1/8th Wave Optics
Parabolic
Primary Mirror
Secondary Mirror
(Diagonal) Anti-Reflection
Coated Window
Focusing
Knob
Image Plane
(Focal Plane)
Eyepiece
Eye Lens
Compound
Field Lens
Field Stop
Eye Relief
Distance
Observer's
Eye
Near the top of the telescope tube is the optically-flat,
plane-parallel glass window. It’s coated with a bluish-
looking anti-reflection coating (like those seen on
binocular and camera lenses) to prevent unwanted
reflection of incoming light from its surfaces (just the
opposite of the primary mirror, which is coated to be
as reflecting as possible!). Attached to the inside of the
window is the small optically-flat diagonal mirror whose
front surface is coated the same as the main mirror.
Light entering the telescope passes through the optical
window down onto the parabolic primary which, being
concave, reflects it back up the tube in a converging
cone. The diagonal intercepts and redirects the light 90
degrees, where it comes to focus at the eyepiece on the
side of the tube for viewing. Modern eyepieces consist
Astroscan's Primary Optical Components

6
of combinations of several lenses or sets of lenses and
have a “field stop” which gives a nice sharp edge to
the circular field of view. In essence, the primary mirror
collects light and forms an image at its focus, while the
eyepiece magnifies that image.
The magnifying power of a telescope is found simply by
dividing the focal length of the primary mirror (or objective
lens for a refractor) by the focal length of the eyepiece
being used. This is often expressed as: X (or power) =
Focal Length/focal length, where the capitalized words
represent the focal length of the primary mirror and lower
case words represent the focal length of the eyepiece.
In the case of the Astroscan used with its standard 28
mm eyepiece, this becomes 445/28 = 16X. Notice that
this is in millimeters. It can also be done in inches, as:
17.5/1.1 = 16X. Also note that to increase magnification,
you decrease the focal length of the eyepiece – not
increase it, as many believe! So to change the Astroscan
to a higher power, replace the 28 mm Plossl with the
supplied 15 mm one and you have: 445/15 = 30X.
Other magnifications can be achieved using additional
eyepieces, and the power of any given eyepiece can be
more than doubled by using the Edmund Scientific 2.5X
Barlow lens. (See the “Accessories” section for these
and other useful items.)
It needs to be stressed here that your Astroscan, as
a low-power wide-field telescope, was designed for
optimum performance in the magnification range of 15X
to 35X. While it can certainly be used at higher powers
(the useful upper limit to magnification for any telescope
is actually around 50X per inch of aperture), there will be
a corresponding reduction in the size of the field of view
(further described in the last paragraph on this page)
and with it increasing difficulty in finding objects. There’s
also increased sensitivity to atmospheric turbulence
as power is increased and precise focusing becomes
ever more critical. Experienced observers typically use
their lower powers most of the time, reserving higher
ones for steady nights and close-up views of the Moon,
planets and tight double stars. It’s been said that a
magnification of 30X will reveal just about everything
the casual stargazer would want to see in the universe,
given enough aperture and good optics – both of which
the Astroscan has!
While on the subject of power, it should be realized that
there are actually three types of telescope “power.” Most
obvious (especially to beginners) is the one we’ve been
talking about – magnifying power, or how much larger
(and closer) a telescope makes things look. But of more
importance (especially to professional astronomers, or
amateur stargazers who enjoy viewing “faint fuzzies”
like galaxies) is light-gathering power – or how much
brighter a telescope makes objects appear. And the third
type is resolving power – or how sharp and detailed an
image the telescope shows. As aperture increases, so
do both of these. For its size and intended use, your new
Astroscan balances all three types of power nicely, as
explained in the following sections of this guide.
One other important matter related to magnifying power
itself is the angular field of view. As mentioned above,
as power increases, the amount of sky seen decreases.
There are really two different types of “field of view.”
One is the “actual field,” or amount of sky shown by the
telescope itself. The Astroscan covers a full 3 degrees or
six full-Moon diameters with its 28 mm (16X) low-power
eyepiece. The other type of field is the “apparent field” of
view of the eyepiece being used. The Plossl eyepieces
supplied with your telescope have fields of 50 degrees.
This is the angle you would see holding the eyepiece up
close to your eye and pointing it at the daytime sky or
other bright surface. The actual field is found simply by
dividing the apparent field of the eyepiece by the power
being used, or Actual Field = Apparent Field/X. For the
Astroscan used with its 16X 28 mm eyepiece this would
be 50/16 = 3.1 degrees. If you switch to the 30X 15 mm
eyepiece, it would be 50/15 = 1.7 degrees, or only about
half as much actual sky coverage.

7
For the Beginner
The novice should begin by spending some time
practicing viewing land objects during the daytime with
the Astroscan. Even though the image appears inverted
(see the section on “Terrestrial Use” on page 24), you
will gain valuable experience in handling the telescope,
focusing the eyepiece, using the finder and other basic
operations.
Getting Used to the Dark
When you first begin observing at night you probably
won’t be able to see very much except for brighter
objects. That’s because your eyes aren’t yet used to the
dark. The full process of “dark adaptation,” as it’s called,
takes about an hour, although you’ll be able to see a lot
more than you could at first within 5 minutes or so. Give
your eyes 10 or 15 minutes in the dark, and preferably
longer before you go seeking faint targets like nebulae or
galaxies. You can pass this time quite enjoyably looking
at some of the brighter sights first, such as the planets
and double stars and then viewing fainter objects. This
allows the eyes to dark-adapt naturally as you observe.
(If the weather outdoors is cold, you can get your “night
eyes” more comfortably by staying indoors with your
eyes closed or sitting in a dark room.) If you use a normal
flashlight or penlight to look at star charts or make notes
at the telescope, its excessive brightness will destroy
your dark adaptation. Always use a red LED flashlight or
a light covered with a red filter.
Cooling Down the Astroscan
When you take your telescope from wherever it has
been stored and set it up outdoors for use, you’ll have
to wait for it to become thermally stabilized or “cooled
down” – that is, for the mirrors, lenses, and air within
the tube and ball to reach the outside air temperature.
Until normalization is achieved, there may be noticeable
image distortion. How much time this takes depends
upon the season (i.e., longer in the winter because of the
greater indoor/outdoor temperature difference), and the
size and type of telescope. Some large backyard scopes
may need an hour or more to come to equilibrium on a
cold night! But for a relatively small-aperture instrument
like the Astroscan, this typically requires only 10 or 15
minutes (again depending on conditions). And in any
case, image distortion is not as obvious at such low
powers as the Astroscan uses. When you set up your
Basic Operation and Viewing Hints
Look through the eyepiece with both eyes open.
telescope, be sure to remove the cap from the end of
the tube (actually from the dew/light shield – see page
10) to allow the night air to reach the optical window.
Conversely, be sure to cap the telescope before bringing
it back indoors to prevent condensation from forming
on the window due to the temperature difference.
(Should you forget to do this, before capping it, simply
let the telescope be exposed to the inside air until the
condensation evaporates as the scope warms up.)
Looking Through the Astroscan
Looking into the eyepiece is easy and doesn’t tire your
eyes when done properly. Try to keep both eyes open,
look straight ahead, and position your observing eye
so that the entire field of the eyepiece lights up with
an image. “Not too close and not too far” is the rule. If
you wear glasses, they will sit just above the eyepiece
when your eye is at the best distance. If you don’t wear
glasses, you’ll find the optimum distance is about one-half
inch away. (In both cases, this really depends upon the
eyepiece in use.) Your eye should not actually touch the
eyepiece lens, but at the same time it must be centered
on the emergent light beam. This is difficult to do when
your eyes are not dark adapted. But once they are, you’ll
notice that the sky typically seen in the telescope is not
really black but a rather luminous gray due to sources
like light pollution and moonlight. Using this illuminated
area as its target, your eye will automatically center on
the eyepiece. If desired, you can cup your hand around
the eyepiece to serve as a guide until you get your eye
centered on the light beam. (See also the section on
“Using the Rubber Eyeguard” on page 10.)
8
As your head moves a bit, the image will sometimes
disappear partly or entirely. Don’t be concerned about
it – simply re-center your eye. Make sure your body is
positioned so that you’re relaxed and not cramped or
getting a stiff neck.
Keeping both eyes open is the key to avoiding eyestrain.
With a bit of practice you’ll learn to ignore the extra image
seen by the unaided eye. If it doesn’t feel natural to look
with one eye, then try the other. If you still feel you can’t
learn to ignore the other image, try closing the other eye
gently so you’re not squinting, which causes eyestrain.
Some observers prefer to use an eyepatch (available at
most drugstores) over the other opened eye.
On bright sunny days you may notice a fuzzy spot that
seems to move about the eyepiece field; this is the
shadow of the small diagonal mirror and will completely
disappear under dim-light conditions as the pupil of your
eye opens much wider at night.
If you wear eyeglasses for either near- or farsightedness,
take them off while observing, simply correcting your
vision by focusing the telescope as described below.
This will be much more comfortable and let you get closer
to the eyepiece when necessary to see the full field of
view. Unfortunately, those having severe astigmatism
should keep their eyeglasses on while observing since
refocusing won’t correct for this aberration.
Focusing the Astroscan
The image is focused by turning the focusing knobs
located beside the eyepiece. With the Astroscan, the
image will seem to almost “snap” into sharpness. For
focusing on nearby objects you’ll find that the eyepiece
comes much farther out than it does for distant objects.
The closest focusing distance is set by how far the
eyepiece tube can be safely moved without it coming
out of the focuser, but generally you can focus to within
20 feet or so for close-up nature studies.
Focusing the eyepiece.
There’s actually no such thing as “exact” focusing of
a telescope. What happens is that the image forms
at a very precise and exact image plane, but you can
see the image well at various settings of the eyepiece
because the eye can adjust for either long or short
focus. The best general practice is to focus “long.”
This is done by extending the eyepiece a little more
than necessary and then focusing in just enough to
get a sharp picture. The “long” focus causes your eye
to focus as for a distant object, its most comfortable
position. If you focus to the maximum “in” position
which retains a sharp image, the eye accommodates
for a close object but finds this somewhat more tiring.
In actual practice, you should alternate between long
and short focus since frequent changes will allow you
to see clearly with the least eye fatigue.
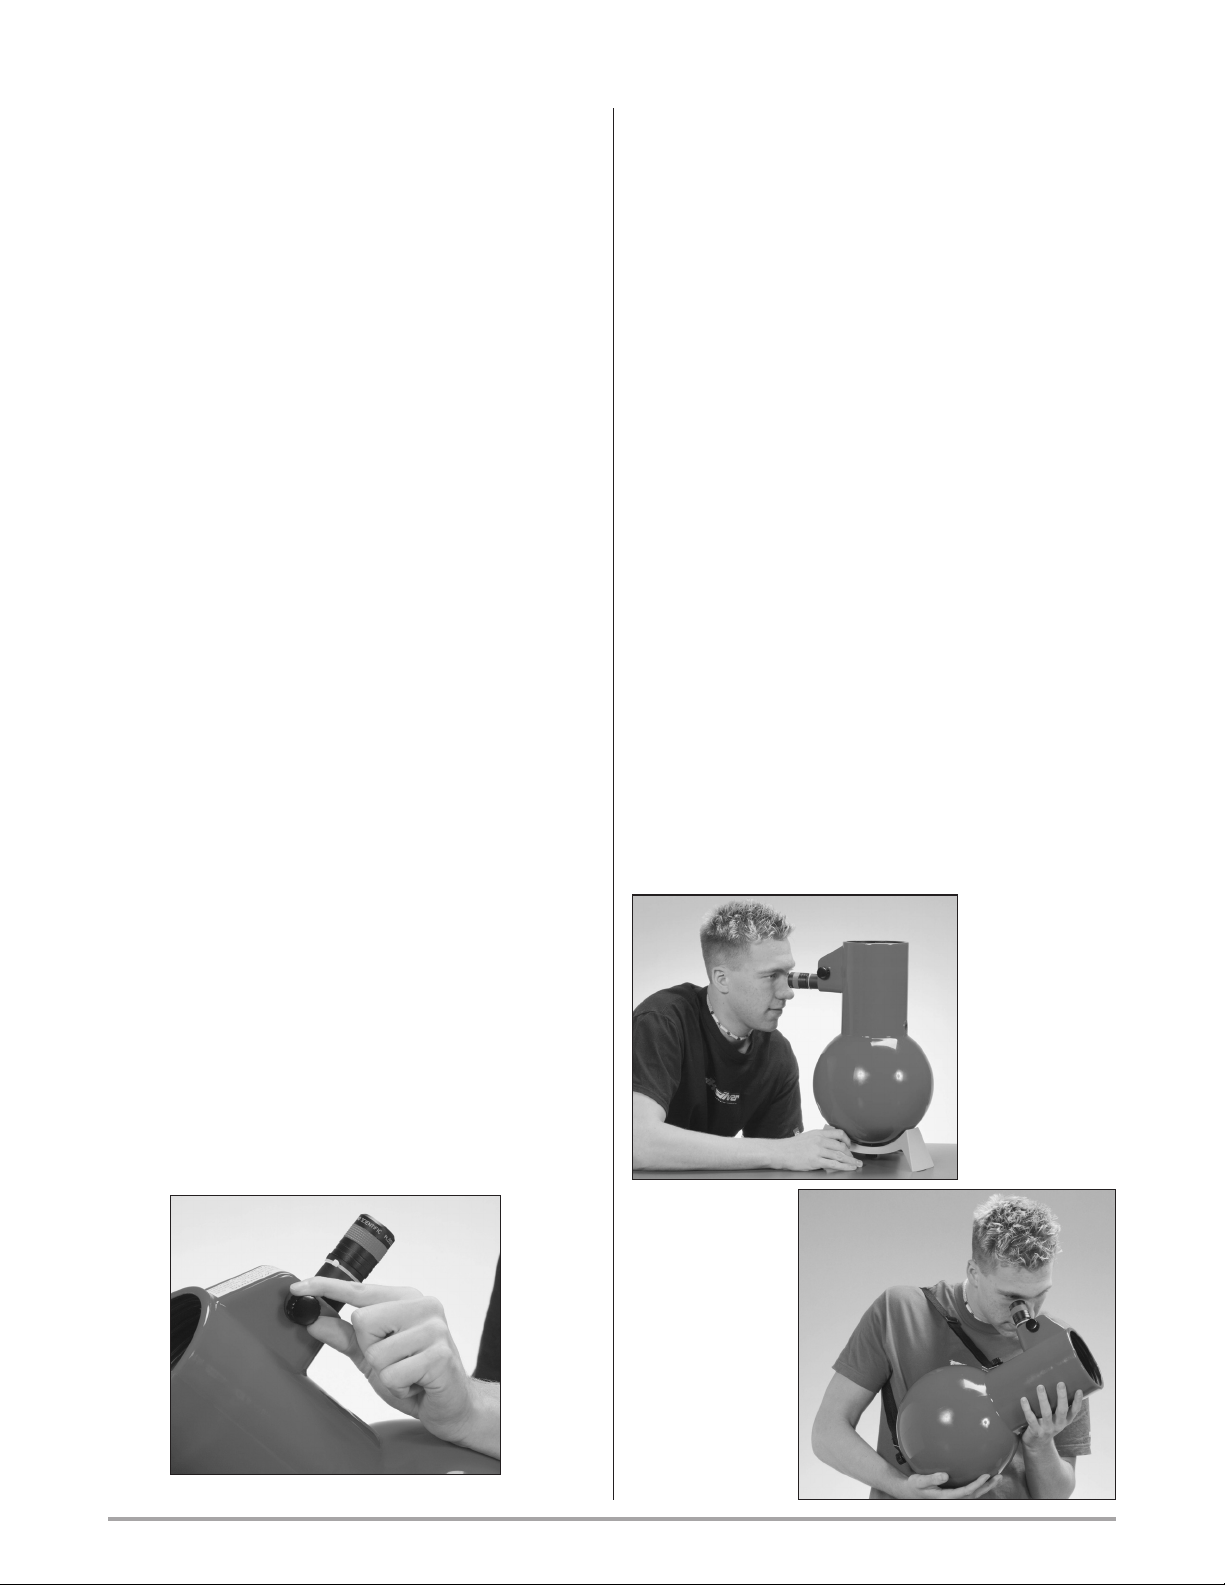
Supporting the Astroscan
The very best way to use your Astroscan is on its built-in
base. This sturdy support allows the telescope to swivel
quickly around the entire sky in seconds, and it doesn’t
need any adjustments, clamping gadgets or other such
complications. You can put the base down on just about
any fairly level sturdy surface such as a picnic or coffee
table, always using the rubber base mat to protect the
surface. You can also place the base on the front hood
or trunk of a car. (Note, however, if the car is warm
– especially the area over the engine – it will produce
Astroscan with
shoulder strap.
Astroscan on
its base.

9
image-distorting heat currents.) For sporting events and
other activities where fast movement is essential, or where
you must stand above a crowd, you can use the supplied
over-the-shoulder strap with the Astroscan resting snugly
against your body to follow the action. The telescope may
also be cradled in your lap for watching flights of geese or
a high-altitude plane (in both cases, being careful not to
accidentally run into the Sun!), or for tracking satellites or
sweeping across the beautiful starfields of the Milky Way
at night. While your lap is certainly not as stable as the
base, it does provide great freedom of movement. You
can also put the Astroscan on a camera tripod, using the
tripod bracket (described in the “Accessories” section)
for looking over the heads of a crowd or for steady
observing while standing up.
For this kind of use, you’ll
need a good solid tripod
with reliable adjustments.
Additionally, you can mount
the base itself on top of
the Scientifics tripod (also
listed in the “Accessories”
section) using the hole in
its center. (First remove the
thumbscrew already there,
but be sure not to lose it!)
This arrangement gives you
flexibility of movement as well
as ample elevation. And you
can quickly lift the Astroscan
off the base and use it with
the over-the-shoulder strap
or in your lap.
Aiming the Astroscan
The beautifully wide 3-degree field of the Astroscan at
16X makes the use of a traditional optical finder scope
unnecessary. But your telescope is equipped with what
is known as a unit-power (1X, or that of the unaided eye)
“reflex-sight” finder (see photo, at right). It superimposes
a small LED-powered red spot of light focused at infinity
and shows about 10 degrees of sky as opposed to the
3 degrees of the Astroscan itself. Once aligned with the
telescope, you sight through the finder and place the dot
on whatever object (the Moon, a planet or star, etc.) or
part of the sky you want to look at and it will be in the
low-power 28 mm (16X) eyepiece. Note that there are
three separate thumbscrews on the finder itself – two for
adjusting the alignment and one for turning the LED light
source on/off and adjusting its intensity. The reflex sight finder.
While aligning the finder can be done at night on a bright
star or other object, it’s easier to do it in the daytime
when you can see what you’re doing. First, using the
small knob located on the right side of the finder, turn
on the LED light and all the way up as indicated by the
arrow. (You may find that even with the light at maximum
intensity you have trouble seeing it on a bright sunny day.
An overcast day, or the time just after sunset, is much
better for doing alignment. Many observers find the Moon
seen in twilight an ideal alignment target and time.)
Next, find some distant object – such as a transmitting
antenna or an obvious treetop (preferably at least ¼ to ½
mile away) – through the telescope itself, using the 28
mm (16X) eyepiece. You’ll have to do some sweeping
back and forth and up and down until you locate the
object – and will soon see why a finder helps!
Once the object is positioned in the eyepiece, look
through the finder, centering your eye on the circular
aperture opening at its front as seen from its rear. Then
turn the knob marked “R” (for Right) located at the front
of the finder left or right until the target is centered on
the red dot in that direction.
Next, turn the knob under the rear of the finder marked
“Up” and move it up or down until the target is centered
on the dot in that direction. Now check back in the
telescope to see if the object is still in the eyepiece.
(It may have moved out of the view while making the
adjustments, and will have to be re-centered and the
process repeated. With a little practice, and patience,
this only takes a minute or two. And once alignment
of the finder with the telescope has been achieved, it
shouldn’t have to be done again unless the finder has
been bumped out of position.)
Astroscan on a tripod.

10
You should experiment with the brightness setting
at night, which depends on how bright your target is
and how lit-up the sky itself is from moonlight and/or
light pollution. Note that battery life of the LED source
depends on how much and how brightly you use it –
and also remembering to turn it off when you’re finished
observing! The LED source is powered by a lithium
wafer-type battery, #CR 2032, and if/when necessary,
replacements can be found at Radio Shack, Wal-Mart,
and also in most drugstores and supermarkets.
Using the Dew/Light Shield
It’s recommended that you keep the dew/light shield in
place on the telescope at all times (except for shipping).
As its name implies, its purpose is twofold. One is to
help prevent condensation from forming on the optical
window as it’s exposed to the night air (especially
important on humid or very cold nights). The other is to
keep stray light from entering the telescope (especially
important near streetlights or a neighbor’s house and
porch lights, and also bright surrounding light from the
sky when viewing in the daytime).
Using the Rubber Eyeguard
Somewhat related in function to the dew/light shield is
the rubber eyeguard. It helps to keep stray light from
entering the eyepiece and also to position the eye at the
optimum distance from the eyepiece to see the entire
field of view. It also cushions eyeglasses (for those who
must wear them) from hitting the lens of the eyepiece.
However, stretching the narrow part of the rubber to fit
properly and at the right position over the eyepiece is a
bit tricky. Another problem is that eyeguards often cause
the eyepiece itself to fog up from moisture held within
them from air around the observer’s eye as it’s pressed
against them. But you can experiment with the eyeguard
to see how it works for you! (Some stargazers prefer to
use a black “photographer’s cloth” – available in camera
stores – draped over their head and the eyepiece area
to totally block out all unwanted light.)
Sky and Viewing Conditions
“Good seeing” for stargazing depends on many factors
but it’s specifically concerned with the state of the
atmosphere through which the telescope must look.
There are two different conditions at play here: one is
the “seeing” or how steady the air is, and the other is
“transparency” or how clear the air is. The atmosphere
is constantly in motion at different altitudes, but some
nights more so than others. When you get a crystal-
clear sky, there’s lots of upper atmospheric movement
and the stars typically twinkle continuously. These are
poor nights if looking for detail on the Moon and planets
or trying to split close double stars. But they are ideal for
observing faint objects like star clusters, nebulae, the
Milky Way and galaxies. Conversely, hazy, muggy nights
indicate that the atmosphere is very tranquil. Images are
typically sharp and steady – ideal for close-up viewing of
the Moon, planets and stars.
Rare, however, are nights when you can use powers
over 300X regardless of the size or quality of your
telescope. Fortunately, atmospheric disturbances are
seldom a problem at the low magnifications employed
by the Astroscan. Sky targets are best viewed on or
near the “celestial meridian.” This is an imaginary line
passing north-south through the overhead point or
“zenith.” Objects rise in the east, cross the meridian,
and then set in the west due to the rotation of the Earth.
When on the meridian, they are at their highest in the
sky and also at their sharpest.
Observing over a hot driveway or roof, or through
an open window, is to be avoided due to rising heat
currents distorting the images seen. Open window
viewing is practical only when the indoor and outdoor
air are nearly the same temperature. Even so, a power
of 50X is tops for this kind of viewing. Additionally,
looking through window glass is generally discouraged
because the imperfections in the glass produce obvious
optical distortions under magnification. However, used
at its lowest magnification of 16X, the Astroscan does
make it possible to study nature this way despite some
minor image distortion – something especially welcome
on cold, wintry days!
The dew/light shield.
11
Sun
The Sun is the nearest star – our “Daytime Star,” as it’s
often called. As such, it’s the only one whose “surface”
details can be seen through normal optical telescopes.
But the Sun is also extremely dangerous. As we’ve
already warned, never point your Astroscan directly
at the Sun; concentrated sunlight can cause serious
eye damage and even blindness in seconds!
There are only two safe ways to view the Sun through a
telescope. One is to use a full-aperture optical solar filter
over the front of the telescope (not over the eyepiece
itself, as in the case of the “Sun filters” often supplied
with inexpensive imported telescopes). This stops
nearly all of the Sun’s light and heat from entering the
telescope and makes it safe to look directly at the Sun.
While commercially available from a number of sources,
you must make sure that this type of filter is made to fit
securely over the front of the Astroscan, since there are
many different telescope sizes and brands.
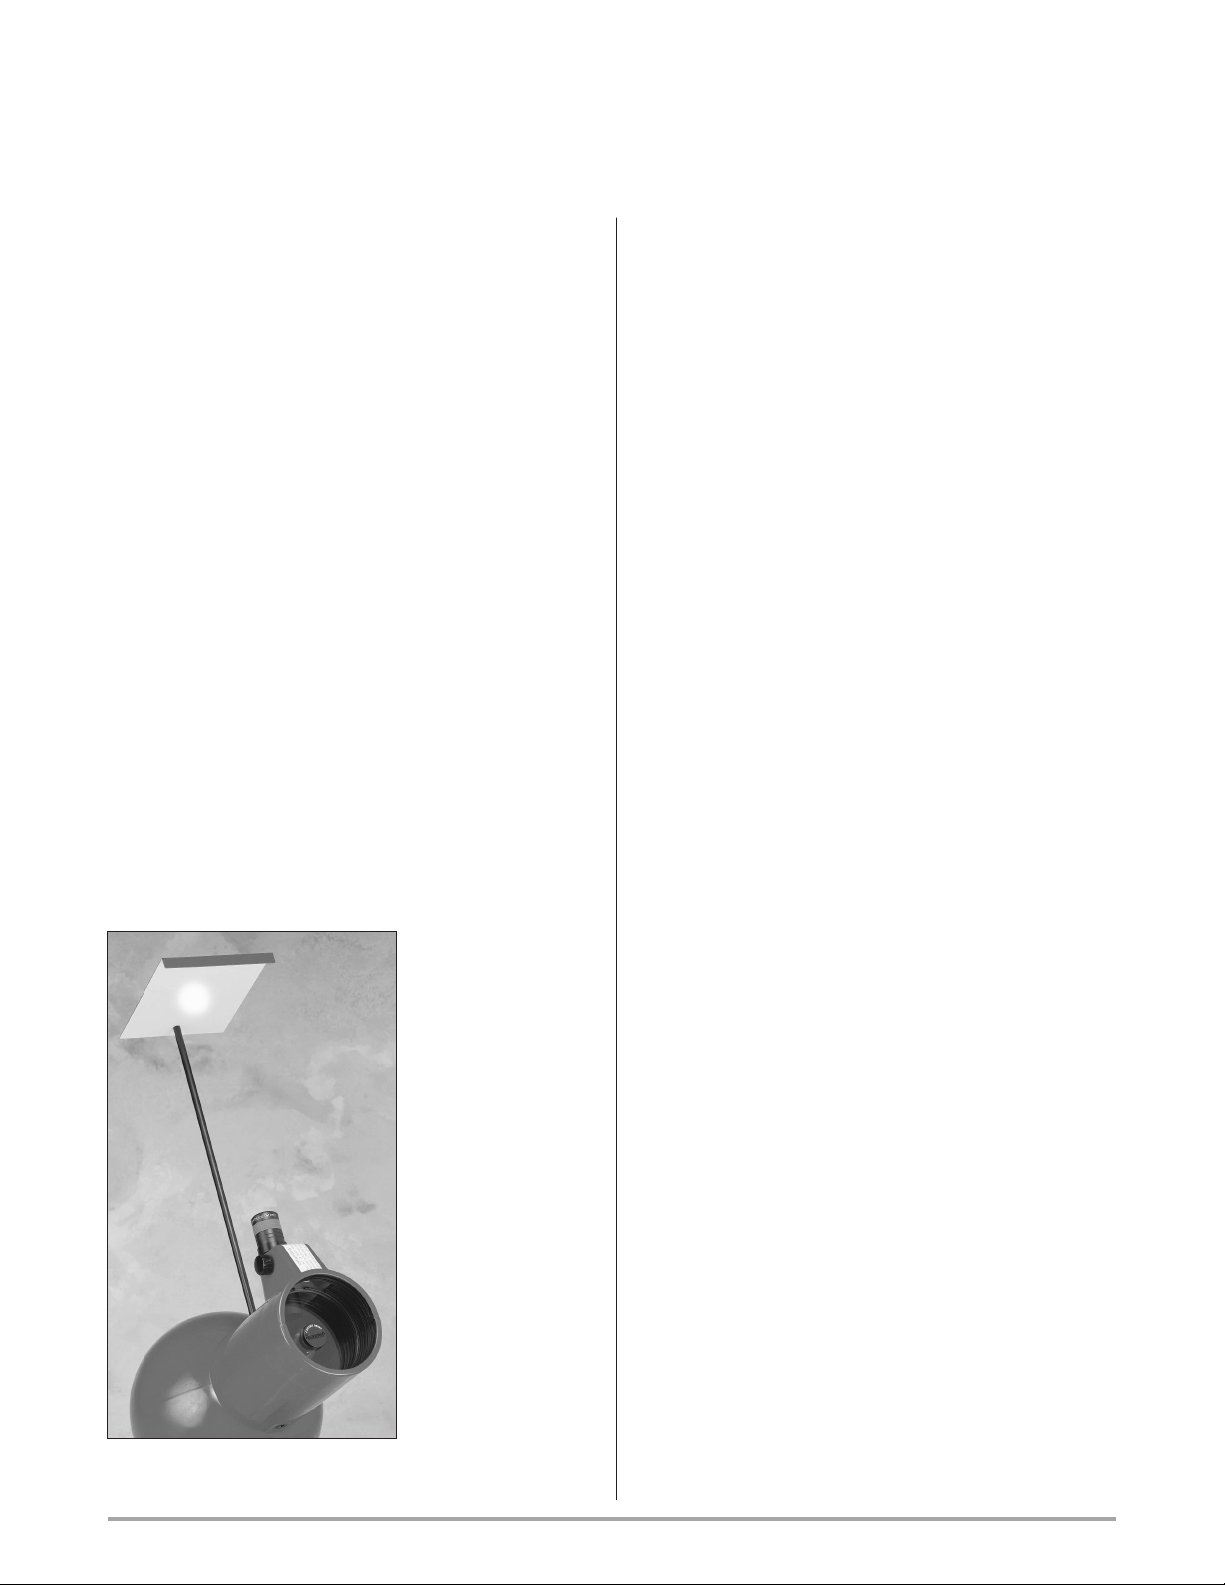
The other method for viewing the Sun is called “eyepiece
projection” and involves projecting the image of the Sun
from the telescope onto a screen where several people
can view it at the same time. (See the Edmund Sun
Viewing Screen under the “Accessories” section.) It’s a
bit tricky finding your target since you can’t look directly
at the Sun through
the telescope itself
or its finder (which,
although it does
no magnifying, is
basically the same
as staring at the
Sun with the naked
eye – something
also to be avoided!).
The best way to
get the Sun on the
screen is to point
the Astroscan in
the Sun’s general
direction and move
it around until the
telescope’s shadow
is the smallest.
Once found, you
may see some of
Discovering the Solar System
the larger dark sunspots (which are magnetic storms) as
they march across the Sun’s visible face from day to day
as it slowly rotates.
The one big drawback to eyepiece projection is that it
lets the lenses in the eyepiece (and to a lesser extent,
the secondary mirror) continuously heat up, the longer
the telescope is pointed at the Sun. For this reason,
projection should be limited to periods of 5 minutes or
less at a time. (IMPORTANT NOTE FOR PARENTS:
Adult supervision is strongly urged whenever attempting
to observe the Sun by whatever method is used!)
Moon
Nothing – positively nothing – beats the Moon for sheer
viewing pleasure with your Astroscan. No other object in
the sky comes close to our lovely satellite in providing
amazing detail, changing in appearance on a night-
to-night and even hour-to-hour basis! This should and
probably will be the first sky target for your new telescope
as you begin your exploration of the heavens.
The Moon moves roughly its own apparent diameter
eastward every hour, thus rising later and later each
night, in its perpetual monthly journey about the Earth.
The lunar month begins with New Moon, when the Moon
is nearly in line with the Sun and the side facing us is in
shadow. A few days later, as the Moon majestically orbits
around, you’ll see it setting an hour or two after sunset
in the early evening, appearing as a thin bright sliver of
light in the sky. If the air is sufficiently clear you’ll see
the “dark” side dimly lit up with the unaided eye by light
that’s reflected from the Earth (known as “Earthshine”).
Using the 28 mm (16X) eyepiece, aim your Astroscan
at the Moon, and as you focus, get ready to hold your
breath! Along the narrow crescent you’ll see a score or
so of rugged-looking lunar craters. Switching to the 15
mm (30X) eyepiece will bring them in closer and reveal
more detail. Also visible will be all or part of a giant ring-
like “supercrater,” the lunar “sea” Mare Crisium. (“Mare”
means sea in Latin and these darkish areas were so
called by 17th-century lunar observers who thought they
were filled with water.) Enclosed within the crescent
you’ll see the rest of the lunar disk glowing faintly; look
closely and you’ll find other lunar “seas.” These are vast
outpourings of lava from the Moon’s violent early history,
Projecting the image of the Sun onto
the Edmund Sun Viewing Screen.

12
while the craters themselves are impact scars where
meteors miles in diameter slammed into the lunar surface.
Most of these features are billions of years old and they
remain essentially unchanged, since the Moon has no
atmosphere to weather them down or erase them.
The thin lunar crescent sets very quickly, but just a few
nights later, as the Moon continues on its path around
the Earth, it will be much higher in the early evening sky
and remain visible for several hours. Now you’ll have a
chance to really examine our amazing neighboring world
at your leisure. The crescent will be much wider, and the
unlit side much fainter and harder to see than before.
The many craters visible along the edge of the shadow
line (known as the “terminator”) will really “knock your
socks off”! Some of them will be right on the edge of the
terminator and their insides still filled with shadow. But
in just a matter of hours the Sun will rise over them and
the shadows will disappear. Other craters will already
be further out into the sunlight and you’ll be able to
look down into them very clearly. Some will encroach
into others, appearing, as indeed they were, blasted
onto each other. You’ll definitely want to use the 15 mm
(30X) eyepiece – and more powerful ones should you
have any – to bring you in closer and see all the rich
detail that’s there. (The Edmund 8 mm Plossl yields
56X, and combined with the 2.5X Barlow lens makes it
possible to reach 139X. See the “Accessories” section.
But also read again the discussion on the useful limits
of magnifying power that appeared earlier in this guide
under “Optical Specifications.”)
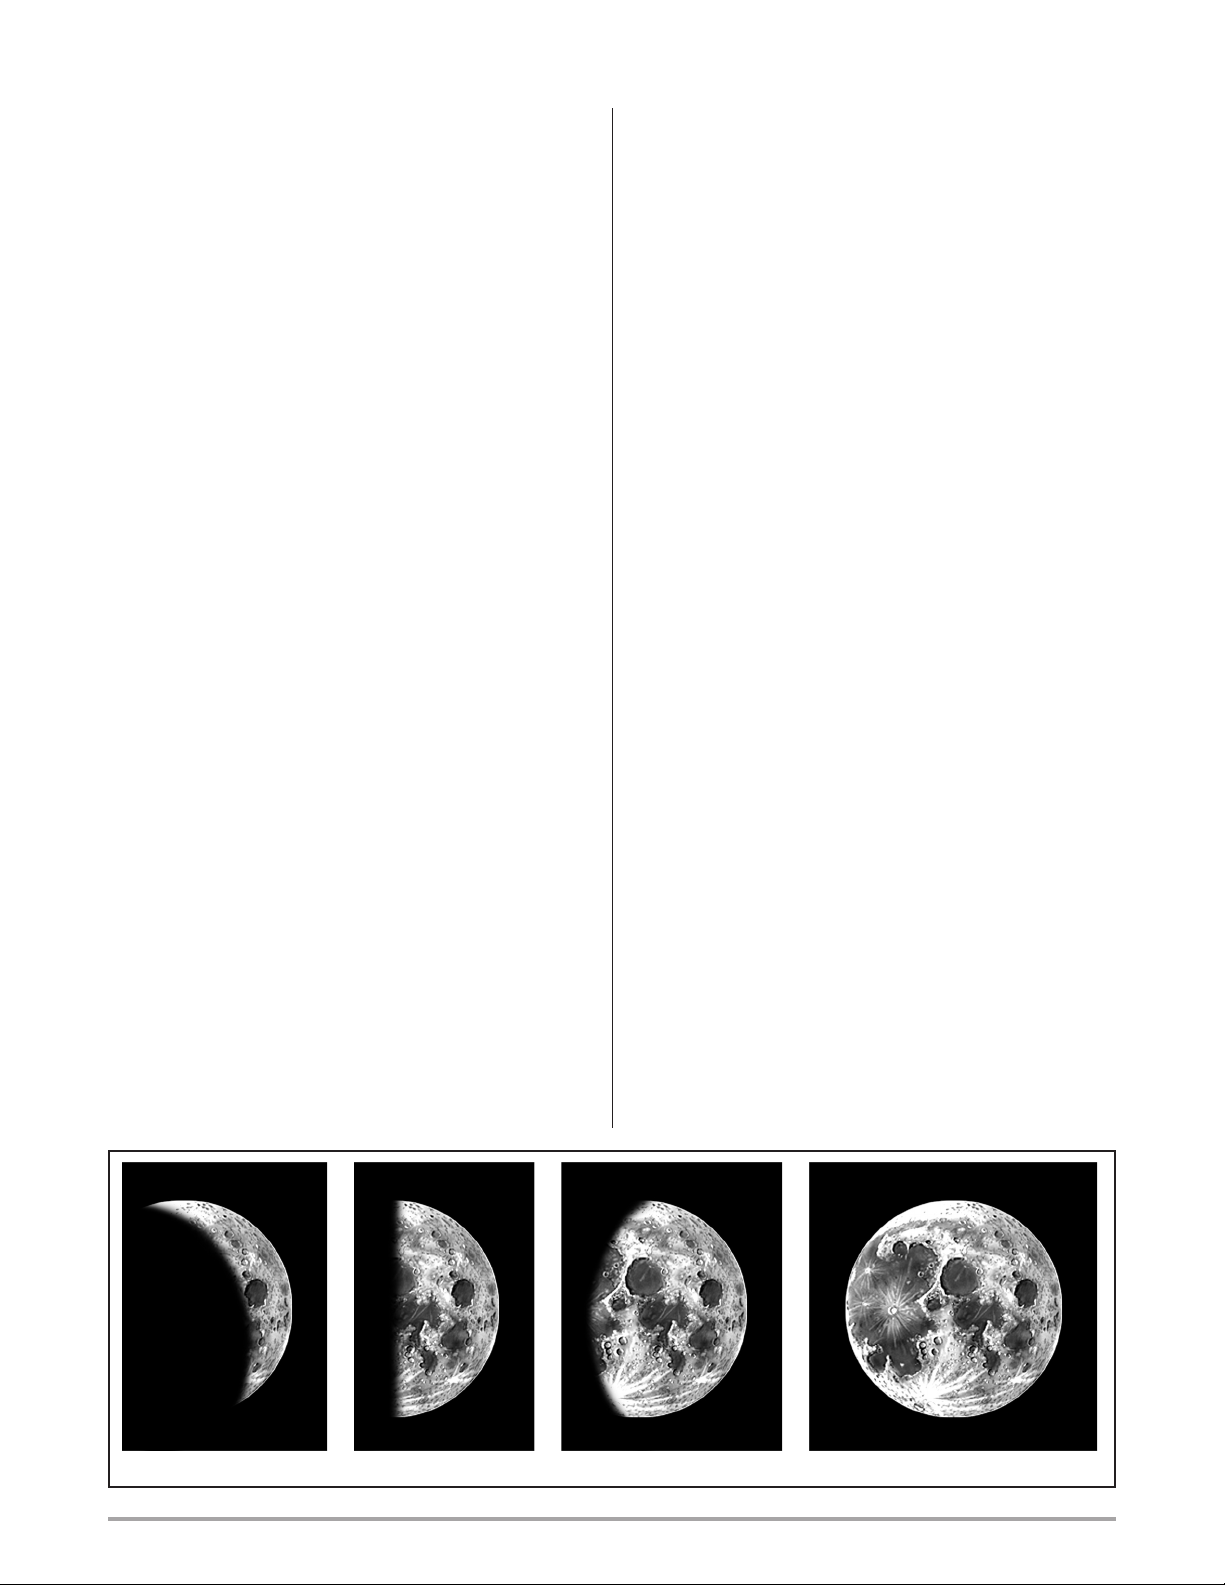
Phases of the Moon
Figures on the inner circle show the Moon in its orbit; those on the outer
circle represent the Moon’s corresponding phases as seen from the Earth.
• A, New Moon (invisible)
• B, Crescent (waxing Moon)
• C, First Quarter (half Moon)
• D, Gibbous
• E, Full Moon
• F, Gibbous
• G, Last Quarter (half Moon)
• H, Crescent (waning Moon)
ASun
C
B
Earth
H
G
F
E
D
Peering inside of the larger craters, you’ll notice that
some have a central mountain peak within their raised
rims and others don’t. Many of the bigger craters you
see are about 50 to 80 miles in diameter, and 2 or 3
miles deep. The low-angle lighting along the terminator
exaggerates relief and makes them look even deeper
than they really are. Note that some of the raised rims
have steps or terraces created by giant landslides as
the inside walls collapsed after the initial violence of the
impact ended.
As the Moon grows in phase, other lunar seas become
visible, including Mare Tranquillitatis where we first
landed on the Moon in 1969. In addition, more craters
become visible in increasing numbers, and those
formerly so obvious become difficult to find as the Sun
shines high over them and their shadows disappear.
If you look at the bright highland areas, you’ll see that
some craters are surrounded by whitish streaks. These
lunar rays were made by the impact throwing material
out across the surface, where it landed in long streaks.
Long rays are one way to recognize the younger craters
on the moon’s surface.
The time around the Half Moon or First Quarter (so
called because the Moon is a quarter of the way around
Map of the Moon
fix
13
its monthly orbit) is perhaps the most dramatic of all. The
terminator then runs right down the middle of its visible
face, and surface relief is at its best.
As Full Moon approaches (at which time it’s opposite the
Sun, rising as the Moon sets), watch the ray systems
become brighter and more obvious. Also watch how,
from night to night, craters obviously visible the night
before “flatten” and disappear in the brilliant glare of the
surface. The huge expanse of Mare Imbrium, ringed by
mountains, and the flooded craters along the shores of
Oceanus Procellarum and Mare Nubium are now seen
at their full extent. Dramatic lighting on the first evening
it becomes visible makes the crater Copernicus, located
about halfway along the terminator, a sight you’ll long
remember! As the nights pass, the Moon's ray system
will emerge into view, the longest sections of which
reach halfway around the Moon.
At Full Moon itself there are no shadows visible, and the
Moon’s surface looks flat and devoid of relief, making it
something of a disappointment to so many who expect
it to be at its best at this time. And yet, this is an almost
magical occasion for dazzling Moon-gazing. Instead of
deep shadowed craters, you’ll see bright rings marking
their outer walls and many small craters looking like
tiny white spots. The rays are now at their best, those
radiating from Tycho and Copernicus being among the
most striking features at this phase.
After Full Moon, our lovely satellite rises later and later
each night, and goes through its phases in reverse order
back to Gibbous, Last Quarter, Waning Crescent, and
finally, back to New again. You may want to set your
alarm clock to different early hours and get up before
dawn so that you can watch the lunar “evening” shadows
cast the opposite direction on craters you saw during the
lunar “morning.”
The Moon map on page 12 shows some of the most
fascinating lunar features and can be used with your
Astroscan to tour our neighboring world at all its phases.
Don’t miss the huge mountain arc of the lunar Apennines
surrounding Mare Imbrium, and be sure to locate the
beautiful crater-chain of Ptolemaeus, Alphonsus and
Arzachel. And there’s also Tycho – a bright new-looking
crater in the southern highlands – and the great ringed
plain Clavius with many smaller craters tucked inside
of it. Another famous attraction is the Straight Wall,
sometimes called the “Lunar Railway”. This striking
linear feature is a subsidence in the Moon’s crust and
if you catch it at just the right time you can clearly see it
with your 15 mm (30X) eyepiece.
Finally, yourAstroscan is perhaps the ultimate instrument
for watching two of the most spectacular of all celestial
events. One is a lunar eclipse, at which time the Moon
slowly passes into the Earth’s dark inner shadow or
umbra. Actually, due to sunlight being bent around our
planet and into the shadow, it’s really not totally dark at
all. Instead, dramatic shades of blood red, rose, copper,
orange, and other heavenly hues are seen at various
eclipses (even occasionally including some pale blues).
The other event is an occultation of a planet or star by the
Moon, during which it slowly covers and then uncovers
such objects lying in its orbital pathway. Perhaps most
dramatic is an occultation of the bright naked-eye star
cluster known as the Pleiades, or the “Seven Sisters.”
The Astroscan at 16X easily encompasses both the
glittering diamonds of this stellar jewelbox and the
Moon in the same field of view as they approach and
depart from each other. Check either of the two leading
monthly astronomy magazines, Sky & Telescope (www.
skyandtelescope.com) or Astronomy (www.astronomy.
com) for the dates and times of upcoming celestial
events including occultations and eclipses.
Waxing Crescent First Quarter Waxing Gibbous Full Moon

14
The Planets
Mercury
Most elusive of the five bright naked-eye planets is
Mercury. This is due to its proximity to the Sun in the
sky (being the closest planet to it in space) and its rapid
orbital motion around the Sun of just 88 days. Mercury
can be so difficult to catch that it’s claimed some famous
astronomers of the past never saw it! But you should
have no trouble doing so if you’ll make the effort to look
in the right place at the right time. It’s typically at peak
visibility for a week or so several times a year, either
in the evening sky after sunset or morning sky before
sunrise.
Mercury appears in the twilight sky as a fairly bright
star, not far above the horizon. The Astroscan’s wide
field and good light-gathering power will allow you to
search the horizon sky and find the planet even if thin
clouds, city haze, light pollution, or twilight itself make
visual detection difficult. Mercury may look almost as if
it’s under water with its image shimmering and breaking
into little bits if the long, low atmospheric viewing path
is turbulent. But if you get a period of excellent seeing,
its tiny disk will be just barely visible at 30X, while at
56X you’ll see it as a crescent, half, or slightly gibbous
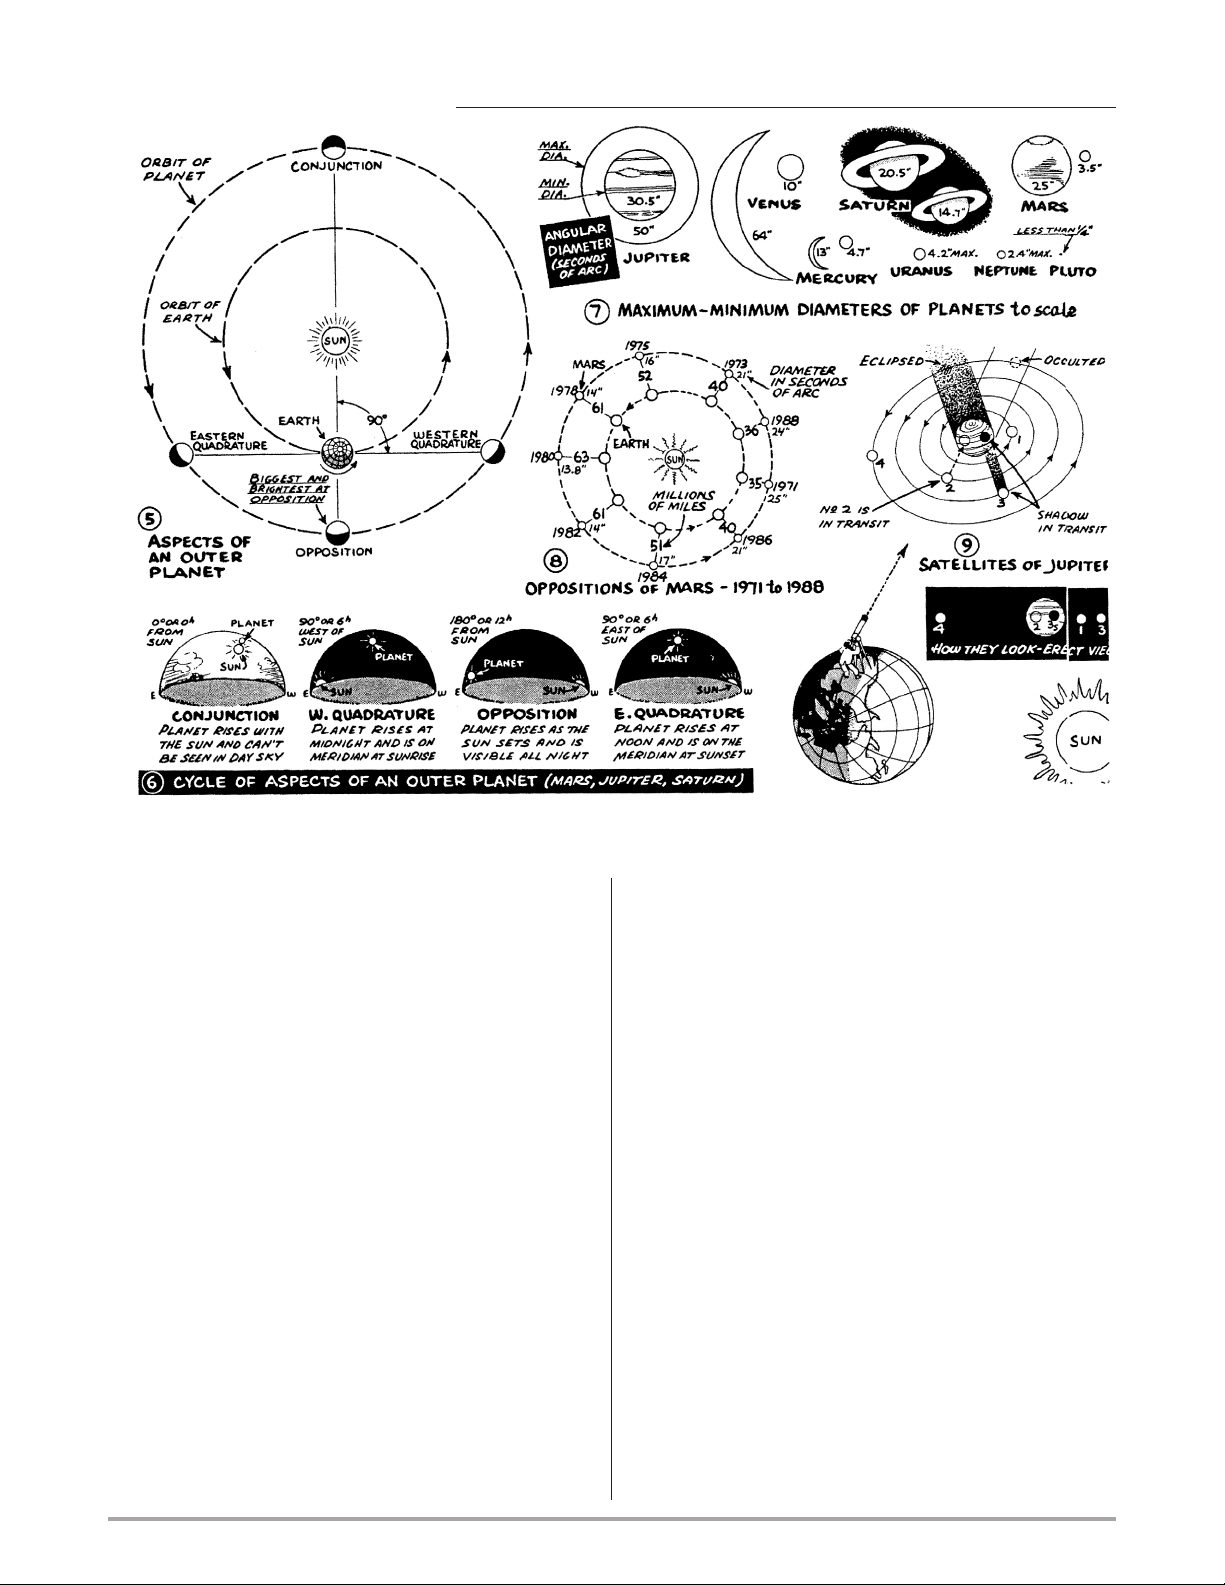
Planets in
Order of
Distance
from the Sun
Length
of Year
(Sidereal
Period)
Average Distance
from the Sun
in Miles
Mercury 87.90 days 36,000,000
Venus 224.70 days 92,957,200
Earth 365.26 days 141,600,000
Mars 686.98 days 141,600,000
Jupiter 11.86 years 484,300,000
Saturn 29.46 years 886,100,000
Uranus 84.01 years 1,783,000,000
Neptune 164.79 years 2,793,000,000
Pluto 247.76 years 3,666,000,000
phase depending on where it is in its orbit. In addition to
the two astronomy magazines referenced on page 13
which give the positions and visibility of all the planets
including Mercury each month, the Scientifics’ Star and
Planet Locator included with your telescope provides
the same information in condensed form for all five of
the bright naked-eye planets.
15
Venus
Brightest of all the planets (and outshining everything else
in the sky except the Sun and Moon) is radiant Venus.
Because Venus, like Mercury, orbits the Sun nearer than
Earth does, we always see it shining in the evening sky
after sunset and in the morning sky before sunrise – but
at much greater angular distances from the horizon and
for much longer periods than Mercury itself. At the former
times, Venus is commonly known as the “Evening Star”
and at the latter times the “Morning Star.” It’s so bright to
the naked eye you won’t be able to miss it and when you
view it through your Astroscan at 16X you’ll be dazzled
by its amazing silvery-white brilliance in the eyepiece.
What you’ll actually see depends on when you look.
Venus goes through phases similar in shape to those of
the Moon and it also changes in apparent size. When it
appears as a thin crescent, it is brightest since it’s then
nearest to us and much larger in apparent size than at
other phases. Its crescent can definitely be seen at 16X
(and has been seen in binoculars). When it appears in
the “half-illuminated” phase (which you’ll need the 15
mm [30X] eyepiece to see), it’s at its greatest angular
distance (or elongation) from the Sun but is also further
from us and looks smaller. When gibbous or approaching
its full phase, the planet looks even smaller and more
distant. Venus is covered with a very dense, opaque
atmosphere, so when you look at it, all you see are the
tops of the clouds and little or no detail of any kind. But
that doesn’t mean it’s not worth looking at. Following it
through its phases from month to month is a lot of fun,
especially as it swings toward or away from “inferior
conjunction” (when it passes between us and the Sun)
and becomes a large, thin crescent even bigger in size
than Jupiter’s disk.
Mars
The famed “Red Planet” (it’s actually ruddy-orange)
Mars comes close to Earth just over every two years
at its “opposition” (meaning it appears opposite the Sun
in the sky, rising as it sets). For about three months
around this time, using your Astroscan with its 15 mm
(30X, and preferably higher-power) eyepiece, will show
a planetary disk and some of the larger surface details.
Other than the time of opposition, Mars is too small and
distant to see anything but its distinctive color and just
16
a hint of a disk, making it a disappointment to planet-
watchers most of the time. During those exciting months
when Mars is near opposition your Astroscan may be
pushed to its highest power of 139X (the 8 mm Plossl
plus Barlow) to look for greenish-blue or grayish surface
details (and occasional clouds or dust storms). The 56X
magnification of the 8 mm Plossl itself typically suffices
to show one of the polar caps, with either the north or
south pole usually having enough ice on it to stand out
as a distinct white area against the ruddy-orange desert
regions of the planet.
Jupiter
Largest, most active and – for many observers – most
exciting of all the planets is Jupiter. It won’t look very
big at 16X in the Astroscan, but you’ll definitely be
able to tell that it has a disk. You’ll also notice several
small bright “stars” strung out in a line on either side
of it. These are the four bright “Galilean” satellites, the
very same ones that Galileo first discovered with his
tiny telescope back in 1610. Each night you look you’ll
see the satellites in a different order because they are
continually circling Jupiter in periods ranging from 1.7 to
17 days. Sometimes there will be two satellites visible on
each side, at other times three on one side and one on
the other. There will also be times when you won’t see
all four because one or more will be hiding in Jupiter’s
shadow, or be behind or in front of the planet itself. At
30X Jupiter looks like a bright, yellowish-white, slightly
flattened ball and, if seeing conditions are good, you
may be able to make out its two large dark equatorial
cloud belts, which are definite at 56X. Perhaps the most
striking aspect of observing Jupiter is watching the
eclipse disappearances and/or reappearances of the
bright satellites as they enter or leave the planet’s huge
shadow over a period of just several minutes right before
your eyes! Another is seeing a satellite slowly approach
Jupiter and then apparently merge with it as it either
passes in front of or behind it. Times of all the various
satellite events are given in Sky & Telescope magazine
whenever Jupiter is well placed for viewing in the sky.
Saturn
The magnificent planet Saturn looks oval or spindle-
shaped in the Astroscan at 16X upon first glimpse. But
switch to 30X and you’ll see it’s a tiny round planet
encircled by a ring seen somewhat edge-on. Most
impressive, perhaps, is how “other-worldly” and delicate
it looks – shining in the eyepiece like some exquisite
piece of cosmic jewelry! Higher magnifications may bring
out a dark narrow gap in its rings known as Cassini’s
Division, or the shadow of the rings on the planet or
of the planet on the rings. It all depends upon seeing
conditions, and also at what angle we’re viewing the
rings which change their tilt as Saturn slowly orbits the
Sun. (Roughly on average about every 15 years, they
disappear completely for a time as we cross the plane of
the amazingly thin system of ice rings. Most recently this
occurred in 2009 and it will happen next in 2025.)
Near Saturn, you will see its biggest satellite Titan,
which Iooks like a small star (and not as bright as any of
Jupiter’s big moons) at 30X. Under good conditions, you
might also glimpse several other satellites appearing
like very faint stars. If you look for Titan regularly, you
can follow it as it swings around Saturn, taking 16 days
for each revolution. A series of little sketches made each
night will help you track its motion.
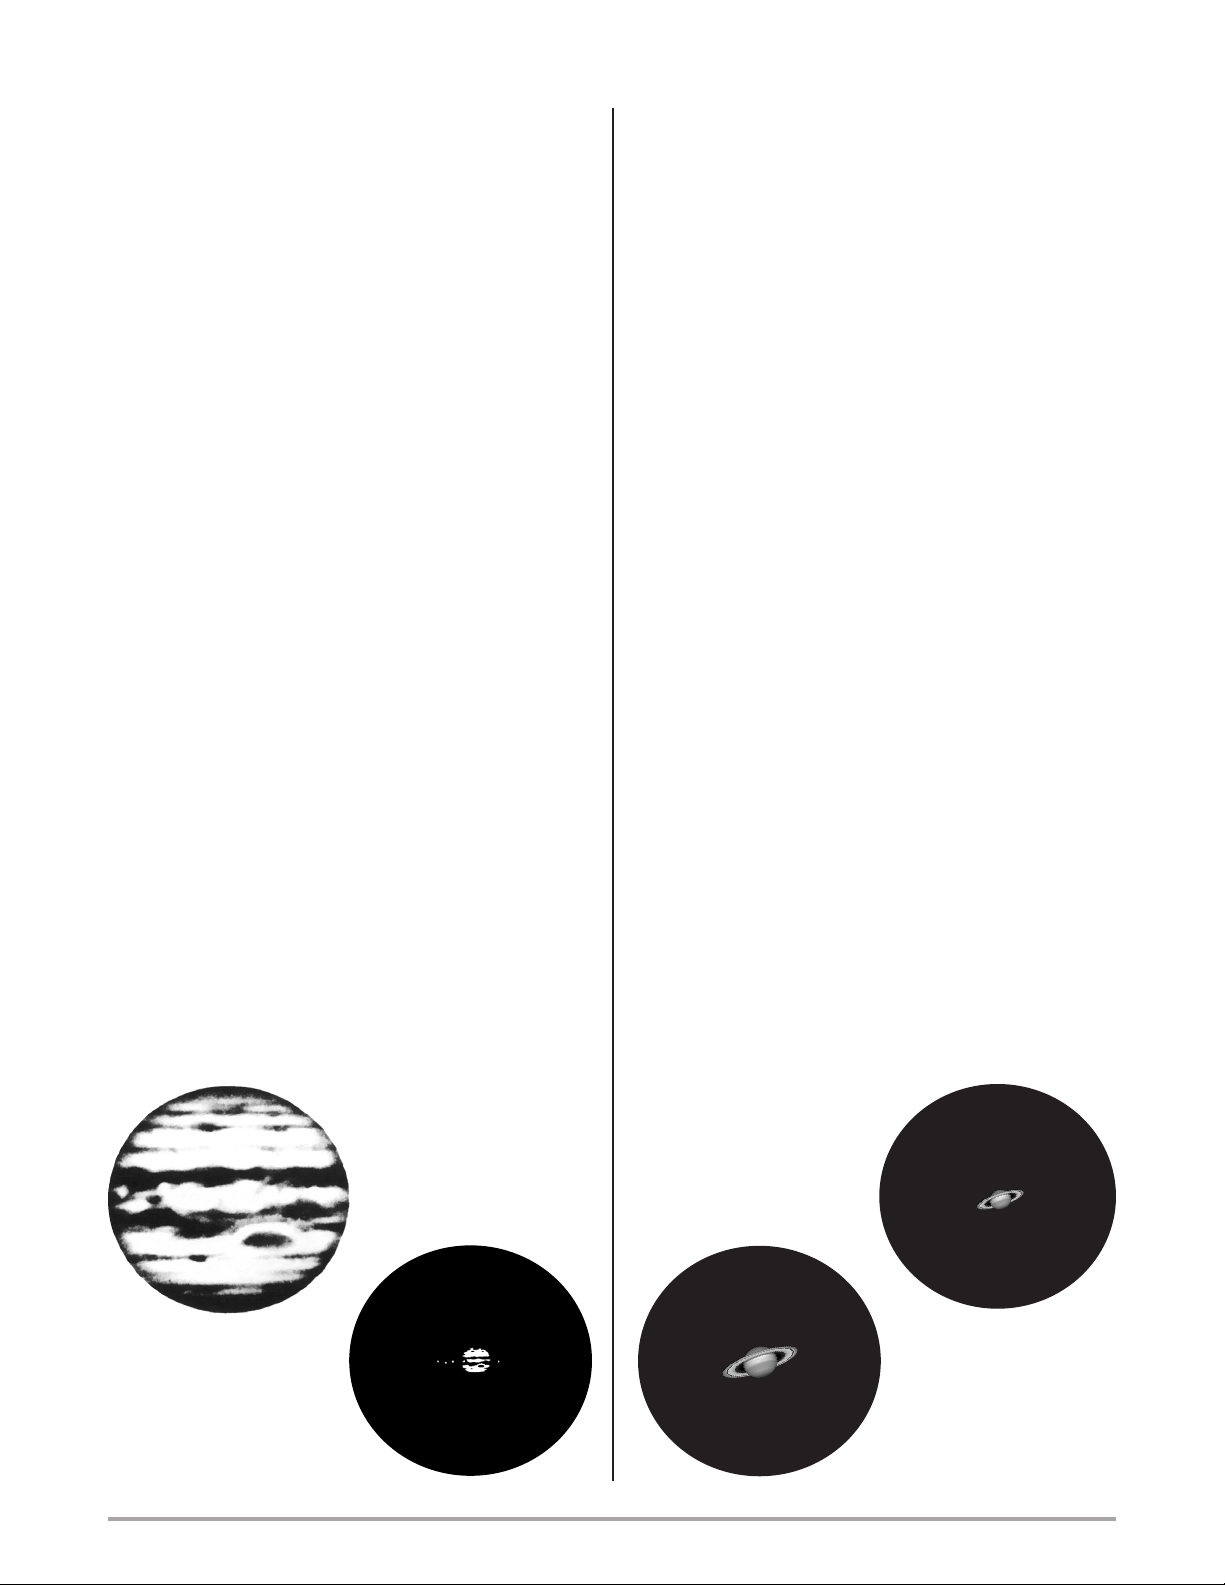
Jupiter and its four bright
moons (low power view).
Saturn, shown at two
different magnifications
Complex cloud patterns
in Jupiter's atmosphere
(high power view).
17
Uranus
The next planet beyond Saturn is Uranus, the first of
those to have been discovered (in 1781 by Sir William
Herschel, an “amateur” astronomer who made all of
his own telescopes), the five bright ones having been
known since antiquity. With a suitable chart for the year
you are observing, you’ll have no problem picking it out.
In your Astroscan at 16X, Uranus is a star-like object
with a slightly greenish cast. Unlike the stars, however,
it moves very slowly from night to night! If you locate
the field where it’s “hiding” one night and make a sketch
of the stars seen, then come back again a week later,
Uranus will be the “star” that’s moved. Switching to the
15 mm (30X) eyepiece, inspect Uranus carefully and
compare it to stars of the same brightness. Its planetary
disk is quite small, but under good conditions its image
will look distinctly “fatter” than a star’s. Its greenish tinge
is another tip-off that you’ve really found another planet!
Neptune
Beyond Uranus, and somewhat fainter and smaller in
apparent size due to its greater distance, lies Neptune,
the last of the big four gas giants. It too requires a finder
chart, some patience, and higher power for definite
confirmation that you’ve found it; its pale bluish tint is
another sign.
While there aren’t any features visible on these outer
denizens of the solar system, just knowing that they’re
there and you are seeing them with your own eyes (with
a little help from the Astroscan, of course) will give you
great satisfaction. (Pluto is so faint and remote that it
takes an aperture at least twice that of the Astroscan
and a trained eye to glimpse it. As most everyone has
heard, it’s now been demoted by astronomers to the
status of a “dwarf planet” due to its small size – less
than that of our Moon!)
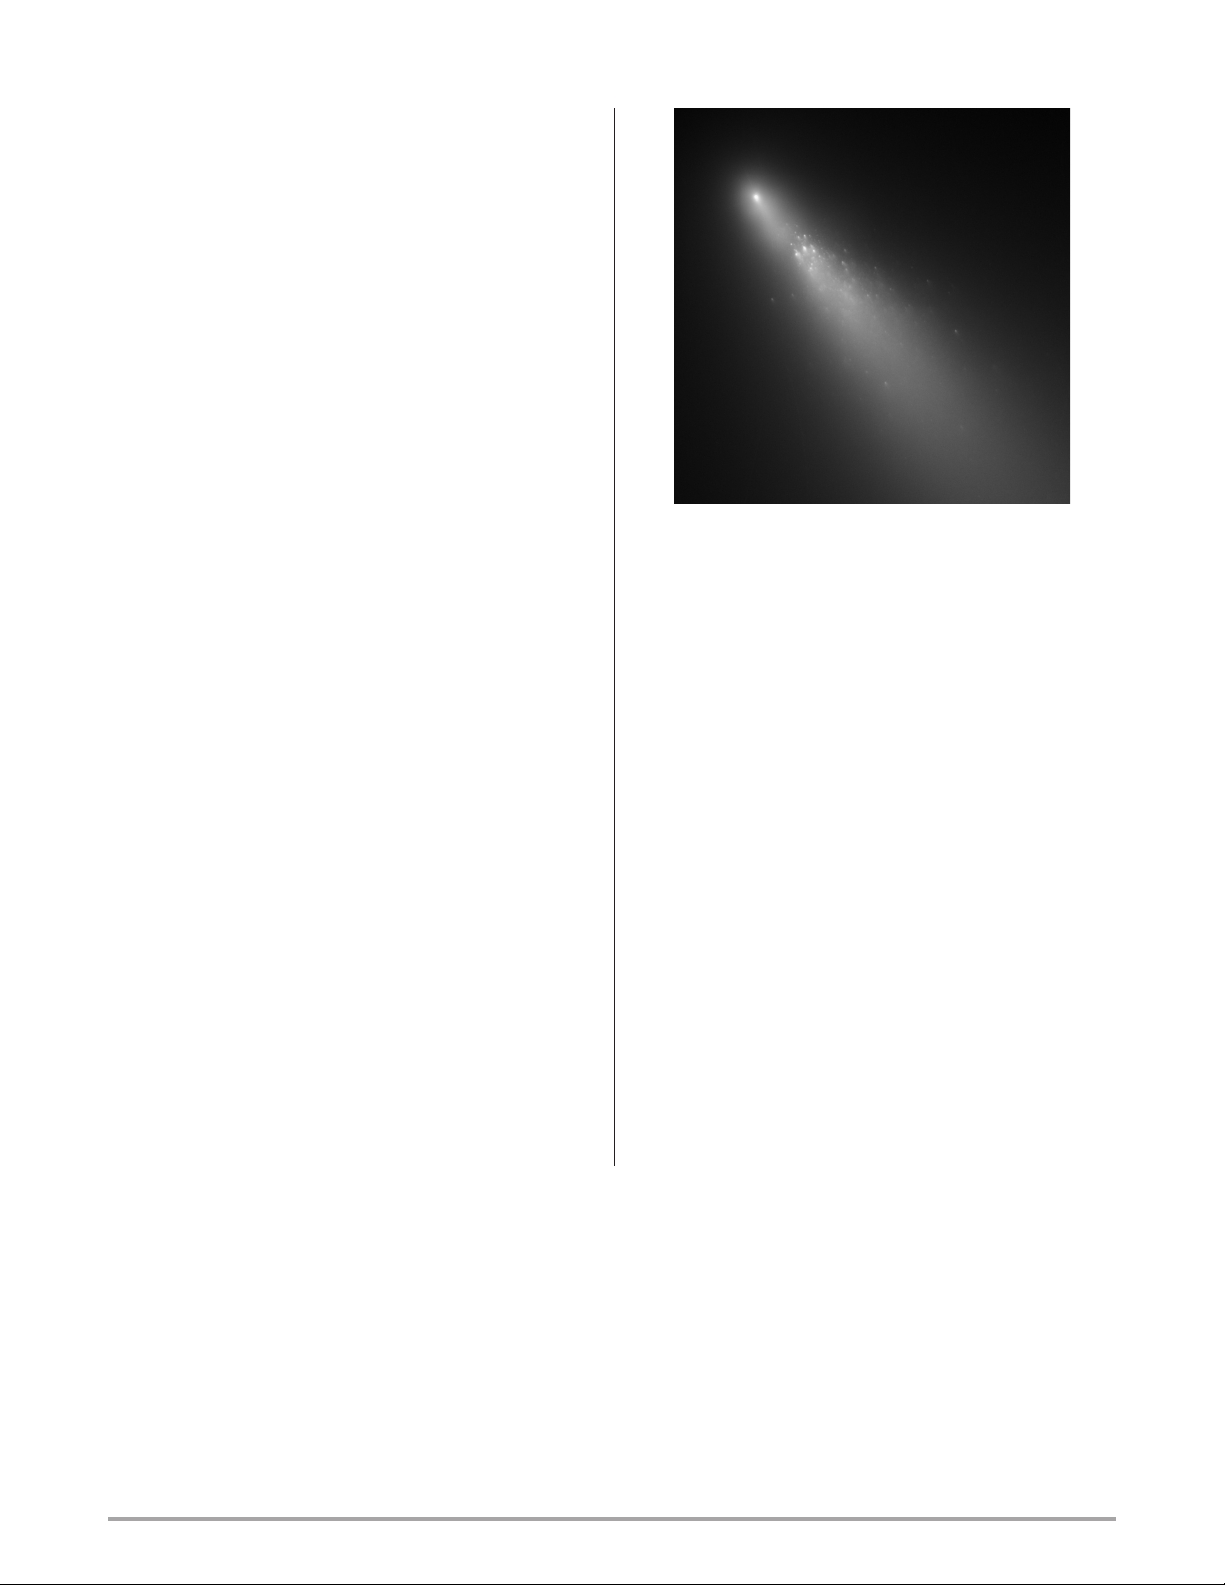
Comets
Your new Astroscan is an ideal instrument for viewing
the brighter and larger comets that appear in the skies
of Earth from time to time, as they complete their long
orbits about the Sun out of the depths of the solar system.
Many of these are predicted returns of previously
discovered comets but others are new discoveries
– some of them by amateur astronomers typically using
low-power, wide-field scopes like the Astroscan to
sweep the skies for them. Comets are named after their
discoverers! Whether you ever discover one or not, the
view of a Great Comet (like Hale-Bopp that appeared
in the mid-90’s and graced our skies for nearly a year)
is something to behold with its bright nucleus trailed
by a magnificent long sweeping tail. The monthly
astronomy magazines mentioned on page 13 report on
both returning and newly discovered comets to keep
stargazers updated on their appearance.
Comet 73P/Schwassmann-Wachmann 3 - Fragment B:
Apr. 20, 2006
Phtoo Credit: NASA, ESA, H. Weaver (APL/JHU),
M. Mutchler and Z. Levay (STScI)

18
“Deep-sky objects” are defined as those lying beyond
the confines of our own solar system. This includes
single, double and multiple stars, pulsating variable
stars, star clusters and asterisms, nebulae, and galaxies
– including, of course, our own magnificent Milky Way
Galaxy. There are a number of ways of locating these
wonders, including modern telescope technology such as
computerized target acquisition and tracking (known as
“Go-To” systems). But perhaps the most fun – especially
with a point-and-look telescope like the Astroscan – is
the traditional technique of “star-hopping.” This involves
using a good star map like those in The Edmund Sky
Guide that came with your telescope (or the more
detailed Edmund Mag 5 Star Atlas) to work your way
from a bright, easily recognized star or star pattern to the
object you’re seeking. Along the way, you’ll encounter
many unsuspected sights, and learn the constellations
as well! The Edmund Sky Guide has some wonderful
illustrations on how to find your way around the sky.
Single Stars and Star Colors
When you first get your Astroscan, you may not know
one star from another. They may, in fact, all look alike to
you. But they really aren’t, and a few minutes of careful
scrutiny will show you that there are lots of individual
stars, just as there are individual people. As you learn
more, you’ll soon understand that every star, just like
every person, is unique and special. The quickest way
to experience this is to just take your Astroscan out on a
clear night and see for yourself. Place it on a low stool or
Discovering the Deep-Sky
O-Type Stars
Blue
above 30,000˚ C
B-Type Stars
Bluish-white
10,000 to 30,000˚ C
A-Type Stars
White
8,000 to 10,000˚ C
F-Type Stars
Yellowish-white
6,000 to 8,000˚ C
G-Type Stars (Sun)
Yellow
4,600 to 6,000˚ C
K-Type Stars
Yellow-orange
3,700 to 4,600˚ C
Stellar
Temperatures
M-Type Stars
Reddish-orange
2,200 to 3,700˚ C
•
•
•
•
•
•
•
Stellar Colors
within Orion
•
•
•
•
•
•
••
Castor
white
Pollux
yellow
Capella
yellow-white
Procyon
white
Rigel
bluish-white
Sirius
bluish-white
Aldebaran
orange
Betelgeuse
reddish-orange
picnic table (which is ideal for casual viewing) and seat
yourself comfortably beside it. With the 28 mm (16X) low-
power eyepiece simply scan randomly across the sky.
Go slowly so you can see the individual stars cross the
field of view. If you live in the city, you may see between a
few and a few dozen stars at any one time, while in dark
country skies you may literally see thousands of them!
The first thing you’ll notice is that, unlike the planets,
stars don’t look any bigger in your Astroscan than they
do to the unaided eye – they are simply much too far
away to show any noticeable size except with the world’s
largest telescopes. Now look at the way the stars clump
in some places and seem spread out in others. For the
most part they are completely randomly distributed, but
if you keep scanning you may see a cluster of stars, or a
fuzzy spot that isn’t a star but rather a nebula.
Notice that the stars come in many different brightnesses,
something which you can easily see with the unaided eye,
but with your Astroscan you realize the scale extends to
stars much fainter than that. Now look at one of the very
brightest stars visible (The Edmund Sky Guide has a list
of the 50 brightest ones) and try to determine its color.
Some people can see star colors easily, while others
have difficulty. Color vision doesn’t work well in the dark.
However, because the Astroscan makes the stars much
brighter, about 250 times brighter in fact, you have a
much better chance of seeing their color.
Set the eyepiece slightly out of focus, since the defocused
image is larger and makes it easier to determine colors.
Now go look at some other bright stars; you’ll soon find
that the sky is alive with subtle celestial hues! There are
white stars, bluish stars, yellowish stars, orange stars
and reddish stars. (There are even some greenish stars
– see the next section.) Star colors are an indication of
temperature, the white and bluish ones being hottest
and the red ones coolest, while the yellow and orange
ones fall in between in temperature. Don’t expect to see
brilliant colors, since celestial hues are typically subtle.
But they will become much easier to distinguish as you
become a more skilled observer.
One other thing to be aware of in observing single stars is
that there are those that change noticeably in brightness
over a period of hours, days or even years. Known as
“variable stars,” these pulsating suns are fascinating to
watch if you have the patience to follow them over time.

19
(also known as the Northern Cross); it lies at the tip of
the Swan’s head (or at the foot of the Cross). It can be
resolved at 16X in your Astroscan and is a stunning sight
at 30X. Here you’ll find a bright topaz-orange primary
sun with a sapphire-blue companion sitting next to it! Not
only is this a physical double but its colors are quite real,
again being the result of differences in temperature of
the two stars. And the concealed beauty of many similar
stellar jewels lies unsuspected until discovered in your
Astroscan, which is capable of showing you literally
thousands of these objects! The Edmund Sky Guide
contains a list of 80 of the most spectacular double and
multiple stars for you to search out and enjoy.
But even if not, note that many of them exhibit a striking
deep-red hue, as evidenced by such picturesque names
as Hind’s Crimson Star and Herschel’s Garnet Star.
Double and Multiple Stars
Among the stars you will sweep over you will notice a
few that seem unusually close together and perhaps
think this is mere happenstance, as it sometimes is.
Stars that just happen to be close together in the sky
are called “optical doubles.” Other times, you’ll see
stars close together because they actually do orbit
each other, spending times varying from a few years to
tens or thousands of years per orbit. These stars are
gravitationally linked and are called “physical doubles.”
As many as half of the stars in the sky may be physical
doubles, although only when they are close enough to
us, or separated in space by a large amount, can we
see them as double. One of the first double stars to be
discovered is also one of the prettiest. It’s called Mizar
and is the middle star at the bend of the Big Dipper’s
handle. If you’ve got good eyes, you’ll be able to see
another faint star called Alcor right next to it. Now look at
Mizar with your Astroscan (preferably using the 15 mm
[30X] eyepiece) and you’ll see that Mizar is actually two
stars very close together forming a physical double.
In addition to double stars, there are also triple stars.
Alcor and Mizar may be one of them, since they lie at
the same distance and are slowly drifting through space
together. All three suns shine like radiant blue-white
diamonds against the blackness of space.
There are also quadruple systems, such as the famed
Double-Double (Epsilon Lyrae) in the constellation Lyra
near the bright blue-white star Vega, and the Trapezium
in the heart of the beautiful Orion Nebula. Many double
stars exhibit exquisite contrasting tints, some of which
are real and others which are imply contrast effects.
Certainly one of the most beautiful pairs in the entire
heavens is Albireo (or Beta Cygni) in Cygnus, the Swan

20
Pleiades M 45 J. Cocozza
classic open cluster (actually a pair of them!) is the
Double Cluster in Perseus. Look for it about midway
between Cassiopeia (the “W”-shaped constellation)
and Perseus by simply sweeping across that area with
your Astroscan at 16X. The Double Cluster turns out
to be two magnificent clusters sprawling side-by-side
in one low-power eyepiece field. The Summer and Fall
skies especially are so full of open clusters that you
could never run out of wonders to see. The Edmund
Sky Guide provides a list of some of the very best ones
for viewing with your Astroscan at all four seasons of
the year.
The other type of starry groupings is the “globular clusters,”
physically far larger and more distant stellar beehives
of hundreds of thousands to more than a million suns.
Because they are so remote and the stars in them are
relatively faint and compressed together, your Astroscan
can resolve only a few of the brightest globulars. For the
most part, they look like soft woolly blobs of light that
occasionally sparkle. One of the most striking of these
objects lies in the constellation Hercules, visible most of
the Spring, Summer and Fall. Known as the Hercules
Cluster, it’s generally labeled on star charts as “M 13.”
This means it’s the 13th object on the list compiled by
the famous French observer Charles Messier, his “M”
prefix adorning many of the sky’s most beautiful clusters,
nebulae and galaxies. (The Pleiades discussed above
is M 45 on his roster.) Point your Astroscan toward the
Star Clusters and Asterisms
Tucked away among the stars of the Milky Way are
dozens of aggregations of suns called star clusters.
There are basically two types of them, and they don’t
look a bit alike in the telescope. Most obvious are the
“open clusters,” stellar jewel boxes with a few hundred
to a thousand or more members that seem to be loosely
gathered together. In your Astroscan an average open
cluster will look somewhat like a small scattered pile of
salt on a sheet of black paper. Most open clusters lie
fairly close to the plane of our galaxy, so they appear
most numerous along the Milky Way.
By far the most stunning open cluster in the entire sky is
the Pleiades, a group visible in the Fall and Winter. It’s
located in the constellation Taurus and plotted on every
star map. Once you’ve spotted the Pleiades by eye (it’s
fairly easy to see even from city areas, appearing like
a little dipper-shaped formation of stars), point your
Astroscan at it. You’ll be amazed at the sight of six bright,
bluish stars glowing like diamonds set in a field of dozens
of fainter stars and hundreds of tiny ones – all filling
about half the field of the 28 mm (16X) eyepiece. The
wide field, low magnification and large light-gathering
power of the Astroscan combine to make this cluster one
of the most beautiful spectacles in the heavens! Close
by, also in Taurus, is a prominent V-shaped cluster
known as the Hyades. It includes the bright orange star
Aldebaran, which actually lies much closer to us than
the cluster itself and is not one of its members. Another
Table of contents
Popular Telescope manuals by other brands

Orion
Orion ATLAS EQ-G instruction manual
EASTCOLIGHT
EASTCOLIGHT Galaxy Tracker 375 32015 user manual

Orion
Orion 7220 instruction manual

Harbor Freight Tools
Harbor Freight Tools 55477 Assembly and operating instructions

Gordon
Gordon 92444 Assembly and operating instructions

William Optics
William Optics Megrez 88 user guide


