EINHELL PROFI Silver Line PS-AS 18/1H User manual

Bedienungsanleitung
Elektronik-Akku-Bohrschrauber
mit Drehmomenteinstellung
Operating Instructions
Electronic Cordless Drill/Screwdriver
With Torque Selector
Mode d’emploi pour
perceuse-visseuse électronique à accu
avec réglage du couple de rotation
Guida all’uso
Trapano/avvitatore elettronico a batteria con
regolazione di coppia
Instrukcja obsługi
Wiertarko-wkrętarka akumulatorowa
Kezelési utasítás
Elektronikus - akkumulátoros fúró / csavarbehajtó
forgatónyomaték-beállítással
PS-AS
18/1H
Art.-Nr.: 44.710.41 I.-Nr.: 01015
I.-Nr.: 015r.:
Anleitung PS-AS 18-1H_SPK1 20.08.2005 9:17 Uhr Seite 1

2
Bitte vor Montage und
Inbetriebnahme die Betriebs-
anleitung aufmerksam lesen
Please read the instructions
carefully before assembling
and starting.
Nous vous prions de lire attentivement
le mode d’emploi avant de procéder au
montage et à la mise en service.
Prima del montaggio e della messa in
esercizio, leggere attentamente la guida
all’uso
Przed montażem przeczytać
dokładnie instrukcję obsługi.
Kérjük, hogy a szerelés és az
üzembevétel elŒtt az üzemeltetési
utasítást figyelmesen olvassa el!
Anleitung PS-AS 18-1H_SPK1 20.08.2005 9:17 Uhr Seite 2

3
1
2
쐃
Anleitung PS-AS 18-1H_SPK1 20.08.2005 9:17 Uhr Seite 3

4
3
4
쏹
a
360°
Anleitung PS-AS 18-1H_SPK1 20.08.2005 9:17 Uhr Seite 4

5
1. Gerätebeschreibung:
1: Drehmomenteinstellung
2: Bohrfutter
3: Umschaltung Links-Rechtslauf
4: Ein-/Ausschalter
5: Akku
6: Ladegerät
7: Umschalter 1. Gang-2.Gang
8: Rasttaste
9: Zusatzhandgriff
2. Sicherheitshinweise
Die entsprechenden Sicherheitshinweise finden Sie
im beiliegenden Heftchen.
3. Wichtige Hinweise:
Lesen Sie vor der Inbetriebnahme Ihres
Akkuschraubers unbedingt diese Hinweise:
1. Laden Sie den Akku-Pack mit dem mitgelieferten
Ladegerät. Ein leerer Akku ist nach ca. 1 Stunde
aufgeladen.
2. Nur scharfe Bohrer sowie einwandfreie und
geeignete Schrauberbits verwenden.
3. Beim Bohren und Schrauben in Wänden und
Mauern diese auf verborgene Strom-, Gas- und
Wasserleitung überprüfen.
4. Inbetriebnahme:
Laden des NC-Akku-Packs
1. Akku-Pack aus dem Handgriff heraus ziehen (Bild
2), dabei die Rasttaste drücken.
2. Vergleichen Sie, ob die auf dem Typenschild
angegebene Netzspannung mit der vorhandenen
Netzspannung übereinstimmt. Stecken Sie das
Ladegerät in die Steckdose.
3. Stecken Sie den Akku auf das Ladegerät (Bild
3). Die rote Leuchtdiode signalisiert, daß der Akku
geladen wird. Die grüne Leuchtdiode signalisiert,
daß der Ladevorgang beendet ist. Die Ladezeit
beträgt bei leerem Akku ca. 1 Stunde. Während
des Ladevorgangs kann sich der Akku-Pack
etwas erwärmen, dies ist jedoch normal.
Sollte das Laden des Akku-Packs nicht möglich sein,
überprüfen Sie bitte
- ob an der Steckdose die Netzspannung
vorhanden ist
- ob ein einwandfreier Kontakt an den
Ladekontakten des Ladegerätes vorhanden ist.
Sollte das Laden des Akku-Packs immer noch nicht
möglich sein, bitten wir Sie,
앬das Ladegerät
앬und den Akku-Pack
an unseren Kundendienst zu senden.
Im Interesse einer langen Lebensdauer des Akku-
Packs sollten Sie für eine rechtzeitige Wiederauf-
ladung des NC-Akku-Packs sorgen. Dies ist auf
jeden Fall notwendig, wenn Sie feststellen, daß die
Leistung des Akku-Schraubers nachläßt.
Entladen Sie den Akku-Pack nie vollständig. Dies
führt zu einem Defekt des NC-Akku-Packs!
Drehmoment-Einstellung (1)
Der Akkuschrauber ist mit einer 17 stufigen
mechanischen Drehmomenteinstellung ausgestattet.
Das Drehmoment für eine bestimmte Schrauben-
größe wird am Stellring (1) eingestellt. Das Drehmo-
ment ist von mehreren Faktoren abhängig:
앬von der Art und Härte des zu bearbeitenden
Materials
앬von der Art und der Länge der verwendeten
Schrauben
앬von den Anforderungen, die an die
Schraubverbindung gestellt werden.
Das Erreichen des Drehmoments wird durch das
ratschende Ausrücken der Kupplung signalisiert.
Achtung! Stellring für das Drehmoment nur bei
Stillstand einstellen.
Bohren
Zum Bohren stellen Sie den Einstellring für das
Drehmoment auf die letzte Stufe „Bohrer“ . In der
Stufe Bohren ist die Rutschkupplung außer Betrieb.
Beim Bohren ist das maximale Drehmoment
verfügbar.
Umschaltung 1. Gang - 2. Gang (7)
Je nach Stellung des Umschalters können Sie mit
einer höheren oder niedrigeren Drehzahl arbeiten.
Um eine Beschädigung des Getriebes zu vermeiden,
soll die Gangumschaltung nur im Stillstand umge-
schaltet werden.
Drehrichtungsschalter (3)
Mit dem Schiebeschalter über dem Ein/Aus-Schalter
können Sie die Drehrichtung des Akku-Schraubers
D
Anleitung PS-AS 18-1H_SPK1 20.08.2005 9:17 Uhr Seite 5

6
einstellen und den Akku-Schrauber gegen
ungewolltes Einschalten sichern. Sie können
zwischen Links-und Rechtslauf wählen. Um eine
Beschädigung des Getriebes zu vermeiden, soll die
Drehrichtung nur im Stillstand umgeschaltet werden.
Befindet sich der Schiebeschalter in der
Mittelstellung, ist der Ein/Aus-Schalter blockiert.
Ein/Aus-Schalter (4)
Mit dem Ein/Aus-Schalter können Sie die Drehzahl
stufenlos steuern. Je weiter Sie den Schalter
drücken, desto höher ist die Drehzahl des
Akkuschraubers.
Schrauben:
Verwenden Sie am besten Schrauben mit Selbst-
zentrierung (z. B. Torx, Kreuzschlitz), welches ein
sicheres Arbeiten gewährleistet. Achten Sie darauf,
daß der verwendete Bit und die Schraube in Form
und Größe übereinstimmen. Nehmen Sie die Dreh-
momenteinstellung, wie in der Anleitung be-
schrieben, entsprechend der Schraubengröße vor.
Spezielle Zusatzfunktionen (Bild 4):
앬Akkudrehung
Für schwer erreichbare Arbeitspositionen kann
der Akku um 360° gedreht werden.
앬Zusatzhandgriff (9)
Eine sichere Körperhaltung beim Arbeiten er-
halten Sie durch Drehen des Zusatzhandgriffes.
Schraube (a) am Zusatzhandgriff lösen und
drehen. Danach Schraube (a) wieder festziehen.
Reinigung und Wartung
Achtung! Bauen Sie vor der Reinigung bzw.
Wartungsarbeiten immer den Akkublock ab.
1. Reinigen Sie das Elektrowerkzeug regelmäßig, am
besten immer nach Abschluss der Arbeit.
2. Reinigen Sie das Elektrowerkzeug nicht mit
scharfen Gegenständen.
3. Es dürfen keine Flüssigkeiten in das Innere des
Elektrowerkzeugs gelangen. Verwenden Sie zum
Reinigen des Gehäuses Seifenlauge und ein
weiches Tuch. Verwenden Sie auf keinen Fall
Benzin, Lösungsmittel oder Reiniger, die
Kunststoff angreifen.
4. Die Lüftungsöffnungen müssen immer frei sein.
Technische Daten:
Spannungsversorgung Motor 18 V =
Drehzahl 0-500/0-1400 min-1
Drehmoment 17 stufig
Rechts-Links-Lauf ja
Spannweite Bohrfutter max. 13 mm
Ladespannung Akku 18 V =
Ladestrom Akku 2500 mA
Netzspannung Ladegerät 230 V ~ 50 Hz
Schalldruckpegel LPA: 73 dB(A)
Schalleistungspegel LWA: 82 dB(A)
Gewicht: 2,4 kg
Vibration: a
– w< 2,5 m/s2
D
!
iNTERNATiONALES SERViCE CENTER GmbH
쾷
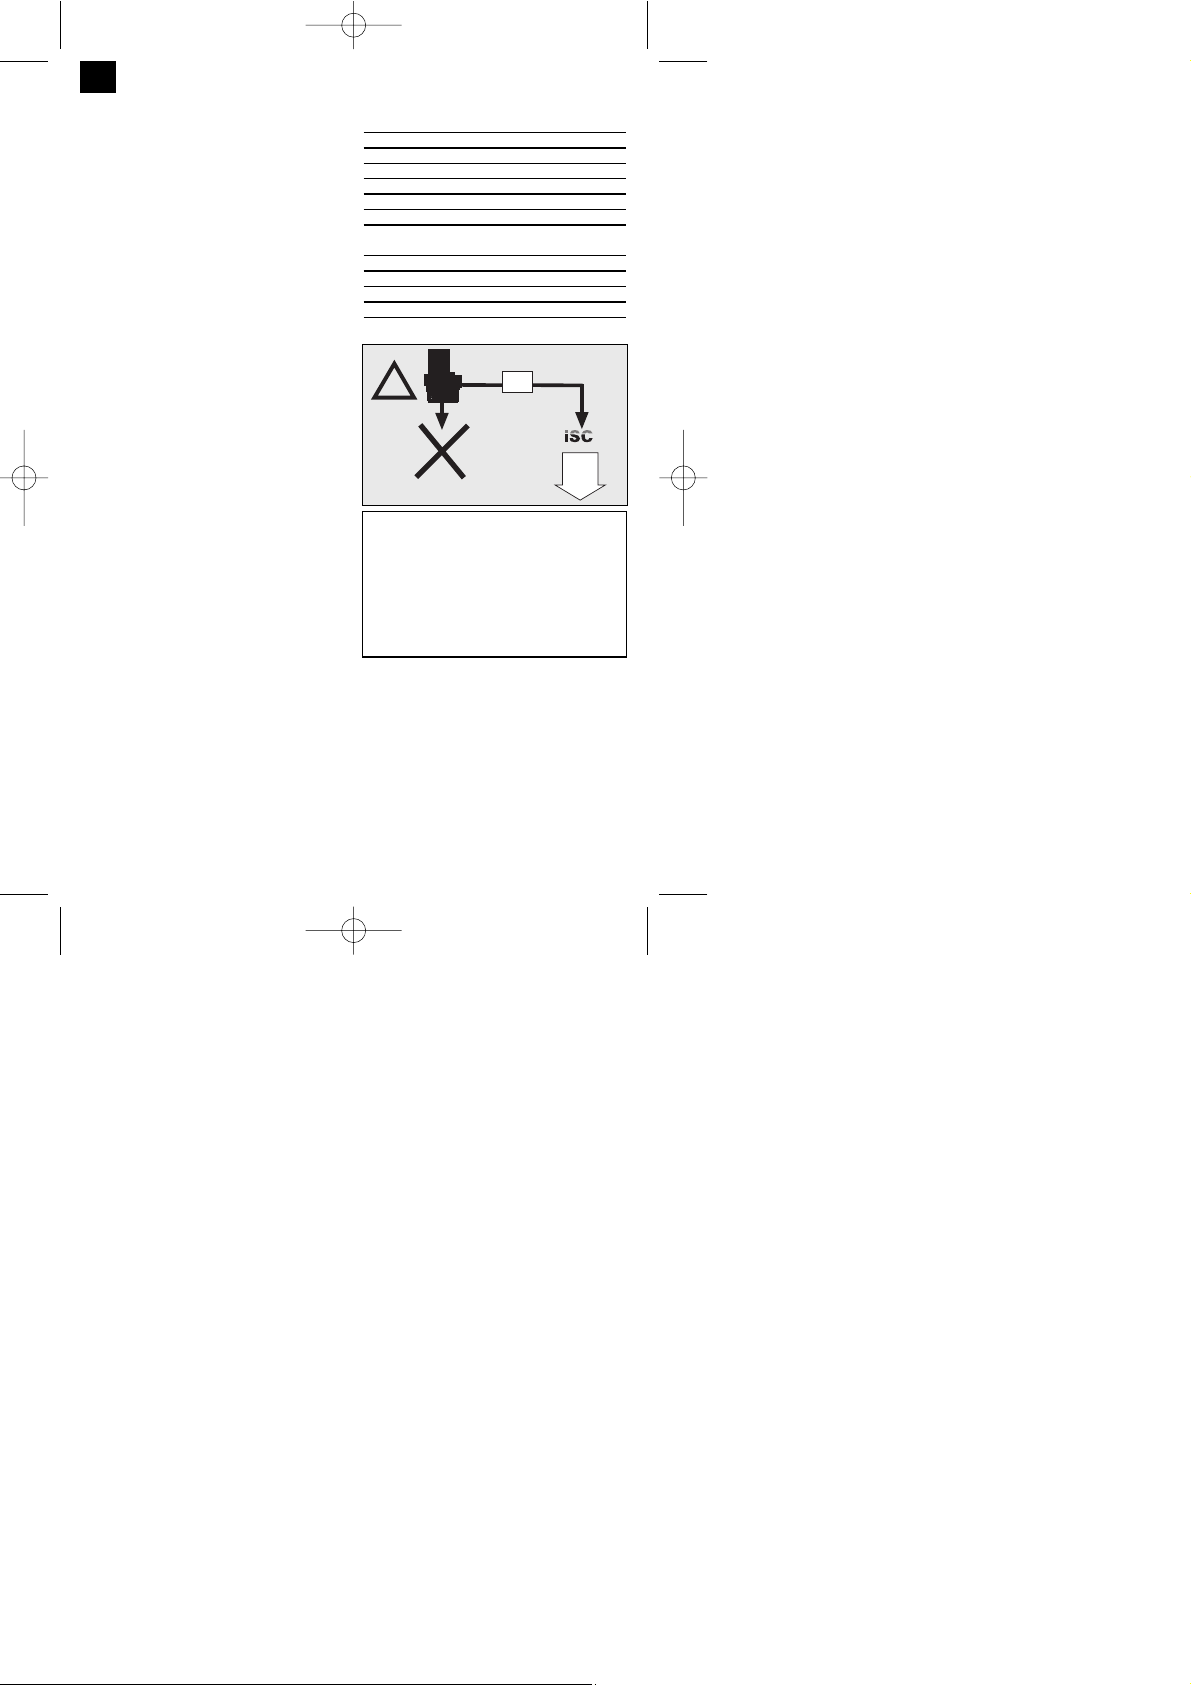
Akkumulatoren und akkugetriebene Elektrogeräte
beinhalten umweltgefährdende Materialien. Akku-Geräte
nicht in den Hausmüll geben. Nach dem Defekt oder
Verschleiß der Geräte den Akku herausnehmen und an
die iSC GmbH, Eschenstraße 6 in D-94405 Landau
einsenden, oder, falls untrennbar verbunden, das Akku-
Gerät einsenden. Nur dort wird vom Hersteller eine
fachgerechte Entsorgung gewährleistet.
Anleitung PS-AS 18-1H_SPK1 20.08.2005 9:17 Uhr Seite 6

7
D
Problem
1. Das Elektrowerkzeug arbeitet
trotz eingesetztem Akkublock
nicht.
2. Die rote Ladekontrolleuchte
leuchtet bei eingesetztem Akku-
block nicht.
3. Das Elektrowerkzeug arbeitet,
aber der Bohrer bzw. Schraub-
einsatz dreht sich nicht.
4. Das Elektrowerkzeug arbeitet
und der Bohrer bzw. Schraubein-
satz drehen sich, aber es wird
keine Bohrung erzeugt bzw. die
Schraube wird nicht einge-
schraubt.
5. Beim Bohren bzw. Schrauben
arbeitet das Elektrowerkzeug
plötzlich nicht mehr.
Mögliche Ursache
1. Akkublock ist inkorrekt einge-
setzt.
2. Akkublock nicht geladen oder
defekt.
1. Netzstecker Ladegeräts nicht
eingesteckt.
2. Netzkabel des Ladegeräts
defekt.
3. Akkublock ist voll aufgeladen.
Bohrer bzw. Schraubeinsatz sitzen
locker.
Das Elektrowerkzeug ist auf
Linkslauf (entgegen Uhrzeiger-
sinn) eingestellt.
1. Der Akkublock ist leer.
2. Die Schraube ist vollständig
eingedreht oder blockiert.
3. Der Bohrer blockiert.
Lösung
1. Überprüfen Sie, daß der Akku-
block vollständig in das Elektro-
werkzeug eingebaut ist und fest
durch die Befestigungslaschen
gehalten wird.
2. Laden Sie den Akkublock.
Wenn das Elektrowerkzeug nach
Laden immer noch nicht arbeitet,
lassen Sie den Akkublock bzw.
das Elektrowerkzeug in einer
Fachwerkstatt überprüfen.
1. Stecken Sie den Stecker an die
Steckdose an.
2. Lassen Sie das Kabel in einer
Fachwerkstatt reparieren.
3. Entnehmen Sie den Akkublock.
Ziehen Sie das Bohrfutter fest.
Schalten Sie die Drehrichtung auf
Rechtslauf (in Uhrzeigersinn).
1. Siehe Problem 1.
2. Schalten Sie das Elektrowerk-
zeug ab oder
3. Schalten Sie das Elektrowerk-
zeug zum Lösen der blockierten
Schraube oder des blockierten
Bohrers auf Linkslauf .
Fehlersuche
Ersatzteilbestellung:
Bei der Ersatzteilbestellung sollten folgende Angaben gemacht werden;
앬Typ des Gerätes
앬Artikelnummer des Gerätes
앬Ident-Nummer des Gerätes
앬Ersatzteilnummer des erforderlichen Ersatzteils
Aktuelle Infos und Preise finden Sie unter www.isc-gmbh.info
Anleitung PS-AS 18-1H_SPK1 20.08.2005 9:17 Uhr Seite 7

8
1. Layout:
1: Torque selector
2: Drill chuck
3: Clockwise/Counter-clockwise changeover
switch
4: ON/OFF switch
5: Battery pack
6: Battery charger
7: Selector switch for 1st/2nd gear
8: Pushlock button
9: Additional handle
2. Safety information
Please refer to the booklet included in delivery for the
safety instructions.
3. Important information
Be sure to read the following information before you
use your cordless screwdriver for the first time:
1.Charge the battery pack with the charger supplied.
An empty battery pack requires a charging period of
approximately 1 hour.
2.Only ever use sharp drill bits and screwdriver bits
which are suitable for the purpose and in faultless
condition.
3.Always check for concealed electric cables and
gas and water pipes when drilling and screwing in
walls.
4. Starting up:
Charging the NC battery pack
1. Take the rechargeable battery pack out of the
handle (Fig. 2), pressing the pushlock button at
the side to do so.
2. Check that your mains voltage is the same as
that marked on the rating plate of the battery
charger. Plug the battery charger in the socket.
3. Insert the rechargeable battery pack into the
battery charger (Figure 3). The red LED will
come on to indicate that the battery pack is being
charged. The green LED will come on to indicate
that charging has been completed. Discharged
battery packs require approx. 1 hour for
charging. The temperature of the battery pack
may rise slightly during the charging operation.
This is normal.
If the battery pack fails to charge, check the
following:
- Whether there is voltage at the socket-outlet
- Whether there is proper contact with the charging
contacts in the battery charger.
If the battery pack still fails to charge, send
앬the battery charger
앬and the battery pack
to our customer services department.
To ensure that the NC battery pack provides long
service, you should take care to recharge it promptly.
At the latest you will certainly have to do this when
you notice the performance of your cordless
screwdriver falling away. Never fully discharge the
battery pack. This will cause it to develop a defect.
Torque selector (1)
The cordless screwdriver is fitted with a 17-setting
mechanical torque selector. The torque for each
screw size is set with the setting ring (1). The torque
is dependent on a number of factors:
앬On the type and hardness of the material
involved
앬On the type and length of the screw used
앬On the requirements that the screw connection
has to satisfy.
The grating disengagement of the coupling indicates
that the selected torque level has been reached.
Important! Only ever adjust the setting ring when
the device is at a standstill.
Drill
For drilling adjust the setting ring for the torque to the
last setting “Drill”. In this drill setting the slip coupling
is non-functional. The maximum torque is available
for drilling.
Selector switch for 1st/2nd gear (7)
You can work with a higher or lower speed
depending on the position of the selector switch.
Change the gear only when the drill is at a standstill.
If you fail to observe this point, the gearing may be
damaged.
Changeover switch (3)
The slide switch above the ON/OFF switch is for
setting the direction of rotation of the cordless
screwdriver and for preventing the cordless
screwdriver from being switched on inadvertently.
You can select between clockwise and counter-
clockwise rotation. Change the direction of rotation
GB
Anleitung PS-AS 18-1H_SPK1 20.08.2005 9:17 Uhr Seite 8

9
only when the drill is at a standstill. If you fail to
observe this point, the gearing may become
damaged. When the slide switch is in the middle
position, the ON/OFF switch is blocked.
ON/OFF switch (4)
Infinitely variable speed control is possible with the
ON/OFF switch. The further you push the switch, the
higher the speed of the cordless screwdriver.
Screws
It is advisable to use self-centering screws (e.g. Torx,
cross recessed head) as these will enable you to
work safely and reliably. Always make sure that the
bit used is of the same size and shape as the screw.
Set the torque to suit the screw size as specified in
the instructions.
Special additional functions (Figure 4):
앬Battery swivel mechanism
To handle work in hard-to-reach areas the
battery pack can be swiveled through 360°.
앬Additional handle (9)
You can achieve a safe body posture for working
by turning the additional handle. Undo the screw
(a) on the additional handle and turn it. Then
tighten the screw (a) again.
Cleaning and maintenance
Important! Always remove the battery pack before
starting cleaning or maintenance work.
Clean the tool at regular intervals, ideally
immediately after you finish working with it.
Do not clean the tool with sharp objects.
No liquids may be allowed to ingress into the tool.
Use soap suds and a soft cloth to clean the casing.
Never use gasoline, solvent or cleaning products that
are aggressive to plastic.
The ventilation slots must be clear at all times.
Technical data:
Motor supply voltage 18 V =
Speed 0-500/0-1400 rpm
Torque 17 settings
Clockwise/Counter-clockwise Yes
Clamping range of drill chuck max. 13 mm
Charge voltage for rechargeable battery 18 V =
Charge current for rechargeable battery 2500 mA
Battery charger supply voltage 230 V ~ 50 Hz
LPA noise level: 73 dB(A)
LWA noise level: 82 dB(A)
Weight: 2.4 kg
Vibration: aw< 2.5 m/s2
GB
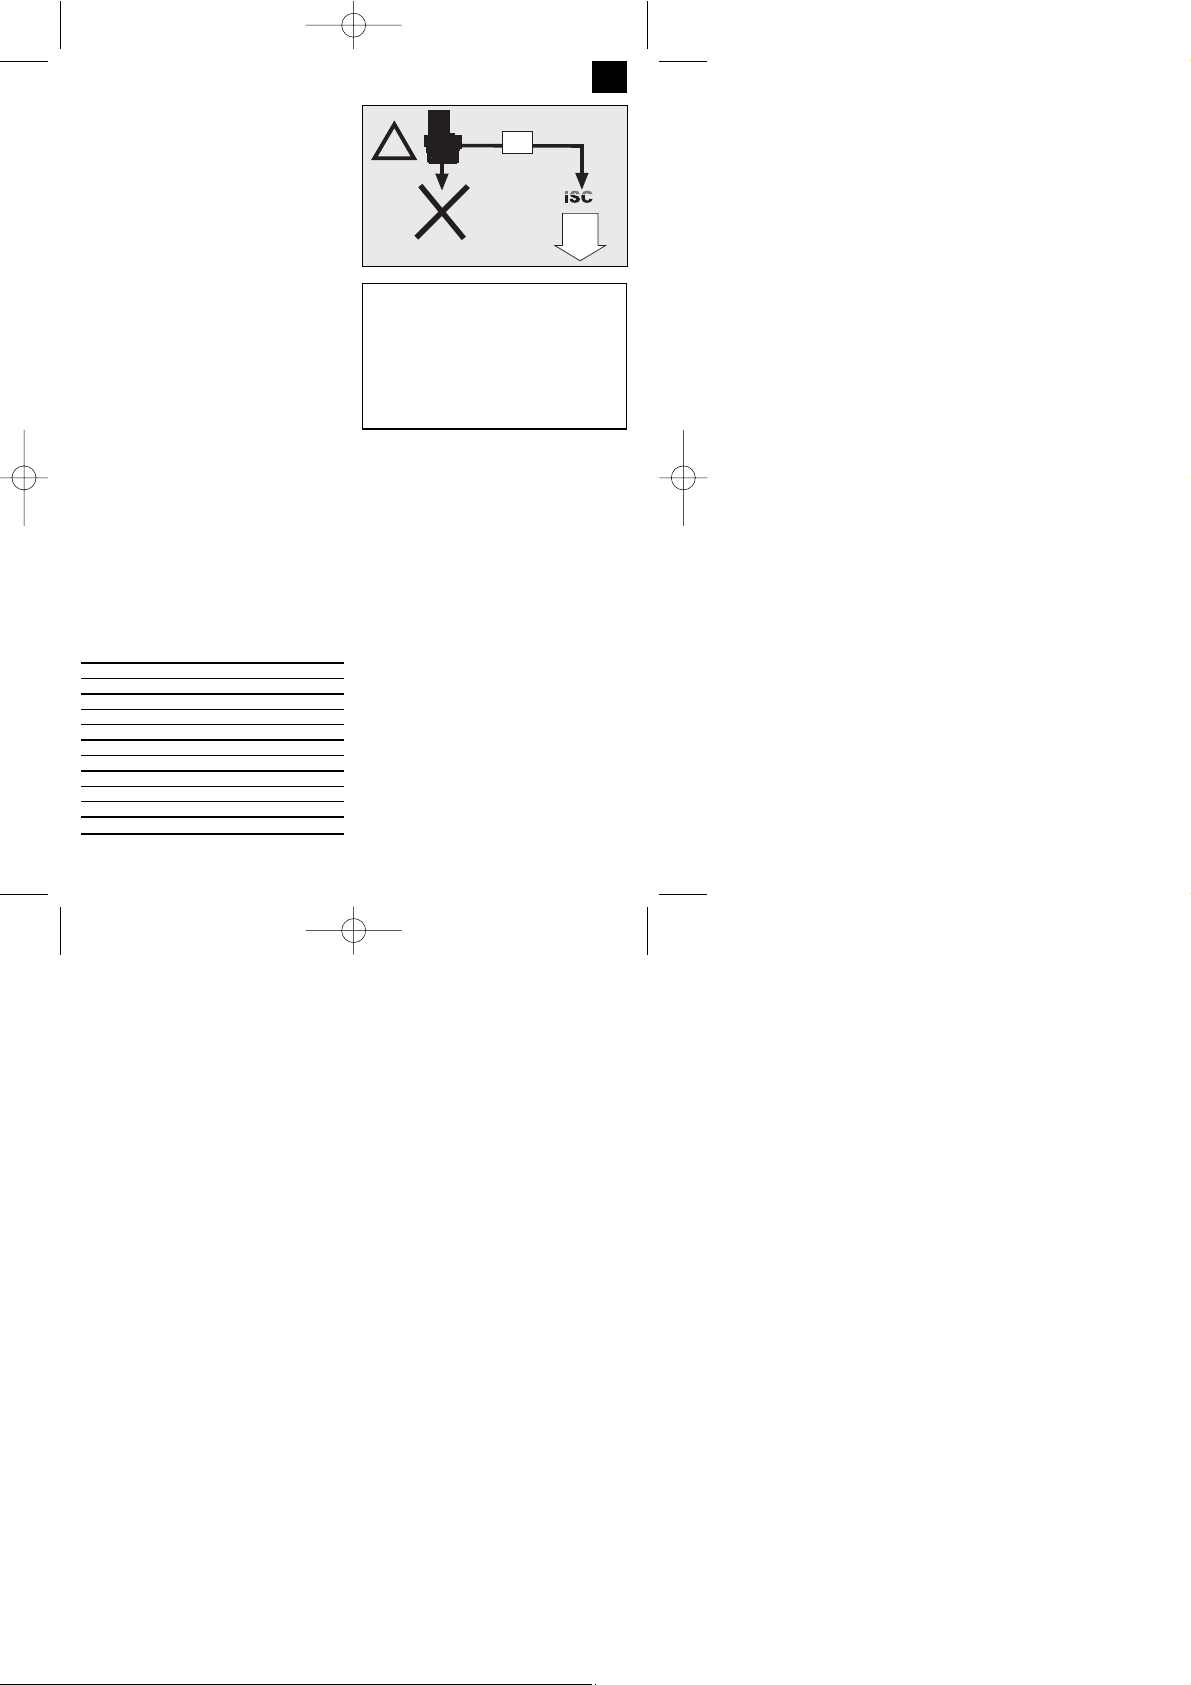
Batteries and cordless electric machines and tools
contain materials that are potentially harmful to the
environment. Never place any cordless electric machines
or tools in your household refuse. When cordless electric
machines or tools become defective or worn, remove the
batteries and return them to iSC GmbH (address:
Eschenstrasse 6, D-94405, Germany). If the batteries
cannot be removed, return the complete cordless
machine or tool. You can then be sure that the
equipment will be correctly disposed of by the
manufacturer.
!
iNTERNATiONALES SERViCE CENTER GmbH
쾷
Anleitung PS-AS 18-1H_SPK1 20.08.2005 9:17 Uhr Seite 9

10
Ordering spare parts
Please provide the following information on all orders
for spare parts:
앬Model/type of tool
앬Article number of the tool
앬ID number of the tool
앬Spare part number of the required spare part
For our latest prices and information please go to
www.isc-gmbh.info
GB
Problem Possible cause Solution
1. The electric tool will not work
despite the battery pack being in
place.
1. The battery pack is not fitted
correctly
2. The battery pack is not charged
or defective.
1. Check that the battery pack is
fully fitted in the tool and is held
securely by the fixing attachments.
2. Charge the battery pack. If the
electric tool still fails to work after
you have charged the battery,
have the battery pack and tool
checked by a specialist workshop.
2. The red charging control light is
not lit when the battery pack is
fitted.
1. The mains plug for the charger
is not connected to the supply.
2. The charger’s mains cable is
defective.
3. The battery pack is fully
charged.
1. Connect the plug to the socket.
2. Have the cable repaired by a
specialist workshop.
3. Remove the battery pack.
3. The electric tool works but the
drill bit or screwdriver bit does not
turn.
The drill or screwdriver bit is loose Tighten the chuck.
4. The electric tool works and the
drill or screwdriver bit turns but it
does not produce a hole or does
not tighten the screw.
The electric tool is set to turn
counter-clockwise.
Switch the direction to clockwise.
5. As you are drilling or tighten the
screw, the electric tool suddenly
cuts out.
1. The battery pack is discharged.
2. The screw is fully tightened or
blocked.
3. The drill bit is blocked.
1. See problem 1.
2. Switch off the electric tool or
3. Switch the electric tool to turn
counter-clockwise to release the
blocked screw or drill bit.
Troubleshooting
Anleitung PS-AS 18-1H_SPK1 20.08.2005 9:17 Uhr Seite 10

1.Description de l’appareil
1: réglage du couple de rotation
2: mandrin
3: commutateur pour rotation à gauche et à
droite
4: interrupteur marche/arrêt
5: accu
6: chargeur
7: commutateur 1ère allure/ 2ème allure
8: touche à encliquetage
9: poignée additionnelle
2.Consignes de sécurité
Vous trouverez les consignes pertinentes dans le
cahier ci-joint.
3.Indications importantes
Ne manquez pas de lire ces consignes de sécurité
avant de mettre en service votre perceuse-visseuse
à accu.
1. Chargez le bloc d’accu en utilisant le chargeur qui
vous a été fourni. Un accu vide est chargé au bout
d’une heure environ.
2. N’utilisez que des mèches aiguës et des embouts
de vissage impeccables et adéquats.
3. Lorsque vous percez ou vissez dans des parois
ou des murs, veuillez toujours vérifier s’il n’y a pas
de conductions de courant cachées, ni des
conduites de gaz ou d’eau cachées.
4.Mise en service
La charge du bloc d’accu NC
1. Sortez le bloc d’accu de la poignée (fig. 2) en
pressant sur la touche à encliquetage.
2. Vérifiez si la tension de réseau indiquée sur la
plaque d’identité correspond à la tension effective.
Insérez le chargeur dans la prise de courant.
3. Insérez le bloc d’accu dans le chargeur (fig. 3). La
diode électroluminescente rouge indique que
l’accu est en train d’être chargé. La diode
électroluminescente verte vous signale que la
charge est terminée. Lorsque l’accu était
complètement vide, la durée de charge est
d’environ une heure. Il est possible que le bloc
d’accu s’échauffe légèrement en se chargeant;
ceci est pourtant normal.
Au cas où la charge ne fonctionnerait pas, veuillez
vérifier
- si la prise de courant est sous tension
- si le contact au niveau des contacts de charge du
chargeur est en ordre
Si le problème persiste, nous vous prions d’envoyer
à notre service après-vente
앬le chargeur
앬le bloc d’accu
Pour profiter d’une longue durée de vie de votre bloc
d’accu NC, vous devriez le charger régulièrement,
une recharge étant indispensable lorsque vous
constatez que la puissance de la perceuse-visseuse
diminue.
Ne déchargez jamais complètement le bloc d’accu
pour ne pas l’endommager!
Le réglage du couple de rotation(1)
La visseuse à accu est pourvue d’un réglage
mécanique du couple à 17 étages. Le couple de
rotation pour une certaine grandeur de vis est réglé
sur la bague de butée (1). Le couple dépend de
plusieurs facteurs:
앬de l’espèce et de la dureté du matériau à travailler
앬de l’espèce et de la longueur des vis employées
앬des exigences émises au vissage
L’accomplissement du réglage du couple est
signalisé par le désembrayage grinçant. Attention!
Ne réglez le couple sur la bague de butée que
lorsque l’appareil est en position d’arrêt.
Perçage
Lorsque vous désirez percer, vous réglez le couple
en choississant le dernier étage „perçage“ de la
bague butée. A cet étage, l’accouplement à
glissement est hors-service. C’est en perçant que
vous disposez du couple maximal.
Commutateur 1ère allure / 2ème allure (7)
Au moyen de ce commutateur vous pouvez régler le
nombre de tours accomplis par votre outil électrique.
Pour ne pas endommager l’engrenage, ne changez
la position du commutateur que lorsque l’appareil est
arrêté.
Commutateur inverseur (3)
Au moyen de l’interrupteur à coulisse situé au-
dessus de l’interrupteur marche/arrêt vous pouvez
régler le sens de rotation de la visseuse à accu et
protéger celle-ci contre une mise en marche
involontaire. Vous pouvez choisir entre rotation à
gauche et rotation à droite. Pour ne pas
endommager l’engrenage, le sens de rotation ne doit
être changé que lorsque l’appareil n’est pas en
marche. Si l’interrupteur à coulisse est dans la
position du milieu, l’interrupteur marche/arrêt est
bloqué.
11
F
Anleitung PS-AS 18-1H_SPK1 20.08.2005 9:17 Uhr Seite 11
Interrupteur marche/arrêt (4)
Au moyen de l’interrupteur marche/arrêt vous
pouvez régler la vitesse de rotation de manière
continue. Plus vous avancez l’interrupteur, plus
grande sera la vitesse de votre perceuse-visseuse.
Visser:
Utilisez, si possible, des vis à centrage automatique
(telles que des vis à empreinte cruciforme, des vis à
empreinte torx, etc.) ce qui permet un travail sûr.
Faites attention à ce que l’embout de vissage et la
vis correspondent en forme et en grandeur. Réglez
le couple, en tenant compte de la grandeur de vis,
comme il a été décrit plus haut.
Fonctions additionnelles spéciales (fig. 4)
앬Rotation de l’accu
En cas de positions de travail difficiles, l’accu peut
être tourné de 360°.
앬Poignée additionnelle (9)
Votre position sera plus stable si vous tournez la
poignée additionnelle. Desserrez la vis (a) de la
poignée additionnelle et tournez-la. Resserrez la
vis (a) ensuite.
Nettoyage et entretien
Attention! Enlevez toujours le bloc d’accu avant de
procéder au nettoyage ou à l’entretien de votre
perceuse-visseuse.
1. Nettoyez l’appareil régulièrement. Nous vous
recommandons de le nettoyer chaque fois après
l’avoir utilisé.
2. N’employez pas d’objets aigus pour le nettoyer.
3. Il faut absolument éviter que des liquides ne
coulent à l’intérieur de l’outil électrique. Nettoyez
le boîtier avec un torchon mou et de la lessive
caustique. N’utilisez en aucun cas de la benzène,
des dissolvants ou des détergents qui attaquent la
matière plastique.
4. Les évents doivent toujours être libres.
Données techniques
alimentation en courant du moteur: 18 V =
nombre de tours: 0–500 / 0-1400 min-1
couple de rotation: à 17 étages
rotation à droite et à gauche: oui
écartement des mâchoires: 13 mm au maximum
tension de charge des accus: 18 V =
courant de charge des accus: 2500 mA
tension de réseau alimentant le chargeur:
230 V ~ 50 Hz
niveau de pression acoustique LPA: 73 dB (A)
niveau de puissance acoustique LWA: 82 dB (A)
poids: 2,4 kg
vibration aw: < 2,5 m/s2
12
F
Les accumulateurs et les appareils électriques à
accu contiennent des substances qui nuisent à
l’environnement. Ne jetez pas les accus à la poubelle.
Enlevez l’accu, lorsque l’appareil est défectueux ou usé,
et envoyez-le à ISC GmbH, Eschenstrasse 6, D-94405
Landau ou, au cas où il serait impossible de séparer
l’accu de l’appareil, envoyez l’appareil complet au
fabricant qui lui seul peut garantir une élimination
appropriée.
!
iNTERNATiONALES SERViCE CENTER GmbH
쾷
Anleitung PS-AS 18-1H_SPK1 20.08.2005 9:17 Uhr Seite 12

Problème
Commande de pièces de rechange
Pour les commandes de pièces de rechange,
veuillez indiquer les références suivantes:
앬Type de l’appareil
앬No. d’article de l’appareil
앬No. d’identification de l’appareil
앬No. de pièce de rechange de la pièce requise
Vous trouverez les prix et informations actuelles à
l’adresse www.isc-gmbh.info
13
F
Recherche d’erreurs Cause possible Solution
1. L’outil électrique ne
fonctionne pas, bien que
le bloc d’accu soit intégré.
1. Le bloc d’accu est intégré
incorrectement.
2. Le bloc d’accu n’est pas
chargé ou il est défectueux.
1. Assurez-vous si le bloc
d’accu est complètement
intégré dans l’outil électrique
et s’il est fermement tenu par
les colliers de fixation.
2. Chargez le bloc d’accu.
Si, après avoir été chargé,
l’outil électrique ne
fonctionne toujours pas,
faites examiner le bloc d’accu et
l’outil électrique par un
atelier qualifié.
2. La lampe rouge de
contrôle de charge ne
s’allume pas, bien que
le bloc d’accu soit
intégré.
1. La fiche mâle du chargeur
n’est pas fichée.
2. Le câble d’alimentation
du chargeur est défectueux.
3. Le bloc d’accu est chargé
complètement.
1. Fichez la fiche mâle.
2. Faites réparer le câble
par un atelier qualifié.
3. Enlevez le bloc d’accu.
3. L’outil électrique
fonctionne, mais la
mèche, ou l’embout
de vis, ne tourne pas.
La mèche ou l’embout de
vis n’est pas fixé comme
il faut.
Serrez fortement le
mandrin.
4. L’outil électrique
fonctionne et la mèche
(ou l’embout de vis)
tourne, mais aucun
perçage ou vissage
n’est réalisé.
L’outil est réglé sur
la rotation à gauche
(dans le sens inverse des
aiguilles d’une montre).
Changez le réglage
de rotation de sorte que
l’outil tourne dans le
sens des aiguilles d’une
montre.
5. L’outil électrique
s’arrête soudainement
lorsque vous êtes en
train de percer ou de
visser.
1. Le bloc d’accu est vide.
2. La vis est complètement
serrée ou bloquée.
3. La mèche est bloquée.
1. Voir problème 1.
2. Débrayez l’outil électrique
ou
3. réglez-le sur la rotation
à gauche pour desserrer la vis
ou la mèche bloquée.
Anleitung PS-AS 18-1H_SPK1 20.08.2005 9:17 Uhr Seite 13

1. Descrizione dell’apparecchio:
1: Regolazione della coppia
2: Mandrino
3: Commutazione rotazione sinistra - destra
4: Interruttore
5: Batteria
6: Caricabatteria
7: Commutatore velocità I/II
8: Tasto di sblocco
9: Impugnatura ausiliaria
2. Prescrizioni di sicurezza
Le prescrizioni di sicurezza sono riportate
nell’opuscolo allegato.
3. Avvertenze importanti
Prima della messa in esercizio del trapano/avvitatore
a batteria, leggere accuratamente le presenti
avvertenze.
1. Caricare la batteria esclusivamente con il
caricabatteria fornito. La batteria completamente
scarica richiede circa 1 ora per la carica.
2. Utilizzare solo punte affilate e bit di avvitatura
adeguati e senza difetti.
3. Per la foratura e avvitatura in pareti e muri,
controllare l’assenza di condutture di gas e
corrente sotto traccia
4. Messa in esercizio
Caricamento del pacco batterie
1. Premere il tasto di sblocco ed estrarre il pacco
batterie dall’impugnatura (Fig. 2).
2. Controllare che la tensione di rete disponibile
coincida con la tensione di rete specificata sulla
targhetta identificativa. Inserire la spina del
caricabatteria nella presa.
3. Inserire la batteria nel caricabatteria (Fig. 3). Il
LED rosso segnala che la batteria si sta
caricando. Il LED verde segnala che la batteria è
carica. A batteria completamente scarica il tempo
di carica è di circa 1 ora. Durante la carica, il
pacco batterie può scaldarsi leggermente; ciò è
del tutto normale.
Se la batteria non si carica, controllare che:
- nella presa sia presente la tensione di rete;
- le lamelle della batteria facciano perfettamente
contatto con quelle del caricabatteria.
Se la batteria ancora non si carica, inviare:
앬il caricabatteria
앬e il pacco batterie
al nostro servizio clienti.
Per garantire una lunga durata del pacco batterie,
eseguire la ricarica della batteria NC a tempo debito.
Ciò è comunque necessario quando si evidenzia
una diminuzione nella potenza del trapano/avvitatore
a batteria.
Non scaricare mai completamente il pacco batterie.
Ciò può causare il danneggiamento del pacco
batterie stesso.
Regolazione della coppia (1)
L’avvitatore a batteria è dotato di una regolazione di
coppia meccanica a 17 stadi. La coppia può essere
regolata, in base alle dimensioni delle viti, mediante
l’anello di regolazione (1). La coppia da utilizzare
dipende da più fattori:
앬il tipo e la durezza del materiale in lavorazione;
앬il tipo e la lunghezza delle viti utilizzate;
앬i requisiti del fissaggio a vite.
Al raggiungimento della coppia, il limitatore di coppia
scatta con un rumore caratteristico.
Attenzione: spostare l’anello per la regolazione
di coppia solo ad apparecchio fermo.
Foratura
Per la foratura, posizionare l’anello di regolazione
della coppia sull’ultimo stadio „Trapano“. In tale
posizione il limitatore di coppia è escluso. Per la
foratura è disponibile la coppia massima.
Commutazione velocità I/II (7)
A seconda della posizione del commutatore è
possibile lavorare con una velocità maggiore o
minore. Per evitare danneggiamenti al riduttore,
commutare la velocità solo ad apparecchio fermo.
Commutatore di direzione (3)
Il commutatore a slitta sopra l’interruttore consente
di cambiare il senso di rotazione del
trapano/avvitatore a batteria e di assicurare
l'apparecchio contro l'avvio indesiderato.
È possibile scegliere tra rotazione a sinistra e a
destra. Per evitare danneggiamenti al riduttore,
commutare la direzione di rotazione solo ad
apparecchio fermo. Quando il commutatore a slitta si
trova nella posizione centrale, l’interruttore è
bloccato.
Interruttore (4)
L’interruttore a pulsante consente di regolare la
velocità di rotazione senza soluzione di continuità.
Più a fondo si preme l’interruttore e maggiore è la
velocità del trapano/avvitatore a batteria.
14
I
Anleitung PS-AS 18-1H_SPK1 20.08.2005 9:17 Uhr Seite 14
Avvitatura
È particolarmente consigliato l’utilizzo di viti con
centratura automatica nell’intaglio (es. viti Torx o con
intaglio a croce), che garantiscono un lavoro sicuro.
Prestare attenzione a che il bit utilizzato e la vite
coincidano per forma e dimensioni. Regolare la
coppia come descritto nella presente guida, in base
alle dimensioni della vite.
Funzioni supplementari (Fig. 4)
앬Rotazione della batteria
Per posizioni di lavoro difficili, è possibile ruotare
la batteria di 360°.
앬Impugnatura ausiliaria (9)
Ruotando l’impugnatura ausiliaria è possibile
mantenere una sicura posizione del corpo durante
il lavoro. Allentare la vite (a) dell’impugnatura
ausiliaria e ruotare l’impugnatura stessa come
desiderato. Quindi serrare nuovamente la vite (a).
Pulizia e manutenzione
Attenzione: prima delle operazioni di pulizia e
manutenzione, estrarre sempre il pacco batterie.
1. Pulire regolarmente l’apparecchio, possibilmente
ogniqualvolta si termina il lavoro.
2. Non pulire mai l’utensile elettrico con oggetti
affilati.
3. All’interno dell’utensile elettrico non devono
penetrare liquidi di alcun genere. Per la pulizia del
corpo dell'apparecchio, utilizzare acqua saponata
e un panno morbido. Non utilizzare assolutamente
benzina, detergenti o solventi che aggrediscono le
parti in plastica dell’apparecchio.
4. Le feritoie di aerazione devono essere sempre
libere.
Dati tecnici
Tensione di alimentazione motore 18 V =
Numero di giri 0-500/0-1400 min-1
Regolazione di coppia 17 stadi
Rotazione destra - sinistra sì
Apertura mandrino max. 13 mm
Tensione di carica batteria 18 V =
Corrente di carica batteria 2500 mA
Tensione di rete caricabatteria 230 V ~ 50 Hz
Livello di rumore LpA 73 dB(A)
Livello di potenza sonora LWA 82 dB(A)
Peso: 2,4 kg
Vibrazioni: äw< 2,5 m/s2
15
I
D Gli accumulatori e gli utensili elettrici alimentati a
batterie contengono materiali pericolosi per l’ambiente.
Non smaltire gli accumulatori usati tra i normali rifiuti
domestici. Estrarre dall’utensile le batterie difettose o
esauste e inviarle a iSC GmbH, Eschenstraße 6 in D-
94405 Landau; se le batterie sono incorporate, inviare
l’intero utensile. Il produttore assicurerà il corretto
smaltimento degli accumulatori esausti.
!
iNTERNATiONALES SERViCE CENTER GmbH
쾷
Anleitung PS-AS 18-1H_SPK1 20.08.2005 9:17 Uhr Seite 15

Opera di Mediazione
Ordinazione di pezzi di ricambio
Volendo commissionare dei pezzi di ricambio, si
dovrebbe dichiarare quanto segue:
앬modello dell’apparecchio
앬numero dell’articolo dell’apparecchio
앬numero d’ident. dell’apparecchio
앬numero del pezzo di ricambio del ricambio
necessitato.
Per i prezzi e le informazioni attuali si veda
www.isc-gmbh.info
16
I
Problema Possibile causa Soluzione
1. La batteria è inserita ma
l’apparecchio non funziona.
1. Batteria inserita in modo non
corretto.
2. Batteria scarica o difettosa.
1. Controllare che il pacco batterie
sia completamente inserito
nell’apparecchio e saldamente
fissato mediante la linguetta di
blocco.
2. Caricare il pacco batterie. Se
dopo la carica l’apparecchio non
funziona, fare controllare
l’apparecchio stesso in
un’officina specializzata.
2. A batteria inserita, il LED rosso
di controllo non si accende.
1. La spina del caricabatteria non è
inserita.
2. Cavo del caricabatteria difettoso.
3. Pacco batteria completamente
scarico.
1. Inserire la spina nella presa.
2. Fare riparare il cavo in un’officina
specializzata.
3. Rimuovere il pacco batterie.
3. L’apparecchio funziona ma la
punta di foratura o avvitatura non
gira.
La punta non è stretta nel
mandrino.
Serrare a fondo il mandrino.
4. L’apparecchio funziona e la
punta di foratura o avvitatura
gira, ma non si crea il foro o la
vite non viene avvitata.
L’apparecchio è impostato sulla
rotazione a sinistra (in senso
antiorario).
Commutare la direzione di
rotazione (in senso orario).
5. Durante la foratura o avvitatura,
improvvisamente l’apparecchio
smette di funzionare.
1. Pacco batterie scarico.
2. Vite completamente avvitata o
bloccata.
3. Punta bloccata.
1. Vedere problema 1.
2. Spegnere l’apparecchio.
3. Commutare l’apparecchio sulla
rotazione a sinistra per sbloccare
la vite o la punta bloccata.
Anleitung PS-AS 18-1H_SPK1 20.08.2005 9:17 Uhr Seite 16

17
1. Opis urządzenia:
1: Ustawienie momentu obrotowego
2: Uchwyt
3: Przełącznik kierunku obrotów lewo/prawo
4: Włącznik/ wyłącznik
5: Akumulator
6: Ładowarka
7: Przełącznik 1-bieg, 2-bieg
8: Przycisk blokady
9: Uchwyt dodatkowy
2. Wskazówki bezpieczeństwa
Właściwe wskazówki bezpieczeństwa zawiera
osobna broszura, która stanowi integralnączęść
instrukcji obsługi.
3. Ważne wskazówki
Przed uruchomieniem wiertarki akumulatorowej
przeczytaćnastępujące wskazówki:
1. Naładowaćakumulator za pomocąładowarki
znajdującej sięw zestawie. Akumulator jest
naładowany po ok. 1 godzinie.
2. Używaćtylko ostrych wiertełi odpowiednich oraz
niezużytych bitów.
3. Przed wierceniem zawsze sprawdzićmiejsce
pracy, czy nie ma ukrytych kabli, rur gazowych i
wodnych.
4. Uruchomienie:
Ładowanie akumulatora NC:
1. Naciskając blokadę(2) wyjąć akumulator z
rękojeści.
2. Sprawdzić, czy napięcie podane na tabliczce
znamionowej jest zgodne z napięciem
sieciowym. Podłączyćkabel ładowarki do
gniazdka.
3. Włożyćakumulator do ładowarki (rys.3).
Czerwona dioda sygnalizuje, że akumulator jest
ładowany; zielona, że ładowanie zostało
zakończone. Czas ładowania pustego
akumulatora wynosi 1 h. Podczas ładowania
akumulator może sięlekko nagrzać, jest to
normalny efekt.
Jeśli akumulator sięnie ładuje, należy skontrolować:
- czy w gniazdku jest napięcie
- czy zestyk pomiędzy ładowarkąa akumulatorem
jest bez zarzutu
Jeśli w dalszym ciągu akumulator sięnie ładuje,
należy w celu skontrolowania:
앬ładowarki
앬akumulatora
skontaktowaćsięz autoryzowanym serwisem.
W celu przedłużenia okresu użytkowania
akumulatora należy go odpowiednio doładowywać.
W każdym przypadku, kiedy stwierdzona zostanie
słabsza moc urządzenia, należy doładować
akumulator.
Nie należy dopuszczaćdo całkowitego rozładowania
akumulatora. Powoduje to jego uszkodzenie.
Ustawienie momentu obrotowego (1)
Wiertarko-wkrętarka akumulatorowa jest
wyposażona w 17-stopniowąmechanicznąregulację
momentu obrotowego. Moment obrotowy dla
określonej wielkości śruby ustawiany jest na
pierścieniu (1). Moment obrotowy zależy od wielu
czynników:
앬od rodzaju i twardości obrabianego materiału
앬od rodzaju i długości używanych wkrętów
앬od wymagaństawianym połączeniom śrubowym
Osiągnięcie momentu obrotowego sygnalizowane
jest poprzez zapadkowe wyłącznie sprzęgła.
Uwaga! Przed ustawieniem zmian na pierścieniu
wyłączyćwcześniej urządzenie.
Wiercenie
Ustawićmoment obrotowy na pierścieniu na ostatni
stopień„wiertarka”. Na tym stopniu wyłączone jest
sprzęgło poślizgowe. Podczas wiercenia do
dyspozycji jest maksymalny moment obrotowy.
Przełącznik biegów: 1-bieg – 2-bieg (7)
W zależności od ustawienia przełącznika można
pracowaćz mniejsząlub większąliczbąobrotów.
Aby uniknąć uszkodzenia przekładni, zmieniaćbiegi
tylko, gdy urządzenie jest wyłączone.
Przełącznik kierunku obrotów (3)
Za pomocąprzełącznika suwowego
umiejscowionego nad włącznikiem można ustawić
kierunek obrotu wiertarko-wkrętarki i zabezpieczyćją
przed niechcianym włączeniem. Możliwe obroty w
prawo lub w lewo. Aby uniknąć uszkodzenia
PL
Anleitung PS-AS 18-1H_SPK1 20.08.2005 9:17 Uhr Seite 17

18
przekładni, zmieniaćkierunek obrotów tylko na
wyłączonym urządzeniu. Jeżeli przełącznik suwowy
znajduje sięna pozycji środkowej, włącznik jest
zablokowany.
Włącznik/wyłącznik (4)
Za pomocąwłącznika / wyłącznika możliwe jest
bezstopniowe sterowanie momentu obrotowego. Im
dalej zostanie przyciśnięty włącznik, tym wyższa
będzie prędkość obrotowa urządzenia.
Wkręcanie
Najlepiej używaćśrub samocentrujących (np. torx,
krzyżowe), które gwarantująbezpiecznąpracę.
Należy zwrócićuwagęna to, aby zamontowany bit
pasowałdo śrub co do wielkości i formy. Wybrać
odpowiednie ustawienie momentu obrotowego
pasujące do wielkości śruby (wg opisu powyżej).
Specjalne funkcje dodatkowe (rys.4)
앬Przekręcany akumulator
Dla pracy w trudnodostępnych miejscach
możliwe jest przekręcenie akumulatora o 360
stopni.
앬Uchwyt dodatkowy (9)
Stabilna pozycja pracy zostaje osiągnięta przez
właściwe ustawienie uchwytu dodatkowego.
Poluzowaćśrubę(a) na uchwycie i przekręcić
uchwyt. Ponownie dokręcićśrubę.
Czyszczenie i konserwacja
Wyciągnąć akumulator przed rozpoczęciem
czyszczenia i konserwacji.
1. Czyścićurządzenie regularnie, najlepiej
bezpośrednio po zakończeniu pracy.
2. Nie czyścićurządzenia za pomocąostrych
przedmiotów.
3. Uważać, żeby ciecze nie dostały siędo
wewnątrz urządzenia. Do czyszczenia używać
szarego mydła i miękkiej ściereczki. Nie używać
benzyny, rozpuszczalników i środków żrących.
4. Szczeliny wentylacyjne utrzymywaćw czystości.
Dane techniczne:
Napięcie 18 V =
Prędkość obrotowa 0-500/0-1400 min-1
Moment obrotowy 17-stopniowy
Bieg prawo/lewo tak
Uchwyt max. 13 mm
Napięcie ładowania akumulatora 18 V =
Prąd ładowania akumulatora 2500 mA
Napięcie sieciowe ładowarki 230 V ~ 50 Hz
Poziom ciśnienia akustycznego LPA 73 dB (A)
Poziom mocy akustycznej LWA 82 dB (A)
Waga 2,4 kg
Wibracje < 2,5 m/s
PL
Baterie i urządzenia zasilane za pomocąbaterii
zawierająsubstancje szkodliwe dla środowiska. Nie
wrzucaćdo śmieci domowych. W razie uszkodzenia lub
zużycia baterie odesłaćdo producenta, w razie
konieczności odesłaćcałe zużyte urządzenie. Zostanie
zgodnie z przepisami zutylizowane.
!
iNTERNATiONALES SERViCE CENTER GmbH
쾷
Anleitung PS-AS 18-1H_SPK1 20.08.2005 9:17 Uhr Seite 18

19
Zamawianie części zamiennych
Przy zamawianiu części zamiennych podać
następujące dane:
앬Typ urządzenia
앬Numer artykułu
앬Numer identyfikacyjny
앬Numer części zamiennej
Aktualne ceny i informacje znajdą Państwo na stonie
www.isc-gmbh.info
PL
Problem Możliwa przyczyna Rozwiązanie
1.Urządzenie nie pracuje mimo
włożenia akumulatora
1.Akumulator nie zostałwłaściwie
założony
2.Akumulator nie został
naładowany lub jest uszkodzony
1.Sprawdzićprawidłowość
założenia i mocowania
akumulatora przez zapadki
mocujące.
2.Naładowaćakumulator. Jeśli
równieżpo naładowaniu
urządzenie nie pracuje,
skontaktowaćsięz
autoryzowanym serwisem.
2. Czerwona dioda kontrolna nie
świeci sięprzy włożeniu
akumulatora.
1.Ładowarka niepodłączona do
sieci.
2.Uszkodzony kabel zasilający
ładowarki.
3.Akumulator jest naładowany do
końca.
1.Podłączyćładowarkędo sieci.
2. Wymienićkabel w
autoryzowanym serwisie.
3.Wyjąć akumulator.
3.Urządzenie pracuje, ale wiertło /
bit nie kręci się.
Wiertło/ bit jest za lekko
zamocowane. Docisnąć uchwyt.
4.Urządzenie pracuje i wiertło / bit
kręci się, ale nie wierci otworów,
lub śruba nie jest wkręcana.
Włączony bieg w lewo. Włączyćbieg w prawo.
5. Przy wierceniu / wkręcaniu
urządzenie nagle przestaje
pracować.
1.Akumulator jest pusty.
2.Śruba jest wkręcona do końca
lub zablokowana.
3.Wietło jest zablokowane.
1.Patrz problem 1.
2.Wyłączyćurządzenie lub
3.Przełączyćurządzenie na bieg w
lewo dla odblokowania śruby /
wiertła.
Usterki
Anleitung PS-AS 18-1H_SPK1 20.08.2005 9:17 Uhr Seite 19

20
1. A készülék leírása:
1: Forgatónyomaték beállító
2: Fúrótokmány
3: Jobbra-/balraforgás átkapcsoló
4: BE-/KI-kapcsoló
5: Akku
6: Töltőkészülék
7: 1. / 2. Fokozat átkapcsoló
8: Bepattintó gomb
9: Kiegészítő fogantyú
2. Biztonsági utasítások
A megfelelő biztonsági utasításokat megtalálja a
készülékhez mellékelt füzetben.
3. Fontos tudnivalók:
Az akkumulátoros fúró-/csavarbehajtó készüléke
alkalmazása előtt feltétlenül olvassa el ezeket a
tudnivalókat:
1. Az akkumulátorblokkot a készülékkel együtt
szállított akkutöltővel töltse fel. Egy üres akku
feltöltése kb. 1 óra.
2. Csak élesre köszörült fúrókat és megfelelő,
kifogástalan csavarozóbetéteket (bit)
alkalmazzon.
3. Falak fúrása és falakba történő csavarozás előtt
ellenőrizze, hogy nincs a fúrás helyén elrejtve
áram-, gáz- vagy vízvezeték.
4. Üzembevétel:
Az NC-akkublokk feltöltése
1. Húzza ki az akkublokkot a tartófogantyúból
(2. ábra), közben nyomja a bepattintó gombot.
2. Hasonlítsa össze, hogy a típustáblán megadott
hálózati feszültség a meglévő hálózati
feszültséggel egyezik-e. Dugja be a
töltőkészüléket a dugaszolóaljzatba.
3. Dugja az akkumulátort a töltőkészülékre
(3. ábra). A piros LED jelzi, hogy az akkumulátor
töltés alatt van. A zöld LED jelzi, ha a töltés
befejeződött. A töltésidő üres akkumulátor
esetén kb. 1 óra. A töltésfolyamat közben az
akkublokk kissé felmelegedhet, de ez
természetes.
Amennyiben az akkumulátoregység töltése nem
lehetséges, akkor kérjük, ellenőrizze az alábbiakat:
- van-e hálózati feszültség,
- megfelelően érintkezik-e az akkumulátor a
töltőkészülékben.
Ha az akkumulátoregység töltése még ekkor sem
volna lehetséges, akkor kérjük, hogy
앬a töltőkészüléket és az
앬akkumulátorblokkot
a vevőszolgálatunkhoz küldje el.
Az akkumulátorblokk hosszú élettartama érdekében
gondoskodjon arról, hogy az NC-akkublokk
feltöltése mindig időben megtörténjen. Ez minden
esetben szükséges, ha megállapítja, hogy az
akkumulátoros csavarbehajtó teljesítménye
csökken.
Sohase süsse ki az akkumulátorblokkot teljesen. Ez
az NC-akkublokk meghibásodásához vezet!
Forgatónyomaték-beállítás (1)
Az akkumulátoros csavarbehajtó egy 17 fokozatú
forgatónyomaték beállítóval van felszerelve. Egy
bizonyos csavarméret forgatónyomatékát az
állítógyűrűn (1) lehet beállítani. A forgatónyomatékot
az alábbi tényezők befolyásolják:
앬a megmunkálandó anyag fajtája és keménysége,
앬az alkalmazott csavar fajtája és hossza,
앬a csavarkötéssel szemben állított
követelmények.
A forgatónyomaték elérését a kuplung recsegő
kiugrása jelzi.
Figyelem! A forgatónyomatékot állító gyűrűt csak
a készülék kikapcsolt állapotában állítsa.
Fúrás
A fúráshoz állítsa az állítógyűrűt a az utolsó
fokozatra („fúrás”). A fúrásfokozatban a
csúszókuplung üzemen kívül van. A fúrásnál a
legnagyobb forgatónyomaték áll rendelkezésre.
1. / 2. Fokozat átkapcsolás
Az átkapcsoló állásától függően dolgozhat egy
magasabb vagy alacsonyabb fordulatszámmal. A
hajtómű megsérülésének elkerülése érdekében a
fokozatátkapcsolást csak a készülék kikapcsolt
állapotában végezze.
Forgásirány-kapcsoló (3)
A BE-/KI-kapcsoló fölötti tolókapcsolóval lehet az
akkumulátoros csavarozó forgásirányát beállítani és
a készüléket a nem szándékos bekapcsolás ellen
biztosítani. A forgásirányt be lehet jobbos vagy
balos forgásirányra állítani. A hajtómű sérülésének
H
Anleitung PS-AS 18-1H_SPK1 20.08.2005 9:17 Uhr Seite 20
Table of contents
Languages:
Other EINHELL PROFI Power Tools manuals


