manuals.online logo
Brands
  1. Home
  2. •
  3. Brands
  4. •
  5. Electrolux
  6. •
  7. Dishwasher
  8. •
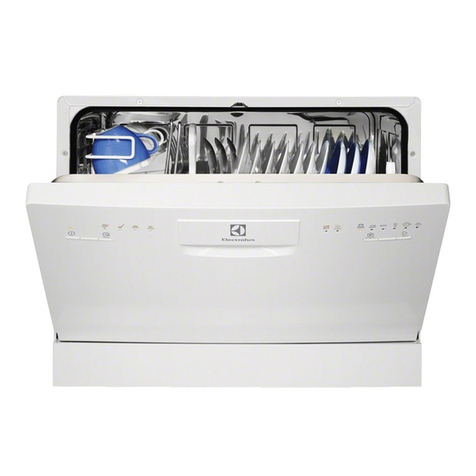
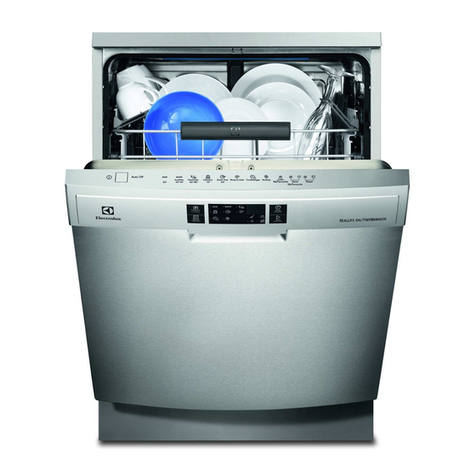
  9. Electrolux EDW 1600 User manual

Electrolux EDW 1600 User manual

© ELECTROLUX HOME PRODUCTS
Consumer Service - EMEA
Quality & Continuous Improvement - Technical Support
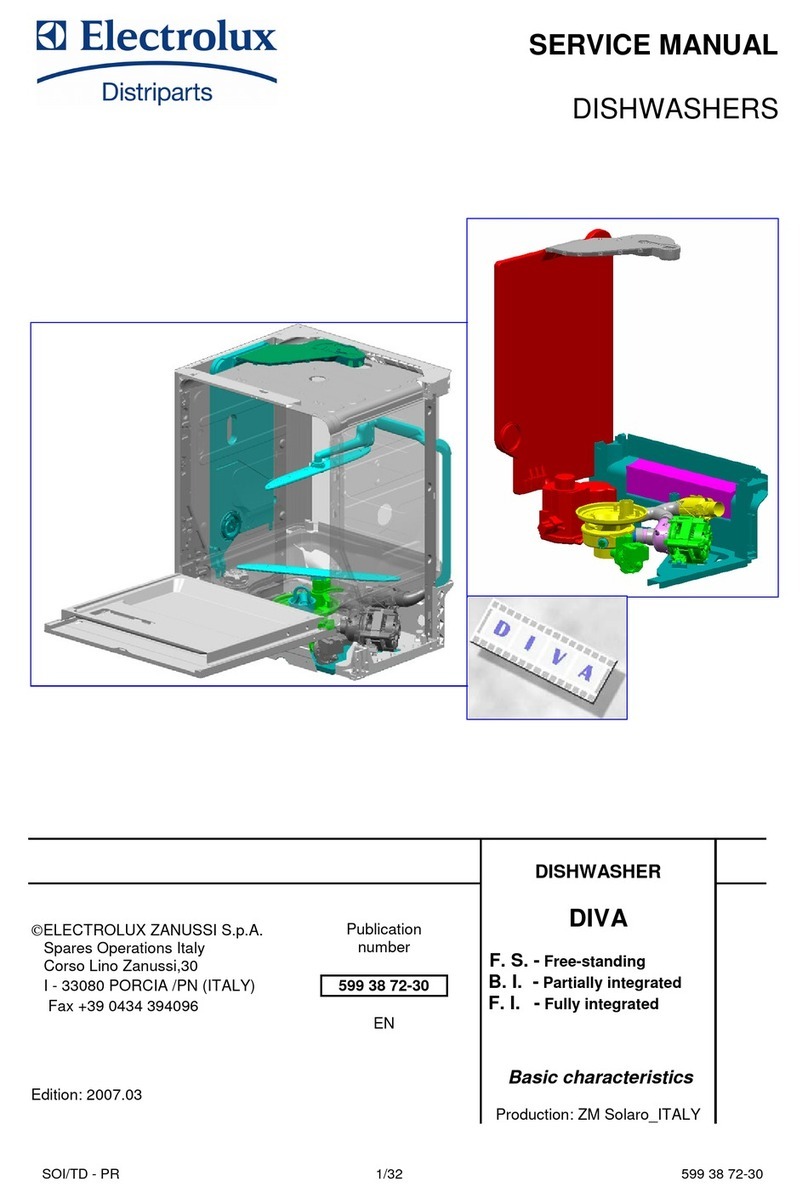
SERVICE MANUAL
DISHWASHERS
FOR INTERNAL AND PARTNERS USE ONLY
For internal and partners use only.
EN
Publication number
599 79 76 – 54
Edition: 12/2017 - Rev. 2
Dishwashers with electronic control system
SERVICE MODE & ALARM CODES
• EDW 1600 • EDW 1850
• EDW 1950 • EDW 2200
• EDW 3510 • EDW 4010
599 79 76 - 54 Rev 2
Introduction & Purpose
Chapter
1
CONTENTS:
Introduction & Purpose Chapter 1
User Interface – Introduction Chapter 2
EDW 1600 Chapter 3.1
EDW 1850 Chapter 3.2
EDW 1950 Chapter 3.3
EDW 2200 Chapter 3.4
EDW 3510 Chapter 3.5
EDW 4010 Chapter 3.6
Alarm Codes Chapter 4
Purpose:
Purpose of this document is to give a description of the error codes of the
DIVA2 electronics of the EDW1xxx-2G and EDW1xxx-2G-ADO as well as
the Global hydraulic electronics power board electronic family.
Abbreviations, Acronyms and Definitions
RTA Remaining time adaptation
MCF Machine Configuration File
NTC
PB100
DIVA2
MCB
ADO
Negative Temperature Coefficient resistor
New platform for dual BLDC machines (Global hydraulic)
Platform with single BLDC control in separate unit (MCB)
Motor Control Board (DIVA2)
Auto Door Opener
Document Revisions
Revision Date Description Author
V0.0 10/2015 Document creation Rui Almeida
V1.0 05/2017 New codes iB1 – iB4
introduced. ‘B’ displayed as
‘H’. Full error code shown to
user
Rui Almeida
V2.0 11/2017 Correction description of iF0.
Added new error codes for
ETB in i6x family
Rui Almeida
Electrical appliances must be serviced only
by qualified Service Engineers.
Always remove the plug from the power
socket before touching internal components.
599 79 76 - 54 Rev 2
User interface – Introduction
Technical Support – A.R. Chapter 2
User Interface – Modes and Function description
Reset
“Reset” is a special kind of User Operation to stop or deselect a
running program. In Dorothea range, when this function is
performed, the appliance will be in Startup mode with ECO program
and its default option selected.
Reset can be performed in any state except the Startup mode.
Reset is done by pressing the reset key combination for at least 2
seconds or press the specific button dedicated to this function by
the custom software.
The Reset key combination or specific Reset key is clearly indicated
on the control panel as ‘Reset’ or ‘Cancel’.
User Mode
The full function User Mode includes:
•Water Hardness Setting
•Rinse Aid Level Setting
•End of Cycle Buzzer Setting
•Display on Floor Display Colour Setting
•ADO Setting
According to hardware configuration of the dishwasher and
marketing requirement, User Mode in individual models can be a
subset of above functions.
The User Mode functions are not described in this Service Manual
since they are available on the User Manual.
Service Mode
The full function Service Mode includes:
•Fault Memory Reading
•Actuator Test
•LEDTest
•Functional Test cycle
•Enable/disable Extra Rinse
•Enable/disable Pulse Wash
•LCD brightness setting
•LCD contrast setting
According to hardware configuration of the dishwasher and
marketing requirement, Service Mode in individual models can be a
subset of above functions.
All the Service Mode functions are described on this user Service
Manual.
599 79 76 - 54 Rev 2
User interface – Introduction
Technical Support – A.R. Chapter 2
Service Mode – Function description
Alarm Reading and Actuator Test
After accessed Service mode to get the saved alarms and test
actuators.
Details of alarm code displaying are in later Alarm Code section.
LED Test / Delete Alarm Memory
To test the LEDS and erase alarm codes from memory.
Functional Test Cycle
Run a test cycle. It runs as a normal wash cycle. It can be cancelled
or run to its end.
Enable/disable Extra Rinse
An additional cold rinse phase can be added to the cycles to
improve wash performance. In factory (default) settings, this is
disabled.
Use this function to enable or disable the Extra Rinse.
Enable/disable Pulse Wash
Pulse Wash can be disabled from the cycles to improve wash
performance. In factory (default) settings, this is enabled.
Use this function to disable or enable Pulse Wash.
599 79 76 - 54 Rev 2
EDW1600
Technical Support – A.R. Chapter
3.1
EDW 1600
Styling Overview
Location of LEDs and Push Buttons
Reset
Press buttons S1+S2 simultaneously for at least 2 seconds to
perform Reset function.
Access Service Mode
The Service Mode can only be accessed after the Reset function
has been carried out and the appliance is switched off.
Press and hold button S1+S2 simultaneously while turn the
appliance on, keep holding the buttons for 4 seconds.
L1, L2 and L3 blink to indicate that Service mode is accessed.
S1
S2
S3
S4
L1
L2
L3
L4
599 79 76 - 54 Rev 2
EDW1600
Technical Support – A.R. Chapter 3.1
Alarm Reading and Actuator Test
After accessed Service mode (L1, L2 and L3 blinking):
1. Press button S1 to show the first alarm code.
L1 blinks to indicate the machine is in Alarm Reading.
The first alarm code saved is shown in the display. Please
see later Alarm Codes section.
2. Press button S1 again to show the second alarm code.
3. Press button S1 once more to show the third alarm code.
4. Press button S1 the fourth time to move to Actuator Test. Press
button S1 repeatedly will sequentially turn on one actuator at a
time.
L1 is turned off. L2 blinks to indicate the machine is in
Actuator Test.
The actuator number is shown in the display, see the
following table for details.
Nu ber of
S1 Pressed
Actuator
Nu ber in
Display
Actuator Co ent
4 4 Regeneration Valve
5 5 Drain Pump
6 6 Inlet Valve
Off hen ater level
reached
7 7 Heater
On only if ater level
reached
8 8 Wash Pump
9 9 Dispenser
10 10 Dry Fan
5. Press button S1 when actuator number 10 is activated, the
machine will cycle back to Alarm reading and show the first
alarm code saved.
6. Switching off the appliance will exit Service mode.
LED Test / Delete Alarm Memory
After accessed Service mode (L1, L2 and L3 blinking):
1. Press button S2 to start this function.
All used LEDS and display (show “8:88”) blinks 5 second on
1 second off.
If a buzzer is equipped, it beeps for 5 seconds.
The alarm codes saved in memory are erased.
2. Switching off the appliance will exit Service mode.
599 79 76 - 54 Rev 2
EDW1600
Technical Support – A.R. Chapter 3.1
Functional Test Cycle
After accessed Service mode (L1, L2 and L3 blinking):
1. Press button S3 to start the test cycle. The cycle will not start if
door is opened.
L3 blinks for the duration of the test cycle.
Display shows the remaining time of test cycle.
The test cycle runs as a normal wash cycle. It can be
cancelled or run to its end.
Enable/disable Extra Rinse
After accessed Service mode (L1, L2 and L3 blinking):
1. Press button S1+S2 to enter this function.
L1 blinks indicating it is in Extra Rinse setting mode.
Display show the current setting of Extra Rinse. “0E” for
disabled, “1E” for enabled.
2. Press button S1 to change the setting.
3. Switching off the appliance will exit Service mode.
Enable/disable Pulse Wash
After accessed Service mode (L1, L2 and L3 blinking):
1. Press button S2+S3 to enter this function.
L2 blinks indicating it is in Pulse Wash setting mode.
Display show the current setting of Pulse Wash. “0P” for
disabled, “1P” for enabled
2. Press button S2 to change the setting
3. Switching off the appliance will exit Service mode.
599 79 76 - 54 Rev 2
EDW1850
Technical Support – A.R. Chapter
3.2
EDW 1850
Styling Overview
Location of LEDs and Push Buttons
Reset
Press buttons S3+S4 simultaneously for at least 2 seconds to
perform Reset function.
Access Service Mode
The Service Mode can only be accessed after the Reset function
has been carried out and the appliance is switched off.
Press and hold button S1+S2 simultaneously while turn the
appliance on, keep holding the buttons for 4 seconds.
S1
S3
S2
S4
L4
599 79 76 - 54 Rev 2
EDW1850
Technical Support – A.R.
Chapter
3.2
L1, L2 and L3 blink to indicate that Service mode is accessed.
Alarm Reading and Actuator Test
After accessed Service mode (L1, L2 and L3 blinking):
1. Press button S1 to show the first alarm code.
L1 blinks to indicate the machine is in Alarm Reading.
The first alarm code saved is shown in the display.
Please see later Alarm Codes section.
2. Press button S1 again to show the second alarm code.
3. Press button S1 once more to show the third alarm code.
4. Press button S1 the fourth time to move to Actuator Test. Press
button S1 repeatedly will sequentially turn on one actuator at a
time.
L1 is turned off. L2 blinks to indicate the machine is in
Actuator Test.
The actuator number is shown in the display, see the
following table for details.
Nu ber of
S1 Pressed
Actuator
Nu ber in
Display
Actuator Co ent
4 4 Regeneration Valve
5 5 Drain Pump
6 6 Inlet Valve
Off hen ater
level
reached
7 7 Heater
On only if ater level
reached
8 8 Wash Pump
9 9 Dispenser
10 10 Dry Fan
5. Press button S1 when actuator number 10 is activated, the
machine will cycle back to Alarm reading and show the first
alarm code saved.
6. Switching off the appliance will exit Service mode.
LED Test / Delete Alarm Memory
After accessed Service mode (L1, L2 and L3 blinking):
1. Press button S2 to start this function.
All used LEDS and display (show “8:88”) blinks 5 second on
1 second off.
If a buzzer is equipped, it beeps for 5 seconds.
The alarm codes saved in memory are erased.
2. Switching off the appliance will exit Service mode.
599 79 76 - 54 Rev 2
EDW1850
Technical Support – A.R. Chapter 3.2
Functional Test Cycle
After accessed Service mode (L1, L2 and L3 blinking):
1. Press button S3 to start the test cycle. The cycle will not start if
door is opened.
L3 blinks for the duration of the test cycle.
Display shows the remaining time of test cycle.
The test cycle runs as a normal wash cycle. It can be
cancelled or run to its end.
Enable/disable Extra Rinse
After accessed Service mode (L1, L2 and L3 blinking):
1. Press button S1+S2 to enter this function.
L1 blinks indicating it is in Extra Rinse setting mode.
Display show the current setting of Extra Rinse. “0E” for
disabled, “1E” for enabled.
2. Press button S1 to change the setting.
3. Switching off the appliance will exit Service mode.
Enable/disable Pulse Wash
After accessed Service mode (L1, L2 and L3 blinking):
1. Press button S2+S3 to enter this function.
L2 blinks indicating it is in Pulse Wash setting mode.
Display show the current setting of Pulse Wash. “0P” for
disabled, “1P” for enabled
2. Press button S2 to change the setting
3. Switching off the appliance will exit Service mode.
599 79 76 - 54 Rev 2
EDW1950
Technical Support – A.R. Chapter
3.3
EDW 1950
Styling Overview
Location of LEDs,
Location of LEDs and Push Buttons
Reset
Press buttons S3+S4 simultaneously for at least 2 seconds to
perform Reset function.
Access Service Mode
The Service Mode can only be accessed after the Reset function
has been carried out and the appliance is switched off.
EDW1950 is a touch key model. After Reset and off/on, press
button S1+S2 simultaneously for at least 4 seconds to access
Service Mode.
L1, L2 and L3 blink to indicate that Service mode is accessed.
S1
S3
S2
S4
L1
L2
L3
L4
599 79 76 - 54 Rev 2
EDW1950
Technical Support – A.R.
Chapter
3.3
Alarm Reading and Actuator Test
After accessed Service mode (L1, L2 and L3 blinking):
1. Press button S1 to show the first alarm code.
L1 blinks to indicate the machine is in Alarm Reading.
The first alarm code saved is shown in the display.
Please see later Alarm Codes section.
2. Press button S1 again to show the second alarm code.
3. Press button S1 once more to show the third alarm code.
4. Press button S1 the fourth time to move to Actuator Test. Press
button S1 repeatedly will sequentially turn on one actuator at a
time.
L1 is turned off. L2 blinks to indicate the machine is in
Actuator Test.
The actuator number is shown in the display, see the
following table for details.
Nu ber of
S1 Pressed
Actuator
Nu ber in
Display
Actuator Co ent
4 4 Regeneration Valve
5 5 Drain Pump
6 6 Inlet Valve
Off hen ater
level
reached
7 7 Heater
On only if ater level
reached
8 8 Wash Pump
9 9 Dispenser
10 10 Dry Fan
5. Press button S1 when actuator number 10 is activated, the
machine will cycle back to Alarm reading and show the first
alarm code saved.
6. Switching off the appliance will exit Service mode.
LED Test / Delete Alarm Memory
After accessed Service mode (L1, L2 and L3 blinking):
1. Press button S2 to start this function.
All used LEDS and display (show “8:88”) blinks 5 second on
1 second off.
If a buzzer is equipped, it beeps for 5 seconds.
The alarm codes saved in memory are erased.
2. Switching off the appliance will exit Service mode.
599 79 76 - 54 Rev 2
EDW1950
Technical Support – A.R. Chapter 3.3
Functional Test Cycle
After accessed Service mode (L1, L2 and L3 blinking):
1. Press button S3 to start the test cycle. The cycle will not start if
door is opened.
L3 blinks for the duration of the test cycle.
Display shows the remaining time of test cycle.
The test cycle runs as a normal wash cycle. It can be
cancelled or run to its end.
Enable/disable Extra Rinse
After accessed Service mode (L1, L2 and L3 blinking):
1. Press button S1+S2 to enter this function.
L1 blinks indicating it is in Extra Rinse setting mode.
Display show the current setting of Extra Rinse. “0E” for
disabled, “1E” for enabled.
2. Press button S1 to change the setting.
3. Switching off the appliance will exit Service mode.
Enable/disable Pulse Wash
After accessed Service mode (L1, L2 and L3 blinking):
1. Press button S2+S3 to enter this function.
L2 blinks indicating it is in Pulse Wash setting mode.
Display show the current setting of Pulse Wash. “0P” for
disabled, “1P” for enabled
2. Press button S2 to change the setting
3. Switching off the appliance will exit Service mode.
599 79 76 - 54 Rev 2
EDW2200
Technical Support – A.R. Chapter
3.4
EDW 2200
Styling Overview
Location of LEDs and Push Buttons
Reset
Press the S3 which is dedicated to this function.
Access Service Mode
The Service Mode can only be accessed after the Reset function
has been carried out and the appliance is switched off.
EDW2200 is a touch key model. After Reset an off/on, press button
S2+S4 simultaneously for at least 4 seconds to access Service
Mode.
L1, L2 and L3 blink to indicate that Service mode is accessed.
S8
S1
S2
S5
S6
S3
S4
S7
L4
599 79 76 - 54 Rev 2
EDW2200
Technical Support – A.R. Chapter 3.4
Alarm Reading and Actuator Test
After accessed Service mode (L1, L2 and L3 blinking):
1. Press button S2 to show the first alarm code.
L1 blinks to indicate the machine is in Alarm Reading.
The first alarm code saved is shown in the display.
Please see later Alarm Codes section.
2. Press button S2 again to show the second alarm code.
3. Press button S2 once more to show the third alarm code.
4. Press button S2 the fourth time to move to Actuator Test. Press
button S2 repeatedly will sequentially turn on one actuator at a
time.
L1 is turned off. L2 blinks to indicate the machine is in
Actuator Test.
The actuator number is shown in the display, see the
following table for details.
Nu ber of
S1 Pressed
Actuator
Nu ber in
Display
Actuator Co ent
4 4 Regeneration Valve
5 5 Drain Pump
6 6 Inlet Valve
ff when water level
reached
7 7 Heater
n only if water level
reached
8 8 Wash Pump
9 9 Dispenser
10 10 Dry Fan
5. Press button S2 when actuator number 10 is activated, the
machine will cycle back to Alarm reading and show the first
alarm code saved.
6. Switching off the appliance will exit Service mode.
LED Test / Delete Alarm Memory
After accessed Service mode (L1, L2 and L3 blinking):
1. Press button S4 to start this function.
All used LEDS and display (show “8:88”) blinks 5 second on
1 second off.
If a buzzer is equipped, it beeps for 5 seconds.
The alarm codes saved in memory are erased.
2. Switching off the appliance will exit Service mode.
599 79 76 - 54 Rev 2
EDW2200
Technical Support – A.R. Chapter 3.4
Functional Test Cycle
After accessed Service mode (L1, L2 and L3 blinking):
1. Press button S5 to start the test cycle. The cycle will not start if
door is opened.
L3 blinks for the duration of the test cycle.
Display shows the remaining time of test cycle.
The test cycle runs as a normal wash cycle. It can be
cancelled or run to its end.
Enable/disable Extra Rinse
After accessed Service mode (L1, L2 and L3 blinking):
1. Press button S2+S4 to enter this function.
L1 blinks indicating it is in Extra Rinse setting mode.
Display show the current setting of Extra Rinse. “0E” for
disabled, “1E” for enabled.
2. Press button S2 to change the setting.
3. Switching off the appliance will exit Service mode.
Enable/disable Pulse Wash
After accessed Service mode (L1, L2 and L3 blinking):
1. Press button S4+S5 to enter this function.
L2 blinks indicating it is in Pulse Wash setting mode.
Display show the current setting of Pulse Wash. “0P” for
disabled, “1P” for enabled
2. Press button S4 to change the setting
3. Switching off the appliance will exit Service mode.
599 79 76 - 54 Rev 2
EDW3510
Technical Support – A.R. Chapter
3.5
EDW 3510
Styling Overview
Location of LEDs and Push Buttons
Reset
Press the Program Key for at least 2 seconds, and then follow the
instructions on the screen to perform Reset function.
Access Service Mode
EDW3510 is a touch key model. After Reset an off/on, press button
S2+S4 simultaneously for at least 4 seconds to access Service
Mode.
After accessing Service mode, using the navigation buttons to
select the desired service function shown in screen and using “OK”
button to enter the selected function, then follow the instruction in
the screen to perform the functions.
Follow the instruction in the screen or switching off the appliance to
save the new setting and exit Service mode.
S1
S3
S2
S5
S6
S4
S7
S8
599 79 76 - 54 Rev 2
EDW4010
Technical Support – A.R. Chapter
3.6
EDW 4010
Styling Overview
Location of LEDs and Push Buttons
Reset
Press the Program Key for at least 2 seconds, and then follow the
instructions on the screen to perform Reset function.
Access Service Mode
EDW4010 is a touch key model. After Reset an off/on, press button
S5+S7 simultaneously for at least 4 seconds to access Service
Mode.
After accessing Service mode, using the navigation buttons to
select the desired service function shown in screen and using “OK”
button to enter the selected function, then follow the instruction in
the screen to perform the functions.
Follow the instruction in the screen or switching off the appliance to
save the new setting and exit Service mode.
S1
S3
S2
S5
S6
S4
S7
S8
599 79 76 - 54 Rev 2
Alarm Codes
Technical Support – A.R. Chapter 4
Alarm management
Alarm codes are defined in families of alarms and current
alarms, displayed as
iXY
•i = alarm indication
•X = family of the alarm
•Y = Current alarm
Caution:
Only the alarm family codes are displayed to the user in old
production. Full alarm codes are shown to user now.
The complete alarm code will be stored among the three alarms
that can be stored by the appliance.
A new alarm code is only stored if it differs from the last one
stored.
The three most recent alarm codes can be displayed only in
Service Mode or using the Sidekick tool.
Appliances without a display will show the alarms by a number
of flashes of the cycle end LED, such as in “DIVA”: i10=1 flash,
i50=5 flashes, iB0=11 flashes.
Alarm Code Description
• i00 Code family: Low mains voltage
The electronic board makes sure the dishwasher operates within certain
voltage limits. If during a cycle the voltage drops below the lowest limit, the
electronic board suspends all loads and interrupts the cycle under way.
The “i00” alarm is then triggered.
• The lowest main voltage threshold is 180 Volt.
• If the voltage goes back to over 186 Volt, the electronic board cancels the
error status and the cycle resumes. The “i00” alarm is also deleted.
• If the mains voltage continues to exceed the maximum threshold, the
electronic board does not do anything.
IMPORTANT: the “i00” alarm is not stored and cannot therefore
be read in Service Mode.
• i10 Code - family : Water Tap Closed
i10 code: during static filling
This alarm code is used to display problems with the water inlet tap being
closed at the beginning of the program. It is set up to detect problems
during the static water filling. A drain phase is performed before the error is
displayed to the user.
• Acoustic signal and visual alarm, depending on the appliance
customization; the program can be restarted.
• The water level defined is not reached within the time limit set.
• The time limit set starts when the fill solenoid valve is opened.
• The time limit set is reset when the fill solenoid valve is closed.
• The water will first be drained before an error is displayed to the user.
• Time limit set: Normal 90 sec; Test cycle = 30 sec (times could differ as
they are defined in the MCF)
599 79 76 - 54 Rev 2
Alarm Codes
Technical Support – A.R. Chapter 4
i11 code: during dynamic filling
• Acoustic signal and visual alarm, depending on the appliance
customization; the program can be restarted.
• The water level defined is not reached within the time limit set.
• The time limit set starts when the fill solenoid valve is opened.
• The time limit set is reset when the fill solenoid valve is closed.
• The water will first be drained before an error is displayed to the user.
• Time limit set: Normal 120 sec; Test cycle = 60 sec (times could differ as
they are defined in the washing cycle specifications)
•i20 Code - family : Draining Problem
•i20 code : Fails to drain
• Acoustic signal and visual alarm, depending on the appliance
customization; the program can be restarted.
• The level switch restore point is not reached within the time limit set.
• The time limit set starts when the drain pump is activated.
• The time limit set is reset when the drain pump stops normally.
• Time limit set: Normal 90 sec; Test cycle = 60 sec
•i30 Codes - family : Aqua Control
•i30 code: aqua control error detected
• The error is set if there is water detected in the bottom tray, or the drain
pump is disconnected or the winding in the pump is open circuit.
• Acoustic signal and visual alarm, depending on the appliance
customization; the program is restarted automatically in this alarm
condition.
• If this alarm condition occurs, the drain pump is activated.
• Time limit set: 10 sec.
•i40 Codes - family : Analogue pressure sensor
problem
•i41 code: No pressure sensor signal
• The error is set if the sensor signal is lost for more than 2,5s.
• Abort program and display error.
•i42 code: Calibration invalid, pressure signal too noisy
• The warning is set if the sensor signal is not stable enough for calibration
or if the signal is out of range for an empty sump.
• The signal noise level for calibration is defined in MCF.
•i43 code: Pressure sensor signal too high
• The error is set if the sensor signal is out of range, signal high for more
than 2,5 s.
• The signal range is defined in MCF.
• Abort program and display error.
•i44 code: Pressure sensor signal too low
• The error is set if the sensor signal is out of range, signal low for more than
2,5 s.
• The signal range is defined in MCF.
• Abort program and display error.
•i45 code: Calibration invalid, pressure signal too low
• The warning is set if the sensor signal is out of range for an empty dw,
signal low.
• The signal range for calibration is defined in MCF.
599 79 76 - 54 Rev 2

Other manuals for EDW 1600

1

This manual suits for next models

5

Other Electrolux Dishwasher manuals

Electrolux ESI 64010 User manual

Electrolux

Electrolux ESI 64010 User manual

Electrolux FAVORIT 88421 VI User manual

Electrolux

Electrolux FAVORIT 88421 VI User manual

Electrolux FAVORIT 55090I User manual

Electrolux

Electrolux FAVORIT 55090I User manual

Electrolux ESI 4120 User manual

Electrolux

Electrolux ESI 4120 User manual

Electrolux ESF 8530ROW User manual

Electrolux

Electrolux ESF 8530ROW User manual

Electrolux Green&Clean EUCAI60 User manual

Electrolux

Electrolux Green&Clean EUCAI60 User manual

Electrolux EIDW6105GS - Fully Integrated Dishwasher User guide

Electrolux

Electrolux EIDW6105GS - Fully Integrated Dishwasher User guide

Electrolux ESF 6800ROW User manual

Electrolux

Electrolux ESF 6800ROW User manual

Electrolux Dishwasher ESL 46510 User manual

Electrolux

Electrolux Dishwasher ESL 46510 User manual

Electrolux ESF 2200 DW User manual

Electrolux

Electrolux ESF 2200 DW User manual
Electrolux ESI64060 User manual

Electrolux

Electrolux ESI64060 User manual

Electrolux EPPWA060 User manual

Electrolux

Electrolux EPPWA060 User manual

Electrolux ESF65054 User manual

Electrolux

Electrolux ESF65054 User manual

Electrolux ESC87310UW User manual

Electrolux

Electrolux ESC87310UW User manual

Electrolux ESL 4115 User manual

Electrolux

Electrolux ESL 4115 User manual

Electrolux GA60SLVS User manual

Electrolux

Electrolux GA60SLVS User manual

Electrolux EX401ISB User manual

Electrolux

Electrolux EX401ISB User manual

Electrolux GA556IFWE User manual

Electrolux

Electrolux GA556IFWE User manual

Electrolux EEQ47215L User manual

Electrolux

Electrolux EEQ47215L User manual

Electrolux GLDB957JB User manual

Electrolux

Electrolux GLDB957JB User manual

Electrolux EEM69410L User manual

Electrolux

Electrolux EEM69410L User manual

Electrolux GA55SLV220 User manual

Electrolux

Electrolux GA55SLV220 User manual

Electrolux ESF 43020 User manual

Electrolux

Electrolux ESF 43020 User manual

Electrolux ESL 7220RO User manual

Electrolux

Electrolux ESL 7220RO User manual

Popular Dishwasher manuals by other brands

V-ZUG Adora 55 S GS55Si operating instructions

V-ZUG

V-ZUG Adora 55 S GS55Si operating instructions

Porter&Charles DWVSS Detailed Planning Dimensions

Porter&Charles

Porter&Charles DWVSS Detailed Planning Dimensions

Favor.it SI60-I14N user manual

Favor.it

Favor.it SI60-I14N user manual

Moyerdiebel 201HT Specifications

Moyerdiebel

Moyerdiebel 201HT Specifications

Magic Chef CDB4000 Use & care guide

Magic Chef

Magic Chef CDB4000 Use & care guide

Magic Chef CDB4000 Use & care guide

Magic Chef

Magic Chef CDB4000 Use & care guide

Whirlpool DU1099XT1 Use & care guide

Whirlpool

Whirlpool DU1099XT1 Use & care guide

AEG OKO FAVORIT 3420 operating instructions

AEG

AEG OKO FAVORIT 3420 operating instructions

V-ZUG Adora 55 N operating instructions

V-ZUG

V-ZUG Adora 55 N operating instructions

Gaggenau DF480100F Quick reference guide

Gaggenau

Gaggenau DF480100F Quick reference guide

Nordmende E-CLV6540X user manual

Nordmende

Nordmende E-CLV6540X user manual

AEG OKO Favorit 875 Electronic operating instructions

AEG

AEG OKO Favorit 875 Electronic operating instructions

ASBER EASY EASY-500 manual

ASBER

ASBER EASY EASY-500 manual

Solt GGSDW6012B quick start guide

Solt

Solt GGSDW6012B quick start guide

Candy CDP 2D36W User instructions

Candy

Candy CDP 2D36W User instructions

Whirlpool ADP 522 operating instructions

Whirlpool

Whirlpool ADP 522 operating instructions

Jackson AJ-44 Installation, operation and service manual

Jackson

Jackson AJ-44 Installation, operation and service manual

Kenmore 15701 Use & care guide

Kenmore

Kenmore 15701 Use & care guide

manuals.online logo
manuals.online logoBrands
  • About & Mission
  • Contact us
  • Privacy Policy
  • Terms and Conditions

Copyright 2025 Manuals.Online. All Rights Reserved.