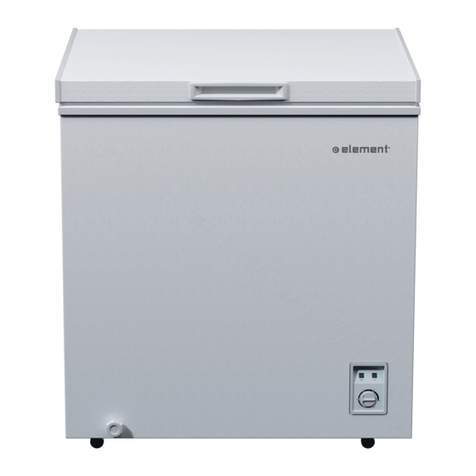
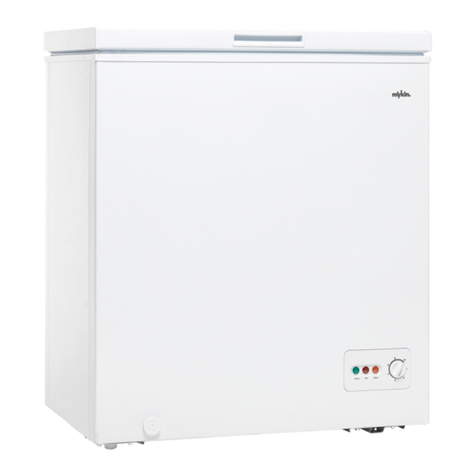
Element EACF05000W User manual

Please read all the instructions carefully before using this product, and keep the manual for future reference.
USER MANUAL
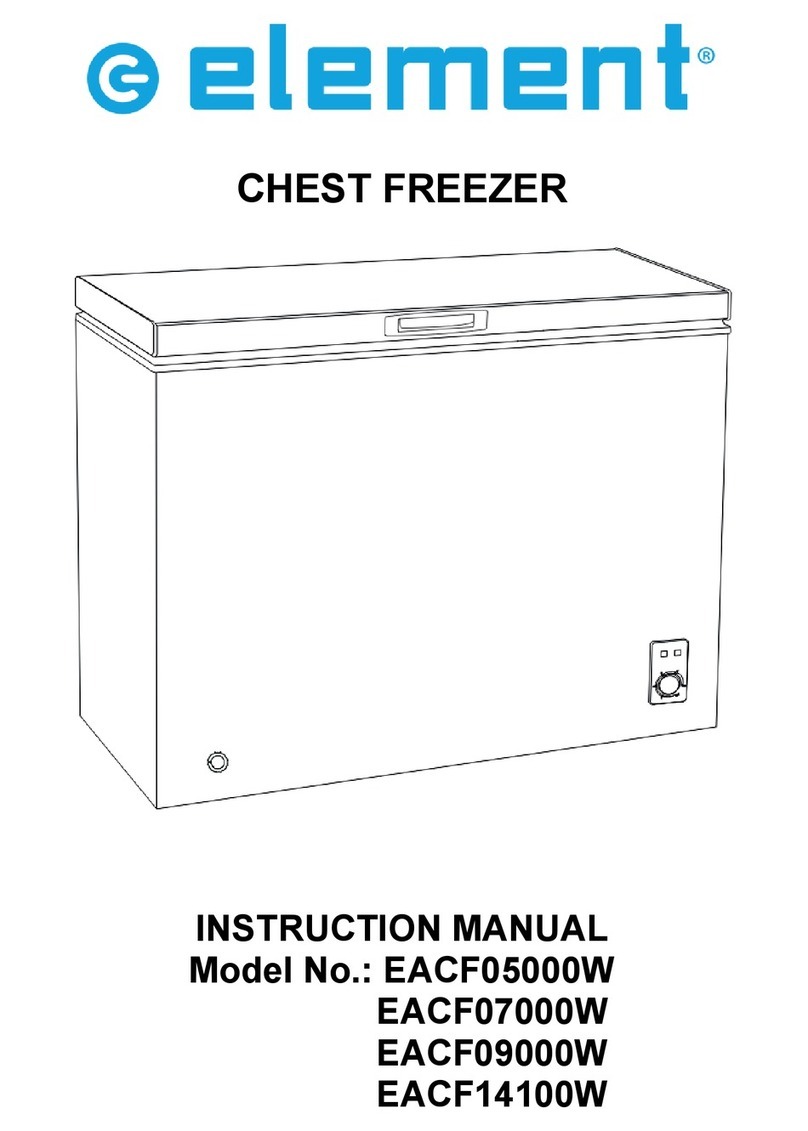
CHEST FREEZER
EACF05000W | EACF07000W | EACF09000W | EACF14100W
Product may vary. Please refer to the actual product.

CONTENTS
REGISTER YOUR FREEZER .................................................................................................................................................. 3
GETTING TO KNOW YOUR FREEZER.................................................................................................................................. 4
WHAT IS INCLUDED?....................................................................................................................................................................... 4
FRONT VIEW.................................................................................................................................................................................... 5
CONTROL PANEL ............................................................................................................................................................................. 5
SETTING UP YOUR FREEZER .............................................................................................................................................. 6
POSITIONING YOUR FREEZER.......................................................................................................................................................... 6
TURNING ON YOUR FREEZER .......................................................................................................................................................... 6
USING YOUR FREEZER ....................................................................................................................................................... 7
TEMPERATURE ADJUSTMENT ......................................................................................................................................................... 7
INDICATOR LIGHTS.......................................................................................................................................................................... 7
STORING FROZEN FOOD ................................................................................................................................................................. 7
FREEZING FRESH FOOD ................................................................................................................................................................... 7
MAINTAINING YOUR FREEZER .......................................................................................................................................... 7
DEFROSTING ................................................................................................................................................................................... 8
REPLACING THE LIGHT BULB (14 CU. FT. MODEL ONLY)................................................................................................................ 9
CLEANING AND CARE ...................................................................................................................................................................... 9
LONG-TERM STORAGE .................................................................................................................................................................... 9
IMPORTANT SAFETY INSTRUCTIONS............................................................................................................................... 10
SPECIFICATIONS .............................................................................................................................................................. 13
TROUBLESHOOTING........................................................................................................................................................ 14
CUSTOMER SUPPORT...................................................................................................................................................... 14
LEGAL NOTICES ............................................................................................................................................................... 15
WARRANTY...................................................................................................................................................................... 15

CHEST FREEZER – USER MANUAL
3
REGISTER YOUR FREEZER
Thank you for purchasing an Element Chest Freezer. If you have questions about your chest freezer, our customer support team
is ready to help:
•Online chat: www.elementelectronics.com
•Phone: 1 (888) 842-3577
•Email: [email protected]m
To register your freezer, go to https://elementelectronics.com/registration/, fill out the Product Registration form, and upload a
picture of you receipt. Your serial number is located on the barcode label on the side of your freezer.
Use the space below to record information about your freezer and keep your original purchase receipt for future reference.
You’ll need this information to receive warranty service.
CHEST FREEZER
Model Number: _____________________________________________
Serial Number: ______________________________________________
(located on the barcode label on the side of your freezer)
Date of Purchase: ____________________________________________
Keep this information and
your original purchase receipt
to receive warranty service.

4
GETTING TO KNOW YOUR FREEZER
WHAT IS INCLUDED?
•Chest freezer
•Removable basket(s)
•Rubber stopper
•Door key (9 cu. ft. and 14 cu. ft. models only)
•User Manual

CHEST FREEZER – USER MANUAL
5
FRONT VIEW
CONTROL PANEL
Door
Handle
Cabinet
Power cord
Control panel
Drain outlet
Power indicator light
(red)
Compressor indicator
light (green)
Temperature adjustment knob

6
SETTING UP YOUR FREEZER
Before using your freezer for the first time:
1. Position your freezer correctly. See “Positioning your
freezer” on page 6.
2. Clean the interior as recommended under "Cleaning and
care" on page 8. Make sure that the interior is dry
before use.
3. Insert the rubber stopper into the drain outlet in the
freezer compartment.
4. Place the basket in the freezer.
5. See “Turning on your freezer” on page 6to start up the
freezer.
POSITIONING YOUR FREEZER
•Avoid placing the freezer near heat sources.
Cookers, radiators, or direct sunlight can cause the
compressor to run for long periods. If you must install
next to a heat source, maintain these minimum side
clearances:
oFrom cookers: 4 in. (10 cm)
oFrom radiators: 12 in. (30 cm)
oFrom refrigerators: 4 in. (10 cm)
•Make sure that there is space for air circulation.
You must have no less than 3.9 in. (10 cm) of space
around the freezer (as shown).
•Place your freezer on a smooth, level surface.
To level the freezer, turn its feet to raise or lower them.
•Do not use the freezer outside.
•Protect your freezer from moisture.
oDo not place the freezer in a moist location to avoid
rusting metal parts.
oDo not spray water onto the freezer, as it will
weaken the insulation and cause leakage.
oIf the freezer is installed in an unheated area (such
as a garage), condensation may form on its outer
surfaces in cold weather. This is normal and is not a
fault. Remove the condensation by wiping with a
dry cloth.
TURNING ON YOUR FREEZER
1. Plug the freezer’s power cord into a power outlet. The
red indicator light turns on.
You may hear noises from the compressor starting or from
the liquid and gasses sealed in the refrigeration system.
This is normal.
2. Set the freezer’s temperature. “5” is the coldest
temperature and “1” is the warmest. See “Temperature
adjustment” on page 7 for more detailed information.
The green indicator light turns on and compressor starts
running.
3. Wait until the correct storage temperature has been
reached before placing food in the freezer.
•If there is a power failure, do not open the door.
Frozen food should not be affected if the failure lasts
for less than 20 hours. If the failure is longer, the food
should be checked and eaten immediately or cooked
and then refrozen.
•If the chest freezer door is difficult to open just after
you have closed it, don’t worry. This is due to the
pressure difference. After a few minutes, the pressure
will equalize, and the door will open normally.
4 in.
(10.2 cm)
4 in.
(10.2 cm)

CHEST FREEZER – USER MANUAL
7
USING YOUR FREEZER
Check your freezer contents regularly to make sure that
nothing has spoiled and that the freezer is operating
correctly.
Defrost food from the freezer thoroughly in a fridge or
microwave, following defrosting and cooking instructions.
CAUTION:
•Do not put liquid-filled bottles or carbonated drinks
into the freezer as they may burst.
•Do not store poisonous or dangerous substances in
the freezer. Your freezer has been designed for the
storage of edible foodstuffs only.
•Do not try to keep frozen food which has thawed. It
should be eaten within 24 hours or cooked and
refrozen.
TEMPERATURE ADJUSTMENT
The temperature of the freezer ranges from 10°F to -22°F
(-12°C to -30°C) and is changed with the adjustment knob on
the control panel. Temperatures can vary depending on
ambient temperature, frequency of door opening, and how
much food is in the freezer. The position of the temperature
knob (1, 2, 3, 4, 5) will change according to these factors -
the smaller the number, the higher the temperature.
We recommend that you check the temperature with a
thermometer to make sure that the freezer is at a desired
temperature.
Each time the door is opened, cold air escapes and the
internal temperature rises. Do not leave the door open:
close it immediately after food is put in or removed.
INDICATOR LIGHTS
The indicator lights on the front of the freezer mean the
following:
•Red light: shows that the freezer is supplied with power.
•Green light: shows that the compressor is working.
STORING FROZEN FOOD
Prepackaged commercially frozen food should be stored in
according to its manufacturer’s instructions. To ensure high
quality frozen food:
•Put food in the freezer as quickly as possible after
purchase.
•Do not use food past its “Use By” or “Best Before” dates
on the packaging.
•Store small items in the basket provided.
FREEZING FRESH FOOD
The quality of the food is best preserved when it is frozen
right through to the center as quickly as possible. To store
fresh food in the freezer:
•Clean fresh foods before freezing.
•Store foods in small portions to ensure rapid freezing.
Do not freeze too large a quantity at any one time.
•Store foods in aluminum foil or freezer-quality plastic
bags. Make sure excess air is removed.
•Place fresh food near the side walls. This helps it freeze
quickly.
•Keep fresh food away from food that is already frozen, if
possible.
•Let hot food cool down before placing it in the freezer.
MAINTAINING YOUR FREEZER
Temperature
adjustment knob

8
DEFROSTING
Defrost the freezer twice a year or when a 0.25 in. (7 mm)
frost layer has formed.
1. Six hours before the defrosting, set the thermostat knob
to “5” (max). This ensures that your food is at the lowest
temperature when you take it out. Wrap the food in
several layers of newspaper and store in a cool place
(for example, a refrigerator).
2. Turn off the freezer and unplug the power cord.
3. Open the freezer door (keep it open) and remove the
basket.
•Never use hairdryers, electrical heaters, or other
electrical appliances for defrosting.
•Do not use pointed or sharp-edged objects such as
knives or forks to remove the frost.
•To defrost more quickly, place buckets of warm water
inside the freezer.
4. Let the freezer defrost. Water will collect at the bottom
of the freezer.
5. When it’s done defrosting, drain the water from the
freezer compartment:
A. Remove the rubber stopper on the bottom of the
freezer.
B. Rotate the drain outlet cover on the front of the
freezer until the arrow points down, then pull it
out.
C. Drain the water into a bucket or drain. Make sure
that the freezer drains completely.
D. Replace the drain outlet cover and rotate it until
the arrow points up.
E. Replace the rubber stopper inside the freezer
compartment.
6. Clean the freezer compartment. See “Cleaning and care”
on page 8.
7. Dry the freezer compartment thoroughly.
8. Plug the freezer’s power cord into a power outlet and
set the temperature adjustment knob to “5.”
9. When the freezer is cold (about three hours), adjust the
temperature adjustment knob to a lower temperature
(if needed), and place your food back in the freezer.
Inside
freezer
Drain
outlet

CHEST FREEZER – USER MANUAL
9
REPLACING THE LIGHT BULB
(14 CU. FT. MODEL ONLY)
1. Remove the left and right screws on the door lamp box.
2. Remove the old light bulb and replace it with a new one.
3. Secure the lamp box back in place with screws.
CLEANING AND CARE
•Turn off the freezer and unplug the power cord before
cleaning.
•To clean the outside cabinet, use lukewarm water and
wipe it dry.
•To clean the interior compartment, use a damp cloth
wrung out in a solution of one teaspoon of baking soda
to one pint of water. Wipe it dry.
•Large accumulations of ice will impair the freezer’s
performance. Remove excess ice deposits regularly with
a plastic ice scraper (available at your local store).
•Check door seals regularly to ensure they are clean and
free from food particles.
•It is normal for water or frost to appear on the freezer
collar and door gaskets in the wet weather. This doesn’t
affect the normal use. If this occurs, regularly clean it
with a dry cloth.
WARNING:
•Never use any sharp abrasive instrument, soap,
household cleaner, detergent, or wax polish for
cleaning.
•Never use water to wash the compressor. Wipe it
with a dry cloth thoroughly after cleaning to prevent
rust.
•Avoid touching the metal condenser wires on the
back of the freezer while cleaning or carrying, as you
might injure your hands or damage the freezer.
LONG-TERM STORAGE
If the freezer is not going to be used for a long period of
time, turn it off, unplug it, remove all food, clean it, and
leave the door open to prevent mold.
This freezer is not designed for stacking with any other
appliance.
Store only in a vertical, upright position. If the freezer has
been transported or stored horizontally, see “Transportation
instructions” on page 12 for more information before using
your freezer.
WARNING: Supervise small children to ensure that they do
not climb inside the freezer.

10
IMPORTANT SAFETY INSTRUCTIONS
CAUTION
RISK OF ELECTRIC SHOCK
DO NOT OPEN
This symbol indicates that dangerous voltage
constituting a risk of electric shock is present
within your freezer.
This symbol indicates that there are important
operating and maintenance instructions in the
literature accompanying your freezer.
WARNING
1. Read and follow the instructions provided.
2. Keep these instructions for future reference.
3. Heed all warnings.
4. Do not use your freezer near water.
5. Clean only with a damp cloth.
6. Do not block any ventilation openings. Install in
accordance with the manufacturer’s instructions.
7. Do not install near any heat sources, such as radiators,
heat registers, stoves, or other apparatus (including
amplifiers) that produce heat.
8. Do not defeat the safety purpose of the polarized or
grounding-type plug. A polarized plug has two blades
with one wider than the other. A grounding-type plug
has two blades and a third grounding prong. The wide
blade or the third prong is provided for your safety. If
the provided plug does not fit into your outlet, consult
an electrician for replacement of the obsolete outlet.
9. Protect the power cord from being walked on or
pinched, particularly at plugs, convenience receptacles,
and the point where it exits from your freezer.
10. Do not attempt to modify or extend the power cord of
your freezer.
11. Unplug your freezer during lightning storms or when it
will not be used for long periods of time.
12. Make sure that the available AC power matches the
voltage requirements of your freezer.
13. Do not handle the plug with wet hands. This could result
in an electric shock.
14. Unplug the power cord by holding the plug, never by
pulling the cord.
15. Turn off your freezer before unplugging it.
16. Refer all servicing to qualified service personnel.
Servicing is required when your freezer has been
damaged in any way, such as the power-supply cord or
plug is damaged, liquid has been spilled or objects have
fallen into your freezer, your freezer has been exposed
to rain or moisture, does not operate normally, or has
been dropped.
17. To reduce the risk of fire or electric shock, do not
expose your freezer to rain, moisture, dripping, or
splashing, and no objects filled with liquids should be
placed on top of it.
18. Do not use extension cords or ungrounded (two-prong)
adapters. If the power cord is too short, have a qualified
electrician install an outlet near your freezer. Use of an
extension cord can negatively affect your freezer’s
performance.
19. Your freezer is not intended for use by persons
(including children) with reduced physical, sensory, or
mental capabilities, or lack of experience and
knowledge, unless they have been given supervision or
instruction concerning use of your freezer by a person
responsible for their safety.
CHEST FREEZER – USER MANUAL
11
20. Children should be supervised to ensure that they do
not play with your freezer.
21. If the power cord is damaged, it must be replaced by the
manufacturer, its service agent, or similarly qualified
person, in order to avoid a hazard.
ELECTRIC SHOCK HAZARD
WARNING
Failure to follow these instructions can result in electric
shock, fire, or death.
1. WARNING: Keep ventilation openings, in both your
freezer and the built-in structure, clear of obstruction.
2. WARNING: Do not touch the interior of your freezer
with wet hands. This could result in frostbite.
3. WARNING: Do not use mechanical devices or other
means to accelerate the defrosting process, other than
those recommended by the manufacturer.
4. WARNING: Do not damage the refrigerant circuit.
5. WARNING: Do not damage the refrigerant tubing when
handling, moving, or using your freezer.
6. WARNING: DANGER—Never allow children to play with,
operate, or crawl inside your freezer.
7. Risk of child entrapment. Before you throw away your
old freezer:
•Take off the door.
•Leave the shelves in place so that children may
not easily climb inside.
8. WARNING: Do not use electrical appliances inside the
food storage compartments of the appliance unless they
are of the type recommended by the manufacturer.
9. Unplug your freezer before carrying out user
maintenance on it.
10. Follow local regulations regarding disposal of your
freezer due to flammable refrigerant and gas. All
refrigeration products contain refrigerants, which under
the guidelines of federal law must be removed before
disposal. It is the consumer's responsibility to comply
with federal and local regulations when disposing of this
product.
11. Do not store explosive substances such as aerosol cans
with a flammable propellant in this appliance.
12. Children should be supervised to ensure that they do
not play with your freezer.
13. This appliance is intended to be used in household and
similar applications such as:
•staff kitchen areas in shops, offices, and other
working environments.
•farmhouses and by clients in hotels, motels,
and other residential-type environments.
•bed and breakfast-type environments.
•catering and similar non-retail applications.

12
GROUNDING REQUIREMENT
Your freezer must be grounded. It is equipped with a with a
grounding wire and a grounding plug. The plug must be
inserted into an outlet that is correctly installed and
grounded. Incorrect use of the grounding plug can result in a
risk of electric shock. Consult a qualified electrician or
service person if the grounding instructions are not
completely understood, or if doubt exists as to whether your
freezer is correctly grounded.
TRANSPORTATION INSTRUCTIONS
The appliance should be transported only in a vertical
upright position. The packing as supplied must be intact
during transportation.
If the freezer must be transported horizontally, it must only
be laid on its left side (when facing the door front). Turn the
freezer upright (lid on top) for four hours before turning on
the freezer.
1. Failure to comply with the above instructions could
result in damage occurring to the appliance. The
manufacturer will not be held responsible if these
instructions are disregarded.
2. The appliance must be protected against rain, moisture,
and other atmospheric influences.
IMPORTANT: Care must be taken while cleaning/carrying
the appliance to avoid touching the condenser metal wires
at the back of the appliance, as you might injure your fingers
and hands or damage your product.
IMPORTANT: This appliance is not designed for stacking with
any other appliance. Do not attempt to sit or stand on top of
your appliance as it is not designed for such use. You could
injure yourself or damage the appliance.
IMPORTANT: Make sure that the main cable is not caught
under the appliance during and after carrying/moving the
appliance, to avoid the main cable becoming cut or
damaged.
When positioning your appliance take care not to damage
your flooring, pipes, wall coverings, etc. Do not move the
appliance by pulling by the door or handle. Do not allow
children to play with the appliance or tamper with the
controls. Our company declines to accept any liability should
the instructions not be followed.

CHEST FREEZER – USER MANUAL
13
SPECIFICATIONS
EACF05000W (5 CU. FT. MODEL)
•Color: White
•Handle: Recessed
•Capacity: 5 ft.3(.14m3)
•Defrost type: Manual
•Interior light: No
•Built-in lock: No
•Temperature range: 10°F to -22°F (-12°C to -30°C)
•Net weight: 59.52 lbs. (27 kg)
•Dimensions (L × W × H): 29.92 × 22.05 × 33.27 in. 76 ×
56 × 84.5 cm)
EACF07000W (7 CU. FT. MODEL)
•Color: White
•Handle: Recessed
•Capacity: 7 ft.3(.19 m3)
•Defrost type: Manual
•Interior light: No
•Built-in lock: No
•Temperature range: 10°F to -22°F (-12°C to -30°C)
•Net weight: 66.13 lbs. (30 kg)
•Dimensions (L × W × H): 38.58 × 22.05 × 33.27 in. 98 ×
56 × 84.5 cm)
EACF09000W (9 CU. FT. MODEL)
•Color: White
•Handle: Recessed
•Capacity: 9 ft.3(.25 m3)
•Defrost type: Manual
•Interior light: No
•Built-in lock: Yes
•Temperature range: 10°F to -22°F (-12°C to -30°C)
•Net weight: 88.18 lbs. (40 kg)
•Dimensions (L × W × H): 43.90 × 24.02 × 33.27 in. 111.5
× 61 × 84.5 cm)
EACF14100W (14 CU. FT. MODEL)
•Color: White
•Handle: Recessed
•Capacity: 14 ft.3(.39 m3)
•Defrost type: Manual
•Interior light: Yes
•Built-in lock: Yes
•Temperature range: 10°F to -22°F (-12°C to -30°C)
•Net weight: 119.05 lbs. (54 kg)
•Dimensions (L × W × H): 53.74 × 28.74 × 33.88in. 136.5 ×
73 × 86 cm)

14
TROUBLESHOOTING
Problem
Solution
No power •Make sure that the freezer is plugged into a working power outlet.
•Check if the circuit breaker is tripped or if a fuse is blown.
Not cold enough •Use the temperature adjustment knob to decrease the temperature. “5” is the coldest
temperature setting.
•Make sure that the door is completely shut. Do not open it excessively.
•The temperature may rise after placing a large quantity of warm food inside. Let the freezer
run to cool the items.
•The freezer may be too close to a heat source or in direct sunlight. Move your freezer or the
heat source.
•The ambient temperature or humidity may be very high. Move your freezer.
Freezer is always
running
•The temperature setting may be too cold. Use the temperature adjustment knob to increase
the temperature. “5” is the coldest temperature setting.
•Make sure that the door is completely shut. Do not open it excessively.
•The temperature may rise after placing a large quantity of warm food inside. Let the freezer
run to cool the items.
•The freezer may be too close to a heat source or in direct sunlight. Move your freezer or the
heat source.
•The ambient temperature or humidity may be very high. Move your freezer.
Freezer makes
strange noises
You may hear noises when the compressor starts or from the liquid and gasses sealed in the
refrigeration system. This is normal.
CUSTOMER SUPPORT
If you need have questions about your chest freezer, our customer support team is ready to help.
•Online chat: www.elementelectronics.com
•Phone: 1 (833) 250-6588
•Email: appliances@elementelectronics.com

CHEST FREEZER – USER MANUAL
15
LEGAL NOTICES
ELECTRICAL INFORMATION
THIS APPLIANCE MUST BE GROUNDED.
This appliance is fitted with a fused three-pin plug to BS
1363 which will be suitable for use in all houses fitted with
sockets to current specifications.
If the fitted plug is not suitable for your socket outlets, it
should be cut off and carefully disposed of. To avoid a
possible shock hazard, do not insert the discarded plug into
a socket.
This appliance complies with the following EEC Directives:
73 / 23 EEC (Low Voltage Directive)
89 / 336 EEC (EMC Directive).
CORRECT DISPOSAL OF THIS PRODUCT
This marking indicates that this product should not
be disposed with other household wastes
throughout the US. To prevent possible harm to the
environment or human health from uncontrolled waste
disposal, recycle it responsibly to promote the sustainable
reuse of material resources. To return your used device,
please use the return and collection systems or contact the
retailer where the product was purchased. They can take
this product for environmentally safe recycling.
WARRANTY
For warranty information, visit
www.elementelectronics.com.

CONTACT US:
Element Appliance Company, LLC. Customer Service
ONLINE CHAT: www.elementelectronics.com
Customer Support: 1 (833) 250-6588
appliance@elementelectronics.com
Copyright © 2020
Element Appliance Company, LLC. All rights reserved.
Element Appliance Company and E Element are trademarks of Element Brand Holding, LLC
20-0260
Other manuals for EACF05000W
2
This manual suits for next models
3
Table of contents
Other Element Freezer manuals

Element
Element EUF17CDBW User manual

Element
Element ERBM19CBS User manual

Element
Element EACF05000W User manual

Element
Element EACF05000W User manual

Element
Element ENR18TFGBW User manual

Element
Element EAUF14000W User manual

Element
Element EUF14CEBW User manual

Element
Element ECF50MD1BW User manual

Element
Element EUF17CEBW User manual