www.elluminatelighting.com.au FOR SALES & TECHNICAL ASSISTANCE CALL 1300 278 283
NO ELECTRICIAN REQUIRED | SAFE 12V DIY LIGHTING IN MINUTES
FEATURES
Your elluminate product has been manufactured with advanced technology and quality
materials to ensure its longevity and that it is t for purpose.
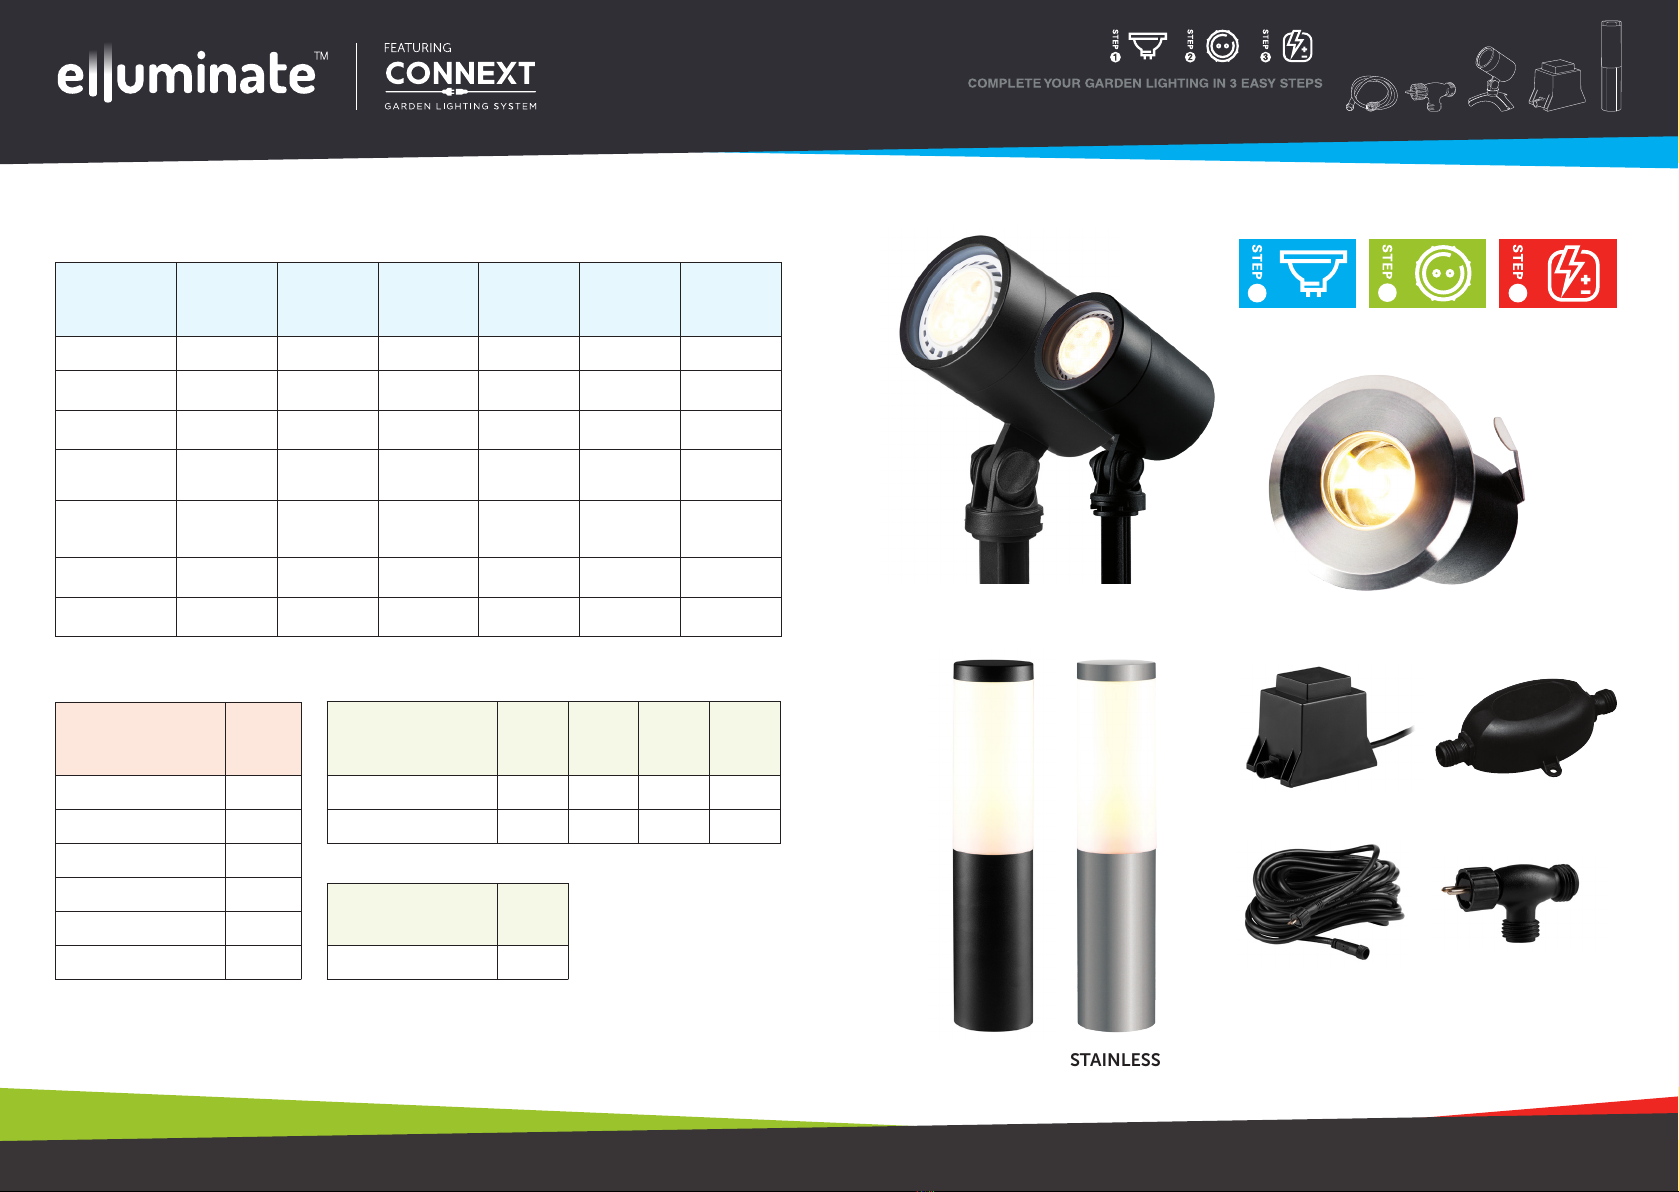
• All elluminate products are designed for outdoor garden use boasting high quality materials such
as 304 Stainless Steel, UV Stabilised Heavy Duty Reinforced Plastic, Powder Coated Stainless Steel
and Tempered Glass Lens.
• The high-power, energy efcient LEDs emit a natural warm light providing years of low maintenance
satisfaction.
• The 240V Outdoor Transformer + Bluetooth Controller with Auto Light Sensor converts the power
supply to a safe 12V for peace of mind in your garden.
THIS SIMPLE AND EASY-TO-CONNECT SYSTEM IS BASED ON A MAXIMUM OF
15 LIGHTS AND NO MORE THAN 75M OF CABLE PER TRANSFORMER.
• You can install multiple Outdoor Transformers + Bluetooth Controllers at one location, meaning
you can have more than 15 lights on the one property and all can be controlled from the elluminate
app.
YOUR ELLUMINATE GARDEN LIGHTING SYSTEM IS COMPLETELY CUSTOMISABLE
SUBJECT TO YOUR PREFERENCE.
• If you do not have a smart phone or you do not want to use the Bluetooth feature or the Auto Light
Sensor simply connect your lights directly to your transformer and turn your elluminate system on
and off at the power point.
• If you do not have a smart phone or you do not want to use the Bluetooth feature but you do want
to use the Auto Light Sensor simply connect your Auto Light Sensor to your transformer before
connecting your lights.
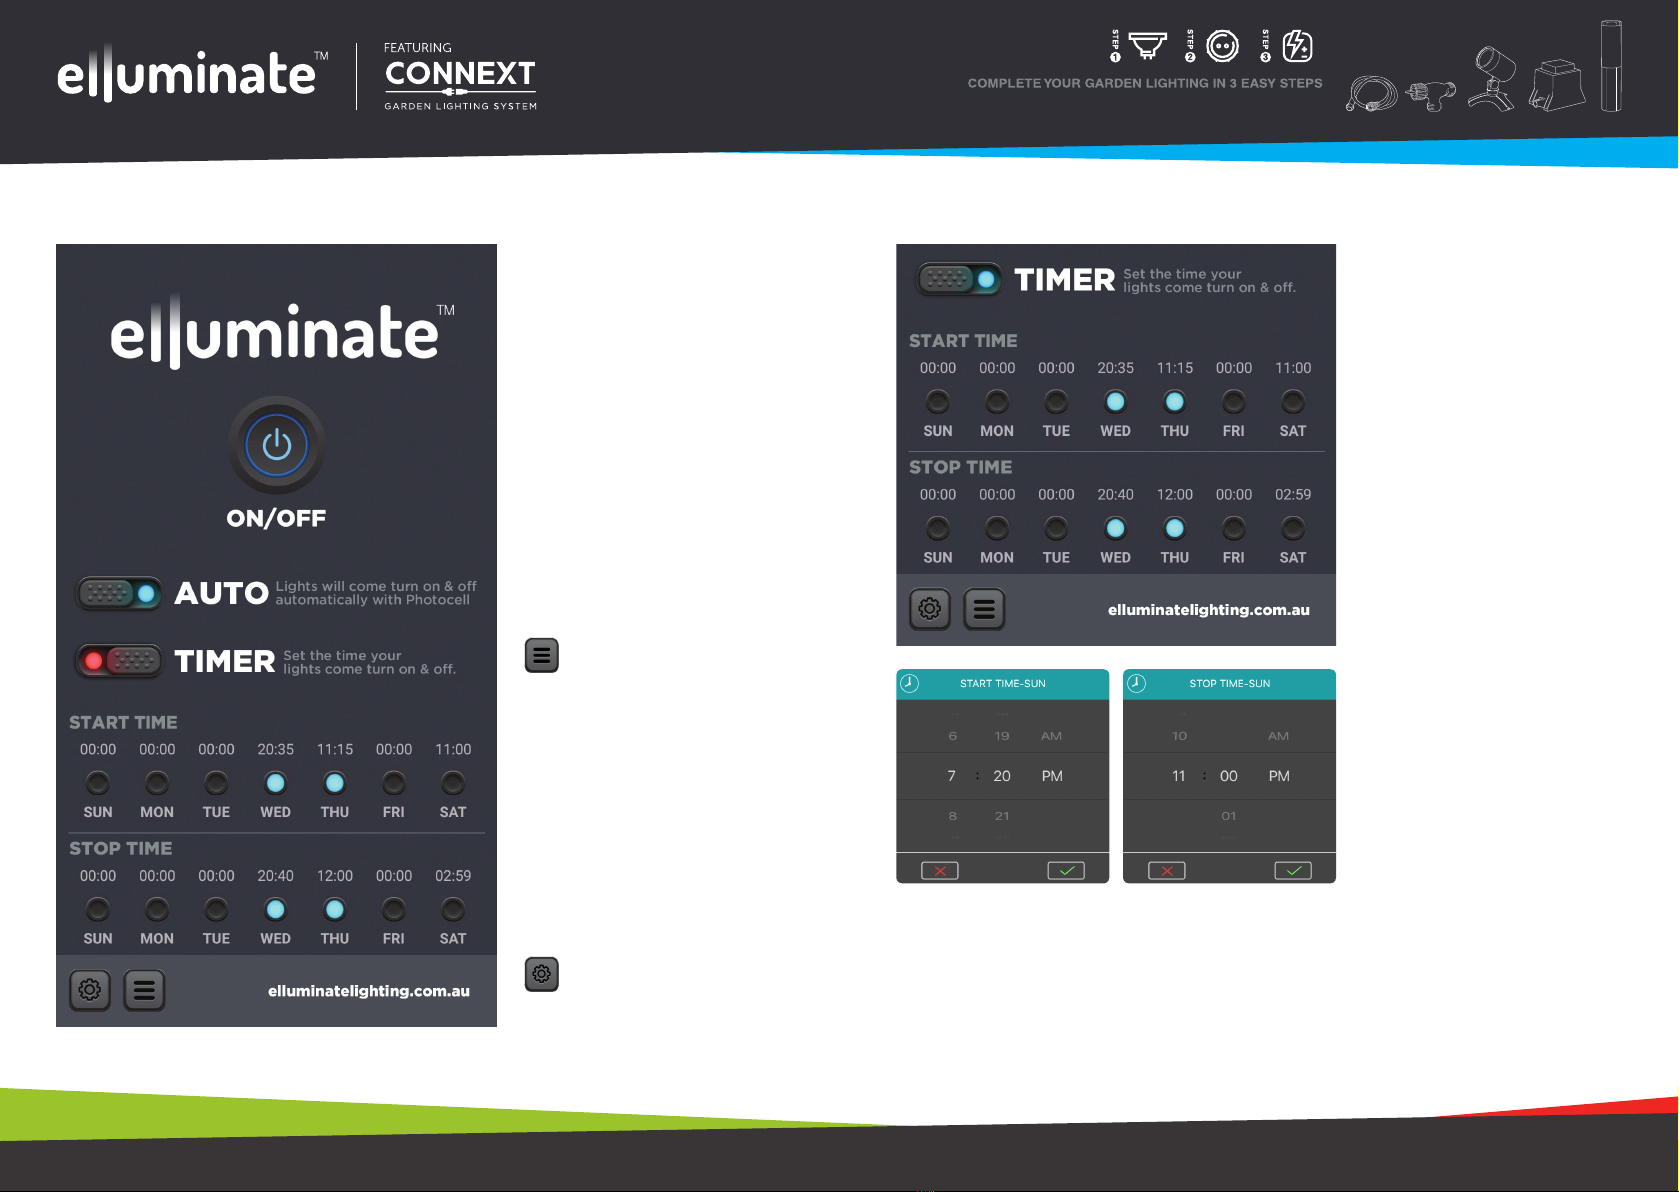
• If you want to take full advantage of the elluminate Bluetooth feature download the elluminate
app from the App Store or Google Play and enjoy the benets of your fully automated Bluetooth
controlled system.
INSTALLATION
• Plug the transformer into a weatherproof power point near to the garden making sure that it can’t
be submerged or overheat.
• Slide the garden spike into the circular recess on the underside of the spotlight body or screw the
garden spike into the base of the bollard. Holding the light body rmly, push the light with attached
spike into the desired location taking care not to penetrate any hidden services.
• To install the small deck lights use a 32mm diameter hole saw.
• Position the spotlights to face the feature you wish to illuminate or for deck and bollard lights place
in the position of choice.
• For the spotlight, once in the correct position lock the light by tightening the thumb screws, taking
care not to over tighten.
• We recommend nal adjustments be carried out at night.
• Multiple lights (max.15) can be connected together using the 2 Pin extension cables and multiple
T-Pieces.
• Connect your cables and T-Pieces to your lights and transformer.
• Turn on your power point.
• There is a handy installation video on our website if you need further assistance.
CONGRATULATIONS ON YOUR PURCHASE.
YOU MADE THE RIGHT CHOICE INVESTING IN THIS
QUALITY PRODUCT. THANK YOU AND ENJOY.
BEFORE USING THIS PRODUCT, PLEASE READ THESE INSTRUCTIONS CAREFULLY
AND MAKE YOURSELF FAMILIAR WITH THE SYSTEM.
PLEASE KEEP THESE INSTRUCTIONS IN A SAFE PLACE FOR FUTURE REFERENCE.