manuals.online logo
Brands
  1. Home
  2. •
  3. Brands
  4. •
  5. EMC2
  6. •
  7. Disk Array System
  8. •
  9. EMC2 DAE5S User manual

EMC2 DAE5S User manual

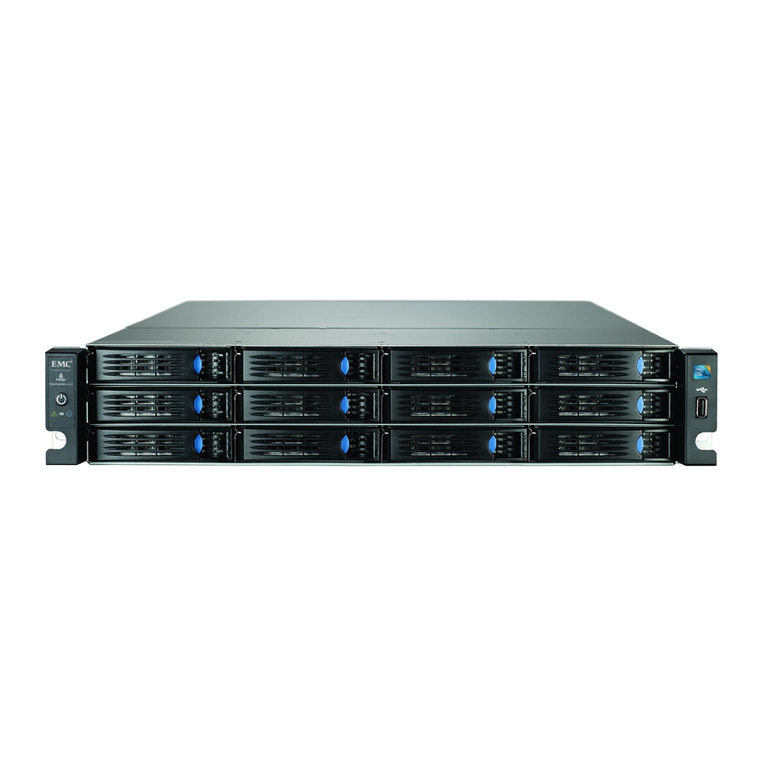
This document describes how to install an optional 25-slot disk-array enclosure (DAE5S)
in a VNXe system.
Before you start
Before you begin the this procedure, refer to your EMC VNXe™ online help (Servicing your
system > Adding or replacing faulted hardware components > Add a new hardware
component) for instructions on how to handle hardware components. Review the Disk
handling cautions.

The enclosure is heavy and should be installed into a rack by two people. To avoid
personal injury and/or damage to the equipment, do not attempt to lift and install the
enclosure into a rack without a mechanical lift and/or help from another person.
Tasks to install a DAE5S
◆Task 1: Verify shipping package contents .................................................................. 2
◆Task 2: Remove the filler panels ................................................................................ 3
◆Task 3: Install the rails for the disk-array enclosure.................................................... 3
◆Task 4: Install the disk-array enclosure in the cabinet/rack........................................ 4
◆Task 5: Install disk modules ...................................................................................... 6
◆Task 6: Install the DAE5S bezel ................................................................................. 7
◆Task 7: Attach AC power cords................................................................................... 8
◆Task 8: Attach the expansion (back-end) cables ........................................................ 9
◆Task 9: Verify the operation of the new DAE5S......................................................... 11
EMC® VNXe
Installing an Optional 25-Slot Disk-Array Enclosure
(DAE5S)
P/N 300-013-731
REV 01
2 EMC VNXe — Installing an Optional 25-Slot Disk-Array Storage System (DAE5S)
Tasks to install a DAE5S
Task 1: Verify shipping package contents
Verify that you received the following:
Component Quantity
Disk-array enclosure
(DAE5S)
Rear view
Front view
1
DAE5S rail kit 1 (includes
2 rails and
16 screws)
Power cords 2
Bezel for disk-array
enclosure (with key)
1
DAE5S SAS cables
(copper) that connect
disk-array enclosures to
each other or to DPE or
SPE
2
CL3776
molex
molex
molex
molex
Tasks to install a DAE5S
EMC VNXe — Installing an Optional 25-Slot Disk-Array Storage System (DAE5S) 3
Task 2: Remove the filler panels
In most cases, the front space into which you will install the enclosure is covered by a filler
panel, which is attached to latch brackets.
If one or more filler panels cover the space where you want to install the DAE5S:
1. Remove the filler panels.
2. Use a flatblade screwdriver or similar tool to pry off the latch brackets.
Task 3: Install the rails for the disk-array enclosure
Install the DAE5S rails in the next available 2U space directly above the base system DPE
or the last DAE5S in system. Most cabinets mark 1U (1.7- inch) increments with horizontal
lines or small holes in the channels.
Note: The front edge of each rail is stamped L or R for left and right sides, when they face
the cabinet front.
Install
each
rail:
1. From the front of the cabinet, insert the rail alignment pins above and below the
bottom U mark on the
rear
cabinet channel.
2. Pull the sliding rail to the front of the cabinet, and secure it to the front channel by
using two of the provided screws at the
middle
two holes of the rail.
CL4064
2U
Alignment pins
here
CL3787
4 EMC VNXe — Installing an Optional 25-Slot Disk-Array Storage System (DAE5S)
Tasks to install a DAE5S
3. Secure the rail to the rear channel with two screws, leave the screws slightly loose to
allow for adjustment when you install the DAE5S enclosure.
Task 4: Install the disk-array enclosure in the cabinet/rack

The enclosure is heavy and should be installed into a rack by two people. To avoid
personal injury and/or damage to the equipment, do not attempt to lift and install the
enclosure into a rack without a mechanical lift and/or help from another person.
1. With help from another person, lift the enclosure and, from the front of the rack, slide
the enclosure onto the rails.
CL3785
CL4722
Tasks to install a DAE5S
EMC VNXe — Installing an Optional 25-Slot Disk-Array Storage System (DAE5S) 5
When the enclosure slides to the back of the cabinet, the rear tabs on the rails insert
into the notches in the rear of the enclosure. The tabs secure and support the rear of
the enclosure.
Note: If the chassis does not slide all the way into the cabinet, you may need to further
loosen the screws that hold the rear of the rails in place, then adjust the rails to allow
the tabs to fit into the notches.
2. Once the enclosure is completely seated into the rear tabs, tighten the four screws
(two on each rail) that secure the rails to the channels.
3. Secure the front of the enclosure to the front vertical channels of the cabinet by using
four screws (two per side).
CL4654
CL4725
6 EMC VNXe — Installing an Optional 25-Slot Disk-Array Storage System (DAE5S)
Tasks to install a DAE5S
Task 5: Install disk modules
If the disk modules shipped separately from the DAE5S enclosure, install them in the
enclosure now. If the disk modules are already installed in the DAE5S, go to “Install the
DAE5S bezel” on page 7.
Disk handling
◆Do not remove a disk filler until you have a replacement disk available to replace it.
◆Disks are sensitive to the extreme temperatures that are sometimes encountered
during shipping.
◆We recommend that you leave the new disk in its shipping material and expose the
package to ambient temperature for at least four hours before attempting to use the
new disks in your system.
◆Avoid touching any exposed electronic components and circuits on the disk.
◆Do not stack disks upon one another, or place them on hard surfaces.
◆When installing multiple disks in a powered up system, wait at least 6 seconds before
sliding the next disk into position.
To install a disk
1. Attach an ESD wristband to your wrist and the enclosure in which you are installing the
disk.
2. Unpack your new disks, one at a time.
3. Align the disk with the guides in the slot.
4. Insert the disk in the slot:
a. With the disk carrier latch fully open, gently push the disk into the slot.
The latch begins to rotate downward when its tabs meet the enclosure.
b. Push on the orange latch tab until the disk is seated in the slot.
c. Push the handle down to engage the latch.
5. Remove and store the ESD wristband.
SAS
300GB
10k
SAS
300GB 10k
CL4720
Tasks to install a DAE5S
EMC VNXe — Installing an Optional 25-Slot Disk-Array Storage System (DAE5S) 7
Task 6: Install the DAE5S bezel
Install the DAE5S front bezel:
1. Align the bezel with the DAE5S.
2. Gently push the bezel into plan on the cabinet until it latches
3. Secure the bezel by turn the key in the lock.
CL4588
8 EMC VNXe — Installing an Optional 25-Slot Disk-Array Storage System (DAE5S)
Tasks to install a DAE5S
Task 7: Attach AC power cords
Attach AC power cords to the DAE5S:
Note: The enclosures will start immediately when connected to active AC power.
1. Connect each power/cooling module in the DAE5S to a separate AC power circuit:
a. Attach the B (left) module to the circuit shared with DPE power supply B.
b. Attach the A (right) module to the circuit shared with DPE power supply A.
2. Attach the retention bails (strain reliefs) to the base of each power cord.
The retention bails prevent the power cords from pulling out of the connections.
3. If the power distribution units in your rack or cabinet are not active, turn on AC power
now.
The enclosure powers up immediately once connected to AC power.
CL4591
Tasks to install a DAE5S
EMC VNXe — Installing an Optional 25-Slot Disk-Array Storage System (DAE5S) 9
Task 8: Attach the expansion (back-end) cables
Each connector on an expansion cable is marked with a or symbol and is keyed to
prevent improper connection provided that you do not force the cable into a connector. An
audible/tangible click indicates that the cable is completely seated in the connector.
Orient the cable connectors as described in the procedure that follows, making sure that:
◆You do not
connect an expansion port  to another expansion port .
◆You do not connect any A-side ports to B-side ports.
Procedure
1. If the DAE5S you just installed is the first DAE in the storage system, connect the DAE
to the DPE:
IMPORTANT
Connecting a DAE to expansion port 1 on the DPE is not supported.
a. If you are connecting to a VNXe3100 DPE that has a cover on expansion port 0
 on SP A and/or SP B, refer to Knowledgebase article emc294981 for
information on how to do the following:
– Remove the cover.
– Clear the port should the cover break when you remove it.
b. Connect the expansion port 0  on SP A (on the right) in the DPE to the primary
port  on the link control card directly above it (LCC A).
c. Connect the expansion port 0  on SP B (on the left) to the primary port  on
the link control card directly above it (LCC B).
2. If the DAE5S you just installed is not the first DAE in the storage system, connect the
new DAE5S to the previous DAE on the bus:
a. Connect the primary port  on LCC A (on the right) of the new DAE5S to the
expansion port  on LCC A of the DAE below.
10 EMC VNXe — Installing an Optional 25-Slot Disk-Array Storage System (DAE5S)
Tasks to install a DAE5S
b. Connect the primary port  on LCC B (on the left) of the new DAE5S to the
expansion port  on LCC B of the DAE below.
3. Verify that the bus (loop) ID LED displays the expected value.
Note: Each LCC includes a bus (loop) identification LED indicator. This indicator
includes two seven-segment LED displays for displaying decimal numbers.
CL4579
molex
molex
molex
6 Gb
SAS
X4
#
X4
Bus (loop) ID
LCC enclosure ID
VNX-000277
Tasks to install a DAE5S
EMC VNXe — Installing an Optional 25-Slot Disk-Array Storage System (DAE5S) 11
Task 9: Verify the operation of the new DAE5S
Verify that the new DAE5S is recognized by your system, and operating correctly:
1. In Unisphere™, select System, then System Health.
2. Select the DAE5S in the Component list or the graphical view:
• In the Component list, the new DAE5S should be marked with a status OK icon:
• In the graphical view, the DAE5S should be highlighted green.
If the system health monitor shows the new DAE5S as faulted, contact your service
provider.
IMPORTANT
Whenever you introduce new disks to your system, you should verify that all disks of that
type/model are running the same level of disk firmware. Refer to your online Help for
details on how to verify and upgrade disk firmware revisions.
Copyright © 2012 EMC Corporation. All rights reserved. Published in the USA.
Published August, 2012
EMC believes the information in this publication is accurate as of its publication date. The information is subject to change without
notice.
The information in this publication is provided as is. EMC Corporation makes no representations or warranties of any
kind with respect to the information in this publication, and specifically disclaims implied warranties of
merchantability or fitness for a particular purpose. Use, copying, and distribution of any EMC software described in this
publication requires an applicable software license.
EMC2, EMC, and the EMC logo are registered trademarks or trademarks of EMC Corporation in the United States and other countries.
All other trademarks used herein are the property of their respective owners.
For the most up-to-date regulatory document for your product line, go to the technical documentation and advisories
section on EMC Online Support.

Popular Disk Array System manuals by other brands

Spectra Verde Series user guide

Spectra

Spectra Verde Series user guide

VERITAS NetBackup 5330 Hardware Service Procedure

VERITAS

VERITAS NetBackup 5330 Hardware Service Procedure

Icy Dock SPFMB user manual

Icy Dock

Icy Dock SPFMB user manual

HP StorageWorks XP512 - Disk Array manual

HP

HP StorageWorks XP512 - Disk Array manual

HP StorageWorks 2000sa user guide

HP

HP StorageWorks 2000sa user guide

HP XP20000/XP24000 Configuration guide

HP

HP XP20000/XP24000 Configuration guide

EqualLogic PS Series quick start

EqualLogic

EqualLogic PS Series quick start

Addonics Technologies RAID Tower XIII RT134SDMS user guide

Addonics Technologies

Addonics Technologies RAID Tower XIII RT134SDMS user guide

Dell PowerVault MD3600f Series Hardware installation and troubleshooting guide

Dell

Dell PowerVault MD3600f Series Hardware installation and troubleshooting guide

Netstor NR170S Quick installation guide

Netstor

Netstor NR170S Quick installation guide

Fastora DAS-208CC user guide

Fastora

Fastora DAS-208CC user guide

HP StorageWorks XP12000 user guide

HP

HP StorageWorks XP12000 user guide

HP StorageWorks XP128 user guide

HP

HP StorageWorks XP128 user guide

manuals.online logo
manuals.online logoBrands
  • About & Mission
  • Contact us
  • Privacy Policy
  • Terms and Conditions

Copyright 2025 Manuals.Online. All Rights Reserved.