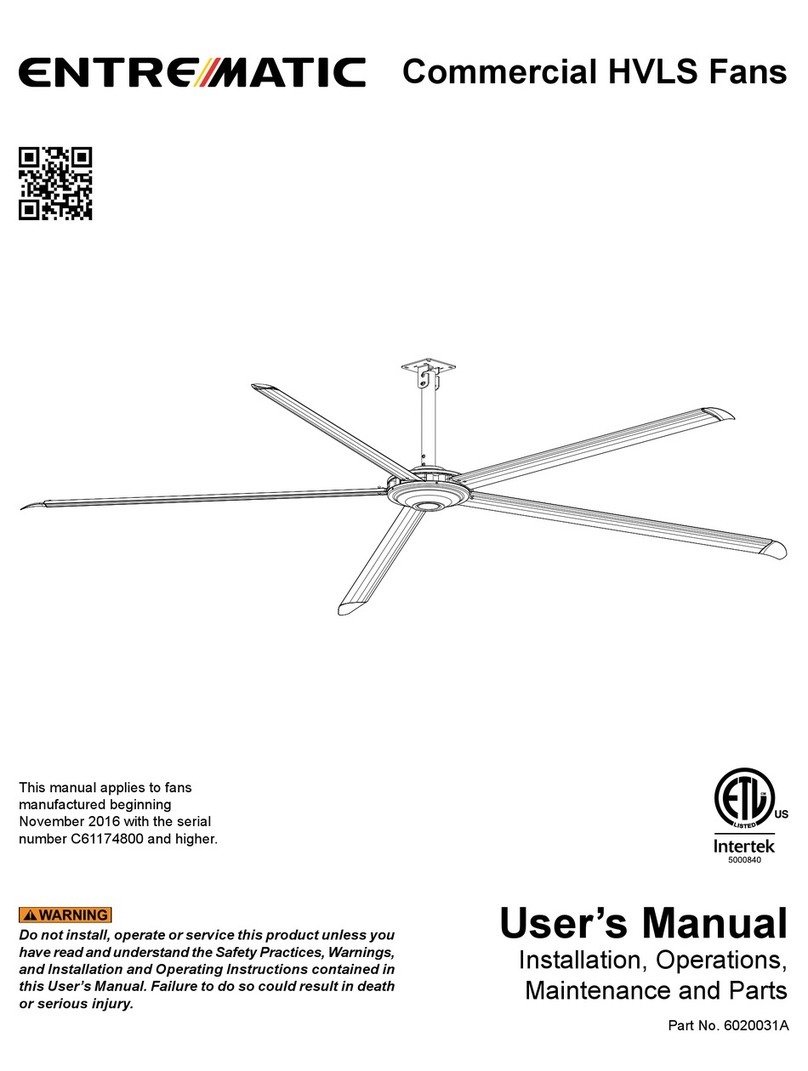
Entrematic Industrial HVLS Fan User manual

User’s Manual
Installation, Operations,
Maintenance and Parts
Part No. 6021140A
Do not install, operate or service this product unless you
have read and understand the Safety Practices, Warnings,
and Installation and Operating Instructions contained in
this User’s Manual. Failure to do so could result in death
or serious injury.
This manual applies to fans
manufactured beginning October
2017.
Industrial HVLS Fan
User’s Manual

© Entrematic Group AB 2017
2 6021140A — Industrial HVLS Fans October 2017
You may nd safety signal words such as DANGER, WARNING, CAUTION or NOTICE throughout this User’s
Manual. Their use is explained below:
Indicates an imminently hazardous situation which,
if not avoided, will result in death or serious injury.
Indicates a potentially hazardous situation which, if
not avoided, could result in death or serious injury.
Indicates a potentially hazardous situation which, if
not avoided may result in minor or moderate injury.
Notice is used to address practices not related to
personal injury.
This is the safety alert symbol. It is used
to alert you to potential personal injury
hazards. Obey all safety messages that
follow this symbol to avoid possible death or injury.
SAFETY SIGNAL WORDS
Introduction.................................................................2
Safety Signal Words ..................................................2
Safety Practices..........................................................3
Owner’s Responsibilities ............................................4
Hardware....................................................................5
Fan Kit ........................................................................6
Installation Considerations .........................................7
Installation ..................................................................9
Components and Specications...............................20
TABLE OF CONTENTS
Operating Instructions ..............................................21
Planned Maintenance...............................................28
Troubleshooting Guide .............................................29
VFD Fault Codes......................................................30
Fire Control System Fan Shutdown..........................32
Electrical Schematics ...............................................35
Parts List...................................................................41
Warranty Information ................................................51
Distributor Information ..............................................52
INTRODUCTION
Welcome and thank you for choosing this industrial fan from Entrematic.
This User’s Manual contains information that you need to safely install, operate and maintain the fan. It also
contains a complete parts list and information about ordering replacement parts. Please keep and read this User’s
Manual before using your new fan.

© Entrematic Group AB 2017
October 2017 6021140A — Industrial HVLS Fans 3
SAFETY PRACTICES
READ AND SAVE THESE INSTRUCTIONS.
READ THESE SAFETY PRACTICES BEFORE
INSTALLING, OPERATING OR SERVICING THE FAN.
Failure to follow these safety practices could result in
death or serious injury.
READ AND FOLLOW THE OPERATING INSTRUCTIONS
IN THIS MANUAL BEFORE OPERATING THE FAN. If you
do not understand the instructions, ask your supervisor
to teach you how to use the fan.
To reduce the risk of personal injury, do not bend the
blade brackets when installing the brackets, balancing the
blades or cleaning the fan. Do not insert foreign objects
in between rotating fan blades.
To reduce the risk of re, electric shock and injury to
persons, HVLS fan motor assemblies must be installed
with the blade assemblies that are marked on their
cartons to indicate the suitability with this model. Other
blade assemblies cannot be substituted.
Be certain to follow the instructions in this manual.
If you do not understand the instructions, ask your
supervisor to explain them to you or call your authorized
local distributor.
INSTALLATION AND OPERATION:
Installation of the equipment must comply with local
and national electrical codes and must be in accordance
with ANSI/NFPA 70-1999.
Do not use this industrial fan until you have received
proper training. Improper use could result in property
damage, bodily injury and/or death. Read and follow the
complete OPERATING INSTRUCTIONS on pages 21-27
before use. If you do not understand the instructions,
ask your supervisor to explain them to you or call your
local distributor.
DO NOT USE THE FAN IF IT APPEARS DAMAGED
OR DOES NOT OPERATE PROPERLY. Inform your
supervisor immediately.
Do not operate the fan until all personnel, building
structure and equipment are clear of all moving parts
and exclusion zones. Install guards as required.
To reduce the risk of electric shock, do not expose to
water or rain.
Support directly from building structure. Do not install
the fan unit onto structure of insufcient strength.
Consult a professional engineer or registered architect.
Improper installation of the fan could result in death or
serious injury.
To reduce the risk of injury to persons, install fan so that
the blade is at least 3.05m (10') above the oor.
MAINTENANCE AND SERVICE:
Before service, inspection, or cleaning make certain
that the power is disconnected and properly locked out.
If the fan does not operate properly using the procedures
in this manual, BE CERTAIN TO REMOVE POWER FROM
THE UNIT AND LOCK-OUT THE DISCONNECT ON THE
POWER CIRCUIT. Call your local distributor for service.
Keep your body clear of moving parts at all times.
All electrical troubleshooting and repair must be done
by a qualied technician and meet all applicable codes.
If it is necessary to make troubleshooting checks
inside the VFD box with the power on, USE EXTREME
CAUTION. Do not place ngers or un-insulated tools
inside the enclosure. Touching wires or other parts
inside the enclosure could result in electrical shock,
death or serious injury.
Variable Frequency Drive (VFD) fan controllers contain
high voltage capacitors. Before working on the fan
controller, ensure isolation of the main voltage supply
and verify voltage has bled off prior to beginning work.
Failure to do so may result in death or serious injury.
If you have problems or questions, contact your local
distributor for assistance.

© Entrematic Group AB 2017
4 6021140A — Industrial HVLS Fans October 2017
OWNER’S RESPONSIBILITIES
The owner’s responsibilities include the following:
The owner should recognize the inherent danger of the
interface between the industrial fan and shop worker. The
owner should, therefore, train and instruct operators in the
safe use of the industrial fan.
Nameplates, cautions, instructions and posted warnings shall
not be obscured from the view of operating or maintenance
personnel for whom such warnings are intended. Warnings
which are worn or non-legible should be replaced.
Manufacturer’s recommended periodic maintenance and
inspection procedures in effect at date of shipment shall be
followed, and written records of the performance of these
procedures should be kept.
Industrial fans that are structurally damaged or have
experienced impacts from external sources, shall be removed
from service, inspected by the manufacturer’s authorized
representative, and repaired as needed before being placed
back in service.
The owner shall see that all nameplates and caution and
instruction markings or labels are in place and that the
appropriate operating and maintenance manuals are provided
to users.
Modications or alterations of industrial fans shall be made
only with written permission of the original manufacturer.

© Entrematic Group AB 2017
October 2017 6021140A — Industrial HVLS Fans 5
HARDWARE
(x4) 1/2-13UNC x 2-1/2
Mount ─ Building
(x4) 1/2-13UNC lock nut
Guy wire assembly
Safety cable
(x20) 3/8-16UNC lock nut
Mount ─ Blade
(x8) #12 14 x 3/4 TEKS
Mount ─ Fan cover
Identification labels
Fan diameter
Fan diameter
Voltage
Fastener torque requirements
Description Torque Wrench size
1/2 dia mount hardware 44-48 ft-lbs. 3/4 hex
3/8 dia blade mount hardware 24-28 ft-lbs. 9/16 hex
Cable clamp, guy wire Secure tight 5/16 nut driver
Cable clamp, safety cable Secure tight 1/2 nut driver
5/16 nut driver
Motor cover fastener Secure tight
(x4) 1/2-13UNC x 1-1/4 bolt
(x4) 1/2-13UNC lock nut
Mount ─ Motor frame
(x2) 1/2-13UNC x 4-1/2 bolt
(x4) 1/2 dia. washer
(x2) 1/2-13UNC nyloc lock nut
Mount ─ Assembly
NOTE:
Additional spare hardware is provided as a courtesy.

© Entrematic Group AB 2017
6 6021140A — Industrial HVLS Fans October 2017
PACKING KIT (Standard)
1. Blade Box – 5 each
2. Fan Motor Box
a. Motor/gearbox assembly with covers.
b. Remote control panel with junction box.
c. Category 5e cable – 100 ft (blue)
d. Mounting hardware. See page 5.
e. VFD box.
PACKING KIT — iFAN (Networked)
See iFAN user's manual 6015948.
REQUIRED TOOLS
• Wrenches: 7/16, 9/16, 3/4 (x2), 1/2
• Sockets: 7/16, 1/2, 9/16, 3/4
• Nut drivers: 1/4, 5/16
• Torque wrench: 15-60 Ft-lbs (for use with sockets)
• Wire strippers
• 1/4" cable cutter
• Tape measure
• Spirit level, short
• Gloves
• For laminated wood beam installs, a drill and 1/2" dia.
drill bit are required.
PRIOR TO FAN INSTALLATION:
1. Ensure that the supplied voltage matches the fan voltage.
A label containing voltage information specic to the
individual fan is located on top of the VFD box.
2. Ensure blade length matches fan model size. See Fig.
1. Consult fan model designation located on the side of
the fan powerhead frame.
3. Ensure all mounting hardware shown on page 5 is present.
FOR OPTIONAL IFAN NETWORK FANS ONLY
Ensure fan number matches network layout. Consult the
round, network ID number label on shipping box.
FAN KIT
NATIONAL FIRE PROTECTION ASSOCIATION STANDARD
In accordance with NFPA 13 Standard from the National Fire
Prevention Association as referenced in sections 12.1.4 and
11.1.7: High Volume Low Speed (HVLS) Fans: The installation
of HVLS fans in buildings equipped with sprinklers, including
ESFR sprinklers, shall comply with the following:
• The maximum fan diameter shall be 24 feet (7.3 m).
• The fan shall be approximately centered between four
adjacent sprinklers.
• The vertical clearance from the fan to sprinkler deector
shall be a minimum of 3 feet (0.9 m).
• All fans shall be interlocked to shut down immediately
upon receiving a water ow signal from the alarm system
in accordance with the requirements of NFPA 72- National
Fire Alarm and Signaling Code.

© Entrematic Group AB 2017
October 2017 6021140A — Industrial HVLS Fans 7
INSTALLATION CONSIDERATIONS
ROOF SLOPE
NOTE:
For roof angles in excess of 20°, consult factory. The extension lengths shown are
minimum recommendations only, based solely of roof pitch and fan diameter. Other
considerations must be evaluated when determining extension requirements, such
as placement of lights, sprinkler systems, HVAC systems, etc. In addition, OSHA
requirements state that fan blades must be a minimum of 10' above the oor.
NOTE:
All fan blade parts must be greater
than 3' from all obstructions
including lights, cables, sprinklers
and other building components and
greater than one (1) fan diameter
from any wall to center of fan.
Failure to maintain exclusion
zones outlined on pages 7,
8 and 9 could result in fan
failures, including blade
separation, which could result
in death or serious injury.
DO NOT operate fans when
physical obstructions or HVAC
air ows extend into exclusion
zones. Regularly inspect fans
to ensure exclusion zones
remain clear of interference
before operating fan.
*Consult factory for assistance with fan placement and extension selection.
Roof slope = rise
run rise
run
Angled roof beam
Exclusion zone
(greater than 3' all around)
Extension (optional)
Pendant
light
9" (std. with fan) Distance
from
ceiling
Blade length
28"
The exclusion zone
MUST BE KEPT CLEAR
of any obstructions
Fig. 1
300
300
300
300
300
300
300
300
Roof Slope* 2/12 4/12
Roof Angle* 9.5° 18.4°
Fan Diameter (Ft)
8 4 4
10 4 6
12 5 7
5
6
14 7 8
16 8 10
18 9 10
20 10 12
24 11 13
Hanging
Weight
(Lb)
Maximum
Torque
(Ft. Lb)
160
181
190
194
208
203
220
258
0
0
4
4
5
5
6
6
7
7
3/12
14.0°
4
9
10
11
12
Blade length (In.)
21.16
33.16
45.16
57.16
69.16
81.16
93.16
117.16
7
Distance from ceiling (Ft)

© Entrematic Group AB 2017
8 6021140A — Industrial HVLS Fans October 2017
INSTALLATION CONSIDERATIONS, continued
CLEARANCE FROM HVAC EQUIPMENT
For applications near HVAC equipment (diffusers, radiant
heaters, exhaust fans, louvers, etc.), the HVLS fan must be
installed at minimum distances.
• Fans located at or above HVAC equipment must have
a minimum clearance of greater than or equal to 1 fan
diameter. See Fig. 2.
• Fans located below HVAC equipment must have a minimum
clearance of greater than or equal to 2 fan diameters. See
Fig. 3.
Failure to maintain exclusion zones outlined on pages
7, 8 and 9 could result in fan failures, including blade
separation, which could result in death or serious injury.
DO NOT operate fans when physical obstructions or
HVAC air ows extend into exclusion zones. Regularly
inspect fans to ensure exclusion zones remain clear of
interference before operating fan.
Fig. 2
Fig. 3
Greater than
1 fan dia.
Greater than
2 fan dia.

© Entrematic Group AB 2017
October 2017 6021140A — Industrial HVLS Fans 9
Failure to maintain exclusion zones outlined on pages
7, 8 and 9 could result in fan failures, including blade
separation, which could result in death or serious injury.
DO NOT operate fans when physical obstructions or
HVAC air ows extend into exclusion zones. Regularly
inspect fans to ensure exclusion zones remain clear of
interference before operating fan.
CLEARANCE FROM SOLID OBSTRUCTIONS
For applications near solid obstructions the HVLS fan must
be installed at minimum distances.
• Fans located above solid obstructions such as racks, walls,
etc. must have a minimum vertical clearance of greater than
or equal to 1 fan diameter above and less than or equal to
1/4 fan diameter inside the fan blade arc. See Fig. 4.
Fig. 4
Greater than
1 fan dia.
Less than
1/4 fan dia.
Greater than
1 fan dia.
INSTALLATION CONSIDERATIONS, continued

© Entrematic Group AB 2017
10 6021140A — Industrial HVLS Fans October 2017
INSTALLATION CONSIDERATIONS, continued
BUILDING STRUCTURE
For open structure roof designs, the fan should only be hung
from either I-beam or angle iron. Do not hang from purlins,
joists or truss structure.
For solid beam or laminated wood beam mounting, use the
laminated wood beam mounting kit available from 4Front.
Consult a professional engineer or registered architect for
specic mounting concerns.
Ensure fan blade clearance meets the requirements. See
Fig. 1-4.
PLACEMENT AND SPACING
Consult your local distributor to help you plan the most
efcient installation of your fans.
Ensure fan placement is such that the fans blades are a
minimum of 10' from any manned working surface (oor or
mezzanine)
Ensure fan blade does not extend into exclusion zone.
Extensions are available if required. See Fig. 1.
Avoid mounting fans directly under lights or skylights to
avoid visual strobing affect.
NOTE:
If the fan is part of a networked system, ensure placement is in
accordance with the building layout. Fan network identication
number is located on the front panel of the VFD box.
NOTE:
Be certain to comply with all local and national codes during
installation.
For fans that will be subjected to high cross winds (open
bay doors or air conditioning diffuser ducts) the fan must
be at least one fan diameter (as measured from the end
of the winglet) from open bays or A/C ducts mounted
below the blade plane or there must be at least two fan
diameters (as measured from the end of the winglet) for
A/C ducts mounted at or above the blade plane.
Fig. 5
1/2-13UNC x 4-1/2 (x2)
1/2 dia washer (x2)
Pivot bracket
Mount tube

© Entrematic Group AB 2017
October 2017 6021140A — Industrial HVLS Fans 11
INSTALLATION
Fig. 7
Building structure
Clamp plate
Shim
Fig. 6
Pivot bolt
Shim (x2)
(as req’d)
1/2-13UNC x 2-1/2 bolts (x4)
1/2-13UNC
lock nut (x4) Angle
adjustment
bolt
Before installation, make certain that the power is
disconnected and properly locked out.
FAN MOUNT ASSEMBLY
1. Fasten pivot brackets to the extension tube with ears
outboard. Leave the 1/2" dia. x 4-1/2" bolts and nylock
nuts nger tight. See Fig. 5.
INSTALL FAN MOUNT
STANDARD I-BEAM
1. Locate fan mount assembly on bottom of building support
beam. Align mount assembly so that it is centered and
square to the beam. Orient mount such that the pivoting
axis is aligned with the building slope if required.
2. Install clamps. For thick ange I-beams add shims as
required. Fasten using the supplied 1/2" dia x 2-1/2"
screws, lock nuts and washers. Torque to 44-48 ft-lbs.
See Fig. 7.

© Entrematic Group AB 2017
12 6021140A — Industrial HVLS Fans October 2017
If building support beam is not level, ensure proper fan
clearance using the mounting information shown on
pages 7-9 or add mounting extensions as required to
ensure clearance. See Fig. 1.
LAMINATED WOOD BEAM MOUNTING —
(OPTIONAL KIT 6014915)
1. Attach laminated wood beam brackets to the wooden
beam using a minimum of four 1/2" dia. grade 5 thru bolts
and self-locking nuts (not supplied). Ensure brackets are
square to the bottom of the beam.
2. Attach mount assembly to the laminated wood beam
brackets using the supplied 1/2" dia x 2-1/2" screws,
nylock lock nuts and washers. Torque to 44-48 ft-lbs. See
Fig. 8.
TRUSS MOUNT
NOTE:
Do not span gaps longer than 72".
To span two trusses or purlins with a gap of 72" or less, span
the gap using two 12 gage steel 1-5/8" x 1-5/8" strut channel.
This will require additional hardware not included with the fan.
Do not use strut channel clamps for any connections when
mounting the fan.
Consult a professional engineer or registered architect for
specic mounting concerns.
Fig. 8
INSTALLATION, continued
Laminated wood
beam bracket
Laminated wood beam
Fig. 9
Fig. 10

© Entrematic Group AB 2017
October 2017 6021140A — Industrial HVLS Fans 13
Fig. 11
Fig. 12
INSTALL POWERHEAD (MOTOR/GEARBOX ASSY)
1. Using a powered lift, orient the powerhead with the blade
hub down. Block motor as required for installation using
the bottom of the frame assembly. Do not support using
the hub or hub cap.
NOTE:
Fan powerhead may be oriented as required for aesthetics
or commonality.
2. Raise the powerhead up until it contacts the bottom of
the fan mount assembly. See Fig. 1.
3. Immediately attach safety cable. See Fig. 13.
a. Slide two of the supplied 1/4" dia cable clamps over
each end of the cable spaced 6" apart.
b. Slide the ends through the cable clamps.
c. Make sure that the cable goes through the motor
frame. See Fig. 13.
e. Securely tighten the clamp fasteners. Make sure the
u-bolts are over the free ends of the cable.
f. Ensure assembly does not interfere with fan motor
housing.
4. Fasten the powerhead to the mount assembly using the
supplied 1/2" dia x 1-1/4" bolts, self-locking nuts and
washers. Torque to 44-48 ft-lbs. See Fig. 12.
If a mounting extension has been used, it may be necessary
to obtain a longer cable from a local supplier.
INSTALLATION, continued
Mount tube
Powerhead
1/2-13UNC x 1-1/4
bolt (x4)
1/2-13UNC
lock nut (x4)
Fig. 13
Safety cable
Motor frame
Space cable
clamps 6" apart

© Entrematic Group AB 2017
14 6021140A — Industrial HVLS Fans October 2017
INSTALLATION, continued
INSTALL GUY WIRES
Guy wires are designed to constrain lateral movement of the
fan in operation. This movement may be due to impacts on
the fan or winds impinging on the blades that would cause
the fan to sway.
Failure to attach guy wires may result in loss of warranty.
If a mounting extension has been used, ensure that the
longer guy wires accompanying the extension are used.
Ensure that the angle formed by the guy wire with the
roof structure is less than 45º. See Fig. 15. Avoid any
sharp edges or corners to reduce fatiguing and fraying
of the guy wires. Failure to attach guy wires may result
in severe injury or death.
1. Adjust turnbuckles to their longest position.
2. Attach the quick link with attached turnbuckle to the fan
as shown. Repeat for all four quick links.
3. Attach one end of the guy wire to the building structure.
Ensure the structure has sufcient strength to withstand
the wire tension. Repeat for all four guy wires.
a. Slide two of the supplied 1/8" dia cable clamps over
one end of the wire.
b. Feed that end of the wire though the building structure
and back through the clamp fasteners.
c. Securely tighten the clamp fasteners so that it cannot
slip. Make sure the u-bolts are over the free end of
the cable.
4. Individually tighten the turn buckle on each cable until
each cable is taut and the powerhead unit hangs plumb.
Use a spirit level to verify powerhead unit hangs plumb.
5. Tighten pivot and angle adjustment bolts on fan mount.
Torque to 44-48 ft-lbs. See Fig. 6.
<45º
Fig. 15
Fig. 14
Guy wires
Quick link
Turnbuckle

© Entrematic Group AB 2017
October 2017 6021140A — Industrial HVLS Fans 15
INSTALLATION, continued
Fig. 16
Fig. 18
Fig. 19
Fig. 17
Spread slightly
Blade retention
lock nuts
Seal removal note
Plastic
shipping
seal
Ventillation
plug
INSTALL BLADES
To reduce the risk of personal injury, do not bend the
blade brackets when installing the brackets or cleaning
the fan. Do not insert foreign objects in between rotating
fan blades.
NOTE:
Blade assemblies come pre-assembled from the factory. Do
not attempt to disassemble.
1. The hub assembly has special blade retention lock nuts
pre-assembled to it. Remove them now and use them to
mount the blade assemblies in the steps below. Use only
the factory supplied lock nuts provided for blade mounting.
2. With the blade oriented such that the blade retention
lanyard is on top, support the blade assembly from below.
Orient and guide the assembly onto the top attachment
studs on the hub assembly. Spread the strut arms slightly
onto the upper studs as shown. Angle the blade upward
as needed to slide blade onto studs. See Fig. 16.
3. Still supporting the blade assembly, rotate the blade
assembly down as shown and allow the bottom blade
strut to ride up and over the bottom attachment studs on
the hub assembly. See Fig. 17.
Do not lean on blade. Damage to strut may occur.
4. Install blade retention lock nuts. Hand tighten nuts ensuring
strut arms are rmly pressing against hub. Torque blade
retention nuts to 24-28 ft-lbs. See Fig. 18.
5. Repeat for each blade assembly.
GEARBOX VENT PLUG
1. Locate ventilation plug on gearbox. See Fig. 19.
2. Pull and remove plastic shipping brace and discard.
3. Remove orange brace removal note and discard.

© Entrematic Group AB 2017
16 6021140A — Industrial HVLS Fans October 2017
INSTALLATION, continued
Fig. 20
Fig. 21
Turnbuckle strap
INSTALL MOTOR COVER
1. Ensure that the motor SO cable has been routed to VFD
box and is secured. See electrical installation instructions.
2. Locate each motor cover and install the cover fasteners.
Do not overtighten. See Fig. 20.
VERIFY CLEARANCE AND CABLE TENSION
1. Rotate fan by hand and observe clearance of each blade
with closest obstruction. If necessary, reposition fan.
Blade tips droop when not in operation and rise when in
operation. Reference chart on page 7 for min. clearance.
2. Verify guy wire tension by attempting to move powerhead
in any horizontal direction. If movement is detected, re-
tension guy wires.
3. Lock the individual turnbuckles using the stop nut on each
and secure it with the turnbuckle strap. See Fig. 21.
ELECTRICAL INSTALLATION
Before doing any electrical work, make certain the power
is disconnected and properly locked or tagged off. Failure
to do so may result in death or serious injury.All electrical
troubleshooting and repair must be done by a qualied
technician and meet all applicable codes. Do not route
control wiring for any other device through the control
box. Ensure that the voltage and phase of the incoming
power agrees with the label located on top of the VFD
box and fan. Be certain power is off when wiring to the
control box. Failure to do so could result in electrical
shock, death or serious injury.
STANDARD UNITS
NOTE:
Reference wiring diagrams on pages 35-39 for all eld
connections.

© Entrematic Group AB 2017
October 2017 6021140A — Industrial HVLS Fans 17
INSTALLATION, continued
Fig. 22
Touch screen
1/2 NPT port
Junction box
60"
Touch screen
(back view)
Remote signal
(blue) cable
Blue label
bulkhead
connector
Power from
building
source
S.O. cable
from fan
VFD box
(top view) Voltage
label
WHT/BRN
BRN
WHT/GRN
GRN
See Fig. 44
INSTALL VFD BOX
The VFD box must be installed outside and a safe distance
from the blade diameter for service purposes.
Verify voltage and phase before mounting. Ensure voltage
shown on VFD box is correct.
2. Mount VFD box outside the fan blade arc. Orient box
such that front panel is accessible and visible with the
connectors on top of the panel.
3. Route the fan S.O. cable from the fan to the VFD box.
Ensure the cable is supported throughout its routing.
4. Route supply power from the building source to the VFD
box.
5. Wire VFD box in accordance with electrical schematics
located on pages 35-37.
6. Attach remote signal (blue) CAT5e cable.
INSTALL REMOTE CONTROL
Do not over-torque mounting screws. Damage to display
screen may occur if mounting screws are over-torqued.
It is the installer’s responsibility to torque properly.
1. Mount touch screen remote to factory supplied junction
box inside building 60" above the oor as close to the fan
assembly as practical. Direct line of sight is preferred. See
Fig 22.
NOTE:
Blue CAT5e cable has terminated ferrules at the remote end.
PROTECT these ferrules during cable routing.
2. Route the remote signal (blue) cable (6015651) from
the top of the VFD box, through the hole in the factory
supplied junction box and wire the 4 leads of the remote
signal (blue) cable to the orange connector of the touch
screen remote control. Excess blue cable length should
be neatly coiled and secured near VFD box.

© Entrematic Group AB 2017
18 6021140A — Industrial HVLS Fans October 2017
INSTALLATION, continued
Fan size
UP/DOWN
arrows
SET
button
SET
24 FT
Use the UP/DOWN arrows to
select the size of the fan and
press the SET button.
Fan size
YES NO
24 FT
Is the size displayed
above correct?
Fig. 233. Mount the touch screen to the junction box using the
fasteners provided.
NOTE:
For cable runs exceeding 1000', consult factory.
VERIFY OPERATION — STANDARD INSTALLATION
Once installation is complete, the initial view of the touchscreen
control will prompt the installer to set and conrm the fan size.
Use the UP/DOWN arrows to select the size of the fan and
press the SET button. Ensure selected size matches the size
specied on the label on the front of the VFD box. If it matches
select the YES button on the following conrmation screen,
if it differs, select the NO button and try again. See Fig. 23.
Operate the industrial fan following the operating instructions
beginning on page 21. Check for proper rotation direction,
stability and noise level.
Train authorized personnel how to use the industrial fan
using the operating procedures located on pages 21-27 in
this manual.

© Entrematic Group AB 2017
October 2017 6021140A — Industrial HVLS Fans 19
INSTALLATION, continued
Fig. 24
TEMPERATURE CONTROL — OPTIONAL
1. Mount temperature control unit to the factory supplied
junction box inside building 60" above the oor and within
1000' of the fan touch screen remote. See Fig. 22 and
wiring details on page 38.
NOTE:
FOR OPTIONAL NETWORKED UNITS, SEE SEPARATE
MANUAL 6015948.

© Entrematic Group AB 2017
20 6021140A — Industrial HVLS Fans October 2017
COMPONENTS AND SPECIFICATIONS
VFD BOX – NEMA 1, Solid State VFD (Variable Frequency
Drive), 208-240VAC 1PH, 208 – 480 VAC, 3PH, line reactor
(where required), Class CC fuses, UL and UL-C listed panel
and components. Power disconnect.
MOTOR
NEMA standard T.E.F.C., 2 HP, continuous duty three phase
GEARBOX
Double helical gear reduced, sealed lubrication.
VFD box
VFD unit
Blade
Winglet
Motor cover
Powerhead
Safety cable
Clamp
Universal mount
Guy wires
Fig. 25
Table of contents
Other Entrematic Fan manuals
Popular Fan manuals by other brands

Westinghouse
Westinghouse Lafayette owner's manual

aldes
aldes Aereco InspirAIR SP 240 installation instructions

Progress Lighting
Progress Lighting AirPro CALERA installation manual

LUCCI
LUCCI BREEZER SERIES manual

Broan
Broan 355SOBK manual

Omega Altise
Omega Altise OP408R Operation, maintenance and safety instructions

Vaventis
Vaventis Fresh-r On-The-Wall Maintenance manual

Hammond
Hammond SDVN4XN2 installation instructions

DryAIR
DryAIR GALE FORCE VAF-16R manual

Space Pak
Space Pak WCSP-D series Installation, operation & maintenance manual

System air
System air Fantech ATMO Series Installation, operation and maintenance manual

Ebmpapst
Ebmpapst D4E200-CA08-41 operating instructions