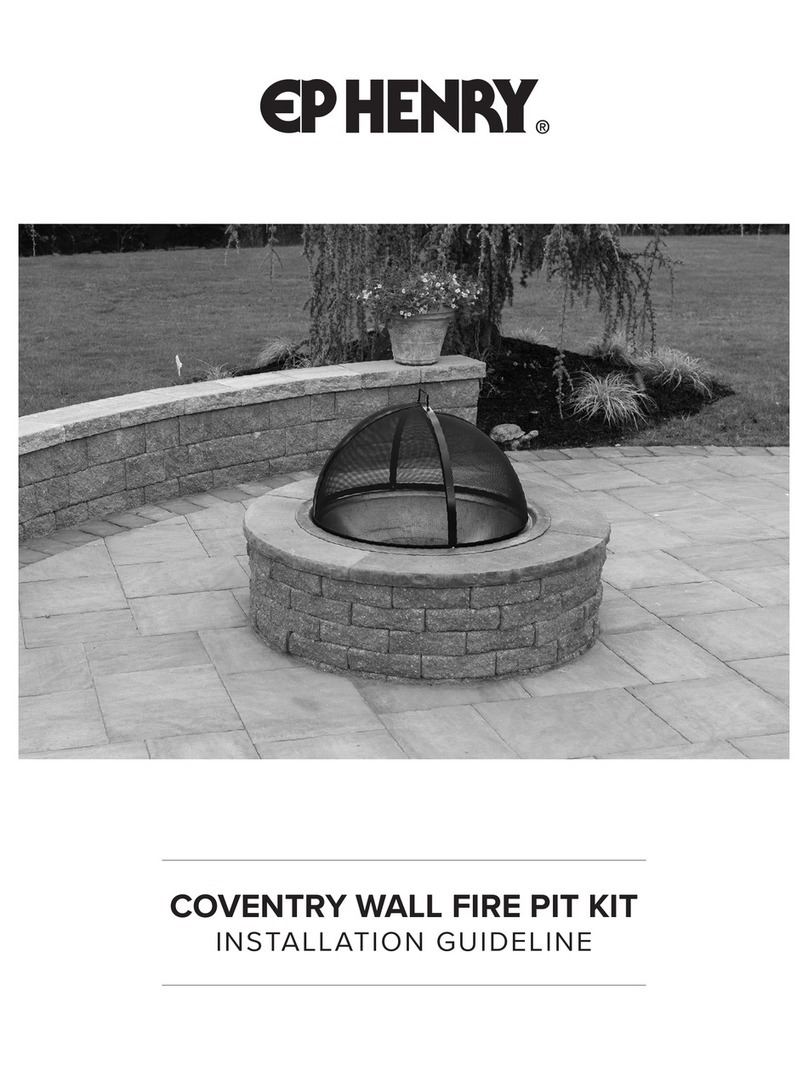
EP HENRY FIRE PIT Instruction sheet

EP HENRY FIRE PIT
INSTALLATION GUIDELINES
EXCELLENCE SINCE 1903

IMPORTANT:
BE SURE TO READ ALL SAFETY
GUIDELINES BEFORE INSTALLING
OR USING YOUR EP HENRY FIRE PIT.
COMPONENTS:
Please make sure all components are in place before
you begin to assemble. Your EP Henry Fire Pit Kit
should contain the following items:
• One (1) copper fire pit bowl
• One (1) screened cover
• Two (2) grills – one (1) small for burning
wood and one (1) large for cooking
• One (1) poker
• Four (4) semi-circular charcoal colored
caps for the top of the fire pit wall
• One hundred twelve (112) tapered fire pit
wall blocks on a separate pallet
Contact your EP Henry Authorized Hardscaping
Distributor® immediately if any components
are missing or damaged upon opening. Proof
of purchase must be provided for any claim to
be recognized.
GETTING STARTED:
When building the fire pit wall, arrange the first
course of tapered fire pit wall block in a circle,
making sure that all of the units are fitted tightly
together. Orient all of the blocks so that the narrow
vertical face of the block is on the inside of the circle.
Each course will require 16 blocks to complete. You
can build the fire pit wall 7 courses high or to a lower
height if so desired. The fire pit wall will have an
inside diameter of 30-1/2” and an outside diameter
of 48”. The wall cap has an inside diameter of 32”
and an outside diameter of 50”. This fire pit is not
designed nor intended to be expanded beyond these
stated dimensions.
High strength heat resistant concrete adhesives are
recommended for gluing the fire pit block together
and if desired, for attaching the cap units* to the top
of the fire pit wall (see Fire Bowl Drainage and
Construction Options first). Make sure all units are
dry and dust free before applying adhesives. All
adhesive should be applied on the upward facing
horizontal flat surface toward the outside of the units
to prevent it from over-heating and emitting toxic
fumes. It is recommended that any adhesive be
allowed to cure for at least 48 hours before lighting
a fire in the fire pit.
*It is recommended that the four (4) semi-circular
charcoal colored caps for the top of the fire pit wall
not be glued to the fire pit wall as that would
prevent easy removal of the fire bowl for dumping
accumulated rain water, cleaning, or debris
removal from the interior cavity of the fire pit. See
Fire Bowl Drainage and Construction Options for
more details.
MARKING OUT THE
CONSTRUCTION:
Establish the location where the fire pit is to be built.
Mark the center of that location. Then drive a stake
into the ground or hold a pin at the center point of
that location. If you are building your fire pit on a
concrete slab or paver surface, tether a line 24” or
slightly longer to that center point with a marking
device tied at the opposite end and follow directions
under step #1. If you are building your fire pit in an
open area on the ground, your excavation and
compacted stone base needs to exceed the exterior
circumference of the fire pit by 6”on all sides so you
will need a line that is 30” or longer and follow
directions under step #2. Carefully swing the
marking device around the center point keeping it
vertically aligned and mark out the circular exterior
dimension of the fire pit construction. If you are
constructing the fire pit on a solid surface that will
remain exposed, do not use a permanent marker.
| FIRE PIT INSTALLATION GUIDELINES
| |
ephenry.com | 800-444-3679

1) CONCRETE SLAB AND PAVER
CONSTRUCTION: When building your fire pit
on top of a concrete slab or paver surface, it is
recommended that a layer of geotextile or
landscaping weed barrier cloth be laid in the bottom
of the pit and turned up the inside of the block 4”.
The bottom of the fire pit cavity should then be
filled with clean sand to a depth of 4”. This will help
prevent ash particles from washing out of the bottom
of the fire pit and staining the surrounding surface.
Continue to page 6.
| 3 |
1) Establish location of Fire Pit. 2) Mark out the exterior dimension. 3) Cut out avers and lay first course.
4) Install weed barrier cloth. 5) Stagger Joints 6) Build to desired height (not to exceed 7
courses).
7) Place co er bowl and grate. 8) Ca the Fire Pit wall. 8) Add s ark screen and enjoy!
PAVERS OR CONCRETE SLAB/INSET INSTALLATION
| FIRE PIT INSTALLATION GUIDELINES

2) DENSE AGGREGATE BASE/FREE-
STANDING INSTALLATION: Mark out the area
of the fire pit and excavate deep enough to
accommodate 6” of well-compacted, dense-graded
aggregate stone, a 1” layer of setting bed sand, and
the 3” thickness of one layer of fire pit wall block
that will be buried as the footer course. Make sure
the excavated soil surface is smooth and level.
Thoroughly compact the soil surface. Geotextile
(Mirafi 500) is recommended as a separation
membrane on top of the soil surface and up the sides
of the excavation to help maintain the integrity of
the dense-graded aggregate stone base, especially
when clay soils are present.
Shovel in the stone for the base and spread it evenly
in layers 2” thick. Carefully compact the stone base.
For best results, use of a vibratory plate compactor
is recommended for this purpose. Repeat this process
until the stone base is 6” deep. Before compacting
the final layer of stone, use a straight edge and level
to see if the surface is smooth and level, then
compact and check again. If the surface is not level
and smooth, scratch the surface with a rake, smooth
and level it, and compact it again. If the fire pit is
being incorporated into a paver installation set the
base course along with the pavers as they are being
installed.
For the 1” sand setting bed, lay two or more pipes
with an outside diameter of 1” on the stone base.
Place a couple of shovelfuls of coarse, washed
concrete sand between the pipes. Then using a
straight edge, such as a 2”x 4”, drag it across the
length of the pipes pushing and smoothing the sand.
Repeat this process until the entire surface is covered
with a uniform layer of coarse concrete sand 1” thick.
Pick up the pipes and fill in the void left by the pipe
with sand, smoothing it with a broom or mason’s
trowel.
Lay the first course of fire pit wall block, setting the
units tightly together and being careful to lower the
block straight down on to the sand. Do not drop the
units into place or set them on edge and let them
flop down. Either method will result in an uneven
base coarse that will cause structural unevenness in
the fire pit wall. If any block are out of alignment or
the circle is distorted, tap the blocks into place with
a rubber mallet or dead blow hammer. The interior
of the circle created by the base course should be as
close to perfect as possible. The exterior dimension
should vary due to the irregular face of each block.
Once the first course has been aligned, seat the
blocks into the sand by striking them in a downward
motion on the exposed horizontal flat side of the
block with a dead blow hammer or rubber mallet.
Check the top surface of the blocks to make sure
they are level from front to back, side to side, and
from block to block around the circle of block and
spanning the circle of block equatorially from one
side to the other. The block should settle into the
sand about 3/8”.
Continue to page 6.
CALL BEFORE OU DIG!
It is your responsibility to notify the utility
companies a fe days prior to digging so that
they can mark out any underground lines. For
your convenience, dial 8-1-1- nation ide and
be prepared to describe the scope of your
project. Avoid injury, expense and possibly a
day in the dark.
For more info, visit
www.call811.com.
| 4 |
| FIRE PIT INSTALLATION GUIDELINES
ephenry.com | 800-444-3679

| 5 |
1) Pre aggregate base and sand setting
bed. 2) Lay first course of block. 3) Level.
4) Make sure first course is erfectly level
rior to laying further courses. 5) Lay second and additional courses. 6) Level and align blocks vertically.
7) Place co er bowl. 8) Ca wall and add grates. 9) Add s ark screen and enjoy!
FREE STANDING INSTALLATION
| FIRE PIT INSTALLATION GUIDELINES
ephenry.com | 800-444-3679

INSTALLING
THE BLOCK
(FOR BOTH INSTALLATION METHODS)
ow set the next course of block in place. Position
each course so the blocks are centered on the joint
between two blocks beneath it. This will stagger the
joints of the block providing stronger, more stable
construction as well as a more pleasing appearance.
Continue to lay block in this manner. It is optional
to apply heat tolerant adhesive toward the outside
edge of the exposed, horizontal, flat surface of each
block as the block being placed on top of it is laid.
Use a level to align the block vertically on the
inside face of the wall. The outside fire pit face
profile will vary due to the split face and deeply
textured surface of the blocks. If the blocks are being
glued, make sure any alignment adjustments are
done quickly because the adhesive will set up in a
short amount of time and the block will be
permanently set in place.
Backfill the exposed compacted stone in the overdig
area with soil or decorative stone. Wood chips,
mulch, and other flammable materials should not be
used in or around the fire pit to cover disturbed soil
or the excavation overdig.
SETTING THE BOWL
AND CAPPING THE
FIRE PIT WALL:
After the fire pit wall has been constructed to your
desired height or the maximum height, place the
metal bowl in the center of the opening. Then dry
lay the four wall caps around the bowl. Overlap the
inside lower surface of the capping units on top of
the bowl flange and butt the sides of the capping
units tightly together. Check to see if the circular cap
overhangs the fire pit wall in a fairly uniform fashion
and is not off center.
Fire Bowl Drainage and Construction Options –
The fire bowl is a solid unit and does not have a
drain hole in the bottom of it. As a result it may fill
with rain water and overflow, causing ash or debris
left in the fire bowl to float out on to the
surrounding surfaces. To reduce the problems caused
by ash being blown out of the fire bowl or washed
out by rain, it is recommended that all ash and debris
be removed from the fire bowl after each use. Ma e
sure all embers are completely burned out and no longer
a fire hazard and that the ash is cool before removing
it. Dispose of all ash properly.
If you want the fire bowl to drain into the fire pit
well below, drill a hole in your fire bowl to allow
drainage. Use a drill bit suitable for metal and drill a
hole 3/8” to 1/2” in diameter on the side of the fire
bowl above the level of the lower grate. This will
allow water to flow out of the bowl above residual
ash and carry less of it into the fire pit well below. If
you opt to drill the drainage hole, the filtration
membrane and sand needs to be installed in the
bottom of the fire pit well to capture ash, debris, and
any cooking residue that drain out. Ash should be
cleaned out and properly disposed of after each use
when all embers have burned out and are no longer
a fire hazard and the ash is completely cool.
To allow for the clean out of the filtration membrane
or to easily dump rain water out of the fire bowl do
not glue or mortar in place the four (4) semi-circular
charcoal colored caps that are placed over the fire
bowl flange. Instead set those units in place so they
fit tightly together and can be removed when
needed. This will allow you to remove the fire bowl
to remove water or clean out the filtration membrane
below it, and is the recommended practice.
| 6 |
| FIRE PIT INSTALLATION GUIDELINES
ephenry.com | 800-444-3679

Gluing Cap Units In Place (Optional): If you
choose to secure the four (4) semi-circular caps units
permanently, after aligning them in place, lift up
each capping unit individually leaving the three
others in place to act as a guide then apply the
adhesive. Place daubs of adhesive the size of a quarter
6” apart, near the outside edge of the fire pit wall
block on the flat horizontal surface. Carefully lower
the cap unit back into place until it touches the
adhesive. Do not tap the units with a hammer to
align them. It will leave marks on the cap surface.
Instead, pat them into place with your hand or use
a rubber mallet if needed.
After the cap units are set in place, insert the smaller
grill that supports the fuel source and keeps it above
the bowl. Then insert the larger grill for cooking.
Place the spark screen on the bowl and you are
finished with your fire pit installation. Do not light
a fire in the fire pit for at least 48 hours to allow any
adhesive to cure properly and for potentially
flammable fumes to dissipate.
LIGHTING FIRES:
IMPORTANT: Please review and become familiar
with the safety guidelines that accompany these
instructions. Your EP Henry Fire Pit is not designed
for large fires. Make sure that the fires you light are
kept small and held away from the edge of the spark
screen for the first several fires. Except in case of
emergency, always allow fires to burn out on their
own. Extinguishing fires with water may cause the
cap or wall units to crack or spall. Do not burn
lumber, plywood, trash, leaves, or other debris in
your fire pit. Only burn dry hardwoods. Do not use
lighter fluid, gasoline, or other fire accelerants to start
or maintain fires. Always use the spark screen to
cover a fire. Always use the fire poker to open and
close the spark screen when fires are lit or burning
out. Wear fire resistant gloves when maintaining the
fire and opening the spark screen. The spar screen
will become extremely hot and burn s in on contact.
EP HENRY FIRE PIT
SAFETY GUIDELINES:
• Read all safety recommendations carefully.
Before assembling your EP Henry Fire Pit read all
of the instructions and installation guidelines.
• Contact your local building code or fire safety
code officials to obtain any regulations regarding
the construction and use of fire pits in your
community. Make sure you comply with those
regulations.
• Selecting the location of your firepit: Choose a
location that is at least 20 feet away from any
structures.
• Make sure that there are no overhanging objects
such as tree branches, canopies, cantilevered roof
structures, or other elements that are flammable
and could catch on fire.
• ever build a fire pit for use in a house, warehouse,
gazebo, garage, or any other indoor setting.
• Make sure that combustible materials such as wood
chips, mulch, ornamental grasses, propane tanks,
barbeque grills and other flammable materials are
a safe distance away.
GENERAL SAFET GUIDELINES:
• ever use fire accelerants such lighter fluid,
kerosene, gasoline, etc. to start or maintain fires.
• Keep children away from the fire pit while burning
fires. ever leave children unsupervised around a
fire.
• Always burn fires with the spark screen on and in
the closed position.
• Always use the poker or similar long fire tools to
| 7 |
| FIRE PIT INSTALLATION GUIDELINES
ephenry.com | 800-444-3679

| 8 |
open and close the spark screen.
• ever touch the spark screen while a fire is lit. The
spark screen will become extremely hot and burn
skin on contact.
• ever use the fire pit to dry clothes, laundry, or
other damp items.
• ever sit too close to the fire. Establish seating
positions at least three feet away from the fire pit.
• Always use fire resistant gloves when placing wood
into the fire, opening, or closing the spark screen.
• Always use fire resistant gloves to manipulate the
spark screen when a fire is lit, or adding wood to
the fire.
• Always have a source of water or fire extinguisher
available in case of emergencies.
• Always burn dry hardwoods in your fire pit. Do
not burn lumber, plywood, trash, leaves, or other
debris in your fire pit.
• ever stack too much wood in the fire bowl. Make
sure the spark screen can close tightly before you
light a fire.
• Unless there is an emergency, never extinguish the
fire with water. It may cause the wall caps or fire
pit block to crack or spaul.
• Do not light fires if the wind is blowing toward
structures or if the wind is strong allowing sparks
to carry any distance away from those maintaining
the fire.
• Do not allow ash to build up in the fire bowl.
ever throw out embers. Make sure that all ash is
completely cold before disposing of it.
EP HENR IS NOT RESPONSIBLE FOR:
• Damages, injuries, or expenses caused by use of the
fire pit or its use in areas where there are hazardous
or flammable materials, flammable gases, fireworks,
or any sources of collateral combustion or
explosion.
• Damages, injuries, or expenses caused by improper
use or use not compliant with the safety guidelines.
• Damages, injuries, or expenses resulting from the
misuse, accidents, negligence, delinquent behavior,
or secondary fires resulting from use of the fire pit.
• Damages, injuries, and expenses caused by
insufficient maintenance of the fire pit, fire bowl,
spark screen, or any other element of the fire pit.
| FIRE PIT INSTALLATION GUIDELINES
ephenry.com | 800-444-3679
EP Henry provides a Lifetime Guarantee on the structural integrity of our paving stones and wall systems for
residential use. Please refer to our catalog, visit us at www.ephenry.com or call 800-444-3679 for full details.
The hardware components – copper bowl, grills, spar screen and po er – are not manufactured by EP Henry and
therefore, not covered by our Lifetime Guarantee.
Please note: Hardware components will show signs of wear after exposure to high temperatures and the elements.
Discoloration, fla ing and rust are normal results of this exposure and not considered product defects. Please refer
also to the Assembly and Instruction Sheet included with the hardware it.
Table of contents
Other EP HENRY Outdoor Fireplace manuals
Popular Outdoor Fireplace manuals by other brands
Camplux
Camplux FP19CR Instructions for installation and use
Backyard Creations
Backyard Creations YB20YL Assembly instructions
Foremost Groups
Foremost Groups RO47248GFP-WD manual

ELEMENTI
ELEMENTI OFG101LP owner's manual
Endless Summer
Endless Summer Anderson GAD1446ES owner's manual
VonHaus
VonHaus 2500555 manual

Firegear
Firegear FPB-19RBSTMSI-N Installation and operating instructions
Sunnydaze Decor
Sunnydaze Decor KF-610019D quick start guide

Uniflame
Uniflame WAF501CS owner's manual

Bond
Bond PGF5820-2 user guide
pleasant hearth
pleasant hearth ATHENA DEEP BOWL FIRE PIT Install manual
First Op International
First Op International ET-F-030-C3 manual
