Evercraft 775-9203A User manual
Rev. 03/08/04
775-9203A 1
ALWAYS READ
INSTRUCTIONS
BEFORE USING
POWER TOOLS
ALWAYS WEAR
SAFETY GOGGLES
WEAR HEARING
PROTECTION
AVOID
PROLONGED
EXPOSURE TO
VIBRATION
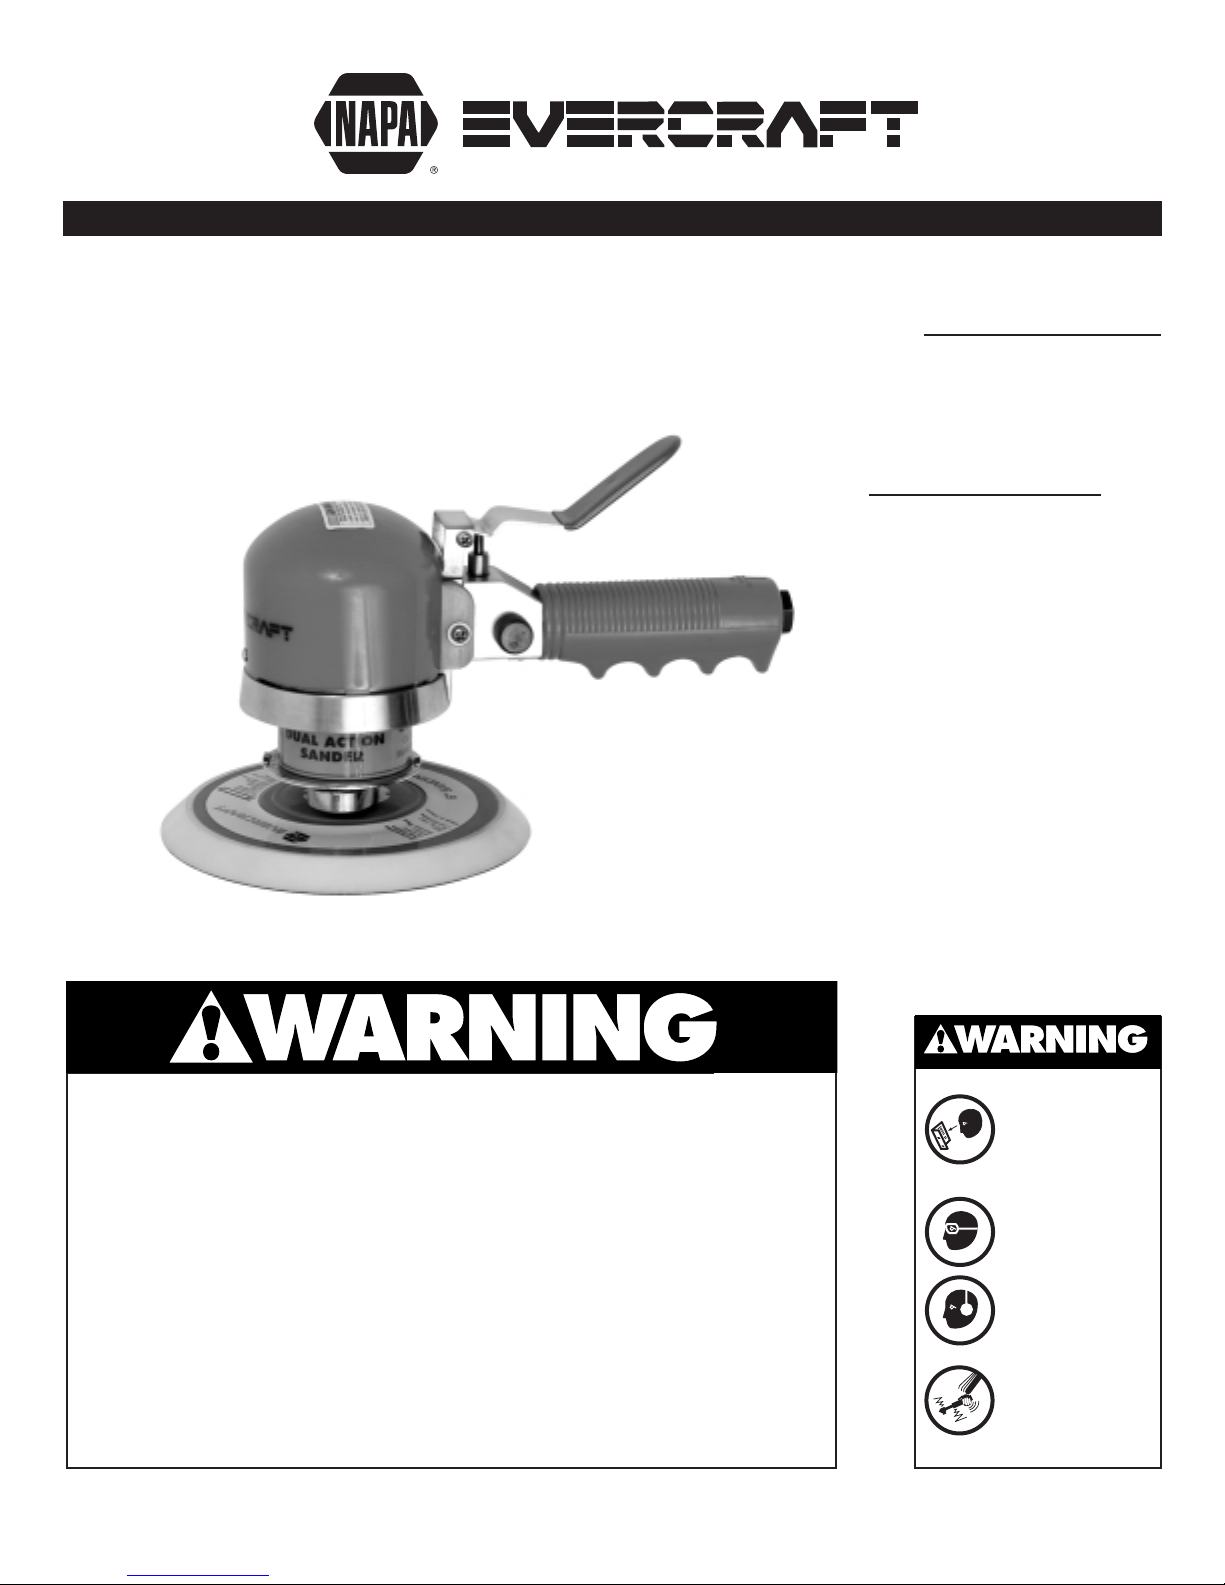
INSTRUCTION MANUAL & PARTS BREAKDOWN
775-9203A
6" DAQ SANDER
Some dust created by power sanding, sawing, grinding, drilling, and other
construction activities contains chemicals known to cause cancer, birth defects
or other reproductive harm. Some examples of these chemicals are:
• lead from lead-based paints,
• crystalline silica from bricks and cement
and other masonry products, and
• arsenic and chromium from chemically-treated lumber.
Your risk from these exposures varies, depending on how often you do this
type of work. To reduce your exposure to these chemicals: work in a well
ventilated area, and work with approved safety equipment, such as those
dust masks that are specially designed to filter out microscopic particles.
Specifications
Free Speed . . . . . . . . .10,000 RPM
Air Inlet (NPT) . . . . . . . . . . . .1/4"
Hose Size (ID) . . . . . . . . . . . . .3/8"
Air Pressure (PSI) . . . . . . . . . . . .90
Air Consumption . . . . . . . . . . . .4
Pad Size . . . . . . . . . . . . . . . . . .6"
Sound Level . . . . . . . . . . . .91 dBA
Height . . . . . . . . . . . . . . . . . . . .5"
Length . . . . . . . . . . . . . . . . .9-3/4"
Shipping Wt. (Lbs.) . . . . . . . . .4.22

Rev. 03/08/04
775-9203A 2
THIS INSTRUCTION MANUAL CONTAINS
IMPORTANT SAFETY INFORMATION.
READ THIS INSTRUCTION MANUAL
CAREFULLY AND UNDERSTAND ALL
INFORMATION BEFORE OPERATING
THIS TOOL.
• Always operate, inspect and maintain this
tool in accordance with American National
Standards Institute Safety Code of Portable
Air Tools (ANSI B186.1) and any other
applicable safety codes and regulations.
• For safety, top performance and maximum
durability of parts, operate this tool at 90
psig, 6.2 bar max air pressure with 3/8"
diameter air supply hose.
• Always wear impact-resistant eye and face
protection when operating or performing
maintenance on this tool. Always wear
hearing protection when using this tool.
• High sound levels can cause permanent
hearing loss. Use hearing protection as
recommended by your employer or OSHA
regulation.
• Keep the tool in efficient operating condition.
• Operators and maintenance personnel must
be physically able to handle the bulk,
weight and power of this tool.
• Air under pressure can cause severe injury.
Never direct air at yourself or others.
Always turn off the air supply, drain hose of
air pressure and detach tool from air supply
before installing, removing or adjusting any
accessory on this tool, or before performing any
maintenance on this tool. Failure to do so
could result in injury. Whip hoses can cause
serious injury. Always check for damaged,
frayed or loose hoses and fittings, and
replace immediately. Do not use quick
detach couplings at tool. See instructions for
correct set-up.
• Air powered tools can vibrate in use.
Vibration, repetitive motions or
uncomfortable positions over extended
periods of time may be harmful to your
hands and arms. Discontinue use of tool if
discomfort, tingling feeling or pain occurs.
Seek medical advice before resuming use.
FAILURE TO OBSERVE THESE WARNINGS COULD RESULT IN INJURY.
• Place the tool on the work before starting
the tool.
• Slipping, tripping and/or falling while
operating air tools can be a major cause of
serious injury or death. Be aware of excess
hose left on the walking or work surface.
• Keep body working stance balanced and
firm. Do not overreach when operating the tool.
• Anticipate and be alert for sudden changes
in motion during start up and operation of
any power tool.
• Do not carry tool by the hose. Protect the
hose from sharp objects and heat.
• Tool shaft may continue to rotate briefly
after throttle is released. Avoid direct
contact with accessories during and after
use. Gloves will reduce the risk of cuts or burns.
• Keep away from rotating end of tool. Do
not wear jewelry or loose clothing. Secure
long hair. Scalping can occur if hair is not
kept away from tool and accessories.
Choking can occur if neckwear is not kept
away from tool and accessories.
• Never mount a grinding wheel on a sander.
A grinding wheel that bursts can cause very
serious injury or death when not properly
guarded. Inspect backing pad before each
use. Do not use if cracked or damaged.
• Avoid direct contact with moving sanding
pad to prevent pinching or cutting of hands
or other body parts.
• Do not lubricate tools with flammable or
volatile liquids such as kerosene, diesel or
jet fuel.
• Do not force tool beyond its rated capacity.
• Do not remove any labels. Replace any
damaged labels.
Rev. 03/08/04
775-9203A 3
PLEASE REVIEW ALL WARNING INSTRUCTIONS PRIOR TO OPERATION. SAVE THIS MANUAL FOR FUTURE REFERENCE.
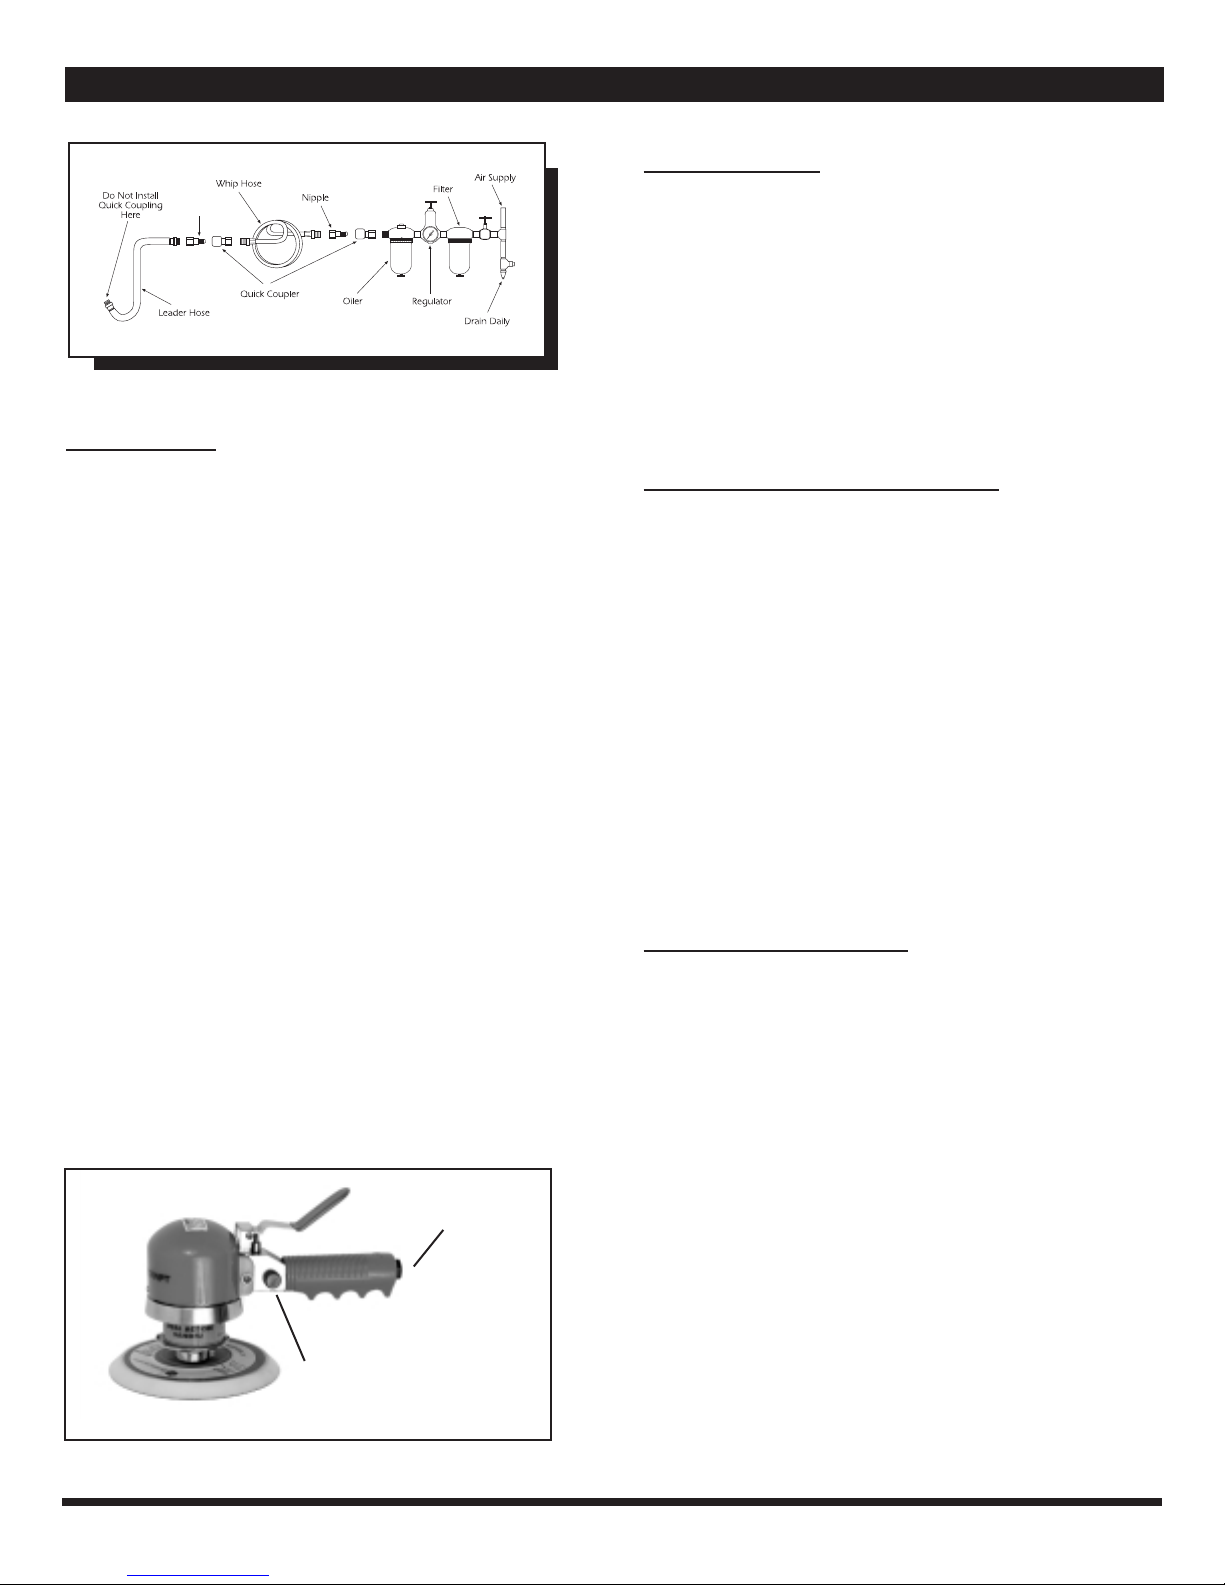
AIR SUPPLY
Tools of this class operate on a wide range
of air pressures. It is recommended that air
pressure of these tools measures 90 PSI at the
tool while running free. Low pressure (under 90
psig; 6.2 bar) reduces the speed of all air tools.
Low air pressure not only wastes time, but also
costs money. Higher pressure (over 90 psig; 6.2 bar)
raises performance beyond the rated capacity of
the tool, which will shorten tool life because of
faster wear and could cause injury.
Always use clean, dry air. Dust, corrosive fumes
and/or water in the air line will cause damage to
the tool. Drain the air tank daily. Clean the air
inlet filter screen on at least a weekly schedule.
The recommended hookup procedure can be
viewed in the above figure.
The air inlet used for connecting air supply, has
standard 1/4" NPT American Thread. Line pressure
should be increased to compensate for unusually
long air hoses (over 25 feet). Minimum hose
diameter should be 3/8" I.D. and fittings should
have the same inside dimensions and be tightly
secured.
LUBRICATION
Lubricate the air motor daily with NAPA air tool
oil. If no air line oiler is used, run a teaspoon of oil
through the tool. The oil can be squirted into the
tool air inlet or into the hose at the nearest con-
nection to the air supply, then run the tool. The
amount of oil to be used is 1 ounce. Overfilling
will cause a reduction in the power of the tool.
OPERATING INSTRUCTIONS
The air regulator knob can be used as an air
throttle and can be used for setting positive speed
control. Let the sander do the work. The normal
weight of the machine is sufficient for efficient
sanding. Do not put additional pressure on the
machine. This will only slow down the speed of
the pad, reduce sanding efficiency and put an
additional burden on the motor. Start the sander
off the work, set it down on the work evenly and
move it slowly back and forth in wide, overlapping
areas. When finished sanding, lift it off the work
before stopping the motor.
TROUBLESHOOTING
Other factors outside the tool may cause loss of
power or erratic action. Reduced compressor
output, excessive drain on the air line, moisture or
restrictions in air pipes, the use of hose
connections of improper size or poor conditions
may reduce air supply. Grit or gum deposits in the
tool may cut power and may be corrected by
cleaning the air strainer and flushing out the tool
with gum solvent oil or an equal mixture of SAE #
10 and kerosene. If outside conditions are in order,
and the tool continues erratic action or low power,
disconnect tool from hose, and contact your
nearest NAPA/EVERCRAFT authorized service center.
INSTRUCTION MANUAL & PARTS BREAKDOWN
Nipple
Figure 2
Figure 1
(B) Air Inlet
(A) Air Regulator Valve
Rev. 03/08/04
775-9203A 4
PLEASE REVIEW ALL WARNING INSTRUCTIONS PRIOR TO OPERATION. SAVE THIS MANUAL FOR FUTURE REFERENCE.
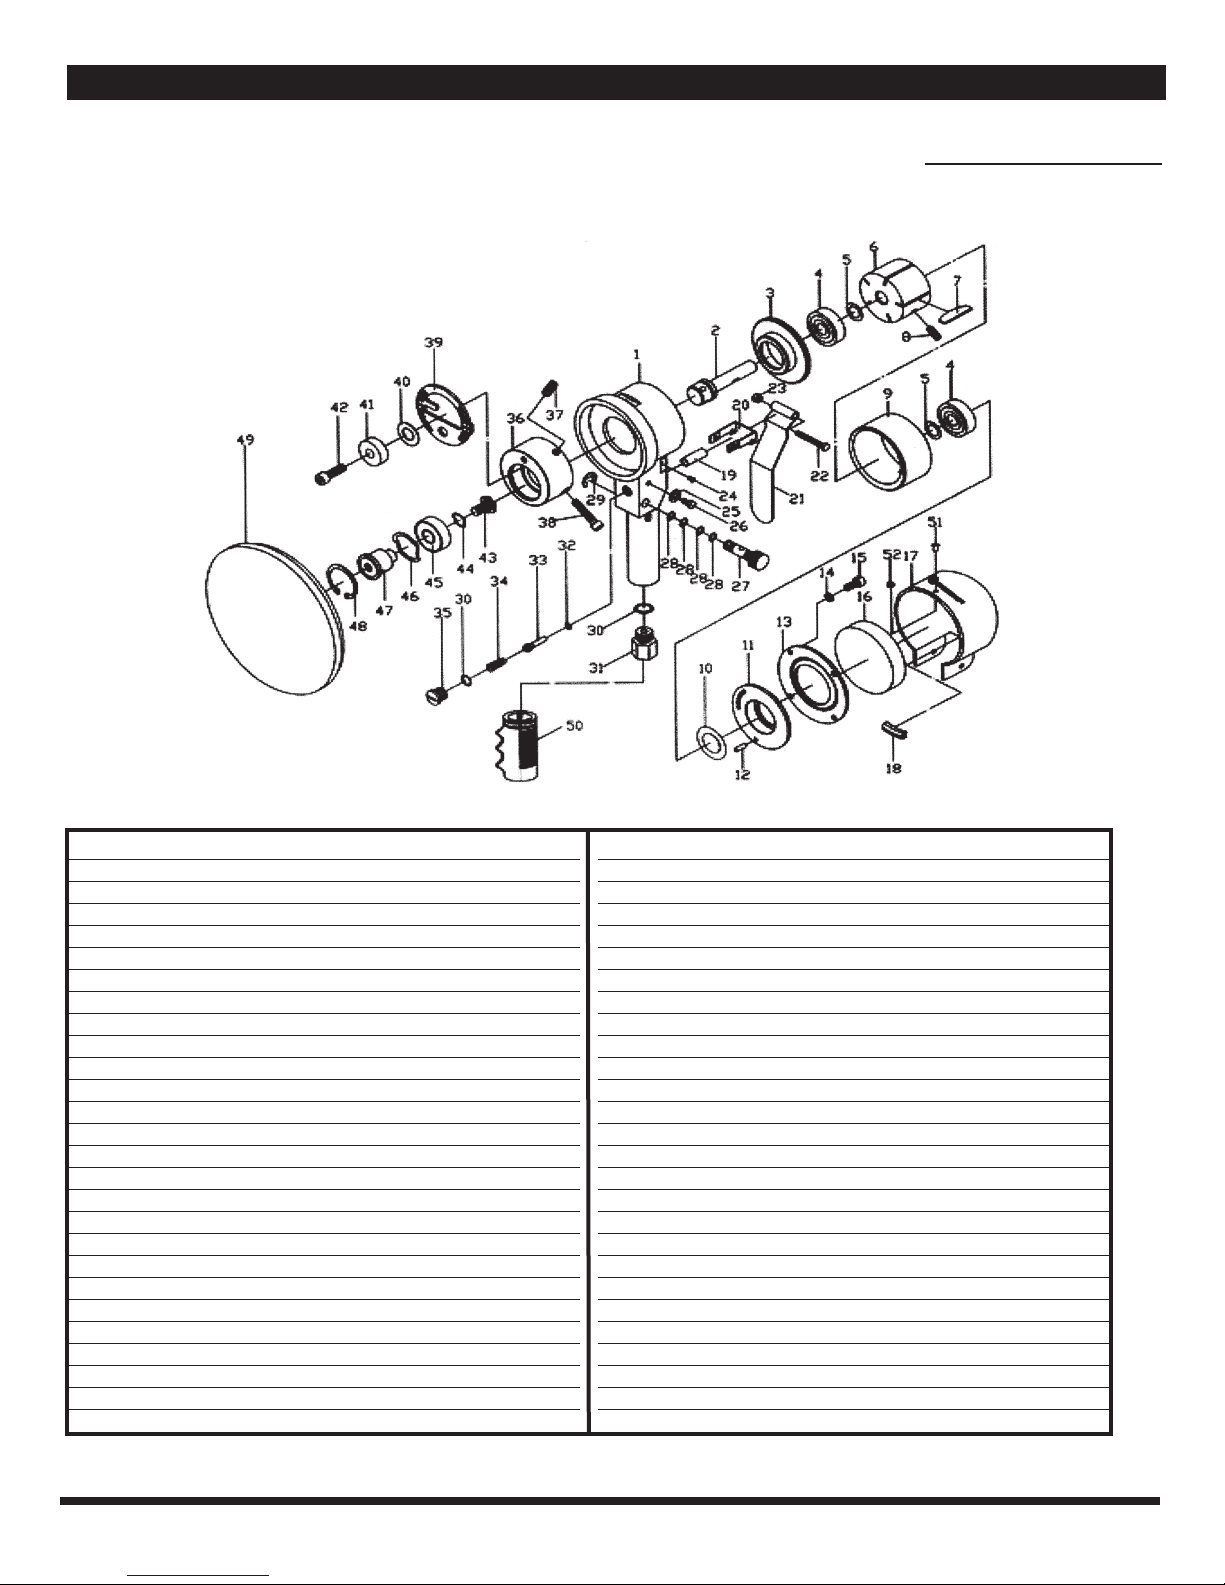
INSTRUCTION MANUAL & PARTS BREAKDOWN
Ref. # Item # DESCRIPTION QTY.
1 RS203A01 Housing 1
2 RS203A02 Work Spindle 1
3 RS203A03 Front Plate 1
4 RS29120 Bearing 2
5 RS203A05 Washer 2
6 RS203A06 Rotor 1
7 RS203A07 Rotor Blade 5
8 RS203A08 Lock Nut 1
9 RS203A09 Cylinder 1
10 RS203A10 Washer 1
11 RS203A11 End Plate 1
12 RS203A12 Pin 1
13 RS203A13 Exhaust Cover 1
14 RS203A14 Washer 4
15 RS203A15 Screw 4
16 RS203A16 Sponge 1
17 RS203A17 End Cover (Includes #s 51,52) 1
18 RS203A18 Cotton 1
19 RS203A19 Valve Bushing 1
20 RS203A20 Bracket 1
21 RS203A21 Trigger 1
22 RS203A22 Trigger Screw 1
23 RS203A23 Screw 1
24 RS203A24 Screw 2
25 RS203A25 Washer 1
26 RS203A26 Screw 2
Ref. # Item # DESCRIPTION QTY.
27 RS203A27 Air Regulator 1
28 RS203A28 O-Ring 4
29 RS203A29 Retainer Ring 1
30 RS203A30 O-Ring 2
31 RS203A31 Air Inlet 1
32 RS203A32 O-Ring 1
33 RS203A33 Valve Stem 1
34 RS203A34 Spring 1
35 RS203A35 Valve Plug 1
36 RS203A36 Balancer 1
37 RS203A37 Screw 1
38 RS203A38 Screw 1
39 RS203A39 Drive Cover 1
40 RS203A40 Washer 1
41 RS203A41 Spindle Lock 1
42 RS203A42 Screw 1
43 RS203A43 Screw 1
44 RS203A44 Washer 1
45 RS21118 Bearing 1
46 RS203A46 Washer 1
47 RS203A47 Drive Spindle 1
48 RS203A48 Retainer Ring 1
49 RS203A49 6" Pad 1
50 RS203A50 Rubber Grip 1
51 Rivet (Included in #17)
52 Bushing (Included in #17)
775-9203A
6" DAQ Sander

Rev. 03/08/04
775-9203A 5
PLEASE REVIEW ALL WARNING INSTRUCTIONS PRIOR TO OPERATION. SAVE THIS MANUAL FOR FUTURE REFERENCE.
IMPACT WRENCHES
TOOL RUNS SLOWLY OR NOT AT ALL AND/OR AIR FLOWS ONLY SLIGHTLY FROM EXHAUST — This is probably caused
by: air flow blocked by dirt build-up; motor parts jammed with dirt; power regulator has vibrated to closed
position.
YOU SHOULD: Check air inlet strainer for blockage. Pour a generous amount of air tool oil into air inlet. Operate
tool in short bursts, in both forward and reverse motion. Repeat if necessary. If tool performance is not
improved, it should be serviced at an authorized service center.
TOOL WILL NOT RUN, EXHAUST AIR FLOWS FREELY. This is probably caused by one or more motor vanes stuck due
to accumulation of sludge or varnish; motor rusted.
YOU SHOULD: Pour a generous amount of air tool oil into air inlet. Operate tool in short bursts, in both forward and
reverse motion. Lightly tap motor housing with plastic mallet. Detach air supply. Try to free motor by turning
drive shank manually, if possible. If tool remains jammed, it should be serviced at authorized service center.
SOCKETS WILL NOT STAY ON. This is probably caused by: worn socket retainer ring or soft back-up ring.
YOU SHOULD: Wear safety goggles. Detach air supply. Using external retaining ring pliers, remove old retaining ring.
Holding square drive with appropriate open-end wrench, use small screwdriver to pry old retainer ring
out of groove. Always pry off ring away from your body - it can be propelled outward at high velocity. Replace
back-up O-ring and retainer ring with correct new parts. (See breakdown). Place retaining ring on table, press
tool anvil into ring in a rocking motion. Snap into groove by hand.
PREMATURE ANVIL WEAR. This is probably caused by: use of chrome sockets or worn sockets.
YOU SHOULD: Stop using chrome sockets. Chrome sockets have a hard surface and a soft core. Drive hole becomes
rounded - but will still be very hard. Besides the danger of splitting, wrench anvils will wear out prematurely
when used with chrome sockets.
TOOL SLOWLY LOSES POWER BUT STILL RUNS AT FULL FREE SPEED. This is probably caused by: worn clutch parts,
due to inadequate lubrication; engaging cam of clutch worn or sticking due to inadequate lubrication.
YOU SHOULD: FOR OIL LUBED WRENCHES - check for presence of clutch oil (where oil is specified for clutch) and
remove oil fill plug; tilt to drain all oil from clutch case; refill with 30 weight SAE oil or that recommended by
manufacturer, in the specified amount. Also check for excess clutch oil. Clutch cases need only be filled 50%.
Overfilling can cause drag on high speed clutch parts. A typical 1/2" oil-lubed wrench only requires 1/2 ounce of
clutch oil. FOR GREASE LUBED WRENCHES - Check for excess grease by rotating drive shank by hand. It should
turn freely. Excess is usually expelled automatically.
TOOL WILL NOT SHUT OFF. This is probably caused by: throttle valve O-ring broken or out of position or throttle
valve stem bent or jammed with dirt particles.
YOU SHOULD: Remove assembly and install new O-ring. Lubricate with air tool oil and operate trigger briskly. If
operation cannot be restored, tool should be serviced at authorized service center.
AIR RATCHETS
MOTOR RUNS. SPINDLE DOESN'T TURN, OR TURNS ERRATICALLY — This is probably caused by: worn teeth on ratchet
or pawl; weak or broken pawl pressure spring; weak drag springs fail to hold spindle while pawl advances for
another bite.
YOU SHOULD: Have replacement parts installed by authorized service center.
TOOL DOESN’T RUN, RATCHET HEAD INDEXES CRISPLY BY HAND— This is probably caused by: dirt or sludge
build-up in motor parts.
YOU SHOULD: Pour a generous amount of air tool oil into air inlet. Operate throttle in short bursts. With socket
engaged on bolt, alternately tighten and loosen bolt by hand. If tool remains jammed, it should be serviced at
authorized service center.
TROUBLESHOOTING

Rev. 03/08/04
775-9203A 6
PLEASE REVIEW ALL WARNING INSTRUCTIONS PRIOR TO OPERATION. SAVE THIS MANUAL FOR FUTURE REFERENCE.
(Continued from page 5)
NOTE
Disassembly of this tool by other than an authorized service center
WILL VOID the warranty on this tool.
90 DAY LIMITED WARRANTY: NAPA/EVERCRAFT air tools are warranted to be free from defects
in material and workmanship. If any unit proves to be defective in material or workmanship
within 90 days from the original date of purchase, it will be replaced free of charge. In the
unlikely event a replacement unit is required, return the unit to your local NAPA Auto Parts Store
for the free replacement. If service is required after the 90-day limited warranty, call toll free
1-866-867-5359 for the closest repair facility. When calling, be prepared to provide the part
number and the serial number of the unit.
The foregoing obligation is NAPA/EVERCRAFT'S sole liability under this or any implied warranty,
and under no circumstances will NAPA/EVERCRAFT be liable for any incidental or consequential
damages.
AIR DRILLS
TOOL WILL NOT RUN, RUNS SLOWLY, AIR FLOWS SLIGHTLY FROM EXHAUST, SPINDLE TURNS FREELY — This is probably
caused by: air flow blocked by dirt build-up; motor parts jammed with dirt.
YOU SHOULD: Check air inlet for blockage. Pour a generous amount of air tool oil into air inlet. Operate trigger in
short bursts. Detach air supply; turn empty and closed drill chuck by hand. Reconnect air supply. If tool
performance is not improved, it should be serviced at an authorized service center.
TOOL WILL NOT RUN. AIR FLOWS FREELY FROM EXHAUST. SPINDLE TURNS FREELY — This is probably caused by:
Build up of dirt or varnish on rotor vanes.
YOU SHOULD: Pour a generous amount of air tool oil into air inlet. Operate trigger in short bursts. Detach air
supply; turn empty and closed drill chuck by hand. Reconnect air supply. If tool performance is not improved,
it should be serviced at an authorized service center.
TOOL LOCKED UP, SPINDLE WILL NOT TURN — This is probably caused by: a broken motor vane; gears broken or
jammed by foreign object.
YOU SHOULD: Send the tool to an authorized service center.
TOOL WILL NOT SHUT OFF — This is probably caused by: throttle valve O-ring blown off seat.
YOU SHOULD: See breakdown for part number and replace O-ring or send the tool to an authorized service center.
AIR HAMMERS
TOOL WILL NOT RUN — This is probably caused by: cycling valve or throttle valve clogged with dirt or sludge.
YOU SHOULD: Pour a generous amount of air tool oil into air inlet; check for dirt. Operate trigger in short bursts
(chisel in place and against solid surface). If not free, detach air supply. Tap nose or barrel lightly with plastic
mallet, reconnect air supply, and repeat above steps. If still not free, detach air supply, insert a 6" piece of
1/8" diameter rod in nozzle and lightly tap to loosen piston in rear direction. Reconnect air supply and repeat
above steps.
CHISEL STUCK IN NOZZLE— This is probably caused by: the end of the shank is misshapen.
YOU SHOULD: Send the tool to an authorized service center.
TROUBLESHOOTING
Rev. 03/08/04
775-9203A 7
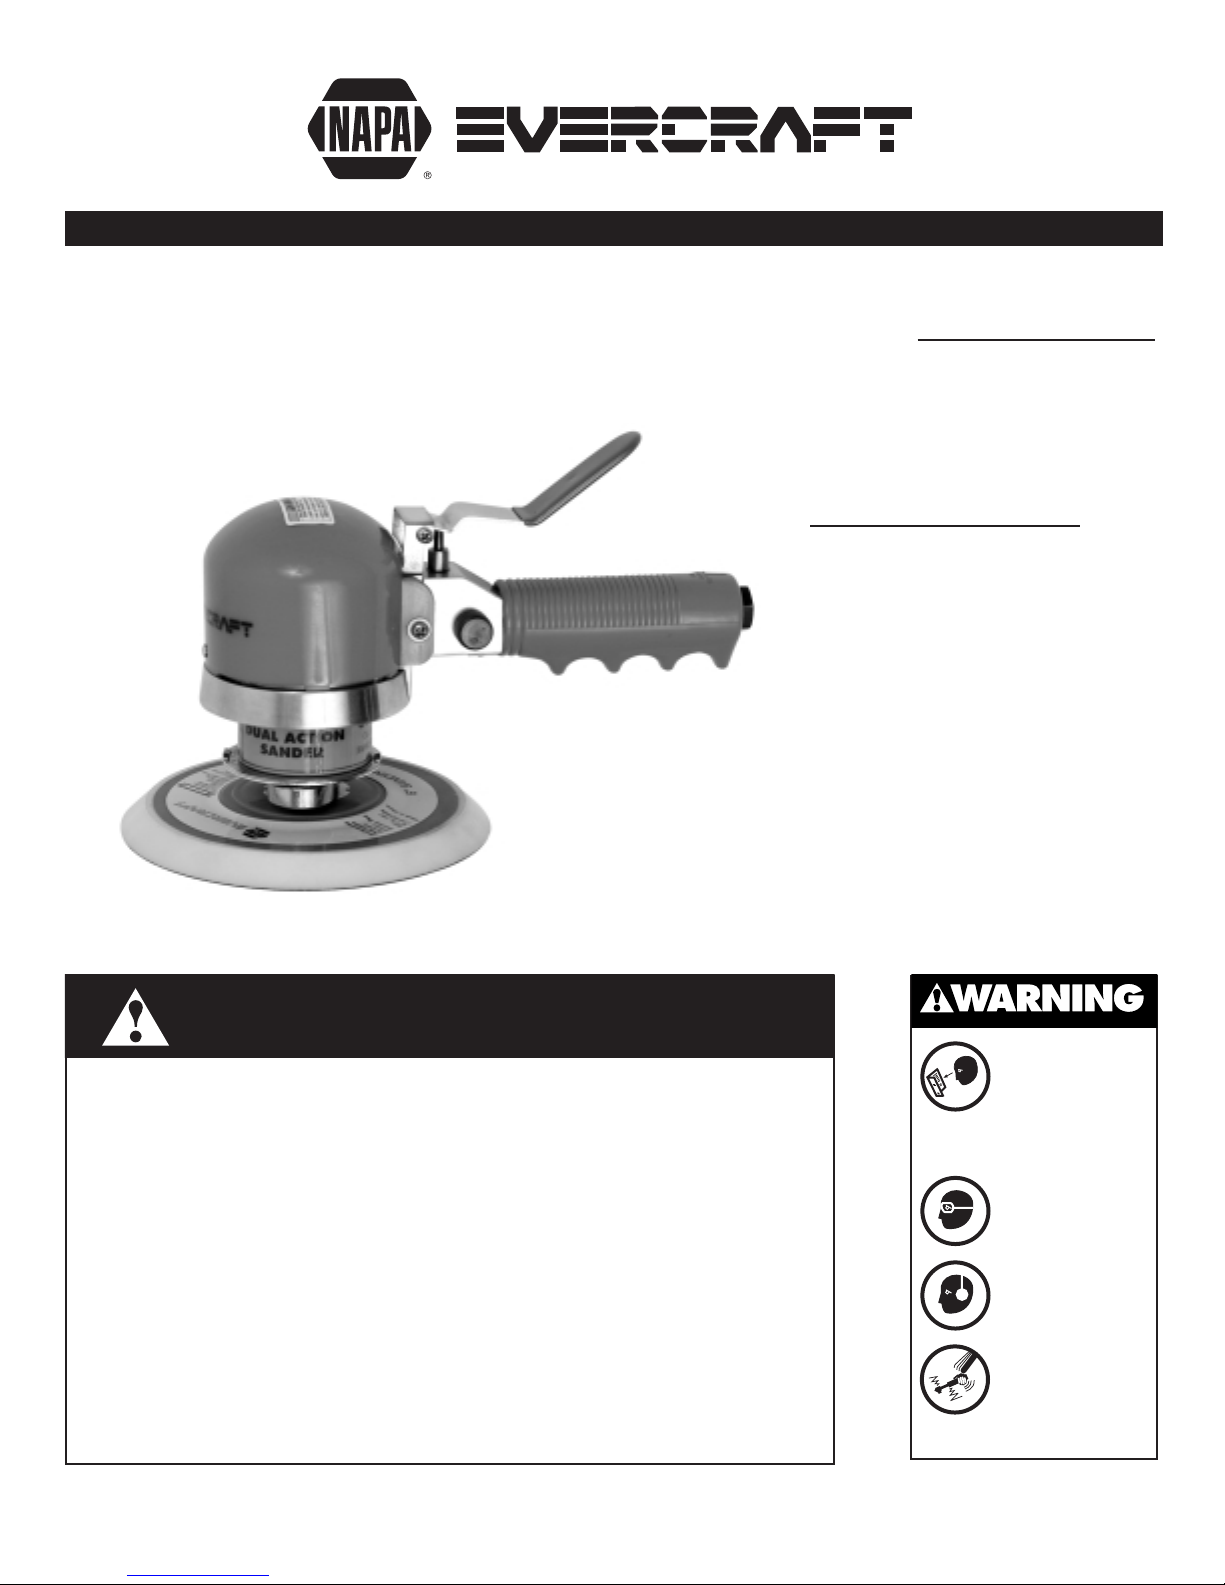
775-9203A
LIJADORA DE 6" DE
DOBLE ACCIÓN
LEA SIEMPRE LAS
INSTRUCCIONES
ANTES DE USAR
HERRAMIENTAS
NEUMÁTICAS.
USE SIEMPRE
GAFAS DE
SEGURIDAD.
USE PROTECCIÓN
PARA LOS OÍDOS.
EVITE EXPONERSE
PROLONGADAMEN
TE A LAS
VIBRACIONES
Especificaciones
Velocidad sin carga (RPM): . . . . . . .10,000
Presión de aire (PSI): . . . . . . . . . . . . . . .90
Tamaño de la almohadilla: . . . . . . . . . .6"
Toma de aire (rosca NPT): . . . . . . . . .1/4"
Tamaño de la manguera: . . . . . . . . . .3/8"
(diámetro interno)
Consumo de aire: . . . . . . . . . . . . . . . . . .4
(pies cúbicos por minuto)
Longitud: . . . . . . . . . . . . . . . . . . . .9-1/2"
Peso al embarcarse (lbs.) . . . . . . . . . .4.22
(1.900 kg)
ADVERTENCIA
Se sabe que el polvo generado por el lijado, la aserradura, el esmerilado, la
perforación mecánica y por otras actividades de construcción contiene químicos
que producen cáncer, malformaciones congénitas u otros daños relacionados
con la reproducción. Algunos ejemplos de estos químicos son:
• Plomo de pintura a base de plomo,
• Sílice cristalina de ladrillos y cementos y otros productos de mampostería, y
• Arsénico y cromo de maderas tratadas químicamente.
El riesgo ante estas exposiciones varía, dependiendo de cuan frecuente usted
haga este tipo de trabajo. Para reducir la exposición a estos químicos: trabaje
en espacios bien ventilados, y trabaje con equipos de seguridad aprobados,
tales como las mascarillas contra el polvo diseñadas específicamente para
detener partículas microscópicas.
INSTRUCCIONES PARA EL FUNCIONAMIENTO Y LISTA DE PIEZAS
Rev. 03/08/04
775-9203A 8
REVISE TODAS LAS INFORMACIONES DE ADVERTENCIA, ANTES DE PROCEDER CON EL FUNCIONAMIENTO.
CONSERVE ESTE MANUAL PARA TENER UNA REFERENCIA EVENTUAL.
Este manual de instrucciones contiene
importantes informaciones de seguridad.
LEA CUIDADOSAMENTE Y ASEGúRESE DE
COMPRENDER TODAS ESTAS INFORMACIONES,
ANTES DE PROCEDER CON EL FUNCIONAMIENTO
DE ESTA HERRAMIENTA.
• Haga funcionar, verifique y mantenga esta
herramienta de acuerdo con el código ANSI
(Organización nacional americana de
normalización) para herramientas portátiles
con aire (ANSI B186.1) y cualesquiera otros
códigos de seguridad y regulaciones
aplicables.
• Para obtener la seguridad, resultados y
durabilidad óptimos de las partes, haga
funcionar esta herramienta con una presión
máxima de 90 psig (6.2 bar), utilizando una
manguera de aire con un diámetro de 9.5
mm.
• Lleve siempre protección de impacto alto para
los ojos y la cara, al funcionar o dar
mantenimento a esta herramienta. Lleve
siempre protección para las orejas al utilizar
esta herramienta.
• Niveles de sonidos altos pueden provocar una
pérdida permanente del oído. Utilice una
protección para las orejas según las
recomendaciones de su patrón las
regulaciones OSHA.
• Mantenga esta herramienta en condición
eficaz de funcionamiento.
• Los operadores y el personal de mantenimiento
deben físicamente poder manejar el volumen,
el peso y la potencia de esta herramienta.
• El aire bajo presión puede provocar lesiones
graves. Nunca la dirija hacia Ud. o hacia otras
personas. Cierre siempre el abastecimiento del
aire, drene la manguera de la presión del aire
y desconecte la herramienta del
abastecimiento del aire antes de instalar,
quitar o ajustar cualquier accesorio a la
herramienta, o antes de dar mantenimiento a
la herramienta. Al no seguir estas
instrucciones se puede provocar lesiones
graves. Las mangueras que azotan pueden
causar lesiones graves. Verifique siempre para
detectar mangueras gastadas, usadas o flojas
y reemplacel as inmediatamente. No utilice los
acoplamientos de conexión rápida con esta
herramienta. Vea las instrucciones para
conocer el modo de instalación adecuado.
• Las herramientas que funcionan con aire
pueden vibrar durante el uso. La vibración, los
movimientos repetitivos o las posiciones
incómodas durante periodos prolongados
pueden ser dañinos a sus manos y brazos.
Interrumpa el uso de la herramienta si
sobreviene una incomodidad, una sensación
de cosquilleo o un dolor. Solicite una opinión
médica antes de volver a proceder con el uso.
• Coloque la herramienta sobre el lugar de
trabajo antes de hacer funcionar la
herramienta. No la apunte en dirección de
una persona y no juede con esta herramienta.
• Un deslizamiento, una zancadilla y/o una
caída durante el funcionamiento de las
herramientas con aire pueden ser causas
importantes de lesiones graves o de la
muerte. Asegúrese que no haya un excedente
de manguera sobre la superficie donde esté
caminando o trabajando.
• Mantenga una postura equilibrada y estable
durante el trabajo. No vaya demasiado lejos
durante el funcionamiento de la herramienta.
• Preve a y esté atento a los cambios súbitos de
movimientos durante el arranque y el
funcionamiento de cualquier herramienta.
• No transporte laherramienta por la manguera.
Proteja la manguera contra los objetos
afilados y el calor.
• El eje de la herramienta puede continuar
brevemente su rotación después del
aflojamiento del gatillo. Evite el contacto
directo con los accesorios durante y después
del uso. El uso de guantes reducirá el riesgo
de cortes y quemaduras.
• Mantengase alejado de la extremidad
giratoria de la herramienta. No lleve joyas o
ropa holgada. Fije el pelo largo. El escalpar
puede ocurrir si el pelo no se mantiene lejos
de la herramienta y accesorios. La asfixia
puede ocurrir si los colllares no se mantienen
lejos de la herramienta y los accesorios.
• Nunca instale una rueda esmeriladora en la
lijadora. La ruptura de una rueda
esmeriladora, que no esté protegida
apropiadamente, puede causarle lesiones
graves o la muerte. Inspeccione el respaldo
de la base antes de usarse. No se use si está
agrietada o dañada.
• Evite el contacto directo con la base lijadora
en movimiento para prevenir pincharse o
cortarse las manos u otras partes del cuerpo.
• No lubrique las herramientas con líquidos
inflamables o volátiles como queroseno, gasoil
o combustible para aviones.
• No fuerce la herramienta más allá de su índice
de capacidad.
• No quite las etiquetas. Reemplace las
etiquetas gastadas.
• Utilice los accesorios recomendadas por Napa
Professional Air Tools.
▲
!
ADVERTENCIA!
AL NO SEGUIR TODAS INSTRUCCIONES DE LA LISTA ABAJO PUEDE
PROVOCAR LESIONES GRAVES

Rev. 03/08/04
775-9203A 9
ABASTECIMIENTO DEL AIRE
Las herramientas que se encuentran en esta clase
funcionan con una variedad grande de presiones del
aire. Recomendamos que la presión del aire para estas
herramientas sea de 90 PSI en la herramienta;
funcionando a una presión más alta (más de 90 PSI; 6.2
bar) levanta los resultados más allá de su índice de
capacidad; al hacerlo reducirá la vida de la
herramienta, producirá el uso prematuro y podrá
provocar lesiones.
Utilice siempre aire limpio y seco. Polvo, vapores
corrosivos y/o agua dentro de la manguera del aire
podrán provocar daños a la herramienta. Drene el
contenedor del aire diariamente. Limpie el filtro de la
entrada del aire al menos una vez por semana. Puede
ver en la ilustración arriba, el procedimiento
recomendado de instalación.
La entrada del aire utilizada para conectar el aire tiene
una entrada estandar de 6 mm (1/4") NPT. Debe
aumentar la presión de la manguera para compensar
las mangueras del aire que sean extraordinariamente
largas (más allá de 7.6 m). El diámetro mínimo de la
manguera debe ser de 9.5 mm (3/8") D.I. y los
acoplamientos deben tener las mismas dimensiones
interiores y ser apretados firmemente.
LUBRIFICACIÓN
Lubrique diariamente el motor con aire, utilizando un
aceite de calidad para herramientas con aire. Si no
utiliza un aceite para la manguera del aire, eche una
cucharadita de aceite a través de la herramienta. Puede
echar el aceite dentro de la entrada del aire de la
herramienta o dentro de la manguera en la conexión
más cercana del abastecimiento del aire; después, haga
funcionar la herramienta. Se requiere solamente una
cantidad de aceite de 30 mm (1 oz.) . Una sobrecarga
provocará una reducción de la potencia de la
herramienta.
FUNCIONAMIENTO
La perilla reguladora del aire podrá utilizarse como un
acelerador de inyección del aire comprimido y también
para establecer el control de la velocidad positiva.
Permita que la lijadora haga sus funciones. El peso
normal de la máquina es el suficiente para lijar. No
ejerza presión adicional en la máquina. Esto sólo
disminuirá la velocidad de la base, disminuirá la
eficiencia de lijar y ejercerá más carga en el motor.
Haga funcionar la lijadora alejada de la superficie,
apóyela uniformemente sobre la superficie y desplácela
lentamente hacia delante y atrás traslapándola sobre
las áreas de la superficie. Una vez que haya terminado
de lijar, aléjela de la superficie antes de interrumpir el
funcionamiento del motor.
INSTRUCCIONES PARA EL FUNCIONAMIENTO Y LISTA DE PIEZAS
REVISE TODAS LAS INFORMACIONES DE ADVERTENCIA, ANTES DE PROCEDER CON EL FUNCIONAMIENTO.
CONSERVE ESTE MANUAL PARA TENER UNA REFERENCIA EVENTUAL.
Ilustración 1 (A)
(B) Admisión
de aire
(A) Válvula de la perilla
reguladora del aire

Rev. 03/08/04
775-9203A 10
LLAVES DE IMPACTO
LA HERRAMIENTA FUNCIONA LENTAMENTE O NO FUNCIONA
EN ABSOLUTO Y / O EL AIRE EMANA SOLAMENTE UN POCO
DEL SISTEMA DE ESCAPE — La causa probable: La corriente
de aire está bloqueada por una acumulación de suciedad; las
partes del motor están atascadas con suciedad; el regulador
de la coriente ha vibrado hacia una posición cerrada.
DEBE: Verifique el colador de la entrada del aire para
detectar un bloqueo posible. Eche una cantidad generosa de
aceite para herramientas con aire dentro de la entrada del
aire. Haga funcionar la herramienta con golpes cortos en
ambas direcciones, adelante y atrás. Repita si es necesario. Si
los resultados de la herramienta no mejoran, debe solicitar
mantenimiento a un centro autorizado de servicio.
HERRAMIENTA NO FUNCIONA Y AIRE DEL ESCAPE EMANA
LIBREMENTE:
La causa probable: Una o más de las valetas del motor está
atascada, a causa de una acumulación de suciedad o barniz; el
motor puede estar oxidado.
DEBE: Eche una cantidad generosa de aceite para herramientas
con aire dentro de la entrada del aire. Haga funcionar la
herramienta con golpes cortos en ambas direcciones, adelante
y atrás. Golpee ligeramente la caja del motor con un mazo de
plástico. Desconecte el abastecimiento del aire. Intente liberar
el motor girando manualmente el mango de propulsión, si es
posible. Si la herramienta está atascada siempre, debe
solicitar mantenimiento a un centro autorizado de servicio.
LOS CASQUILLOS NO SE MANTIENEN SOBRE LA
HERRAMIENTA: La causa probable: El anillo para bloquear
o el anillo blando alternativo del casquillo están gastados.
DEBE: Lleve gafas de protección. Desconecte el abastecimiento
del aire. Quite el viejo anillo para bloquear, utilizando
tenazas al exterior para mantener el anillo para bloquear.
Manteniendo la pieza cuadrada con una llave abierta
apropiada, utilice un destornillador pequeño utilizándolo
como una palanca sobre el viejo anillo para quitarlo fuera de
la ranura. Quite siempre el anillo fuera de su cuerpo - puede
ser propulsado hacia afuera con una velocidad alta. Cambie el
anillo “O” alternativo y el anillo para bloquear con las partes
apropiadas (Vea la lista). Coloque el anillo para bloquear
sobre la mesa, apoye el yunque de la herramienta dentro del
anillo con un movimiento oscilante. Coloquelo a mano con un
golpe en
la ranura.
USO PREMATURO DEL YUNQUE:
La causa probable: El uso de los casquillos de cromo o los
casquillos están gastados.
DEBE: Deje utilizar casquillos de cromo. Los casquillos de
cromo tienen una superficie dura y un corazón blando. El
agujero del casquillo se hace redondo, pero está siempre más
duro. Además del peligro al romperse, los yunques de llave se
gastarán antes de tiempo cuando los utilice con casquillos de
cromo.
LA HERRAMIENTA PIERDE LENTAMENTE SU POTENCIA PERO
FUNCIONA SIEMPRE A TODA VELOCIDAD LIBREMENTE.
La causa probable: Partes gastadas del embrague, causadas
por una lubrificación inadecuada; pisando la leva del
embrague cuando esté gastada o pegada a causa de una
lubrificación inadecuada.
DEBE: PARA LLAVES LUBRIFICADAS CON ACEITE - Verifique
para detectar la presencia de aceite para embrague (donde se
especifica el uso de aceite para el embrague) y quite el tapón
para aceite; inclinelo para drenar todo el aceite de la caja del
embrague ; rellenela con aceite SAE 30 o el tipo de aceite
recomendado por el fabricante en la cantidad especificada.
Verifique también para detectar una cantidad excesiva de
aceite. Las cajas del embrague necesitan solamente un relleno
de 50%. Una sobrecarga puede causar un arrastre sobre las
partes del embrague de velocidad alta. Una llave tipica de 13
mm (1/2”) lubricada con aceite necesita solamente 14 ml de
aceite para embrague. PARA LLAVES LUBRIFICADAS CON
GRASA - Verifique para detectar una cantidad excesiva de
grasa, girando el mango de propulsión manualmente. El
mango debe girar libremente. El exceso está normalmente
propulsado hacia afuera automáticamente.
LA HERRAMIRENTA NO SE APAGA: La causa probable: Un
anillo “O” de la válvula de aceleración está gastado, fuera de
su posición o el eje de la válvula de aceleración está doblado
o atascado con partículas de suciedad.
DEBE: Quite el ensamblado e instale un nuevo anillo “O”.
Lubrique con aceite para herramientas con aire y haga
funcionar el gatillo rápidamente. Si no puede funcionar la
herramienta adecuadamente, debe solicitar mantenimiento
para la herramienta a un centro autorizado de servicio.
TRINQUETES CON AIRE
EL MOTOR FUNCIONA, EL EJE NO GIRA O GIRA DE UN MODO
IRREGULAR — La causa probable: Diente gastado sobre el
trinquete o el engranaje; resorte con presión del engranaje
está frágil o quebrado; resortes de arrastre frágiles no pueden
mantener el eje cuando el engranaje se mueva hacia un otro
diente.
DEBE: Obtiene un reemplazo de las partes, que serán
instaladas por un centro autorizado de servicio.
LA HERRAMIENTA NO FUNCIONA,
LA CABEZA DEL TRINQUETE PUEDE SER MOVIDA
MANUALMENTE CON DIFICULDAD — La causa probable:
Acumulación de suciedad dentro de las partes del motor.
DEBE: Eche una cantidad generosa de aceite para herramientas
con aire dentro de la entrada del aire. Haga funcionar la
válvula de aceleración en golpes cortos. Con el casquillo
pisado sobre la tuerca, apriete y afloje manualmente la tuerca
por otra parte. Si la herramienta está siempre atascada, debe
solicitar mantenimiento a un centro autorizado de servicio.
TALADROS CON AIRE
LA HERRAMIENTA NO FUNCIONA, FUNCIONA LENTAMENTE,
EL AIRE EMANA LIGERAMENTE DEL SISTEMA DE ESCAPE Y EL
EJE GIRA LIBREMENTE — La causa probable: La corriente de
aire está bloqueada por una acumulación
de suciedad; las partes
del motor están atascadas con suciedad.
DEBE: Verifique la entrada del aire para detectar un
bloqueo posible. Eche una cantidad generosa de aceite para
herramientas con aire dentro de la entrada del aire. Haga
funcionar el gatillo en golpes cortos. Desconecte el
abastecimiento del aire. Si los resultados de la herramienta no
mejoran, debe solicitar mantenimiento a un centro
autorizado de servicio.
PROBLEMAS Y SOLUCIONES
REVISE TODAS LAS INFORMACIONES DE ADVERTENCIA, ANTES DE PROCEDER CON EL FUNCIONAMIENTO.
CONSERVE ESTE MANUAL PARA TENER UNA REFERENCIA EVENTUAL.

Rev. 03/08/04
775-9203A 11
LA HERRAMIENTA NO FUNCIONA, EL AIRE EMANA
LIBREMENTE DEL SISTEMA DE ESCAPE Y EL EJE GIRA
LIBREMENTE — La causa probable: Una acumulación de
suciedad o barniz sobre las valetas del rotor.
DEBE: Eche una cantidad generosa de aceite para
herramientas con aire dentro de la entrada del aire. Haga
funcionar el gatillo en golpes cortos. Desconecte el
abastecimiento del aire; gire manualmente el mandril vacío y
cerrado del taladro. Vuelva a conectar el abastecimiento del
aire. Si los resultados de la herramienta no mejoran, debe
solicitar mantenimiento a un centro autorizado de servicio.
LA HERRAMIENTA ESTÁ COMPLETAMENTE BLOQUEADA,
EL EJE NO GIRA — La causa probable: Una valeta del motor
está quebrada; engranajes quebrados o atascados con un
objeto extraño.
DEBE: Mande la herramienta a un centro autorizado de
servicio.
LA HERRAMIRENTA NO SE APAGA:
La causa probable: Un anillo “O” de la válvula de aceleración
está fuera de su asiento.
DEBE: Vea la lista para conocer el número de la pieza y
reemplace el anillo “O” o mande la herramienta a un centro
autorizado de servicio.
MARTIILOS CON AIRE
LA HERRAMIENTA NO FUNCIONA — La causa probable: La
válvula de los ciclos o la válvula de aceleración están
atascadas con suciedad.
DEBE: Eche una cantidad generosa de aceite para herramientas
con aire dentro de la entrada del aire. Verifique para
detectar la presencia de suciedad. Haga funcionar el gatillo
en golpes cortos (cincel en su lugar y contra una superficie
dura). Si no está libre, desconecte el abastecimiento del aire.
Golpee ligeramente la extremidad o el cañón con un mazo
de plástico y vuelva a conectar el abastecimiento del aire y
repita las etapas anteriores. Si todavía no está libre, desconecte
el abastecimiento del aire, inserte una varilla de 15 cm y un
diámetro de 3 mm dentro de la boquilla y golpee ligeramente
para aflojar el émbolo hacia atrás. Vuelva a conectar el
abastecimiento del aire y repita las etapas anteriores.
CINCEL ATASCADO ESTÁ DENTRO DE LA BOQUILLA — La
causa probable: La extremidad del mango de propulsión está
deforme.
DEBE: Mande la herramienta a un centro autorizado de
servicio.
PROBLEMAS Y SOLUCIONES
NOTA:
Desensamblado de esta
herramienta que se haga por otro, que no sea un centro autorizado
de servicio INVALIDARá la garantía para esta herramienta.
GARANTÍA LIMITADA A 90 DÍAS. Se garantiza que las herramientas neumáticas
NAPA/EVERCRAFT carecen de defectos en sus materiales y mano de obra. Si dentro del
transcurso de 90 días posteriores a la fecha original de su compra, se comprueba la existencia de
defectos en los materiales y la mano de obra de alguna unidad, ésta le será repuesta sin costo
alguno. Si en el caso improbable que sea necesario reponer una unidad, devuelva la unidad a la
Refaccionaria Automotriz NAPA de su localidad y solicite una reposición gratuita. Si es necesaria
alguna reparación posterior a la garantía limitada de 90 días, llame sin costo al 1-866-867-5359
y consulte la ubicación más cercana de un taller de reparación. Al llamar esté preparado para
proporcionarnos el número del modelo y el número de serie de la unidad. La obligación antes
mencionada queda bajo la responsabilidad exclusiva de NAPA/EVERCRAFT según se menciona, o
de cualquier garantía implícita, y bajo ninguna circunstancia quedará bajo la responsabilidad de
NAPA/EVERCRAFT cualquier daño incidental o consecuencial.
REVISE TODAS LAS INFORMACIONES DE ADVERTENCIA, ANTES DE PROCEDER CON EL FUNCIONAMIENTO.
CONSERVE ESTE MANUAL PARA TENER UNA REFERENCIA EVENTUAL.

Rev. 03/08/04
775-9203A 12
Table of contents
Languages:
Popular Sander manuals by other brands

Hitachi
Hitachi SB 10V2 Handling instructions

Jet
Jet M-708447M operating instructions

EINHELL
EINHELL TE-OS 18/150 Li Original operating instructions

Milwaukee
Milwaukee M18 FLAG180XPDB Original instructions

DeWalt
DeWalt dwe6411 Original instructions

Chicago Electric
Chicago Electric 67256 Set up and operating instructions

MIRKA
MIRKA Random Orbital Sander operating instructions

Matco Tools
Matco Tools MT2422 manual

Makita
Makita 9218PB instruction manual

Festool
Festool SHINEX RAP 150 FE Original operating manual/spare parts list

Central Machinery
Central Machinery 40643 Assembly and operating instructions

Makita
Makita 9237C instruction manual


