FERREX FPB 1500 User manual

ROTARY HAMMER
FPB 1500
User Manual
ID: #05007
m
y
h
a
n
s
e
c
o
n
t
r
o
l
.
c
o
m
M
A
N
U
A
L
D
E
V
E
L
O
P
E
D
I
N
G
E
R
M
A
N
Y
User-friendly
Manual
Original instructions

Package contents................................................................3
Components ............................................................................. 6
General information............................................................ 7
Reading and storing the user manual ..................................7
Explanation of symbols ...........................................................7
Safety ...................................................................................9
Explanation of notes ............................................................... 9
Proper use................................................................................. 9
Improper use............................................................................ 9
Residual risks...........................................................................10
General power tool safety warnings ....................................11
Special safety instructions for rotary hammer drills......... 14
Supplementary safety instructions..................................... 14
First use...............................................................................17
Checking the rotary hammer drill
and package contents ........................................................... 17
Inserting a tool........................................................................ 17
Removing a tool ......................................................................18
Mounting and adjusting the depth stop.............................18
Setting the extra handle .......................................................18
Operation of the rotary hammer drill .............................. 18
Switching the rotary hammer drill on and off
and adjusting the speed .......................................................19
Switching between the functions....................................... 20
Cleaning and maintenance............................................... 22
Checking the rotary hammer drill........................................22
Cleaning ...................................................................................23
Storage .............................................................................. 23
Transport ........................................................................... 23
Troubleshooting................................................................24
Technical data ................................................................... 25
Noise/vibration information ............................................26
Disposal..............................................................................28
Disposing of the packaging ................................................. 28
Disposing of the rotary hammer drill ................................. 28
Declaration of conformity.................................................29
Contents
3
Package contents
Dok./Rev.-Nr. 197392_20190710
A
1 2
3
5
7
6
4
8
10
9
B
Package contents

4
Package contents
13
12
11
10
C
D
14
15

5
Package contents
NOTICE:
The keyed chuck may only be used
without the hammer function!
Spiral and wood drill bits
are not included in the
package contents.
E
F G
17
16

6
Package contents
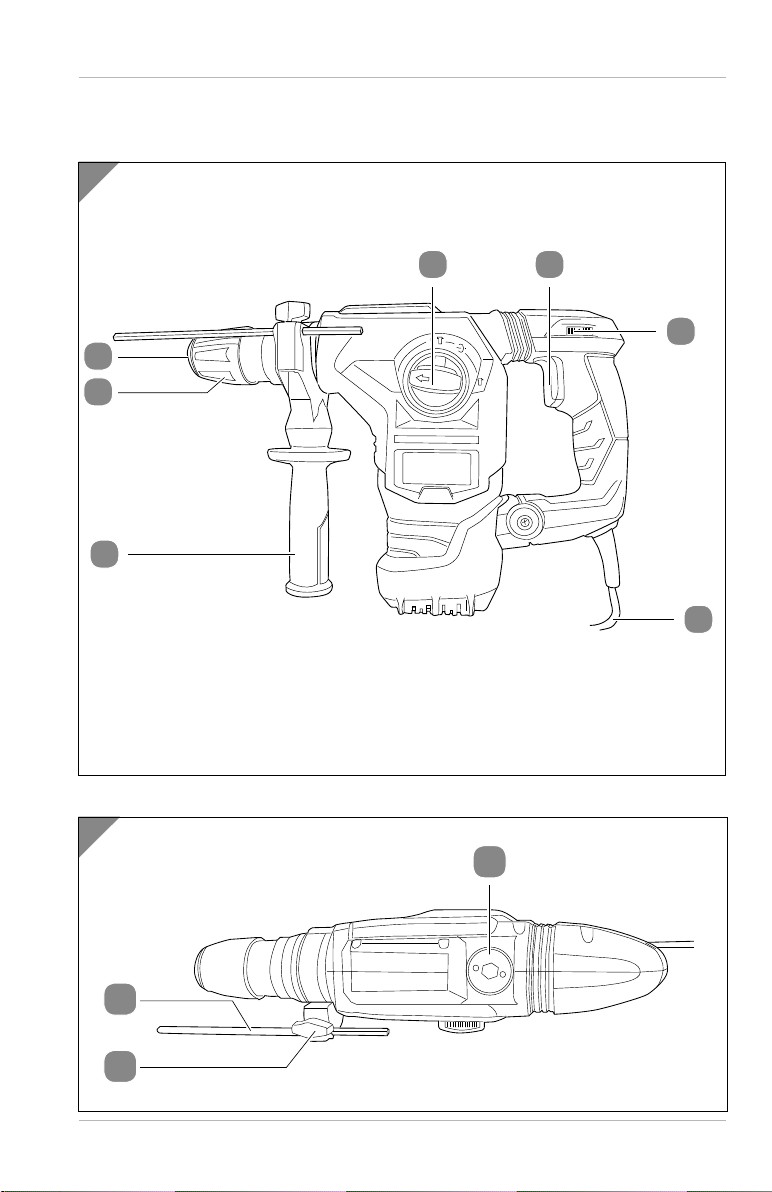
Components
1Selector switch “Drilling/Hammer drilling/Set chisel working angle/Chiselling”
2On/Off switch
3Speed control
4Mains cord
5Extra handle (front handle)
6Retaining bush
7Tool holder (SDS plus system chuck)
8Gear grease filler hole
9Wing screw for depth stop
10 Depth stop
11 SDS chisel, 2× (1× flat chisel, 1× pointed chisel)
12 SDS drill bit, 3× (1× 12 mm, 1× 16 mm, 1× 18 mm)
13 Key for the gear grease filler hole
14 Chuck key
15 Keyed chuck with adapter
16 Dust cover
17 Storage case
General information
7
General information
Reading and storing the user manual
This user manual accompanies this rotary hammer FPB 1500 (hereinafter
referred to only as the “rotary hammer drill”). It contains important
information about safety, usage and care.
Read this user manual carefully before using the rotary hammer drill. Pay
particular attention to the safety instructions and warnings. Failure to comply with the
instructions in this user manual may result in severe injury or damage to the rotary
hammer drill.
Comply with all applicable local or national regulations concerning the use of this
rotary hammer drill. Keep this user manual in a safe place for future reference. If you
pass the rotary hammer drill on to third parties, please be absolutely sure to include
this user manual.
Explanation of symbols
The following symbols are used in this user manual, on the rotary hammer drill or on
the packaging.
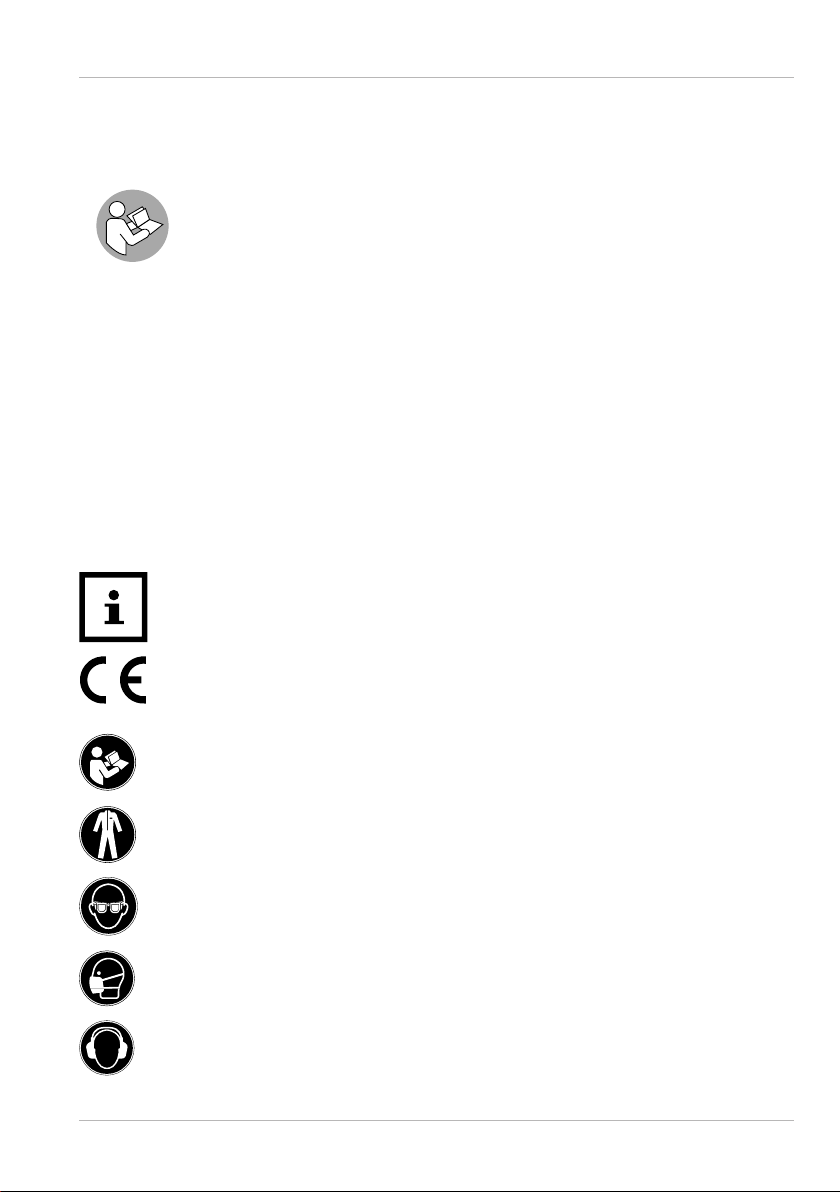
This symbol provides you with useful supplementary information about
the use.
Declaration of conformity (see “Declaration of conformity” section):
Products marked with this symbol meet all applicable Community
regulations for the European Economic Area.
Read the user manual.
Wear suitable, tight fitting clothing.
Wear protective goggles.
Wear a dust mask.
Wear ear protection.
General information
8
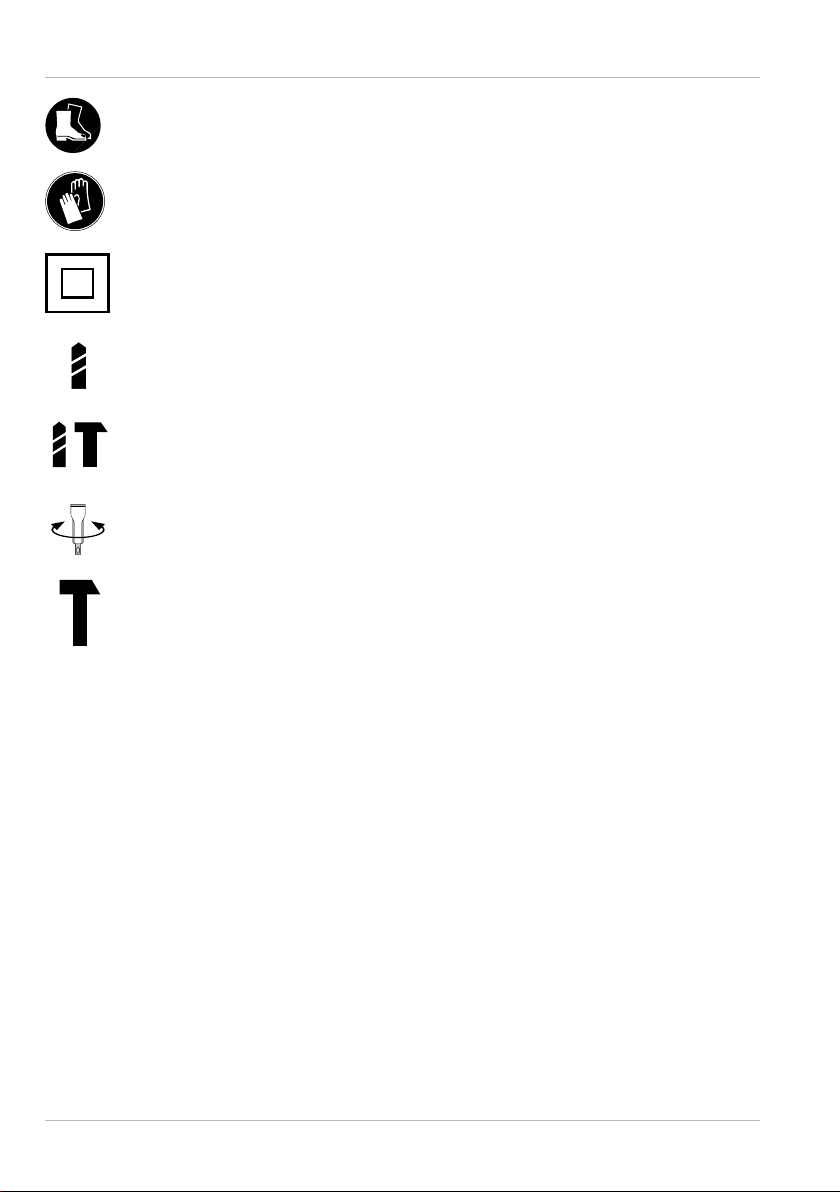
Wear suitable secure footwear.
Wear suitable protective gloves.
Protection class II
Drilling in wood and metal without the hammer function
Hammer drilling in concrete and masonry
Setting the working angle
sorgung muss mit den Angaben auf
dem Typenschild der Maschine übe
r- Chiselling in tiles and masonry

Safety
9
Safety
Explanation of notes
The following symbols and signal words are used in this user manual.
WARNING!
Indicates a hazardous situation that, if not
avoided, could result in death or serious injury.
CAUTION!
Designates a dangerous situation that may result
in minor or moderate injury if not avoided.
NOTICE!
Warns of possible damage to property.
Proper use
The rotary hammer drill is only designed for drilling and hammer drilling in concrete,
rock and masonry as well as for minor chiselling tasks. With the keyed chuck, the
rotary hammer drill can also be used for drilling without the hammer function in
wood and metal. It is only intended for private use and is not suitable for commercial
use.
The tool holder is suitable for tools corresponding to the SDS plus system.
Any other applications are expressly prohibited and are deemed improper use.
Improper use
All applications with the device, which are not specified in the chapter “Proper use”
are deemed improper use.
Neither the manufacturer nor the retailer can accept any responsibility for injury, loss
or damage caused by misuse of this product of any kind.
Examples of misuse are given in the following non-exhaustive list:
• using the rotary hammer drill for other than the intended purposes. This can
result in hazards and injuries;
• use of accessories that are not especially intended for this rotary hammer drill.
Even if the accessories can be mounted on your rotary hammer drill, this is no
guarantee for safe use.
The warranty offered by the manufacturer is forfeited if different or non-original
parts are used on the machine.

Safety
10
• changes to the rotary hammer drill;
• commercial or industrial use of the rotary hammer drill as well as in connection
with the trades;
• use of the rotary hammer drill by persons under the age of 16;
• operation or maintenance of the rotary hammer drill by persons not familiar with
how to handle the rotary hammer drill and/or who are not aware of the related
risks;
• failure to observe the safety instructions and warnings as well as the assembly,
operating, maintenance and cleaning instructions contained in this user manual;
• failure to comply with any regulations relating to accident prevention,
occupational medicine or safety, which specifically and/or generally apply to the
use of this rotary hammer drill;
• repairs of the rotary hammer drill performed by parties other than the
manufacturer or a qualified professional;
• use of fitted tools whose permissible speed is not at least as high as the
maximum speed specified for the rotary hammer drill. Accessories that rotate
faster than permissible may break and be projected. There is a risk of injury.
The user of the device is liable for all damage to property and injury to persons
incurred due to incorrect use.
Residual risks
Despite proper use, inconspicuous residual risks cannot be completely ruled out.
The following risks may arise due to the nature of the use:
• injury if long hair, articles of clothing or jewellery are caught by rotating parts or
fitted tools;
• injury caused by projected workpieces or parts of work pieces;
• fire hazard if the motor is not sufficiently ventilated;
• injury to health attributed to hand-arm vibrations if the rotary hammer drill is
used for a prolonged period of time or if the rotary hammer drill is not guided
and maintained properly;
• lung injury if a suitable dust mask is not worn;
• hearing loss if suitable ear protection is not worn;
• eye injury caused by flying materials or parts thereof if no suitable eye protection
is worn.

Safety
11
General power tool safety warnings
WARNING Read all the safety notes, instructions, illustrations and
technical details supplied with this power tool. Failure to follow the safety
notices and instructions may result in an electric shock, fire and/or severe
injury.
Save all warnings and instructions for future reference.
The term “power tool” used in the safety instructions refers to mains-operated
power tools (corded) and battery-powered power tools (cordless).
Work area safety
a) Keep your work area clean and well lit.
Cluttered or dark areas
invite accidents.
b) Do not operate power tools in explosive atmospheres, such as
in the presence of flammable liquids, gases or dust.
Power tools
create sparks which may ignite the dust or fumes.
c) Keep children and bystanders away while operating a power
tool.
If you are distracted, you could lose control of the power tool.
Electrical safety
a) Power tool plugs must match the outlet. Never modify the plug in
any way. Do not use any adapter plugs with earthed (grounded)
power tools.
Unmodified plugs and matching outlets will reduce risk
of electric shock.
b) Avoid body contact with earthed or grounded surfaces, such as
pipes, radiators, ranges and refrigerators.
There is an increased
risk of electric shock if your body is earthed or grounded.
c) Do not expose power tools to rain or wet conditions.
Water
entering a power tool will increase the risk of electric shock.
d) Do not use the cord for improper purposes such as for carrying
the power tool, for hanging it up or for pulling or unplugging
it from the socket. Keep cord away from heat, oil, sharp edges
and moving parts.
Damaged or entangled cords increase the risk of
electric shock.
e) When operating a power tool outdoors, use only extension cords
that are suitable for outdoor use.
Use of a cord suitable for outdoor
use reduces the risk of electric shock.

Safety
12
f) If operating a power tool in a damp location is unavoidable, use
a residual current device (RCD) protected supply.
Use of an RCD
reduces the risk of electric shock.
Personal safety
a) Stay alert, watch what you are doing and use common sense
when operating a power tool. Do not use a power tool while you
are tired or under the influence of drugs, alcohol or medication.
A moment of inattention while operating power tools may result in
serious personal injury.
b) Use personal protective equipment. Always wear eye protection.
Wearing personal protective equipment (such as a dust mask, non-
slip safety shoes, a hard hat or ear protection) as appropriate to the
tool and to your application can reduce the risk of injury.
c) Prevent unintentional starting. Ensure the switch is in the off-
position before connecting to your power source and/or battery
pack, picking up or carrying the tool.
Carrying power tools with
your finger on the switch or connecting the power tool to a power
supply while the switch is set to “on” may lead to accidents.
d) Remove any adjusting key or wrench before turning the power
tool on.
A wrench or a key left attached to a rotating part of the
power tool may result in personal injury.
e) Do not overreach. Keep proper footing and balance at all
times.
This enables better control of the power tool in unexpected
situations.
f) Dress properly. Do not wear loose clothing or jewellery. Keep
your hair and clothing away from moving parts.
Loose clothes,
jewellery or long hair can be caught in moving parts.
g) If there is an option for installing dust suction devices and dust
containers, these should be attached and used correctly.
Use of
dust collection can reduce dust-related hazards.
h) Do not be lulled into a false sense of security and ignore the
safety rules for power tools, even if you are well acquainted with
power tools, having used them frequently.
Using power tools
without due care and attention can cause serious injuries in a split
second.

Safety
13
Power tool use and care
a) Do not overload the power tool. Use the correct power tool for
your application.
The correct power tool will do the job better and
more safely at the rate for which it was designed.
b) Do not use the power tool if the switch does not turn it on and
off.
Any power tool that cannot be controlled with the switch is
dangerous and must be repaired.
c) Disconnect the plug from the power source and/or remove the
rechargeable battery from the power tool before making any
adjustments, changing insertion tools or storing the power tool.
Such preventive safety measures reduce the risk of starting the
power tool accidentally.
d) Store idle power tools out of the reach of children. Do not let any
individual who is not familiar with the power tool or who has not
read these instructions operate this power tool.
Power tools are
dangerous in the hands of untrained users.
e) Maintain power tools and insertion tools with care. Check for
misalignment or binding of moving parts, breakage of parts and
any other condition that may affect the power tool’s operation.
If any parts of the power tool are damaged, have them repaired
before use.
Many accidents are caused by poorly maintained power
tools.
f) Keep cutting tools sharp and clean.
Properly maintained cutting
tools with sharp cutting edges are less likely to bind and are easier to
control.
g) Use the power tool, accessories, insertion tools etc. in accordance
with these instructions. taking into account the working
conditions and the work to be performed.
Use of the power tool for
operations different from those intended could result in a hazardous
situation.
h) Keep handles and handle surfaces dry, clean and free from oil
and grease.
Slippery handles and handle surfaces will prevent you
from operating and controlling the power tools safely in unforeseen
situations.

Safety
14
Service
a) Have your power tool serviced by a qualified repair person using
only identical replacement parts.
This will ensure that the safety of
the power tool is maintained.
Special safety instructions for rotary hammer drills
a) Wear ear protection.
Noise may cause hearing loss.
b) Use the extra handles shipped with the device.
Loss of control may
cause injury.
c) Hold the device by the insulated gripping surfaces when
performing work where the fitted tool may come into contact
with hidden power lines or its own mains cord.
Cutting accessory
contacting a “live” wire may make exposed metal parts of the power
tool “live” and could give the operator an electric shock.
Supplementary safety instructions
WARNING!
Risk of electric shock!
A faulty electrical installation or excessive mains voltage may result in an electric
shock.
− Only connect the rotary hammer drill if the mains voltage of the socket
corresponds to the data on the rating plate.
− Only connect the rotary hammer drill to an easily accessible socket so that
you can quickly disconnect it from the power supply in the event of a fault.
− Never touch the rotary hammer drill or the mains plug with damp hands.
− Lay the mains cord so that it does not pose a tripping hazard.
− Do not kink the mains cord and do not lay it over sharp edges.
− If the connection line is damaged, you must – in order to avoid risks – have
it replaced by the manufacturer or its customer service representative.
− Before beginning work, check the work area for hidden power, water or
gas lines. If necessary, use a pipe detector.
− Secure the workpiece with a suitable clamping device. This will ensure
that it is more securely held than it would be with your hand.

Safety
15
− Immediately switch the rotary hammer drill off if the fitted tool jams. A tool
that jams can trigger kickback.
− Never use the rotary hammer drill as a screwdriver when hammer drilling.
It is prohibited to tighten and loosen screws, nuts and the like when
hammer drilling.
WARNING!
Risk of injury!
Failure to follow the warning notes can result in injury.
− Store the rotary hammer drill in an area that is not accessible for children.
− Wear suitable protective clothing! Wear protective goggles and a
protective helmet to protect yourself against airborne particles and
splintered debris.
− Set up partitioning walls to protect nearby persons from airborne particles
and splintered debris.
− Wear work gloves to prevent your fingers from being crushed and to
prevent skin abrasions.
− Only connect the rotary hammer drill to the power supply after it has been
switched off.
− Make sure that the rotary hammer drill’s switch is set to the position that
corresponds to the type of work you intend to perform.
− Only start the rotary hammer drill when it is pressed against a workpiece
(wall, ceiling etc.).
− Disconnect the rotary hammer drill from the mains once you have finished
work.
− Never touch the outer casing directly after drilling. It becomes very hot
when drilling.
− Before performing work, always check whether the chisel or the drill bit
are correctly secured in the tool holder.
− Check the tool holder regularly for wear or damage.
− Never remove dust, chips or splinters while the motor is running.
− Secure small workpieces so that they are not pulled along by the drill bit
when drilling.

Safety
16
NOTICE!
Risk of damage!
Improper handling of the rotary hammer drill may result in damage to the
rotary hammer drill or the fitted tools.
− Only place the rotary hammer drill on an easily accessible, flat, dry, heat-
resistant and sufficiently stable work surface.
− Do not place the rotary hammer drill on the edge of the work surface.
− Never place the rotary hammer drill on or near hot surfaces (stovetops
etc.).
− Ensure that the mains cord does not come into contact with hot parts.
− Never expose the rotary hammer drill to high temperatures (heaters etc.)
or to effects of the weather (rain etc.).
− Never attempt to clean the rotary hammer drill by immersing it in water
and do not use a steam cleaner to clean it. Otherwise you could damage
the rotary hammer drill.
− Do not use aggressive solvents to clean the rotary hammer drill.
− Stop using the rotary hammer drill if its plastic parts exhibit cracks
or breaks or are deformed. Only have a qualified workshop replace
damaged parts with corresponding original spare parts.
− Operate the selector switch “Drilling/Hammer drilling/Set chisel working
angle/Chiselling” only when the motor is not running. Switching when the
motor is running can damage the gears.
− Always keep the connector cord away from your sphere of action by
moving it back away from the rotary hammer drill.
− Avoid the motor from coming to a stop under load when drilling and
screw driving.

First use
17
First use
Checking the rotary hammer drill and package contents
NOTICE!
Risk of damage!
If you are not cautious when opening the packaging with a sharp knife or other
pointed objects, you may quickly damage the rotary hammer drill.
− Be very careful when opening.
1. Lift the rotary hammer drill out of the packaging with both hands.
2. Place the rotary hammer drill on a level, stable surface, e.g. on a workbench.
3. Remove the packaging material and all protective foils.
4. Check whether the rotary hammer drill or the individual parts exhibit damage.
If this is the case, do not use the rotary hammer. Contact the manufacturer at the
service address specified on the warranty card.
5. Check to make sure that the delivery is complete (see Fig. A, B, C, D, F, G).
The tool holder is suitable for tools in accordance with the SDS plus
system.
Inserting a tool
The drill bit and chisel with a shaft corresponding to the SDS plus system can be
inserted directly into the tool holder 7.
1. If necessary, clean the end of the drill bit 12 or the chisel 11 to be inserted and
grease it lightly with drilling grease (not included in the package contents).
2. Point the tool holder up.
3. Insert the lightly greased end of the drill bit and turn it to the locking point with
gentle pressure. It is not necessary to push the retaining bush 6down in the
process.
In case of drill bits for wood or metal, you must first mount the additional keyed chuck
with adapter 15 (see chapter “Drilling without the hammer function”).
1. Insert the keyed chuck with adapter into the tool holder.
2. Insert a suitable drill bit into the keyed chuck and secure it with the chuck key 14 .
NOTICE: The keyed chuck may only be used without the hammer function!
Operation of the rotary hammer drill
18
Removing a tool
1. Tool without keyed chuck 15 :
Push the retaining bush 6back to remove the tool.
2. Tool with keyed chuck:
Use the chuck key 14 to open the keyed chuck and remove the tool. Push the
retaining bush 6back to remove the keyed chuck.
Mounting and adjusting the depth stop
1. Loosen the wing screw 9on the extra handle 5until the depth stop 10 can
be inserted in the clamping opening.
2. Pull the depth stop up to the tip of the inserted drill bit 12 .
3. Push the tip of the drill bit and depth stop up against a flat surface and push the
depth stop back by the desired drilling depth.
4. Fix the setting by tightening the wing screw. The front end of the depth stop will
come into contact with the respective base once the set drilling depth is reached.
5. Drill a test hole if necessary.
Setting the extra handle
1. Loosen the extra handle 5by turning it anticlockwise and turn it around the drill
axis to a convenient lateral working position.
2. Turn the front handle clockwise to fix it in place.
Operation of the rotary hammer drill
WARNING!
Risk of accident and injury!
There is a risk of accident and injury in the event of accidental activation/
deactivation when inserting and removing tools as well as when transporting
and cleaning the rotary hammer drill.
− Before inserting and removing tools, pull the mains plug to prevent the
rotary hammer drill from accidentally activating.
− Never touch the inserted tool while it is still rotating.
Operation of the rotary hammer drill
19
NOTICE!
Risk of damage!
When performing overhead work, dust and other contaminants may penetrate
the chuck and damage it.
− Before inserting the tool, push the dust cover over the tool shaft so that it
collects the drill dust.
− Place the dust cover on the tool shaft so that the keyhole of the dust cover
points towards the tip of the tool.
Switching the rotary hammer drill on and off and
adjusting the speed
WARNING!
Risk of accident and injury!
Drilling into brick masonry could damage power lines, gas lines and water lines.
There is a risk of electrocution, gas emission and water damage.
− Before drilling into walls and masonry, check that they do not contain
power, gas or water lines.
− Always use both hands to hold the rotary hammer drill by the insulated
handles to protect yourself against an electric shock.
1. Use the speed control 3to set the motor to the desired speed.
“6” indicates the maximum speed.
Observe the speed recommendations of the accessory manufacturer with respect
to working carefully with materials.
2. Push the On/Off switch 2.
The rotary hammer drill will operate at the preselected speed.
3. Release the On/Off switch to switch off the rotary hammer drill.
This rotary hammer drill has a vibration damper to reduce vibrations.

Operation of the rotary hammer drill
20
Switching between the functions
CAUTION!
Risk of injury!
When hammer drilling, chiselling and drilling, rock splinters, airborne dust,
borings and sparks may be produced.
− Wear protective goggles and ear protection when hammer drilling,
chiselling or drilling.
− Also wear a dust mask when drilling in a material with a loose structure,
slabs or concrete and masonry or when hammer drilling.
NOTICE!
Risk of damage!
Improper handling may damage the rotary hammer drill.
− Only switch between hammer drilling and normal drilling if the rotary
hammer drill and the inserted tool have come to a stop.
− Only use the keyed chuck without the hammer function.
WARNING!
Risk of accident and injury!
Flat chisels do not have guiding cutting edges. Therefore, they cannot be used
for drilling. The flat cutting edge also produces strong kickback forces when it
is rotated.
− Always switch tool rotation off when working with a chisel tool.
Drilling without the hammer function
NOTICE!
Risk of damage!
Improper handling may damage the rotary hammer drill.
− Always push the release button before you turn the selector switch.
Table of contents
Popular Rotary Hammer manuals by other brands


Dexter Laundry
Dexter Laundry 1500RH2-50.5 Legal and Safety Instructions

Hitachi Koki
Hitachi Koki Instruction ManualDH 22PG Handling instructions

Bosch
Bosch GBH 4-32 DFR Professional Repair instructions

Metabo
Metabo BHE 2444 operating instructions

Bosch
Bosch GBH 2-24 DS Repair instructions

Hitachi
Hitachi DH 25DL Handling instructions


