Fienza DELTA K005 User manual
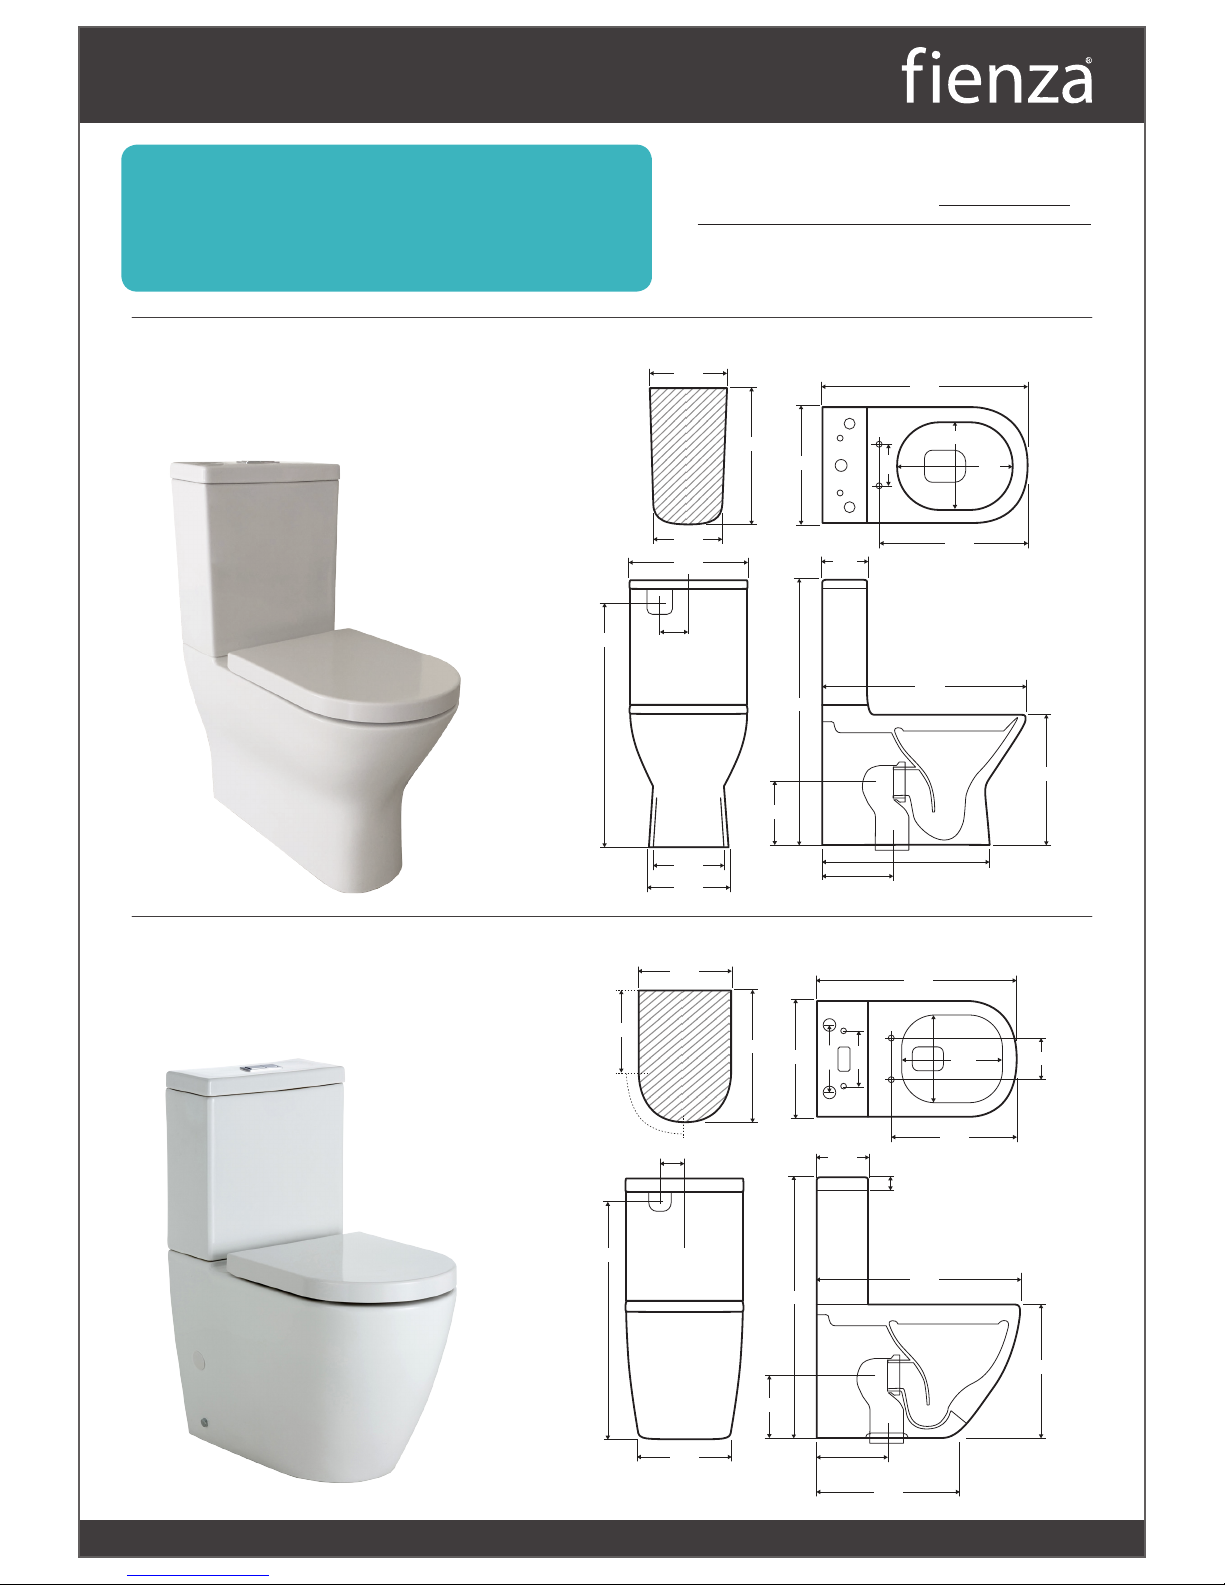
885
680
450
90–160 / 160–230
570
185
360
240
205
360
680
440
820 80
FOOTPRINT
570
160
160
FRONT VIEW
355
270
205
240
840
635
415
90-160 / 160-230
180
160
45
80
270
770
460
270
FOOTPRINT
480
280
360
210
175
420
145
635
320
270
FRONT VIEW
DELTA K005
EMPIRE K003
All measurements are in millimetres and subject
to change without notice. Effective 1st Jan 2018.
All installations should be carried out by a qualified tradesman
in compliance with the national Plumbing & Drainage Code and
any State or Local Authority Regulations. Installation shall be in
accordance with AS/NZS 3500 series of standards and AS/NZA 6400.
IMPORTANT: This Guide covers TWO
DIFFERENT toilet suites. Check which
product spec to use before installation.
www.fienza.com.au
INSTALLATION INSTRUCTIONS
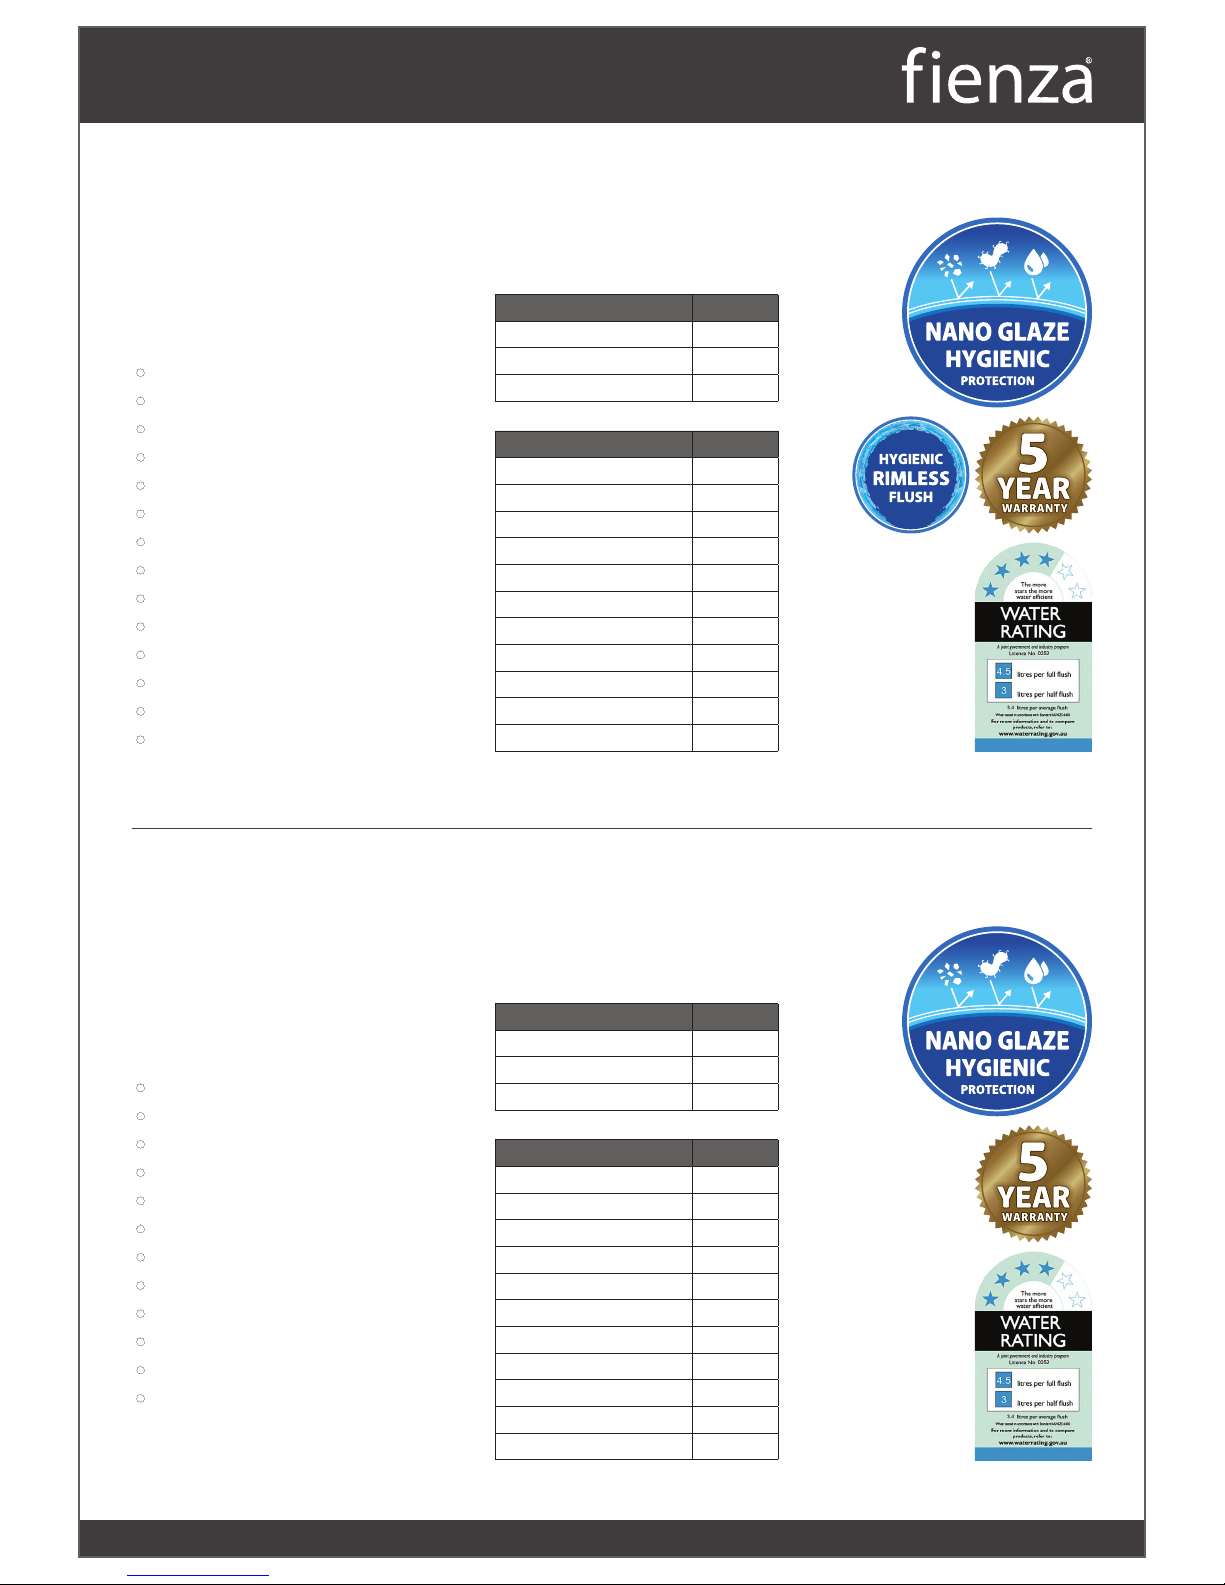
COMPLETE SET CODE
Suite with P-Trap K003P
Suite with S-Trap 90-160 K003A
Suite with S-Trap 160-230 K003B
SPARE PARTS CODE
Cistern only K003-C
Seat only UF2009W
Pan only P-Trap K003-P
S-Trap Pipe 160-230 X011B
S-Trap Pipe 90-160 X011G
R&T Top Inlet Valve 200-129
R&T Outlet 200-127
Pan Screws L Brackets 200-150
Rubber Donut 200-160
300mm Flexi Hose 200-206
900mm Flexi Hose 200-204
● Hygienic NANO-GLAZE protection
● Short projection for tight spaces
● Concealed pan for easy cleaning
● UF quick release, soft close seat
● Large easy push flush buttons
● High quality R&T flush mechanism
● Stainless steel hinges
● WELS 4 Star rated
● Available as P-Trap or S-Trap
● Dual top or bottom inlet
● Dual left or right bottom inlet
● Includes floor mounting screws
EMPIRE
Back-to-Wall Suite
● RIMLESS PAN hygienic flush
● Hygienic NANO-GLAZE protection
● Extra height pan
● Concealed pan for easy cleaning
● UF quick release, soft close seat
● Large easy push flush buttons
● High quality R&T flush mechanism
● Stainless steel hinges
● WELS 4 Star rated
● Available as P-Trap or S-Trap
● Dual top or bottom inlet
● Left top inlet
● Dual left or right bottom inlet
● Includes floor mounting screws
DELTA
Back-to-Wall Suite COMPLETE SET CODE
Suite with P-Trap K005P
Suite with S-Trap 90-160 K005A
Suite with S-Trap 160-230 K005B
SPARE PARTS CODE
Cistern only K003-C
Seat only UF1002
Pan only P-Trap K005-P
S-Trap Pipe 160-230 X011B
S-Trap Pipe 90-160 X011G
R&T Top Inlet Valve 200-129
R&T Outlet 200-127
Pan Screws L Brackets 200-150
Rubber Donut 200-160
300mm Flexi Hose 200-206
900mm Flexi Hose 200-204
www.fienza.com.au
INSTALLATION INSTRUCTIONS
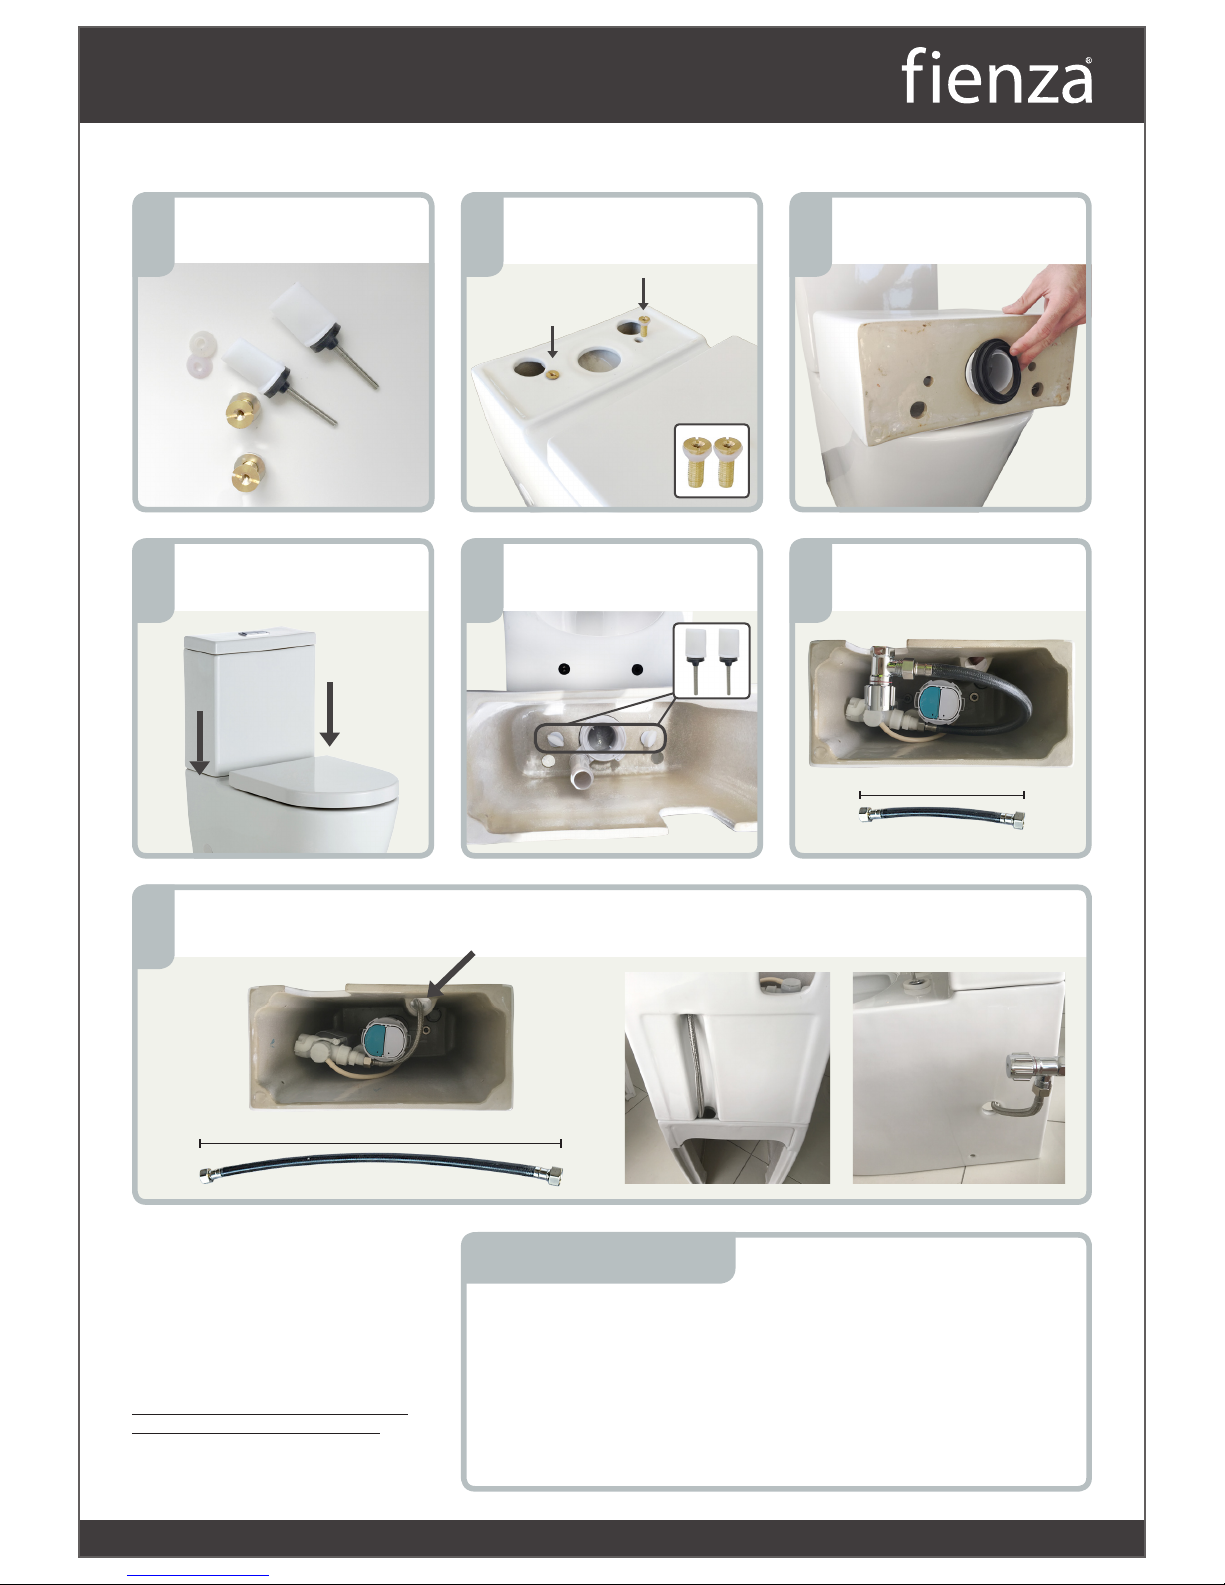
900mm
Parts required to mount
cistern to pan.
Attach cistern bolts into pan.
Tighten from underneath.
Ensure outlet rubber is
fitted to cistern.
Sit cistern onto pan. Use supplied bolts to
fasten cistern to pan.
TOP INLET SETUP:
Use 300mm flexi hose.
300mm
or BOTTOM INLET SETUP:
Use 900mm flexi hose. Feed hose down through channel in back of cistern.
1. The S-pipe should be put into position and cut to suit your set out.
2. Then attached to the wall using the thread bolt and plate provided.
3. Now push pan into position hard to ensure the ceramic outlet is pushed into
the S-pipe by approx 50mm. This is so the rubber inside the S-pipe gets a
good seal to stop water leaking.
PLEASE DO NOT SILICONE PAN TO FLOOR UNTIL TOILET HAS BEEN CHECKED FOR LEAKS.
S-TRAP INSTALLATION
DELTA & EMPIRE
All measurements are in millimetres and subject
to change without notice. Effective 1st Jan 2018.
All installations should be carried out by a
qualified tradesman in compliance with the
national Plumbing & Drainage Code and
any State or Local Authority Regulations.
Installation shall be in accordance with AS/NZS
3500 series of standards and AS/NZA 6400.
1 2 3
4 5 6
6
www.fienza.com.au
INSTALLATION INSTRUCTIONS

Fienza will charge a service fee for each visit to an installation by its technician where it is determined that the fault
is due to poorly executed or unlicensed installation work or where the product is not a genuine Fienza product or
where the product is outside the warranty period. This may be paid in advance by credit card over the phone to a
Fienza technician attending the site and will be refunded if the Fienza product is found to be at fault.
All installations should be carried out by a qualified tradesman in compliance with the national Plumbing and
drainage code and any State or Local Authority Regulations.
1. Open the box and check all the components.
2. Insert the expansion fittings (5) into the seat bolt holes in the WC.
3. Assemble washers (4), hinge fixings (3) and bolts (2) as shown in
the diagram. Leave loosely attached.
4. Align the hinge housing of the seat with the hinge fixings and
adjust the seat to desired position.
5. Remove the seat by depressing the chrome release buttons and
lifting upwards.
6. Tighten the bolts with a Phillips head screwdriver ensuring that
the expansion fittings are secure. Put the decorative cap in the
position then attached the seat on the hinges.
INSTALLATION STEPS
The toilet seat may be removed for cleaning - depress the chrome hinge release buttons and lift up.
Clean only with a soft cloth or sponge using warm water and mild soap or detergent.
Do not use any abrasive cleaning materials.
Do not use any solvents or corrosive liquids.
CLEANING
VITEROUS CHINA
Fienza quality viterous china is
gauranteed for 5 years from date of
purchase subject to the conditions below.
PLASTICS & ACCESSORIES
Fienza Plastic Cisterns,, Accessories,
Valves, Washers and Fixings are
gauranteed for 1 year from the date of
purchase subject to the conditions below.
CONDITIONS
• Instalation has been carried out by a
licensed plumber in accordance with
the plumbing code of Australia.
• All maintenance and adjustments to the
product after the installation have been
carried out by a licensed plumber.
• No additives have been introduced into
the cistern tank.
• Only mild household detergents and
soft (non-abrasive) cloth has been used
to clean the product.
• All goods of substandard quality
manufacture (excluding imperfections
permitted within AS1976 - Viterous
China used in Sanitiary Applications)
will be credited or replaced by Fienza
when advised within the warranty
period, subject to prior inspection and
agreement.
• Proof of purchse is required for
warranty claims.
LIMITATIONS
To the extent permitted under the Trade
Practices Act and other relevant legislation,
Fienza’s liability is limited to:
• The cost of replacing the goods, or
• The cost of obtaining equivalent goods, or
• The cost of having the goods repaired
• Fienza is not responsible for any lack of
operation or performance of goods (or any loss
or damage) where goods are used or adapted
for a with other goods not supplied by Fienza.
• It is the responsibility of the customer and
installer before installation to ensure are
correct and free of obvious visible faults.
• Fienza is not responsible for the labour and
rectification costs incurred in the above
circumstance.
WARRANTY STATEMENT
CONDITIONS FOR ON-SITE WARRANTY SERVICE CALLS
Decorative cap
Bolt
Hinge fixing
Washer
Expansion fitting
Chrome
release buttons
www.fienza.com.au
INSTALLATION INSTRUCTIONS

www.fienza.com.au
INSTALLATION INSTRUCTIONS
This manual suits for next models
1
Table of contents
Popular Other manuals by other brands


aoky
aoky CJE-1002 operating instructions

Russell Hobbs
Russell Hobbs SV1000B instructions

LAMBORGHINI
LAMBORGHINI XILO T 24 M W-TOP - SCHEMA manual

MobiE
MobiE MB7500-110 operating manual

Empire
Empire Pro-Finish 2636 operating instructions

Shishido Electrostatic
Shishido Electrostatic CABX350 instruction manual


