FIOCCHETTI SUPERFREEZER ECO 70 User guide


The manufacturer works constantly on the further development
of all the types and models. Therefore please understand that
we have to reserve the right to make design, equipment and
technical modifications.
To get to know all the benefits of your new appliance, please
read the information contained in these instructions carefully.
Instructions for action are marked with a , the results of
action are marked with a .
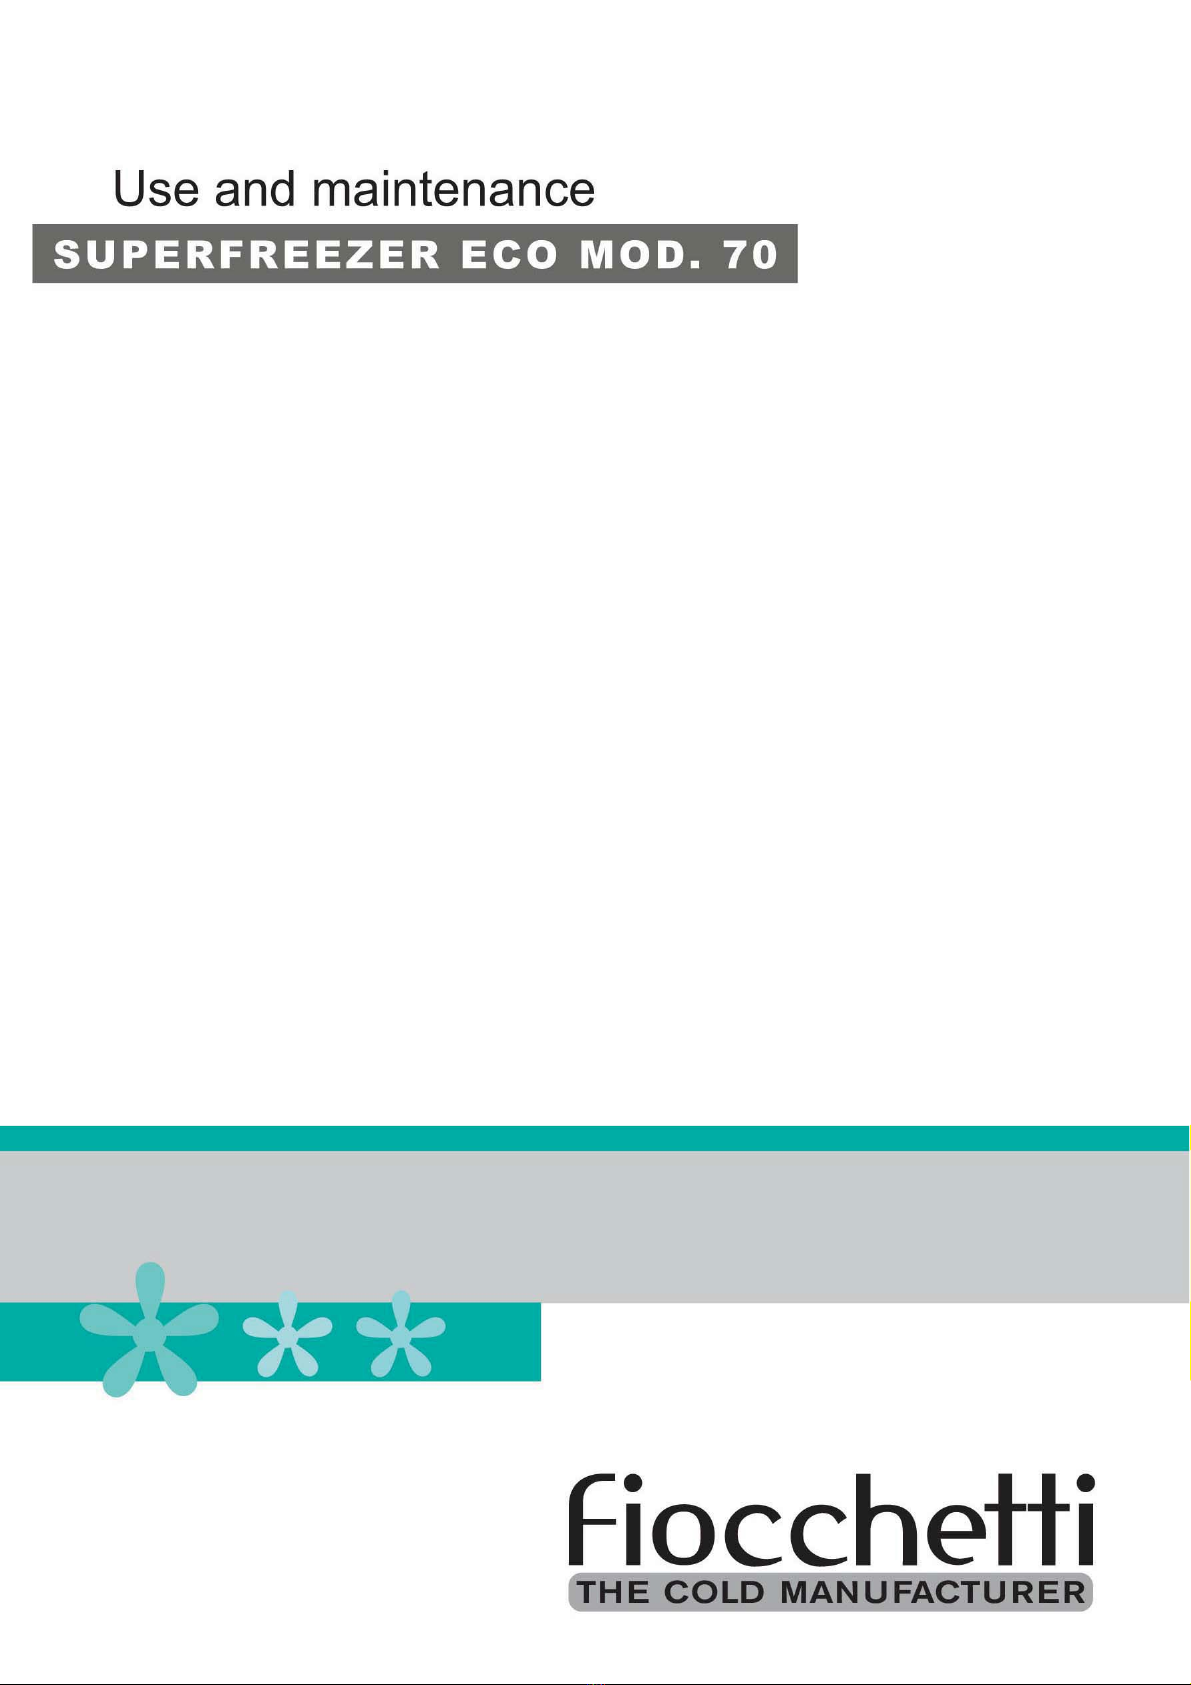
1 Appliance at a glance
1.1 Description of appliance and equip-
ment
Note
uShelves, drawers and baskets are arranged for optimum
energy efficiency on delivery.
Fig. 1
(1) Operating controls (4) Type plate
(2) VarioSpace (5) Adjustable feet
(3) Drawer
1.2Range of appliance use
Misuse of the appliance can result in the stored products
suffering harm or perishing. Furthermore, the appliance is not
suitable for operation in potentially explosive atmospheres.
The appliance is set to operate within specific ambient temper-
ature limits according to its climate rating. The correct climate
rating for your appliance is indicated on the type plate.
Note
uCompliance with the ambient temperatures indicated is
required, otherwise the cooling performance is reduced.
Climate
rating
for ambient temperatures
SN-T from +10°C to +43°C
Appliance at a glance

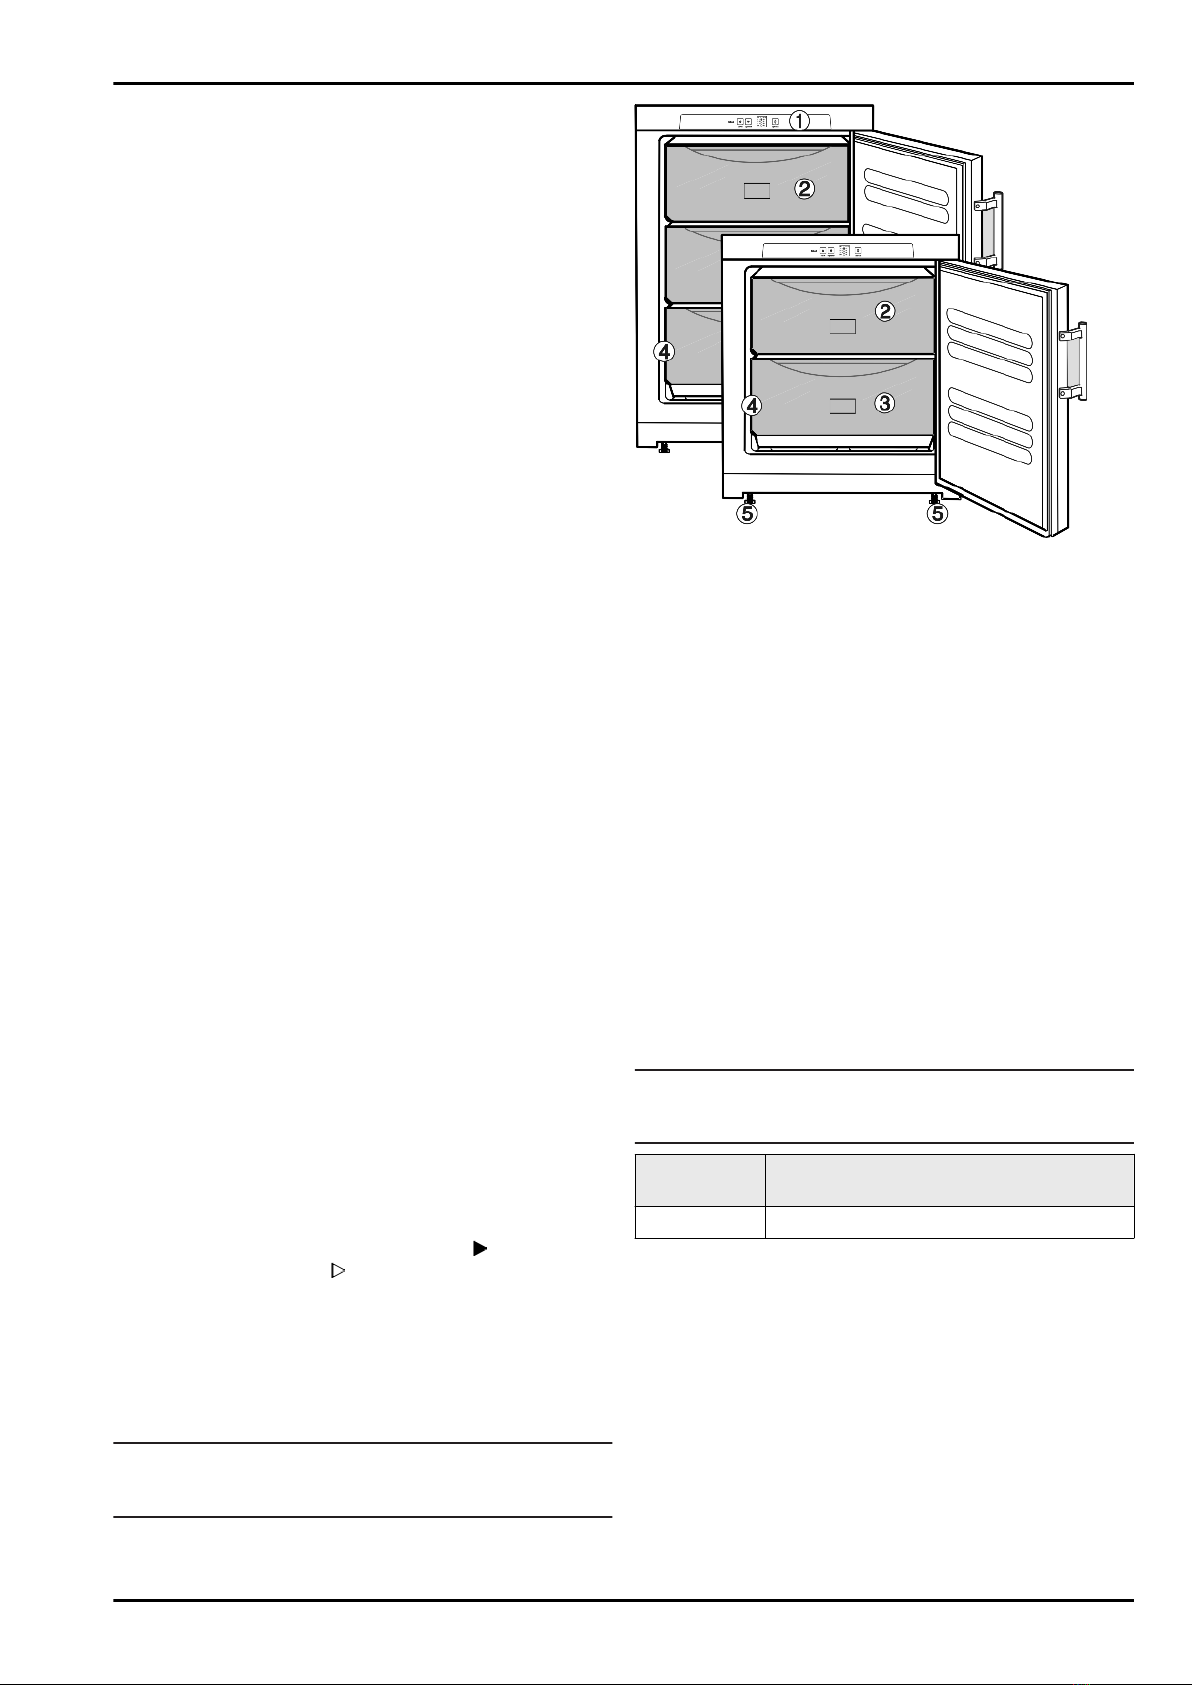
1.4 External dimensions of the appli-
ance
Fig. 2
Model h a g e e' d c c'
70 6315536116246531129563592
1.5 Saving energy
-Always ensure good ventilation. Do not cover ventilation
openings or grille.
-Do not place appliance in areas of direct sunlight or next to a
heater or similar object.
-The energy consumption depends on the installation condi-
tions, e.g. the ambient temperature (see 1.2) .
-Keep the time the appliance is open to a minimum.
-The lower the temperature setting, the higher the power
consumption.
-Ensure that all products are well packed for storage.
This will prevent frost from forming.
-If there is a thick layer of frost in the appliance: defrost the
appliance.
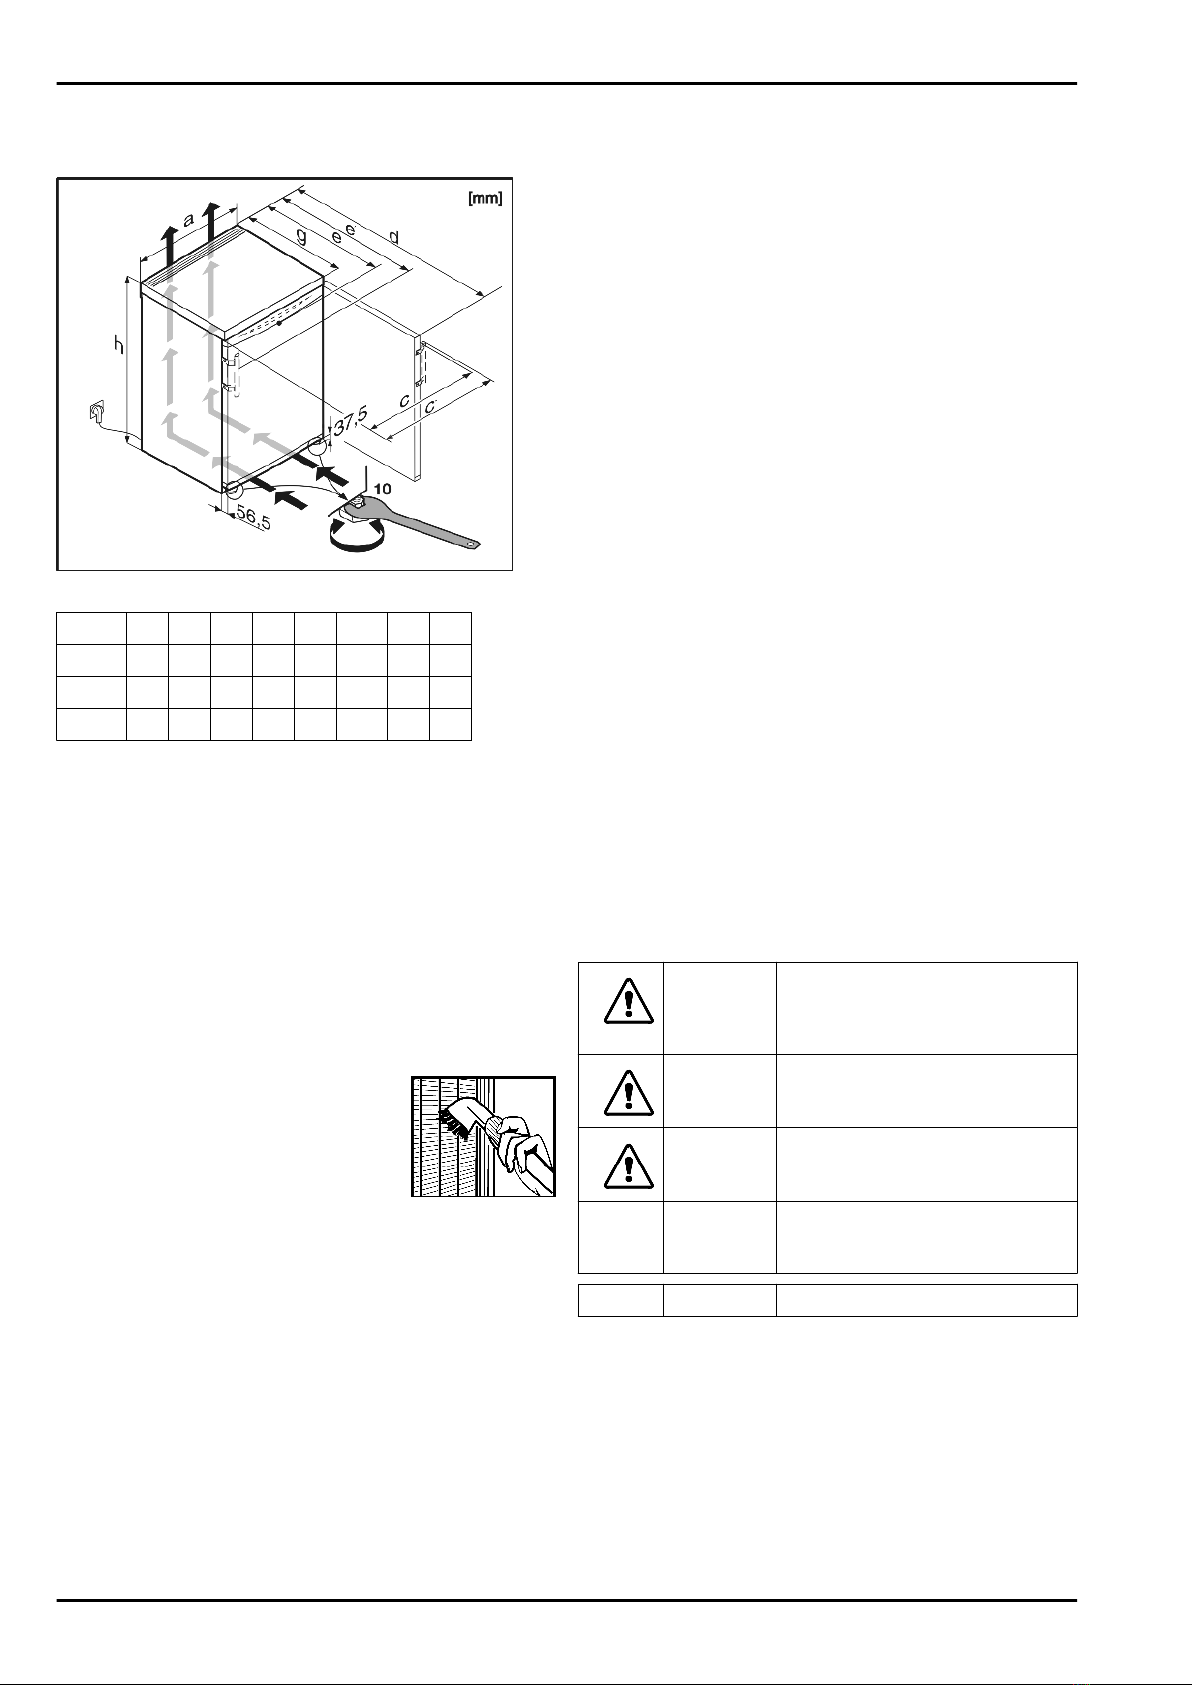
Accumulated dust increases the energy
consumption:
-Once a year, dust the refrigerating unit
together with the metal grille of the heat
exchanger at the back of the appliance.
2 General safety information
Danger for the user:
-This appliance is not designed for persons (including chil-
dren) with physical, sensory or mental impairment or
persons not having sufficient experience and knowledge,
unless they are instructed in the use of the appliance and
are initially supervised by a person responsible for their
safety. Keep children under supervision to ensure they do
not play with the appliance.
-In case of a fault, pull out the mains plug (not by pulling the
connecting cable) or switch off the fuse.
-Have any repairs to or intervention in the appliance, and any
change of the mains power cable, carried out by the
customer service only or by other specialised personnel
trained for the purpose.
-When disconnecting the appliance from the supply, always
take hold of the plug. Do not pull the cable.
-Install and connect the appliance only as instructed.
-Please keep these instructions in a safe place and pass
them on to any subsequent owners.
Fire hazard:
-The refrigerant R 600a is environmentally friendly but flam-
mable. Escaping refrigerant may ignite.
•Do not damage the refrigerant circuit pipes.
•Do not allow naked flames or ignition sources to enter the
appliance.
•Do not use any electrical appliances in the interior
•If refrigerant escapes: eliminate naked flames or sources
of ignition from the vicinity. Pull out the power plug. Venti-
late the area well. Notify customer service.
-Do not store explosives or sprays using combustible propel-
lants such as butane, propane, pentane, etc. in the appli-
ance. To identify these spray cans, look for the list of
contents printed on the can, or a flame symbol. Gases
possibly escaping may ignite due to electrical components.
-Keep burning candles, lamps and other items with naked
flames away from the appliance so that they do not set the
appliance on fire.
-Always store high-percentage alcohol in tightly sealed,
upright containers. Alcohol possibly escaping may ignite
due to electrical components.
Danger of tipping and falling:
-Do not misuse the plinth, drawers, doors etc. as a step or for
support. This applies particularly to children.
Danger of frostbite, numbness and pain:
-Avoid lasting skin contact with cold surfaces or refrigerated/
frozen product or take protective steps, e.g. wear gloves.
Please observe the specific information in the other
sections:
DANGER identifies a situation involving direct
danger which, if not obviated, may
result in death or severe bodily
injury.
WARNING identifies a dangerous situation
which, if not obviated, may result in
death or severe bodily injury.
CAUTION identifies a dangerous situation
which, if not obviated, may result in
minor or medium bodily injury.
NOTICE identifies a dangerous situation
which, if not obviated, may result in
damage to property.
Note identifies useful information and tips.
General safety information

3 Controls and displays
3.1 Operating and control elements
Fig. 3
(1) On/Off button (6) Menu symbol
(2) Setting button (7) Alarm symbol
(3) Temperature display (8) Brightness symbol
(4) SuperFrost button (9) Child lock symbol
(5) SuperFrost symbol
3.2 Temperature display
The following are displayed in normal operation:
-the set freezing temperature
The temperature display flashes:
-the temperature setting is being changed
-after switch-on the temperature is not yet cold enough
-the temperature has risen several degrees
4 Putting into operation
4.1 Transporting the appliance
CAUTION
Risk of injury and danger of damage as a result of incorrect
transport!
uTransport the appliance in a packed condition.
uTransport the appliance upright.
uDo not transport the appliance without assistance.
4.2 Installing the appliance
WARNING
Fire hazard due to dampness!
If live parts or the mains lead become damp this may cause
short circuits.
uThe appliance is designed for use in enclosed areas. Do not
operate the appliance outdoors or in areas where it is
exposed to splash water or damp conditions.
WARNING
Risk of fire due to short circuit!
If the mains cable/connector of the appliance or of another
appliance touch the rear of the appliance, the mains cable/
connector may be damaged by the appliance vibrations,
leading to a short circuit.
uStand the appliance so that it is not touched by connectors
or main cables.
uDo not plug the appliance or any others into sockets located
near the rear of the appliance.
WARNING
Fire hazard due to refrigerant!
The refrigerant R 600a is environmentally friendly but flam-
mable. Escaping refrigerant may ignite.
uDo not damage the piping of the refrigeration circuit.
WARNING
Fire hazard and danger of damage!
uDo not place appliances emitting heat on the appliance!
WARNING
Blocked ventilation openings pose a risk of fire and damage!
uAlways keep the ventilation openings clear. Always ensure
that the appliance is properly ventilated!
qIn the event that the appliance is damaged, contact the
supplier immediately before connecting to the mains.
qThe floor at the site must be flat and level.
qDo not install the appliance in a location where it is exposed
to direct radiation of the sun, next to a heat source and
similar.
qThe ideal installation site is a dry, well ventilated room.
qAlways stand the appliance backed directly to the wall using
the enclosed wall spacers (see below).
qThe appliance may be moved only when it is empty.*
qDo not install the appliance without assistance.
qStandard EN 378 specifies that the room in which you install
your appliance must have a volume of 1 m2 per 8 g of R
600a refrigerant used in the appliance. If the room in which
the appliance is installed is too small, a flammable gas-air
mixture may form in the event of a leakage in the refrigera-
tion circuit. The quantity of refrigerant used in your appliance
is indicated on the type plate on the inside of the appliance.
uDetach the connecting cable from the rear of the appliance,
removing the cable holder at the same time because other-
wise there will be vibratory noise!
uRemove all transit supports.
uDispose of packaging material (see 4.5) .
uAlign the appliance so that it
stands firmly and on a level by
applying the accompanying
spanner to the adjustable-
height feet (A) and using a
spirit level.
Note
uClean the appliance (see 6.2) .
If the appliance is installed in a very damp environment,
condensate may form on the outside of the appliance.
uAlways see to good ventilation at the installation site.
4.3 Changing over the door hinge*
You can change over the door hinges if necessary.
Make sure that the following tools are at hand:
qTorx® 25
Controls and displays

qTorx® 15
qSupplied open-ended wrench
qIf necessary, a second person to assist with installation
CAUTION
Risk of injury if the door tips!
uTake good hold of the door.
uSet down the door carefully.
Fig. 4 On appliances with a door handle
Fig. 5 On appliances without a door handle
uFollow the sequence of the item numbers in the diagram.
4.5 Disposing of packaging
WARNING
Danger of suffocation due to packing material and plastic film!
uDo not allow children to play with packing material.
The packaging is made of recyclable materials:
-corrugated board/cardboard
-expanded polystyrene parts
-polythene bags and sheets
-polypropylene straps
-nailed wooden frame with polyethylene panel*
uTake the packaging material to an official collecting point.
4.6 Connecting the appliance
NOTICE
Risk of damage to the electronic control system!
uDo not use stand-alone inverters (conversion of d.c. to a.c./
three-phase) or energy saving plugs.
Putting into operation

WARNING
Fire and overheating hazard!
uDo not use extension cables or multiple socket outlets.
The type of current (alternating current) and voltage at the
installation site have to conform with the data on the type plate
(see Appliance at a glance).
Connect the appliance only with a properly installed
socket outlet with earthing contact. The socket outlet
must be fused with 10 A or higher.
It must be easily accessible so that the appliance can
be quickly disconnected from the supply in an emer-
gency. It must be outside the area of the rear of the
appliance.
uCheck the electrical connection.
uPlug in the power plug.
4.7 Switching on the appliance
uPress the On/Off button
Fig. 3 (1)
.
wThe appliance is switched on. The temperature display and
Alarm symbol
Fig. 3 (7)
flash until the temperature is cold
enough.
5 Control
5.1 Brightness of the temperature
display
You can adjust the brightness of the temperature display to the
light conditions of the room in which the appliance is installed.
5.1.1 Adjusting the brightness
The backlight can either be switched off or set to one of 5
levels. The backlight is switched off ex works.
uTo activate the setting mode: Press the SuperFrost button
Fig. 3 (4)
for about 5 seconds.
wThe menu symbol
Fig. 3 (6)
shines and the child lock symbol
Fig. 3 (9)
flashes.
uPress the setting button
Fig. 3 (2)
to select the brightness
function.
wThe child lock symbol
Fig. 3 (9)
goes out and the brightness
symbol
Fig. 3 (8)
flashes.
uTo confirm: Briefly press the SuperFrost button
Fig. 3 (4)
.
wThe brightness symbol
Fig. 3 (8)
shines.
uUsing the setting button
Fig. 3 (2)
, select either "off" or the
brightness wanted. The more display fields of the tempera-
ture display that light up, the brighter it is. If no field is lit up, it
means "off".
uTo confirm: Press the SuperFrost button
Fig. 3 (4)
.
wThe brightness symbol
Fig. 3 (8)
flashes.
wThe brightness is adjusted to the new value.
uTo deactivate the setting mode: Press the On/Off button
Fig. 3 (1)
.
-or-
uWait for 5 minutes.
wThe brightness symbol
Fig. 3 (8)
and the menu symbol
Fig. 3 (6)
go out.
wThe temperature is indicated again in the temperature
display.
5.2 Child proofing
The child-proofing function enables you to make sure that the
appliance is not inadvertently switched off by children.
5.2.1 To activate child lock
uTo activate the setting mode: Press the SuperFrost button
Fig. 3 (4)
for about 5 seconds.
wThe menu symbol
Fig. 3 (6)
shines and the child lock symbol
Fig. 3 (9)
flashes.
uBriefly press the SuperFrost button
Fig. 3 (4)
to select the
child lock function.
wThe child lock symbol
Fig. 3 (9)
shines. The
-15 °C and -21 °C LEDs shine in the temperature
display.
uBriefly press the SuperFrost button
Fig. 3 (4)
to activate the
child lock.
wThe child lock symbol
Fig. 3 (9)
flashes. The -15 °C and
-21 °C LEDs go out.
uTo deactivate the setting mode: Press the On/Off button
Fig. 3 (1)
.
-or-
uWait for 5 minutes.
wThe menu symbol
Fig. 3 (6)
goes out and the temperature is
displayed again in the temperature display. The child lock
symbol
Fig. 3 (9)
shines.
5.2.2 To deactivate child lock
uTo activate the setting mode: Press the SuperFrost button
Fig. 3 (4)
for about 5 seconds.
wThe menu symbol
Fig. 3 (6)
shines and the child lock symbol
Fig. 3 (9)
flashes.
uBriefly press the SuperFrost button
Fig. 3 (4)
to select the
child lock function.
wThe child lock symbol
Fig. 3 (9)
shines. The
-18 °C LED shines in the temperature display.
uBriefly press the SuperFrost button
Fig. 3 (4)
to deactivate
the child lock.
wThe child lock symbol
Fig. 3 (9)
flashes.
uTo deactivate the setting mode: Press the On/Off button
Fig. 3 (1)
.
-or-
uWait for 5 minutes.
wThe menu symbol
Fig. 3 (6)
goes out and the temperature is
displayed again in the temperature display. The child lock
symbol
Fig. 3 (9)
no longer shines.
5.3 Temperature alarm
The temperature display and the alarm symbol
Fig. 3 (7)
flash
at the same time.
The Alarm symbol
Fig. 3 (7)
goes out and the temperature
display stops flashing, once the temperature has reached the
appropriate level of coldness again.
5.4Freezing products
The maximum load of frozen products for the drawers is 25 kg each
and for the shelves 35 kg each.
Control

CAUTION
Risk of injury due to broken glass!
Bottles and cans may burst when being
frozen. This applies particularly to sparkling fluids.
uDo not freeze bottles and cans containing fluids!
5.7Setting the temperature
The temperature can be changed continuously. Once the
-32 °C setting is reached, it starts again with -15 °C.
uTo access temperature adjustment: press setting button
Fig. 3 (2)
once.
wThe LED of the current temperature flashes in the tempera-
ture display.
uPress the setting button
Fig. 3 (2)
the number of times
needed until the required temperature shines in the LED
display.
Note
uLong pressing of the setting button sets a slightly colder
value within a small temperature range (e.g.: between
-15 °C and -18 °C). The LED of the next lower temperature
range then shines in the temperature display.
5.8SuperFrost
In addition, frozen product already in storage is given a "cold
reserve". The product stays frozen longer as a result when you
defrost the appliance.
You have to activate SuperFrost in good time, depending on
how many products are to be frozen: about 6 hours before
placing the products inside in case of small amounts and about 24
hours in advance in case of the maximum amount of products to be
frozen.
You do not have to activate SuperFrost in the following cases:
-when placing frozen goods in the freezer
5.8.1Freezing with SuperFrost
uBriefly press the SuperFrost button
Fig. 3 (4)
.
wThe SuperFrost symbol
Fig. 3 (5)
shines.
wThe freezer temperature drops, the appliance operates with
the maximum refrigerating capacity.
Note
uPressing the SuperFrost button can cause the compressor
to switch on up to 8 minutes later, thanks to the integrated
switch-on delay. This delay increases the service life of the
compressor.
In case of a small amount of products to be frozen:
uwait approx. 6 h.
uPlace wrapped products in the bottom drawers.
uwait about 24 h.
uRemove bottom drawer and place products directly in the
appliance so that it touches the base or sides.
wSuperFrost is automatically deactivated after about 65 h.
wTheSuperFrost button
Fig. 3 (5)
extinguishes once freezing
is completed.
wThe temperature range set for the normal mode shines in
the temperature display.
uPlace products in the drawer and then push the drawer back
in again.
wThe appliance continues to operate in the energy-saving,
normal mode.
To save energy SuperFrost can switch switched off, even
before the full 65 hours of freezing time has elapsed, by
pressing the SuperFrost button
Fig. 3 (4)
again. Only switch off
SuperFrost once the temperature is -18 °C or colder.
5.9Drawers
uTo store frozen products directly on the shelves: pull the drawer
forwards and lift it out.
5.10Shelves
uTo remove the shelf: lift up at the front
and pull out.
uTo put the shelf back: simply push in as
far as it will go.
Control

5.11 VarioSpace
Apart from being able to remove the
drawers, you can also remove the
shelves, creating space for large
items of frozen products.
uThe maximum load of frozen
goods for the drawers is 25 kgeach
and for the shelves 35 kg each.
6 Maintenance
6.1 Manual defrosting
The layer of frost or ice builds up faster if the appliance is
opened often.
However, a thick layer of ice will increase the appliance‘s
energy consumption. You should therefore defrost the appli-
ance regularly.
CAUTION
Risk of injury and damage as a result of hot steam!
uDo not use electric heaters or steam cleaners, naked flames
or defrosting sprays for defrosting.
uDo not remove ice using sharp instruments.
uSwitch on SuperFrost one day before defrosting.
wThe frozen goods are provided with a "cold reserve".
uSwitch off the appliance.
wThe temperature display goes out.
uPull out the power plug or switch off the fuse.
uIf possible, put the frozen goods in the freezer drawer,
wrapped in newspaper or a blanket, and store in a cool
place.
uPlace a pan with hot, not boiling
water on a middle shelf.
-or-
uHalf-fill the two lower drawers with
lukewarm water and put them in the
appliance.
wDefrosting is speeded up.
wDefrost water is collected in the drawers.
uLeave the door of the appliance open while defrosting.
uRemove detached pieces of ice.
uIf necessary, pick up defrost water several times, using a
sponge or cloth.
uClean the appliance (see 6.2) .
6.2 Cleaning the appliance
CAUTION
Risk of injury and damage as a result of hot steam!
Hot steam may damage the surfaces and cause burns.
uDo not use any steam cleaners!
NOTICE
Incorrect cleaning damages the appliance!
uDo not use cleaning agents in concentrated form.
uDo not use any scouring or abrasive sponges or steel wool.
uPlease do not use any aggressive, scouring, sand-,
chloride-, chemical- or acid-based cleaning agents.
uDo not use chemical solvents.
uDo not damage or remove the type plate on the inside of the
appliance. It is important for the customer service.
uDo not pull off, bend or damage cables or other compo-
nents.
uDo not allow any cleaning water to enter the drain channel,
ventilation grille or electrical parts.
uPlease use soft cleaning cloths and a universal pH-neutral
cleaning agent.
uPlease use cleaning and care products suitable for contact
with products in the appliance interior.
uEmpty appliance.
uPull out the power plug.
uClean plastic outer and inner surfaces with lukewarm
water and a little washing-up liquid.
After cleaning:
uWipe dry the appliance and items of equipment.
uConnect the appliance and switch it on again.
6.3 Customer service
First check whether you can correct the fault yourself by refer-
ence to the list (see Malfunction). If this is not the case, please
contact the customer service.
WARNING
Risk of injury if repair work is not carried out professionally!
uHave any repairs and action - not expressly specified - on
the appliance and mains cable carried out by service
personnel only. (see Maintenance)
uRead the appliance
designation and serial number off the type plate
located inside the
appliance on the left-
hand side.
uNotify the customer service, specifying the fault, appliance
designation
and serial No.
wThis will help us to provide you with a faster and more accu-
rate service.
uKeep the appliance closed until the customer service
arrives.
wThe goods will stay cool longer.
uPull out the mains plug (not by pulling the connecting cable)
or switch off the fuse.
7 Malfunction
Your appliance is designed and manufactured for a long life
span and reliable operation. If a malfunction nonetheless
occurs during operation, check whether it is due to a handling
error. In this case you will have to be charged for the costs
Maintenance

incurred, even during the warranty period. You may be able to
rectify the following faults yourself:
Appliance does not work.
→The appliance is not switched on.
uSwitch on the appliance.
→The power plug is not properly inserted in the wall socket.
uCheck power plug.
→The fuse of the wall socket is not in order.
uCheck fuse.
The compressor runs for a long time.
→The compressor switches to a low speed when little cold is
needed. Although the running time is increased as a result,
energy is saved.
uThis is normal in energy-saving models.
→SuperFrost is activated.
uThe compressor runs for longer in order to rapidly cool the
products. This is normal.
A LED on the bottom rear of the appliance (at the
compressor) flashes regularly every 15 seconds*.
→The inverter is equipped with a diagnostic LED.
uThe flashing is normal.
Excessive noise.
→Speed-controlled* compressors may produce varying
running noise due to different speed steps.
uThe sound is normal.
A bubbling and gurgling noise.
→This noise comes from the refrigerant flowing in the refriger-
ation circuit.
uThe sound is normal.
A quiet clicking noise.
→The noise is produced whenever the refrigeration unit
(motor) automatically switches on or off.
uThe sound is normal.
A hum. It is briefly a little louder when the refrigeration
unit (the motor) switches on.
→The refrigeration increases automatically when the Super-
Frost, function is activated, products have just been placed
in the appliance or the door has been left open for a while.
uThe sound is normal.
→The ambient temperature is too high.
uSolution: (see 1.2)
Vibratory noise.
→The appliance is not standing firmly on the floor. As a result,
adjoining units or objects are set into vibration by the
running refrigeration unit.
uMove the appliance away a little and align it using the
adjustable feet.
The SuperFrost symbol
Fig. 3 (5)
flashes together with the
temperature display.
→There is a fault.
uContact the after sales service. (see Maintenance).
DEMO shines in the temperature display.
→The demo mode is activated.
uContact the customer service. (see Maintenance).
The outside surfaces of the appliance are warm.
→The heat of the refrigeration circuit is used to prevent
condensate from forming.
uThis is normal.
The temperature is not cold enough.
→The door of the appliance is not properly closed.
uClose the door of the appliance.
→Insufficient ventilation.
uClear ventilation grilles.
→The ambient temperature is too high.
uSolution: (see 1.2) .
→The appliance was opened too frequently or for too long.
uWait until the appliance reaches the required temperature
itself. If not, contact the customer service. (see Mainte-
nance).
→Too much products were placed inside without SuperFrost.
uSolution: (see 5.8)
→The temperature is incorrectly set.
uSet to a colder temperature and check after 24 h.
→The appliance is too close to a heat source.
uSolution: (see Putting into operation).
8 Decommissioning
8.1 Switching off the appliance
uPress On/Off button
Fig. 3 (1)
for about 2 seconds.
wThe temperature display is dark.
8.2 Taking the appliance out of service
uEmpty the appliance.
uPull out the power plug.
uClean the appliance (see 6.2) .
*
uLeave the door open to prevent odour.
9 Disposing of the appliance
The appliance contains some reusable materials
and should be disposed of properly - not simply
with unsorted household refuse. Appliances which
are no longer needed must be disposed of in a
professional and appropriate way, in accordance
with the current local regulations and laws.
When disposing of the appliance, ensure that the refrigeration
circuit is not damaged to prevent uncontrolled escape of the
refrigerant it contains (data on type plate) and oil.
uDisable the appliance.
uPull out the plug.
uCut through the connecting cable.
Decommissioning


MNL061_ENG rev.A
Table of contents
Other FIOCCHETTI Freezer manuals