FLYLINE Room Raiders Flight System User manual

FLYLINE® GAMEPLAY EXPERIENCE
Contact Us:
By Phone: 1.800.696.3247
@FlyLineRC
CREATIVE PLAY INTERNATIONAL CORPORATION
FLYLINE ROOM RAIDERS SYSTEM COMPONENTS
Tethering System
Interlocking Playmat
Combat Streamers
Charging Unit
Special
Components
THIS PACKAGE CONTAINS
CARRIER LANDING
FORMATION FLIGHT
Transmitter
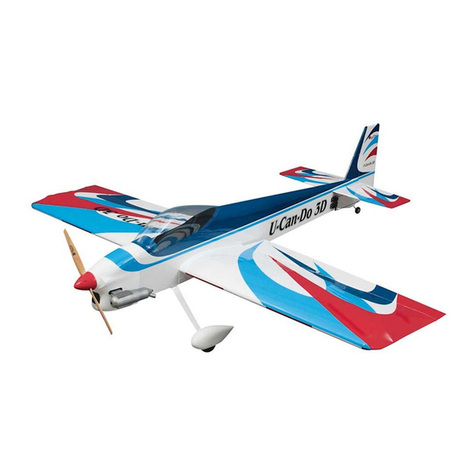
Plane
Anchoring Base System
8410 NW 53 Terrace
Monterey Building
suite #200
Doral, FL 33166
FLYLINE® PLAY EXPERIENCE
Each FlyLine System is ideal for both solo flying and
multiplayer action. Attach your plane to the anchoring
system to perform amazing stunts at incredible speed.
Control the throttle and elevator to climb, dive, and
attempt stunts like the knife-edge, wingover, and for
experts, loops and inverted flight patterns.
Combat - Racing - Stunts
FLYLINE’S ROOM RAIDERS STARTER SET COMPLETE FLIGHT SYSTEM INSTRUCTION MANUAL
FLYLINE COMPLETE INDOOR FLIGHT SYSTEM
A revolutionary way to fly!
Thank you for purchasing the FlyLine Room Raiders
Flight System. The FlyLine System allows beginner
pilots to fly in the same airspace as top gun flying
aces. Learn to fly with the 2.4 Ghz remote control,
and as you get better, challenge yourself to learn
stunt patterns. FlyLine is easy to learn, and
challenging to master.
When you think you’re ready, challenge others to
indoor dogfights, races, and other flying contests
with your FlyLine planes at supersonic scale speeds.
Please follow these instructions before flying, and
visit us online for more information.
COMBAT TOUCH AND GO
Attach paper streamers to the tail fin
of each plane with a small piece of
tape. Set the two planes opposite
each other, and coordinate a
simultaneous take-off. Once in the
air, try to use your propeller to cut the
other pilot’s tail streamer. The plane
with the longest streamer at the end
of the dogfight battle is the winner. If
there is a crash, it is a tie.
On the FLyLine Playmat, you will see
numbered scoring zones. If you can
bring the plane’s wheels to the
surface, and then get the plane back
up in the air before leaving the zone,
you score that number of points.
Each player gets 10 chances to score
as many points as possible, and the
player with the highest score wins.
On the FLyLine Playmat, you will see
a designated landing zone. You must
bring the plane’s wheels to the
surface without touching the area
before or after the landing zone in
order to successfully land on the
Aircraft Carrier.
Players take turns landing until only
one player successfully lands in the
zone in turn.
A cooperative game, you will have to
work as a team to simulate the
awesome synchronized flying
patterns of Air Force aces like the
Blue Angel Pilots.
Start by taking off at different ends,
then slowly begin to fly directly above
your teammate. Synchronize your
climbs and dives as closely as
possible, and get as dangerous as
possible without crashing.
www.flylinerc.com

FLYLINE COMPLETE INDOOR FLIGHT SYSTEM OPERATOR’S GUIDE
Preparing the Anchoring System
THE TRANSMITTER CONTROLS EXPLAINED
The buttons and their functions explained
TROUBLESHOOTING
PROBLEM CAUSE SOLUTION
Plane is not bound to
the transmitter.
Follow the simple
binding instructions
below.
Plane power switch is
on or transmitter
switch is o
See charging
instructions above.
Minor physical
damage
Combat, Crashes,
Accidents
Apply a small piece of
clear tape to the area.
Water opening
Collect other FlyLine Room Raiders Expansion Planes, and use them with your starter set anchoring system and transmitter. Also look for the FlyLine
Room Raiders Playmat online and in special Combo Packs for awesome solo and multi-player games!
The transmitter will require four (4) AA batteries. Insert the
batteries in the large compartment on the backside of the
transmitter.
If your transmitter needs to be bound, please refer to the
note on Binding the Transmitter below in the
troubleshooting section.
With the plane’s power switch in the off position, insert the
charging cable from the transmitter into the receiver under
the fuselage.
Turn on the Transmitter to charge the battery in the plane,
ensuring that the plane’s power switch remains off.
Charge time is approximately 10-15 minutes.
Preparing the Transmitter
Fill the base with
water and apply the
base cap included in
the accesory pack.
Ensure that the other
end of the line is
attached to the hook
on the fuselage.
Attach the Magic
Ring to the
anchoring system
Attach any additional
planes to the
anchoring system
and remove all slack
from the lines.
Make sure your
flight area is clear,
attach the plane’s
landing gear, and
it’s ready to fly!
Insert the anchoring
pole(s). Use 1 pole
for standard height,
or 2 poles to expand
the vertical area.
Ensure that the line
is attached to the
Magic Ring.
Ensure that the line
is correctly placed
through the guide at
the edge of the wing.
Elevator Lever
Link
Throttle Lever
Beg-Adv.
Plane doesn’t
respond to transmitter
Plane battery will
not charge
•If you are holding your transmitter correctly, it will appear as it does in the image above with the power switch at the bottom of the control panel.
Controls the rear elevator flap of the
plane. Pull back to make the plane go up,
push forward to dive.
This switch controls the sensitivity of the
plane to the changes in the control levers.
In Beginner mode, the plane operates at
70% of its capacity, and will not nose-dive.
Use this button during
the binding process.
Controls the speed of the plane
The large compartment on the left
holds the four AA batteries that
power the transmitter. The smaller
compartment houses the charging
cable for the plane.
1- Ensure that both the
transmitter and all nearby planes
have been powered off prior to
starting this process.
2- Turn on the power switch of
the plane you want to bind.
3- Locate the link button on the
transmitter, press it and hold it
while you complete step 4.
4- While holding the link button,
turn on the transmitter.
Charging the Plane Batteries
Binding Your FlyLine Transmitter to Any Plane
Battery Compartment and Charging Cable
THIS STARTER SET IS EXPANDABLE!
REPAIRS
•If your plane experiences a minor damage,
such as a crack in one of the wings, simply
apply clear packing tape to the affected area.
•For repairs that cannot be fixed with tape,
you can glue the damaged part with epoxy
that is foam safe. This includes the landing
gear base (slot) in the bottom of the wings.
•If you accidentally break the tethering line,
it is possible to tie the two pieces back with a
double knot.
Clear tape
WARBIRDS
GREATEST ATTACK CAPABILITY
ROOM RAIDERS PLAYMATJET COMMAND
BUILT FOR SPEED
STUNT MAVERICKS
SHOWCASE YOUR SKILLS
VERTICAL TAKE OFF
& LANDING
T2
Elevator Trimming: Use this button to adjust
the default position of your rear flaps.

BATTERIES
Important battery information • Fully charge the inernal battery before first use.
• Always fully charge the inernal battery in repeat use.
• The supply terminals are not to be short-circuited.
• Do not use the battery with the positive and negative
terminals reversed.
• Do not attempt to open, disassemble or shortcircuit
the inernal battery.
• Stop using and do not recharge the inernal battery
that shows leakage, damage or deformation.
• Do not charge or store inernal battery near
combustible materials, fire, where temperature is
extremely high, or where it is wet or damp.
• Never dispose of the inernal battery in fire.
• Do not allow the internal battery to overheat at any
time! Cells that reach greater than 60°C (140°F) can
and usually will become damaged physically and could
possibly catch fire! Always inspect a battery which has
previously overheated for potential damage and do not
re-use if you suspect it has been damaged in any way.
• Do not modify the internal battery in any way that
might result in permanent damage or dangerous
responses.
WARNING Lithium Polymer batteries are significantly
more volatile than alkaline or Ni-Cd/Ni-MH batteries
used in RC applications.
All manufacturer’s instructions
and warnings must be followed closely.
Mishandling of Li-Po batteries can result in fire.
• Use only fresh batteries of required size and
recommended type.
Do not mix old and new batteries, different types of
batteries [standard (Carbon- zinc), Alkaline or
rechargeable] or rechargeable batteries of different
capacities.
• Respect the correct polarity, (+) and (-).
• Do not try to recharge non-rechargeable batteries.
• Do not dispose of batteries in a fire.
• Replace all batteries of the same type/brand at the
same time.
• The supply terminals are not to be short-circuited.
WASTE ELECTRICAL AND ELECTRONIC EQUIPMENT DIRECTIVE
The Waste Electrical and Electronic Equipment (WEEE) Directive requires the recycling of waste
electrical and electronic equipment. The equipment that you have purchased may contain substances
that are hazardous to health and the environment. In order to prevent the release of these substances
into the environment and to reduce the pressure on natural resources, we encourage you to use
appropriate return systems. These systems will ensure that most of the materials in your equipment
are properly reused or recycled at the end of its operational life. The crossed-bin symbol signifies that
this product should not be disposed of in general waste or landfill facilities. For further information on collection,
reuse and recycling systems, please contact your regional waste management administration.
This symbol is only valid in the European Union. If you wish to discard this product, please contact
your local authorities or dealer and ask for the correct method of disposal.
IMPORTANT SAFETY INFORMATION
Keep FlyLine® plane away from your face, eyes and hair and those of others at all times. Keep fingers away from the
moving propellers. Do not launch plane near other people or animals. Do not fly near overhead wires, buildings,
trees, or other obstructions. For charging, use ONLY the charger provided in this package. Do not overcharge your
plane. Follow the charging instructions provided in the instruction manual contained within this package.
QUESTIONS?
For more information, call our customer inquiry line at 1-855-OWN-DAIR (1-855-696-3247) or visit our FlyLine® website
for additional tutorials, tips, tricks and advice on becoming an ace pilot at www.FlyLineRC.com

FCC REQUIREMENT
This device complies with Part 15 of the FCC Rules. Operation is subject to the following two conditions:
(1) This device may not cause harmful interference, and
(2) This device must accept any interference received, including interference that may cause undesired operation.
NOTE
This equipment has been tested and found to comply with the limits for a class B digital device, pursuant to part 15
of the FCC rules. These limits are designed to provide reasonable protection against harmful interference in a
residential installation. This equipment generates, uses and can radiate radio frequency energy and, if not installed
and used in accordance with the instructions, may cause harmful interference to radio communications.
However, there is no guarantee that interference will not occur in a particular installation. If this equipment does
cause harmful interference to radio or television reception, which can be determined by turning the equipment off
and on, the user is encouraged to try and correct the interference by one or more of the following measures:
• Reorient or relocate the receiving antenna
• Increase the separation between the equipment and receiver
• Connect the equipment into an outlet on a circuit different from that to which the receiver is connected
• Consult the dealer or experienced radio/TV technician for help.
WARNING: Changes or modifications to this unit not expressly approved by the party responsible
for compliance could void the user’s authority to operate the equipment.
WARNINGS AND SAFETY
PLEASE READ THIS FIRST
Caution: Not recommended for children under 6 years of age. As with all battery operated products, precautions
should be observed during handling and use to prevent injury and damage.
***Supervision recommended for children under 14***
Battery operated toy.
(1) Observe all warnings and safety instructions provided in your Instruction Manual provided with your Flight
System. Otherwise, serious injury and damage can occur. Think safety first.
(2) Keep propeller away from body parts, even when it isn’t spinning, as it could be turned on by accident. Beware
of hair becoming entangled in the propeller.
(3) Adult supervision is recommended for ages 14 and under.
(4) DO NOT FLY IF TOO WINDY, you can lose control and crash causing injury or damage. Never fly near people,
vehicles, train tracks, buildings, power lines, water, hard surfaces or trees. Never allow anyone to attempt to catch
the aircraft or enter the flying area while it’s in flight or serious injury can result.
(5) Battery charging: Only use a battery charger intended for use with the flight battery. Never leave the transmitter
unattended while charging. This will help prevent overcharging. While charging, place the transmitter on a heat
resistant surface. Do not lay it on carpet or upholstery while charging. Never use wet hands in contact with the
battery.
(6) Never cut into the battery or airplane wires or serious injury can occur. Causing the battery to “short out”
(connecting positive-red and negative-black bare wires) can cause a fire, serious injury and damage.
(7) Lithium batteries may burst and catch fire with improper use. Read all safety instructions and warnings included
with this product. Store batteries in a cool and dry place and never store and transport the battery with metal objects.
This product is in compliance with essential requirements and other provisions of Directive 1995/5/EC.
Table of contents