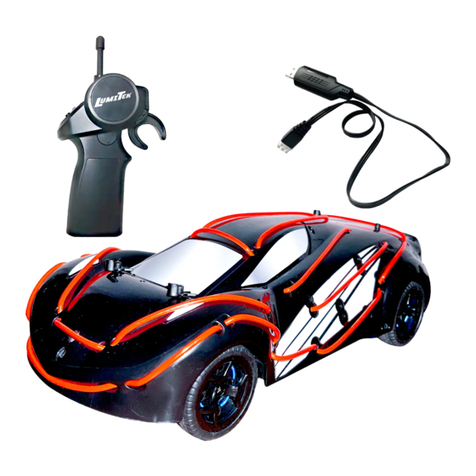
WeCool Lumitek LUMI LEAGUE 2 PACK User manual

LUMI LEAGUE
2 PACK

(1). Turn on the vehicle first,then turn on the transmitter.
(2). When the light of the transmitter is flash, that mean it's matching.
(3). If the light is on and not flash, that means they are matched.
(4). If it doesn’t complete the binding process within 8 seconds, please turn off both the vehicle and
transmitter and re-start the binding process.
(5). When the binding process is complete,whenever you switch the vehicle and transmitter on and off,
it searches for the memorised code and will only lock onto the transmitter signal containing that code.
(6). If you have more than two vehicles,please bind them one by one.When the second vehicle is
binding,always keep the first vehicle and transmitter on.
(7). Please turn off both the vehicle and transmitter and re-start the binding process if you are
changing to another 2.4GHZ transmitter.
(8). Switch ON the vehicle and transmitter
(10). Use the accelerator trigger to drive the vehicle forwards, stop, or backwards
(9). Use the steering wheel to control the vehicle turning left or right
HOW TO BIND AND PLAY
Forwards Stop Backwards
Turn Left Turn Right
Vehicle Transmitter
This user's manual is designed for use with your vehicles and contains the instructions you will
need to assemble, operate and maintain your vehicles.
We know you are anxious to start driving, but it is very important that you take time to read the
manual even if you are an experience RIC driver.
Carefully read and follow all instructions in the manual. Failure to follow the instruction will be
considered abuse and/or neglect and may void the warranty.
Dust, Sand, water and carpet fibres can lodge in the working parts of your cars and can damage
your vehicle if not removed promptly. We do not warranty your vehicle from damage due to
outside elements including sand, dirt or water. The user's are responsible for the maintenance and
safe operate of this vehicle.
Never attempt to re-assemble any electronic components. These have been carefully calibrated at
the factory.
Only use manufactured parts to upgrade your car. Any malfunction incurred by custom
modification will void your warranty.
Before driving your vehicle, please read this manual completely and examine your vehicle and
radio control for any defects.
For better performance, some adjustment may be necessary.
Always remove batteries from the vehicle and the radio controller when not in use.
Please operate your vehicle in a spacious area. Never operate your vehicle in crowded street.
This product is fully assembled at factory. We do not take any responsibility for damage and/or
accidents that occur as the result of custom modifications and/or incorrect operation.
Wecool toys offers a limited 30 day warranty on select products from date of purchase under
normal and intended use service against defective workmanship and material. If our product
fails to meet our limited wattanty, we will at our option, replace the product free of charge, or
provide you with a replacement of comparable value.
This warranty does not apply in cases of damage in transit, inadequate care or neglect, abuse,
abnormal use, misuse, accidents, normal wear and tear, damage due to environmental or
natural elements, failure to follow product instructions, immersion in water (except for products
specifically identified by us in writing as intended for water use), barrery leakage or improper
installation, improper storage or maintenance of the products, or improper service or causes not
arising out of defects in materals and workmanship. For more information contact
customerser[email protected]
LIMITED 30 DAY WARRANTY
GENERAL INFORMATION

(11). Play on a smooth surface for optimum performance
(12). Remember to switch OFF the power of the Vehicle and Transmitter after playing
(13). The optimum control range is up to 20 metres indoor
(14). To turn on/off the light on the car, press the small round button on the side of the transmitter.
You might find out that the steering pulls to one side (it could happen once in a while after a
shock or long driving hours). If that is the case, you need to adjust the steering of your vehicle.
Minor trim adjustments can be performed by gently rotating the direction adjustment dial found
underneath (seen above) between the two front wheels.
Comforms to safety requirements of ASTM, FCC, CPSIA.
(1). Please unscrew the battery cover on the car open it.
(2). Insert 3 x AAA 1.5V batteries in the battery compartment and close it. Tighten the screw.
(3). Please unscrew the battery cover on the transmitter and open it.
(4). Insert 2 x AA 1.5V batteries in the battery compartment and close it. Tighten the screw.
HOW TO TUNE THE STEERING BATTERY WARNING
Do not mix old and new batteries.
Do not mix alkaline, standard (carbon-zinc), or rechargeable (nickel—cadmium) batteries.
Insert batteries using the correct polarity. Do not short-circuit the supply terminal.
Remove batteries when not in use. Recycle or dispose of exhausted batteries according to
federal, state, and local laws.
Do not dispose of batteries in afire-they may leak or explode.
Only use specified battery(ies), charger(s) and/or adapter, if applicable, specified by the
manufacturer.
Always use, replace, and recharge (if applicable) batteries under adult supervision.
Non-rechargeable batteries are not to be recharged.
Rechargeable batteries are to be removed from the unit before being charged (if removable).
Rechargeable batteries are only lo be charged under adult supervision;
Exhausted batteries are to be removed from the toy.
The supply terminals are not to be short-circuited.
Packaging has lo be kept since it contains important information.
Product may vary slightly from image shown
Do not drive the vehicle into any hard object.
Radio controller
BATTERY INSTALLATION
Batteries not included
3x1.5V
Car
Light
DECLARATION OF CONFORMITY

RUNNING PRACTICE
Once you become conformable driving the vehicle, perform driving practice as shown in the figure.
Keep practising until you feel comfortable with the steering, throttle and brake at low speeds.
Once you are feeling comfortable try operating on on more complex configurations.
When you have mastered the basics you will be able to drive at higher speeds in a more controlled
fashion.
Do not attempt to disassemble the vehicle or transmitter.
Do not operate the vehicle with the same frequency as other player(s) in the same location as this will
interfere and make the vehicle go out control.
Make sure the batteries are installed with correct polarities (+/-)as shown inside the battery
compartment.
Remove the package and take out all accessories before giving the Vehicle and Transmitter to a child
to play with.
The packaging and instruction manual contains important information. Please keep them for future
reference.
Warning! Choking Hazard. Not suitable for children under the age of 3 years due to small parts.
We reserve the right to improve/amend specifications and colours without notice.
Warning! The Antenna of the vehicle is not to be inserted into socket outlets.
CAUTIONS
Batteries should not be disposed of in the household waste. As the consumer you are
legally obliged to return batteries containing harmful substances and all other used
batteries. You can hand in your old batteries at public cllection points in your area or
wherever batteries are sold. You will find these chemical abbreviations along with a
crossed-out refuse bin on batteries containing harmful substances:
Pb=Battery contains lead
Cd=Battery contains cadmium
Hg=Battery contains mercury
Do not drive on grass, dirt, sand, dusts, carpet or through water
Do not drive in windy or rainy weather
Avoid the vehicle directly impacting with obstacles
Switch OFF the power when not in use Io prevent damage to the vehicle or transmitter due to leakage
of electrolytes from batteries
Remove all batteries from the vehicle and transmitter when not in use for a long period of time.
The operating range can be affected by a variety of factors:
a) Low Voltage of batteries in the transmitter or vehicle
b) Interference from other items that emit radio frequency signals
It is recommended to play with the vehicle on a clean and smooth surface
Clean the battery compartment to make sure it is free from dust to prevent poor contact of batteries
PERFORMANCE TIPS
DISPOSAL OF BATTERIES
Do not operate during thunderstorms or rain.
Avoid water, sand, grass and snow when operating the car.
Do not submerge car or controller in water.
Never operate your car on the street or highway
Never operate your car in a confined or crowded area and do not use people or animals as obstacles.
Do not run your car into furniture, objects or hard surfaces, as this will cause damage to both the
objects and the car.
Keep fingers, hair and loose clothing away from the tires, gears and motor while the car is switched to “ON“.
Do not leave the car or transmitter near sources of heat or under direct sunlight for long periods of time.
Do not leave the car or transmitter outside overnight. Dampness is harmful to interior components.
Remove all batteries when not in use to avoid accidental operation
Adult supervision is recommended when operating this car.
SAFETY PRECAUTIONS

HOW TO PLAY LUMI LEAGUE 2 PACK HOCKEY/SOCCER GAMES
After running your car, the following procedures should be performed regularly and will help to
maintain your car's performance.
Inspect your car for any obvious damage
Check the gears for wear, debris or broken/slipping teeth.
Check the wheels and tighten the wheel screws properly.
Check for loosen screws in the chassis.
Check the wiring for frayed or damaged wires or connectors.
Check the steering servo which will wear out over time and require replacement.
Check all batteries.
Keep the chassis clean and free of sand, dust and moisture.
Remove and clean the motor if nesscessary. (never attempt to re-assemble the motor, you will
damage it and void the warranty).
Clean the car boby with a soft lint-free cloth.
Remove all batteries when not in use.
MAINTAINING YOUR CAR
Blue team Start and Goal Red team Start and Goal
Ball/Puck starting point
The aim of the Lumi League 2 Pack Soccer/Hockey game is for two players [or two teams if more
than 2 players are playing] to play head-to-head and score three goals before their opponent.
The playing field will be divided in half, where
each player/team has a goal to defend in their
half of the field. Each half of the playing field
must be a mirror image of the other in terms
of dimensions. The goal itself could be
constructed with what ever materials the
players decide on but must be equal in size
and opening.
Each player will start directly in front of their own goal. The ball/puck will be placed in the center of
the playing field. The youngest player will count down "3-2-1", at "1" the match begins, and players
are free to attempt to get the soccer ball/hockey puck into their opponents goal. If the ball/puck
goes out of the playing field, all players and the ball/puck will revert back to the beginning of the
match set-up.
OBJECT OF THE GAME
1
PLAYING FIELD SET-UP
2
BEGINNING THE MATCH AND AFTER A GOAL IS SCORED
3
You can use any part of the Lumi League 2 Pack body to move the ball/puck around the playing
field. If your car flips over you are free to reach in and place your car on it's tires in the same
location you got turned over.
GAMEPLAY
4
NOTE: USE LUMI LEAGUE 2 PACK ONLY ON HARD SURFACES OR VERY LOW PILE CARPET
Not a Goal Goal!!!
Goal!!! Goal!!!
First player/team to score 3 goals wins.
(1). Soccer Scoring: To score, the ball must go
into your opponent's goal. The whole ball needs
to be over the line for it to be a legitimate goal.
(2). Hockey Scoring: To score, the puck must
go into your opponent's goal, The puck only
needs to pass over the line for it to be a
legitimate goal.
A goal can be scored with any part of the car body and/or roll in freely. If player pushes the
ball/puck into their own goal, it is considered a goal for the opposing team. After a goal has been
made, the playing field will revert back to "Beginning the Match and After a Goal is Scored".
SCORING
5
WINNING THE GAME
6
(1). Colored tape on hard surfaces works well to designate goals
and boundaries
(2). Goalie box construction ideas: the Lumi League 2 Pack box,
colored tape on the ground, sticks, small chair, paper, etc... Be
creative and use your imagination. Just make sure it displays an
easy to see perimeter, it doesn't create a bump on the ground to
prevent the ball/puck entering the goal area and both goals on
each side of the field are evenly matched to be fair.
(3). Field boundaries can be made out of practically anything:
boxes, pool noodles, towels, rolled sheets, garden hose, rope,
PVC pipe, etc... Be creative and use your imagination. Just make
sure it creates an easy to see perimeter that the Lumi League 2
Pack can be not cross.
(4). Have tall carpet and not able to play on it? Use a very large
fully opened cardboard box as a playing field. Just lie the
cardboard flat and run the Lumi League 2 Pack ontop of the
flattened box.
The Lumi League 2 Pack
box has been pre
perforated to become a
goalie box.
RECOMMENDATIONS
7

operation. Note: This equipment has been tested and found to comply with the limits for a
1. Check to see if transmitter and car are on.
2. Replace batteries.
1. Check if the servo feels jammed, try centering it by hand.
2. Check the whole steering system.
1. Check gear mesh between spur gear and pinion.
2. Check for stripped and/or dirty gears.
3. Clean and oil bushings or ball bearing.
1. Check if there are damaged parts.
2. Replace or charge the battery pack and/or the radio batteries.
3. Check if there are damaged parts.
A. The vehicle does
not work at all.
B. The vehicle runs
slow.
C. The throttle works,
but not the steering.
D. It steers, but throttle
is uncontrollable.
E. The vehicle runs
nosily.
1. Replace or charge the battery pack and/or the radio batteries.
2. Make sure the vehicle is geared properly and pinion and spur
gear are over tightened.
3. Clean all bushings or ball bearings.
4. Check for stripped or dirty gears.
TROUBLESHOOTING PRECAUTIONS AND CARE
FCC STATEMENT
This device complies with part 15 of the FCC rules. Operation is subject to the following two conditions:
(1) this device may not cause harmful interference, and
(2) this device must accept any interference received, including interference that may cause undesired
Class B digital device, pursuant to Part 15 of the FCC Rules. These limits are designed to provide
reasonble protection against harmful interference in a residential installation. This equipment generates,
uses and can radiate radio frequency energy and, if not installed and used in accordance with the
instructions, may cause harmful interference to radio communications. However, there is no quarantee
that interference will not occur in a particular installation. If this equipment does cause harmful
interference to radio or television reception, which can be determined by turning the equipment off and
on, the user is encouraged to try to correct the interference by one or more of the following measures:
- Reorient or relocate the receiving antenna
- Increase the separation between the equipment and receiver.
- Connect the equipment into an outlet on a circuit different from that to which the receiver is connected
- Consult the dealer or an experienced radio/TV technician for help.
warning: Changes or modifications to this unit not expressly approved by the party responsible for
compliance could void the user’s authority to operate the equipment.
910
Table of contents
Other WeCool Toy manuals
Popular Toy manuals by other brands

Eduard
Eduard Armoured Carrier UE quick start guide

AeroWorks
AeroWorks 31% EDGE 540T ARF Assembly manual

Value Hobby
Value Hobby F3A Oasis instruction manual

Horizon Hobby
Horizon Hobby Rare Bear instruction manual

VTech Baby
VTech Baby Squishy Spikes Alligator instruction manual

E-FLITE
E-FLITE Stearman PT-17 15e ARF Assembly manual