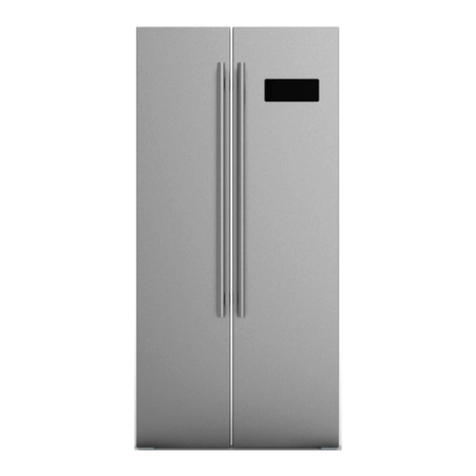
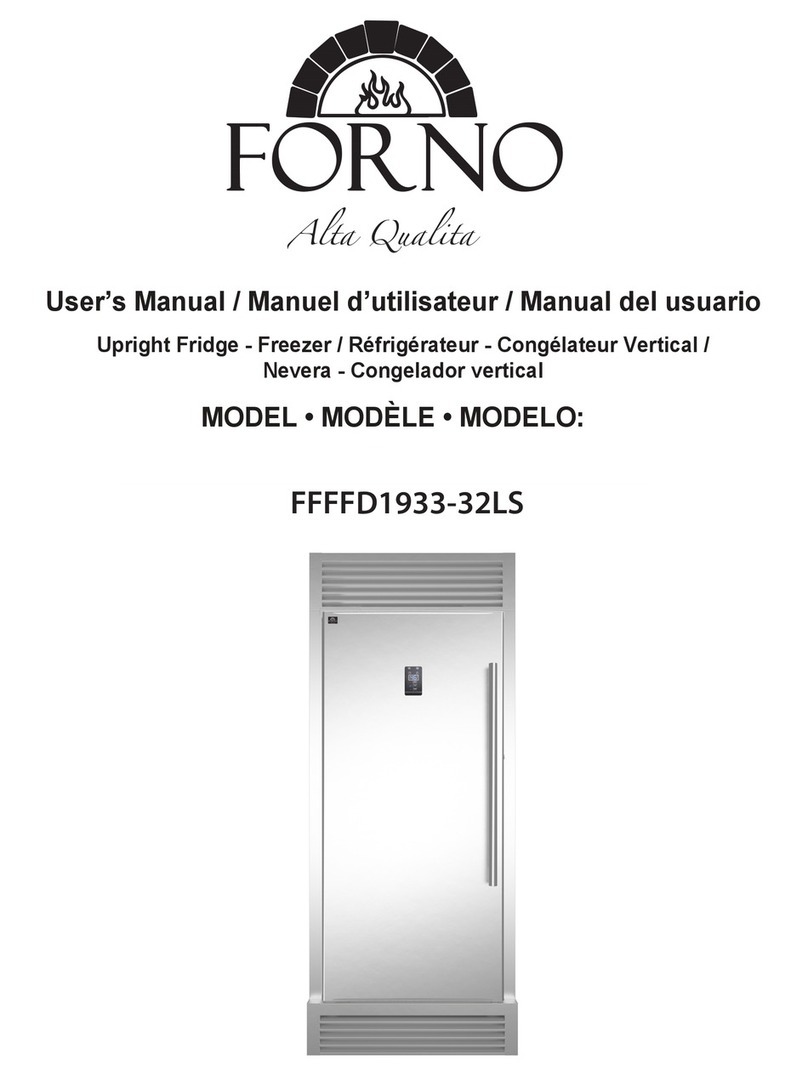
Forno FFFFD1722-28LS User manual

Forno Cu.Ft. Upright Refrigerator/Freezer
FFFFD1722-28LS

Thank you for purchasing a FORNO product. Please read the entire instruction manual before operating
your new appliance for the first time. Whether you are an occasional user or an expert , it will be beneficial
to familiarize yourself with the safety practices, features, operation and care recommendations of your
appliance.
Both the model and serial number are listed inside the product. For warranty purposes, you will also need
the serial number, the date of purchase & a copy of your proof of purchase.
Record this information below for future reference.
Use these number in any correspondance or
service calls concerning your product.
If you received a damaged product,
immediately contact FORNO.
Save time and money. Before you call for
service, check the Troubleshooting Guide. It
lists the causes of minor operating problems
that you can correct yourself.
SERVICE IN CANADA & UNITED STATES
Keep the instruction manual handy to answer your questions. You can also find all the information
you need online at www.forno.ca.
If you don't understand something or need more assistance, please visit our website or email:
If there is a problem, please contact FORNO customer service. Please note that troubleshooting
with a customer service representative will be needed before being able to send a service
provider. All warranty work needs to be authorized by FORNO customer service. All our
authorized service providers are carefully selected and rigorously trained by us.
2

What this limited warranty covers:
The Warranty coverage provided by Forno Appliances in this statement applies exclusively to the original Forno
appliance (“Product”) sold to the consumer (“Purchaser”) by an authorized Forno dealer/distributor/retailer,
purchased and installed in the United States or Canada, and which has always remained within the original
country of purchase (the United States or Canada). Warranty coverage is activated on the date of the Product's
original retail purchase and has a duration of two (2) years.
Warranty coverage is non-transferable. In the event of replacement of parts or of the entire product, the
replacement Product (or parts) shall assume the remaining original Warranty activated with the original retail
purchase document. This Warranty shall not be extended with respect to such replacement. Forno Appliances
will repair or replace any component/part which fails or proves defective due to materials and/or workmanship
within 2 years of the date of the original retail purchase and under conditions of ordinary residential,
non-commercial use. Repair or replacement will be free of charge, including labor at standard rates and shipping
expenses. Purchaser is responsible for making the Product reasonably accessible for service. Repair service
must be performed by a Forno Authorized Service company during normal working hours.
IMPORTANT
Retain proof of original purchase to establish warranty period. Forno’s liability on any claim of any kind, with
respect to the goods and/or services provided, shall in no event exceed the value of the goods or service or part
there of which has given rise to the claim.
30-Day Cosmetic Warranty
The Purchaser must inspect the product at the time of delivery. Forno warrants that the Product is free from
manufacturing defects in materials and workmanship for a period of thirty (30) days from date of the original retail
purchase of the Product.
This coverage includes:
- Paint blemishes
- Chips
- Macroscopic finish defects
Cosmetic warranty does NOT cover:
> issues resulting from incorrect transport, handling and/or installation (e.g.: dents, broken, warped or deformed
structures or components, cracked or otherwise damaged glass components);
> slight color variations on painted/enameled components;
> differences caused by natural or artificial lighting, location or other analogous factors;
> stains/corrosion/discoloration caused by external substances and/or environmental factors;
> labor costs, display, floor, B-stock, out- of-box,“as is” appliances and demo units.
How to receive service
To receive warranty services, the Purchaser must contact the Forno Support department in order to determine
the problem and the required service procedures. Troubleshooting with a customer service representative will be
necessary before moving forward with the service. Model number, serial number and date of original retail
purchase will be requested.
Warranty
3

THERE ARE NO EXPRESS
WARRANTIES OTHER THAN THOSE LISTED AND DESCRIBED ABOVE, AND NO
WARRANTIES, EITHER EXPRESS OR IMPLIED, INCLUDING, BUT NOT LIMITED TO, ANY IMPLIED
WARRANTIES OF MERCHANTABILITY OR FITNESS FOR A PARTICULAR PURPOSE THAT SHALL APPLY
AFTER THE EXPRESS WARRANTY PERIODS STATED ABOVE, AND NO OTHER EXPRESS WARRANTY OR
GUARANTEE GIVEN BY ANY PERSON, FIRM OR CORPORATION WITH RESPECT TO THIS PRODUCT
SHALL BE BINDING ON FORNO. FORNO SHALL NOT BE LIABLE FOR LOSS OF REVENUE OR PROFITS,
FAILURE TO REALIZE SAVINGS OR OTHER BENEFITS, TIME AWAY FROM WORK, MEALS, LOSS OF FOOD
OR BEVERAGES, TRAVELING OR HOTEL EXPENSES, EXPENSES TO RENT OR PURCHASE APPLIANCES,
REMODELING/CONSTRUCTION EXPENSES IN EXCESS OF DIRECT DAMAGES WHICH ARE UNDENIABLY
CAUSED EXCLUSIVELY BY FORNO OR ANY OTHER SPECIAL, INCIDENTAL OR CONSEQUENTIAL
DAMAGES CAUSED BY THE USE, MISUSE OR INABILITY TO USE THIS PRODUCT, REGARDLESS OF THE
LEGAL THEORY ON WHICH THE CLAIM IS BASED, AND EVEN IF FORNO HAS BEEN ADVISED OF THE
POSSIBILITY OF SUCH DAMAGES. NOR SHALL RECOVERY OF ANY KIND AGAINST FORNO BE GREATER
IN AMOUNT THAN THE PURCHASE PRICE OF THE PRODUCT SOLD BY FORNO AND CAUSING THE
ALLEGED DAMAGE.WITHOUT PREJUDICE TO THE FOREGOING, PURCHASER ASSUMES ALL RISK AND
LIABILITY FOR LOSS, DAMAGE OR INJURY TO PURCHASER AND PURCHASER’S PROPERTY AND TO
OTHERS AND THEIR
PROPERTY ARISING FROM THE USE, MISUSE, OR INABILITY TO USE THIS PRODUCT
SOLD BY FORNO THAT IS NOT A
DIRECT RESULT OF NEGLIGENCE ON THE PART OF FORNO THIS
LIMITED WARRANTY SHALL NOT EXTEND TO ANYONE OTHER THAN THE ORIGINAL PURCHASER OF
THIS PRODUCT, IS NON-TRANSFERABLE, AND STATES YOUR EXCLUSIVE REMEDY.
> Use of the Product in any non-residential,
commercial application.
> Use of the Product for anything other than its
intended purpose.
> Repair services provided by anyone other than a
Forno Authorized Service
agency.
> Damages or repair services to correct services
provided by unauthorized parties or the use of
unauthorized parts.
> Installation not in accordance with
local/state/city/county fire codes, electrical codes, gas
codes, plumbing codes, building codes, laws or
regulations.
> Defects or damage due to improper storage of the
Product.
> Defects,damage or missing parts on products sold
out of the original factory packaging or from displays.
> Service calls or repairs
to correct an incorrect
installation of the Product and/or related accessories.
> Replacement of parts/service calls to connect,
convert or otherwise repair the electrical wiring and/or
gas line in order to properly use the product.
> Replacement of parts/service calls to provide
instructions and information
on the use of the Product.
> Replacement of parts/service calls to correct issues
arising from the product being used in a manner other
than what is normal and customary for residential use.
> Replacement of parts/service calls due to wear and
tear of components such as seals, knobs, pan
supports, shelving, cutlery baskets, buttons, touch
displays, scratched or broken ceramic-glass tops.
>Replacement of parts/service calls for lack
of/improper maintenance, including but not limited to:
build up of residues, stains,
scratches, discoloration,
corrosion.
> Defects and damages arising from accidents,
alteration, misuse, abuse or improper installation.
> Defects and damages arising from Product
transport, logistics and handling.
Inspection of the
product must be made at time of delivery. Following
receipt and inspection, the selling dealer/delivery
company must be notified of any issues arising from
handling, transport and logistics.
> Defects and damages arising from external forces
beyond the control of Forno Appliances, including but
not limited to wind, rain, sand, fires,
floods,
mudslides,
freezing temperatures, excessive moisture or
extended exposure to humidity, power surges,
lightning, structural failures surrounding the appliance
and other acts of God.
> Products whose serial number has been
altered/damaged/tampered with. In no case shall
Forno be held liable or responsible for damage to
surrounding property, including furniture, cabinetry,
flooring, panels, and other structures surrounding the
Product. Forno is neither liable nor responsible for the
Product if it is located in a remote area or an area
where certified trained technicians are not reasonably
available. Purchaser must bear any transportation and
delivery costs of the Product to the nearest Authorized
Service Center or the additional travel expenses of a
certified trained technician
Warranty Exclusions: What Is Not Covered.
4

Contents
Safety and warning information………….5
Installing your new appliance……….10
Description of the appliance……………13
Display controls ……………………….14
Using your appliance……………………..17
Cleaning and care………………………18
Helpful hints and tips…………………… 20
Troubleshooting…………………………. 21
Disposal of the appliance……………… 22
Safety and warning information
For your safety and correct usage, before installing and first using the appliance,
read this user manual carefully, including its hints and warnings. To avoid
unnecessary mistakes and accidents, it is important to make sure that all people
using the appliance are thoroughly familiar with its operation and safety features.
Save these instructions and be sure that they remain with the appliance if it is
moved or sold, so that anyone using it throughout its life, will be properly
informed on its usage and safety notices.
For the safety of life and property,keep the precautions of these user's
instructions as the manufacturer is not responsible for damages caused by
omission.
Safety for children and others who are vulnerable people
●According to EN standard
This appliance can be used by children aged from 8years and above and
persons with reduced physical, sensory or mental capabilities or lack of
experience and knowledge if they have been given supervision or instruction
concerning use of the appliance in asafe way and understand the hazards
involved. Children shall not play with the appliance. Cleaning and user
maintenance shall not be made by children without supervision.
●According to IEC standard
This appliance is not intended for use by persons (including children) with
reduced physical, sensory or mental capabilities, or lack of experience and
knowledge, unless they have been given supervision or instruction concerning
use of the appliance by aperson being responsible for their safety.
Keep all packaging away from children as there is risk of suffocation.
If you are discarding the appliance, pull the plug out of the socket, cut the
connection cable (as close to the appliance as you can) and remove the
door to prevent children playing from suffering an electric shock or from
closing themselves inside it.
If this appliance, featuring amagnetic door seals, is to replace an older
appliance having aspring lock (latch) on the door or lid, be sure to make
the spring lock unusable before you discard the old appliance. This will
prevent it from becoming adeath trap for achild.
General safety
5

6
WARNING - This appliance is intended to be used in household
and similar applications such as
-staff kitchen areas in shops, offices and other working environments;
-farm houses and hotels, motels and other residential type environments;
-bed and breakfast type environments;
-catering and similar non-retail applications.
WARNING - Do not store explosive substances such as aerosol cans with
a flammable propellant in this appliance.
WARNING - If the supply cord is damaged, it must be replaced by the
manufacturer, its service agent or similarly qualified persons in order to
avoid a hazard.
WARNING - Keep ventilation openings, in the appliance enclosure or in
the built-in structure, clear of obstruction.
WARNING - Do not use mechanical devices or other means to accelerate
the defrosting process, other than those recommended by the
manufacturer.
WARNING - Do not damage the refrigerant circuit.
WARNING - Do not use electrical appliances inside the food storage
compartments of the appliance, unless they are of the type recommended
by the manufacturer.
WARNING - The refrigerant and insulation blowing gas are flammable.
When disposing of the appliance, do so only at an authorized waste
disposal center. Do not expose to flame.
WARNING -When positioning the appliance, ensure the supply cord is not
trapped or damaged.
WARNING -Do not locate multiple portable socket-outlets or portable
power supplies at the rear of the appliance.
Replacing the illuminating lamps
WARNING-The illuminating lamps must not be replaced by the user! If
the illuminating lamps is damaged, contact the customer helpline for
assistance. This warning is only for refrigerators that contain illuminating
lamps.
Refrigerant
The refrigerant isobutene (R600a) is contained within the refrigerant circuit of
the appliance, a natural gas with a high level of environmental compatibility,
which is nevertheless flammable. During transportation and installation of the
appliance, ensure that none of the components of the refrigerant circuit
becomes damaged.
The refrigerant (R600a) is flammable.
WARNING — Refrigerators contain refrigerant and gases in the insulation.
Refrigerant and gases must be disposed of professionally as they may cause

7
eye injuries or ignition. Ensure that tubing of the refrigerant circuit is not
damage prior to proper disposal.
It is hazardous for anyone other than an Authorized Service Person to service
this appliance. In Queensland the Authorized Service Person Must hold aGas
Work Authorized for hydrocarbon refrigerants to carry out servicing or repairs
which involve removal of covers.
WARNING: Risk of fire /flammable materials
If the refrigerant circuit should be damaged:
-Avoid opening flames and sources of ignition.
-Thoroughly ventilate the room in which the appliance is situated.
It is dangerous to alter the specifications or modify this product in any way.
Any damage to the cord may cause ashort circuit, fire, and/or electric shock.
Electrical safety
1.The power cord must not be lengthened.
2. Make sure that the power plug is not crushed or damaged. Acrushed or
damaged power plug may overheat and cause afire.
3. Make sure that you can access the main plug of the appliance.
4. Do not pull the main cable.
5. If the power plug socket is loose, do not insert the power plug. There is a
risk of electric shock or fire.
6.You must not operate the appliance without the interior lighting lamp cover.
7.The fridge is only applied with power supply of single phase alternating
current of 115V/60Hz. If fluctuation of voltage in the district of user is so large
that the voltage exceeds the above scope, for safety sake, be sure to apply
A.C. Automatic voltage regulator of more than 350W to the fridge. The fridge
must employ aspecial power socket instead of common one with other
electric appliances. Its plug must match the socket with ground wire.
Daily use
Do not store flammable gas or liquids in the appliance, there is ariskof an
explosion.
Do not operate any electrical appliances in the appliance (e.g. electric ice
cream makers, mixers etc.).
When unplugging always pull the plug from the mains socket, do not pull
on the cable.
Do not place hot items near the plastic components of this appliance.
Do not place food products directly against the air outlet on the rear wall.
Store pre-packed frozen food in accordance with the frozen food
manufacturer’s instructions.
The appliances manufactures storage recommendations should be strictly

8
adhered to. Refer to relevant instructions for storage.
Do not place carbonated or fizzy drinks in the freezercompartment as it
creates pressure on the container, which may cause it to explode,
resulting in damage to the appliance.
Frozen food can cause frost burns if consumed straight from the freezer
compartment.
Do not place the appliance in direct sunlight.
Keep burning candles, lamps and other items with naked flames away
from the appliance so that do not set the appliance on fire.
The appliance is intended for keeping food stuff and/or beverages in
normal household as explained in this instruction booklet .You should
take care when move it as the appliance is heavy.
Do not remove nor touch items from the freezer compartment if your
hands are damp/wet, as this could cause skin abrasions or frost/freezer
burns.
Never use the base, drawers, doors etc. to stand on or as supports.
Frozen food must not be refrozen once it has been thawed out.
Do not consume ice popsicles or ice cubes straightfrom the freezer as
this can cause freezer burn to the mouth and lips.
To avoid items falling and causing injury or damage to the appliance, do
not overload the door racks or put too much food in the crisper drawers.
Note:
When the door is open, the LED lights is on. When the door is open at
the same angle for 10 seconds, the LED lights is off.
CAUTION!
Care and cleaning
Before maintenance, switch off the appliance and disconnect the mains
plug from the mains socket.
Do not clean the appliance with metal objects, steam cleaner, ethereal
oils, organic solvents or abrasive cleansers.
Do use aplastic scraper instead of asharp object to remove frost from the
appliance.
Installation Important!
For electrical connection carefully, follow the instructions given in this
manual. Unpack the appliance and check if there are damages on it.
Do not connect the appliance if it is damaged. Report possible damages
immediately to Forno customer support.In this case retain packing.
It is advisable to wait at least four hours before connecting the appliance
to allow the oil to flow back in the compressor.
Adequate air circulation should be around the appliance, lacking this leads
to overheating. To achieve sufficient ventilation, follow the instructions
relevant to installation.

9
Wherever possible the back of the product should not be too close to a
wall to avoid touching or catching warm parts (compressor)to prevent the
risk of afire, follow the instructions relevant to installation.
The appliance must not be locating close to radiators or cookers.
Make sure that the mains plug is accessible after the installation of the
appliance.
Service
Any electrical work required to do the servicing of the appliance should be
carried out by qualified electrician or competent person.
This product must be serviced by an authorized Service Provider, and only
genuine spare parts must be used.
1)If the appliance is FrostFree.
2)If the appliance contains freezer compartment.
WARNING: This product can expose you to chemicals including [Lead &
Lead Compounds], which is [are] known to the State of California to cause
cancer, birth defects and / or reproductive harm. To minimize exposure to
these substances. Always operate this unit according the Owner’s Manual,
and ensure that you provide proper ventilation. For more information go to
www.P65Warnings.ca.gov

10
Before using this appliance for the first
time, it's important to be aware of the
following tips.
Warning!
Please note that for proper installation, the
refrigerator must be placed on a level
surface of hard material that is the same
height as the surrounding flooring. This
surface must be strong enough to support
the weight of a fully loaded refrigerator.
The rollers on the bottom of the refrigerator
are designed for forward or backward
movement only. Moving the refrigerator
sideways may cause damage to both the
floor and the rollers. Therefore, please
avoid any lateral movement of the
refrigerator to ensure its longevity and
proper functioning.
Ventilation of appliance
To enhance the efficiency of
the cooling system and save
energyenergy, it is crucial to maintain
adequate ventilation around the
refrigerator to dissipate heat. Therefore,
there should be a sufficient clear space
around the appliance.
For optimal performance, we
recommend a minimum of 1.96" (50mm)
of space between the back of the
refrigerator and the wall, at least 3.94"
(100mm) of space from the top of the
refrigerator, and at least 3.94" (100mm)
from the side of the refrigerator to the wall.
Additionally, there should be enough clear
space in front of the refrigerator to allow
the doors to open 125°
.
Note:
This appliance performs well within the
climate class from SN to Tshowed in the
table below. It may not work properly if
being left at atemperature above or below
the indicated range for along period.
Climate class Ambient temperature
SN +10°C to +32°C
N +16°C to +32°C
ST +16°C to +38°C
T +16°C to +43°C
Stand your appliance in adry place to
avoid high moisture.
Keep the appliance out of direct sunlight,
rain or frost. Stand the appliance away
from heat sources such as stoves, fires or
heaters.
Leveling of appliance
For sufficient leveling and air circulating in
the lower rear section of the appliance, the
bottom feet may need to be adjusted. You
Installing your new appliance
Please refer to the following diagrams for a
visual representation of the recommended
clearances.

11
can adjust them manually by hand or by
using asuitable spanner.
Tools you will need:
Not provided Philips Screwdriver &
Slotted Screwdriver
Provided
Allen wrench
Handle supports
Handle
To allow the doors to self-close, tilt the top
backwards by 10-15mm.
You can adjust them manually by hand
or using asuitable spanner.
Note:
If required you may lay the refrigerator
on its back in order to gain access to the
base, you should rest it on soft foam
packaging or similar material to avoid
damaging the backboard of the
refrigerator.
There is no need to install these
accessories under normal usage.
Only under extreme circumstances, this
refrigerator may be at risk of tipping
when the door is opened to a 90-degree
angle. To prevent tipping, it is
recommended to fasten rubber
supporting pads to the lower base cover
to stabilize the appliance
1. Tilt appliance to find screw hole on the
left of lower base cover.
2. Put screw into the hole of rubber
supporting pad.
3. Make screw in alignment with the hole
on lower base cover. Fasten rubber
supporting pad to the base cover firmly by
across screwdriver (self-provided).

12
Installing the handles
Before you usethe appliance, you have to
install the handles provided in the fridge
compartment.
Please follow steps below to install and
reverse the handle.
Fasten the handle supports (C) to the
door by using a Phillips screwdriver.
(not-provided).
Place the handle (A) on the door by fitting
the handle footprints over the handle
supports (C), then fasten the screws (B)
with Allen screwdriver (provided).
Phillips screwdriver

13
Description of the appliance
View of the appliance
1. Door shelf (Small)
2. Handle
3. Door gasket
4. Door shelf (Big)
5. Door
6. Door switch
7. Adjustable bottom fee
8. Drawer
11. Lower air duct
13. Upper air duct
14. Display panel
Note!
Due to unceasing modification of our products, your refrigerator may be slightly different
from this instruction manual, but its functions and using methods remain the same.
To get the best energy efficiency of this product, please place all shelves, drawers and
baskets on their original position as the illustration above.
9. Glass shelf (Lower)
10. Glass shelf (Middle)
12. Glass shelf (Upper)

14
Display controls
Use your appliance according to the following control regulations, your appliance has the
corresponding functions as the control panels showed in the pictures below.
Controlling the temperature
Use your appliance according to the
following control regulations, your
appliance has the corresponding functions
as the control panels showed in the
pictures below.
Caution!
When you set atemperature, you set an
average temperature for the whole
refrigerator compartment.Temperatures
inside each compartment may vary from
the temperatures displayed on the panel,
depending on how much food you store
and where you place it. High or low room
temperature may also affect the actual
temperature inside the appliance.
1. POWER
Press and hold the POWER button at least
3 seconds to enter/exit standby mode.
After entering the standby mode, the
POWER icon will light up, the temperature
area will display "OFF", other icons will turn
off,and other key functions will be invalid,
until the original control is restored after
pressing the button again to exit the
standby mode.
2. Freezer/Fridge conversion
Press and hold Freezer/Fridge
conversion button for 3 seconds to
convert between freezer mode and fridge
mode.
Afterwards,the light will go out, and then
turn on or flash once. This is a normal
phenomenon indicating that the
conversion started and that the
functionality of the unit was switched from
one setting to another (Freezer/Fridge).
Cautio
Before changing the compartment
setting, make sure that the stored food
is suitable for new setting mode. If
not, please empty it first.
When the freezer mode is changed to
fridge mode, please open the door for 5
minutes before putting in the food that
needs to be refrigerated.
When the fridge mode is changed to
freezer mode, please close the door and
let
the
unit run for
at
least 200 minutes
before putting in the food that needs to be
frozen.
When the fridge mode is changed to
freezer mode, ensure there are no
bottled or canned drinks (especially
carbonated drinks) in the freezer
compartment. Bottles and cans may
explode.
3. T E M P.
Press the TEMP. button to adjust the
temperature to the desired setting.
If you have set the Freezer
compartment type to Fahrenheit, the
temperature will be set in the following
sequence.
If you have set the Freezer
compartment type to Celsius, the
temperature will be set in the following
sequence.
If you have set the Fridge compartment
type to Fahrenheit, the temperature will
be set in the following sequence.
n!

15
If you have set the Fridge compartment
type to Celsius, the temperature will be
set in the following sequence.
4.
°F /°C
Press and hold the T E M P. button for 3
seconds to toggle between Celsius and
Fahrenheit on the display.
5. Door Alarm
When the door has been opened for over
2minutes, the door alarm will come on.
In case of door alarm, the door alarm
indicator will light up and blink, and "dr"is
displayed in the temperature display area,
meanwhile, the buzzer will sound 3 times
every 1 minute and will stop alarming
automatically after 8 minutes.The door
alarm can be cleared by closing the door.
If the door alarm goes on,you can
press and hold the MODE button for at
least 3 seconds to clear the door alarm
sound, and then the control panel will
show “dr” and the “Alarm” icon will
light.
To save energy, please avoid keeping
the door open for a long time when
using the appliance.
6. Energy Saving
This function makes the refrigerator
work in apower saving mode which is
useful for reducing energy consumption
when you are away.
Press the MODE button to turn on the
Energy saving function. The Energy
Saving icon will be illuminated.
When the Energy Saving function is
on, in the fridge state, thetemperature is
set to 6°C (43°F); in the freezer state,
the temperature is set to -17°C (1°F).
When Energy Saving function is on,
you can turn it off by pressing the
MODE or TEMP. button and the
refrigerator temperature setting will
revert back to the previous setting.
7. Super Freeze
The Super Freeze feature helps to keep
the food stored in the freezer at the set
temperature during periods of high
usage, large grocery loads, or
temporarily warm room temperatures.
When on freezer mode,press the
MODE button to turn on the Super
Freeze function. The Super
Freeze/Super Cool icon will be
illuminated.
When the Super Freeze function is
on, inthe freezer mode,the temperature
is automatically set to -24°C (-11°F).
When Super Freeze function is on,
you can turn it off by pressing the MODE
or TEMP. button and the refrigerator
temperature setting will revert back to
the previous setting.
Super Freeze will automatically turn
off after 52 hours.
NOTE: Do not leave glass bottles or
canned drinks (especially carbonated
drinks) in the freezer
compartment.
Bottles and cans may explode.
in the fridge state, the temperature is
set to 2°C (36°F).
I f the door alarm goes on, you can
turn it off by closing the door.
When the Super Cool function is on,
8
.SuperCool
The Super Cool feature helps to keep
f
ood stored inthe refrigerator at the set
temperature during periods of high
us
age,large grocery loads, or
temporarily warm room temperatures.
When on
the fridge
mode
,press the
MODE button to turn on the Super Cool
f
unction.The Super Freeze/Super
Cool icon
will be illuminated.

16
Super Cool will automatically turn off
after 6hours.
8. Demo mode
Demo mode is for store display and it
prevents the refrigerator from
Press and holdthe POWER and MODE
buttons at the same time for 3seconds to turn
off the demo mode and the buzzer gave along
sound.
generating cool air. In this of Cooling off Mode,
the refrigerator may seem likeitis working but it
will not make cool air. The display panel will
show special segments as follow.
When Super Cool functionison, you
can turn it off by pressing the “MODE”
or TEMP. button and the refrigerator
temperature setting will revert back to
the previous setting.

17
Using your appliance
●
●
As indicated in the "Description of the Appliance," your appliance comes with various
accessories. To ensure you use them correctly, please refer to this section of the
instruction manual. We highly recommend reading through these instructions
thoroughly before operating the appliance
Door shelf
These door shelves are ideal for storing
eggs, canned liquids, bottled drinks,
packed food, and other lightweight items.
It's important to avoid placing too much
weight on them to prevent damage or
bending.
The small shelves on the lower part of
the door can be adjusted to different
heights to accommodate your storage
needs. We recommend removing the
items from the shelf before adjusting its
height to prevent spills or accidents
Glass shelves
The refrigerator compartment features
removable shelves for easy cleaning and
maintenance.
Crisper drawer
The crisper drawer is specifically
designed to keep your vegetables and
fruits fresh and crisp for longer periods
of time. It provides an ideal storage
environment that helps to maintain the
natural moisture and flavor of your
produce, while also protecting them from
external elements that can cause
spoilage
Freezer compartment
The freezer compartment is designed to
safely store frozen foods, including meat,
ice, and other items that need to be kept at
sub-zero temperatures.
Additionally, please avoid leaving drink
bottles in the freezer for extended periods
of time, as freezing liquids can cause
bottles to crack or break. Be sure to remove
them promptly after freezing, and handle
them with care.

18
Cleaning and care
1. Remove all existing food and
accessories baskets from the
freezer compartment. Unplug the
appliance from the main power
source and leave the doors open. To
speed up the process, you can also
ventilate the room thoroughly.
2.Wait for the frost to thaw completely,
which may take several hours. Once
the ice has melted, wipe down the
interior of the freezer with a dry cloth or
sponge to remove any excess
moisture.
3. Thoroughly clean all of the removable
parts and accessories with a mild
detergent and warm water. Rinse and
dry them completely before placing
them back into the freezer.
4. Once everything is dry, plug the
appliance back in and wait for it to cool
down to its desired temperature before
returning the food and accessories to
the freezer.
Although this appliance features an
automatic defrost function, frequent
opening or leaving the freezer door open
for too long may result in the formation of
a layer of frost on the interior walls of the
freezer compartment. If the frost is too
thick, it's recommended that you defrost
the freezer manually by following these
steps:
To ensure that your appliance stays
hygienic and functioning properly, it's
recommended that you clean it (including
both the exterior and interior accessories)
at least every two months.
Warning!
Before beginning the cleaning process,
make sure to turn off the appliance and
unplug it from the main socket to prevent
electrical shock
Exterior cleaning
Avoid using ethereal oils, abrasive
cleansers, or organic solvents such as
benzene, as these can damage the
surface of the appliance and may even
cause fire hazards. Instead, use a damp
cloth or sponge with a mild detergent to
wipe down the exterior regularly.
Interior cleaning
For the interior, it's best to clean it
regularly, especially when food stocks
are low to make the process easier. Use a
weak solution of baking soda and
water to wipe down the inside of the
fridge and freezer, and then rinse with
warm water using a wrung-out sponge or
cloth. Be sure to wipe everything dry
before replacing the shelves and
baskets, and thoroughly dry all surfaces
and removable parts before putting them
back into place.

Clean
the
doors, handles and cabinet
surfaces with amild detergent and then
wipe dry with asoft cloth.
Caution!
Don’t use sharp objects to clean with, as
they are likely to scratch the surface.
Cleaning and care
Don’t
use
Thinner,
Car
detergent,
bleach,
your
freezer
as
described
above.
ari
Do not use sharp objects to remove
frost from the freezer compartment. Only
after the interior is completely dry
should the appliance be switched back
on and plugged back into the main socket.
Door seals cleaning
Take care to keep door seals clean. Sticky
food and drinks can cause seals to stick
to the cabinet and tear when you open the
door. Wash the seal with amild detergent
and warm
water.
Rinse
and
dry
it
thoroughly after cleaning.
Caution!
Only
after
the
door seals are
completely
dry
should
the
appliance
be
powered on
Replacing the LED light
Warning: The LED light must be replaced
by acompetent person. If the LED light is
damaged, follow the steps below:
1. Unplug your appliance.
2.
Remove
light
cover
by rising up and
pulling out the LED light.
3.
Hold
the
LED
light
with one hand and
pull
it
with
the
other
hand
while
pressing
the connector latch.
4. Replace LED light and snap it correctly
in place and recover the light cover.
Spray water onto a cleaning cloth
instead
of
spraying
directly
on
the
surface
of
the
appliance.
This
helps
ensure an even distribution of moisture to
the surface.
19

20
Helpful hints and tips
Energy saving tips
We recommend that you follow the tips
below to save energy.
Try to avoid keeping the door open for
long periods in order to conserve energy.
Ensure the appliance is away from any
sources of heat (Direct sunlight, electric
oven or cooker etc.)
Don‘t set the temperature colder than
necessary.
Don’t store warm food or evaporating
liquid in the appliance.
Place the appliance in a well ventilated,
humidity free, room. Please refer to
Installing your new appliance chapter.
If the diagram shows the correct
combination for the drawers, crisper and
shelves, do not adjust the combination as
this is designed to be the most energy
efficient configuration.
Hints for fresh food refrigeration
Do not place hot food directly into the
refrigerator or freezer, by doing so
the internal temperature increase,
resulting in the compressor having to
work harder to decrease the temperature,
therefore will consume more energy.
Cover or wrap the food,particularly if it
has a strong flavor.
Place the food properly so that air
can circulate freely around it.
Hints for refrigeration
Meat (All Types) should be wrapped in
polythene food wrap and placed on the
glass shelf above the vegetable drawer.
Cooked food or other cold dishes should
be stored in a container and can be
placed on any shelf.
Fruit and vegetables should be stored in
the crisper drawer for optimal freshness.
Butter and cheese s
hould be wrapped in
airtight foil or plastic film wrap.
Milk bottles s
hould have a lid and be
stored in
one of the door shelves
.
Hints for freezing
When first starting-up or after a period out
of use, let the appliance run at least 2 hours
on the coldest settings before
putting food in the compartment.
Prepare food in small portions to enable
it to be rapidly and completely frozen and to
make it possible to subsequently thaw only
the quantity required.
Wrap up the food in aluminum foil or
polyethylene food wraps which are airtight.To
prevent a rise in temperature of
already frozen food, do not allow fresh or
unfrozen food to come into contact with it.
Keep them separated in the freezer.
Iced products that are consumed
immediately after being removed from the
freezer may cause frost burns to the skin. It
is best to let them thaw for a few
minutes before consuming.
To keep track of storage time, it is
recommended to label and date each
frozen package. This helps to ensure that
food is used before it reaches its
expiration date and helps to prevent food
waste.
Hints for the storage of frozen food
To ensure the safety and quality of frozen
food, it is important to make sure that it has
been stored correctly by the food retailer.
Once food has been defrosted, it will
deteriorate rapidly and should not be
re-frozen. Additionally, it is important not to
exceed the storage period indicated by the
food manufacturer.
Switching off your appliance
If you need to switch off your appliance for an
extended period of time, it is important to take the
following steps to prevent mould from developing
on the appliance:
1. Remove all food.
2. Remove the power plug from the mains socket.
3. Clean and dry the interior thoroughly.
4. Ensure that all the doors are wedged open
slightly to allow air to circulate.
Table of contents
Other Forno Refrigerator manuals
Forno
Forno FFFD1907-33S User manual
Forno
Forno Espresso FFFFD1785-31S User manual

Forno
Forno Alta Qualita FFFFD1907-33SB User manual

Forno
Forno FFFFD197435SG User manual

Forno
Forno FFFFD1974-31SB User manual

Forno
Forno FFRBI1844-40SG User manual

Forno
Forno FFRBI1821-30S User manual

Forno
Forno ALTA QUALITA FFRBI1820-40SG User manual
Forno
Forno FFRBI1805-33SB User manual
Forno
Forno FFFFD1948-48S User manual

