Do not touch hot oven shelves
Protect your hands from burning by making sure the oven is
cool before sliding oven shelves into oven. If a shelf must be
removed while the oven is hot, do not let oven mitts or
potholder contact the base of the oven or hot heating
elements in the oven.
Protect glass oven doors
Do not use harsh/abrasive cleaners, scourers or sharp metal
scrapers to clean the oven door glass since they scratch the
surface, which may result in the glass shattering.
Never step on oven door or place a heavy object (like a
Turkey) on it.
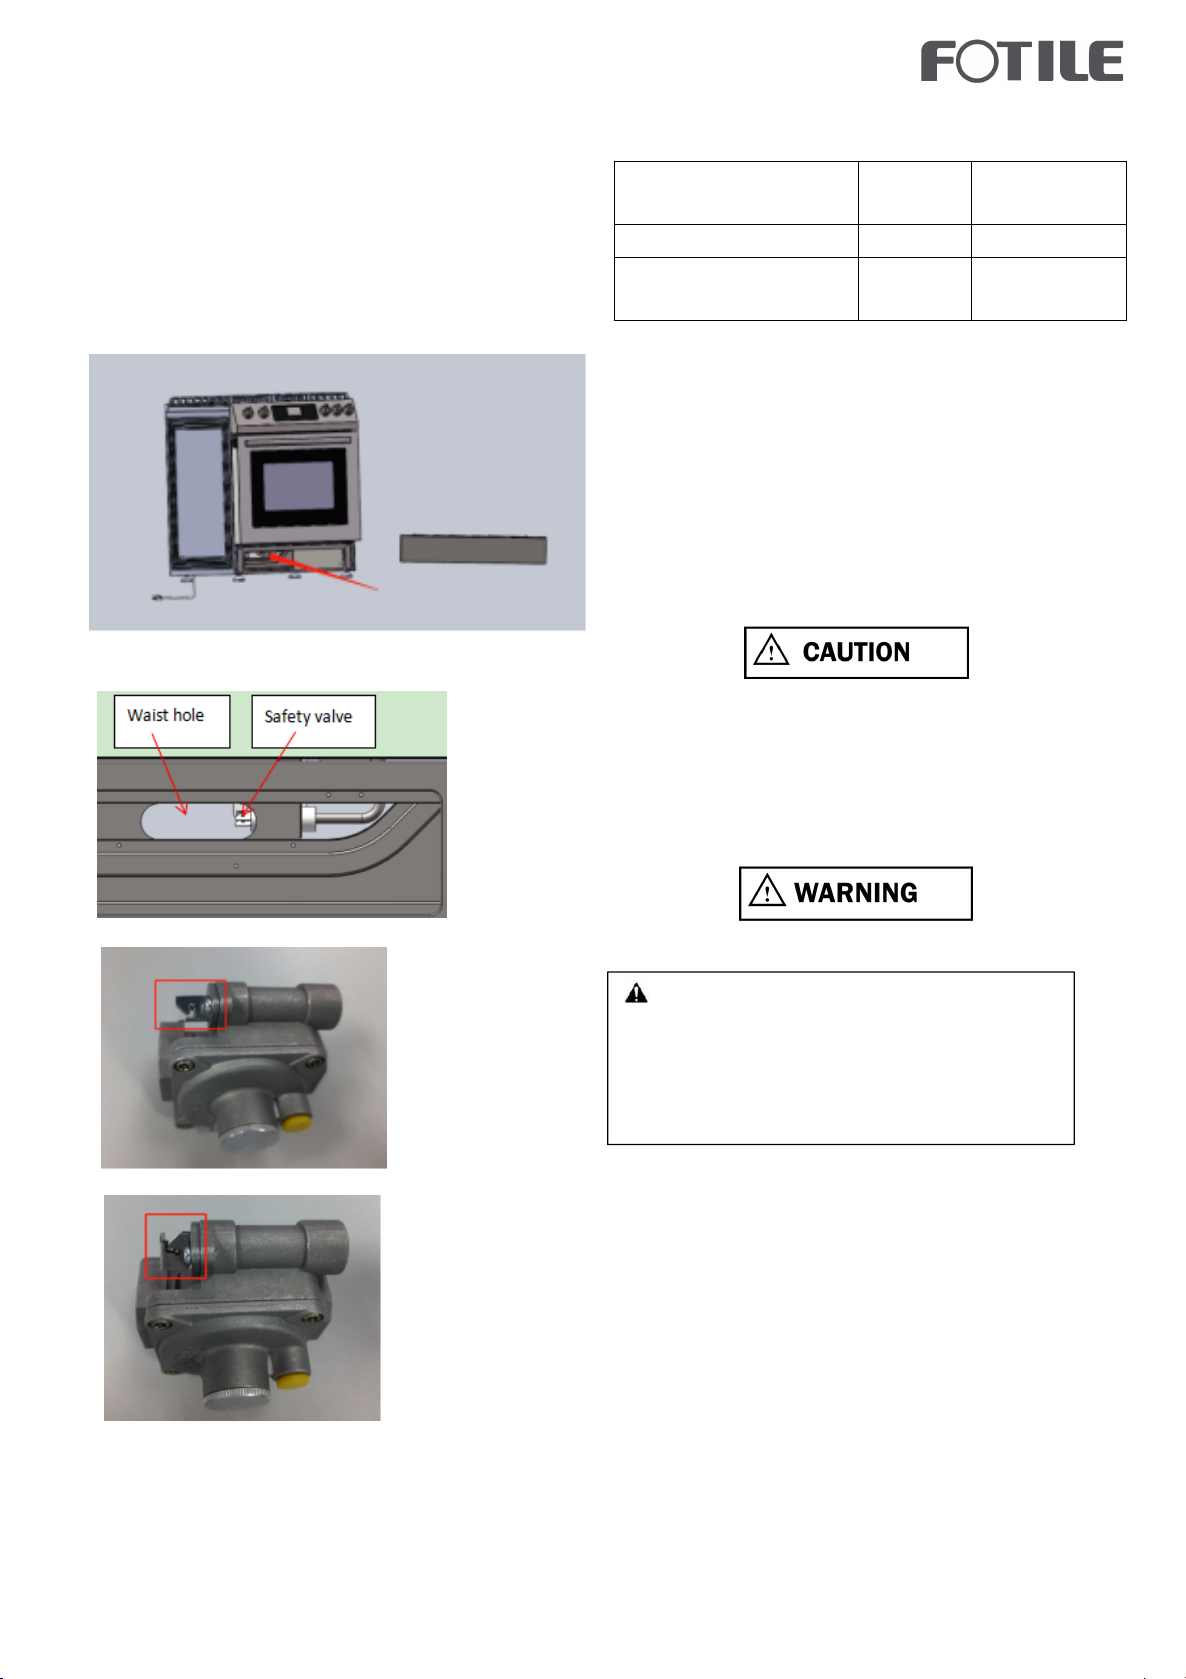
Check for gas leaks
When the appliance installed, check for gas leaks according
to the instructions before use.
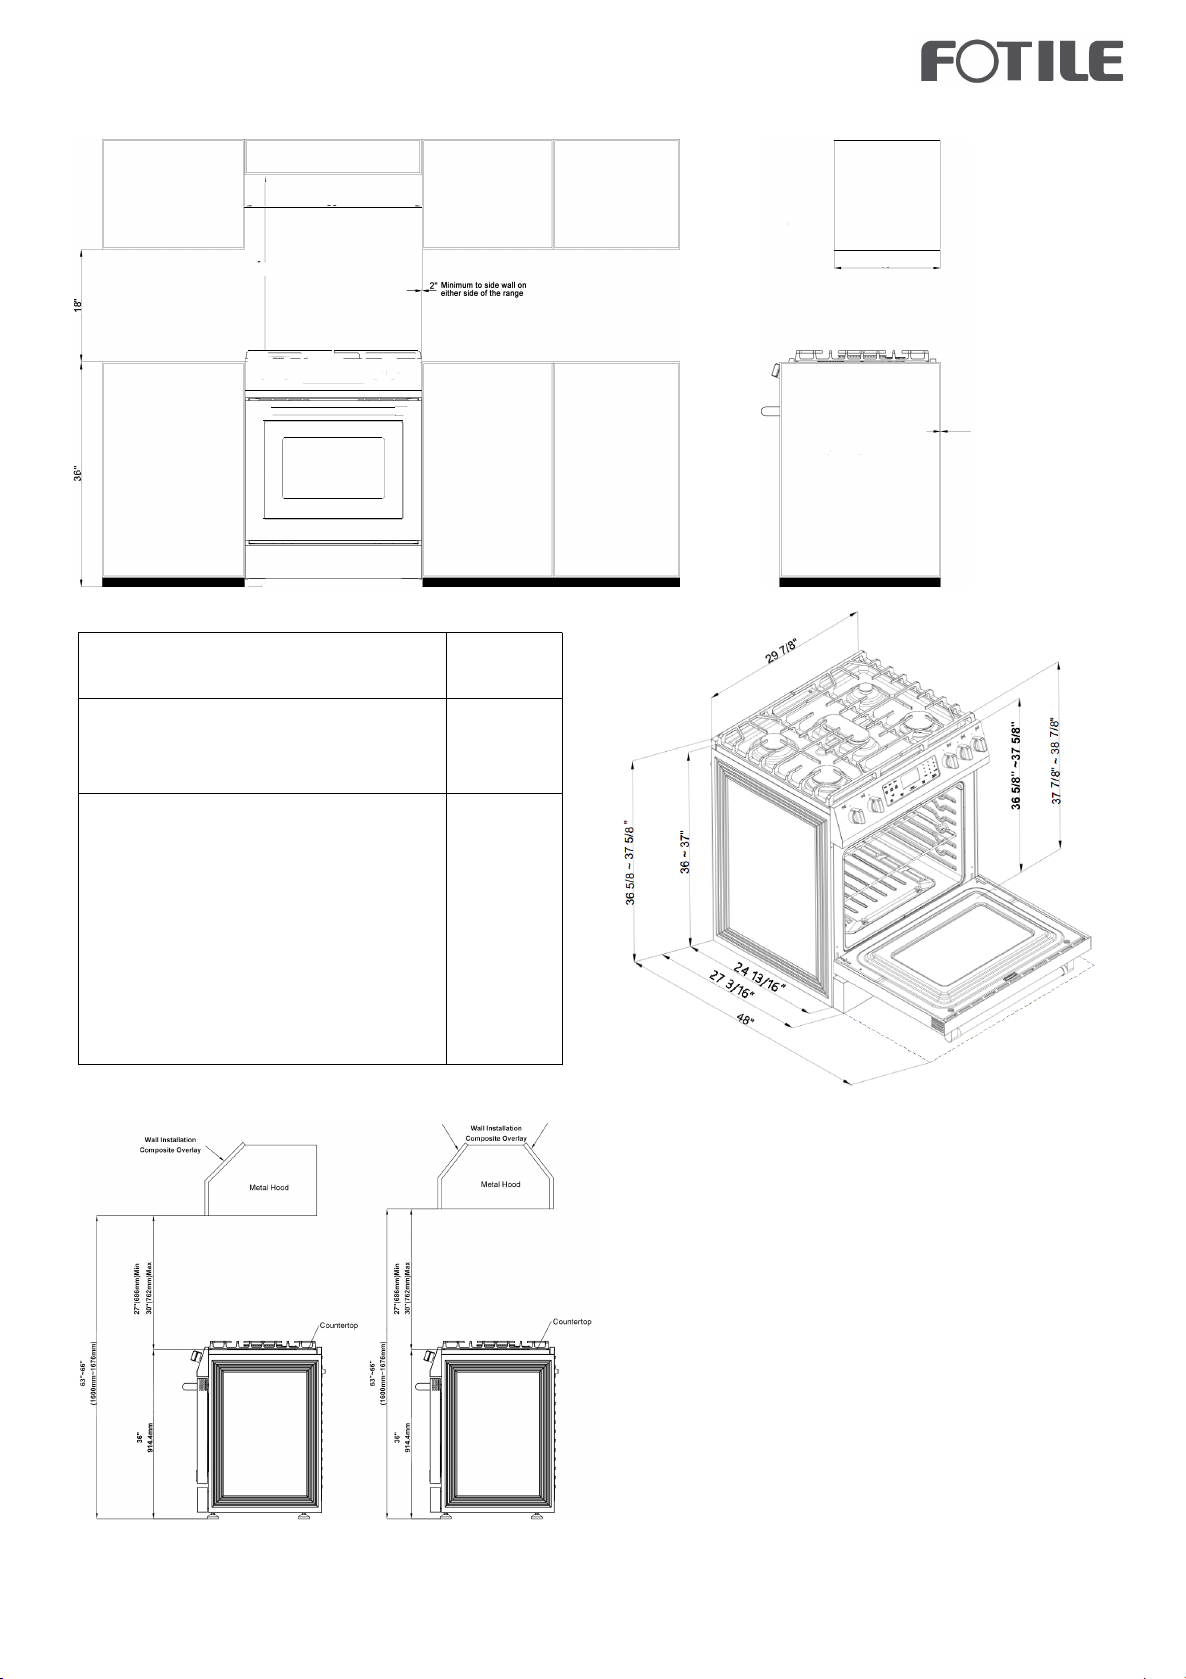
Ventilation hood is mandatory
This appliance should not be operated without a properly
sized and operational ventilation hood.
Use proper gas conversion kit
This stove only uses natural gas. For LP gas, please use
conversion kit (not included with the stove).
Please have a certified technician install the unit and
conversion kit. If planning to resell unit, please indicate
whether it is natural gas or has LP kit installed.
Do not reach for items over the stove when it is lit
Be careful when reaching for items stored in cabinets above
the appliance.
Read all instructions before using the product to ensure
proper and safe operation. Install or locate the product
only in accordance with the provided Installation.
Instructions.
Do not attempt to adjust, repair, service or replace any part
of your appliance unless it is specifically recommended in
this guide.
Do not use the range as a space heater.
Do not leave children unattended in the area where the
range is in use. Never allow children to sit or stand on any
part of the range. Do not let children play with the range.
All servicing should be referred to a qualified technician.
Have the technician show you the location of the gas shut
off valve and how to shut it off in an emergency.
Always disconnect power to appliance before any type of
servicing.
Do not use abrasive or caustic cleaners or detergents on
this appliance.
Do not use abrasive or caustic cleaners or detergents on this
appliance. they may cause permanent damage to the surface.
When cooking, set the burner controls so that the flame
heats only the bottom of the utensil and does not overlap at
the sides of the utensil.
Utensils (pots and pans) that conduct heat slowly, i.e. glass
pots, should be used in conjunction with burner flames at a
low or medium setting.
Turn off all controls and wait for appliance parts to cool down
before touching them. Do not touch the burner grates or
surrounding areas until cool.
Do not use water on grease fires.
Clean appliance with caution.
Always turn pot handles to the side or back of the
range. Do not turn handles towards the area where they are
easily burned. Handles should not extend over the adjacent
burners.
Use the range only for cooking tasks as outlined in this
manual. When using the range, do not touch the grates,
burner caps, burner bases, or any other parts in proximity to
the flame. These components may be hot enough to cause
burns.
Use dry pot holders. Moist or damp pot holders on hot
surfaces may result in burns from steam.
Do not use a towel or other bulky cloth.
Do not heat unopened food containers. Buildup of pressure
may cause the container to explode and result in injury.
During and after use, do not touch interior surfaces of the
oven until cool.
Do not let pot holder touch hot surface areas.
9) Self-Cleaning Oven Safety Instructions
Do not touch oven surfaces during self-clean operation. Keep
children away from the oven during self-cleaning. Failure to
follow these instructions may cause burns.
Before operating the self-clean cycle,wipe off all excessive
spillage, remove tha pans,shiny metal oven racks and other
utensils from the oven. Only enameled (not shiny) oven racks
may be left in the oven. Do not use self-clean to clean other
parts, such as drip pans or bowls.
Before operating the self-clean cycle, wipe grease and food soils
from the oven. Excessive amount of grease may ignite causing
smoke damage to your home.
If the self-cleaning mode malfunctions, turn the oven
off and disconnect the power supply. Have it serviced
by a qualified technician.