manuals.online logo
Brands
  1. Home
  2. •
  3. Brands
  4. •
  5. GARDIVAL
  6. •
  7. Outdoor Storage
  8. •
  9. GARDIVAL ALPHA 200 User manual

GARDIVAL ALPHA 200 User manual

Montage handleiding - Notice de montage - Manual
Manual de montaje - Montageanleitung
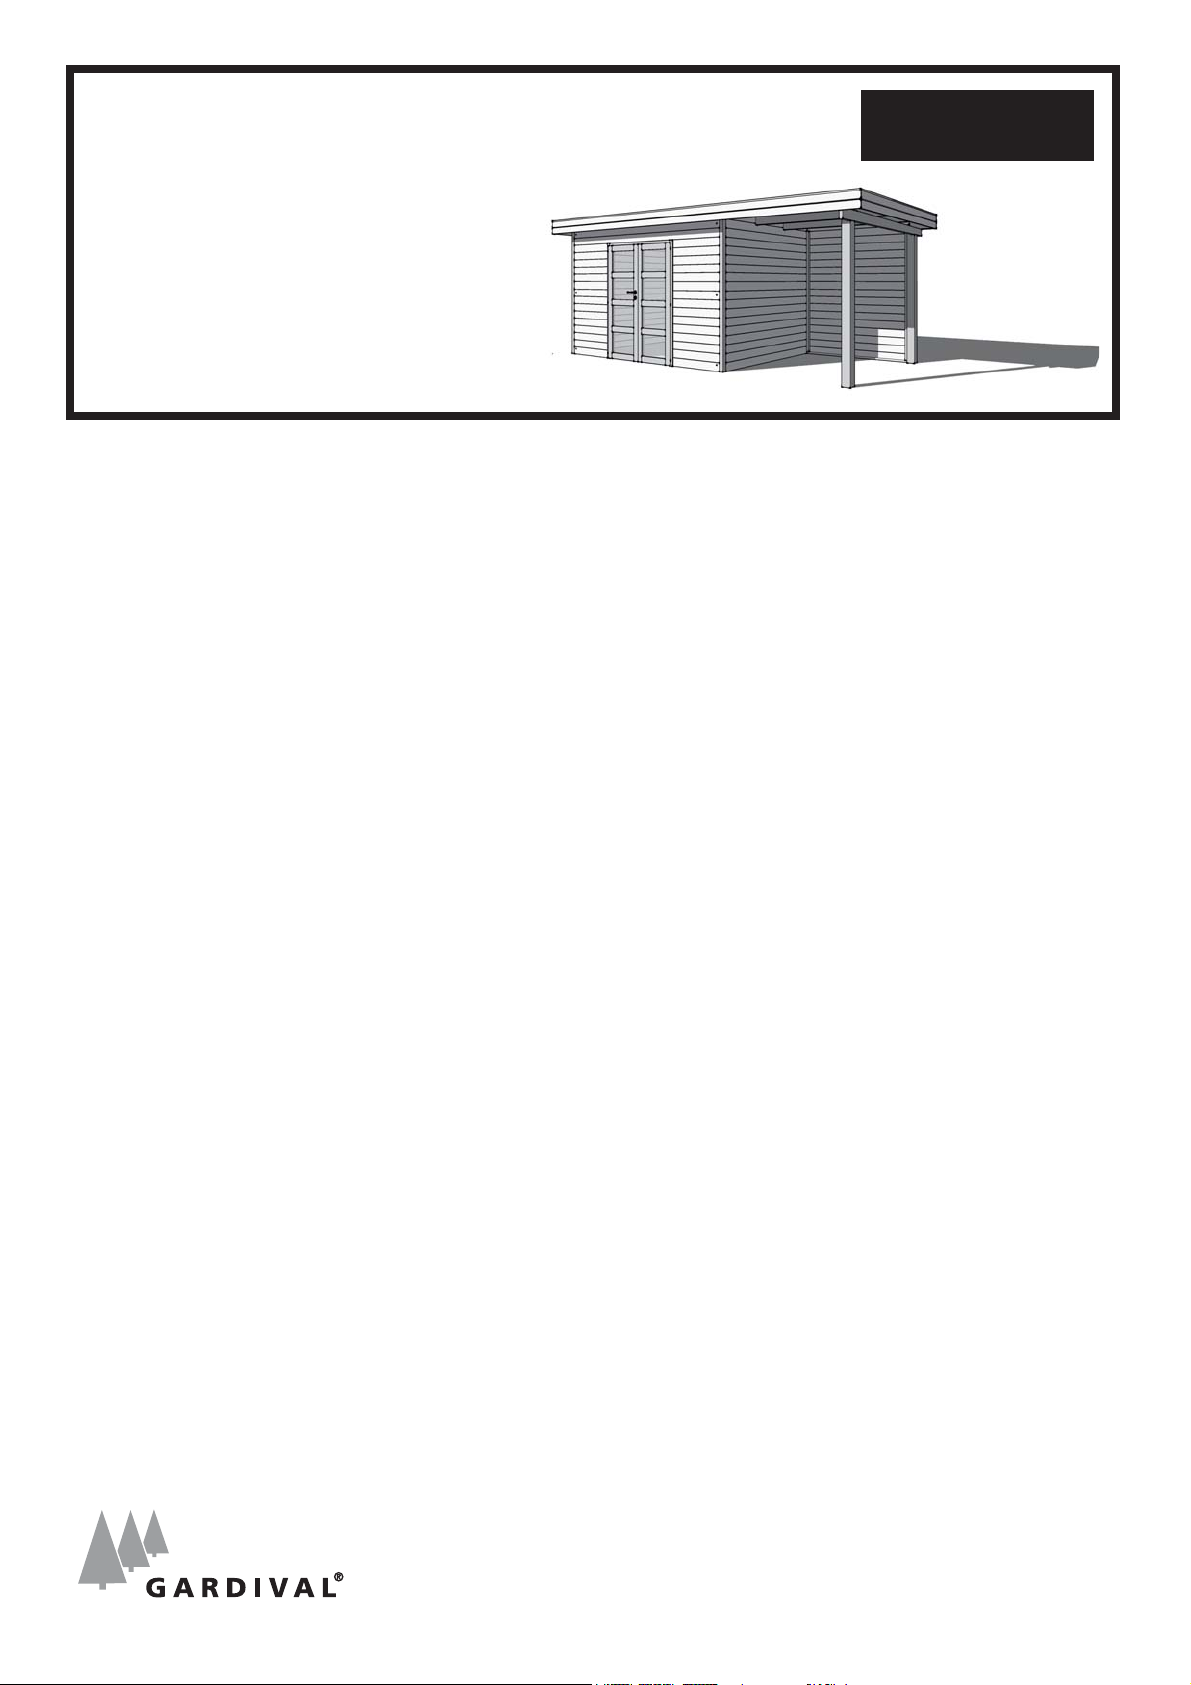
First avec auvent
First met luifel
200 / 250 / 300 / 350 / 420
VALCKE & zN NV - BRUGSESTEENWEG 141A - 8830 GITS - T +32 (0)51 21 13 48 - F +32 (0)51 21 07 64 - INFO@GARDIVAL.BE - WWW.GARDIVAL.BE
alpha
INLEIDING / INTRODUCTION / INTRODUCTION / INTRODUCCIó N / EINLEITUNG
Hartelijk gefeliciteerd met uw Gardival®ALPHA. Uw tuinhuis ALPHA is vervaardigd uit kwaliteitsvol Noord-Europees grenen, dat al dan niet in druk werd
geïmpregneerd. Hierbij vindt u de handleiding om uw ALPHA zelf te plaatsen. Het is aan te raden deze brochure eerst aandachtig te lezen
voordat u met de plaatsing van de ALPHA begint. Indien u nog problemen zou hebben, verwijzen we u graag door naar uw Gardival®verkoper,
die u graag met raad en daad zal bijstaan.
Volgende hulpmiddelen zijn nuttig om bij de hand te hebben om uw ALPHA vlot te plaatsen:
hamer - zaag - stuk hout - koord - schroevendraaier - mes - houtbeitel - waterpas - potlood - boormachine - (vouw)meter
Veel succes met het plaatsen van uw ALPHA.
---
Nous vous remercions pour votre achat d’un ALPHA Gardival ®. Votre abri ALPHA est fait dans un bois de qualité le Sapin Rouge du Nord, éventuellement
ce bois est traité sous pression. Ci-joint vous trouvez la notice de montage pour vous faciliter la pose de votre ALPHA.
Nous vous conseillons de lire d’abord cette notice avant de commencer la pose. En cas de problème, veuillez contacter votre revendeur Gardival®,
qui vous aidera volontairement.
Les outils suivants sont utiles pour la pose de votre ALPHA à emboîtement:
un marteau - une foreuse - une scie - une corde - un tournevis - un crayon - des ciseaux - un niveleur - un mètre (pliant) - un couteau
Nous vous souhaitons beaucoup de succès avec la pose de votre ALPHA à emboîtement.
---
Congratulations on your purchase of a Gardival®ALPHA. Your ALPHA has been manufactured in high-quality Nordic pine, which may or may not have
undergone high-pressure impregnation treatment. Here are the instructions to assemble your ALPHA. We recommend reading this brochure carefully before
starting the assembly of your ALPHA. If you encounter any problems, please contact your Gardival®salesman, who will be happy to assist you.
You will need the following tools to assemble your ALPHA quickly and easily:
hammer – saw – a piece of wood – some thick string – screwdriver – wood chisel – spirit level – pencil – electric drill – (roll-out) tape measure
We wish you lots of success with the assembly of your ALPHA.
---
Felicidades por la compra de su construcción Gardival®en sistema ALPHA. La construcción ALPHA está hecho con pino rojo nórdico de alta calidad,
que puede estar o no impregnado a presión.. Aquí encontrará las indicaciones pertinentes para realizar el montaje.
Antes de proceder al montaje le recomendamos leer atentamente este pequeño manual. En caso de tener problemas no dude en ponerse en
contacto con el distribuidor Gardival®, que lo ayudará a solucionar sus problemas.
Usted necesitará las siguientes herramientas para el montaje:
martillo - serrucho - madera - cuerda - destornillador - cuchilla - tijeretas - nivel - lápiz - taladro - cinta métrica
Le deseamos éxito en el montaje de su construcción.
---
Herzlichen Glückwunsch zu Ihrer Gardival®ALPHA. Ihre ALPHA ist aus hochwertiger nordeuropäischer Kiefer hergestellt,
wahlweise mit oder ohne Druckimprägnierung. Anbei dieAnleitung zur Selbstmontage Ihrer neuen ALPHA. Wir empfehlen, diese Broschüre
zuerst aufmerksam durchzulesen, bevor Sie mit dem Aufbau der ALPHA beginnen. Falls Sie weitere Fragen dazu haben sollten,
verweisen wir Sie gerne an Ihren Gardival®Händler, der Ihnen gerne mit Rat und Tat zur Seite steht.
Für einen zügigen Aufbau Ihrer ALPHA empfehlen wir Ihnen, folgende Hilfsmittel vorzubereiten:
Hammer – Säge – Stück Holz – Seil – Schraubenzieher – Messer – Holzmeißel – Wasserwaage – Bleistift – Bohrmaschine - Meterstab
Viel Erfolg beimAufbauen Ihrer ALPHA.
INTRO
alpha
2
Belangrijk - Attention - Pay attention to - Aufpassen
Voorzichtig behandelen - Manipuler avec soin - Handle with care - mit Vorsicht zu behandeln
* Breekbaar - Fragile - Fragile - Brechbar
Niet kantelen
Pas d'inclinaison -
Don’t turn
keine Neigung
OK
*
*
*
*
Niet schuiven
Pas glisser
Don't slide
Nicht verschieben
Positioneer en plaats
Positionner et poser
Positioning and place
Positionierung und Platzieren
01
02
De Gardival Alpha wordt geplaatst op een houten vloer
Votre abri Gardival Alpha est posé sur un plancher de sol en bois
La construcción Gardival Alpha se monta sobre un suelo de madera
Your Gardival Alpha log cabin will be installed on a wooden oor
Die Gardival®- Alpha wird auf einem Holzboden aufgestellt
end piece / pieza final / endstück
connecting piece / pieza intermedia
eindstuk / pièce d’extrémité
tussenstuk /
pièce intermédiaire
Breedte tuinhuis / Largeur abri / Width of the garden house / Lateral de la construción / Breite der Alpha
Diepte tuinhuis / Profondeur abri / Depth of the garden house
Fachada de la construcción / Tiefe d
er
Alpha
zwischenstück
end piece / pieza final / endstück
eindstuk / pièce d’extrémité
end piece / pieza final / endstück
eindstuk / pièce d’extrémité
end piece / pieza final / endstück
eindstuk / pièce d’extrémité
3
alpha
03
De Gardival Alpha wordt geplaatst op een betonplaat
Votre abri Gardival Alpha est posé sur une dalle en béton
Your Gardival log cabin Alpha will be installed on a concrete foundation slab
La construcción Gardival Alpha séra montada sobre une solera de hormigón
Die Gardival®- Alpha wird auf einer Betonplatte aufgestellt
4
04
H
H
H
H
alpha
H
4 x H
houten vloer
plancher de sol en bois
Un suelo de madera
Holzboden
Breedte tuinhuis / Largeur abri / Width of the garden house / Fachada de la construcción / Breite der
Alpha
Diepte tuinhuis / Profondeur abri / Depth of the garden house
Lateral de la construcción / Tiefe der
Alpha
""
""
5
alpha
05
110mm
130mm
1. ZOEK DE STARTPLANKEN
(ZONDER GROEF ONDERAAN)
plaats deze planken als onderste laag
1. CHERCHEZ LES PLANCHES DE DÉPART
(SANS LANGUETTE EN DESSOUS)
mettez-les comme couche initiable
belangrijk!!!
important!!!
STARTPLANK
ZONDER GROEF
PLANCHE DE DÉPART
SANS LANGUETTE
06
07
alpha
Ø 3,5 x 25mm
6
H
H
H
H
H
08
09
Plaatsing op betonplaat
Poser sur une dalle en béton
Construction on a concrete foundation slab
Instalación sobre solera de hormigón
Aufstellen auf Betonplatte
Plaatsing op houten vloer
Poser sur un plancher de sol en bois
Instalación sobre suelo de madera
Aufstellen auf Holzboden
alpha
H
H
H
Ø 3,5 x 25mm
7
H
H
H
Voorzijde - Façade - Front side - Vorseite
Achterzijde - Façade arriere - Back side - Rückseite
90°
""90°
90°
90°
8
10
11
Het deurkader steekt onderaan
een beetje uit. Bij een blokhut op
een betonplaat mag dat stukje
ingekort worden tot op de gewenste
hoogte. Bij plaatsing op een houten
vloer moet hieraan niet gezaagd
worden.
Les montants du cadre dépassent,
en bas de la porte. Si la pose se
fait sur une dalle en béton, vous
devez ajuster ce dépassement en
fonction de la hauteur nécessaire,
sur un plancher de sol en bois les
longueurs sont bonnes.
The doorframe overlaps slightly at
the bottom. If your log cabin is to
be placed on a concrete founda-
tion, this may be shortened to the
desired length. For construction on a
El marco de la puerta sobresale
un poco en la parte inferior. Si el
montaje se hace sobre un suelo de
hormigón, se deberá cortar hasta
alcanzar la altura deseada. Si se
coloca la construcción sobre un
suelo de madera las longitudes son
correctas. En caso de suelo de
madera las longitudes son correctas.
Der Türrahmen ragt im unteren
Bereich etwas hervor. Bei einer
Blockhütte auf einer Betonplatte
kann dieser Teil auf das gewünschte
Maß zurückgesägt werden. Wenn
Ihre Blockhütte auf einer Holzplatte
aufgebaut wird, muss dieser Bereich
nicht zurückgesägt werden.
Plaatsing op houten vloer
Poser sur un plancher de sol en bois
Instalación sobre suelo de madera
Aufstellen auf einem Holzboden
Plaatsing op betonplaat
Poser sur une dalle en béton
Construction on a concrete foundation slab
Instalación sobre solera de hormigón
Aufstellen auf einer Betonplatte
alpha
13
12
9
alpha
Teken twee lijnen op de twee
buitenvlakken van de hoekpalen
gemeten vanaf de basis
van de tand op 130mm.
Faites deux lignes sur côtés
éxterieurs des poteaux de coin
à 130mm, mésure du debut du
dent.
130mm
130mm
130mm
2.
15
14
10
alpha
Ø 4 x 35mm
130mm
100mm
Breedte tuinhuis / Largeur abri / Width of the garden house / Fachada de la construcción / Breite der Blockhütte
Diepte tuinhuis / Profondeur abri / Depth of the garden house
Lateral de la construcción / Tiefe der Blockhütte
"
""
"
""
""
130mm
130mm
AFZAGEN OP HOOGSTE LIJN
COUPER SUR LA LIGNE LA PLUS HAUTE
100mm
100mm
AFZAGEN OP HOOGSTE LIJN
COUPER SUR LA LIGNE LA PLUS HAUTE
BELANGRIJK
WANNEER DE HOOGTELIJNEN
VERSCHILLEN OP DE TWEE
ZIJDEN VANDE HOEKPAAL,
NEEM DAN DE HOOGSTE LIJN
OM DE HOEKPAAL AF TE ZAGEN.
IMPORTANT
SI LES LIGNES D'HAUTEUR SONT
DIFFÉRENTES SUR LES 2 CÔTÉS
DU POTEAU DE COIN,
PRENEZ LA PLUS HAUTE
POUR SCIER LE POTEAU.
11
12
16
PLAATSEN HOEKPROFIEL
POSITIONNER PROFIL DE COIN
lengte A = lengte 1 -16mm
lengte B = lengte 2 -16mm
longueur A = longueur 1 - 16 mm
longueur B = longueur 2 - 16 mm
A. ZONDER VLOER
A. SANS PLANCHER DE SOL
1. LENGTE HOEKPROFIEL BEPALEN
1. déterminer longueur profil de coin
2. HOEKPROFIEL (4 STUKS) AFKORTEN
A (2x) = afkorten op lengte A
B (2x) = afkorten op lengte B
2. couper profil de coin (4 unités)
A (2x) = couper à longueur A
B (2x) = couper à longueur B
3. HOEKPROFIEL SCHROEVEN
schroef (4x60 verzinkt)
9x per hoekprofiel
3. visser profil de coin
vis (4x60 zinguée)
9x par profil de coin
B. MET VLOER
B. AVEC PLANCHER DE SOL
1. LENGTE HOEKPROFIEL BEPALEN
1. déterminer longueur profil de coin
2. HOEKPROFIEL (4 STUKS) AFKORTEN
A (2x) = afkorten op lengte A
B (2x) = afkorten op lengte B
2. couper profil de coin (4 unités)
A (2x) = couper à longueur A
B (2x) = couper à longueur B
3. HOEKPROFIEL SCHROEVEN
schroef (4x60 verzinkt)
9x per hoekprofiel
3. visser profil de coin
vis (4x60 zinguée)
9x par profil de coin
Ø 4 x 60mm alpha
PLANK 130mm
130
100
130
100
Lengte A (hoge zijwand)
Lengte 1 (hoge zijwand)
Lengte B (lage zijwand)
Lengte 2 (lage zijwand)
AB
±130mm
±65mm ±260mm
AB
±130mm
±260mm±49mm
12
17
alpha
1. Schroef de bovenste twee planken 2 keer vast volgens de tekening in elke hoek.
1. vissez les duex planches plus hautes 2 fois dans le coin selon de plan.
2. Schroef de onderste plank 1 keer vast in elke hoek aan beide zijden.
2. vissez la planche la plus basse 1 fois dans le coin dans les deux sens
Ø 3.5 x 35mm
2x schroeven
2x visser
2x schroeven
2x visser
2x schroeven
2x visser
2x schroeven
2x visser
1.
2.
17
12
18
Ø 3 x 35mm
herverdelen en vastschroeven
re-positionner et visser
1.
1. Indien er een hoogteverschil is tussen 2 wanden moet men de planken
herverdelen waar de wand lager is. Schroef telkens elke plank 1 keer vast.
1. s'il y a une différence de hauteur entre 2 parois on doit re-positionner
les planches où le paroi est plus bas. Vissez chaque planche 1 fois.
Ø 4 x 60mm
28 / 45 x 145 / 195mm 28 / 45 x 145 / 195mm
13
17
20
alpha
12
19
Ø 3 x 35mm
*
*
*
*
*
*
*
*
*
*
*
*
*
*
*
*
* Vastschroeven van raam -en deurkader
om de twee planken (binnenzijde).
* Visser le cadre de porte et fenêtre
tous les 2 planches (à l'intérieur)
Ø 4x 60mm INOX
HOEKPAAL
POTTEAU
DE COIN 28 x 130mm 28 x 130mm
LAT 45 x 45mmLAT 45 x 45mm
SAMENGESTELD
ASSEMBLÉ 1
1
1
1
2
2
2
2
21
14
alpha
Lengte planken voor terraswand = positie paal 120 x 120mm
Longueur plancher pour paroi de terrasse = position poteau 120 x 120mm
OPTIE: TERRASWAND
OPTION: PAROI DE TERRASSE
15
12
22
alpha
Ø 3.5 x 35mm
16 x 95 x 700mm
4x
16
12
23
alpha
Ø 4 x 40mm
Ø 4 x 30mm Ø 4 x 20mm
4 x Hoekijzer 40 x 40mm
17
24
25
alpha
Dakplanken / Le plancher de toit / Tablas de techo / Dachbretter
Ø 2.4 x 50mm
Ø 2.4 x 50mm
26
18
alpha
Plaatsing EPDM dakbedekking / Pose de la couverture de toit EPDM
Hieronder vindt u richtlijnen terug voor het installeren van de dakbedekking van uw tuinhuis.
Veuillez trouver ci-après les instructions pour la mise en œuvre de la couverture de votre abri de jardin.
Belangrijk: Lees de instructies aandachtig vooraleer u met de plaatsing van start gaat!
De installatie dient te gebeuren bij droge en vriesvrije weersomstandigheden.
Important : Lisez attentivement les instructions avant de commencer l’installation !
Les travaux seront effectués dans des circonstances de temps sec et absence de gel.
Voorbereiding / Préparation
• Het platte dak (helling <2%) dient vlak, egaal, droog en proper te zijn.
Het dakoppervlak wordt daarvoor eerst afgeborsteld en nagekeken op eventuele uitstekende schroeven of onzuiverheden.
Le toit plat (une déclivité inférieure à 2%) doit être lisse, sec et propre.
Brossez bien la surface du toit et qu’il n’y a plus d’inégalités (e.g. des aspérités dangereuses ou impuretés)
Materialen / Matériaux
Controleer of volgende producten zich in de kartonnen doos bevinden / bien que la boîte contient ce qui suit :
• EPDM folie / La feuille EPDM (1.15 mm) : 3.05 x 3.05m
Spuitbus met EPDM contactlijm / Aérosol avec colle de contact EPDM
• Aluminium hemelwaterafvoer met klemring / Tuyau de descente aluminium avec anneau de
Controleer of ook volgende zaken zijn bijgeleverd / Veuillez contrôler que vous trouviez également ce qui suit :
• Schroeven / Vis
• Houten blokje / Petite pièce de bois
Voorts dient u zelf over volgende benodigdheden te beschikken: klokboor, mes, schaar, schroevendraaier, veegborstel, hamer.
Veuillez prévoir aussi les outils suivant : Scie cloche, Couteau, Ciseaux, Tournevis, Brosse, Marteau
Installatie / Installation
1. Positionering EPDM folie / Application de la feuille EPDM
Benodigdheden / Les outils :
EPDM folie / La feuille EPDM
Uitvoering / Exécution :
- Het EPDM membraan wordt op de grond opengevouwen.
- Dépliez la feuille EPDM au sol.
- Plaats de folie op het platte dak van uw tuinhuis en vouw deze open.
- Repliez la feuille EPDM et positionnez-la sur le toit de votre abri de jardin.
19
alpha
2. Plaatsing hemelwaterafvoer / Installation du tuyau de descente
Benodigdheden / Les outils :
Klokboor, aluminium tapbuis, schroeven en schroevendraaier.
Sciecloche, tuyau en aluminium, les vis et le tournevis.
Uitvoering / Exécution :
- Maak in de laagste zijde, al of niet in het hoekpunt van het dak, een gat met diameter 9cm in de houten structuur;
vouw de EPDM folie hiervoor ca. 1m terug.
Let op dat de afstand tussen de opkant en het midden van de cirkel min. 7 cm is. (houdt eveneens rekening met de aan
te sluiten afvoerbuis langs de wand).
- Repliez la feuille EPDM environ 1 m. Forez dans le côté le plus bas, soit dans un coin du toit, un trou d’un diamètre de
9 mm dans la structure en bois.
Faites bien attention que la distance entre le bord du toit et le milieu du cercle est au moins 7 cm. (Tenez également
compte de l’emplacement du tuyau le long du mur).
1. Kies de positie van de hemelafvoer
Choisissez la position du tuyau de descente 2. Duid de te maken hemelafvoer aan
Indiquez où le tuyau de descente doit être installé
3. Boor het gat m.b.v. de klokboor
Forez le trou en utilisant la scie cloche
5. Plaats de plakplaat van de hemelwaterafvoer in
de opening. Schroef de plakplaat vast in de houten
ondergrond m.b.v. de bijgeleverde schroeven.
Posez la plaque d’eau dans le trou. Fixez la plaque
en utilisant les vis adéquates.
4. Verwijder na het boren met de klokboor de houtvezels
Eliminez le reste des de bois après forage
20
alpha
tuinhuizen - abris de jar din
3. Verlijming van de EPDM folie / Collage de la feuille EPDM
Benodigdheden / Les outils :
EPDM folie, Spuitbus met EPDM contactlijm, veegborstel
Feuille EPDM, Aérosol avec colle de contact EPDM, brosse
Uitvoering / Exécution :
- Vouw de helft van het membraan terug.
Repliez d’abord la moitié de la feuille.
- Breng de Bonding Adhesive contactlijm aan op de houten
ondergrond én de achterkant van de EPDM folie met
behulp van de bijgeleverde spuitbus (4m2/spuitbus).
Appliquez la colle de contact Bondin Adhesive sur
le fondement en bois et le côté arrière du feuil EPDM
en utilisant l’aérosol (4m2/aérosol).
- Let op / Attention :
De EPDM folie moet goed gepositioneerd blijven tijdens
de ganse uitvoering. Loop zo weinig mogelijk over
de EPDM folie daar waar deze net gelijmd is,
om verschuivingen van de folie te voorkomen.
Faites en sorte que la feuille EPDM reste bien positionné
pendant l’opération de collage. d’empêcher le
déplacement de la feuille EPDM, nous vous conseillons
d’éviter de marcher sur la feuille EPDM qui il vient d’être collée.
4
2
13
- Wanneer de lijm droog is (max 10 min.) dient men het EPDM membraan in de lijm terug op zijn plaats
te rollen in zigzag beweging.
Une fois que la colle est sèche (après max 10 minutes), vous devez remettre la feuille EPDM à sa place en zigzag.
plooilijnen
Les plissés
rol-beweging
le mouvement roulant

This manual suits for next models

4

Other GARDIVAL Outdoor Storage manuals

GARDIVAL Vintage STPL User manual

GARDIVAL

GARDIVAL Vintage STPL User manual

GARDIVAL Vintage 365 User manual

GARDIVAL

GARDIVAL Vintage 365 User manual

Popular Outdoor Storage manuals by other brands

Keter SCALA 6x5 user manual

Keter

Keter SCALA 6x5 user manual

USP DuraMax 8 Ft x 8 Ft DuraPlus owner's manual

USP

USP DuraMax 8 Ft x 8 Ft DuraPlus owner's manual

Landi T-PS0608K owner's manual

Landi

Landi T-PS0608K owner's manual

Duratuf MK4B Assembly instructions

Duratuf

Duratuf MK4B Assembly instructions

Suncast 774098 Assembly manual

Suncast

Suncast 774098 Assembly manual

vidaXL 42983 manual

vidaXL

vidaXL 42983 manual

Keter OAKLAND 7511 user manual

Keter

Keter OAKLAND 7511 user manual

garofalo TUSCANY user manual

garofalo

garofalo TUSCANY user manual

SmartStore SS2515 Assembly instructions

SmartStore

SmartStore SS2515 Assembly instructions

Yardmaster 83 GEYZ Assembly instructions

Yardmaster

Yardmaster 83 GEYZ Assembly instructions

Mercia Garden Products 01PTSHPCHEST-V1 General instructions

Mercia Garden Products

Mercia Garden Products 01PTSHPCHEST-V1 General instructions

Moebelix T-0608ps owner's manual

Moebelix

Moebelix T-0608ps owner's manual

SmartStore SM3025 Assembly instructions

SmartStore

SmartStore SM3025 Assembly instructions

FOCO Linked container Assembly instructions

FOCO

FOCO Linked container Assembly instructions

Mercia Garden Products 03DTSHPN0406DSHSA-V1 General instructions

Mercia Garden Products

Mercia Garden Products 03DTSHPN0406DSHSA-V1 General instructions

Arrow Storage Products SCG1217CC Owner's manual & assembly guide

Arrow Storage Products

Arrow Storage Products SCG1217CC Owner's manual & assembly guide

ABSCO SHEDS 15141RK manual

ABSCO SHEDS

ABSCO SHEDS 15141RK manual

Duratuf KIWI MK2A Assembly instructions

Duratuf KIWI

Duratuf KIWI MK2A Assembly instructions

manuals.online logo
manuals.online logoBrands
  • About & Mission
  • Contact us
  • Privacy Policy
  • Terms and Conditions

Copyright 2025 Manuals.Online. All Rights Reserved.