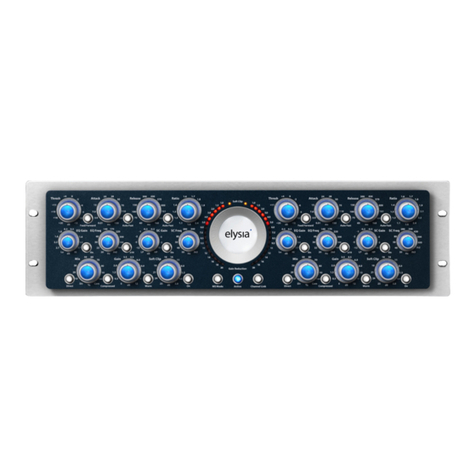
GAS MAX EQ2 User manual

MAX
HARDCORE CAR AUDIO
MAX
EQ2-9BT

WE PLAY LOUD!!
We know what you want. You want it LOUD, and that’s
exactly what we do, what we live for. Vibrations,
gut-punches and straight up loud music - that’s what
makes us tick. We won’t dress up in fancy words or
claim to be something we’re not. We are the NO
BULLSH!T car audio brand!
Every single product with the GAS logo on it is born
out of passion, the same that has driven us for two
generations and that will keep us rolling up to your
neighbourhood, winning and pushing the limits for
many generations to come!
It’s up to you to choose your own level of loud, and if
you don’t like what we do that’s OK. You are welcome
back when you’ve had your first true GAS experience.
We don’t exclude, we don’t judge and we do not make
up any excuses for who we are.
We are GAS and we are proud to be LOUD!

TABLE OF CONTENT
SAFETY...................................................................................................
UNPACKING.........................................................................................
DIMENSIONS...............................................................................................
SPECIFICATIONS.................................................................................
MAX EQ2-9BT...................................................................................
Recommended cable size................................................................
FEATURES................................................................................................
Tweak with super precision..............................................................
The quick and easy way....................................................................
Take control.....................................................................................
Wireless freedom with Bluetooth 5.0................................................
FUNCTIONS.................................................................................
Sub-level..........................................................................................
Volume.............................................................................................
Aux Button & BT LED........................................................................
Fader................................................................................................
Band settings...................................................................................
Light switch.....................................................................................
Low pass filter..................................................................................
Aux in level.....................................................................................
HOW TO.........................................................................................................
Install equalizer................................................................................
Equalizer settings............................................................................
TROUBLESHOOTING......................................................................................
No power, no lights...........................................................................
No sound..........................................................................................
Distorted sound...............................................................................
Unwanted noice...............................................................................
WARRANTY & DISPOSAL...............................................................................
THE GAS WORLD...........................................................................................
3
4
4
5
5
5
6
6
6
6
6
7
7
7
7
7
7
8
8
8
9
9
11
13
13
13
13
13
14
15

SAFETY
3
Make sure to pay attention to the instructions when you see this symbol:
Make sure that your vehicle has a 12 VDC voltage negative ground system, that it can
handle an increased power consumption.
Keep the cables inside the vehicle separate from sharp edges or components that may
be affected or take damage. Follow the recommended cable sizes and always use high
quality cables and accessories. Even if you are eager to put the amplifier to use – take
no shortcuts when installing the cables, make sure that all connectors are protected
and secured, and take your time finding the perfect grounding point.
Don’t drill any holes without checking what lies beneath, and don’t cut anything
without making sure that no important components risk being damaged.
There’s a first time for everything, if you need help - ask a friend or contact your local
GAS AUDIO POWER dealer/installer.
We want you to experience your products to the MAX, but we don’t want you to injure
yourself or others. Use common sense, respect high pressure levels and volume, and
follow your local laws and regulations.
NO COMPROMISES! Especially when it comes to safety. Before installing your MAX
EQ2 series equalizer, make sure that you read through the manual thoroughly and
follow the instructions. Save the manual for future usage and reference!

4
UNPACKING
Unboxing your new MAX product is an experience, make sure that the equalizer and all the
accessories are included in the packaging:
Equalizer Manual Molex cord V-clips
(2pcs)
Screws
(6pcs)
DIMENSIONS
A
B
C
D
EQ2-9BT
A B C D
mm
184 179 105 27

5
SPECIFICATIONS
We take pride in our work! True, honest specifications and power ratings are an important
part of all equalizers. Listening, measuring and engineering are essential parts in our
workshop. That’s how we make sure to bring you an awesome product with NO BULLSH!T.
Component
Pre-out channels
Equalizer with BT
3 pairs
MAX EQ2-9BT
Input Mode Main / AUX / BT
Bluetooth 5.0
EQ Band
Freq.Response (+/- 1dB)
RMS output Voltage
THD @ 6V
MAX output Voltage
EQ
Yes
10-50 000Hz
6V
0,01 %
7V
9 band
Boost/Cut
S/N ratio
12 dB
101 dBA
Input Sensitivity
Head Room
Input Impedance
50 mV - 3V
20 dB
20 kOhm
Output Impedance 1k Ohm
Stereo Separation
Power Voltage
82 dB/1 kHz
11-15V
ATO (Auto turn on) DC-Offset on Hi Level
Rem Output Voltage
Subwoofer Crossover
12V
30-200Hz (18dB/Oct)
50Hz, 120Hz, 250Hz,
500Hz, 1kHz, 2kHz,
4kHz, 8kHz, 16kHz
Type
REC. CABLE SIZE
Power
Min. size Max. size
REM
1.5 mm²
1.5 mm²
2.5 mm²
2.5 mm²

6
FEATURES
If you have this in your hand, you have finally made it. Congratulations! You are ready to take
the next step, to enter a world of NO COMPROMISES with an equalizer that will take your car
to a whole new level. So get out there and impress the non-believers! Show them that true
dedication comes from the inside of your trunk and that “good enough” just doesn’t cut it.
TWEAK WITH SUPER PRECISION
We’ve taken control to the next level with a powerful and intuitive 9 band graphical. No
nonsense and no extra noise added thanks to its high-quality internal components, with
exceptional linear frequency response from top to bottom.
THE QUICK AND EASY WAY
Shape your favorite music according to your liking. Do you want to boost the bass and cut
some treble? Or do you want to alter the master volume (or even the subwoofer level)? Why
not adjust the fader with awesome precision? This is all at your fingertips with the MAX
EQ2-9BT.
TAKE CONTROL
The equalizer should never be the weakest link in your sound system. This powerful EQ
features three pairs of 6V (RMS) gold plated and low impedance RCA inputs, high level
inputs for easy installation and an automatic turn off system.
WIRELESS FREEDOM WITH BLUETOOTH 5.0
We live in a digital age and you’re never more than a few taps away from playing a song, a
playlist or a collection of awesome beats. Stream directly from your phone, tablet or
computer directly to the equalizer via Bluetooth 5.0! Showing off your sound system has
never been easier.

7
FUNCTIONS
NO COMPROMISES - that’s the spirit of the MAX series. The MAX equalizers are made for the
enthusiasts out there who crave high precision audio! We know you’re itching to get your
new sound system going, but make sure to read through these pages - so you can get the
most out of your setup!
SUB LEVEL
1
Adjust the subwoofer level.
VOLUME
2
Adjust the volume. Master setting
for your connected sound system.
12 3 4
AUX BUTTON & BT LED
3
AUX BUTTON: Switch for AUX
source. Press once to select
auxiliary. Press again to switch
back to main input source instead.
BT LED: Flashing blue LED light
around the AUX button. Indicates
when Bluetooth is active.
FADER
4
Adjust the sound level between
your front and back sound system.
Band settings
5
Equalizer gain control knobs to
adjust the gain settings. Each
band can be adjusted from -12db
to +12dB.
The bands are divided on the
following knobs:
• 50Hz
• 120Hz
• 250Hz
• 500Hz
• 1kHz
• 2kHz
• 4kHz
• 8kHz
• 16kHz
5

8
FUNCTIONS
LIGHT SWITCH
6
Change the illumination color of
the equalizer. Choose between
white or orange lighting.
AUX-IN LEVEL
8
Adjust the level to match the main
input from stereo or other device.
LOW PASS FILTER
7
Adjust the low pass crossover
level. The crossover is adjustable
between 30-200Hz (18dB/Oct).
6 7 8

9
A well-built sound system will set you aside from the rest and elevate your vehicle! It’s
important that you carefully read the instructions on the following pages. This is to make
sure that you install and use the equalizer correctly, for the true MAX EXPERIENCE!
INSTALL EQUALIZER
HOW TO
Make sure your vehicle is up to task. You need a 12VDC negative ground electric system
and the power source and the alternator should be fully functional and healthy.
Disconnect and secure the negative terminal from your
power source to eliminate the risk of damaging your-
self or the products. Place the negative terminal in a
secure position so that it won’t accidentaly contact
the positive or the negative power source post.
Have all the necessary tools ready and close at hand. Make sure that the needed wiring
accessories are prepared. Your wiring kit should be of the recommended size stated in
this manual (see the SPECIFICATION chapter).
Find the perfect location to place your equalizer! The EQ2 equalizer can be mounted next to
your head unit or under the dashboard using the included mounting brackets. Always use
great care when attaching a new product to your vehicle - Check clearances in front, behind
and on both sides of the planned installation spot before drilling any holes or installing any
screws. Use a Phillips-head screwdriver to mount the unit. The front panel controls should
be easily accessible from the driver’s seat.

10
HOW TO
Find the best way to run the cables through your vehicle! This might take some time, and may
vary between different models. Preferably the cables shouldn’t be visible when you’re
finished and they shouldn’t be placed in a way that they obstruct any of the vehicle’s
functions or hinder you from operating the vehicle safely. It’s also important you don’t run
the power cable together with the signal cable, since this can cause interference. Make sure
to use high quality signal cables to avoid noise problems.
Always make sure that your full concentration is on the road while you drive. Do not
make advanced adjustments on your equalizer’s settings while driving.
/
Trac k
BAND
MIC RST
IR
AUX
MAXM140-BTX
REMOTE IN
FUSE
GND
MAIN IN
AUX IN
REMOTE OUT
REAR OUT
FRONT OUT SUB OUT

11
HOW TO
EQUALIZER SETTINGS
SETTING THE SYSTEM VOLUME
AUTO TURN ON - ATO
Auto turn on function starts the unit, when a Hi-level (Speaker signal) is connected to either
MAIN or AUX-inputs. Even if you are paired with your mobile device the unit will start if
connected as above. To use the Auto turn on function, you need to use this type of cable:
ADJUST THE BAND SETTINGS
1. Set all frequencies to center position. The mark on the knob should be at 12 o'clock.
2. Play your favorite music, adjust the controls so it suits your taste.
Note: Stay away from extreme settings, this can lead to distortion in th music.
3. Adjust the equalizer gain control to suit your style.
4. If your system includes a subwoofer, slowly increase the sub level until you get the correct
bass level.
5. If your system includes rear speakers, adjust the fader control to add or subtract the level
of the rear system
1. Turn the master volume and subwoofer level controls to minimum on GAS EQ2.
2. Turn the source unit on (OEM Stereo) and increase the volume to approx. 70% of full volume.
3. Turn up the master level on the GAS EQ until you hear distortion. Normally 50% is a good
value (Straight up).
4. Reduce the volume to just below the distortion level.
This is the maximum usable musical signal for the source unit (OEM Stereo). Turning the volume
beyond this point only increases noise and distortion without increasing the music.
Note! Once you set the source unit volume, do not change it. Always use the volume on the
equalizer as the master volume control. The GAS MAX EQ has most likely better electronic
components and a higher S/N than the OEM Source.

12
HOW TO
CONNECTING AUX-IN
1. Plug in the external player in the AUX RCA input. (Do not Play music yet).
2. Unpress the AUX button on the front panel, make sure the button is out.
Ready to receive input from MAIN input. (NOT AUX input).
3. Turn the master volume to normal listening level.
4. Play music from the external device.
5. Press the AUX button on the front.
6. Use a small flat head screwdriver to adjust the level adjustment on the top of the unit.
Make sure the AUX source matches the volume of the main source.
SETTING THE LOW PASS FILTER (LPF)
1. Set the adjustable knob to frequency (30-200Hz) of choice for your subwoofer system.
2. Adjust the subwoofer level until you get the desired level of bass.
CONNECTING BLUETOOTH
1. Start your sound system and the equalizer.
2. Browse Bluetooth devices on your mobile device and choose the MAX EQ2-9BT equalizer.
3. Set the volume on the mobile device to 75-90% of max (Depending on model). If you can hear
distortion, the level on the mobile device should be adjusted just below the distortion level.
4. Use Master Volume to adjust the listening level.

13
TROUBLESHOOTING
NO POWER, NO LIGHTS
• Use a multimeter to check the voltage on the 12V + terminal and REM in.
• Check the fuse on the power cable.
• Check the ground wiring. Use a multimeter to confirm 12V
DISTORTED SOUND
• The source unit may be set too high. Reduce the volume on the source.
• EQ gain controls may be set too high. Re-set the EQ controls to the center.
• Check the settings onthe amplifier, make sure that the gain/level is set accoring to the
instruction. Test so lower the gain/level, to hear if the distortion ends.
• Lower the EQ’s on the GAS MAX EQ.
• Check the speakers, it might be something wrong with the speakers. Too much EQ can
damage a speaker.
UNWANTED NOISE
• Check the negative grounding point, make sure that the surface is clean and have a pure
metal connection. (Ground loop-issues)
• Check that no signal cables are close to the power cables.
• Lower/turn off the Bass EQ function on the amplifier.
• Check your speakers.
NO SOUND
• Wrong input is selected. Press AUX on the front panel to change between Main/Aux input.
• Bluetooth is paired with a device. Unpair or disable Bluetooth on the mobile device.
• Check that all signal cables are correct connected.
• Check speaker wires.
• Check AUX GAIN on the top of MAX EQ
When all above is tested/looked over, and all is as it should be. Consult your local GAS AUDIO
POWER dealer.

14
This product is covered by warranty, depending on the conditions in the country where it’s
sold. If the equalizer is returned for service, please include the original dated receipt (or a
copy) with the product. Make sure that the equalizer is packaged properly and secured,
preferably in its original packaging.
This product has been granted with the CE certification mark to show that the product
follows the health, safety, and environmental protection standards for products sold
within the European Economic Area (EEA).
The crossed-out wheelie bin symbol means that the product, literature and packaging
included must be taken to separate collection at the end of their working life. Don’t
dispose of these products as unsorted municipal waste: take them for recycling. For
info on your nearest recycling point, check with your local waste authority.
GAS Audio Power products comply with the relevant pro-
visions of the RoHS Directive for the European Union. In
common with all Electrical and Electronic Equipment (EEE)
the product shouldn’t be disposed of as household waste.
Alternative arrangements may apply in other jurisdictions.
GAS Audio Power is a global partner of the European Mobile
Media Association, an organization that focus on promoting
the custom made mobile media installations to consumers.
WARRANTY & DISPOSAL

15
You’ve entered the world of GAS. We aim to please, and we’ve made sure to have products
made for you. No matter what stage of the LOUD-addiction you might find yourself in, there
is a GAS product to fill your need.
Just starting out? The MAD series is made to play LOUD
and to be the express lane to a no bullsh!t sound system
that will make sure everyone can hear you coming!
THE GAS WORLD
MAD
The MAX series holds products made to deserve the
center stage. Powerful, heavy duty and designed to be
noticed. We made NO COMPROMISES because we know
that you wouldn’t accept it.
MAX
The CMP series has been developed for the crucial
seconds when the dB-counter starts to tick. All CMP
products have hand-picked, high quality, COMPETITION
GRADE components and they are specially designed
to withstand an awesome amount of power.
CMP

THANKS FOR JOINING
GAS AUDIO POWER!
Winn Scandinavia AB reserves for possible typos, factual or numeric errors that may have been printed on
any products, package designs, user manuals and/or other included accessories.
GAS AUDIO POWER and SHAKY are registered trademarks by Winn Scandinavia AB and is
protected by relevant laws and jurisdictions such as Copyright and Trademark laws.
Winn Scandinavia AB ׀ Elementvägen 15, 70227 Örebro, Sweden ׀www.winnscandinavia.com


This manual suits for next models
1
Table of contents
