User Manual
Page 5
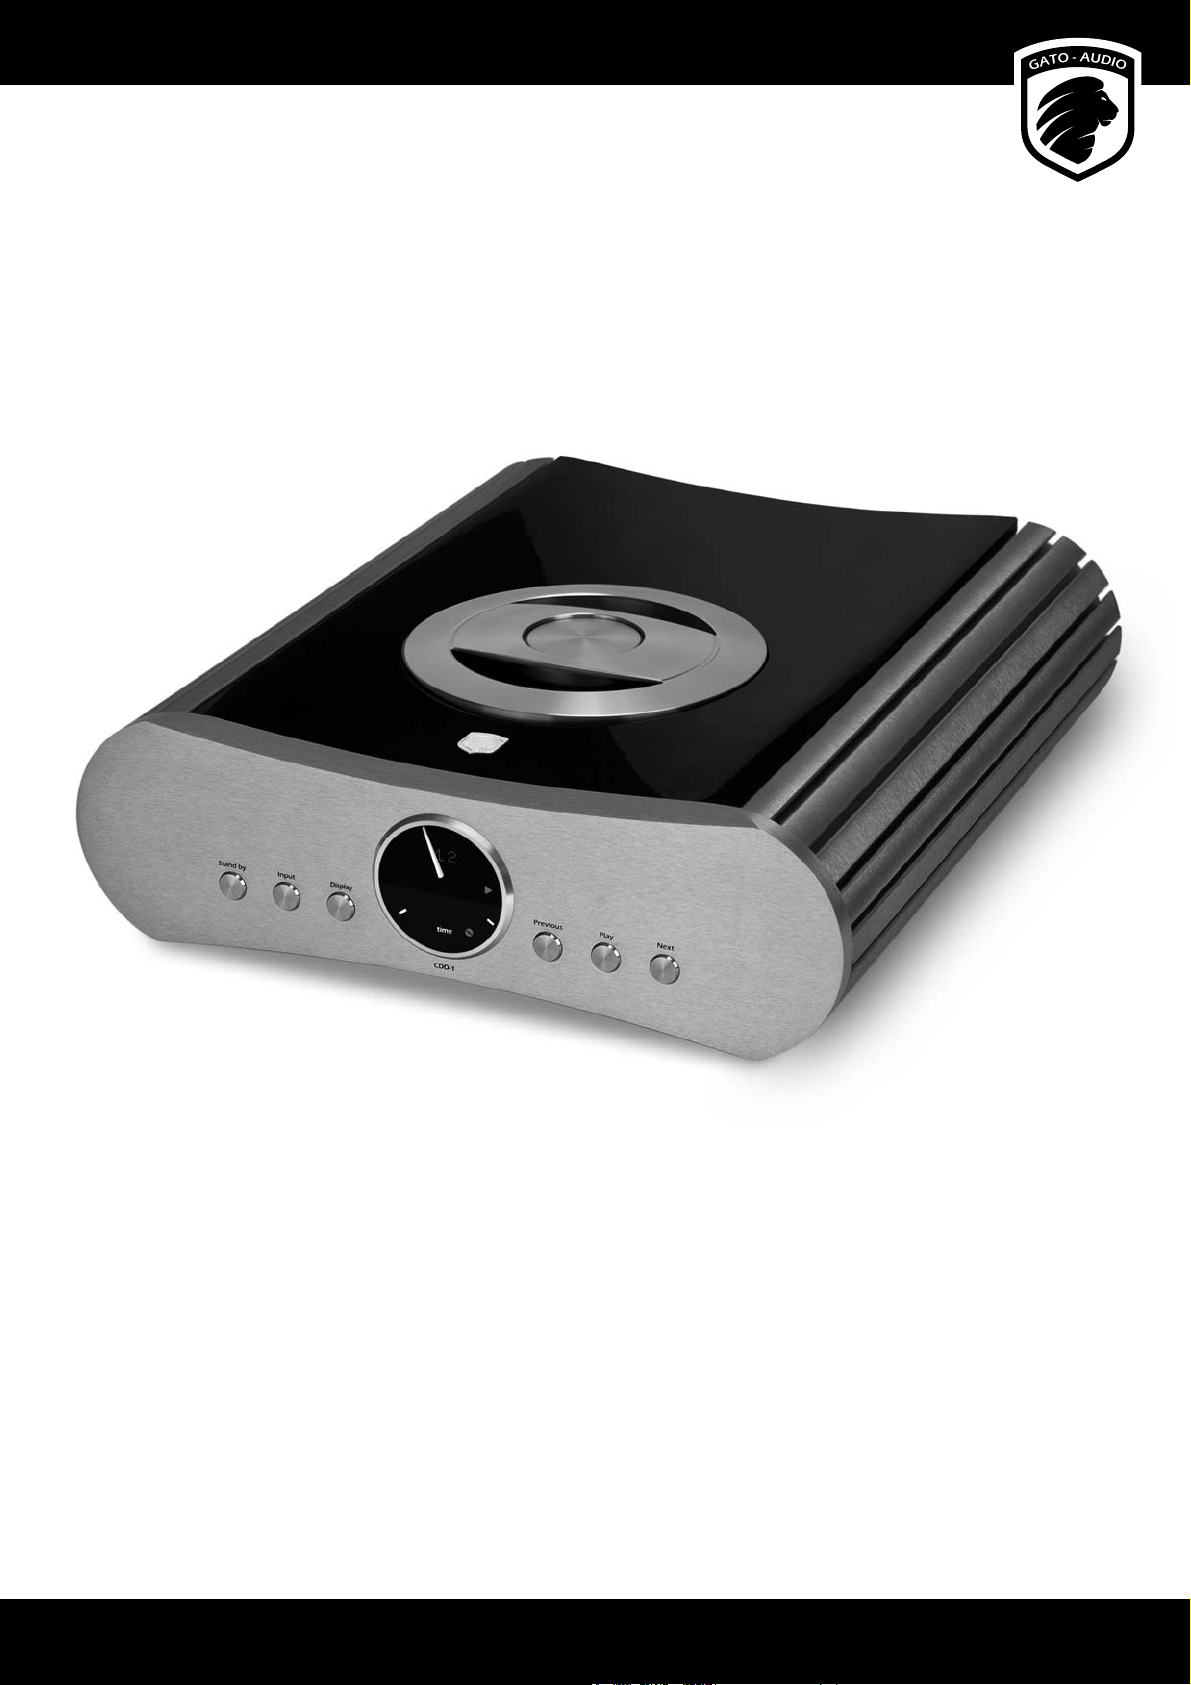
About the CDD-1
General Design
Developing CD players and digital-to-analogue converters (DAC’s) is almost an art form, a delicate mix of digital and analogue signal
circuits that must combine the best of both worlds. Advanced software and microprocessor technology keep track of every movement
and build a bridge between man and machine. The CDD-1 is designed to match the Gato Audio AMP-150 integrated amplier and the
PRD-3S preamp + PWR-222 mono power ampliers to perfection; together, their performance and styling set them apart from all other
contenders in high end audio today.
CD Transport
A stable platform for retrieving data from the CD is essential for playback of the highest delity. The renowned Philips CDpro2LF drive is
mounted in approximately 1 kg of solid machined aluminium suspended in a tripod of Sorbothane® viscoelastic material to ensure not
only ultra-low mechanical resonance, but also high damping of external vibrations.
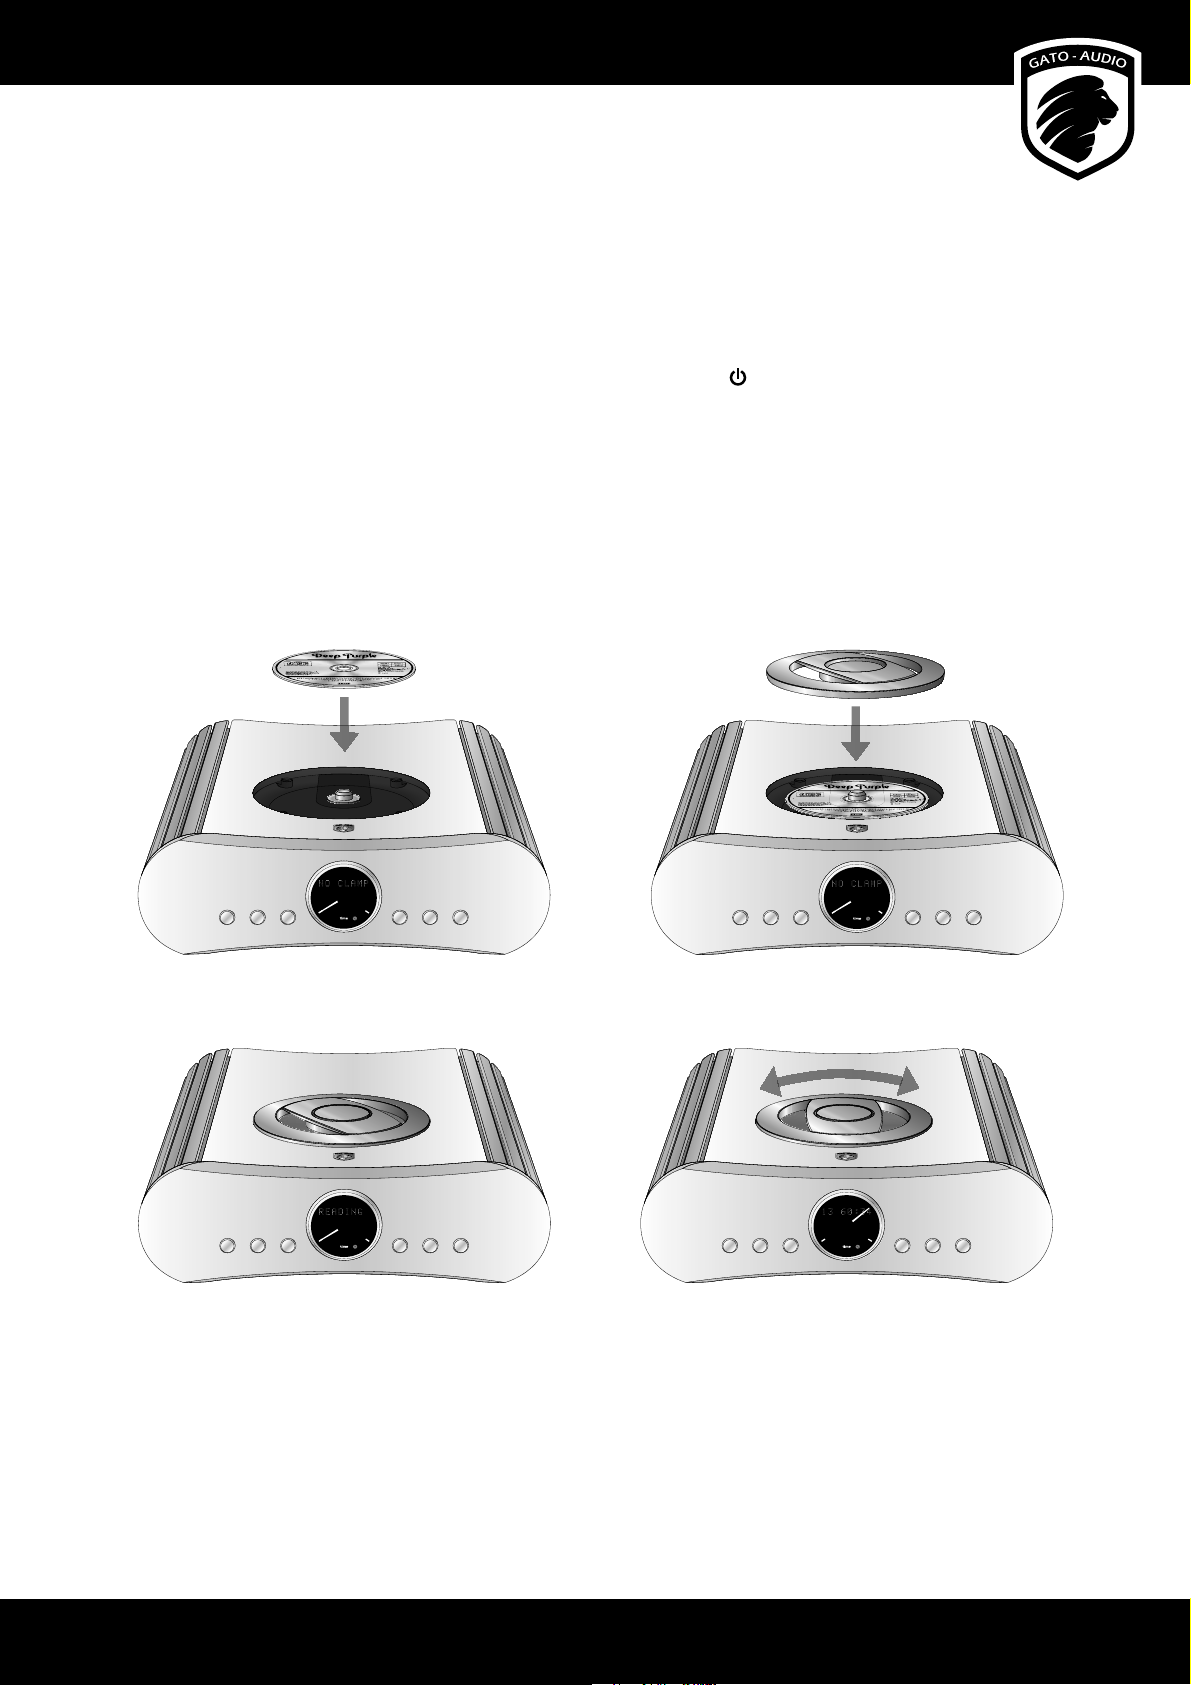
The special clamp/lid solution secures and stabilises the CD and acts as a protective cover for the delicate mechanics in one simple
movement.
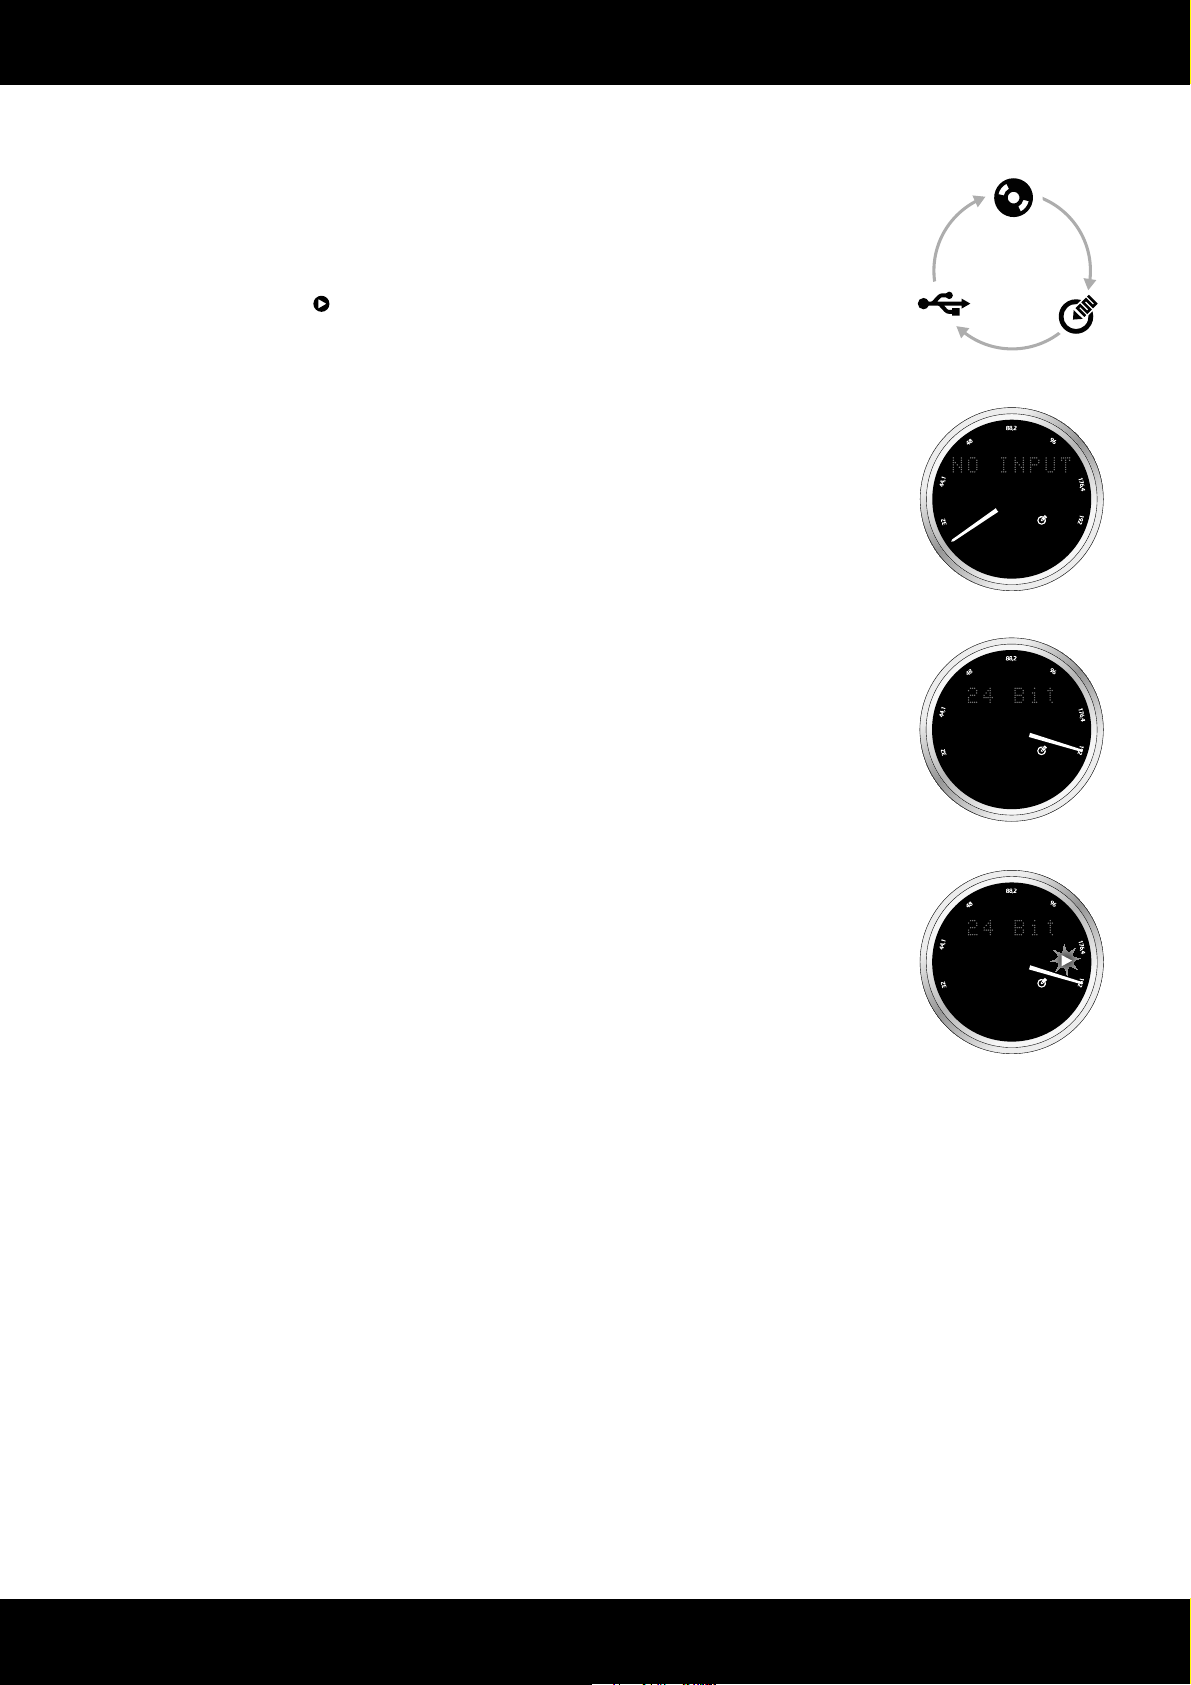
Digital Inputs
The selected input source (CD, USB or S/PDIF) is fed into our high quality selector circuit and passed on to the state of the art sample rate
converter which upsamples all inputs to 24-bit/192 kHz. This enables the use of gentler and less harsh digital and analogue lters later in
the process.
DAC
All retrieved inputs, CD, USB or S/PDIF is fed into our high quality selector circuit and passed on to a state of the art sample rate converter,
converting all inputs to 24 Bit/192 kHz. This enables the use of softer and less harsh digital and analogue lters later in the process.
The dual mono, dual dierential coupled D to A converter circuit with outstanding technical quality and theoretically 132 dB dynamic
range – converts and process the digital data. Specially selected balanced I/V converters and soft HF lters oers precise and dynamic
sound that is true to life.
Analogue Stage
Specially selected components and circuits are crucial to achieving the nest analogue performance. The CDD-1 features super low noise,
wide-bandwidth amplication and special signal relays originally developed to handle extremely sensitive telecommunications signals.
Close proximity to the output connectors ensures a very short signal path, low noise and minimal distortion. Many hundreds of hours have
been invested in ne-tuning this critical section of the CDD-1.
Components
Every single component in the CDD-1 must live up to stringent production tolerances and over-specied values, but equally importantly,
selection of any component is contingent upon approval of its sonic capabilities through an obstacle course of intensive listening tests.
Simply put, if it does not sound right in its circuitry environment, we cannot use it, regardless of how good its measured values are. This
is the only way to maintain a natural, crisp and clear soundstage. Most CDD-1 components operate at a mere 30% of their maximum
workload capacity during normal use to ensure longevity and minimum stress for the player.
PCB design
Internally, the CDD-1 is divided into three parts, each with its own separate, dedicated printed circuit board:
1.Control board with advanced Motorola Coldre microprocessor and various interface functions, such as display, knobs, etc.
2.Power supply with a total of three transformers and nine regulated sources for stability and minimal interference between circuits.
3.Digital and analogue audio circuits, connectors and USB device.
Fine-Tuning by Ear
The nal 5% of ne-tuning and voicing is by far the most complicated and time-consuming aspect of our development work. Each time a
single critical component is replaced, it often requires modication of voltage and current supplies and consequently, listening evaluation
starts all over again.
In addition, blind-test listening is used, not just in our own reference installation, but also in various other systems, in order to evaluate the
CDD-1 just as thoroughly as every other product in our range.