GE PHONE 28300 User manual

Model 28300
2 in 1 - Internet Phone
User’s Guide
can be used with the internet
or as a landline telephone
Quick
Set-Up
Guide
on page 6

3
Interference Information
This device complies with Part 15 of the FCC Rules. Operation is subject to the following two conditions: (1)
This device may not cause harmful interference; and (2) This device must accept any interference received,
including interference that may cause undesired operation.
This equipment has been tested and found to comply with the limits for a Class B digital device, pursuant
to Part 15 of the FCC Rules. These limits are designed to provide reasonable protection against harmful
interference in a residential installation.
This equipment generates, uses, and can radiate radio frequency energy and, if not installed and used in
accordance with the instructions, may cause harmful interference to radio communications. However,
there is no guarantee that interference will not occur in a particular installation.
If this equipment does cause harmful interference to radio or television reception, which can be
determined by turning the equipment off and on, the user is encouraged to try to correct the interference
by one or more of the following measures:
• Reorient or relocate the receiving antenna (that is, the antenna for radio or television that is
“receiving” the interference).
• Reorient or relocate and increase the separation between the telecommunications equipment and
receiving antenna.
• Connect the telecommunications equipment into an outlet on a circuit different from that to which the
receiving antenna is connected.
If these measures do not eliminate the interference, please consult your dealer or an experienced
radio/television technician for additional suggestions.
Hearing Aid Compatibility (HAC)
This telephone system meets FCC standards for Hearing Aid Compatibility.
FCC RF Radiation Exposure Statement
This equipment complies with FCC RF radiation exposure limits set forth for an uncontrolled environment.
This equipment should be installed and operated with a minimum distance of 20 centimeters between the
radiator and your body. This transmitter must not be co-located or operated in conjunction with any other
antenna or transmitter.”
For body worn operation, this phone has been tested and meets the FCC RF exposure guidelines when
used with the belt clip supplied with this product. Use of other accessories may not ensure compliance
with FCC RF exposure guidelines.
Information for DECT Product
This 28300 telephone is compliant with the DECT 6.0 standard which operates in the
1.92GHz to 1.93GHz frequency range.

4
Table of Contents
EquipmEnt ApprovAl informAtion .................2
intErfErEncE informAtion.............................3
HEAring Aid compAtibility (HAc) .................3
licEnsing .....................................................3
fcc rf rAdiAtion ExposurE stAtEmEnt ........3
informAtion for dEct product ..................3
tAblE of contEnts .......................................4
introduction ...............................................7
bEforE you bEgin ........................................7
Parts CheCklist ...........................................7
telePhone JaCk requirements.........................8
instAllAtion .................................................8
Digital seCurity system ...................................8
imPortant installation guiDelines .................8
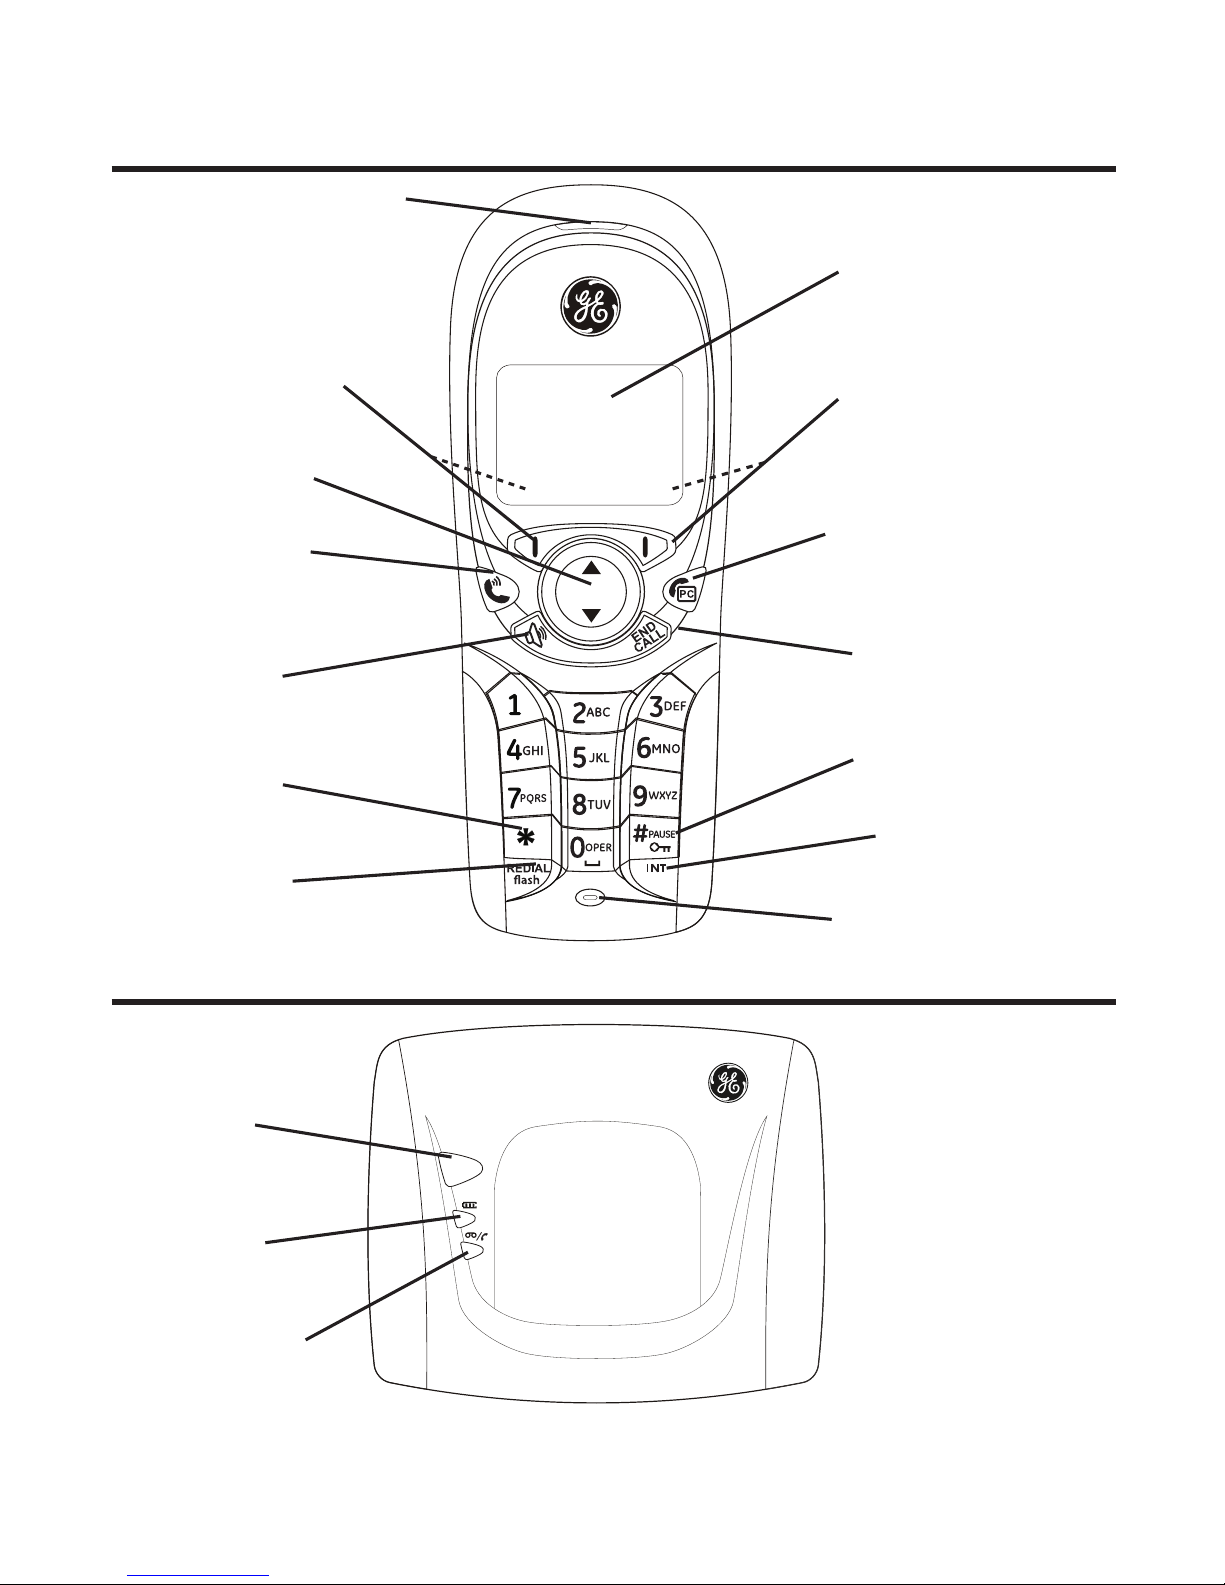
HAndsEt lAyout ...........................................9
bAsE lAyout .................................................9
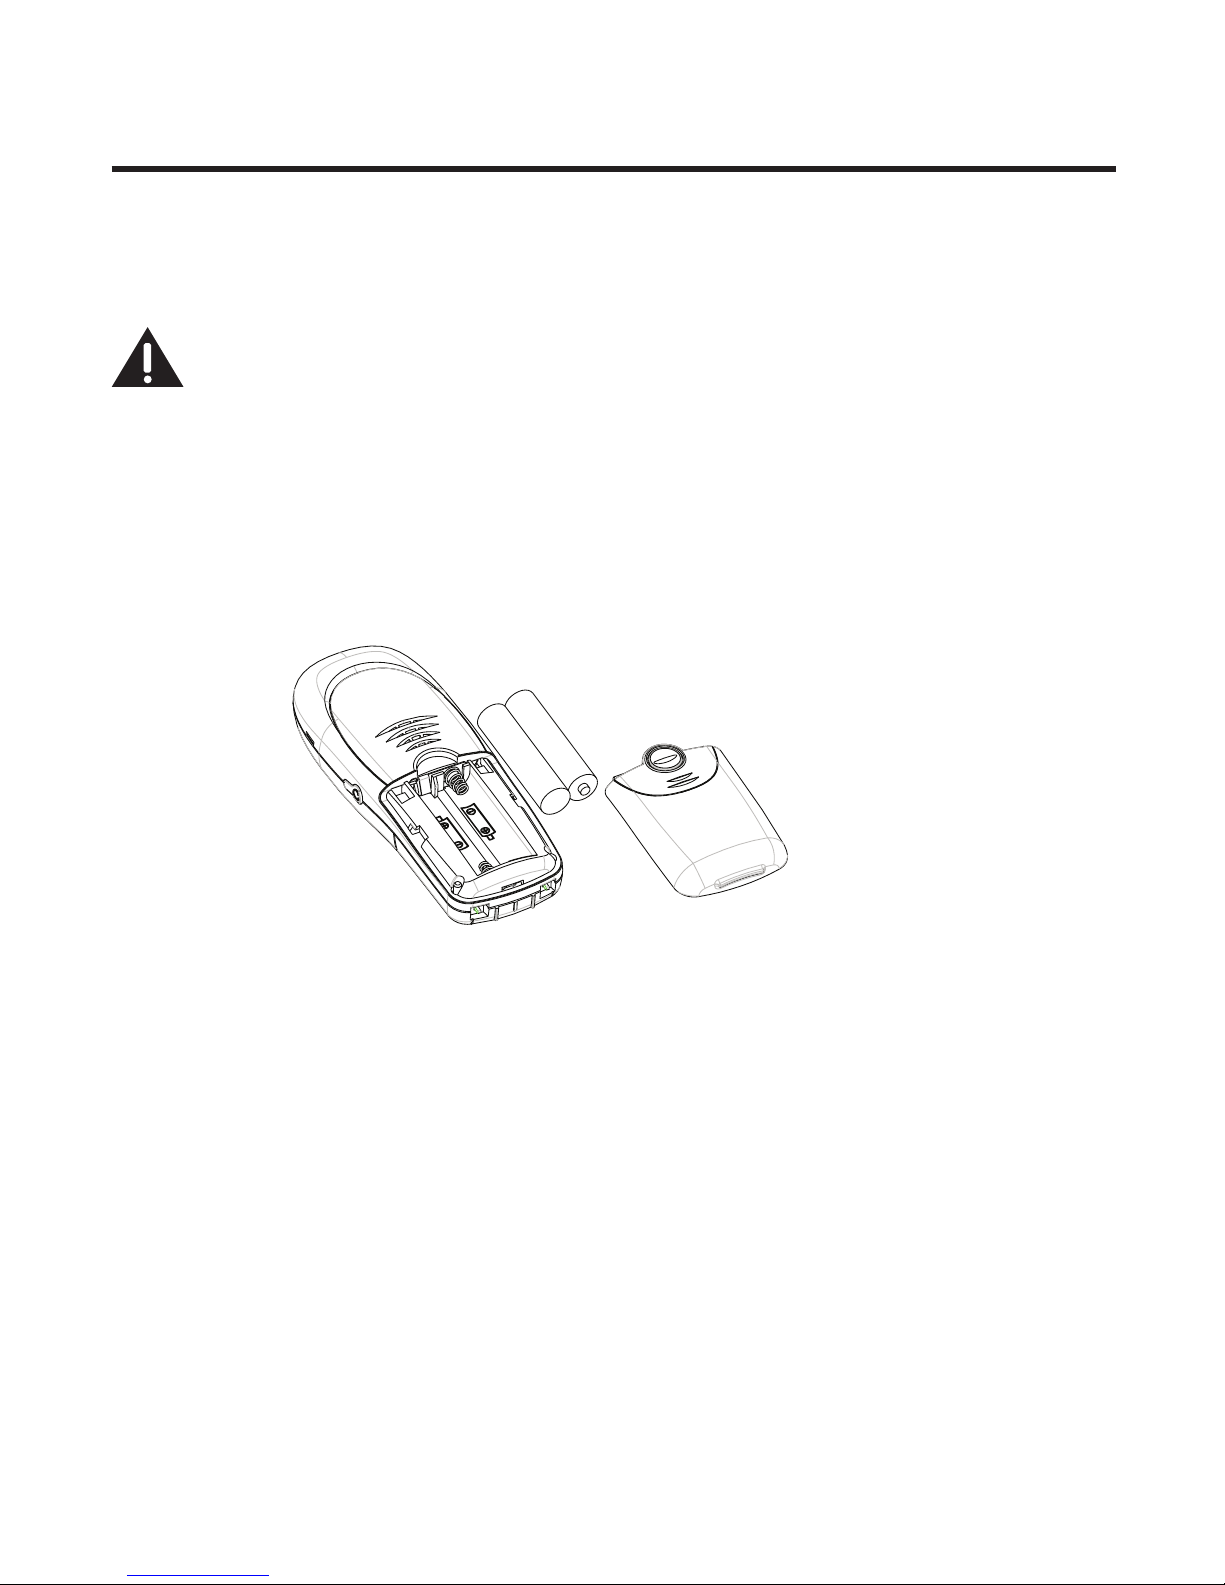
instAlling tHE pHonE..................................10
installing the hanDset Battery ...................10
Base station ....................................................10
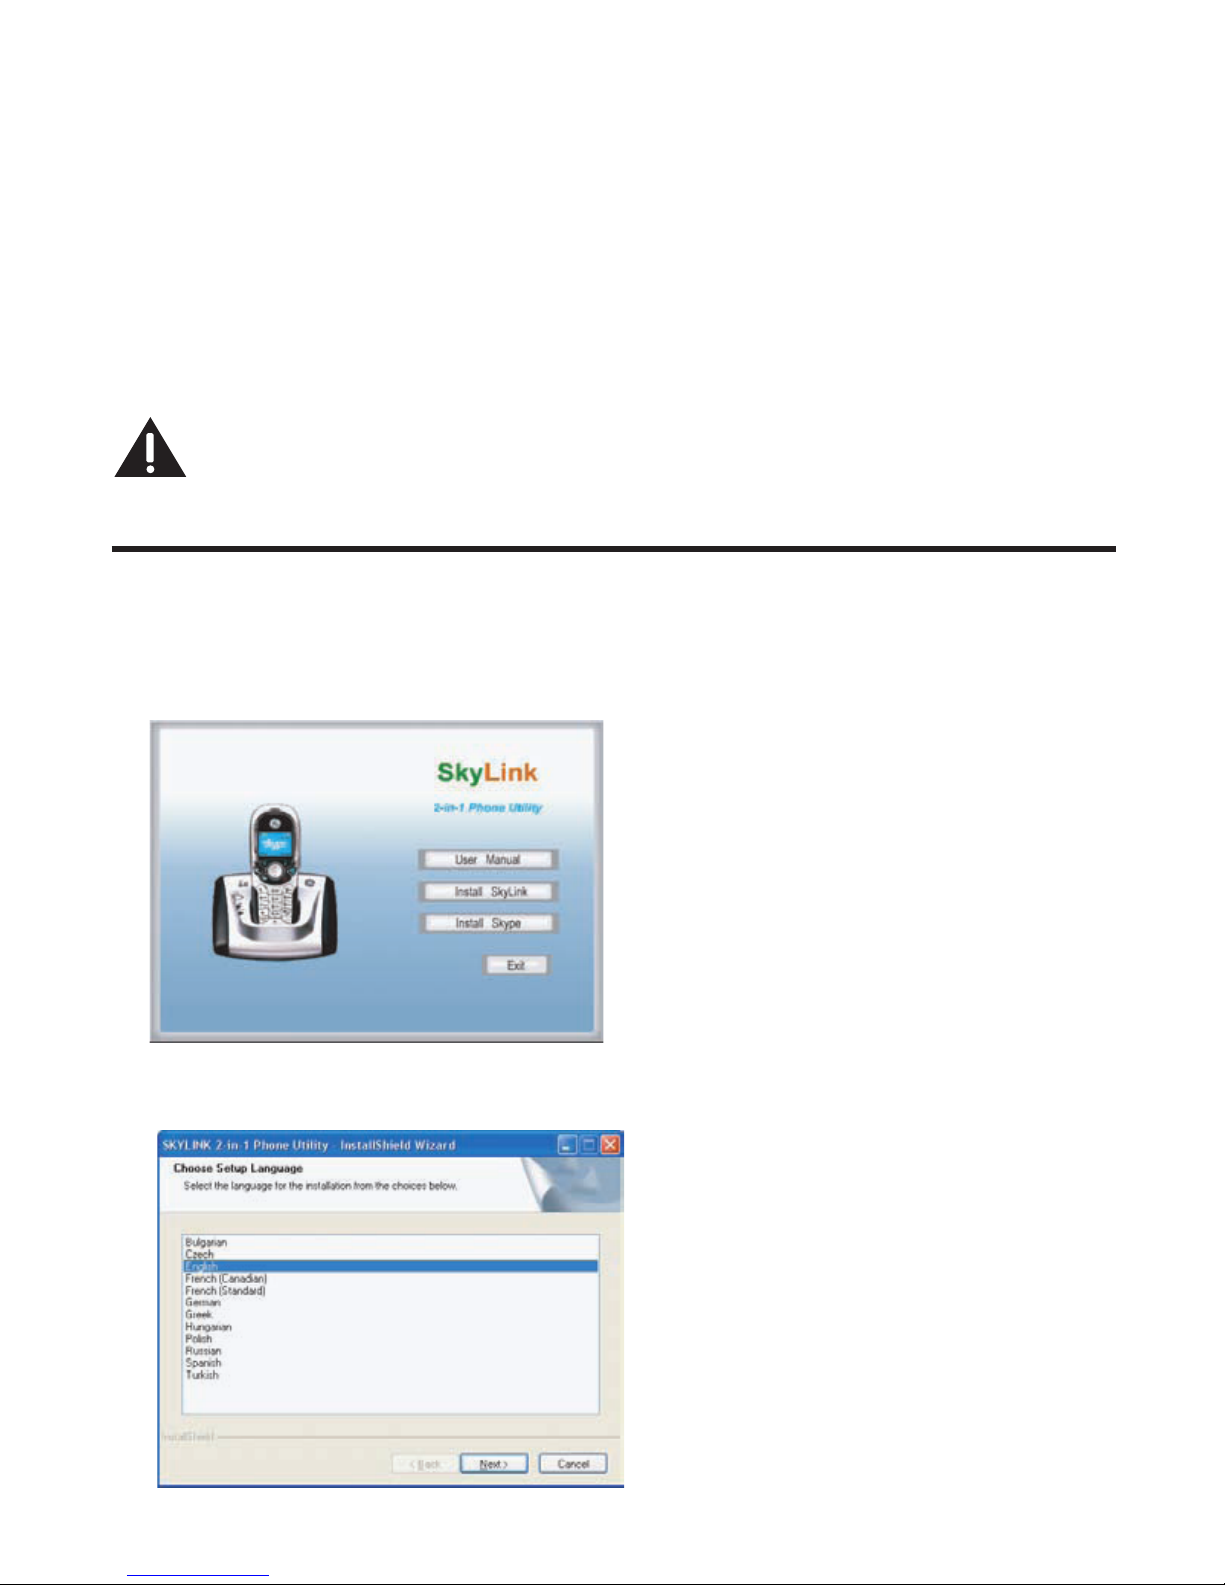
softwArE instAllAtion ...............................11
sKylinK™ opErAtion guidE.....................13
to uninstall the software .....................14
progrAmming tHE tElEpHonE ......................14
timer .................................................................15
time format ................................................15
CloCk (set Date/time) ..............................15
alarm ..........................................................15
hanDset settings ...........................................16
language ....................................................16
ringer tyPe ................................................17
ringer Volume ...........................................17
message waiting ......................................18
wallPaPer ..................................................19
Contrast .....................................................19
key tones ...................................................19
auto answer .............................................20
hanDset name ...........................................20
menu Color ...............................................21
BaCklight ....................................................21
skyPe ContaCts ..........................................21
registration ...............................................22
Deregistration ...........................................22
seleCt Base ................................................23
Default setting .........................................23
Base settings ..................................................23
ringer tyPe ................................................24
ringer on/off ..........................................24
skyPe status ...............................................24
Default setting .........................................24
funCtion ..........................................................25
games ..........................................................25
tElEpHonE opErAtion .................................25
Power on/off oPeration ............................25
making a Call.................................................25
traDitional lanDline Calls .....................25
skyPe Calls ................................................26
skyPeout Call .....................................26
skyPe Call .............................................27
During an ongoing lanDline Call ..27
answering a Call ..........................................28
Call waiting ...................................................28
inComing lanDline Call During a
lanDline Call .......................................28
inComing lanDline Call During skyPe
Call or inComing skyPe Call During
lanDline Call .......................................28
Dialing from ContaCts..................................30
aDJusting earPieCe anD ringer Volume .....30
muting the miCroPhone anD ringer ..........30
Paging the hanDset .......................................30
hanDset sPeaker Phone ...............................31
key loCk ..........................................................31
Call transfer/forwarDing(aPPliCaBle only
with aDDitional hanDsets) .................... 31
intErcom opErAtion ...................................32
hanDset to hanDset interCom Call ...........32
reCeiVing an interCom Call..........................32

5
aDVanCeD interCom features .......................32
reCeiVing an inComing Call During an
interCom Call ............................................32
using interCom with external telePhone
Calls ...........................................................32
two-way Calling .....................................33
confErEncE opErAtion
..............................33
loCal three-way ConferenCe Call .......33
skyPe ConferenCe Call ............................34
ConferenCe Call with a lanDline anD an
skyPe ContaCt............................................34
cAll log....................................................34
Browsing Call logs ....................................35
formatting anD saVing inDiViDual Call
reCorDs .................................................35
Deleting inDiViDual Call reCorDs ....36
Deleting Call logs .......................................36
contActs (lAndlinE only) ..........................36
searChing ........................................................37
aDDing ..............................................................37
grouP ...............................................................38
sPeeD Dial .......................................................38
CheCk memory ................................................39
emergenCy Call ..............................................39
cHAnging tHE bAttEry ................................39
bAttEry sAfEty prEcAutions .......................40
sHortcut KEy guidE ...................................40
lcd icon guidE.........................................41
troublEsHooting guidE..............................42
forgot Base Pin .....................................42
telePhone solutions ................................42
Caller iD solutions .................................44
skyPe solutions.........................................44
Battery solutions .....................................45
gEnErAl product cArE ..............................45
AccEssory informAtion ..............................46
cAusEs of poor rEcEption..........................46
sErvicE.......................................................47
limitEd wArrAnty......................................48
indEx .................................................. 50, 51
SEE MARKING ON BOTTOM / BACK OF PRODUCT
RISKOFELECTRIC SHOCK
DONOTOPEN
WARNING: TO
PREVENT FIRE OR
ELECTRICAL SHOCK
HAZARD, DO NOT
EXPOSETHIS
PRODUCT TO RAIN
OR MOISTURE.
THE LIGHTNING
FLASH AND ARROW
HEAD WITHIN THE
TRIANGLE IS A
WARNING SIGN
ALERTING YOU OF
“DANGEROUS
VOLTAGE” INSIDE
THE PRODUCT.
CAUTION: TO REDUCE THE
RISK OF ELECTRIC SHOCK, DO
NOT REMOVE COVER (OR
BACK). NO USER
SERVICEABLE PARTS INSIDE.
REFER SERVICING TO
QUALIFIED SERVICE
PERSONNEL.
THE EXCLAMATION
POINT WITHIN THE
TRIANGLE IS A
WARNING SIGN
ALERTING YOU OF
IMPORTANT
INSTRUCTIONS
ACCOMPANYING
THE PRODUCT.
CAUTION:
Table of Contents

6
Connect to
traditional phone
system
Connect to
Skype™
Get Connected Easily
System Requirements
Recommended:
PC running Windows 2000, XP or Vista
1 GHz processor
256 MB RAM
30 MB free space on hard drive
Cable, DSL or equivalent broadband
connection to Internet Standard
PSTN line (RJ-11)
Minimum:
PC running Windows 2000, XP or Vista
400 MHz processor
128 MB RAM
10M free disk space on hard drive
Internet Connection (either dial-up:
minimum 33.6 Kbps modem, or any
broadband: cable, DSL, etc.)
? ?
steps
3
setup your
GE 28300 USB DECT
step 1
download and install Skype™
software from www.skype.com
1. go to website: www.skype.com
2. download the free software
3. follow the install wizard
1. put the CD into the CD-rom
drive of your computer
2. double click the setup icon
3. follow the install wizard
1. plug in power cord
2. connect to your landline
socket with phone cable
3. connect to USB port when
prompted by CD-rom
step 2
install the software in
the CD to your computer
step 3
connect the GE 28300 to your
computer and landline respectively
now you canmake and receive
both traditional phone calls
& VOIP calls
traditional
phone calls
VOIP
calls

7
Introduction
CAUTION: When using telephone equipment, there are basic
safety instructions that should always be followed. Refer to the
IMPORTANT SAFETY INSTRUCTIONS provided with this product
and save them for future reference.
IMPORTANT: Because cordless phones operate on electricity, you
should have at least one phone in your home that isn’t cordless, in
case the power in your home goes out.
Before You Begin
Parts Checklist (for model 28300xx1)
Make sure your package includes the items shown here.
Base
Handset
Telephone
line cord
AC power
adaptor
2 AAA
Nickel-metal
Hydride
batteries
Battery
compartment
cover
SKYLINK™
Install
CD ROM
For Model 28300xx2 there will be ONE additional handset, belt clip, battery
compartment cover, AAA Nickel-metal Hydride batteries and a charge
cradle than shown above.
Belt
clip
PAGE
SKYLINK™ Dual Phone Utility

8
Telephone Jack Requirements
To use this phone with a landline, you need an RJ11C type
modular telephone jack, which might look like the one pictured
here, installed in your home. If you don’t have a modular jack, call
your local phone company to nd out how to get one installed.
Installation
Digital Security System
Your cordless phone uses a digital security system to protect against false ringing,
unauthorized access, and charges to your phone line.
INSTALLATION NOTE: This product operates at a frequency of
1.9GHz. to provide communication with minimal interference
from other electronic devices. To further minimize the possibility
of interference, the base of the cordless telephone should not
be placed near or on top of a TV, microwave oven, or VCR. If
interference continues, move the cordless telephone further away
from these appliances.
Important Installation Guidelines
• Avoid sources of noise and heat, such as motors, uorescent lighting, microwave
ovens, heating appliances and direct sunlight.
• Avoid areas of excessive dust, moisture and low temperature.
• Avoid other cordless telephones.
• Never install telephone wiring during a lightning storm.
• Never install telephone jacks in wet locations unless the jack is specically
designed for wet locations.
• Never touch non-insulated telephone wires or terminals, unless the telephone line
has been disconnected at the network interface.
• Use caution when installing or modifying telephone lines.
Modular
telephone
line jack
Wall plate

9
PAGE
Base Layout
Handset Layout
Soft Key Left (SKL/ | )
(button)
display
speaker
(button)
#/PAUSE/lock
(button)
INT
(intercom button)
END CALL
(button)
REDIAL/flash
(button)
*
(button)
5/6Navigational
(button)
Landline (button)
[traditional call]
earpiece
Skype (button)
[computer call]
Soft Key Right (SKR/ | )
(button)
microphone
IN USE/CID/VM
(indicator)
CHARGE
(indicator)
PAGE
(indicator)

10
Installing the Phone
Installing the Handset Battery
NOTE: You must connect the handset battery before using the
cordless handset(s).
CAUTION: To reduce the risk of fire or personal injury,
use only the Thomson Inc. approved model GP80AAAHC - NiMH
1.2V 800mAh rechargeable Nickel-metal Hydride battery, which
is compatible with this unit.
1. Locate batteries and battery door which are packaged together inside a plastic
bag and are separate from the handset.
2. Locate the battery compartment on the back of the handset.
3. Insert the batteries.
4. Close the battery compartment by pushing the door up until it snaps into place.
Base Station
1. Choose an area near an electrical outlet and a telephone wall jack (RJ11C), and
place your cordless telephone on a level surface near your personal computer.
System Requirements:
Recommended: Minimum:
1 GHz processor 400 MHz processor
256 MB RAM 128 MB RAM
30 MB free space on your hard drive 10M free disk space on your hard drive
Cable, DSL or equivalent broadband Internet Connection (either dial-up:
connection to Internet minimum 33.6 Kbps modem,
Standard landline (RJ-11) or any broadband: cable, DSL, etc.)
PC running Windows2000,XP or Vista PC running Windows2000,XP or Vista

11
2. Plug one end of the telephone line cord into the TEL jack on the back of the base
and the other end into a modular jack.
3. Plug the AC power converter into the electrical outlet and the DC connector into
the jack on the back of the base.
4. Place the handset in the base cradle. The CHARGE indicator turns on, verifying the
battery is charging.
Allow handset to charge for 16 hours prior to first use. If you do not properly
charge the handset, battery performance is compromised.
CA
with this unit. Using other power adaptors may damage the unit.
Software Installation(For Windows2000/XP)
1. Insert the SKYLINK
TM
2-in-1 Phone Utility CD in your personal computer
-OR-
If the following screen does not appear, please double click your CD-ROM driver
and click on icon of the SetupWizard.exe.
2. Click [Install Skylink] button to install Skylink software. Select the install
language, and click [Next] to continue.
UTION: Use only the THOMSON power adaptor that came

12
6. The folder where setup installs the files can be changed. The default directory is
“C:\Program Files\SKYLINKTM 2-in-1 Phone Utility” Press [Change…] to change the
7. The Install screen appears. Click [Install] to continue.
8
9. A Skype prompt window will pop-up, select ”Allow this program to use Skype” to
assure that the SkylinkTM 2-in-1 Phone Utility works properly with Skype.
.Install is complete. Click [Finish] to exit the program
3. Wait while the program prepares setup. Click [Cancel] ONLY if you wish to stop
the installation
4. The Welcome screen appears. Click [Next] to continue or [Cancel] to terminate the
procedure.
5. Select “I accept the terms of the license agreement” and click [Next] to continue.
Important: If you do not select “Allow this program to use Skype” the Skype connection will not
work with this phone.
directory,Click [Next] to continue.
NOTE: if the Skype program is not installed on the computer, it will prompt you
to install. Click [Yes], to automatically go to the Skype Website where you can
download the Skype software. Click [No] to cancel
Software Installation (For Windows Vista)
1. Insert the SKYLINKTM 2-in-1 Phone Utility CD in your personal computer. The AutoPlay
screen pops-up. Select “Run SetupWizard.exe” to continue.
-OR-
If the following screen does not appear, please double click your CD-ROM driver and
click on icon of the SetupWizard.exe.

2. If the current user is administrator, please click [Accept] to let the program run.
If the current use is not an administrator, the following display will be shown,
please type an administrator password, and then click OK.
13

3. The SetupWizard.exe runs and the following screen appears. Click [Install Skylink]
button to install Skylink software.
14
4. Select the install language, and click [Next] to continue.

5. Wait while the program prepares setup. Click [Cancel] ONLY if you wish to stop
the installation
6. The Welcome screen appears. Click [Next] to continue or [Cancel] to terminate the
procedure.
7. Select "I accept the terms of the license agreement" and click [Next] to continue.
8. The folder where setup installs the files can be changed. The default directory is
"C:\Program Files\SKYLINKTM 2-in-1 Phone Utility" Press [Change…] to change the
directory, Click [Next] to continue.
9. The Install screen appears. Click [Install] to continue.
10. Install is complete. Click [Finish] to exit the program.
NOTE: if the Skype program is not installed on the computer, it will prompt you to
install. Click [Yes], to automatically go to the Skype Website where you can down
load the Skype software. Click [No] to cancel
11. A Skype prompt window will pop-up, select "Allow this program to use Skype" to assure
that the SkylinkTM 2-in-1 Phone Utility works properly with Skype. Important: If you do
not select "Allow this program to use Skype", the Skype connection will not work with this
phone.
12. After phone installation, 28300 becomes default sound path for PC.
13. Pop up window appears with instruction to manually change PC sound setting.
15

16
After successful installation, a SKYLINK™ 2-in-1 Phone Utility icon will appear in your
toolbar menu. Right-Click on the icon to view the following options;
Open Monitor Opens the SKYLINK™ 2-in-1 Phone Utility Monitor window,
see SKYLINK™ Operation Guide section for more detail.
SKYLINKTM Operation Guide

17
Start when windows start Automatically starts the SKYLINK™ 2-in-1 Phone Utility
when computer is started or rebooted. This can be turned
ON or OFF as the user prefers.
Exit Closes the SKYLINK™ 2-in-1 Phone Utility.
SKYLINK™ Operation Guide
The "Status" screen indicates SKYLINK™ and Skype are operational.
The "Tools" screen allows you to easily register handsets and deregister handsets
from the drop down menu.
The "About" screen has information regarding SKYLINK™ 2-in-1 Phone Monitor.

18
To Uninstall the Software
If you choose to uninstall the software from the PC.
1. Go to the START/Setting/Control Panel, choose the icon "Add or Remove Programs".
2. Select "SKYLINK™ 2-in-1 Phone Utility" from the list and click [Remove] to uninstall.
3. A message box appears. Click [Yes] to continue, or [No] to cancel.
4. After uninstalling the program, click [Finish] to exit.
Programming the Telephone
LCD Standby Screen
The screen displays various information regarding the status of your phone the
handset name, time, battery charge status and wallpaper when idle. It also displays
information when using Skype.
The handset menu gives you access to all of the built-in features. Press the
SKL button to display the first menu Phone Book, and press or buttons to
navigate to the desired menu option. Press the SKL button to activate a menu
option. For details on programming, refer to the applicable section.
During programming, you may press the SKR button at any time to exit the
menu and keep the previous setting.
The telephone can store up to 100 landline entries in
the contacts list with three numbers per entry.
CALL LOG Review Caller ID data (20 record limit) and Skype call
data (unlimited); allows you to review a number and
dial or redial.
TIME Set time format, clock and alarm settings.
HANDSET SETTINGS Allows you to set preferences for the handset.
BASE SETTINGS Allows you to set preferences for the base.
FUNCTION Games selection.
PHONE BOOK

19
Time
There are two programmable menus available: Clock and Alarm.
1. Make sure your phone is OFF (not in talk mode).
2. Press the SKL button and use the or button to scroll to TIME.
3. Press the SKL button to enter the menu.
Clock (Set Date/Time)
From the TIME menu;
1. Use the or button to scroll to CLOCK.
2. Press the SKL button to enter the menu.
3. Use the number keypad to input the date.
4. Press the SKL button to save your selection.
5. Use the number keypad to input the time.
6. Press the SKL button to save your selection.
Alarm
Select the settings for your alarm notification.
From the TIME menu;
1. Use the or button to scroll to ALARM.
2. Press the SKL button to enter the menu.
3. Use the or button to select On/Off, Ringer Type or Ringer Volume and press
the SKL button.

20
On/Off
There are four options: Off, Once, Everyday, and Weekday.
Off - Press the SKL button to confirm.
Once, Everyday,and Weekday - Press the SKL button to enter the menu. Set
the time using the keypad, then press SKL button to confirm.
NOTE: Once the alarm is set, the alarm icon will appear in the
top icon bar.
Ringer Type
1. Use the or button to scroll to the desired ring tone for your alarm.
2. Press the SKL button to confirm your selection.
Ringer Volume
1. Use the or button to scroll to the desired ring volume for your alarm.
2. Press the SKL button to confirm your selection.
Handset Settings
There are seventeen programmable menus available: Language, Ringer Type, Ringer
Volume, Prefix, Message Waiting, Wallpaper, Contrast, Key Tones, Auto Answer, Handset
Name, Menu Color, Backlight, Skype Contacts, Registration, De-registration, Select
Base and Default.
1. Make sure your phone is OFF (not in talk mode).
2. Press the SKL button and use the or button to scroll to HANDSET
SETTINGS.
3. Press the SKL button to enter the menu.
Language
This menu allows you to change the language of the display prompts and the input
special characters for text.Spanish or Portuguese
From the HANDSET SETTINGS menu;
1. Use the or button to scroll to LANGUAGE.
2. Press the SKL button to enter the menu.
3. Use the or button to scroll to the desired language. The default is ENGLISH.

21
4. Press the SKL button to save your selection.
NOTE: When English is selected, press the SKL button if you
would like to add an additional input language, (or SKR to
use English character set only) then press the or button to
scroll to ter set and press the SKLSpanish or Portuguese charac
button to confirm. Press the SKR repeatedly to return to the
main menu.
5. Press the SKR button twice to return to main menu.
Ringer Type
This menu allows you to change the ringer tone (from 10 ring melodies) for each
category/group.
From the HANDSET SETTINGS menu;
1. Use the or button to scroll to RINGER TYPE.
2. Press the SKL button to enter the menu.
3. Use the or button to scroll to a category.
4. Press the SKL button to enter.
5. Use the or button to scroll to the desired ring tone.
6. Press the SKL button to confirm your selection.
Ringer Volume
This menu allows you to change the ringer volume (5 levels) for each category/group.
From the HANDSET SETTINGS menu;
1. Use the or button to scroll to RINGER VOLUME.
2. Press the SKL button to enter the menu.
3. Use the or button to scroll to a category.
4. Press the SKL button to enter.
5. Use the
7. Use the or button to scroll to RINGER ON/OFF.
or
button to scroll to the desired ring volume.
6. Press the SKL button to confirm your selection.
8. Press SKL button to enter.
9. Use the or button to scroll to On or Off.
10. Press SKL button to confirm your selection
Table of contents