GE PVM9215SKSS User manual

49-40704-1 11-14 GE
GEAppliances.com
Write the model and serial numbers here:
Model # __________________________
Serial # __________________________
You can find them on a label when the
door is open.
Microwave Oven
PVM9215
Owner’s Manual
Safety Instructions........2–9
Operating Instructions
ConvenienceFeatures..........15
Exhaust Features...........25,26
MicrowaveTerms..............19
MyPlate Feature................16
OvenFeatures.............11,12
OtherFeatures.............21,22
PowerLevels...................20
Replacing the Light Bulb........25
SensorFeatures.............17-18
TimeFeatures..............13,14
Care and Cleaning ......23-24
Troubleshooting Tips
Before you call for Service. . 28, 29
Consumer Support
OptionalKits....................10
Consumer Support..............32
Warranty ......................31 Español
For a Spanish version of this manual, visit
our Website at GEAppliances.com.
Para consultar una version en español de
este manual de instrucciones, visite nuestro
sitio de internet GEAppliances.com.

Read and follow the specific precautions in the
PRECAUTIONS TO AVOID POSSIBLE EXPOSURE TO EXCESSIVE
MICROWAVE ENERGY section above.
This appliance must be grounded. Connect only to a properly
grounded outlet. See the GROUNDING INSTRUCTIONS section
on page 8.
Install or locate this appliance only in accordance with the
provided installation instructions.
Be certain to place the front surface of the door 3" or more
back from the countertop edge to avoid accidental tipping of
the appliance in normal usage.
This microwave oven is not approved or tested for marine
use.
Do not mount this appliance over a sink.
Do not operate this appliance if it has a damaged power
cord or plug, if it is not working properly, or if it has been
damaged or dropped.
Do not cover or block any openings on the appliance.
Use this appliance only for its intended use as described in
this manual. Do not use corrosive chemicals or vapors in this
appliance. This microwave oven is specifically designed to
heat, dry or cook food, and is not intended for laboratory or
industrial use.
Do not store this appliance outdoors. Do not use this
SURGXFWQHDUZDWHU³IRUH[DPSOHLQDZHWEDVHPHQWQHDUD
swimming pool, near a sink or in similar locations.
Do not let cord hang over edge of table or counter.
Do not store anything directly on top of the appliance when
it is in operation.
Keep power cord away from heated surfaces.
Do not immerse power cord or plug in water.
To reduce the risk of fire in the oven cavity:
³ 'RQRWRYHUFRRNIRRG&DUHIXOO\DWWHQGDSSOLDQFHZKHQ
paper, plastic or other combustible materials are placed
inside the oven while cooking.
³ 5HPRYHZLUHWZLVWWLHVDQGPHWDOKDQGOHVIURPSDSHURU
plastic containers before placing them in the oven.
³ 'RQRWXVHWKHRYHQIRUVWRUDJHSXUSRVHV'RQRWOHDYH
paper products, cooking utensils or food in the oven when
not in use.
³ ,IPDWHULDOVLQVLGHWKHRYHQLJQLWHNHHSWKHRYHQGRRUFORVHG
turn the oven off and disconnect the power cord, or shut
off power at the fuse or circuit breaker panel. If the door is
opened, the fire may spread.
See door surface cleaning instructions in the Care and
cleaning of the microwave oven section of this manual. Do
not use cleaners with ammonia or alcohol on the microwave
oven. Ammonia and alcohol can damage the appearance of
the microwave.
GE does not support any servicing of this microwave oven,
except as described by the Consumer Support sections
of this manual. Do not attempt to service the microwave
oven yourself. If service is desired, this appliance should be
serviced only by qualified service personnel. Contact the
nearest authorized service facility for examination, repair or
adjustment.
As with any appliance, close supervision is necessary when
used by children.
IMPORTANT SAFETY INSTRUCTIONS.
READ ALL INSTRUCTIONS BEFORE USING.
IMPORTANT SAFETY INSTRUCTIONS.
Use this appliance only for its intended purpose as described in this Owner’s Manual.
When using electrical appliances basic safety precautions should be followed, including the following:
WARNING!
To reduce risk of burns, electric shock, fire, personal injury or exposure to excessive microwave energy.
PRECAUTIONS TO AVOID POSSIBLE EXPOSURE
TO EXCESSIVE MICROWAVE ENERGY
2
(a) Do Not Attempt to operate this oven with the door
open since open-door operation can result in harmful
exposure to microwave energy. It is important not to
defeat or tamper with the safety interlocks.
(b) Do Not Place any object between the oven front
face and the door or allow soil or cleaner residue to
accumulate on sealing surfaces.
(c) Do Not Operate the oven if it is damaged. It is
particularly important that the oven door close properly
and that there is no damage to the:
(1) door (bent),
(2) hinges and latches (broken or loosened),
(3) door seals and sealing surfaces.
(d) The Oven Should Not be adjusted or repaired by
anyone except properly qualified service personnel.
SAVE THESE INSTRUCTIONS

INSTRUCCIONES IMPORTANTES DE SEGURIDAD.
LEA PRIMERO TODA LAS INSTRUCCIONES. GEAppliances.com
¡PRECAUCIÓN!
Por su seguridad, la información contenida en este manual debe seguirse para minimizar el riesgo de incendio, explosión,
descarga eléctrica, exposición a energía microondas.
INSTRUCCIONES IMPORTANTES DE SEGURIDAD.
Use este electrodoméstico sólo para su propósito original, como se describe en el Manual del Propietario.
Al usar artefactos eléctricos se deberán seguir las precauciones básicas de seguridad, incluyendo lo siguiente:
Lea y obedezca las precauciones específicas en la sección
de PRECAUCIONES PARA EVITAR POSIBLE EXPOSICIÓN A UNA
ENERGÍA EXCESIVA DE MICROONDAS de arriba.
Este electrodoméstico debe estar conectado a tierra.
Conéctelo sólo a una toma de corriente con toma de tierra.
Vea la sección de INSTRUCCIONES DE TOMA DE TIERRA en la
página 9.
Instale o coloque este electrodoméstico siguiendo sólo las
Instrucciones de Instalación provistas.
Asegúrese de colocar la superficie frontal de la puerta 3”
o más atrás del extremo de la base, a fin de evitar caídas
accidentales del electrodoméstico durante un uso normal.
Este horno microondas no está aprobado ni evaluado para
uso naval.
No monte el electrodoméstico sobre un lavabo.
No usar este electrodoméstico si el cable de corriente
o el enchufe han sufrido algún daño, si no funciona
correctamente o si ha resultado dañado o se ha caído.
No bloquee ni cubra cualquier abertura del
electrodoméstico.
Dé a este electrodoméstico el uso para el cual fue
diseñado únicamente, como se describe en este manual.
No use productos químicos corrosivos ni vapores en este
electrodoméstico. Este horno microondas fue diseñado
específicamente para calentar, secar o cocinar comida, y no
para uso industrial o en laboratorio.
No use este producto cerca del agua; por ejemplo, en un
sótano húmedo, cerca de una piscina, cerca de un lavabo o
en ubicaciones similares.
No permita que el cable se sostenga sobre el extremo de la
mesada
No guarde nada directamente sobre la superficie del horno
microondas cuando el mismo se encuentre funcionando
No guarde este electrodoméstico al aire libre.
Mantenga el cable de corriente alejado de superficies
calientes.
Para reducir el riesgo de incendio en la apertura del horno:
³1RFRFLQHGHPDVLDGRODFRPLGD3UHVWHDWHQFLyQFXLGDGRVD
al electrodoméstico cuando se coloca papel, plástico u otro
material combustible en el horno mientras se cocina.
³4XLWHODVFLQWDVGHFLHUUHFRQPHWDO\ODVDVDVPHWiOLFDVGH
los recipientes de papel o plástico antes de introducirlos en el
horno.
³1RDOPDFHQHFRVDVHQHOKRUQR1RGHMHSURGXFWRVGHSDSHO
utensilios de cocinar ni comida en el horno mientras no lo
esté usando.
³6LVHLQFHQGLDUDDOJ~QPDWHULDOGHQWURPDQWHQJDODSXHUWD
del horno cerrada, apague el horno y desconecte el cable
de corriente eléctrica, o apague la corriente en el fusible o
panel del diferencial. Si se abre la puerta el fuego podría
expandirse.
Lea las instrucciones de limpieza de la superficie de la puerta
en la sección de Cuidado y limpieza del horno microondas
de este manual. No use limpiadores que contengan
amoníacos o alcohol en el horno microondas. El amoníaco o
el alcohol pueden dañar el aspecto del horno microondas.
GE no respalda ningún servicio técnico sobre este horno
microondas, excepto como se describe en las secciones de
Soporte al Consumidor de este manual. No intente reparar
el horno microondas usted mismo. Si es necesario reparar el
electrodoméstico, entonces el servicio deberá ser realizado
por una persona calificada del servicio técnico. Comuníquese
a una sucursal autorizada del servicio técnico para realizar
cualquier control, reparación o ajuste.
Al igual que con cualquier electrodoméstico, se deberá
realizar una supervisión de cerca si es usado por niños.
PRECAUCIONES PARA EVITAR POSIBLE EXPOSICIÓN
A UNA EXCESIVA ENERGÍA DE MICROONDAS.
(a) No Intente operar este horno con la puerta abierta ya
que esto podría resultar en una exposición a energía
microondas dañina. Es importante no cancelar ni
manipular de forma indebida los dispositivos de
seguridad.
(b) No Sitúe ningún objeto entre la parte frontal del horno
y la puerta ni permita que se acumule suciedad o
residuos limpios en las gomas de cierre hermético.
(c) No Use el horno si está dañado. Es especialmente
importante que la puerta del horno se cierre
correctamente y que no se dañe:
(1) la puerta (doblada),
(2) bisagras y pasadores (rotos o sueltos),
(3) sellos de la puerta y gomas de cierre hermético.
(d) El horno no debería ajustarse ni repararse por nadie
que no sea personal de servicio adecuadamente
calificado.
GUARDE ESTAS INSTRUCCIONES
3

IMPORTANT SAFETY INSTRUCTIONS.
READ ALL INSTRUCTIONS BEFORE USING.
4SAVE THESE INSTRUCTIONS
ARCING
If you see arcing, press the Cancel/Off pad and correct the problem.
FOODS
Do not pop popcorn in your microwave oven unless in a special
microwave popcorn accessory or unless you use popcorn
labeled for use in microwave ovens.
6RPHSURGXFWVVXFKDVZKROHHJJVDQGVHDOHGFRQWDLQHUV³IRU
H[DPSOHFORVHGMDUV³DUHDEOHWRH[SORGHDQGVKRXOGQRWEH
heated in this microwave oven. Such use of the microwave
oven could result in injury.
Do not boil eggs in a microwave oven. Pressure will build up
inside egg yolk and will cause it to burst, possibly resulting in
injury.
Operating the microwave with no food inside for more than a
minute or two may cause damage to the oven and could start
a fire. It increases the heat around the magnetron and can
shorten the life of the oven.
Foods with unbroken outer “skin” such as potatoes, hot dogs,
sausages, tomatoes, apples, chicken livers and other giblets
and egg yolks should be pierced to allow steam to escape
during cooking.
Avoid heating baby food in glass jars, even
with the lid off. Make sure all infant food is thoroughly cooked.
Stir food to distribute the heat evenly. Be careful to prevent
scalding when warming formula. The container may feel cooler
than the formula really is. Always test the formula before
feeding the baby.
Don’t defrost frozen beverages in narrow-necked bottles
(especially carbonated beverages). Even if the container is
opened, pressure can build up. This can cause the container to
burst, possibly resulting in injury.
SUPERHEATED WATER
Liquids, such as water, coffee or tea are able to be overheated
beyond the boiling point without appearing to be boiling. Visible
bubbling or boiling when the container is removed from the
microwave oven is not always present. THIS COULD RESULT
IN VERY HOT LIQUIDS SUDDENLY BOILING OVER WHEN THE
CONTAINER IS DISTURBED OR A SPOON OR OTHER UTENSIL IS
INSERTED INTO THE LIQUID.
To reduce the risk of injury to persons:
³ 'RQRWRYHUKHDWWKHOLTXLG
³ 6WLUWKHOLTXLGERWKEHIRUHDQGKDOIZD\WKURXJKKHDWLQJLW
³ 'RQRWXVHVWUDLJKWVLGHGFRQWDLQHUZLWKQDUURZQHFNV
³ $IWHUKHDWLQJDOORZWKHFRQWDLQHUWRVWDQGLQWKHPLFURZDYH
oven for a short time before removing the container.
³ 8VHH[WUHPHFDUHZKHQLQVHUWLQJDVSRRQRURWKHUXWHQVLO
into the container.
Hot foods and steam can cause burns. Be careful when
opening any containers of hot food, including popcorn bags,
cooking pouches and boxes. To prevent possible injury, direct
steam away from hands and face.
Do not overcook potatoes. They could dehydrate and catch
fire, causing damage to your oven.
&RRNPHDWDQGSRXOWU\WKRURXJKO\³PHDWWRDWOHDVWDQ
INTERNAL temperature of 160°F and poultry to at least
an INTERNAL temperature of 180°F. Cooking to these
temperatures usually protects against foodborne illness.
Arcing is the microwave term for sparks in the oven. Arcing is
caused by:
Metal or foil touching the side of the oven.
Foil not molded to food.
Plates or dishes with metallic trim or glaze with a metallic
sheen.
Metal, such as twist-ties, poultry pins or gold-rimmed dishes, in
the microwave.
Recycled paper towels containing small metal pieces being
used in the microwave.
IMPORTANT SAFETY INSTRUCTIONS.
Do not clean with metal scouring pads. Pieces can burn off the
pad and touch electrical parts involving risk of electric shock.
This microwave oven is UL listed for installation over both gas
(less than 60,000BTU) and electric ranges.
This over-the-range oven is designed for use over ranges no
wider than 36”. It may be installed over both gas and electric
cooking equipment. .
WARNING!

5
INSTRUCCIONES IMPORTANTES DE SEGURIDAD.
LEA PRIMERO TODA LAS INSTRUCCIONES. GEAppliances.com
GUARDEESTASINSTRUCCIONES
FORMACIÓN DE ARCO ELÉCTRICO
COMIDAS
No haga rosetas o palomitas de maíz en el microondas a no
ser que esté usando un accesorio especial para prepararlas o
que esté empleando rosetas o palomitas de maíz que indiquen
ser válidas para el uso de hornos microondas.
Algunos productos tales como huevos enteros y envases
sellados – por ejemplo: tarros de vidrio cerrados – pueden
explotar y por esto no se deben calentar en el horno
microondas. Dicho uso del horno microondas podrá producir
lesiones.
No hierva huevos dentro de un horno microondas. Se
generará presión dentro de la yema del huevo que causará
que explote pudiendo, posiblemente, dañar a alguien.
Si se pone en marcha el microondas sin tener comida en su
interior por más de un minuto o dos podrían causarse daños
al horno y podría empezar un fuego. Esto hace aumentar
la temperatura alrededor del magnetrón y puede reducir el
período de vida útil del horno.
Las comidas cocinadas en líquidos (como la pasta) pueden
tener cierta tendencia a hervir más rápidamente que los
alimentos que contengan menos humedad. Si esto ocurre,
revise la sección de Cuidado y limpieza del horno microondas
donde encontrará instrucciones en cuanto a la limpieza del
interior del microondas.
No caliente la comida del bebé en jarras de cristal, incluso
si están destapadas. Asegúrese de que los alimentos de los
niños estén bien cocinados. Remueva la comida para distribuir
el calor de forma pareja. Tenga cuidado de que el niño no se
queme al calentar la leche de fórmula. El contenedor puede
parecer más frío de lo que realmente está la fórmula. Pruebe
siempre la fórmula antes de dársela al bebé.
No descongele bebidas congeladas en botellas de cuello
estrecho (especialmente bebidas carbonatadas). Incluso con el
contenedor abierto, podría generarse un aumento de presión.
Esto puede causar que el contenedor explote, lo cual podría
producir daños personales.
AGUA SOBRECALENTADA
Líquidos, tales como agua, café, o té, se podrían sobrecalentar
más allá del punto de ebullición sin parecer que estén
hirviendo. No siempre habrá burbujas o evidencia de que
el líquido está hirviendo cuando se extrae el envase con el
líquido del microondas. ESTO PODRÍA RESULTAR EN LÍQUIDOS
MUY CALIENTES DE REPENTE COMENZANDO A HERVIR Y
A REBOSARSE CUANDO EL ENVASE ES MOVIDO O SI UNA
CUCHARA U OTRO UTENSILIO SE LE INTRODUCE AL LÍQUIDO.
Para reducir el riesgo de lesiones personales:
³1RVREUHFDOLHQWHORVOtTXLGRV
³0XHYDHOOtTXLGRWDQWRDQWHVFRPRDPHGLDGRVGHOWLHPSRGH
calentamiento.
³1RXVHHQYDVHVGHODGRVUHFWRVFRQFXHOORVHVWUHFKRV
³'HVSXpVGHOFDOHQWDPLHQWRSHUPLWDTXHHOHQYDVH
permanezca en el microondas por un tiempo corto antes de
remover el envase.
³8VHFXLGDGRH[WUHPRFXDQGRLQVHUWHXQDFXFKDUDXRWUR
utensilio en el envase.
Los alimentos calientes y el vapor pueden causar quemaduras.
Tenga cuidado al abrir cualquier contenedor con comida
caliente, incluso bolsas de rosetas o palomitas de maíz, bolsas
o cajas de cocinar. Para prevenir posibles daños personales,
mantenga el vapor alejado de sus manos y rostro.
No cocine demasiado las papas. Podrían deshidratarse e
incendiarse, causando daños a su horno.
&RFLQHODFDUQH\HOSROORSRUFRPSOHWR³ODFDUQHKDVWDTXH
alcance una temperatura mínima INTERIOR de 160°F, y el pollo
hasta una temperatura INTERNA mínima de 180°F. Cuando
se cocinan a estas temperaturas se evita la contracción de
enfermedades por intoxicación.
¡PRECAUCIÓN!
Si ve que se forman arcos eléctricos, presione el botón Cancel/Off (borrar/apagado) y resuelva el problema.
Arco eléctrico es lo que, en la terminología de los microondas,
describe las chispas en el horno.
Hay un metal o papel de aluminio tocando el lateral del horno.
El papel de aluminio no está envolviendo bien la comida.
Platos o la vajillas con bordes metálicos o con una capa de
brillo metálico.
Hay algún metal, como cintas de cierre con metal, pinchos de
pollo, o platos con decoración de oro dentro del microondas.
Se está usando papel toalla reciclado que contienen pequeñas
porciones de metal en el microondas.
INSTRUCCIONES IMPORTANTES DE SEGURIDAD.
No limpie con almohadillas metálicas para fregar. Las piezas
podrán quemar la almohadilla y tener contacto con partes
eléctricas y producir riesgo de descargas eléctricas
Este horno de microondas está listado por UL para ser
instalado sobre estufas electricas y degas (memos de 60,000
BTU).
Este horno puede instalarse encima de la cocina y está
diseñado para su uso sobre cocinas encimeras no más
anchas de 36”. Puede instalarse sobre equipos para cocinar
de gas o eléctricos.

6
IMPORTANT SAFETY INFORMATION.
READ ALL INSTRUCTIONS BEFORE USING.
Make sure all cookware used in your microwave oven is
suitable for microwaving. Most glass casseroles, cooking dishes,
measuring cups, custard cups, pottery or china dinnerware which
does not have metallic trim or glaze with a metallic sheen can be
used. Some cookware is labeled “suitable for microwaving.”
If you are not sure if a dish is microwave-safe, use this test:
Place in the oven both the dish you are testing and a glass
PHDVXULQJFXSILOOHGZLWKFXSRIZDWHU³VHWWKHPHDVXULQJ
cup either in or next to the dish. Microwave
30–45 seconds at high. If the dish heats, it should not be used
for microwaving.
If the dish remains cool and only the water in the cup heats,
then the dish is microwave-safe.
If you use a meat thermometer while cooking, make sure it is
safe for use in microwave ovens.
Do not use recycled paper products. Recycled paper towels,
napkins and waxed paper can contain metal flecks which may
cause arcing or ignite. Paper products containing nylon or
nylon filaments should be avoided, as they may also ignite.
Some foam trays (like those that meat is packaged on)
have a thin strip of metal embedded in the bottom. When
microwaved, the metal can burn the floor of the oven or ignite
a paper towel.
Do not use the microwave to dry newspapers.
Not all plastic wrap is suitable for use in microwave ovens.
Check the package for proper use.
Paper towels, waxed paper and plastic wrap can be used to
cover dishes in order to retain moisture and prevent spattering.
Be sure to vent plastic wrap so steam can escape.
Cookware may become hot because of heat transferred from
the heated food. Pot holders may be needed to handle the
cookware.
“Boilable” cooking pouches and tightly closed plastic bags
should be slit, pierced or vented as directed by package. If they
are not, plastic could burst during or immediately after cooking,
possibly resulting in injury. Also, plastic storage containers
should be at least partially uncovered because they form a
tight seal. When cooking with containers tightly covered with
plastic wrap, remove covering carefully and direct steam away
from hands and face.
Use foil only as directed in this guide. TV dinners may be
microwaved in foil trays less than 3/4"high; remove the top
foil cover and return the tray to the box. When using foil in the
microwave oven, keep the foil at least 1" away from the sides
of the oven.
3ODVWLFFRRNZDUH³3ODVWLFFRRNZDUHGHVLJQHGIRUPLFURZDYH
cooking is very useful, but should be used carefully. Even
microwave-safe plastic may not be as tolerant of overcooking
conditions as are glass or ceramic materials and may soften
or char if subjected to short periods of overcooking. In longer
exposures to overcooking, the food and cookware could ignite.
Follow these guidelines:
1. Use microwave-safe plastics only and use them in
strict compliance with the cookware manufacturer’s
recommendations.
2. Do not microwave empty containers.
3. Do not permit children to use plastic cookware without
complete supervision.
WARNING!
SAVE THESE INSTRUCTIONS
THE VENT FAN
The fan will operate automatically under certain conditions (see
Automatic Fan feature). Take care to prevent the starting and
spreading of accidental cooking fires while the vent fan is in use.
Clean the underside of the microwave often.
Do not allow grease to build up on the microwave or the fan
filters.
In the event of a grease fire on the surface units below the
microwave oven, smother a flaming
pan on the surface unit by covering the pan completely with a
lid, a cookie sheet or a flat tray.
Use care when cleaning the vent fan filters. Corrosive cleaning
agents, such as lye-based oven cleaners, may damage the
filters.
When preparing flaming foods under the microwave, turn the
fan on.
Never leave surface units beneath your microwave oven
unattended at high heat settings. Boilovers cause smoking and
greasy spillovers that may ignite and spread if the microwave
vent fan is operating. To minimize automatic fan operation, use
adequate sized cookware and use high heat on surface units
only when necessary.

7
INSTRUCCIONES IMPORTANTES DE SEGURIDAD.
LEA PRIMERO TODA LAS INSTRUCCIONES. GEAppliances.com
GUARDEESTASINSTRUCCIONES
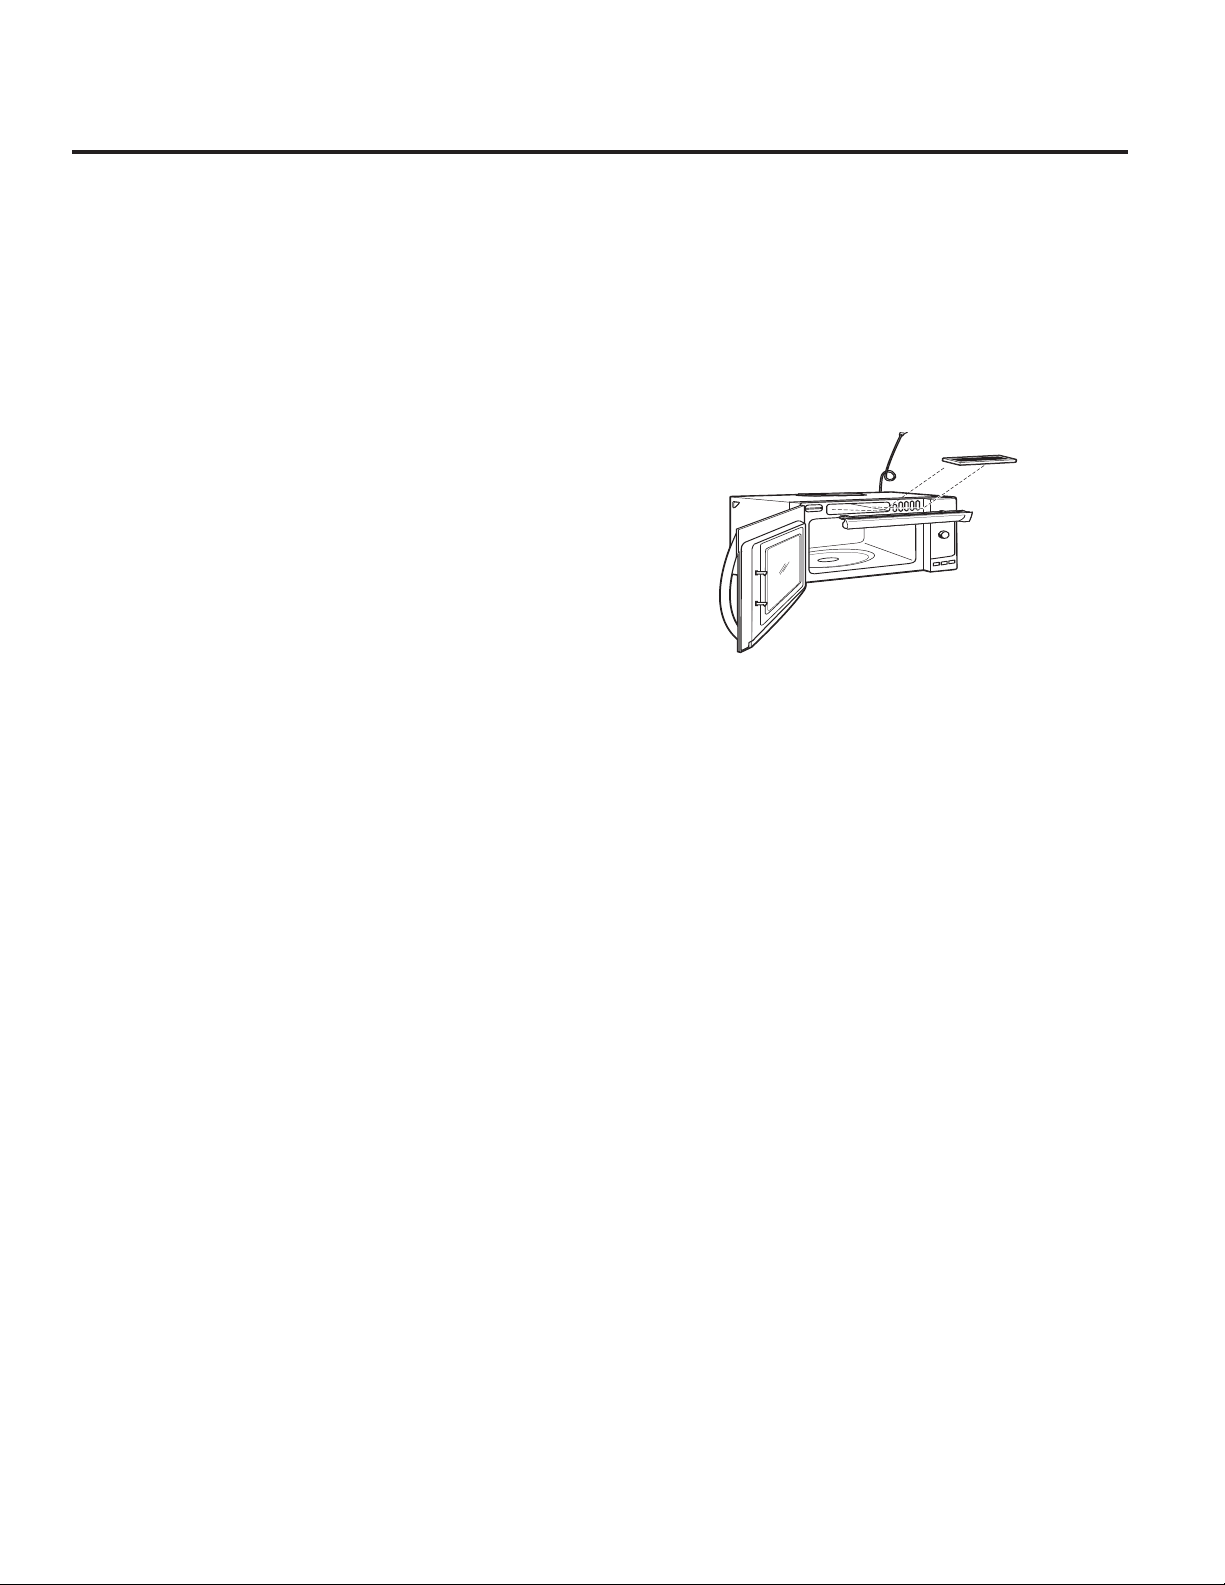
Asegúrese de que todos los utensilios de cocina que use en su
horno sean aptos para microondas. Pueden usarse la mayoría
de las cazuelas, platos para cocinar, tazas de medir, tazas de
flanes y botes de cristal, o las vajillas de porcelana que no tienen
decoraciones metálicas o barnices con brillo metálico. Algunos
utensilios tienen la siguiente inscripción: “puede usarse en
microondas.”
Si no está seguro de que un plato pueda usarse en el
microondas, haga esta prueba: Coloque el plato que esté
probando y un vaso de medir con 237 ml (1 taza) de agua en
el horno – ponga la taza de medir dentro o al lado del plato.
Ponga el microondas en marcha, a máxima potencia, durante
30-45 segundos. Si el plato se calienta no debería usarse en el
microondas.
Si el plato se mantiene frío y sólo se calienta la taza, entonces
el plato puede usarse de forma segura en el microondas.
Si usa un termómetro de carne al cocinar con microondas),
asegúrese de que sea apto para ser usado en microondas.
No use productos de papel reciclado. El papel toalla, las
servilletas y el papel de cera reciclados pueden contener
motas metálicas que podrían causar la formación de
arcos eléctricos o incendiarse. Los productos de papel que
contengan nilón o filamentos de nilón tampoco deberían
usarse ya que se podrían incendiar de igual modo.
Algunas bandejas de gomaespuma (como aquellas donde se
empaqueta la carne) poseen una tira fina de metal insertada
en la parte inferior. Si se usan en el horno microondas, el metal
podrá quemar el piso del horno o encender una toalla de
papel.
No use el horno microondas para secar el periódico.
No todos los envoltorios de plástico están preparados para
uso en el horno microondas. Controle el paquete para un uso
adecuado.
Algunas bandejas de plástico (como en las que se empaqueta
la carne) tienen una cinta fina de metal incrustada en el plato.
Al ponerse en el microondas, el metal puede quemar el suelo
del horno o incendiar un papel toalla.
Podrían calentarse los utensilios por el calor transferido por los
alimentos calientes. Puede necesitar usar manoplas ce cocina
para manejar los utensilios.
Al utilizar con el microondas bolsas de cocinar “que puedan
hervir”, así como cualquier bolsa de plástico firmemente
cerrada, deberán cortarse, perforarse o proveer cualquier tipo
de ventilación según indique el paquete. En caso contrario,
el plástico podría explotar mientras se cocina o después,
pudiendo causar daños físicos. Además, los recipientes
de plástico deberían permanecer, al menos, parcialmente
destapados ya que pueden sellarse fuertemente. Cuando
cocine con recipientes firmemente cubiertos con film plástico,
retire la cubierta con cuidado y mantenga el vapor alejado de
sus manos y rostro.
Use papel de aluminio sólo de la forma detallada en este
manual. Cuando use aluminio dentro de un horno microondas,
mantenga el aluminio, al menos, a una pulgada de distancia
de los laterales del horno.
8WHQVLOLRVGHSOiVWLFR³/RVXWHQVLOLRVGHSOiVWLFRGLVHxDGRV
para su uso en microondas son muy prácticos, pero deben
usarse con cuidado. Incluso aquellos utensilios autorizados
para su uso en microondas podrían no ser tan tolerantes
como el cristal o los materiales de cerámica en condiciones
de sobrecalentamiento y podrían ablandarse o carbonizarse
al someterlos a períodos cortos de sobrecalentamiento. En
exposiciones más largas a sobrecalentamiento, la comida y los
utensilios podrían incendiarse.
Siga estas normas:
1. Use solamente plásticos aptos para microondas y
úselos siguiendo estrictamente las recomendaciones del
fabricante de los utensilios.
2. No introduzca en el microondas recipientes vacíos.
3. No permita que los niños usen utensilios de plástico sin
completa supervisión.
¡PRECAUCIÓN!
EL VENTILADOR EXTRACTOR
El ventilador se pondrá en funcionamiento de forma
automática bajo ciertas circunstancias (ver función de
Ventilador Automático). Prevenga el que empiece algún
fuego al cocinar y que se extienda mientras el ventilador del
respiradero está en marcha.
Limpie a menudo la parte inferior del microondas. No
permita que se acumule grasa en el microondas o en los
filtros del ventilador.
Si la grasa se incendiara en las unidades de
la cocina (fogones) bajo el horno microondas, sofoque
cualquier sartén en llamas de la unidad de cocina por
completo con una tapa, una bandeja de galletas o
cualquier otra bandeja plana.
Tenga cuidado al limpiar los filtros del ventilador extractor.
Los productos de limpieza corrosivos, como los limpia-
hornos a base de lejía, pueden dañar los filtros.
Ponga en marcha el extractor cuando
esté cocinando comidas con llama bajo el microondas.
Nunca deje las unidades de la cocina
(fogones) bajo su microondas sin atención cuando se esté
trabajando a altas temperaturas. Cuando la comida entra
en ebullición se generan humos y se derraman grasas
que pudieran incendiarse y propagarse si el ventilador
del microondas está funcionando. Para minimizar el
funcionamiento del extractor automático, use utensilios de
cocina de tamaño adecuado y use el fuego rápido en las
unidades de la cocina (fogones) sólo cuando sea necesario.

8
IMPORTANT SAFETY INFORMATION.
READ ALL INSTRUCTIONS BEFORE USING.
Usage situations where appliance’s power cord will be disconnected infrequently.
Because of potential safety hazards under certain conditions,
we strongly recommend against the use of an adapter plug. However, if you still elect to
use an adapter, where local codes permit, a TEMPORARY CONNECTION may be made to a
properly grounded wall receptacle by the use of a UL listed adapter which is available at most
local hardware stores.
The larger slot in the adapter must be aligned with the larger slot in the wall receptacle to
provide proper polarity in the connection of the power cord.
CAUTION: Attaching the adapter ground terminal to the wall receptacle cover screw
does not ground the appliance unless the cover screw is metal, and not insulated, and
the wall receptacle is grounded through the house wiring.
You should have the circuit checked by a qualified electrician to make sure the receptacle is properly grounded.
When disconnecting the power cord from the adapter, always hold the adapter with one hand. If this is not done, the adapter ground
terminal is very likely to break with repeated use. Should this happen, DO NOT USE the appliance until a proper ground has again been
established.
Usage situations where appliance’s power cord will be disconnected frequently.
Do not use an adapter plug in these situations because frequent disconnection of the power cord places undue strain on the adapter
and leads to eventual failure of the adapter ground terminal. You should have the 2-prong wall receptacle replaced with a 3-prong
(grounding) receptacle by a qualified electrician before using the appliance.
ADAPTER PLUGS
GROUNDING INSTRUCTIONS
This appliance must be grounded. In the event of an electrical
short circuit, grounding reduces the risk of electric shock by
providing an escape wire for the electric current.
This appliance is equipped with a power cord having a grounding
wire with a grounding plug. The plug must be plugged into an
outlet that is properly installed and grounded.
Consult a qualified electrician or service technician if the
GROUNDING INSTRUCTIONS are not completely understood, or if
doubt exists as to whether the appliance is properly grounded.
If the outlet is a standard 2-prong wall outlet, it is your personal
responsibility and obligation to have it replaced with a properly
grounded 3-prong wall outlet.
Do not under any circumstances cut or remove the third (ground)
prong from the power cord.
We do not recommend using an extension cord with this
appliance. If the power cord is too short, have a qualified
electrician or service technician install an outlet near the
appliance. (See EXTENSION CORDS section.)
For best operation, plug this appliance into its own electrical
outlet to prevent flickering of lights, blowing of fuse or tripping of
circuit breaker.
WARNING³,PSURSHUXVHRIWKHJURXQGLQJSOXJFDQUHVXOWLQDULVNRIHOHFWULFVKRFN
Ensure proper
ground and firm
connection before
use.
TEMPORARY
METHOD
Align large
prongs/slots
(Adapter plugs not
permitted in Canada)
READ AND FOLLOW THIS SAFETY INFORMATION CAREFULLY.
SAVE THESE INSTRUCTIONS
Most pacemakers are shielded from interference from electronic products, including microwaves. However, patients with
pacemakers may wish to consult their physicians if they have concerns.
PACEMAKERS

9
INSTRUCCIONES IMPORTANTES DE SEGURIDAD.
LEA PRIMERO TODA LAS INSTRUCCIONES. GEAppliances.com
Situaciones de uso en que el cable de corriente del electrodoméstico será desconectado con poca frecuencia.
Debido a los posibles riesgos sobre la seguridad bajo ciertas condiciones, recomendamos
enfáticamente no usar adaptadores de enchufe. Sin embargo, si aún elije usar un adaptador,
cuando los códigos locales lo permitan, se podrá realizar una CONEXIÓN TEMPORARIA a
un tomacorriente de pared de 2 enchufes adecuadamente conectado a tierra, utilizando un
adaptador que figure en la lista de UL que se encuentre disponible en la mayoría de los locales de
repuestos.
La ranura más larga del adaptador deberá estar alineada con la ranura más larga en el
tomacorriente de pared, a fin de brindar la polaridad adecuada en la conexión del cable de
corriente.
PRECAUCIÓN: Conectar la terminal del adaptador con conexión a tierra al tornillo de la cubierta
del tomacorriente no conecta el electrodoméstico a tierra, a menos que el tornillo de la cubierta sea de metal, y no esté aislado, y que
el tomacorriente esté conectado a tierra a través del cableado del hogar.
Contrate a un electricista calificado para que controle el circuito, a fin de asegurar que el tomacorriente esté correctamente conectado
a tierra.
Cuando desconecte el cable de corriente del adaptador, siempre sostenga el adaptador con una mano. En caso de no hacer esto,
es muy probable que la terminal del adaptador con conexión a tierra se rompa con el uso repetido. Si esto sucede, NO USE el
electrodoméstico hasta que se haya establecido una conexión a tierra adecuada nuevamente.
Situaciones de uso en que el cable de corriente del electrodoméstico será desconectado con frecuencia.
No use un adaptador de enchufe en estas situaciones, ya que una desconexión frecuente del cable de corriente representa un
esfuerzo excesivo sobre el adaptador y conduce finalmente a una falla de la terminal del adaptador con conexión a tierra. Deberá
solicitar a un electricista calificado el reemplazo del tomacorriente de 2 cables por uno de 3 cables (con conexión a tierra), antes de
usar el electrodoméstico.
ADAPTADORES DE ENCHUFE
INSTRUCCIONES DE TOMA DE TIERRA
Este electrodoméstico debe estar conectado a tierra. Si se
produjera un cortocircuito, la toma de tierra reduce el riesgo
de descarga eléctrica al proveer un cable de escape para la
corriente eléctrica.
Este electrodoméstico está equipado con un cable de corriente
que dispone de un hilo para toma de tierra con un enchufe con
toma de tierra. El enchufe debe estar conectado a una toma de
corriente que esté debidamente instalada y con salida a tierra.
Consulte con un electricista cualificado o un técnico de
reparaciones si no entiende completamente las instrucciones
sobre la toma de tierra, o si tuviese alguna duda sobre si su
aparato está debidamente conectado a tierra.
Si la toma de corriente es un modelo estándar de dos clavijas, es
su responsabilidad personal y su obligación el reemplazarla por
una toma adecuada para tres clavijas con conexión a tierra.
Bajo ninguna circunstancia debe cortar o quitar la tercera clavija
(tierra) del cable de corriente.
No use un enchufe adaptador con este electrodoméstico.
No use un cable extensor de corriente con
este electrodoméstico. Si el cable de corriente es demasiado
corto, haga que un electricista cualificado o un técnico
de reparaciones instalen una toma de corriente cerca del
electrodoméstico.
Para un mejor funcionamiento, enchufe este electrodoméstico
en una toma de corriente exclusiva para evitar parpadeos de luz,
fusibles quemados o que salte el diferencial.
¡ADVERTENCIA!
El uso indebido del enchufe de tierra puede resultar en riesgo de descarga eléctrica..
FAVOR DE LEER Y SEGUIR CUIDADOSAMENTE ESTA INFORMACIÓN
DE SEGURIDAD.
GUARDE ESTAS INSTRUCCIONES
Asegure una
conexión a tierra
firme y adecuada
antes del uso
MÉTODO
TEMPORARIO
Alinee las patas/
ranuras largas
(Enchufes adaptadores no
permitidos en Canadá)
La mayoría de loas marca pasos están protegidos contra la interferencia de aparatos electrónicos, incluyendo los microondas.
Sin embargo, cuando tengan alguna duda, los pacientes con marca pasos deben consutar con su médico.
MARCA PASOS

GEAppliances.comOptional kits
Filler Panel Kits
-;:+³:KLWH
-;%/³%ODFN
When replacing a 36” range hood, filler panel kits
fill in the additional width to provide a custom
built-in appearance.
For installation between cabinets only; not for end-
of-cabinet installation. Each kit contains two 3”
wide filler panels.
Filter Kits
6DOHV1R-;+³5HFLUFXODWLQJ&KDUFRDO)LOWHU.LW
Service No. WB02X10956
Filter kits are used when the oven cannot be
vented to the outside.
See back cover to order by phone or at
GEAppliances.com.
Available at extra cost from your GE supplier.
10

Back
A
dd
30 S
ec
Cooking
Menu
C
ancel
O
ff
Start
Pause
Sensor Microwave
Lock Controls
Hold 3 Sec
Family Snacks
Steam Defrost
T
u
r
n
t
o
S
e
l
e
c
t
P
r
e
s
s
t
o
E
n
t
e
r
Settings Power Saver
Timer
On/Off Vent
Fan Surface
Light
About the features of your oven.
Throughout this manual, features and appearance may vary from your model.
Features of the Oven
Door Handle.
Door Latches.
Window with Metal Shield. Screen allows
cooking to be viewed while keeping microwaves
confined in the oven.
Control Panel and Dial.
Removable Turntable. Do not operate the oven
in the microwave mode without the turntable
and turntable support seated and in place.
Removable Turntable Support. Do not operate
the oven in the microwave mode without the
turntable and turntable support seated and in
place.
Power Saver Feature (on some models)
Your GE microwave has an Power Saver feature. Many electronic appliances, including Microwaves, consume
electric power while they are switched off or in a standby mode. Eliminating standby power can reduce your
operating costs.
To ACTIVATEWKH3RZHU6DYHU)HDWXUH³
Press the Power Saver button on the unit. The unit will display “Power Saver is On.” Once the unit has been in
standby mode (no buttons pressed or cooking performed) for one minute, the display will turn off.
NOTE: The clock will not display in this mode. When a button is pressed, the display will turn on throughout the
operation and remain on until the unit has been in standby for one minute.
To DEACTIVATEWKH3RZHU6DYHU)HDWXUH³
Press the Power Saver button on the unit. The display will come on and will read “Power Saver is Off.” The display
will remain on despite the length of time in standby mode.
11

About the cooking features of your
microwave oven.
Back Cancel
Off
Start
Pause
Lock Controls
Hold 3 Sec
Family Snacks
Steam Defrost
T
u
r
n
t
o
S
e
l
e
c
t
P
r
e
s
s
t
o
E
n
t
e
r
Cooking Menu Add 30Sec
Settings Power Saver
Cooking Controls
Time Features
Press Enter
COOKING MENU Food type, Cook Type, etc.
DEFROST 7LPH:HLJKW)RRG7\SHRUOE4XLFN'HIURVW
SETTINGS
TIMER
ADD 30 SEC Starts immediately!
Sensor Features
Press Enter
STEAM
Enter pad to select Food
MyPlate
Enter pad to select Food
FAMILY SNACKS
Enter pad to select Food
Check the Convenience Guide before you begin.
12

13
T
u
r
n
t
o
S
e
l
e
c
t
P
r
e
s
s
t
o
E
n
t
e
r
About the time features. GEAppliances.com
Cook Time
Cook Time I
Allows you to microwave for any time between
15 seconds and 99 minutes.
Power level 10 (High) is automatically set,
but you may change it for more flexibility.
1Press the COOKING MENU button.
2Turn the dial to select Cook by Time.
3Set the time.
4Set the power level.
4Press the dial or the START/PAUSE button
to start cooking.
You may open the door during Cook Time
to check the food. Close the door and press the
dial or START/PAUSE to resume cooking.
NOTE:You may change the cook time at any
time during cooking by turning the dial or
by pressing the dial to edit the cook settings.
You may also change the power level by
pressing the dial to edit the cook settings.
Cook Time I & II
Lets you change power levels automatically
during cooking. Here’s how to do it:
1Press the COOKING MENU button.
2Turn the dial to select Cook by Time I & II.
3Set time 1
4Set the first Power Level.
5Set time 2
6Set the second Power Level.
7Press the dial or the START/PAUSE button
to start cooking.
At the end of Cook Time I, Cook Time II counts
down.
NOTE:You may change the cook time at any
time during cooking by turning the dial or
by pressing the dial to edit the cook settings.
You may also change the power level by
pressing the dial to edit the cook settings.
Using the Dial
You can make selections on the oven by
turning the dial and pressing it to enter
the selection.
Pressing the dial can also be used in place
of the START/PAUSE button for quicker
programming of the oven.
ADD 30 SEC
This is a quick way to set and start cooking
in 30 second blocks each time the ADD 30
SEC button is pressed. The cook time may be
changed by turning the dial at any time during
cooking.
The power level will automatically be set at 10
and the oven will start immediately.
The power level can be changed as time is
counting down by pressing the dial to edit the
cook settings.
Cooking
Menu
T
u
r
n
t
o
S
e
l
e
c
t
P
r
e
s
s
t
o
E
n
t
e
r
Start
Pause
T
u
r
n
t
o
S
e
l
e
c
t
P
r
e
s
s
t
o
E
n
t
e
r
Add
30 Sec

Food Time Comments
Breads, Cakes
Bread, buns, or rolls (1 piece) 1/4 min.
Sweet rolls (approx. 12 oz.) 2 to 4 min. Rearrange after half the time.
Fish and Seafood
Fillets, frozen (1 lb.) 6 to 9 min.
Fruit
3ODVWLFSRXFK³RU 1 to 5 min.
(10-oz. package)
Meat
Bacon (1 lb.) 2 to 5 min. Place unopened package in oven. Let stand 5 minutes after defrosting.
Franks (1 lb.) 2 to 5 min. Place unopened package in oven. Microwave just until franks can be separated.
Let stand 5 minutes, if necessary, to complete defrosting.
Ground meat (1 lb.) 4 to 6 min. Turn meat over after first half of time.
Roast: beef, lamb, veal, pork
9 to 13 min.
Use power level 10.
per lb.
Steaks, chops and cutlets 4 to 8 min. Place unwrapped meat in cooking dish. Turn over after first half of time and
per lb. shield warm areas with foil. After second half of time, separate pieces with table
knife. Let stand to complete defrosting.
Poultry
Chicken, broiler-fryer, cut up
14 to 20 min.
Place wrapped chicken in dish. Unwrap and turn over after first half of time. After
(21ø2to 3 lbs.)
second half of time, separate pieces and place in cooking dish. Microwave 2 to 4
minutes more, if necessary. Let stand a few minutes to finish defrosting.
Chicken, whole (21ø2to 3 lbs.)
20 to 25 min.
Place wrapped chicken in dish. After half the time, unwrap and turn chicken over.
Shield warm areas with foil. To complete defrosting, run cold water in the cavity
until giblets can be removed.
Cornish hen 7 to 13 min. Place unwrapped hen in the oven breast-side-up. Turn over after first half of time.
per lb. Run cool water in the cavity until giblets can be removed.
Turkey breast (4 to 6 lbs.) 3 to 8 min. Place unwrapped breast in microwave-safe dish breast-side-down. After first half
per lb. of time, turn breast-side-up and shield warm areas with foil. Defrost for second
half of time. Let stand 1 to 2 hours in refrigerator to complete defrosting.
Defrosting Guide
Time Defrost
Use Time Defrost to defrost for a selected
length of time.
1Press the DEFROST button.
2Turn the dial to select Defrost by Time.
3Turn the dial to select the time you want.
Press the dial to enter.
4Press the START/PAUSE button to start
defrosting.
5Turn the food over if the oven signals TURN
FOOD OVER.
You may change the defrost time at any time
during defrosting by turning the dial.
Power level is automatically set at 3, but can be
changed. You can defrost small items quickly by
raising the power level after entering the time.
Power level 7 cuts the total defrosting time in
about half; power level 10 cuts the total time
to approximately 1/3. However, food will need
more frequent attention than usual.
A dull thumping noise may be heard during
defrosting. This is normal when oven is not
operating at High power.
Defrosting Tips
Foods frozen in paper or plastic can be
defrosted in the package. Closed packages
should be slit, pierced or vented AFTER
food has partially defrosted. Plastic storage
containers should be partially uncovered.
Family-size, prepackaged frozen dinners can
be defrosted and microwaved. If the food is in
a foil container, transfer it to
a microwave-safe dish.
Foods that spoil easily should not be allowed
to sit out for more than one hour after
defrosting. Room temperature promotes the
growth of harmful bacteria.
For more even defrosting of larger foods,
such as roasts, use Weight Defrost. Be sure
large meats are completely defrosted before
cooking.
When defrosted, food should be cool
but softened in all areas. If still slightly icy,
return to the microwave very briefly, or
let it stand a few minutes.
14
About the time features.
T
u
r
n
t
o
S
e
l
e
c
t
P
r
e
s
s
t
o
E
n
t
e
r
Start
Pause
Defrost

15
About the convenience features. GEAppliances.com
If the weight of food is stated in pounds and
ounces, the ounces must be converted to
tenths (.1) of a pound.
Ounces Pounds
1–2 .1
3 .2
4–5 .3
6–7 .4
8 .5
9–10 .6
11 .7
12–13 .8
14–15 .9
Conversion Guide
1 lb Quick Defrost
OE4XLFN'HIURVWDXWRPDWLFDOO\VHWVWKH
defrosting times and power levels to give even
defrosting results for meats, poultry and fish
weighing one pound.
Remove meat from package and place on
microwave-safe dish.
1Press theDEFROST button.
27XUQWKHGLDOWR´OE4XLFN'HIURVWµWKHQ
press the dial to enter.
3Press the START/PAUSE button or the dial
to start defrosting.
4Turn the food over if the oven signals TURN
FOOD OVER.
Remove defrosted meat or shield warm
areas with small pieces of foil.
After defrosting, most meats need to stand 5
minutes to complete defrosting.
Weight Defrost (Do not use the shelves
when microwave cooking.)
Use Weight Defrost for meat, poultry and fish
weighing up to six pounds.
Use Weight Defrost
for most other frozen foods.
Weight Defrost automatically sets the
defrosting times and power levels to give even
defrosting results for meats, poultry and fish.
Remove meat from package and place
on microwave-safe dish.
1Press the DEFROST button.
2Turn the dial to “Defrost by Weight”, then
press the dial to enter.
3Turn the dial to the food weight, using the
Conversion Guide below. For example, dial
1.2 for 1.2 pounds (1 pound, 3 oz.) Press the
dial to enter.
4Press the START/PAUSE button or the dial to
start defrosting.
5Turn the food over if the oven signals TURN
FOOD OVER.
Remove defrosted meat or shield warm
areas with small pieces of foil.
After defrosting, most meats need to stand 5
minutes to complete defrosting. Large roasts
should stand for about 30 minutes.
T
u
r
n
t
o
S
e
l
e
c
t
P
r
e
s
s
t
o
E
n
t
e
r
Start
Pause
Defrost
T
u
r
n
t
o
S
e
l
e
c
t
P
r
e
s
s
t
o
E
n
t
e
r
Start
Pause
Defrost

About the MyPlate Feature.
MyPlate Feature
Allows you to microwave healthy food choices
by servings or with sensor.
1Press MyPlate pad.
2Turn the dial to enter the food type you
want. Press the dial to enter. See Cooking
Guide for MyPlate below or check the
display for food types.
3Enter the specific food you want, then
enter the amount if prompted.
4Press the dial or the START/PAUSE button
to start cooking.
NOTE FOR SENSOR COOKING: for best
results do not open the door while cooking.
For non-sensor food, you may open the door
during cooking to check the food. Close the
door and press START to resume cooking.
NOTE: Do not use the sensor features twice in
succession on the same food portion. If food
is undercooked after the first countdown, use
COOK TIME for additional time.
Cooking Guide for Feature
NOTE: Use power level 10 unless otherwise noted.
16
First Choice Second Choice Third Choice
Grain Rice 1/2 cup, 1 cup, 1 1/2 cups
Oatmeal 1 to 4 packets
Popcorn 1oz, 3.0 ozs, 3.5 ozs
Macaroni 1/2 cup, 1 cup, 1 1/2 cups
4XLQRD 1/2 cup, 1 cup, 1 1/2 cups
Vegetables Asparagus Fresh, Frozen, Canned
Broccoli Fresh, Frozen
Canned Beans Canned
Green Beans Fresh, Frozen, Canned
Carrots Fresh, Frozen, Canned
Corn Fresh Whole Cobs (1 to 4), Frozen Kernel,
Canned
Green Peas Frozen, Fresh, Canned
Potato Baking, Sweet
Spinach Frozen, Fresh, Canned
Ground Meat
Poultry Bone-in Chicken
Bonless Chicken
Seafood Salmon
Tilapia
Whitefish
T
u
r
n
t
o
S
e
l
e
c
t
P
r
e
s
s
t
o
E
n
t
e
r
Start
Pause

17
About the sensor microwave features. GEAppliances.com
Steam
Use the Steam feature to steam certain pre-
programmed foods. For best performance, please
use a NordicWare Rice Cooker/Steamer Bowl.
1
Press the Steam button.
2
Turn the dial to
select the food you wish to
steam. Press the dial to enter
3Place steamer bowl with water, salt (if
necessary), and food in the microwave with
the steam vents on the steamer bowl in the
OPEN position.
4Press START/PAUSE or turn the dial to begin
cooking.
5When prompted, open the door and CLOSE
the steam vents on the steamer bowl.
NOTE: Make sure to open the door and
close the steam vents on the steamer bowl
when prompted. If the START button is
pressed before opening the door, the oven
will display the “Insert Food” message.
6Close the door and press START/PAUSE to
resume cooking.
NOTE: The NordicWare Rice Cooker/Steamer Bowl
should be used for best cooking results.
Family Snacks
Use the Family Snacks feature to cook from a
variety of pre-programmed family snack items.
1
Press the Family Snacks button.
2
Turn the dial to
select the food you wish to
cook. Press the dial to enter
3Enter an amount for the snack selected.
4Press START/PAUSE to start cooking.
First Choice Second Choice
Burrito 1 to 3
Chicken Nuggets 1 to 2 servings
Oatmeal 1 to 4 packets
Instant Macaroni and Cheese 1 to 2 packets
Canned Pasta 1 to 2 cans
Hot Dogs 1 to 4
Pizza (5 inch Frozen)
Hot Chocolate 1 to 3 cups
Soften
Use the Soften feature to soften certain pre-
programmed foods:
1
Press cooking menu or defrost button.
2
Turn the dial to the Soften. Press the dial to
enter.
3
Turn the dial to
select the food you wish to
Soften. Press the dial to enter
4Enter an amount for the food selected.
5Press START/PAUSE to start cooking.
First Choice Second Choice
Butter 1/2 Stick; 1 Stick; 2 Sticks
Cream Cheese 3 ounces; 8 ounces
Ice Cream 1 pint; 1 quart;
Melt
Use the Melt feature to melt certain pre-
programmed foods:
1
Press cooking menu or defrost button.
2
Turn the dial to the Melt. Press the dial to enter.
3
Turn the dial to
select the food you wish to
Melt. Press the dial to enter
4Enter an amount for the food selected.
5Press START/PAUSE to start cooking.
First Choice Second Choice
Butter 1/2 Stick; 1 Stick;
2 Sticks
Caramel 4 ounces; 8 ounces;
12 ounces; 16 ounces
Chocolate Chips 4 ounces; 8 ounces;
12 ounces; 16 ounces
Marshmallows 5 ounces; 8 ounces;
10 ounces; 16 ounces
First Choice Second Choice
Rice 1 - 1 cup white,
2 - 1 cup brown
Asparagus 1 to 2 cups
Broccoli 1 to 2 cups
Brussel Sprouts 1 to 2 cups
Carrots 1 to 2 cups
&DXOLÀRZHU 1 to 2 cups
Zucchini 1 to 2 cups
Family Snacks
Steam
T
u
r
n
t
o
S
e
l
e
c
t
P
r
e
s
s
t
o
E
n
t
e
r
T
u
r
n
t
o
S
e
l
e
c
t
P
r
e
s
s
t
o
E
n
t
e
r

Humidity Sensor
What happens when using the Sensor Features:
The Sensor Features detect the increasing humidity released during cooking. The oven
automatically adjusts the cooking time to various types and amounts of food.
'RQRWXVHWKH6HQVRU)HDWXUHVWZLFHLQVXFFHVVLRQRQWKHVDPHIRRGSRUWLRQ³LWPD\UHVXOWLQ
severely overcooked or burnt food. If food is undercooked after the countdown, use COOK TIME
for additional cooking time.
The proper containers and covers are essential for best sensor cooking.
Always use microwave-safe containers and cover them with lids or vented plastic wrap. Never
XVHWLJKWVHDOLQJSODVWLFFRQWDLQHUV³WKH\FDQSUHYHQWVWHDPIURPHVFDSLQJDQGFDXVHIRRGWR
overcook.
Be sure the outside of the cooking containers and the inside of the microwave oven are dry
before placing food in the oven. Beads of moisture turning into steam can mislead the sensor.
Dry off dishes so they don’t
mislead the sensor.
Vented
Covered
About the sensor microwave features.
18

19
Arcing Arcing is the microwave term for sparks in the oven. Arcing is caused by:
metal or foil touching the side of the oven.
foil that is not molded to food (upturned edges act like antennas).
metal such as twist-ties, poultry pins, gold-rimmed dishes.
recycled paper towels containing small metal pieces.
Covering Covers hold in moisture, allow for more even heating and reduce cooking time. Venting plastic wrap
or covering with wax paper allows excess steam to escape.
Shielding In a regular oven, you shield chicken breasts or baked foods to prevent over-browning. When
microwaving, you use small strips of foil to shield thin parts, such as the tips of wings and legs
on poultry, which would cook before larger parts.
Standing Time When you cook with regular ovens, foods such as roasts or cakes are allowed to stand to finish cooking
or to set. Standing time is especially important in microwave cooking. Note that a microwaved cake
is not placed on a cooling rack.
Venting After covering a dish with plastic wrap, you vent the plastic wrap by turning back one corner so
excess steam can escape.
Term Definition
Microwave terms. GEAppliances.com

About changing the power level.
The power level may be entered or changed
immediately after entering the time for Cook
Time, Time Defrost or Express Cook. The
power level may also be changed during time
countdown.
1First, follow directions for Cook Time, Time
Defrost or Express Cook.
2Press the dial to accept the time and enter
power level editing.
3Turn the dial clockwise to increase and
counterclockwise to decrease the power
level. Press the dial to enter.
Variable power levels add flexibility to
microwave cooking. The power levels on the
microwave oven can be compared to the
surface units on a range. Each power level gives
you microwave energy a certain percent of the
time. Power level 7 is microwave energy 70%
of the time. Power level 3 is energy 30% of the
time. Most cooking will be done on High (power
level 10) which gives you 100% power. Power
level 10 will cook faster but food may need
more frequent stirring, rotating or turning over.
A lower setting will cook more evenly and need
less stirring or rotating of the food. Some foods
may have better flavor, texture or appearance
if one of the lower settings is used. Use a lower
power level when cooking foods that have
a tendency to boil over, such as scalloped
potatoes.
Rest periods (when the microwave energy
cycles off) give time for the food to “equalize”
or transfer heat to the inside of the food. An
example of this is shown with power level 3³
the defrost cycle. If microwave energy did not
cycle off, the outside of the food would cook
before the inside was defrosted.
Here are some examples of uses for various
power levels:
High 10: Fish, bacon, vegetables, heating
liquids.
Med-High 7: Gentle cooking of meat and
poultry; baking casseroles and reheating.
Medium 5: Slow cooking and tenderizing for
stews and less tender cuts of meat.
/RZRU Defrosting; simmering; delicate
sauces.
Warm 1: Keeping food warm; softening butter.
20
T
u
r
n
t
o
S
e
l
e
c
t
P
r
e
s
s
t
o
E
n
t
e
r
This manual suits for next models
6
Table of contents
Languages:
Other GE Microwave Oven manuals

GE
GE JES1290SK Manual

GE
GE AVM4160 User manual

GE
GE Profile Spacemaker JVM2070BH User instructions

GE
GE JVM1600 Series User manual

GE
GE PVM9225 User manual

GE
GE JKP9027 User manual

GE
GE JES0736 User manual

GE
GE JHP66G Installation instructions

GE
GE SpacemakerXL JVM3660 User manual

GE
GE Spacemaker HVM1540 User manual