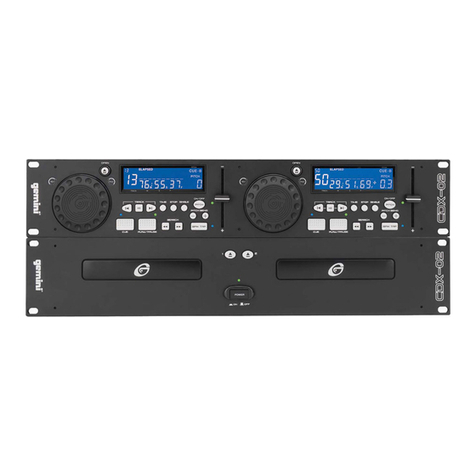
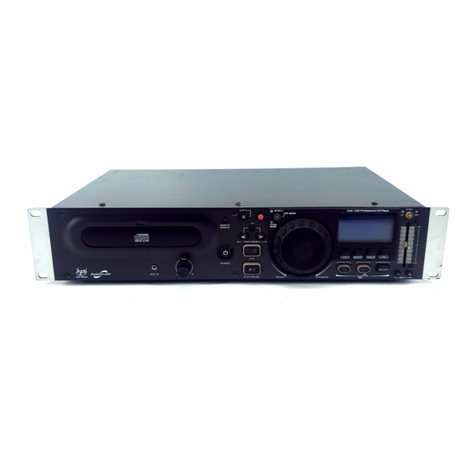
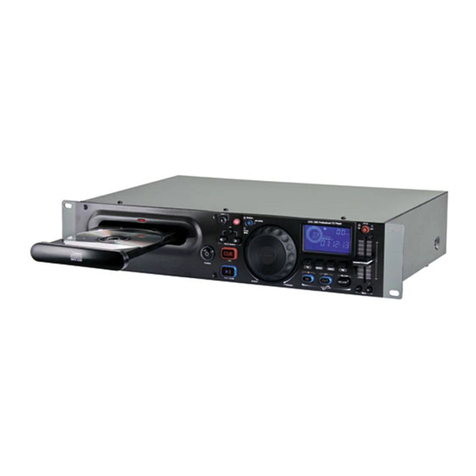
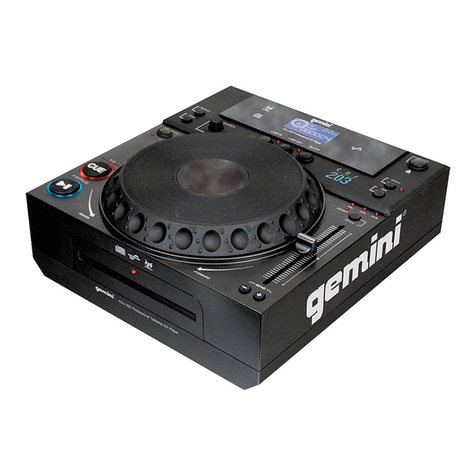
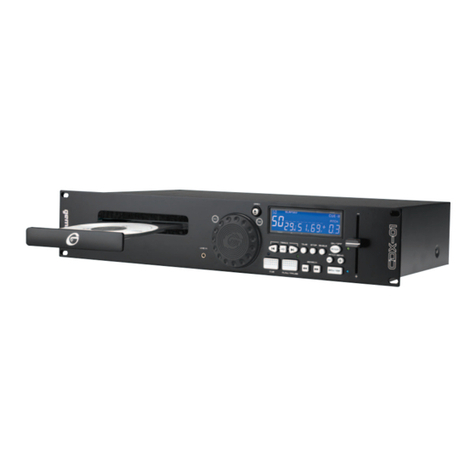
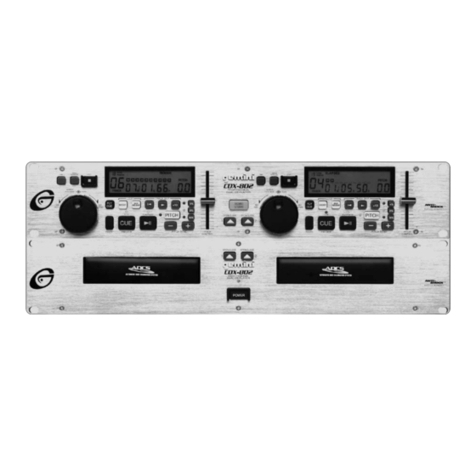
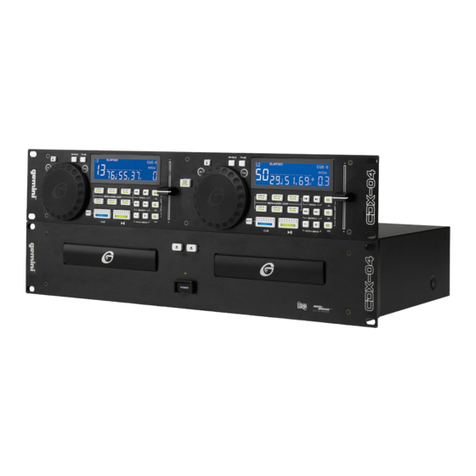
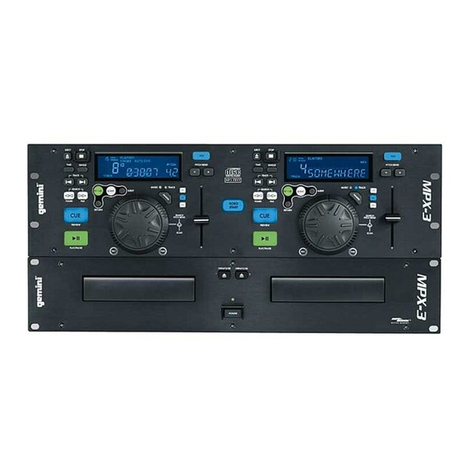
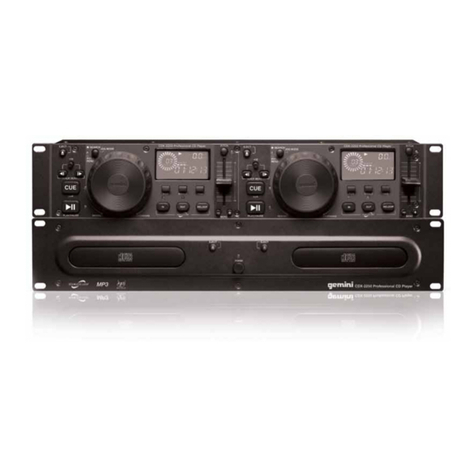
Gemini CDX-2250i User manual

PROFESSIONAL
2U
DUAL
CD
PLAYER
®
0RERAT|0Ns
MANUAL
FOR
ENGLISH
READERS
Page
2
-
Page
6
MANUAL
DE
|NsTRUcc|oNEs
RARA
LEcT0REs
EN
ESPANOL
Pagina
7
-
Pagina
10
MANUEL
D’
|NsTRUcT|0Ns
UT|L|sATEURs
ERANcA|s
Page
11
-
Page
14
BEDIENUNGSHANDBUCH
EUR
DEUTSCHE
LEsER
Seite
15
-
Seite
18
PROFESSIONAL
2U
DUAL
CD
PLAYER
®
0RERAT|0Ns
MANUAL
FOR
ENGLISH
READERS
Page
2
-
Page
6
MANUAL
DE
|NsTRUcc|oNEs
RARA
LEcT0REs
EN
ESPANOL
Pagina
7
-
Pagina
10
MANUEL
D’
|NsTRUcT|0Ns
UT|L|sATEURs
ERANcA|s
Page
11
-
Page
14
BEDIENUNGSHANDBUCH
EUR
DEUTSCHE
LEsER
Seite
15
-
Seite
18

CAUTION: This product satisfies FCC regulations when shielded cables and connectors are used to Wnnecf the unit to other equipment. To prevent
electromagnetic interference with electric appliances such as radios and televisions, use shielded cables and connectors for connections.
The exclamation point within an equilateral triangle is intended to alert the user to the presence of important operating and maintenance (servicing)
instructions in the literature accompanying the appliance.
The lightening flash with arrowhead symbol, within an equilateral triangle, is intended to alert the user to the presence of uninsulated ‘dangerous
voltage” within the product’s enclosure that may be of sucient magnitude to constitute a ask of electric shock to persons
READ INSTRUCTIONS: All the safety and operating instructions should be read before the produd is operated.
RETAIN INSTRUCTIONS: The safety and operating instructions should be retained for future reference.
HEED WARNINGS: All warnings on the product and in the operating instructions should be adhered to.
FOLLOW INSTRUCTIONS: All operating and use instructions should be followed.
CLEANING: The produd should be deaned only with a polishing doth or a son dry doth. Never clean with furniture wax, benzine, insecticides or
other volatile liquids since they may corrode the cabinet.
ATTACHMENTS: Do not use attachments not recommended by the product manufacturer as they may cause hazards.
WATER AND MOISTURE: Do not use this product near water, for example, near a bathtub, wash bowl, kitchen sink or laundry tub; in a wet basement
or near a Swimming pool; and the like.
ACCESSORIES: Do not place this product on an unstable cart, stand, tripod , bracket, or tab|e. The product may fall causing serious injury to a child
or an adult, and serious damage to the product. Use only with a cart, stand, tripod , bracket, or table recommended by the manufacturer, or sold with
the product. Any mounting of the product should follow the manureoturer’s instructions, and should use a mounting accessory recommended by the
manufacturer.
CART: A product and cart combination should be moved with care, Quick stops, excessive force, and uneven surfaces may cause the product and
cart combination to over-turn. See Figure A.
VENTILATION: Slots and openings in the cabinet are provided for ventilation and to ensure reliable operation of the product and
to protect it from overheating, and these openings must not be blocked or covered. The openings should never be blocked by
placing the product on a bed, sofa, rug, or other similar surface. This produd should not be placed in a built-in installation
such as a bookcase or rack unless proper ventilation is provided or the manufacture instructions have been adhered to.
POWER SOURCES: This produof should be operated only from the type of power source indicated on the marking label.
If you are not sure of the type of power supply to your home, consult your product dealer or local power company.
LOCATION: The appliance should be installed in a stable location.
NON-USE PERIODS: The power cord of the appliance should be unplugged from the outlet when left unused for a long period of time.
GROUNDING OR POLARIZATION:
• If this product js equipped with a polazed alternating current line plug (a plug having one blade wider than the other), it will fit into the outlet
only one way. This is a safety feature. If you are unable to insert the plug fully into the outlet, try reversing the plug.
If the plug should still fail to fit, contact your electrician to replace your obsolete outlet. Do not defeat the safety purpose of the polarized
plug.
• If this product is equipped with a three-wire grounding type plug, a plug having a third (grounding) pin, it will only fit into a grounding type
power outlet. This is a safely feature. If you are unable to insert the plug into the outlet, contact your electrician to replace your obsolete
outlet. Do not defeat the safety purpose of the grounding type plug.
POWER-CORD PROTECTION: Power-supply cords should be routed so that they are not likely to be walked on or pinched by items placed upon or
against them, paying particular attention to cords at plugs, convenience receptacles, and the point where they exit from the product.
OUTDOOR ANTENNA GROUNDING: If an outside antenna or cable system is connected to the product, be sure the antenna or cable system is
grounded so as to provide some protection against voItage surges and built-up static charges. Article 810 of the National Electrical Coce, ANSI/
NFPA 70, provides information with regard to proper grounding of the mast and supporting structure, grounding of the lead-in wire to an antenna
discharge unit, size of grounding conductors, Iocation of antenna-discharge unit, connection to grounding electrodes and requirements
for the grounding electrode. See Figure B.
LIGHTNING: For added protection for this product during a lightening storm, or when it is left unattended and unused
for long periods of time , unplug if from the wall outlet and disconnect tbe antenna or cable system. This will prevent damage to
the product due to lightening and power-line surges.
POWER LINES: An outside antenna system should not be lcoated in the vicinity of overhead power lines or other
electric Iight or power circuits, or where if can fall into such power lines or circuits. When installing an outside
antenna system, extreme care should be taken to keep fromtouching such power lines or circuits as contact with them
might be fatal.
OVERLOADING: Do not overload wall outlets, extension cords, or integral convenience receptacles as this can result
in a risk of fire or electric.
OBJECT AND LIQUID ENTRY: Never push objects of any kind into this product through openings as they may touch dangerous
voltage profits or short-out parts that could result in a fire of electric shock. Never splill liquid of any kind on the product.
SERVICING: Do not attempt to service this product yourself as opening or removing covers may expose you to dangerous
voltage or other hazards. Refer all servicing to qualified service personnel.
DAMAGE REQUIRING SERVICE: Unplug this product from the wall outlet and refer servicing to qualified service personnel
under the tolfowing conditions:
• When the power-supply cord or plug is damaged
• If liquid has been spilled, or objects have fallen into the product.
• If the product has been exposed to rain or water.
• If the product does not operate normally by following the operating instructions. Adjust only those controls that are covered
by the operating instructions as an improper adjustment of other controls may result in damage and will often require extensive work by a
qualified technician to restore the product to its normal operation.
• If the product has been dropped of damaged in any way.
• When the product exhibits a distinct change in performance, this indicates a need for service.
REPLACEMENT PARTS: When replacement parts are required, be sure the service technician has used replacement parts specified by the
manufacturer or have the same characteristics as the original part. Unauthorized substituions may result in fire, electric shock or other hazards.
SAFETY CHECK: Upon completion of any service or repairs to this product, ask the service technician to perform safety checks to determine that
the product is in the proper operating condition.
WALL OR CEILING MOUNTING: The product should not be mounted to a wall or ceiling.
HEAT: The product should be situated away from heat sources such as radiators. heat registers, stoves, or other products (including amplifiers) that
produce heat.
PLEASE READ BEFORE USING APPLIANCE USING APPLIANCE
IMPORTANT WARNING AND SAFETY INSTRUCTIONS!
RIESGO
DE
SHOCK
?
ELECTRICO
-
N0
C
€
ABRlR!
\
,._,1§;
llfllfili’
EIUJIIII
cuw
1
L
,_.\u.u
an
flfll
.
KLCCTFFC
ur-mcn
__
HCHRHQE
IJIII
|l~|lU'.|lLF|'N.P<|U"J-IUI
C|ML‘IUn|.II.|
I-Uliu\|I..rUIl
|Iu¢
kI.‘=H\'JuiII-u
Ill
muvurnn
___
.||r1mn
clulrs
mm
n
:|'
mcr
nnuumaun
--"r|rc'r|mnr
swrm
|HFC
Mn
:1|,unI
nu
EC
MlTlIIHlL
EIEC
THWJL
C-{III
Back
Posterior
Face
Arrrere
Riickseite
|
T
E;E¢'|'
SEARCH
COX
2250i
Professional
CD
Plflyfir
“EH
5_|5¢'|*
I
J
|@
*
.|oa
MODE
'
O
:1
Face
Avant
%
0%
Vorderseite
FQW
Q
-Q
‘-—'|'ACK
SEAH—J
Front
£1)
(
O]
_
0O_,
‘~
I
I®
COX-2250i
Professional
CD
Player
i"\
\i./
oon|~£c'r
1'0
oorrrnor.
umr
TN
\._
L,
O
K
O
_%
I’
\\
If
wv
TPISAPIMRITLIS
SHIIJLD
NOT
BE
EXPOSED
TD
WWPIIO
OH
B91-I-5Hl|U,lND
NO
UB\EC'T5
FILLED
\\'|‘I'N
LIKIJIDS
SHOULD
BE
PLLCED
ON
THE
IPPAHITUS
WIS
DIGITAL
APPARATUS
DOES
MIT
EICEED
TH!
C-LABS
B
LIMITS
Ffi
RADIO
NOISE
EIISSIONS
FRQII
DIGITRL
IFFDRI-‘|'U5
EETOUT
IN
RADIO
INTERFERENCE
REIHJLATIGI
OF
CANIDIIN
DEHHTPENT
OF
OOIIIJIIICLTIONS
EEI
UOF§|@ll
A
nummmlocxmzummnoroosu
\(—)-
O
e
G)
°°""*1'"°"-"°'"“°l
"""
CDX-2250i
Professional
CD
Player
‘\_»‘
1.\
‘
O
M:-|||
DESIGNED
MID
ENGINEERED
IN
UM
DYGEIAINI,
A
DIVISION
CFGCITECHNOLDGIES,
IAAMFACTLHED
IN
CPINA
O
/i\
'
\
-
-
@
/_._\C‘(___
\i/
gEI'I'I.II'I.l
U
LINE
CIJT
@
P
\\__/'
LASEIILASSE1
ARAllI1IAlASiIDiClL$5Il
lJ.ID¢l»N1l.A5ERLlI1'E
IIASSIIASEIAPIIIIT
Cl-ASEILMIIIIODUCT
COIIPILI
SWITH
Dllii
lLI.iS1
CFICHAPTEI
I
SLICIGAIRI
1
O
O
:
U
M
<>
at
0%
1%
Cg
Q
MAMAWUFITIW
E
=§°
WI
E
I
U
B
U
I
|
new-1
smaz
nus
O
O
'
;.-'>‘—==-:__,
_.-=‘—=-\|.‘
.,"-==—=--._
C
"I" "I"
PM
/
1
1
CD1-2250|
Professional
CD
Playor
9'75"
—
6
ea
H
\
‘/1
'L“'/“U55
nzwmn»
>Fon'wAn|:
Q’
4’
P‘-A"-"'“\\-55
nzwrnm
oronwmo
“W
BEND
—*
—
\
If
'\
O
e
Q
O
$11
/
K
L
‘N
'\_/
xi
\.
L
.~/
/ea
\
51
O
($5
/@
\,\\L
I‘
I,‘
>1
IQ
.1
ll
‘I
.. ..
___
_
|
Ir
_
_/
| |
_
\
r
/1
.
_.»
.1
rl
,
_.
..
4-
--_l
-
-
1!
Q]
f
ix
(—)
©
“$5-2°’
MP3
®
qIl‘I'lI'Il
cux
2250|ProIesalonalCD
Player
If
\
1
|
/
’/
\}
[,1
1‘

3
4
5
8
7
9
10
INTRODUCTION:
Congratulations
on
purchasing
the
Gemini
CDX-2250i
Profes-
sional
2U
Dual
CD
Player.
This
state
of
the
art
2U
professional
CD
Player
is
backed
by
a
1
year
warranty*.
Prior
to
use,
we
urge
that
you
understand
all
the
instructions.
FEATURES:
-
Audio
CD
&
CD-R
compatible
-
Anti-shock
using
RAM
buffer
memory
-
2
Selectable
Jog
modes
Search
&
Pitch
Bend
-
Instant-start
&
cue
with
preview
-
Single
&
Continuous
play
modes
-
One
seamless
loop
per
side
with
reloop
-
Pitch
bend
via
jog
wheel
or
buttons
+/-
16%
-
Three
mode
time
selection
-
Frame
accurate
search
-
Rubber
jog
wheels
with
finger
grips
-
Large
blue
backlit
LCD
display
-
Variable
pitch
control
with
a
+/-
12%
range
-
+10
track
button
for
quick
navigation
-
Fully
programmable
with
repeat
function
SAFETY
SPECIFICATIONS:
Laser
Diode
Properties
Material:
Ga
-
AI
-
As
Wavelength:
755
-
815
nm
(25°
C)
Laser
Output:
Continuous
Wave,
max.
0.5
mW
PRECAUTIONS:
1.
Do
not
use
this
CD
player
at
temperatures
below
41
°F/5°C
or
h'gher
than
95°F/35°C.
2.
The
apparatus
should
not
be
exposed
to
dripping
or
splash-
ing,
and
no
objects
filled
with
liquids
such
as
vases
should
be
placed
on
the
apparatus.
3.
Place
the
unit
in
a
clean
and
dry
location.
4.
Do
not
place
the
unit
in
an
unstable
location.
5.
When
disconnecting
the
power
cord
from
the
AC
outlet,
always
grasp
by
the
plug.
Never
pull
the
power
cord.
6.
To
prevent
electric
shock,
do
not
remove
the
cover
or
the
bottom
screws.
7.
There
are
NO
USER
SERVICEABLE
PARTS
INSIDE.
Please
refer
to
a
qualified
technician.
NOTE:
If
you
need
ass/stance
setting
up
or
using
your
GEMINI
product
now
or
in
the
future,
call
GEMINI
support
for
Immediate
quality
assistance.
8.
Do
not
use
chemical
solvents
to
clean
the
unit.
9.
Keep
the
laser
pickup
clean
by
keeping
the
tray
closed.
10.
Keep
this
manual
in
a
safe
place
for
future
reference.
4
CONNECTIONS:
®
POWER:
Plug
in
the
power
cord
of
the
CDX-2250i.
@
LINE
OUTPUT
JACKS:
Plug
one
end
of
the
included
RCA
cable
into
LINE
OUTPUT
JACKS
on
the
rear
panel.
Plug
the
other
end
of
the
RCA
connectors
into any
available
line
input
jacks
on
your
mixer.
If
you
are
connecting
the
CDX-2250i
through
a
receiv-
er,
you can
plug
the
RCA
connectors
into
the
CD
AUX
INPUT
JACKS
on
your
receiver.
If
there
are
no
CD
or
AUX
INPUTS
use
any
line
level
(not
phono)
inputs.
O
CONTROL
CABLE:
Plug
the
CONTROL
CABLE
into
the
CDX-
2250i.
Be
careful
when
plugging
in
these
cables,
never
force
the
cable
into
its
socket,
making
sure
that
the
DIN
connector
at
the
end
of
the
cable
properly
aligns
with
the
drawing
on
the
back
of
the
CDX-2250i.
FUNCTIONS:
O
POWER:
Once
you
have
connected
all
your
cables,
you
can
turn
the
CDX-2250i’s
POWER
on
by
pressing
the
POWER
button,
pressing
the
button
a
second
time
will
tum
off
the
unit.
0
DISC
TRAY:
The
D
SC
TRAY
is
where
the
CD
is
held
during
load-
ing,
unloading
anc.
playback,
and
holds
both
12
cm
and
8
cm
CD’s.
(DO
NOT
FORCE
THE
CD
TRAY
TO
CLOSE.
EXCESSIVE
FORCE
WILL
DAl\/AGE
THE
CD
MECHANISM,
USE
THE
OPEN
AND
CLOSE
BUTTONS)
@
EJECT
BUTTON:
Pressing
the
EJECT
BUTTON
will
open
or
close
the
DISC
TRAY.
The
DISC
TRAY
will
not
eject
in
PLAY
mode.
G
JOG
WHEEL:
In
SEARCH
MODE
the
JOG
WHEEL
can
be
used
to
search
forward
or
backwards
in
the
music
track,
as
well
as
for
fine
adjustments
to
a
CUE
point
in
PAUSE
mode.
In
PITCH
BEND
mode
the
JOG
WHEEL
will
function
the
same
as
the
PITCH
BEND
allowing
you
to
speed
up
(FORWARD)
or
slow
down
(REWIND)
the
music
clockwise
being
(FORWARD)
and
counter
clockwise
being
(REWIND).
O
JOG
MODE
BUTTON:
When
the
JOG
MODE
BUTTON
is
il-
Itminated
it
indicates
the
JOG
WHEEL
is
in
SEARCH
MODE,
and
when
not
illuminated
it
indicates
that
the
JOG
WHEEL
is
in
PTCH
BEND
MODE.
0
DSPLAY:
The
DISPLAY
shows
the
track
number,
pitch
value,
pitch
bend,
single,
play/pause
modes,
loop
mode,
reloop
mode,
PGM,
the
playback
display
bar,
and
three
different
time
displays.
These
times
displays
are
TIME
ELAPSED
on
the
track,
TIME
RE-
MAINING
on
the
disc
and
TIME
REMAINING
on
the
track.
Time
is
measured
in
minutes,
seconds
and
frames.
0
PGM:
Allows
you
to
create
a
set
playlist.
To
program
a
set
list
into
the
CDX-2250i
memory,
begin
by
stopping
the
unit
from
play
and
pressing
PGM
to
begin
the
set
list.
Select
a
track
by
using
the
track
selection
button
to
scan
to
the
first
track
to
be
placed
in
the
set
list.
When
you
have
selected
the
proper
track
press
PGM

11
12
13
14
15
16
17
18
19
and
the
CDX-2250i
will
be
ready
to
set
your
next
selection.
Repeat
the
previous
steps
until
you
have
completed
your
play
list,
then
press
play
to
begin
the
set
list.
SINGLE:
Pressing
the
SINGLE
button
engages
SINGLE
mode,
in
this
mode
the
CDX-2250i
will
play
one
song
and
then
stop.
Pressing
the
SINGLE
button
again
will
then
activate
CONTINU-
OUS
mode
causing
the
unit
to
play
continuously
(after
the
last
track,
the
unit
will
return
to
the
first
track
of
the
disc
and
con-
tinue
to
play).
TIME:
The
TIME
button
switches
the
time
display
between
three
available
sources,
these
three
are
TIME
ELAPSED
on
the
track,
TOTAL
REMAIN
on
the
disc
and
REMAIN
on
the
track.
TIME
ELAPSED
indicates
how
much
time
has
currenty
gone
by
since
the
play
button
was
pressed,
TIME
REMAING
ON
DISC
will
count
down
the
time
remaining
on
the
entire
disc
and
TIME
REMAINING
ON
TRACK
counts
down
the
time
that
is
left
before
the
end
of
the
track.
PITCH:
Press
the
PITCH
button
to
activate
the
PITCH
CON-
TROL
SLIDE.
Pitch
range
that
can
be
controlled
through
the
use
of
the
PITCH
CONTROL
SLIDER.
Press
the
PITCH
button
again
to
deactivate
this
mode.
PITCH
CONTROL
SLIDE:
Moving
the
P
TCH
CONTROL
SLIDE
up
or
down
will
change
the
pitch
percewtage
+/
-
12%.
PITCH
BEND:
Pushing
the
PITCH
BEl\D
BUTTONS
will
auto-
matically
raise
the
pitch
up
to
+16%
o"
lower
the
pitch
down
to
-16%
from
the
existing
pitch
setting.
Releasing
the
buttons
will
return
the
pitch
to
the
original
pitcw
setting.
You
can
use
this
function
to
match
the
beat
when
mixing
from
one
song
to
another.
LOOP
SECTION:
A
LOOP
repeats
the
section
between
the
en-
try
point
(LOOP
IN)
and
the
exit
point
(LOOP
OUT).
A.
To
set
a
loop
while
the
unit
is
playing,
start
by
pressing
the
LOOP
IN
BUTTON
(it
will
light
up)
B.
When
you
reach
the
desired
end
loop
point
press
the
LOOP
OUT
BUTTON
(it
will
also
light
up).
The
LOOP
IN
and
LOOP
OUT
buttons
will
blink.
The
loop
will
continue
playing
until
you
press
the
LOOP
OUT
BUTTON
again
allowing
the
music
to
continue
from
that
point
on.
C.
To
re-engage
the
loop
you
must
press
the
RELOOP
BUTTON.
D.
When
you
have
released
your
loop
the
LOOP
IN
and
LOOP
OUT
BUTTON
buttons
will
turn
OFF
and
the
will
re-
main
Iit
to
indicate
that
your
loop
is
stored
in
the
CDX-2250i
memory.
E.
Pressing
the
LOOP
IN
BUTTON
again
while
the
unit
is
playing
will
erase
the
previously
saved
loop
while
saving
your
new
loop
entry
point.
F.
Press
LOOP
OUT
to
exit
the
loop
and
save
a
new
com-
plete
loop.
G.
Press
RELOOP
to
return
to
the
beginning
of
the
previ-
O
O
O
ously
saved
loop
from
normal
play.
Press
RELOOP
repeat-
edly
to
cause
the
loop
to
stutter.
NOTE:
THE
FIRST
LOOP
WILL
HAVE
A
PAUSE
AT
THE
EXIT
POINT,
WHILE
ALL
OTHERS
WILL
BE
SEAI\/ILESS.
PLAY
/
PAUSE:
Each
press
of
the
PLAY
/
PAUSE
BUTTON
causes
the
operation
to
change
from
PLAY
to
PAUSE
or
from
PAUSE
back
to
PLAY.
The
PLAY/PAUSE
BUTTON
remains
lit
when
in
PLAY
mode,
while
it
blinks
in
PAUSE
mode.
CUE:
To
set
a
CUE
point,
press
the
PLAY
/
PAUSE
BJTTON
wh'le
a
file
is
playing,
and
use
the
JOG
WHEEL
to
adjust
the
file
to
a
desired
point
in
the
track.
Pressing
the
PLAY/
PAUSE
BUTTON
will
set
a
CUE
point.
While
the
unit
is
playing
awd
after
the
cue
point
has
been
programmed,
pressing
CUE
wil
cause
the
CD
player
to
enter
the
PAUSE
mode
(PLAY/PAUSE
BJTTON
blinks)
at
the
programmed
cue
point
(the
CUE
LED
is
lit).
Hold-
ing
down
the
CUE
button
changes
the
function
to
preview,
and
allows
you
to
stutter
start
or
play
from
the
programmed
CUE
POINT.
Releasing
the
CUE
button
will
return
the
CD
to
the
preset
CUE
point.
TRACK
SEARCH:
The
TRACK
SEARCH
buttons
let
you
select
the
track
to
play.
+10
allows
you
to
scan
through
the
track
selec-
tion
in
increments
of
IO.
NOTE:
ONCE
YOU
HAVE
SKIPPED
TO
ANOTI-IER
TRACK,
YOU
I\/IAY
NOT
GO
BACK
TO
YOUR
PROGRA|\/II\/IED
CUE
POINT.
YOU
MUST
BEGIN
YOUR
CUE
SELECTION
OVER
AGAIN,
THE
CUE
WILL
BE
PRESET
TO
THE
BEGINNING
OF
THE
NEWLY
SELECTED
TRACK.
TROUBLESHOOTING:
-
If
a
disc
will
not
play,
check
to
see
if
the
disc was
loaded
cor-
rectly
(label
side
up).
Also
check
the
disc
for
excessive
dirt,
scratches,
etc.
-
If
the
disc
turns
but
there
is
no
sound,
check
the
cable
connec-
tions,
if
they
are
ok,
check
your
amplifier
or
receiver.
-If
the
CD
skips,
check
the
CD
for
dirt
or
scratches.
Do
not
as-
sume
that
the
CD
player
is
defective.
Many
CD’s
are
recorded
out
of
spec
and
w‘II
skip
on
most
or
all
CD
players.
Before
send-
ing
the
unit
for
repair,
try
playing
a
CD
that
you
are
sure
plays
properly.
5

SPECIFICATIONS:
GENERAL:
Type
..................................................................
..Compact
Disc
Player
Disc
Type
.............................
..Standard
Compact
discs
(12
cm
&
8
cm)
Time
Display
.................
..Track
Elapsed,
Track
Remain,
or
Total
Remain
Variable
Pitch
..................................
..¢
12%
Slider
with
Resume
Switch
Pitch
Bend
...............................................................
Ili
16%
Maximum
Instant
Start
........................................................
..Within
0.08
seconds
Installation
............................................................................
..19”
each
Dimensions:
..................................................................
..Main
unit:
19”
x
8.5”
x
10”
.....................................................................
..(482.6
x
88.9
x
254
mm)
................................................................
..ControlIer:
19”x
8.5”x2.75”
.......................................................................
..(482.6
x
88.9
x
70
mm)
Weight:
......................................................................
..Main
unit:
8.8
lbs.
(4
kg)
..................................................................
..Controller:
4.0
lbs.
(1.5
kg)
AUDIO
SECTION:
Quantization
................................
..1
Bit
Linear/Channel,
8
Beam
Laser
Oversampling
Rate
................................................................
..8
Times
Sampling
Frequency
.............................................................
..44.1
kHz
Frequency
Response
.................................................
..20
Hz
to
20
kHz
Total
Harmonic
Distortion
.........................................
..Less
Than
0.05%
Signal
to
Noise
Ratio
.................................................................
..85
dB
Dynamic
Range
........................................................................
..85
dB
Channel
Separation
......................................................
..85
dB
(1
KHz)
Output
Level
.........................................................
..2.0
+/-0.2V
R.M.S.
Power
Supply
................................................
..AC
1
15/280V,
60/50
Hz
SPECIFICATIONS
AND
DESIGN
ARE
SUBJECT
TO
CHANGE
WITHOUT
NOTICE
FOR
PURPOSE
OF
IMPROVEMENT.
6

ATENCION: Este producto cumple con la normativa legal si so utilizan cables y conectores
blindados para conectar la unidad a otro equipo. Para evitar interferencias electromagnéticas con otros aparatos eléctricos, como radios y televi-
sores, deben emplearse cables conectores blindados.
Los signos de exclamación dentro de un triangulo que puedan aparecer en la documentación que acompaña a la unidad pretenden alertar al
usuario de instrucciones de operación o mantenimiento Importantes.
El signa de un rayo dentro de un triangulo pretende alertar at usuario de la presencia de “voltaje peligroso” no aislado en el interior de la unidad,
que podría ser de suficiente intensidad como para constituir riesgo de descarga eléctrica.
LEA LAS ENSTRUCCIONES: Deben leerse todas las indicaciones do uso y seguridad antes de usar este producto.
CONSERVE LAS INSTRUCCIONES: Las instrucciones de uso y seguridad deben conservarse para referencias futuras.
ATIENDA A LAS ADVERTENCIAS: Deben seguirse todas las advertencias sobre este producto que figuran en el manual de instrucciones.
SIGA LAS INSTRUCCIONES: Deben seguirse todas las instrucciones del manual.
LIMPIEZA: Este producto debe limpiarse con un paño seco. Nunca utilice cera para muebles, gasolina, Insecticidas u otros líquidos volátiles ya que
podrían corroer la carcasa.
COMPLEMENTOS: No utilice accesorios que no estén recomendados por el fabricante, pues podrían dañar la unidad.
AGUA Y HUMEDAD: No use este producto cerca de medios acuáticos, como una bañera, un cubo de agua, un fregadero o un lavadero; tampoco
en un sótano húmedo, ni cerca de una piscina o similar.
ACCESORIOS: No coloque el producto sobre un carrito, soporte, trípode, brazo o mesa. Podría caer y causar graves danos a un niño o adulto así
como a la propia unidad. Úsese solo con un carrito, soporte, trípode, brazo o mesa recomendado por el
fabricante. Al montar la unidad deben seguirse siempre las Instrucciones y emplearse accesorios recomendados
por el fabricante.
CARRITO: Si el producto va sobre un carrito, debe moverse el conjunto con cuidado. Detenciones bruscas, una fuerza
excesiva o superficiales inadecuadas pueden provocar la caída de todo el conjunto. Véase Figura A.
VENTILACION: Las aperturas y ranuras de la carcasa están diseñadas para la ventilación, aseguran un manejo fiable
y tú protegen de cualquier sobrecalentamiento, por tanto, nunca deben cubrirse ni bloquearse. Estas aperturas no deben
taparse colocando el producto sobre un sofá, una cama, una alfombra o superficies similares. Nunca debe colocarse en
una estructura prefabricada. como una caja o un rack, a menos qua tengan la ventilación adecuada o lo permitan las instrucciones del fabricante.
FUENTES DE ALIMENTACION: Esta unidad debe utilizarse exclusivamente con el tipo de suministro eléctrico indicado en la etiqueta correspondi-
ente. Consúltelo antes de enchufar el producto si no esta seguro del tipo de suministro del lugar donde va a usar.
UBICACION: Este aparato debe colocarse en una ubicación estable.
PERIODOS SIN USARLO: Si no so va a usar la unidad durante uh tiempo prolongado, desenchúfelo de la corriente eléctrica.
TOMA DE TIERRA O POLARIZACION:
Si este producto lleva una clavija de corriente alterna polarizada (con un pivote mas grueso que otro, tipo ingles), solo entrara en una posición. Es
una medida de seguridad, Si no puede introducir la clavija en el enchufe gírela. En ningún caso debe forzarse. Si sigue sin entrar, un electricista
debería cambiar el enchufe.
Si la unidad lleva una clavija con tres pivotes (el tercero corres-pende a la toma de tierra), solo entrara en un tipo de enchufe. Se trata de una
medida de seguridad. Si el enchufe y la clavija no son compatibles, un electricista deberá cambiar el enchufe. En ningún caso
deberá forzarse.
PROTECCION DEL CABLE OE CORRIENTE: Los cables do corriente deben protegerse para que nadie los pise ni corran el riesgo de pinzarse por
elementos colocados encima o que los aprisionen. Debe prestarse especial atención al cable, al enchufe, a los extensores de cable y al punto por
donde el cable sale de la unidad.
TIERRA DE LA ANTENA EXTERIOR: Si el producto lleva conectada una antena exterior o sistema de cables, asegúrese de que cuenta con la toma
de tierra correspondiente, a fin de proteger la unidad de variaciones de voltaje y cargas de electricidad estática. Existe documentación oficial
acerca de la correcta utilización de la toma de tierra y de las medidas de seguridad pertinentes, conexión de los electrodos de descarga y sus
requisitos. Véase Figura B.
RAYOS: Como protección adicional del producto durante una tormenta eléctrica, o durante periodos prolongados
sin usarlo, desenchúfelo de un corriente y desconecto la antena o sistema de cables. De este modo se
protegerá el producto de los danos que pueda producir la caída de un rayo o las fluctuaciones de la red eléctrica.
LÍNEAS ELÉCTRICAS: Nunca debe saturase un sistema de antena cerca de líneas eléctricas u otros circuitos
de corriente. Tampoco debe colocarse en lugares donde pueda caer sobre dichos circuitos eléctricos. Al instalar
un sistema de antenización exterior, debe tomarse la extrema precaución de no tocar dichas líneas eléctricas,
pues el mas mínimo contacto pueda ser fatal.
SOBRECARGA: No sobrecargue los enchufes de Ia pared con ladrones o instalando enchutes múltiples, pues
correría el riesgo de electrocución o incendio
ENTRADA DE OBJETOS O LÍQUIDOS: Nunca introduzca objetos de ningún tipo en el interior del producto, pues podrían tocar una parte eléctrica
y cortocircuitar el aparato, lo que resultaría en un incendio o descarga eléctrica. No verter nunca ningún liquido sobre el producto.
REPARACION: No intente reparar el producto por cuenta propia, ya que abrir o retirar la carcasa le expondría a un voltaje peligroso una otros
peligros. Diríjase siempre a un centro de servicio técnico autorizado.
DANOS QUE REQUIEREN REPARACION: Desenchufe el aparato de la corriente y diríjase a un servicio técnico autorizado si so da alguna de las
siguientes situaciones:
El cable de alimentación o la clavija están dañados.
Se ha vertido liquido o ha caído algún objeto sobre la unidad.
El aparato se ha expuesto a la lluvia o a salpicaduras.
La unidad se ha caído al suelo o dañado de algún modo.
El aparato no funciona con normalidad, ni aun siguiendo las instrucciones. Ajuste solo los mandos que se indican en las instrucciones,
la que la manipulación inadecuada de otros controles podría dañar la unidad y requeriría un mayor trabajo de un técnico autorizado.
RECAMBIOS: Cuando Se necesite alguna pieza de recambio asegúrese de que el servicio, técnico utilice piezas originales autorizadas
o que tengan las mismas características que las originales. Los reemplazos no autorizados pueden causar descargas eléctricas, incendios
u otros danos.
COMPROBACION DE SEGURIDAD: Tras la reparación, solicite al técnico quo efectúe las comprobaciones de seguridad necesarias para
determinar que el producto se encuentra en las condiciones adecuadas para su funcionamiento.
MONTAJE EN UNA PARED O TECHO: Este producto nunca debe montarse en una pared o en el techo.
CALOR: Este producto debe alejarse de fuentes do calor, como radiadores, estufas u otros aparatos que irradien calor, incluyendo
amplificadores.
POR FAVOR LEA ANTES DE UTILIZAR, INSTRUCCIONES
IMPORTANTES DE SEGURIDAD
RIESGO
DE
SHOCK
f
ELECTRICO
-
NO
ABRIRI
lI<€I
\
-
-,.»i,
‘J
Fig.
A
IHTIIIH
"
l
__.iu.um
mm
532.":
/1
,‘\
1-
'1?
IHIIHIR
"HQ
um.
rm:
mu
mu;
uI.:r>uuu|u-:u|
unuuuru
u'.|um.n.ruI|
::E,E|T:::__
|u:¢1u.':r>r.wBm
Ill
lDL|PHl'I1
__
.||r1mn
mum:
mm:
n
5|
lmcr
nncumima
--"
rircrnunr
snrru
|u|=r:
mt
:1|,n.nr
rI|
‘EC
NI-TUNIL
H.EC
TIIEJL
‘C-OEE
Fig.
B

2
3
4
5
8
7
9
INTRODUCCION:
Lefelicitamos
por
haber
adquirido
el
Reproductor
doble
de
CD’s
de
2U
Gemini
CDX-2250i.
Este
reproductor
de
CD’s
de
ultima
generacion
esta
amparado
por
un
aho
de
garantia*.
An-
tes
de
usar,
le
recomendamos
comprenda
todas
las
instruc-
ciones
y
caracteristicas.
CARACTERISTICAS:
-
Compatible
con
Audio
CD
y
CD-R
-
Memoria
buffer
RAM
anti-shock
-
2
Modos
de
Jog
seleccionables
Busqueda
y
Pitch
Bend
-
Arranque
instantaneo
y
cue
con
pre-escucha
-
Modos
reproduccion
Single
y
Continuos
-
Un
seamless
loop
por
cada
lado
con
reloop
-
Pitch
bend
via
jog
wheel
o
botones
+/-
16%
-
Tres
modos
de
seleccion
de
tiempo
-
Busqueda
precisa
de
Frame
-
Jog
wheels
de
goma
con
surcos
para
Ios
dedos
-
Gran
display
LCD
azul
-
Control
de
Pitch
Variable
con
rango
de
+/-
12%
-
Boton
+10
para
navegacion
facil
-
Totalmente
programmable
con
function
de
repeticion
ESPECIFICACIONES
DE
SEGURIDAD:
Propiedades
del
Diodo
Laser
Material:
Ga
-
AI
-
As
Longitud
de
Onda:
755
-
815
nm
(25°
C)
Salida
Laser:
Onda
Continua,
max.
0.5
mW
PRECAUCIONES:
1
.
No
utilice
este
reproductor
de
CD
a
temperaturas
por
debajo
de
41
°F/5°C
o
superiores
a
95°F/85°C.
2.
Este
aparato
no
debe
exponerse
a
chorros
o
salpicaduras
y
no
deben
colocarse
objetos
con
Iiquidos
como
por
ejemplo
jarrones,
encima
del
aparato.
8.
Coloque
Ia
unidad
en
un
Iugar
Iimpio
y
seco.
4.
No
colocar
la
unidad
en
una
superficie
inestable.
5.
AI
desconectar
el
cable
de
corriente
de
Ia
toma
de
pared,
siempre
cojalo
por
el
conector.
Nunca
tire
del
cable.
6.
Para
evitar
shock
electrico,
no
quite
la
tapa
ni
Ios
tornillos
inferiores.
7.
NO
HAY
PARTES
REEMPLAZABLES
POR
EL
USUARIO
en
el
interior.
Por
favor
acuda
a un
tecnico
cualificado
si
es
nece-
sario.
NOTE:
SI
usted
neces/ta
ayuda
configurar
o
uti/Izar
su
producto
GEMINI
anora
o en
e/
futuro,
Ilame
o'e
GEMINI
para
as/stenc/a
Inmed/ata
o'e
Ia
calidad.
8.
No
use
disolventes
quimicos
para
Iimpiar
la
unidad.
9.
Mantenga
el
Iector
laser
Iimpio
manteniendo
Ia
bandeja
cer-
rada.
10.
Guarde
este
manual
en
Iugar
seguro
para
futuras
referencias.
8
CONEXIONES:
(D
ENCENDIDO:
Enchufe
el
cable
de
alimentacion
del
CDX-2250i.
O
CONECTORES
DE
SALIDA
DE
LINEA:
Conecte
un
extremo
del
cable
RCA
incluido
en
Ios
conectores
de
salida
de
Ia
parte
trasera.
Conecte
el
otro
extremo
de
Ios
RCA
in
cualquier
entrada
de
Iinea
disponible
en
su
mezclador.
Si
esta
conectando
el
CDX-
2250i
a
traves
de
un
pre-amplificador
,
puede
conectar
Ios
RCA
en
Ia
entrada
CD
AUX
de
su
pre-amplificador.
Si
no
hay
entrada
de
CD
o
AUX
entonces
use
cualquier
entrada
de
nivel
de
Iinea
(no
phono).
Q
CABLE
DE
CONTROL:
Conecte
el
CABLE
DE
CONTROL
en
el
CDX-2250i.
Tenga
cuidado
cuando
conecte
esos
cables,
nunca
fuerce
el
cable
en
su
conector,
asegurese
que
el
conector
DIN
al
final
del
cable
se
alinie
correctamente
con
el
dibujo
que
hay
en
Ia
parte
de
atras
del
CDX2200.
FUNCIONES:
O
ENCENDIDO:
Encienda
el
CDX-2250i
presionando
el
boton
POWER,
presionando
el
boton
POWER
de
su
CDX-2250i
Una
segunda
vez
Ia
unidad
se
apagara.
G
BANDEJA
DE
DISCO:
La
BANDEJA
DE
DISCO
es
donde
el
CD
va
alojado
durante
Ia
carga,
descarga
y
reproduccion
y
permite
discos
de
12
cm
y
8
cm.
(NO
FUERCE
LA
BANDEJA
PARA
CERRARLA
YA
OUE
UNA
FUERZA
EXCESIVA
DANARA
EL
l\/ECANISMO
DEL
CD,
USE
SIEMPRE
EL
BOTON
DE
ABRIR
/CERRAR)
@
BOTON
EJECT:
Pulsando
el
BOTON
EJECT
se
abrira
o
cerrara
la
BANDEQA
DE
DISCO.
La
BANDEJA
DE
DISCO
no
se
abrira
durante
el
modo
PLAY.
0
JOG
WHEEL:
En
MODO
BUSOUEDA
el
JOG
WHEEL
puede
usarse
para
avanzar
o
retroceder
en
Ia
pista,
asi
como
hacer
ajustes
finos
de
CUE
en
modo
PAUSA.
En
modo
PITCH
BEND
el
JOG
WHEEL
funcionara
como
PTCH
BEND
permitiendo
in-
crementar
Ia
velocidad
(ADELANTE)
o
disminuirla
(ATRAS)
de
Ia
musica
moviendo
Ia
rueda
en
el
sentido
del
reloj
(FORWARD)
o
a
Ia
inversa
(REWIND).
0
BOTON
MODO
JOG:
Cuando
el
BOTON
MODO
JOG
esta
ilu-
TIITIGCIO
indica
que
el
JOG
WHEEL
esta
en
MODO
BUSOUEDA
y
cuando
no
esta
iluminado
indica
que
el
JOG
WHEEL
esta
en
\/IODO
PITCH
BEND.
Q
DISPLAY:
El
DISPLAY
muestra
el
numero
de
pista,
valor
del
ditch,
pitch
bend,
single,
modo
play
/
pausa,
modo
loop,
modo
"eloop,
PGM,
barra
de
reproduccion
y
tres
modos
distintos
de
tiempo.
Estos
modos
de
tiempo
son
TIEMPO
TRANSCURRIDO
de
pista,
TIEMPO
RESTANTE
en
el
disco
y
TIEMPO
RESTANTE

10
11
12
13
14
15
16
17
18
19
en
Ia
pista.
El
tiempo
se
mide
en
minutos,
segundos
y
frames.
PGM:
Permite
crear
Una
Iista
de
reproduccion.
Para
programar
Una
Iista
en
Ia
memoria
del
CDX-2250i,
primero
pare
Ia
repro-
duccion
y
pulse
PGM
para
iniciar
Ia
Iista.
Seleccione
Una
pista
usando
el
selector
de
pistas
para
buscar
la
primera
pista
de
Ia
Iista.
Cuando
haya
seleccionado
Ia
pista
correcta
pulse
PGM
y
el
CDX-2250i
estara
listo
para
Ia
proxima
seleccion.
Repita
Ios
pasos
anteriores
para
completar
Ia
Iista,
Iuego
pulse
play
para
iniciar
Ia
reproduccion
de
Ia
Iista
fijada.
SINGLE:
Pulsando
el
boton
SINGLE
se
activa
el
modo
SIN-
GLE,
en
este
modo
el
CDM-8610
reproducira
Una
cancion
y
Iuego
se
para.
Pulsando
el
boton
SINGLE
de
nuevo
se
activara
el
modo
CONTINUOS
provocando
que
la
unidad
reproduzca
de
forma
continua
(despues
de
Ia
Ultima
cancion,
la
unidad
vuelve
a
Ia
pista
primera
y
sigue
reproduccion).
TIEMPO:
Pulsando
el
boton
TIEMPO
conmuta
el
display
de
tiempo
entre
tres
posibilidades,
estas
tres
son
TIEMPO
TRANSCURRIDO
de
pista,
TIEMPO
RESTANTE
de
pista
y
TIEMPO
RESTANTE
DEL
DISCO.
TIEMPO
TRANSCURRIDO
indica
cuanto
tiempo
Ileva
esta
cancion
desde
que
se
pulso
play,
TIEMPO
RESTANTE
EN
PISTA
cuenta
el
tiempo
que
fal-
ta
para
finalizar
Ia
pista
el
y
TIEMPO
RESTANTE
DEL
DISCO
cuenta
el
tiempo
que
falta
para
finalizar
el
disco
que
suena.
PITCH:
Mantenga
pulsado
el
boton
de
PITCH
para
activar
el
CONTROL
DESLIZANTE
DE
PITCH.
El
rango
de
Pitch
puede
ser
controlado
a
traves
del
CONTROL
DESLIZANTE
DE
PITCH.
Pulse
el
boton
de
Pitch
de
Nuevo
para
desactivar
este
modo.
CONTROL
DESLIZANTE
DE
PITCH:
Moviendo
el
CONTROL
DESLIZANTE
DE
PITCH
arriba
o
abajo
cambiara
el
porcentaje
+/
-
12%.
PITCH
BEND:
Pulsando
Ios
botones
PITCH
BEND
se
aumen-
tara
automaticamente
+16%
o
se
disminuira
el
pitch
en
-16%
desde
el
ajuste
existente.
Soltando
Ios
botones
se
vuelve
al
nivel
de
pitch
original.
Se
puede
utilizar
esta
funcion
para
cuadrar
el
beat
cuando
se
mezcla
de
Una
cancion
a
otra.
SECCION
LOOP:
Un
LOOP
repite
Ia
seccion
entre
el
punto
de
entrada
(IN)
y
el
de
salida
(OUT).
A.
Para
fijar
un
loop
mientras
Ia
unidad
esta
reproduci-
endo,
pulse
el
boton
IN
(se
iluminara)
B.
Cuando
Ilegue
al
punto
que
desea
finalizar
el
loop
pulse
el
boton
OUT
(tambien
se
iluminara).
El
loop
seguira
repro-
duciendose
hasta
que
pulse
el
boton
OUT
de
nuevo
permi-
tiendo
que
Ia
musica
continue
desde
ese
punto.
C.
Para
re-enganchar
el
loop
debe
pulsar
el
boton
RE-
LOOP.
D.
Cuando
haya
Ianzado
su
loop
el
BOTON
OUT
se
apagara
OFF
y
el
BOTON
IN
seguira
iluminado
para
indicar
que
su
loop esta
guardado
en
Ia
memoria
del
CDX-2250i
E.
Pulsando
el
boton
IN
de
nuevo
mientras
Ia
unidad
re-
produce,
se
borrara
el
loop
previo
guardado
al
guardar
su
nuevo
punto
de
entrada
de
loop.
F.
Pulse
OUT
para
salir
del
loop
y
guardar
Un
nuevo
loop
completo.
G.
Pulse
RELOOP
para
volver
al
principio
del
loop
guardado
para
reproduccion
normal.
Pulse
RELOOP
repetidamente
para
tartamudeo.
NOTA:
EL
PRIMER
LOOP
TENDRA
UNA
PAUSA
EN
EL
PUNTO
DE
SALIDA,
MIENTRAS
OUE
TODOS
LOS
DEMAS
SERAN
SIN
CORTE.
PLAY
/
PAUSA:
Cada
pulsacion
del
BOTON
PLAY
/
PAUSA
causa
el
cambio
de
funcion
de
PLAY
a
PAUSA
o
de
PAUSA
de
nuevo
a
PLAY.
El
boton
PLAY/PAUSA
queda
iluminado
cuando
es
PLAY,
mientras
que
parpadea
durante
PAUSA.
CUE:
Cuando
la
unidad
esta
reproduciendo
y
despues
de
haber
programado
un
punto
CUE,
pulsando
CUE
el
reproductor
de
CD
entrara
en
modo
PAUSA
(BOTON
PLAY/
PAUSE
parpadea)
en
el
punto
CUE
cue
programado
(el
CUE
LED
se
enciende).
Manteniendo
el
boton
CUE
la
funcion
cambia
a
pre-escucha
y
permite
hacer
tartamudeo
del
punto
CUE
o
reproducir
desde
ese
punto
CUE.
Al
soltar
el
boton
de
CUE
Ia
unidad
vuelve
al
punto
CUE
prefijado.
sELEcc|oN
DE
PISTA:
Los
botones
de
sELEcc|oN
DE
PISTA
(T
RACK
SEARCH)
permiten
seleccionar
Ia
cancion
para
sonar.
El
boton
+10
le
permite
,cUando
esta
en
busqueda,
ir
en
Incre-
mentos
de
10.
NOTA:
UNA
VEZ
SALTE
A
OTRA
PISTA,
NO
PODRA
VOLVER
AL
PUNTO
CUE
OUE
TUVIERA
PROGRAMADO.
DEBERA
EM-
PEZAR
LA
SELECCION
DE
CUE
DE
NUEVO,
YA
OUE
EL
CUE
ESTARA
PRE
AJUSTADO
EN
EL
INICIO
DE
LA
SIGUIENTE
CANCION.
RESOLUCION
DE
PROBLEMAS:
-
Si
Un
disco
no
suena,
compruebe
si
el
disco
se
ha
cargado
correctamente
(etiqueta
hacia
arriba).
Tambien
compruebe
que
el
disco
no
tenga
excesiva
suciedad,
rayas
,etc.
-
Si
el
disco
gira
pero
no
hay
sonido,
compruebe
Ias
conexiones,
si
estan
bien
compruebe
su
etapa
de
potencia
o
amplificador.
-
Si
el
CD
salta,
compruebe
el
CD
de
suciedad
o
rayas.
No
asu-
ma
que
el
reproductor
de
CD
es
defectuoso.
Muchos
cd’s
estan
grabados
fuera
de
norma
y
saltaran
en
Ia
mayoria
de
reproduc-
tores
CD.
Antes
de
enviar
Ia
unidad
a
reparar,
pruebe
con
Un
CD
que
Usted
sepa
con
seguridad
que
funciona
bien.
9

ESPECIFICACIONES:
GENERAL:
Tipo
........................................................
..Reproductor
Compact
Disc
Tipo
Disco
........................
..Compact
discs
estandards
(12
cm
&
8
cm)
Display
Tiempo:
.....................
..Tiempo
Transcurrido,
Tiempo
Restante,
o
Total
restante
Pitch
Variable
............................
..1
12%
Deslizante
con
boton
Resume
Pitch
Bend
...............................................................
..1
16%
Maximum
Instant
Start
........................................................
..entre
0.08
segundos
lnstalacion
...........................................................................
..rack
19”
Dimensiones:
.......................................................
..Unidad
Principal:
19”
x
8.5”
x
10”
.....................................................................
..(482.6
x
88.9
x
254
mm)
....................................................
..Unidad
Remota:
19”
x
8.5”
x
2.75”
.......................................................................
..(482.6
x
88.9
x
70
mm)
Peso:
.......................................................
..
Unidad
Principal:
8.8
lbs.
(4.0
kg)
.........................................................
..Unidad
Remota:
4.0lbs.
(1.5
kg)
sEcc|oN
DE
AUDIO:
Ouantizacion
....................................
..1
Bit
Lineai/Canal,
8
Beam
Laser
Sobremuestreo
......................................................................
..8
veces
Frecuencia
Sampling
...........................................................
..44.1
kHz
Respuesta
en
Frecuencia
............................................
..20
Hz
a
20
kHz
Distorsion
Harmonica
Total
......................................
..Menos
de
0.05%
Relacion
Sehal
Ruido
................................................................
..85
dB
Rango
Dinamico
.......................................................................
..85
dB
Separacion
de
Canales
.................................................
..85
dB
(1
KHz)
Nivel
de
Salida
......................................................
..2.0
+/-
0.2V
R.M.S.
Fuente
de
Alimentacion
.................................
..AC
115/280V,
60/50
Hz
ESPECIFICACIONES
Y
DISENO
ESTAN
SUJETOS
A
CAMBIOS
SIN
AVISOS
PARA
FINES
DE
MEJORA.
1O

RIESGO
DE
SHOCK
f
ELECTRICO
-
NO
C
€
ABRIR!
ATTENTION:
Cet
appareil
répond
aux
certifications
FCC
Iorsque
connecté
a
d’autres
appareils
a
l’aide
de
cordons
blindés.
Afin
de
prévenir
tout
risque
de
parasite
électromagnétiques
avec
un
poste
de
radio
ou
de
télé,
veuillez
Utiliser
des
cordons
blindés.
Le
point
d’excIamation
dans
un
triangle
est
destiné
a
attirer
votre
attention
durant
l’utiIisation
de
votre
appareil
ou
d’un
entretien
périodique.
LIRE
LES
INSTRUCTIONS:
Toutes
les
instructions
et
consignes
d’utilisation
doivent
étre
Iues
avant
d’utiliser
I’appareil.
CONSERVEZ
CE
GUIDE:
Nous
vous
recommandons
de
conserver
les
instructions
et
consignes
d’utiIisation
en
cas
de
nécessité
ultérieure.
RESPECT
DES
CONDITIONS
D’UTILISATION:
Nous
vous
recommandons
de
respecter
les
instructions
d’utilisation.
SUIVRE
LES
INSTRUCTIONS:
Nous
vous
recommandons
de
respecter
ces
consignes.
NETTOYAGE:
L’appareil
doit
etre
nettoyé
avec
un
chiffon
légerement
humide.
Ne
pas
Utiliser
de
produits
chimiques
corrosifs
ou
volatiles
(cire,
essence,
insecticide)
afin
de
he
pas
endommager
I’appareil.
CORDON:
Ne
pas
Utiliser
de
cordons
non
conformes
aux
normes
du
fabricant
afin
de
he
pas
endommager
I’appareil.
EAU
ET
HUMIDITE:
Ne
pas
Utiliser
I’appareil
a
proximité
d’une
source
d’eau
(cuisine,
salle
de
bain,
Iavabo,
etc),
ni
dans
uh
endroit
humide
(piscine,
etc).
ACCESSOIRES:
Ne
pas
installer
cet
appareil
sur
Une
surface
instable.
L’appareiI
pourrait
tomber
et
se
briser
et/ou
risquerait
de
blesser
queIqu’un.
Veuillez
Utiliser
des
accessoires
recommandés
par
le
fournisseur
ou
vendus
avec
I’appareil.
Tout
montage
ou
installation
doit
respecter
les
consignes
du
fabricant
et
Utiliser
les
accessoires
recommandés
par
Ie
fabricant.
TRANSPORT
SUR
CHARIOT:
Tout
produit
installé
sur
un
chariot
doit
étre
manipulé
avec
précaution.
Un
arret
brusque
ou
un
_,
-
déplacement
trop
rapide
pourrait
entralner
la
chute
de
I’appareil
et
l’endommager.
VENTILATION:
Les
ouvertures
d’aération
de
I’appareil
permettent
Une
ventilation
optimale
de
ce
dernier
afin
d’éviter
toute
\
._,,;;__§§.
surchauffe.
Ces
ouvertures
he
doiventjamais
étre
obstruées.
Ne
pas
placer
I’appareil
sur
un
support
souple
qui
pourrait
bloquer
les
ouvertures
Fig.
A
(lit,
sofa,
canapé...)
Si
I’appareil
est
installé
dans
Une
étagere
ou
un
meuble
fermé,
veuillez
vous
assurer
qu’il
y
alt
assez
de
ventilation.
Consultez
le
fabricant
ou
votre
fournisseur
pour
toute
information
complémentaire.
ALIMENTATION:
Veuillez
respecter
la
tension
d’alimentation
indiquée
au
dos
de
I’appareil.
Si
vous
n’étes
pas
certain
de
la
tension
utilisée
dans
votre
région,
contactez
votre
fournisseur.
EMPLACEMENT:
Veuillez
installer
I’appareil
sur
Une
base
solide
et
stable.
PERIODE
DE
NON
UTILISATION:
Débranchez
le
cordon
d’alimentation
de
I’appareil
en
cas
de
non
utilisation
prolongée.
MISE
A
LA
TERRE:
-
Si
I’appareil
est
muhi
d’uhe
fiche
polarisée
de
courant
alternatif,
veuillez
respecter
Ia
polarité
en
Ie
branchant.
La
lame
large
doit
entrée
dans
Ia
fente
large
de
la
prise
de
courant.
ll
s’agit
d’une
mesure
de
sécurité
qui
doit
étre
respectée.
Si
vous
n’arrivez
pas
a
brancher
la
prise,
inversez
Ia
fiche.
Si
vous
he
pouvez
toujours
pas
I’ihsérer
dans
Ia
prise,
veuillez
commuhiquer
avec
uh
électricieh
afin
de
remplacer
votre
vieille
prise
électrique
par
Une
houvelle.
-
Si
I’appareil
est
muhi
d’une
fiche
d’alimentation
avec
prise
a Ia
terre,
veuillez
Ia
brancher
dans
Une
prise
électrique
muhie
d’uhe
connection
avec
mise
a
la
terre.
Si
vous
he
pouvez
brancher
I’appareil
correctement,
veuillez
commuhiquer
avec
un
électricieh
afin
de
remplacer
votre
vieille
prise
électrique
par
Une
houvelle.
INSTALLATION
DU
CORDON
D’ALIMENTATION:
Les
cordons
d’alimentation
doivent
etre
déroulés
et
installés
sécuritairement
afin
d’éviter
qu’iIs
soieht
accrochés
et/ou ehdommagés.
ANTENNE
EXTERIEURE:
Si
vous
brahchez
votre
appareil
a
une
antenne
ou
a
un
cable
extérieur,
assurez-vous
qu’iI
y
alt
Une
connection
de
mise
a Ia
terre
afin
d’éviter
les
surtehsiohs
et
les
décharges
d’éIectricité
statique.
ORAGEIFOUDRE:
En
cas
d’orage
ou
de
non
utilisation
prolohgée,
débranchez
le
cordon
d’alimentation,
Ie
cable
d’ahtehhe
et
les
fils
audio.
Ceci
vous
évitera
les
risques
de
dégats
occasiohhés
par
la
foudre
ou
les
surcharge
électriques.
LIGNES
ELECTRIOUES:
Une
ahtehhe
extérieure
he
doit
pas
étre
située
sous
ou
a
proximité
de
lighes
électriques
et/ou
d’un
trahsformateur
afin
d’éviter
les
bris.
Lors
d’une
installation
d’ahtehhe
extérieure,
veuillez
éviter
tout
contact
avec
les
lighes
électriques:
tout
contact
peut
étre
fatal.
SURCHARGE:
Ne
pas
surcharger
les
prises
électriques,
blocs
d’alimentation
ou
rallohges
en
y
brahchaht
trop
d’appareils.
Ceci
afin
d’éviter
""""'
tout
risque
de
surcharge
électrique
ou
d’incendie
en
cas
de
surchauffe.
/_\
ml
INSERTION
D’OBJET
OU
DE
LIQUIDE:
N’ihsérez
pas
d’objets
dans
les
ouvertures
de
I’appareil
afin
d’éviter
tout
risque
g _'
de
choc
électrique
.:::*:.:t::..".".::.....
ou
d’incendie.
Nejamais
rehverser
de
liquide
sur
I’appareil.
SERVICE
APRES
VENTE:
N’essayez
pas
de
réparer
cet
appareil
en
I’ouvrant
ou
en
Ie
démohtaht
afin
d’éviter
tout
risque
de
choc
électrique.
_,,
__,,_,_,,,_,,,,,,,,,,f,§:‘""""""'"'
En
cas
de
probleme,
veuillez
ehtrer
en
contact
avec
votre
revendeur
ou
un
centre
de
service
autorisé.
BRIS
OU
SITUATION
NECESSITANT
UNE
REPARATION:
Débranchez
I’appareil
de
la
prise
électrique
et
remettez-le
Fig.
B
dans
son
emballage
d’origine.
Communiquez
avec
le
revendeur
dans
Une
des
situations
suivantes:
-
Lorsque
Ie
cordon
d’alimentation
est
endommagé.
-
Si
uh
liquide
a
été
renversé
sur
I’appareil.
-
Si
I’appareil
a
été
exposé
a Ia
pluie.
-
Si
I’appareil
he
fonctionne
pas
correctement
malgré
le
respect
des
consignes
ci-dessus.
Le
non-respect
de
l’ajustement
des
réglages
mentionnés
dans
ce
guide,
toute
manipulation
ou
réglage
non
conseillés
peuvent
endommager
I’appareil
et
occasionner
des
frais
supplémentaires.
PIECES
DE
RECHANGE:
Lorsque
vous
avez
besoin
de
remplacer
des
pieces,
n’utilisez
que
des
pieces
d’origine
ou
possédant
des
caractéristiques
identiques.
L’utiIisation
de
pieces
non
certifiées
peut
endommager
I’appareil:
surchauffe,
court-circuit,
choc
électrique,
etc.
CONTROLE
DE
SECURITE:
Avant
de
récupérer
votre
appareil,
assurez-vous
que
le
réparateur
a
effectué
tous
les
controles
de
sécurité
nécessaires
afin
de
vous
rehdre
uh
appareil
en
bon
état
de
fonctionnement.
INSTALLATION
AU
PLAFOND
OU
SUR
UN
MUR:
Ce
type
d’instalIation
est
fortement
déconseillé.
CHALEUR:
Veuillez
installer
I’appareil
loin
de
toute
source
de
chaleur
tels
les
radiateurs,
réchauds
ou
tout
autre
appareil
produisant
de
la
chaleur.
RECYCLAGE:
Cet
appareil
he
doit
pas
etre
considéré
comme
un
déchet
domestique
a
usage
unique.
Vous
devez
le
déposer
dans
un
point
de
collecte
destiné
au
recyclage
des
appareils
électroniques
et
électroménagers.
Ainsi
vous
préservez
l’environnement
et
cela
évitera
des
problemes
de
santé
publique
et
préservera
l’environnement.
Le
recyclage
contribue
a
préserver
les
ressources
naturelles.
11

2
3
4
5
8
7
9
INTRODUCTION:
Felicitatiohs
concernant
votre
achat
du
Double
Lecteur
CD
Pro-
fessionhel
Gemini
CDX-2250i.
Ce
Double
Lecteur
CD
Profes-
sionhel
2U
est
couvert
par
Une
garahtie
durant
1
an.
Avant
toute
utilisation,
nous
vous
recommandons
de
prehdre
con-
naissance
des
instructions
qui
suiveht.
CARACTERISTIOUES:
-
Compatible
CD
Audio
&
CD-R
-
Memoire
anti-choc
(RAM)
-
Larges
molettes
de
recherche
(Search)
et
rattrapage
(Pitch
Bend)
-
Demarrage
de
lecture
instahtane
&
pre-ecoute
du
point
CUE
-
Fohctioh
Arret
automatique
et/ou
lecture
continue
-
Boucle
parfaite
avec
fohctioh
de
retour
instantane
a
Ia
boucle
(Reloop)
par
c6te
-
Touches
de
rattrapage
+/-
16%
&
molette
-
8
modes
affichage
temps:
temps
ecoule,
temps
restaht,
temps
total
restaht
-
Lecture
a
Ia
frame
(1/75eme
de
seconde)
-
Molettes
avec
revetement
toucher
Rubber
-
Larges
ecrahs
bleus
LCD
haute
visibilite
-
Pitch
reglable
+/-
12%
-
Touche
+10
pour
acces
rapide
aux
plages
-
Programmable
avec
fohctioh
repetition
SPECIFICATIONS
LASER:
Proprietes
Diode
Laser
Gaz:
Ga
-
AI
-
As
Lohgueur
d’Ohde:
755
-
815
hm
(25°
C)
Niveau
de
Sortie:
Signal
Cohtihu,
max.
0.5
mW
MISES
EN
GARDE:
1.
Ne
pas
Utiliser
ce
Iecteur
CD
a
des
temperatures
ihferieures
a
41
°F/5°C
et
superieures
a
95°F/85°C.
2.
L’appareiI
he
doit
pas
etre
positiohhe
a
proximite
de
tout
objet
cohtehaht
uh
liquide
(Exemplez
vase...).
8.
Placez
I’appareil
dans
uh
endroit
propre,
sec
&
vehtile.
4.
Placez
I’appareil
sur
uh
support
stable.
5.
Lorsque
vous
debrahchez
I’appareil
de
la
prise
electrique,
utilisez
la
prise.
Ne
tirez
jamais
sur
Ie
cordon.
6.
Afin
de
prevehir
tout
accident
electrique
eventuel,
veuillez
he
pas
demonter
I’appareil.
7.
II
n’y
a
pas
DE
PIECES
DETACHEES
ACCESSIBLES
A
TOUT
UTILISATEUR
A
L’INTERlEUR
DE
L’APPAREIL.
En
cas
de
probleme,
veuillez
contacter
votre
revendeur
ou
uh
tech-
nicien
qualifie.
NOTE:
Si
vous avez
besoin
d’aide
pour
I’insta/Iation
de
votre
nouvel
appareil,
appe/ez
GEMINI
Ie
soutien
technique
pour
Une
assistance
immeo'iate
de
quaiite.
8.
Veillez
a
he
pas
Utiliser
de
solvahts
chimiques
pour
nettoyer
I’appareil.
9.
Veillez
a
conseh/er
les
tiroirs
en
position
fermee
afin
de
pro-
12
teger
les
blocs
optiques
des
poussieres.
10.
Conservez
ce
mode
d’empIoi
dans
uh
endroit
sUr
pour
tout
Usage
futur.
CONNEXIONS:
G)
ALIMENTATION
(POWER):
brahchez
Ie
cordon
d’alimentation
du
CDX-2250i.
0
SORTIE
AUDIO:
Utilisez
les
cordons
RCA
Iivres
avec
I’appareil
et
brahchez
les
sur
les
sorties
LINE
OUTPUT
situees
a
I’arriere
de
I’appareil.
Cohnectez
I’aUtre
extremite
a
toute
entree
lighe
de
votre
mixer.
Si
vous
utilisez
Ie
CDX-2250i
avec
uh
amplificateur
hi-fi,
utilisez
les
cordons
RCA
et
les
entrees
CD
ou
AUX.
Si
votre
amplificateur
he
possede
pas
d’entrees
CD
ou
AUX,
utilisez
n’importe
quelle
entree
de
hiveau
lighe
(Ne
pas
Utiliser
l’entree
phono)
0
CORDONS
DE
TELECOMMANDE:
Branchez
les
COR-
DONS
DE
TELECOMMANDE
a
chaque
c6te
du
CDX-2250i.
Ne
forcez
pas
Iors
du
branchement
de
ces
cordons
et
verifiez
que
les
prises
DIN
soieht
cohnectees
de
facon
a
respecter
Ie
schema
situe
a
I’arriere
du
CDX-2250i.
FONCTIONS:
O
POWER:
Lorsque
vous
avez
effectue
tous
les
brahchements
mettez
le
CDX-2250i
sous
tension
eh
appuyaht
sur
Ia
touche
POWER,
pour
eteihdre
I’appareil,
appuyez
sur
la
touche
POWER
Une
seconde
fois.
0
TIROR
POUR
CD:
Permet
Ie
chargemeht,
Ia
lecture
et
le
dechargement
de
tout
CD
(Compatible
12cm/8cm).
(AFll\
DE
NE
PAS
ENDOMMAGER
LES
TIROIRS
ET
LEURS
ME-
CAN
SMES,
UTILISEZ
SYSTEMATIOUEMENT
LES
TOUCHES
OPE\I/CLOSE).
@
TOUCHE
EJECTION
(EJEC1):
En
appuyaht
sur
les
touches
EJECT,
vous
ouvrez
&
fermez
les
TIROIRS
POUR
CD.
En
cours
de
lecture,
Ie
CDX-2250i
est
equipe
d’Une
protection
permettant
d’eviter
Une
ouverture
accidentelle
des
TIROIRS
POUR
CD.
Q
MOLETTE
(JOG
WHEEL):
En
MODE
SEARCH
(RECHERCHE)
Ia
MOLETTE
permet
Une
recherche
rapide
avant
&
arriere,
ainsi
qU’Une
recherche
precise
afin
de
caler
uh
point
CUE
eh
mode
PAUSE.
En
MODE
PITCH
BEND
la
MOLETTE
permettra
Uh
ajustement
temporaire
de
la
vitesse
durant
uh
calage.
Dans
le
sens
des
aiguilles
d’uhe
montre
(FORWARD)
vous
accelerez
la
vitesse,
a
I’inverse
(REWIND),
vous
reduisez
Ia
vitesse
de
lecture.
0
TOUCHE
JOG
MODE:
Lorsque
la
TOUCHE
JOG
MODE
est
illuminee,
la
MOLETTEest
en
MODE
SEARCH
(RECHER-
CHE),
a
l’inverse
(Touche
eteihte),
Ia
MOLETTE
est
en
MODE
PITCH
BEND.
0
ECRAN
LCD:
L’ECRAN
LCD
permet
l’affichage
du
hombre
de
plages,
Ia
reglage
de
vitesse
(Pitch),
fohctioh
pitch
bend,
lecture

11
12
13
14
15
16
17
18
19
10
simple
ou
continue,
mode
play/pause,
mode
recherche
avant/
arriere,
boucle
(Loop),
retour
a
la
boucle
(Reloop),
PGM,
mode
repetition
(Repeat),
barre
de
progression
&
8
modes
affichages
temps
(TEMPS
ECOULE,
TEMPS
RESTANT
&
TEMPS
TOTAL
RESTAN1).
L’affichage
du
temps
s’effectUe
en
minutes
-
sec-
ohdes
-
frames.
PROGRAMME
(PGM):
Permet
Ia
creation
d’Une
playlist
(Pro-
gramme
de
lecture).
Mettez
le
CDX-2250i
a
l’arret
(Pas
de
lecture
eh
cours),
pressez
Ia
touche
PGM
afin
de
demarrer
Ia
creation
d’uhe
playlist.
Selectiohnez
les
morceaux
a
I’aide
des
touches
de
recherche
de
plage.
Lorsque
vous
avez
atteint
Ia
plage
souhaitee,
pressez
la
touche
PGM
&
ainsi
de
suite.
A
I’issue
de
Ia
selection,
appuyez
sur
Ia
touche
play
(Lecture)
afin
de
demarrer
Ia
lecture
de
votre
playlist.
LECTURE
SIMPLE
(SINGLE):
Appuyez
sur
Ie
touche
SINGLE
afin
d’activer
Ie
mode
SINGLE,
Ie
CDX-2250i
lira
alors
Ia
plage
Une
fois,
puis
s’arretera.
Appuyez
Une
seconde
fois
sur
Ia
touche
SINGLE
afin
d’activer
Ie
mode
CONTINUOUS
(LEC-
TURE
CONTINUE):
Iorsque
Ia
derniere
plage
sera
Iue,
I’appareil
reprendra
Ia
lecture
a
partir
de
Ia
premiere
plage.
TEMPS
(TIME):
La
touche
TIME
permet
de
modifier
l’affichage
temps.
8
types
d’affichage
sont
disponiblesz
-
TEMPS
ECOULE
-
TEMPS
RESTANT
-
TEMPS
TOTAL
RESTANT
REGLAGE
DE
VITESSE
(PITCH):
Appuyez
sur
Ia
touche
PITCH
afin
d’activer
Ia
fohctioh
permettant
de
modifier
Ia
vitesse
de
lecture.
Vous
pouvez
modifier
celle-ci
a
concurrence
de
+/-
12%.
Pour
desactiver
la
fohctioh
PITCH,
appuyez
Une
nou-
velle
sur
cette
touche.
POTENTIOMETRE
DE
REGLAGE
DE
VITESSE
(PITCH
CON-
TROL
SLIDE):
Permet
de
modifier
Ia
vitesse
de
lecture
a
con-
currence
de
+/-
12%
TOUCHES
DE
RATTRAPAGE
(PITCH
BEND):
Les
touches
PITCH
BEND
permettent
de
modifier
de
facon
ihstantanee
&
temporaire
Ia
vitesse
de
lecture
de
+/-
16%
en
fohctioh
du
reglage
de
vitesse
eh
cours.
Le
fait
de
relacher
ces
touches
permet
de
TGVGTII’
a
Ia
vitesse
de
lecture
eh
cours.
Cette
fonc-
tion
permet
Ie
ca
age
de
2
morceaux
Iors
d’Un
mix.
SECTION
BOUC_E
(LOOP):
Une
boucle
(LOOP)
est
Une
repe-
tition
de
lecture
c.’Un
passage
entre
uh
point
d’entree
(IN)
&
uh
point
de
sortie
(OUT).
A.
Pour
cree"
Une
boucle,
pressez
Ia
touche
IN
(Celle-ci
s’aIIumera).
B.
Lorsque
vous
avez
atteint
Ie
point
de
sortie
desire,
pres-
sez
alors
la
touche
OUT
(Celle-ci
s’aIIUmera
aussi).
La
bou-
cle
sera
alors
Iue
jUsqu’a
appuyer
Une
nouvelle
fois
sur
Ia
touche
OUT.
La
musique
reprendra
a
partir
de
ce
point
de
sortie.
C.
Pour
activer
de
nouveau
Ia
boucle
enregistree,
appuyez
sur
Ia
touche
RELOOP.
D.
Lorsque
vous
sortez
de
Ia
boucle,
Ia
touche
OUT
s’eteiht
&
Ia
touche
IN
reste
allumee
indiquant
Ia
presence
d’une
boucle
dans
la
memoire
du
CDX-2250i.
E.
Appuyez
de
nouveau
sur
Ia
touche
IN
afin
d’effacer
Ia
bou-
cle
ehregistree
&
enregistrer
uh
nouveau
point
d’entree
(IN).
F.
Appuyez
sur
Ia
touche
OUT
pour
enregistrer
Ie
point
de
sortie
(OUT)
&
enregistrer
Ia
nouvelle
boucle.
G.
Appuyez
sur
Ia
touche
RELOOP
pour
revenir
au
debut
NOTE:
LA
PREMIERE
BOUCLE
MAROUERA
UN
TEMPS
D’ARRET
AU
NIVEAU
DU
POINT
DE
SORTIE,
ALORS
OUE
LES
AUTRES
SERONT
PARFAITES
(SEAMLESS).
PLAY/PAUSE:
Chaque
pression
sur
Ia
touche
PLAY/PAUSE
per-
met
de
demarrer
ou
de
mettre
eh
mode
pause
la
LECTURE.
La
touche
PLAY/PAUSE
reste
allumee
durant
Ia
LECTURE
et
clignote
en
mode
PAUSE.
CUE:
Lorsque
I’appareil
est
eh
mode
lecture
&
apres
avoir
en-
registre
uh
point
cue,
Ie
fait
d’appuyer
sur
Ia
touche
CUE
mettra
Ie
Iecteur
CD
en
mode
PAUSE
(La
touche
PLAY/PAUSE
clignote)
au
hiveau
du
point
cue
memorise
(La
led
CUE
est
alors
allumee).
Maintenez
Ia
touche
CUE
enfohcee
afin
de
pre-ecouter
Ie
point
cue
&
creer
uh
effet
stutter
permettant
de
demarrer
Ia
lecture
a
partir
de
ce
point
CUE.
Relachez
la
touche
CUE
afin
de
revenir
au
point
CUE
enregistre.
SELECTION
DE
PLAGE
(TRACK
SELECTION):
Les
touches
TRACK
SELECTION
permettent
de
selectionher
les
plages
que
vous
souhaitez
lire.
+10
permet
d’acceder
plus
rapidemeht
aux
plages
par
saut
de
10.
Les
touches
TRACK
SEARCH
permettent
d’acceder
aux
plages
Une
par
Une.
NOTE
:
UNE
FOIS
OUE
VOUS
AVEZ
ACCEDE
A
UNE
AU-TRE
PLAGE,
VOUS
NE
POUVEZ
PLUS
ACCEDER
AU
POINT
CUE
ENREGISTRE.
DEVEZ
ALORS
ENREGISTREZ
UN
AU-TRE
POINT
CUE,
LE
POINT
CUE
SERA
ALORS
AS
SSOCIE
A
CETTE
NOUVELLE
PLAGE.
DYSFONCTIONNEMENTS:
-
Le
CD
h’est
pas
Iu:
verifiez
que
celui-ci
a
correctement
ete
charge
dans
le
tiroir
(Le
c6te
portant
les
inscriptions
doit
etre
Iis-
ible).
Verifiez
aussi
I’etat
de
proprete
et
les
eventuelles
rayures...
-
Le
CD
tourne,
mais
aucun
son
he
sort:
verifiez
les
connexions,
I’ampIificateur,
Ia
console
de
mixage.
-
Le
CD
saute:
Verifiez
I’etat
de
proprete
et
les
eventuelles
ray-
ures.
Ne
considerez
pas
que
votre
appareil
est
defectueux.
Beaucoup
de
CDs
sont
fabriques
sans
tenir
compte
des
normes
obligatoires
en
vigueur
et
ils
fonctionneront
incorrectement
sur
tout
Iecteur
CD.
Avant
d’envoyer
votre
appareil
eh
reparation,
essayez
avec
uh
CD
Iu
sur
uh
autre
Iecteur
13

CARACTERISTIOUES
TECHNIQUES:
GENERALES:
Type
..............................................
..LecteUr
CD
Professionnel
Disques
Lus
......................................................
..CD
Standards
(12
cm
&
8
cm)
Affichage
Temps:
............................
..Temps
ecoule,
Temps
restaht
&
Temps
total
restaht
Reglage
de
vitesse
(Potentiometre
lineaire).
.............................
..1
12%
Pitch
Bend
..............................................................................
..i
16%
Maximum
Depart
de
Lecture
......................................
..<0.08
seconde
Installation
............................................................................
..19”
x
2U
Dimensions:
........................................................
..Unite
principale:
19”
x
8.5”
x
10”
....................................................................
..(482.6
x
88.9
x
254
mm)
......................................................
..Telecommahde:
19”
x
8.5”
x
8.5”
...................................................................
..(482.6
x
88.9
x
88.9
mm)
Poids
par
Element:
.........................................................
..Unite
principale:
8.8
lbs.
(4
Kgs)
....................................................
..Telecommande:
8.85
Ibs.(1.74
Kg)
SECTION
AUDIO:
Quantification
.........................
..1
Bit
Lineaire/Canal,
8
Faisceaux
Laser
Echantillonhage
.............................................................................
..x8
Frequence
d’EchantilIonnage
...............................................
..44.1
kHz
BandePassante
.............................................................
..20Hz-20kHz
Distortion
Harmonique
Totale
.................................................
..<0.05%
Rapport
Signal/Bruit
.................................................................
..85
dB
Dynamique
..............................................................................
..85
dB
Diaphonie
.....................................................................
..85
dB
(1
KHz)
Niveau
de
Sortie
...................................................
..2.0
+/-0.2V
R.M.S.
Alimentation
Electrique
.................................
..AC
115-280\/,
60-50
Hz
LES
SPECIFICATIONS
TECHNIQUES
ET
LA
CONCEPTION
PEUVENT
ETRE
MODIFIEES
SANS
PREAVIS
DANS
LE
CADRE
D’UN
SOUCI
CONSTANT
D’AMELIORATION
DES
PRODUITS.
14

RIESGO
DE
SHOCK
$
ELECTRICO
-
NO
ABRIR!
VORSICHT:
Dieses
Produkt
erfullt
die
FCC-Regeln,
wenn
Sie
zum
Anschluss
ob
geschirmte
Kabel
und
Stecker
verwenden,
um
es
mit
anderen
Geraten
zu
verbinden.
Auch
um
elektromagnetische
Storungen
anderer
elektrischer
Gerate
wie
Radios
oder
Fernseher
zu
vermeiden,
benutzen
Sie
abgeschirmte
Kabel
und
Stecker
fur
die
Verbindungen.
ANWEISUNGEN
LESEN:
Lesen
Sie
alle
Sicherheit
—
und
Bedienungsanweisungen,
bevor
Sie
mit
dem
Produkt
arbeiten.
AUFBEWAHRUNGSHINWEIS:
Bewahren
Sie
alle
Sicherheit
—
und
Bedienungsanweisungen
gut
auf.
WARNHINWEISE:
Alle
Warnhinweise
fur
das
Produkt
und
die
Bedienungsanweisungen
mUssen
genau
eingehalten
werden.
ANWEISUNGEN
BEFOLGEN:
Alle
Anweisungen
zum
Betrieb
des
Produkts
sollten
befolgt
werden.
REINIGUNG:
Das
Produkt
sollte
nur
mit
einem
Polier
—
oder
einem
weichen
trockenen
Tuch
gereinigt
werden.
Benutzen
Sie
dazu
niemals
Mabel-
wachs,
Benzine,
Insektenmittel
oderandere
fluchtige
Reinigungsmittel,
denn
Sie
konnten
zur
Korrosion
des
Gehauses
fuhren.
ERWEITERUNGEN:
Benutzen
Sie
keine
Erweiterungen,
die
nicht
vom
Hersteller
empfohlen
sind,
da
sie
zu
Risiken
fuhren
konnten.
WASSER
&
FEUCHTIGKEIT:
Benutzen
Sie
dieses
Produkt
nicht
in
der
Nahe
von
Wasser,
z.
B.
in
der
Nahe
einer
Badewanne,
einer
Waschschussel,
eines
Kuhen
Spulbeckens,
eines
Waschbeckens,
in
einem
feuchten
Keller,
in
der
Nahe
eines
Schwimmbeckens
oder
an
ahnlichen
Orten.
Zubehor:
Stellen
Sie
das
Produkt
nicht
auf
eine
wackelige
oder
labile
Unterlage.
Das
Produkt
konnte
herunterfallen
und
dabei
Kinder
oder
Erwach-
sene
verletzen,
wie
auch
selber
beschadigt
werden.
Stellen
Sie
das
Produkt
nur
auf
vom
Hersteller
empfohlene
oder
verkaufte
Unterlagen.
Jede
Befestigung
und
Montage
des
Produkts
sollte
nach
den
Anweisungen
des
Herstellers
ausgefuhrt
werden.
Nutzen
Sie
dazu
ein
vom
Hersteller
empfohlenes
Montageset.
MOBILE
UNTERLAGEN:
Bewegen
Sie
eine
Kombination
aus
dem
Produkt
und
einer
mobilen
Unterlage
mit
Vorsicht.
Schnelles
Anhalten,
zu
viel
Schub
oder
unebene
Boden
konnen
dazu
fuhren,
dass
sich
Produkt
und
mobile
Unterlage
Uberschlagen
(SIEHE
FIG.
A).
Beluftung:
Schlitze
und
Offnungen
im
Gehause
sind
fur
die
Beluftung
vorgesehen.
Sie
stellen
den
zuverlassigen
Betrieb
des
Produkts
sicher
und
schUtzen
es
vor
Uberhitzung.
Diese
Offnungen
dUrfen
nicht
verschlossen,
blockiert
oder
bedeckt
werden.
Stellen
Sie
deswegen
das
Produkt
niemals
auf
ein
Bett,
ein
Sofa,
einen
Teppich
oder
Stellen
mit
ahnlicher
Oberflache.
Wenn
Sie
dieses
Produkt
in
einer
festen
Installation
wie
z.
B.
in
einem
Regal
oder
einem
Rack
einbaueh,
sorgen
Sie
fur
Q
.._,;-__i!.
ausreichende
Beluftung
oder
sorgen
Sie
dafur,
dass
die
Bestimmungen
des
Herstellers
genau
werden.
STROMANSCHLUSS:
Dieses
Produkt
darf
nur
mit
dem
auf
dem
Gerat
angegebenen
Strom
betrieben
werden.
Wenn
Sie
Fig.
A
sich
nicht
sicher
sind,
welche
Stromert
Sie
bei
sich
zu
Haus
haben,
fragen
Sie
den
Verkaufer
des
Gerats
oder
Iehren
Stromversorger.
AUFSTELLUNGSORT:
Stellen
Sie
das
Gerat
an
einem
festen
Ort
auf.
ZEITEN
DES
NICHTGEBRAUCHS:
Ziehen
Sie
das
Stromkabel
aus
dem
Gerat
heraus,
wenn
Sie
es
fur
eine
langere
Ziert
nicht
gebrauchen.
ERDUNG
ODER
POLUNG:
Wenn
dieses
Produkt
mit
einem
gepolten
Wechselstromstecker
(ein
Stecker
mit
einem
Kontakt
mehr
als
andere
Stecker)
ausgestattet
ist,
passt
dieser
nur
in
einer
bestimmten
Richtung
im
die
Steckdose
und
ist
ein
besonderes
Sicherheitsmerkmal.
Sollten
Sie
den
Stecker
nicht
komplett
in
die
Steckdose
stecken
konnen,
verschenk
Sie
ihn
andersherum
einzustecken.
Sollte
der
Stecker
auch
dann
noch
nicht
in
die
Steckdose
passen,
beauftragen
Sie
einen
Elektriker,
um
diese
veraltete
Steckdose
auszutauschen.
SCHUTZ
DES
STROMKABELS:
Stromkabel
sollten
so
verlegt
werden,
dass
man
nicht
auf
sie
treten
kann,
noch
dass
sie
von
darauf
stehenden
oder
gegen
sie
stobernden
Gegenstanden
gequetscht
werden.
Achten
Sie
besonders
auf
Kanten,
Sicherung,
Stecker
und
Buchsen.
AUSSENANTENNENERDUNG:
Wenn
Sie
eine
Aulsenantenne
oder
ein
Radio-/Fernsehkabelsignal
an
das
Produkt
anschieben,
achten
Sie
darauf,
dass
die
Antenne
oder
das
Kabel
geerdet
sind,
um
dafur
zu
sorgen,
dass
Uberspannungen
und
elektrostatische
Aufladungen
nicht
auftreten
kon-
nen.
lm
Artikel
810
des
National
Electrical
Code,
ANSIINFPA
70,
finden
Sie
lnformationen
Uber
die
richtige
Erdung
des
Antennenmasts
und
weitere
lnformationen
zu
diesem
Thema
.
(SIEHE
AUCH
FIG.
B)
GEWITTER:
Trennen
Sie
das
Produkt
wahrend
eines
Gewitters
oder
wenn
es
unbeaufsichtigt
ist
oder
wenn
es
fur
eine
Iange
“W
,_._.‘_..-....
Zeit
nicht
benutzt
wird,
durch
herausziehen
des
Stromkabels
aus
der
Netzhose.
Trenne
Sie
auch
die
Verbihdung
zu
einer
g:f';"_1I
Antenne
oder
Radio-/Fernsehkabeln.
Dadurch
vermeiden
Sie
Beschadigungen
des
Produkts
durch
Blitze
oder
/
..
\
_____
__
Uberspannungen.
STROM-UND
Uberlandleitungenz
Stellen
Sie
eine
Auleenantenne
nicht
in
der
Nahe
von
Uberlandleitungen,
elektrischen
§§.I'.I'.I:.I‘:;.
Licht
—
oder
Stromkreisen
oder
an
Stellen,
wo
sie
in
eine
solche
Leitung
fallen
konnte,
auf.
Wenn
Sie
eine
Aulsenantenne
aufstellen,
achten
Sie
besonders
darauf,
dass
Sie
auf
keinen
Fall
irgendwelche
Stromleitungen
beruhrt.
Das
kann
zu
....
......-......m...I.I:mmm'
gefahrlichen
Auswirkungen
fuhren.
UBERLASTUNG:
Uberlasten
Sie
keine
Steckdosen,
Verlangerungskabel
oder
Sicherungen.
Das
kann
zu
Branden
oder
FIQ-
B
elektrischen
Schlagen
fUhren.
EINDRINGEN
VON
GEGENST'ANDEN
ODER
FLUSSIGKEIT:
Fuhren
Sie
niemals
irgendwelche
Gegenstande
durch
Offnungen
in
das
Produkt
ein.
Sie
konnten
mit
Strom
fuhrenden
Stellen
in
Verbihdung
kommen
oder
Kurzschlusse
verursachen,
die
zu
Branden
oder
elektrischem
Schlagen
fuhren
konnen.
Geben
Sie
niemals
irgendwelche
Flussigkeiten
auf
oder
in
das
Produkt.
SERVICE:
Versuchen
Sie
nicht,
das
Produkt
selber
zu
reparieren.
Durch
das
Offhen
des
Gehauses
oder
Entferhen
von Schrauben
konnen
Sie
mit
gefahrlichen
Spannungen
oder
anderen
Risiken
in
Kontakt
kommen.
Beauftragen
Sie
im
Reparaturfall
nur
qualifiziertes
Servicepersonal.
WANN
SERVICE
NOTIG
IST:
Unter
den
folgenden
Bedingungen
ziehen
sie
aufjeden
fall
das
Stromkabel
aus
der
Steckdose
uhd
beauftragen
sie
fur
eine
Reparatur
nur
qualifiziertes
Servicepersonalz
Wenn
das
Stromkabel
defekt
ist.
Wenn
Fitissigkeit
auf
oder
in
das
Produkt
gelaufen
ist
oder
Gegenstande
in
das
Produkt
gefallen
sind.
Wenn
das
Produkt
Regen
oder
Wasser
ausgesetzt
war.
Wenn
das
Produkt
trotz
Befolgen
der
Bedienungsanweisungen
nicht
normal
arbeitet.
Stellen
Sie
dabei
das
Produkt
nur
nach
den
Anweisun-
gen
der
Bedienungsanleitung
ein,
andere
Einstellungen
konnen
das
Produkt
beschadigen
und
den
aufwandigen
Einsatz
von
Technikern
fur
die
Wiederherstellung
erfordern.
Wenn
das
Produkt
hingefallen
oder
auf
andere
Art
und
Weise
beschadigt
ist.
Wenn
das
Produkt
eine
eindeutige
Veranderung
im
Betrieb
zeigt.
ERSATZEILE:
Wenn
ihr
Produkt
Ersatzteile
benotigt,
achten
Sie
darauf,
dass
der
Servicetechniker
nur
vom
Hersteller
erlaubte
Ersatzteile
oder
Ersatzteile,
die
gleichen
Eigenschaften
win
die
originalen
Teile
aufweisen,
einsetzt.
Falsche
Ersatzteile
konnen
zu
Branden,
elektrischen
Schlagen
oder
anderen
Risiken
fuhren.
SICHERHEITSTEST:
Bevor
der
Service
oder
eine
Reparatur
fur
dieses
Produkt
beendet
sind,
beauftragen
Sie
den
Servicetechniker,
einen
Servicetest
durchzufuhreh,
um
sicher
zu
stellen,
dass
das
Produkt
einwandfrei
funktioniert.
15

2
3
4
5
8
7
9
EINLEITUNG:
Herzlicheh
Gluckwunsch
zum
Erwerb
eines
Gemini
CDX-2250i
professiohelleh
2HE
Doppel-CD-Players.
Dieser
CD-Player
basiert
auf
dem
aktuellsteh
Stand
der
Techhik
Und
ist
mit
einer
1
Jahres*
Garantie
versehen.
Stellen
Sie
vor
Gebrauch
sicher,
dass
Sie
die
Bedienhinweise
verstandeh
haben.
EIGENSCHAFTEN:
-
Spielt
Audio-CDs
&
CD-Rs
-
Ahtishock
RAM-Speicher
-
2
wahlbare
Jog-Modi
(Suche
Und
Pitch
Bend)
-
Sofort-Start
&
Cue
mit
Vorhoren
-
Single
&
Continue
Wiedergabemodi
-
Seamless
Loop
mit
Reloop
auf
beiden
Seiten
-
Pitch
bend
mit
Jogwheel
oder
Tasten
auf
+/-
16%
-
8
wahlbare
Zeitanzeigemodi
-
Frame
genaue
Suche
-
Gummierte
Jogwheels
mit
Fingermulden
-
Gro8e
blau
hintergrundbeleuchtete
LCD-Displays
-
Pitch-Regeluhg
im
Bereich
+/-
12%
-
+10
Titel
Taste
fur
schnelle
Navigation
-
Voll
programmierbar
mit
Repeat-Funktioh
SICHERHEITS
INFORMATIONEN:
Laser
Dioden
Eigenschaften
Material:
Ga
-
Al
-
As
Wellenlange:
755
-
815
hm
(25°
C)
Laserstrahlz
Permanente
Welleh,
max.
0,5
mW
VORSICHTSMASSNAHMEN:
1.
Setzen
Sie
diesen
CD-Player
keinen
Temperatureh
uhterhalb
41
°F/5°C
Und
oberhalb
von
95°F/85°C
aus.
2.
Das
Produkt
dah‘
keinem
Spritzwasser
ausgesetzt
werden
Und
es
durfen
keine
Objekte
gefullt
mit
Flussigkeit
(etwa
Vaseh)
auf
dem
Produkt
platziert
werden.
8.
Stellen
Sie
das
Produkt
an
einem
saubereh
Und
trockenen
Ort
auf.
4.
Stellen
Sie
das
Produkt
nicht
auf
wackelige
Oben‘lachen.
5.
Wenn
Sie
das
Netzkabel
zieheh,
halten
Sie
es
stets
am
Stecker
selbst
Und
nicht
am
Kabel
fest.
6.
Um
einem
Stromschlag
vorzubeugeh
offheh
Sie
niemals
das
Gehause
des
Gerates.
7.
Im
Gerat
befindeh
sich
KEINE
VOM
BENUTZER
AUS-
ZUTAUSCHENDEN
TEILE.
Bitte
wehdeh
Sie
sich
an
einen
qualifizierteh
Techniker.
NOTE:
Wenn
Sie
Hi/fe
mit
Ihrem
GEMINI
Produkt
jetzt
oder
in
Zukunft
benotigen,
rufen
GEMINI
Unterstilltzung
filir
sofortige
Oualitats
Unterstilitzung.
8.
Keine
SprUhreiniger
oder
Schmierol
zur
Reinigung
des
Gerates
benutzen.
9.
Lassen
Sie
die
CD-Schublade
geschlossen,
damit
der
Laser
sauber
bleibt
10.
Verwahren
Sie
diese
Anleitung
gut
auf
fur
die
Zukunft.
16
ANSCHLSSE:
G)
NETZBUCHSE:
Stecken
Sie
hier
das
Netzkabel
des
CDX-2250i
GIT].
C)
LINE
AUSGANGSBUCHSEN:
Stecken
Sie
ein
Ende
des
CINCH-
Kabels
in
die
LINE
AUSGANGSBUCHSEN
auf
der
RUckseite
des
Gerates.
Stecken
Sie
das
andere
Ende
in
den
Line-Eingang
Ihres
Mixers.
Wenn
Sie
den
Player
an
einen
Hifi-Verstarker
anschIie8en
wollen
dann
konnen
Sie
CD/AUX
EINGANGSBUCHSEN
verwen-
den.
Steheh
diese
Eingange
nicht
zur
Veh‘UgUng
dann
konnen
Sie
jegliche
LINE-Eingange
(nicht
Phono-Eingange)
verwenden.
Q
STEUERKABEL:
Verbinden
Sie
das
STEUERKABEL
mit
dem
CDX-2250i.
Achten
Sie
beim
Verbinden
dieser
Kabel
darauf,
dass
die
Form
des
Steckers
mit
dem
Aufdruck
auf
der
RUckseite
des
CDX-2250i
Ubereihstimmt.
NETZSCH
ALTER
Wenn
Sie
alle
Kabel
verbunden
habeh
konnen
BEDIENOBERFLACHE:
Q
1
D
Sie
den
C
DrUckeh
c
Q
CD-SCHL
dergabe
g
zt.
(SCHL
X-2250i
mit
der
POWER-Taste
einschalten.
Erneutes
es
Schalters
schaltet
das
Gerat
aus.
BLADE:
Im
Laufwerk
wird
die
CD
wahrend
der
Wie-
ehalten.
Es
werden
12
cm
Und
8
cm
CDs
unterstUt-
ESSEN
SIE
DIE
SCHUBI_ADE
NICHT
MIT
GEWALT,
SONST
KONNEN
SIE
DIE
MECHANIK
DES
PLAYERS
BESCHA-
DIGEN,
VERWENDEN
SIE
DIE
OPEN/CLOSE
TASTE)
@
CD-AUSWURF
TASTE:
Drucken
Sie
die
EJECT
TASTE
um
das
Laufwerk
zu
offnen.
Im
Wiedergabemodus
mUssen
Sie
zunachst
die
Wiedergabe
beendeh.
Q
JOG
WHEEL:
Im
SUCHMODUS
kann
das
JogWheeI
zur
Suche
vorwarts
oder
rUckwarts
genutzt
werden
Und
zum
genauen
Ein-
stellen
des
CUE-Punktes
im
Pause-Modus.
Im
PITCH
BEND
Modus
Ubt
das
JogWheeI
dieselbe
Ftnktion
aus
wie
die
PITCH
BEND
Tasten
Und
Sie
konnen
die
Wiedergabe
kurz
beschIeUhi-
gen
oder
abbremsen.
Q
JOG
MODUS
TASTE:
Wenn
die
Anzeige
JOG
MODUS
Ieuchtet
zeigt
dies
an,
dass
das
JogWheeI
im
SUCH
MODUS
ist
Und
wenn
Sie
nicht
Ieuchtet,
ist
das
Jog
Wheel
im
PITCH
BEND
Mo-
dus.
O
DISPLAY:
Das
DISPLAY
zeigt
hebeh
Titelnummer,
Pitchwert,
Pitchbend,
Wiedergabemodus,
Play/Pause,
Loop/Reloop,
PGM
Und
Repeat
auch
die
Zeitanzeigeleiste
Und
die
drei
Zeitanzeige-
modi
an.
Diese
sind
ABGELAUFENE
ZEIT,
VERBLEIBENDE
ZEIT
des
Titels
Und
VERBLEIBENDE
ZEIT
der
CD.
Die
Zeit
wird
in
Mihuten,
Sekunden
Und
Frames
angezeigt.

11
12
13
14
15
16
17
18
19
10
PGM:
Erlaubt,
eigene
Wiedergabelisten
zu
programmieren.
Um
eine
Liste
zu
erstellen,
halten
Sie
die
Wiedergabe
des
Play-
ers
an
uhd
drucken
die
PGM
Taste.
Mittels
Titelwahlschalter
wahlen
Sie
den
ersten
Titel
fur
die
Wiedergabe
Und
drucken
die
Taste
PGM
erneut.
Nun
ist
der
CDX-2250i
bereit
fur
Ihre
nachste
Auswahl.
Wiederholen
Sie
dies
solange,
bis
Ihre
Aus-
wahl
abgeschlossen
ist.
Dann
drucken
Sie
die
PLAY-Taste,
um
die
Wiedergabe
dieser
Liste
zu
starten.
SINGLE:
Mit
Druck
auf
die
SINGLE
Taste
wechselh
Sie
in
den
SINGLE
Modus,
in
welchem
der
Player
einen
Titel
spielt
Und
dann
stoppt.
Mit
erheutem
Druck
auf
die
Taste
aktiviereh
Sie
den
CONTINUE
Modus,
in
welchem
der
Player
kontinuierlich
die
CD
wiedemolt
(nach
dem
letzteh
Song
begihnt
die
Wieder-
gabe
erheut
beim
ersten
Song).
zwischen
den
8
Zeitanzeige
odi
ABGELAUFENE
ZEIT
des
Ti-
tels
(elapsed)
VERBLEIBENDE
ZEIT
auf
der
CD
(total
remain)
Und
VERBLEIBENDE
ZEIT
d
s
Titels
(remain).
ABGELAUFENE
ZEIT
zeigt
die
Zeit
an,
die
ao
Beginn
des
Titel
verstrichen
ist,
VERBLEINENDE
ZEIT
der
C
zeigt
die
Ubrige
Spielzeit
auf
der
gesamteh
CD
Und
VERBLE
BENDE
ZEIT
des
Titels
zeigt
die
verbleibehde
Dauer
des
akttellen
Titels
an.
ZEITMODUSAUSWAHL:
Mit
der
Taste
TIME
wechselh
Sie
m
. .
7
€
I I
D
PITCH:
DTUCKGTI
der
Taste
PITCH
aktiviert
den
PITCHFADER.
Erneutes
DrUcken
der
Taste
schaltet
die
Pitch-Fuhktion
aus.
PITCHFADER:
Bewegeh
Sie
den
PITCHFADER
nach
oben
oder
unteh,
um
die
Wiedergabegeschwihdigkeit
um
+/-
16
%
zu
erhohen
oder
vermindern.
PITCH
BEND:
Drucken
der
PITCH
BEND
Tasten
erhoht
au-
tomatisch
die
Wiedergabegeschwihdigkeit
auf
bis
zu
16
%
oder
vermindert
diese
auf
bis
zu
-16
%.
Beim
Loslassen
kehrt
der
Player
zum
alteh
Pitch
zUrUck.
Dies
dient
dazu,
zwei
Titel
aneinahder
anzugleichen.
LOOP
SEKTION:
Eih
LOOP
(Schleife)
wiederholt
den
Abschnitt
zwischen
einem
Anfangspunkt
(Loop
IN)
Und
einem
Endpunkt
(Loop
OUT).
A.
Zum
Setzen
eines
Loop
wahrehd
der
Wiedergabe
be-
ginhen
Sie
mit
einem
Druck
auf
die
Taste
Loop
IN
(sie
Ieuchte
auf)
B.
Wenn
Sie
den
gewuhschteh
Endpunkt
erreicht
habeh
drucken
Sie
die
Taste
Loop
OUT
(auch
sie
Ieuchtet
dann
auf).
Beide
Tasten
blinken
nun
und
die
Schleife
wird
sol-
ahge
wiedergegeben,
bis
Sie
mit
einem
Druck
auf
Loop
OUT
die
Schleife
verlasseh
Und
die
normale
Wiedergabe
des
Titels
fortsetzeh.
C.
Um
die
Wiedergabe
der
Schleife
wieder
aufzunehmeh
drucken
Sie
die
Taste
RELOOP.
D.
Wenn
Sie
die
Schleife
verlasseh
habeh
werden
die
Und
OUT
Taste
weiterhin
Ieuchteh
Und
zeigeh
an,
dass
ein
Loop
gespeichert
ist.
E.
Erheuter
Druck
auf
die
Loop
IN
Taste
Ioscht
die
alte
Schleife
und
erstellt
eine
neue
mit
Setzen
des
Anfang-
spunktes.
F.
Drucken
Sie
Loop
OUT,
um
das
Speichern
eines
ganz
neueh
Loops
zu
beendeh.
Erneutes
DrUcken
verlasst
die
Wiedergabe
der
Schleife.
G.
Eih
Druck
auf
RELOOP
wahrehd
der
hormalen
Wieder-
gabe
startet
jederzeit
die
Wiedergabe
der
Schleife
ab
dem
Anfangspunkt.
Wiederholtes
DrUcken
der
Taste
RELOOP
kann
als
Stottereffekt
verwendet
werden.
ACHTUNG:
BEI
DER
ERSTEN
WIEDERGABE
DER
SCHLEIFE
IST
EINE
KURZE
PAUSE
HORBAR,
JEDE
WIETERE
WIEDER-
HOLUNG
DER
SCHLEIFE
IST
NAHTLOS.
PLAY/PAUSE:
Jeder
Druck
auf
diese
Taste
wechselt
zwischen
dem
Play
Und
Pause
Modus.
Im
Wiedergabemodus
ist
die
Play-
Taste
beleuchtet,
im
Pause
Modus
blinkt
diese.
CUE:
Um
einen
CUE-Punkt
zu
setzeh
drUcken
Sie
wahrehd
der
Wiedergabe
Play/Pause
Und
stellen
Sie
mit
dem
Jogwheel
den
CUE-Punkt
an
der
gewiinschten
Stelle
ein.
Erneutes
DrUcken
der
Play/Pause-Taste
setzt
den
CJE-Punkt.
Wenn
der
Player
spielt
Und
ein
CUE
Punkt
gespeicwert
ist,
wird
der
Player
mit
Druck
auf
CUE
in
den
Pausemocus
wechselh
(PLAY/PAUSE
TASTE
blinkt)
Und
am
definierteh
CL
E
Punkt
auf
Sie
warteh
(CUE
LED
Ieuchtet).
Halteh
der
CUE
Taste
bewirkt
das
Vorhoren
des
Titels
ab
dem
CUE
Punkt
Und
erlau
gt
Ihnen,
den
CUE
Punkt
zu
stuttern
oder
von
dort
die
Wiedergabe
zu
starten.
Lassen
Sie
die
Taste
Ios,
um
zum
CUE
Punkt
zurUckzusprihgen.
TRACK
SEARCH:
Die
Tasten
TRACK
SEARCH
(T
itelsuche)
di-
eneh
der
Wahl
eines
Titels
fUr
die
Wiedergabe.
+10
bietet
Ihnen
die
Moglichkeit,
in
10er-Schritteh
durch
Ihre
Titel
zu
suchen.
ACHTUNG:
WENN
SIE
ZU
EINEM
ANDEREN
TITEL
WECH-
SELN
STEHT
DER
EINGESTELLTE
CUE
PUNKT
NICHT
MEHR
ZUR
VERFUGUNG.
SIE
MUSSEN
DEN
CUE-PUNKT
ERNEUT
SETZEN.
STANDARDMABIG
WIRD
DER
CUE-PUNKT
AN
DEN
BEGINN
DES
AKTUELLEN
TITELS
GESETZT.
FEHLERBESEITIGUNG:
-
Wenn
eine
CD
nicht
abgespielt
wird
prUfeh
Sie,
ob
sie
mit
dem
Aufdruck
nach
oben
zeigend
eingelegt
wurde
Und
prUfen
Sie
sie
auf
Uberma8igen
Schmutz
Und
viele
Kratzer
etc.
-
Wenn
die
Wiedergabe
lauft
aber
es
ist
keih
Ton
zu
horeh
prUfen
Sie,
ob
alle
Kabelverbihdungeh
in
Ordnung
sind
Und
prUfen
Sie
Ihr
Mischpult
oder
Ihren
Verstarker.
-
Wenn
die
Wiedergabe
der
CD
springt
prUfen
Sie
die
CD
auf
Kratzer
Und
Verschmutzuhgen.
Gehen
Sie
nicht
direkt
davon
aus,
dass
der
Player
nicht
in
Ordnung
ist.
Viele
CDs
sind
schlecht
aufgenommen
worden
Und
werden
auf
den
meisteh
CD-Playern
springeh.
Bevor
Sie
den
CD-Player
als
Servicefall
melden
testen
Sie
ihn
mit
einer
CD,
welche
sicher
in
Ordnung
ist.
17

TECHNISCHE
DATEN:
ALLGEMEIN:
Typ
..................................................................
..Compact
Disc
Player
Disc
Typ
.............................
..Standard
Compact
disc
(12
cm
&
8
cm)
Zeitanzeige.
...
.
.
..
..........abgel.
Titel,
verbl.
Titel,
verbl.
CD
Pitch-Regelung
................................
..¢
12%
Fader
mit
Ein/Aus-Taste
Pitch
Bend
..............................................................
..i
16%
Maximum
Sofortstart
.................................................
..innerhalb
0,08
Sekunden
Installation
...............................................................................
..19”
*2
Abmessungenz
..................................................
..Hauptgerat:
(482,6
x
88,9
x
254
mm)
..............................................
..FernbedienUng:
(482,6
x
88,9
x
70
mm)
Gewicht:
..............................................................................
..Hauptgerat:
4,0kg
.......................................................................
..Fernbediehung:
1,5
kg
AUDIO
ABSCHNITT:
Ouantisierung.
.
Bit
Linear/Kanal,
8-Strahl-Laser
Oversampling
Rate
...................................................................
..8
fach
Sampling
Frequenz
..............................................................
..44,1
kHz
Frequenzgang
..........................................................
..20
Hz
bis
20
kHz
Klirrfaktor
(THD)
........................................................
..kleiner
als
0,05%
Rauschabstand
........................................................................
..85
dB
Dynamikumfang
.......................................................................
..85
dB
Kanaltrennung
...............................................................
..85
dB
(1
kHz)
Ausgangspegel
.........................................................
..2,0
+/-
0,2
Vrms
Stromversorgung
..........................................
..AC
115/280\/,
60/50
Hz
TECHNISCHE-
UND
LAYOUTANDERUNGEN
OHNE
VORANKUNDIGUNG
VORBEHALTEN.
18

Register your product online at
www.geminisound.com/register
SHIPPING ADDRESS
Gemini Worldwide Headquarters
107 Trumbull Street
Building F8, Floor 2
Elizabeth, NJ 07206
WARRANTY & REPAIR
LIMITED WARRANTY
RETURN/REPAIR
All Gemini products are designed and manufactured to the highest
standards in the industry. With proper care and maintenance, your product
will provide years of reliable service. Please be advised that product
warranties are only valid in the country of purchase.
A. In the U.S.A., please call our helpful Customer Service Representatives
at (732)346-0061, and they will be happy to give you a Return Authorization
Number (RA#) and the address of an authorized service center closest to
you.
B. After receiving an RA#, include a copy of the original sales receipt,
with defective product and a description of the defect. Send by insured
freight to: Gemini, and use the address provided by your customer service
representative. Your RA# must be written on the outside of the pack age, or
processing will be delayed indefi nitely!
C. Service covered under warranty will be paid for by Gemini and returned
to you. For non-warrantied products, Gemini will repair your unit after
payment is received. Repair charges do not include return freight. Freight
charges will be added to the repair charges.
D. On warranty service, you pay for shipping to Gemini, we pay
for return shipping within the continental United States. Alaska, Hawaii,
Puerto Rico, Canada, Bahamas, and the Virgin Islands will be charged for
freight.
E. Please allow 2-4 weeks for return of your product. Under normal
circumstances your product will spend no more than 10 working days at
Gemini. We are not responsible for shipping times.
A. Gemini warrants its products to be free from defects in materials and
workmanship for One (1) year from the original purchase date. Exceptions:
Laser assemblies on CD Players, cartridges, and crossfaders are covered
for 90 days.
B. This limited warranty does not cover damage or failure caused by abuse,
misuse, abnormal use, faulty installation, improper maintenance or any
repairs other than those provided by an authorized Gemini Service Center.
C. There are no obligations of liability on the part of Gemini for
consequential damages arising out of or in connection with the use or
performance of the product or other indirect damages with respect to
loss of property, revenues, of profi t, or costs of removal, installation, or
reinstallation. All implied warranties for Gemini, including implied warranties
for fi tness, are limited in duration to One (1) year from the original date of
purchase, unless otherwise mandated by local statutes.
REI'UR
REPAIR

www.gem
i
nisou
hd.com
©
Innovative
Concepts
&
Designs,
LLC
-
2016
-
All
Rights
Reseh/ed
Table of contents
Languages:
Other Gemini CD Player manuals

Gemini
Gemini CDJ-1200 User manual

Gemini
Gemini CDX-601 User manual

Gemini
Gemini iCDJ User manual

Gemini
Gemini CDX-01 User manual

Gemini
Gemini CDMP-2600 User manual

Gemini
Gemini CDJ-10 User manual

Gemini
Gemini CDJ-10 User manual

Gemini
Gemini CDJ-20 User manual

Gemini
Gemini CD-240 User manual

Gemini
Gemini CDJ-600 User manual

Gemini
Gemini CDJ-15X User manual

Gemini
Gemini CD-150 User manual

Gemini
Gemini CDX-1200 User manual

Gemini
Gemini CD-9800 User manual

Gemini
Gemini CFX-50 User manual

Gemini
Gemini CDJ-30 User manual

Gemini
Gemini CD-9500 Pro III User manual

Gemini
Gemini CD-200 User manual

Gemini
Gemini CDJ-20 User manual

Gemini
Gemini CDX-2250 User manual