GENERAL MACHINES 350 GXL Automatic Specification sheet

350 GXL Automatic
SLICER 350 GXL Automatic
Instructions for use and maintenance
1Page

TECHNICHAL DATA
MACHINE MODEL 350 GXL Automatic
Blade
diameter
350 mm
Blade
diameter
350 mm
Power of lade motor 0,34 kW (0,5 HP)
Power of carriage motor 0,18 kW (0,25 HP)
Carriage stroke 340 mm
Strokes per minute 30
Cutting capacity, ROUND 250 mm
Cutting capacity, SQUARE 200 x 280 mm
Cutting thickness 0/ 15 mm
Voltage / frequency 230 / 50
Amp. draw 1,3
Operating temperature -10 °C to + 40 °C
Net weight 67 kg
3Page

MACHINE IDENTIFICATION
MANUFACTURER:
OMEGA TAGLIO FOODTECH
SRL
Viale Danimarca, 1
21013 GALLARATE (Va) Italy
Tel.: (+39) 0331 777987
Fax: (+39) 0331 794447
e-mail: info@omegafoodtech.it
www.omegafoodtech.it
MACHINE TYPE:
Cutting-slicing machine
MODEL: AM250/300
NAME PLATE:
1 Serial Number
2 Year of manufacture
3 Current draw
4 Motor power
5 Model
The
name
plate
must
always
be
The
name
plate
must
always
be
legible and it must not be
removed or tampered.
If it is damaged or lost, ask the
manufacturer for a new one.
4Page
INTRODUCTION
This document is an integral part of
the machine and must be kept
carefully for future reference.
The document must always
accompany the machine, even if
this is sold to third parties.
Should it become lost or damaged,
ask the manufacturer for a
replacement copy.
It is forbidden to copy this
document, even partially, without
the written authorization of the
manufacturer.

TECHNICAL ASSISTANCE
The manufacturer provides a qualified technical assistance which
should be contacted for any technical or warranty intervention, or
for spare parts.
Read this document carefully and scrupulously follow the
instructions contained within to ensure that the machine is used
correctly and safely and kept in good condition.
PRODUCTS THAT CAN BE SLICED
Consult the technical characteristics for the maximum
dimensions of products that can be positioned and sliced on the
machine.
- cold cuts and sausages of all types
- roasts, roast-beef and bresaola
- raw ham, cooked ham, shoulder etc.
- meat with or without rind
- cheese
- vegetables
PRODUCTS THAT CANNOT BE SLICED
Do not try to slice foods that can cause a hazardous situation for
the
operator
and/or
damage
the
mechanisms
of
the
machine
.
5Page
the
operator
and/or
damage
the
mechanisms
of
the
machine
.
- non-food products
- products with bone
- frozen foods
- products with a loose consistency
- very hard foods
- bread

GENERAL PRECAUTIONS
The purpose of the safety guards fitted by the manufacturer is to
safeguard the user so it is absolutely forbidden to use the machine
without them.
The operator must be properly trained to use the machine and
must follow scrupulously the instructions contained in this manual.
The operator must wear suitable clothing to protect and safeguard
him in accordance with the regulations in force.
The machine must be used in perfect stability on a flat surface.
Should an operating anomaly occur, do not use the machine and
do not attempt to repair or undertake any intervention but contact
the technical assistance service.
Do not use the machine with wet or damp hands or feet.
Do not turn off the machine by pulling the power cable from the
socket or shutting down the mains master switch.
Do not connect to the mains via extensions, adaptors or multiple
plugs.
Do not leave the machine exposed to atmospheric agents.
The machine must not be used by children or handicapped people.
6Page
The machine must not be used by children or handicapped people.
The mains power supply must be protected from over-currents with
thermo magnetic circuit breakers.
Check that the mains voltage and the current draw comply with the
name plate data.
The electrical safety is only guaranteed when the machine is
correctly connected to an efficient earthing system as envisaged by
the safety regulations in force.
The packing materials and maintenance residues must be
collected separately and sent for disposal by an authorized
company.
In case of emergency, disconnect the mains supply immediately.
Incorrect installation can cause damage to persons and property
for which the manufacturer shall accept no responsibility.

1. DESCRIPTION OF THE MACHINE
The machine is a gravity slicing machine exclusively for slicing
food as indicated in the previous paragraph.
The cutting is done by a blade (1) driven by an electric motor that
cuts the food placed on the meat hopper (2).
The food to be sliced must be correctly placed on the surface of
the meat hopper and firmly blocked with the last slice device
(LSD) (3). The blade must only be started .
The carriage can be moved either manually or automatically to
feed the product that must be sliced.
7Page
2
3
1

8
COMPONENTS
12
7
5
4
12
3
14
15
13
9
19
20
8Page
6
17
10
11
1 Blade Stop button
2 Blade Start button
3 Pilot light
4 Dial knob
5 Carriage handle
6 Engagement Lever
7 Meat hopper
8 Last slice device
9 Blade
10 Blade cover
11 Fixed rear-blade guard
12 Gauge plate
13 Deflector
14 Sliced food tray
15 Blade cover tie-rod
16 Sharpener
17 LSD handle
18 LSD slide bar
19 Carriage start button
20 Carriage stop button
18

Safety devices
The machine is fitted with safety devices which can prevent accidental damage
and injuries.
These devices must not be removed or deactivated for any reason.
If they must be deactivated for maintenance or repair interventions, only operate
on the machine with electrical power disconnected.
The safety devices are made in compliance with regulations in force.
We recommend that these devices are always kept at maximum efficiency.
Mechanical safeties:
- Fixed rear blade-guard ring
- Meat hopper can be removed after adjusting the dial knob to zero and with the
carriage fully backwards. Once the meat-hopper is removed the mechanisms
are interlocked.
- Safety panels and covers in aluminium and plastic to avoid accidental contact.
Electrical safeties:
- Operation stop/start pushbuttons .
- Micro-switch that prevents operation when the blade-guard is removed
(optional).
Risks due to the use of the slicing machine
Page 9
Risks due to the use of the slicing machine
The most dangerous risks are basically due to the movement of the food
carriage during the cutting operation and during the collection of the slice.
Other risks that the operator must be aware of:
Handling of the food to be sliced.
Stability of the food on the meat hopper.
Electrical system (connectors, controls etc...).
The main risk causes are:
Placing the food on the meat hopper.
Cutting and collecting slices.
Blade sharpening and cleaning.
Ordinary maintenance (cleaning).
Accidents.
Residual risks
The blade fixed rear guard ring in the sharpening zone does not completely
eliminate the risk of cuts. When intervening on or standing close to the blade,
take great care and wear metallic cut-proof gloves.

2 - UNPACKING
Goods receipt check
On receipt of the goods, check that the material corresponds to that
indicated in the transport documents.
If defects are found, such as:
- marks on the structure or the cover;
- controls broken or not working;
- missing pieces or other;
Inform the transporter and our commercial technical service immediately.
The packaging (plastic bags, polystyrene, cartons, etc...) must never be
disposed of in the environment but sent to an authorized company.
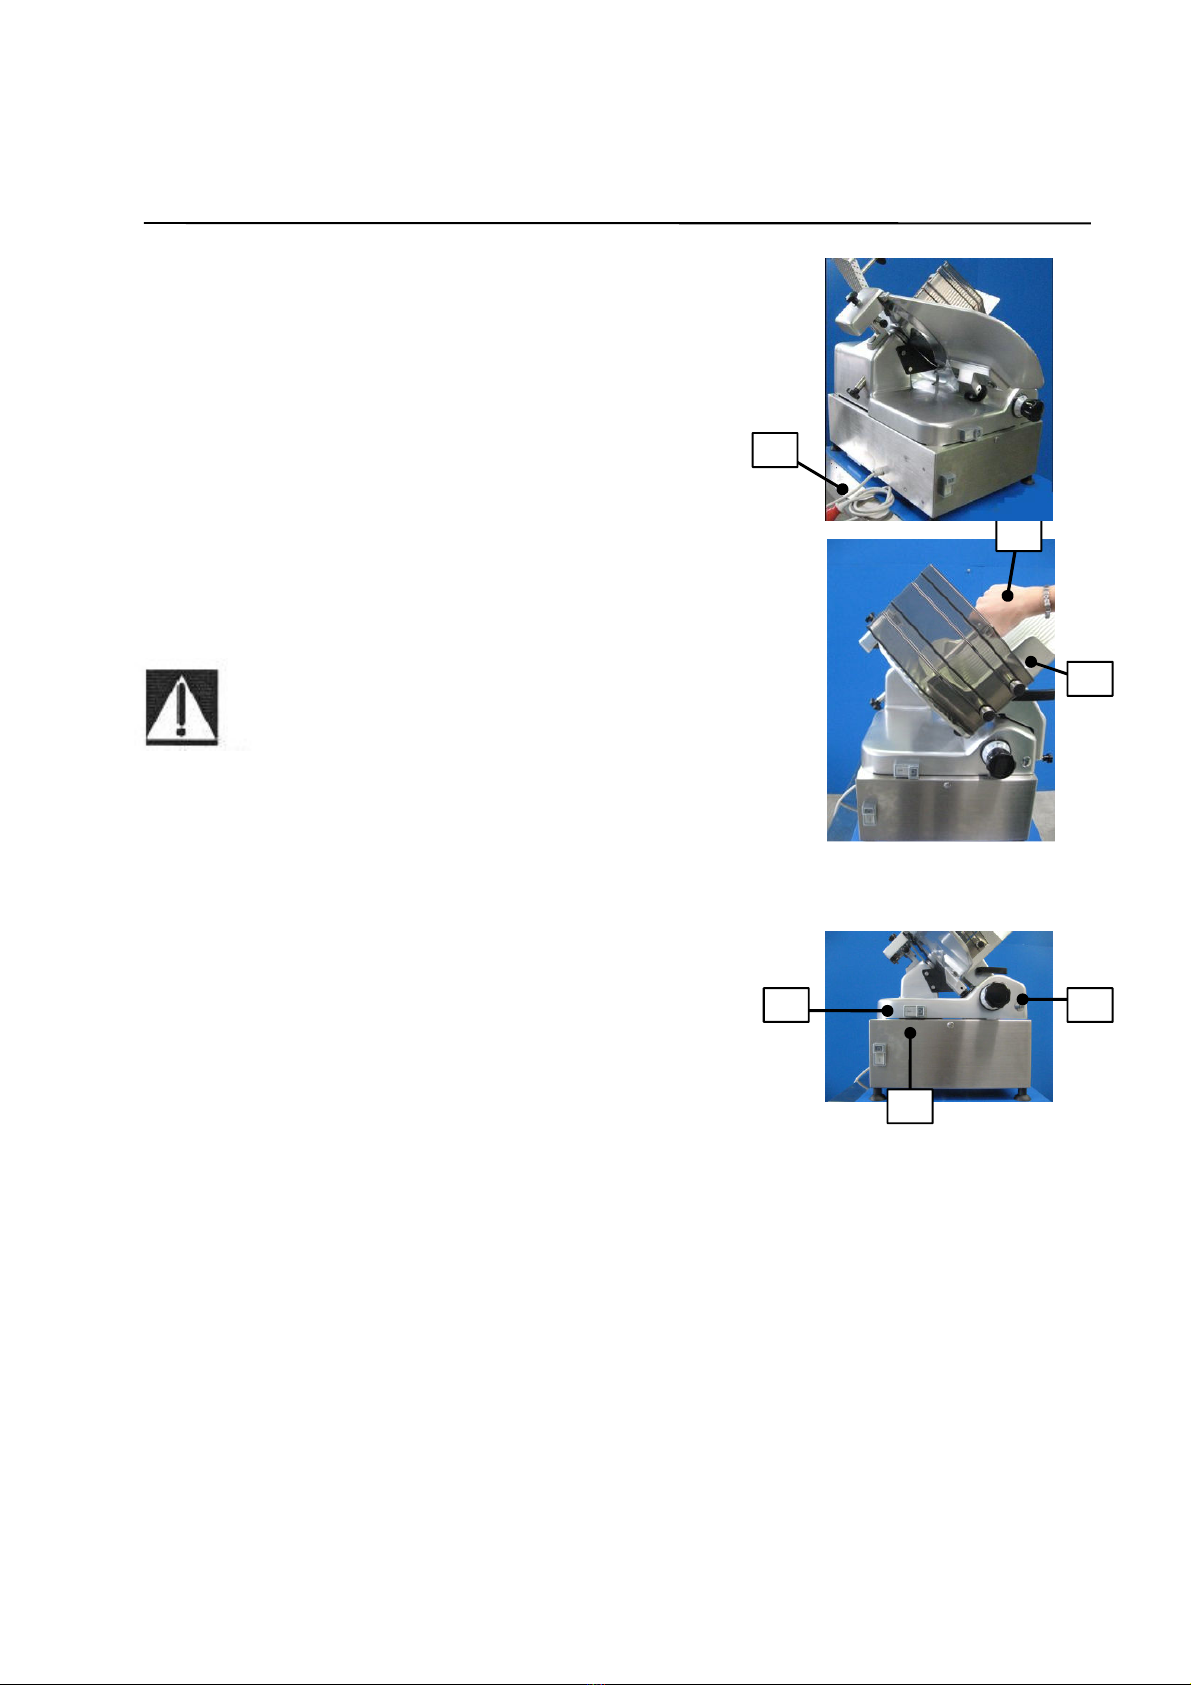
3 - INSTALLATION
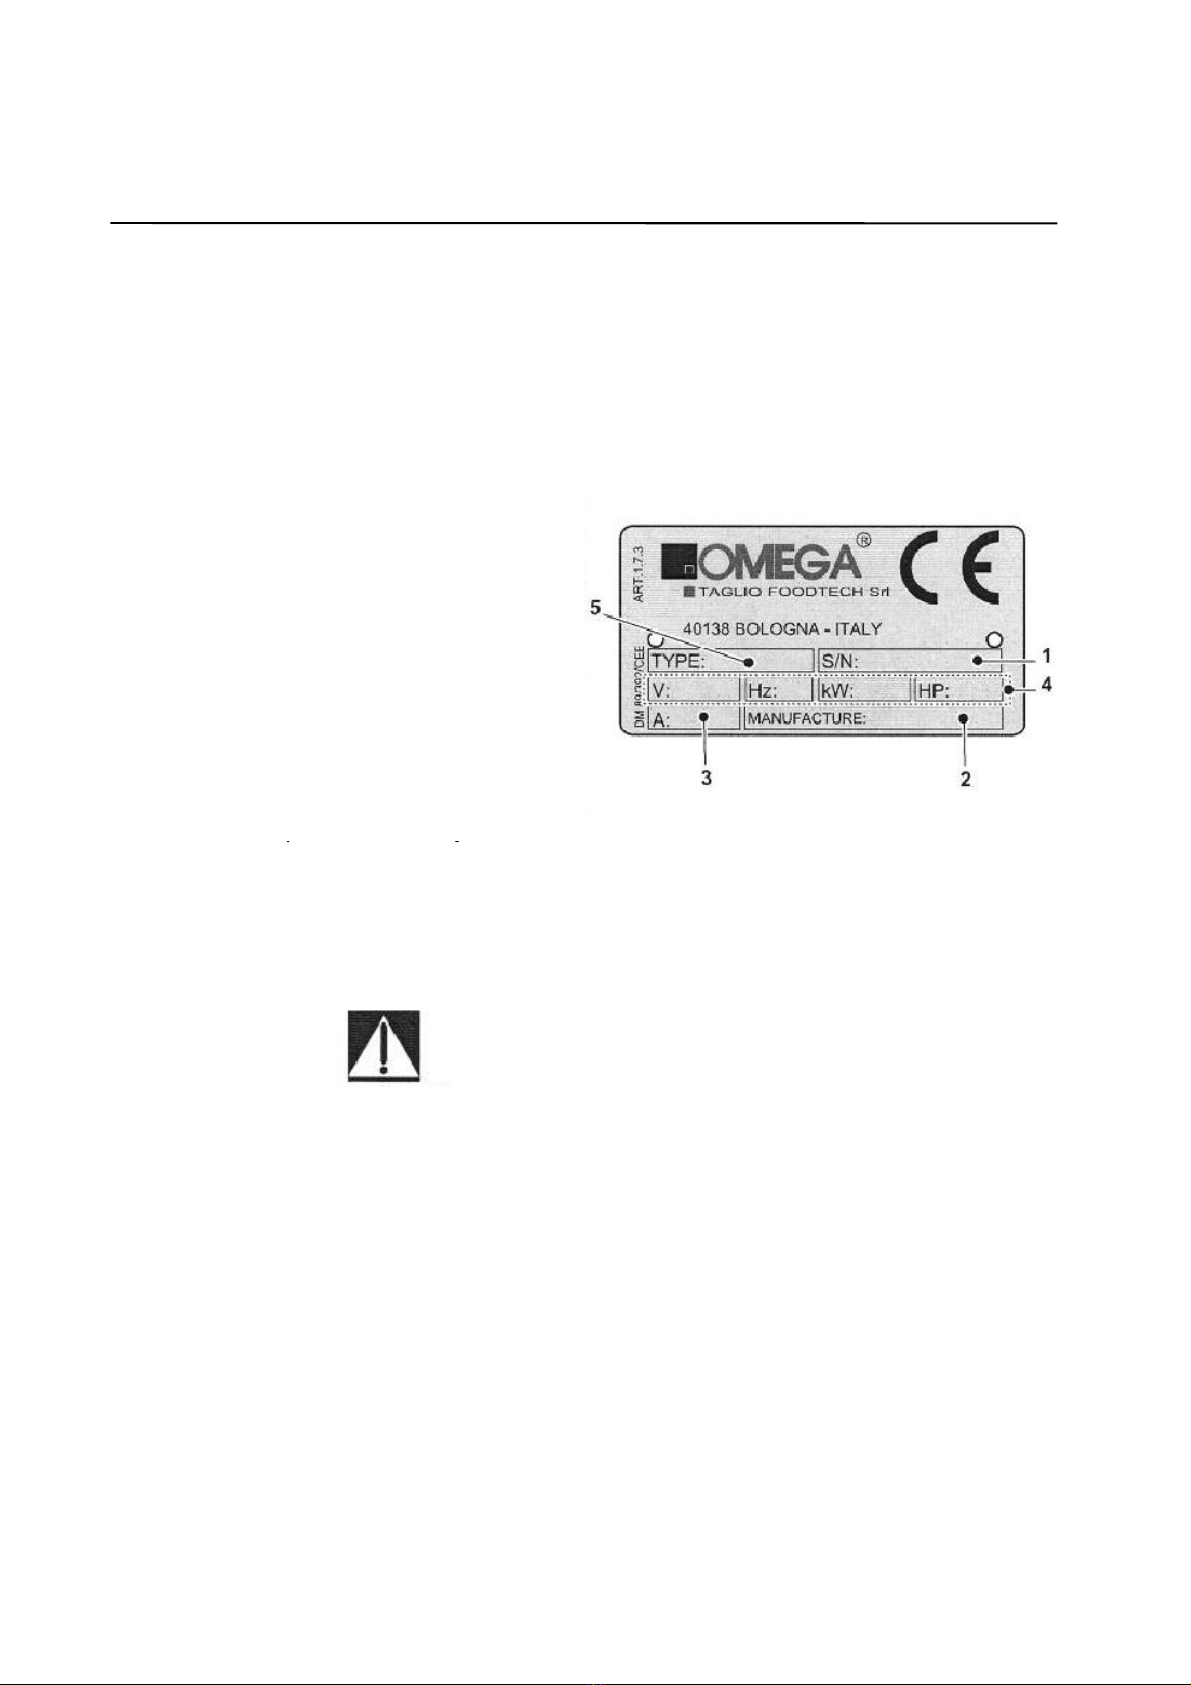
The slicer is delivered ready for installation according to the name plate data
(see page 4).
The installation must be made by qualified personnel.
Make sure that the mains supply has the same characteristics as the
machine.
If the machine is wet or very damp, do not install or use. Have a
precautionary check made by the technical service to ensure that the
electrical components have not suffered any damage.
Page 10
Positioning area
The recommended working height is
about 800 mm from the ground.
The size of the supporting surface
must take account of the machine
size, see the “Overall dimensions”
paragraph. Leave enough space
around the machine to work safely
and allow the operator to load and
unload the food onto the food
carriage, the cutting and collection of
slices free of any close obstacles or
impediments.
On the side of the carriage at the end
of its stroke, a minimum space of 600
mm must be provided in order to avoid
any crash caused by the automatic
movement of the carriage itself.

Electrical pre-arrangement
The machine is supplied with a power cord
with plug (1).
Set up a socket with safety protection
close to the machine.
Install a differential circuit breaker
complete with thermomagnetic releases
(sensitivity 30mA) upstream of the power
cord.
Check that the earth system complies with
the regulations in force in the country of
installation.
Each machine must be fitted
with its own safety devices
therefore it is forbidden to
connect more than one
machine to the same socket.
It is mandatory for the
machine
to
be
earthed
3
2
1
Page 11
Place the machine on the working surface and press on all four corners in
correspondence with the feet to make sure the suction pads grip well on the surface.
Check that all the components of the machine are integral and that the safety devices
are in place.
Clean the machine of any packaging residue.
Connect the electric cord (1) to the mains socket.
Check that the meat hopper (carriage) (2) slides well and the LSD (3) functions.
Check the operation of the gauge plate with dial knob (4).
Press the pushbutton (5) and check that the blade rotation works. Stop the blade with
the pushbutton (6).
machine
to
be
earthed
according to the regulations in
force.
The manufacturer does
not accept any responsibility
should the accident
prevention regulations not be
respected.
Positioning
45
6

CHECKING OF DIRECTION OF BLADE
ROTATION (FOR THREEPHA E
MACHINE ONLY)
1. Start the machine
2. Make sure that the pilot light is on
3. Make sure that the blade rotates as
shown by arrow ( counterclockwise)
NOTE: If the lade rotates the opposite direction(i.e. clockwise), it is necessary to switch the
position of two wires in the plug. This operation must e performed y a Post-Sales
assistance specialist or a qualified person.
4 - USE OF THE MACHINE
MANUAL MODE
Make sure that the carriage
2
3
Page 12
moves freely manually back and
forth; if not, pull outward the
engagement lever and rotate it
by 90° (a quarter of a turn),
either left or right.
Move the meat hopper (1) fully
backwards and lift the LSD (2)
with the handle (3).
Place the food to be sliced on
the meat hopper (1) against the
gauge plate (4).
1
4

Lower the LSD onto the food, pressing it so
that the spikes (5) on the arm penetrate the
food.
Make sure that the food is securely fixed
between the meat hopper and the LSD and
it is against the gauge plate. Adjust the
gauge plate according to the type of food
and cutting requirements.
Adjust the dial knob (6) to the desired
cutting thickness.
Press the button (7) and start the blade.
Move the food carriage forwards and
backwards to cut.
The movement must be made with
continuity and with sufficient force to cut.
The pressing force depends on the type of
food, its consistency and the thickness of
the slice required.
The slice is collected on the food tray (8)
using only the special collection tools.
It is dangerous to collect the slice directly
with the hand.
When the cutting is completed, stop the
blade
with
the
pushbutton
(
9
)
.
5
67
Page 13
blade
with
the
pushbutton
(
9
)
.
AUTOMATIC MODE
Pull and turn the engagement lever (10) by
90°(a quarter of a turn) and release it.
Switch the blade on.
Switch the carriage motor on: the
engagement of the carriage takes place
automatically.
The product to be sliced must be placed
on meat carriage as described above on
“MANUAL MODE”.
The blade must always be
stopped, even when the work is
suspended for a short time. It is
forbidden to leave the machine
with the blade running.
9
8
10

When the diameter of the blade has
been reduced by 10 mm sharpening is
no longer possible. In this case it must
be replaced.
The edge of the blade must be sharpened
every time that cutting becomes difficult.
The sharpening frequency depends on the
intensity of machine use and the
characteristics of the food being sliced. It
is advisable to perform the operation once
a day to maintain optimum cutting
5 - BLADE SHARPENING
When the diameter of
the blade has been
reduced by 10 mm
sharpening is no longer
possible. In this case it
must be replaced.
1
2
Page 14
a day to maintain optimum cutting
performance.
- Check that the machine is turned off.
- Loosen the knob (1), lift the sharpener
(2) and turn it 180 degrees, then reposition
the sharpener and block it with the knob
(1).
At this point the stones of the sharpener
are in the sharpening position.
- Press the button (3). The blade starts.
- Press, and keep pressed the sharpening
stone button (4). After about 20 seconds,
press and keep pressed the honing stone
pushbutton as well. Keep the two buttons
pressed for about 2-3 seconds.
- Stop the blade with the pushbutton (5).
- Return the sharpener to the original
position.
5
3
4

Clean the machine at the end of
the working day and before
starting work after a long break.
Check that the machine is
switched off and cut off the mains
electrical supply.
7 - REMOVING OF COMPONENTS
-Move the dial knob (1) to the “0”
position.
6 - MACHINE CLEANING
IMPORTANT:
6
“0”
Page 15
- Move the carriage (2) fully
backwards, pull and swing it away
from the machine. Pass through
some cotton cloths and detergent
(soap) suitable for cleaning food
machines.
Rinse with cloths soaked in clean
water and dry with dry cloths that do
not leave fibers or textile residues.

- Remove the blade cover (1).
- Loosen the knob (2) and remove the
sharpener (3).
3
2
1
Page 16
- Remove the deflector (4).
4

8 - CLEANING
Take some cotton cloths and
detergent (soap)
suitable for cleaning food
machines.
Rinse with cloths soaked in clean
water and dry with dry cloths that
do not leave fibers or textile
residues. Wear cut-proof gloves
when cleaning.
Do not use jets of water or steam
or compressed air.
Do not use abrasive sponges or
scourers.
- Take great care to keep the
hands away from the cutting edge
of the blade when cleaning.
- Insert a cloth between the blade
and the safety ring and move it
slowly backwards and forwards in
Page 17
slowly backwards and forwards in
the gap.
- Clean the body and components
of the machine.

9 - RE-ASSEMBLING
When cleaning is completed, re-
assemble the various parts following
the dismantling procedure in reverse:
- fix the deflector (1)
- insert the sharpener (2) and fix it
with the knob (3)
- fix the blade cover (4) with its tie rod
(5). 1
2
3
Page 18
4
5

-Swing the meat hopper back to
its working position.
Cleaning of sharpener
For perfect sharpening, the sharpener
stones must be periodically cleaned.
-
Remove
the
sharpener
from
the
3
Page 19
-
Remove
the
sharpener
from
the
machine as indicated in the relative
paragraph.
- Remove any grease residue from
the outer side of the stones (3) using a
small brush and neutral detergent.
- Clean the sharpener body with a
damp cloth.
- Re-assemble the sharpener as
indicated in the relative paragraph.
3

10 - LUBRICATION
Food carriage
When the carriage slides with
difficulty, lubricate the sliding bar with
Vaseline oil.
- Disconnect the mains electrical
supply.
- Move the carriage fully forwards to
the blade.
- Lift the machine and put some drops
on the sliding bar.
- Rest the machine on the counter and
move the food carriage forwards and
backwards.
Last slice device (LSD)
When the LSD slides with difficulty,
lubricate the sliding bar (2) with
Vaseline oil.
2
Page 20

13 -MACHINE OUT OF SERVICE
Temporary
Disconnect the electrical power
Perform a complete maintenance intervention on all machine components.
Lubricate the guides and shafts with a coat of oil.
Pack the machine with carton or polystyrene and store in a dry dust-free
environment.
Definitive
When the machine is to be demolished, a differentiated disposal of the
components is required in accordance with local regulations in force.
Disconnect the electrical power supply.
Dismantle the machine and separate the component materials according
to type of material.
The various parts can then be sent for recycling or disposal by authorized
companies.
14 - INFORMATION FOR THE USER
This machine has been designed
and assembled with high quality
materials
and
components,
which
Page 21
The symbol of a wheeled bin crossed with an X means that the product
meets the requirements of the EC regulations 2002/96/EC of 27th
January 2003 regarding Waste Electrical & Electronic Equipment
(WEEE), it also means that used foods should not be mixed with general
household waste.
Get informed regarding the mode of waste for electrical and electronic
components in force in the area where you want to get rid of them.
It is possible to return your machine to your local retailer upon the
purchase of an equivalent new one.
Disposing of this correctly will help to save valuable resources and
prevent any potential negative effects on human health and the
environment which could otherwise arise from inappropriate waste
handling. Please contact your nearest designated collection point where
the parts will be collected on a free of charge basis.
Penalties may be applicable for incorrect disposal of this waste, in
accordance with national legislation.
materials
and
components,
which
can be recycled and reused.
Table of contents