Goscam GD8816 User manual

Version 1.0
Please read this user manual carefully before using this product.
Failure to understand operation procedures may result in injury.
EU Environmental Protection
Waste electrical products should
not be disposed of with household
waste. Please recycle where
facilities exist. Check with your
local authority or retailer for
recycling advice.
Model: GD8816
3G IP Camera
www.mfshop.ru

CONTENTS
Contents
Your new WCDMA 3G IP camera is a smart WCDMA
terminal. It can be used in a WCDMA network for
surveillance of your home, office, or any other place that
may need video/audio monitoring; anytime,anywhere.
instant
5. Media Options
6. Alarm Settings
7. Advanced Options
8. Device Options
9. System Tools
● Querying and controlling the
device state by sending an SM
FAQ
● Charge
● Operation problems of the 3G
video surveillance camcorder
Safety Information
26
29
32
35
36
39
40
40
41
49
Safety Precautions
Product Overview
● Brief Introduction
● Functions
● Specification
● Examples of Application Scenarios
● Others
Use and Operations
● Packing List
● Support installation diagram
● Indicator Description
● Quick Installation Guide
● Operation Guide of the Mobile Phone
● IPhone/IPad Operation Guide
● PC Operation Guide
1. Management Interface
2. Login Management Interface
3. Running Status
4. Network Options
02
04
04
04
06
08
09
10
10
10
11
12
14
17
22
22
22
23
24
CONTENTS
www.mfshop.ru

Before using this wireless device, please carefully read the content
in this section to ensure that you can use this wireless device correctly
and safely.
Turn off the wireless device in the place where use of a
wireless device is prohibited or use of a wireless device will
lead to interference or danger.
Do not use the wireless device in driving, lest safe driving
would be affected.
Observe the related regulations or rules in a medical site.
Turn off the wireless device in the area close to medical
equipment.
Turn off the wireless device before boarding the plane, lest
the radio signal would interfere with signal control of the
plane.
Turn off the wireless device in the area near to electronic
equipment with high precision. Otherwise, the electronic
equipment may fail.
Safety Precautions
Thank you for selecting our 3G video surveillance camcorder. To use
this product better, please carefully read through this user manual
beforehand.
Tips
Due to the product version upgrade or other reasons, this manual
is subject to update irregularly. This manual is used as a user guide
only unless otherwise agreed. All the statements, information, and
suggestions in this manual shall not make any explicit or implicit
guarantee
Do not disassemble this wireless device or its accessories
by yourself. Only the qualified maintainer can repair this
wireless device.
Do not place this wireless device or its accessories in an
instrument with a strong electromagnetic field.
01 0 2
www.mfshop.ru

Keep this wireless device far away from a magnetic device,
because radiation of this wireless device may erase the
information stored in the magnetic device.
Do n ot us e thi s wi r ele s s de v ice a t a p l ace with a hig h
temperature or an inflammable gas, for example, nearby a
gas station.
Place this wireless device and its accessories in a place out
of reach of children. Do not let a child use this wireless device
without supervision.
Use the fittings specified by our company.
When using this wireless device, please observe the related
laws and regulations and respect the privacy and legal rights
of others.
Product Overview
● Brief Introduction
The 3G video surveillance camcorder is a WCDMA-based wireless
video surveillance terminal provided for industrial or home customers.
It supports adaptive switching between the WCDMA network and
GSM network. Through a mobile phone where the GHOME client is
installed, the customer can view the real-time video in any place within
WCDMA signal coverage such as the office, home, or the store
anytime and anywhere.
● Functions
The 3G video surveillance camcorder provides the following four main
functions:
1. Remote real-time surveillance through a mobile phone
Through a mobile phone where the GHOME client is installed, the
user can view the real-time condition in the surveilled site anytime
and anywhere.
2. PTZ remote control of infrared night vision
The user can remotely control the camera through the mobile
phone to realize overall surveillance, for example, control video
recording, directly capture the screen, freely adjust the angle,
control the camera to rotate horizontally , upward, or downward,
and adjust light. In addition, the camera provides the infrared
function. Even if the environment is dark, the camera can transmit
clear surveillance video and provide the user with more professional
video surveillance service.
3. Automatic security alarm and video recording
After the security functions are armed at the mobile phone, the
device can send an alarm message to the user-specified number
upon finding any exception, and trigger automatic video recording.
In addition, the user can select to store the video file at the device.
4. Plug and play, without wiring
The device can be used conveniently after being connected to a
power supply Wiring is not required.
The following table descries the specific functions (depending on
the real subjects):
03 0 4
www.mfshop.ru

1. Surveillance
Audio and video
surveillance
Supp orting playin g of the audio and video
surveillance record at the mobile phone or
PC client
PTZ control
Controlling the camera to rotate upward,
downward, leftward, and rightward through
the management page and the mobile phone
or PC client
2. Night vision
function
Equipped with the
infrared night vision
function
Automatically starting the infrared function
when the environment becomes dark, and
implementing surveillance within 3m
3. Motion
detection
Motion detection
switch
Arming and disarming through the management
page and the mobile phone or PC client
Image change
detection
Detecting image changes, with adjustable
sensitivity
4. Video recording
Video recording
triggered by motion
detection
Starting video recording when the image
changes; the pre-recording time is more than
8 seconds.
Remote control
on video recording
The mobile p hone cli ent can control video
recording at a remote end.
Remote viewing
and playing of
video record
The mobile phone client can play the video
record at a remote end.
5. Message alarm
Message alarm
of motion
detection
Sending a message notice if the image changes
when the security functions are armed
6. Management
functions
Configuration and
management
Managing and configuring the device through
the PC management interface
Version upgrade U p g r ad i ng t he v er s i o n t h r o u g h t h e P C
management interface
● Specification
Description
1 Kg (±0.2 Kg)
8W
110 x 108 x 135 mm
Temperature: 0°C ~ 40°C
Humidity: 20% ~ 80%
Temperature: -20°C ~ 60°C
Humidity: 15% ~ 85%
• Desktop installation
• Ceiling installation
• Wall mounting
Built-in MIC (select MIC IN)
External interface: 2.54 mm audio interface
(select LINE IN)
Level: -20 ~ -3 Dbv; impedance: 1 Kohm
Rj45 interface, with shielding, state indicator,
and data indicator:
10baseT Ethernet/100baseTXFast Ethernet
Frequency 1: 2010 MHz ~ 2025 MHz
Frequency 2: 1880 MHz ~ 1920 MHz
Frequency 3: 900 MHz
Frequency 4: 850 MHz
1. Voltage Standing Wave Ratio (VSWR): < 2.5:1
Gain: GSM ≥ 1 dBi; DCS/UMTS ≥ 2 dBi
Input impedance: 50 Ω
Maximum power: 50 W
Polarization mode: vertical polarization
DC5V / 4A
• A side button, used to restore factory
parameters of the device
• Self-eject TFLASH socket, supporting the
SDHC protocol and the maximum capacity
of 32 GB
• Input: photoelectric isolation input (I, G), 0
VDC ~ 5 VDC
Output: relay output (A, B), 0.5 A at 125
VAC; 1 A at 24 VDC
•
5V UART interface, 5V TTL level
The maximum bit rate of 128 Kbps
• 1/5-inch CMOS camera, 4.5-mm focus
• Day and night lens
• Video size: VGA (480 × 600)
• Frame rate: 30 frames
• Signal to Noise Ratio (SNR): 50 dB
• When the illumination is lower than 5 lux,
the infrared lights are turned on completely.
The infrared night vision range is 3 m.
• When the illumination is higher than 15 lux,
the infrared lights are turned off completely.
Normally, the best video distance is from
5m to 7m.
75°
Type
Physical
parameters
Use environment
Physical interface
Camera
Function
Weight
power consumption
Dimensions
Operating
environment
Transportation
environment
Installation mode
Audio interface
Network interface
3G antenna
Power supply
RESET button
Storage card
interface
GPIO
COMM
Lens
Infrared lights
Visual angle
05 0 6
www.mfshop.ru

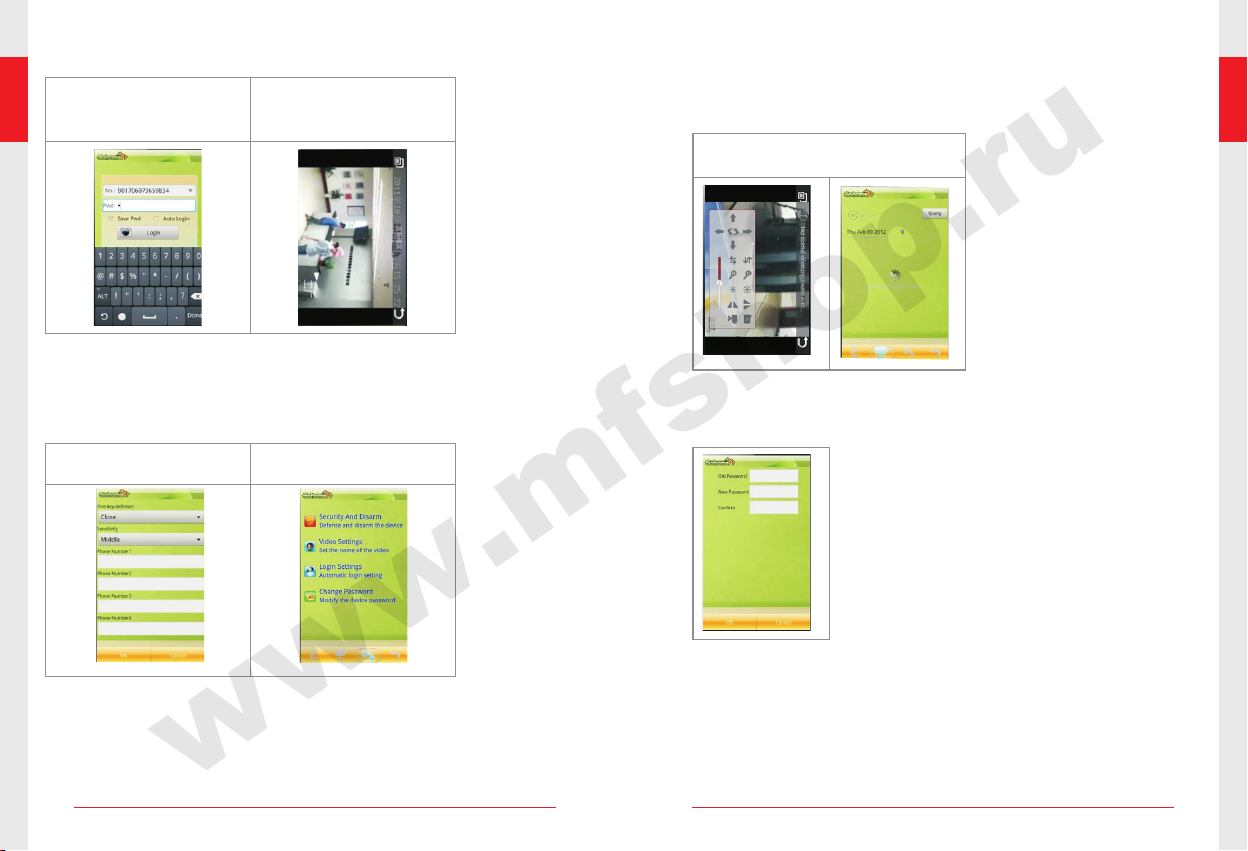
• Supporting PTZ operations of upward,
downward, leftward, rightward, center,
horizontal, and vertical scanning, and
multi-step angle selection; restoring the
preset position after the device is restarted:
the center position or the position before
the device is turned off
• Horizontal PTZ rotation angle of 270°,
vertical PTZ rotation angle of 60°, and
multi-level rotation speed settings
• Horizontal PTZ rotation life: ≥ 10000 cycles
• Vertical PTZ rotation life: ≥ 10000 cycles
Hardware structure based on TI Da Vinci
series SOC (ARM + DSP) chips
Built-in WCDMA module, supporting the dual
modes of WCDMA and GSM
Capacity: 1200 mAh
• Continuous operating time (coding transmissi
on state) when only the battery is used as a
power supply: more than 15 minutes
• Battery life: charge/discharge times more
than 300
• TIVC QVGA320 × 240 (default)
• TIVC 240 × 180 (optional)
• H.264 CIF (352 × 288) (optional)
CBR: Constant Bit Rate
25 kbps ~ 100 kbps;
≥ 12 fps
≥ 33 dB
• HSPA/UMTS 850/1900/2100
• EDGE/GPRS/GSM 850/900/1800/1900 MHz
• Supporting automatic detection and selection
of a network
• Uplink rate of HSUPA up to 2.0 Mbps
• Downlink rate of HSUPA up to 7.2 Mbps
• Uplink rate of WCDMA (UMTS) up to 384Kbps
• Downlink rate of EDGE up to 237 Kbps and
uplink rate up to 118 Kbps
• Downlink rate of GPRS up to 85.6 Kbps and
uplink rate up to 42.8 Kbps
• Supporting concurrency of Short Message
(SM) and data services
• Class 3 for UMTS/HSDPA/HSUPA
• Class 4 for GSM 900
• Class 1 for GSM 1800
• Class E2 for EDGE 900/1800
10BaseT/100BaseTXwith Auto-MDIX IEEE
802.3/802.3u
TCP/IP, DHCP, ICMP, DDNS, and HTTP 1.1
VCSPOP
Embedded WEB server pages or client
software, supporting device configuration and
maintenance
Chip
Communication
module
Lithium battery
Video coding
resolution
Video coding mode
Video coding bit rate
Frame rate size
per second
Video quality
Module operating
band
Transmission rate
SMS
Output power
One RJ45 interface
Protocol
Transfer protocol
Operation interface
Indicator
• One yellow system indicator
• One red alarm indicator
• One yellow 3G network indicator
• One red 2G network indicator
PTZ
Circuit module
Battery (optional)
Video coding
3G communication
mode
Wired network
Network protocol
User Interface (UI)
● Examples of Application Scenarios
1) Care the elderly and children at home,
turning your family into your visible concern.
It is a happy thing to ensure security of
your family.
2) When you go for an outing with your
family, you can view the real-time video
at home anytime and anywhere through
your mobile phone , thus k nowin g the
actual condition at home.
3) You can check the housework progress
of the nursemaid and how the nursemaid
takes care of your kids to witness the
happy growth process of your kids.
4 ) Yo u c a n c o n t r o l s e c u r i t y o f t h e
enterprise by implementing real-time video
surveillance in the garage and office. The
p ro d uc t me e t s y o ur p r a c t ic a l v i d eo
requirements in many aspects, making
you more satisfied with your work.
Care the elderly and children View the real-time video at home
anytime and anywhere
Check the housework progress
of the nursemaid Check the real-time video in the
garage and office
07 0 8
www.mfshop.ru

● Others
1. Remote surveillance management of stores: Leisure-style
management on multiple chain stores or stall frees you from
exhausting work. With this product, you can implement surveillance
anytime and anywhere through your mobile phone and realize
management easily.
2. Remote care of a patient: What can you do if you are far away
from home and cannot timely visit a sick relative or friend on
the site due to inconvenient transportation? Our product enables
you to know the latest information and surgery progress of the
sick relative or friend through your mobile phone in real time.
Your care is reachable anytime and anywhere.
3. ……
Use and Operations
● Packing List
Wireless camera Antenna Audio cable Bracket
(optional)
Power adapter Small resetting tool Network cable
● Support installation diagram
* The pictures are for reference only, please refer to real subjects.
09 1 0
www.mfshop.ru

● Indicator Description
Indicator State Description
▲ The system is starting.
The indicator is constantly on after the
system starts and the domain name server
or center server is registered successfully.
The device system operates normally.
The device system is starting, or the domain
name server or center server is being
registered.
A client logs in to the device.
The device fails.
▲ The securities functions are armed when
the system starts. Armed successfully
▲ The securities functions are not armed
when the system starts. Disarmed
successfully
The device is recording. You cannot pull out
the SD card.
Dialing succeeds and the device operates in
the WCDMA mode.
2G indicator on: The device operates in a
non-3G mode (when neither the 2G indicator
nor the 3G indicator is on, the device operates
in the wired mode).
2G indicator off: The SIM card is not detected.
Dialing…
Dialing succeeds and the device operates in
the GSM mode.
3G indicator on: The device operates in a
non-2G mode.
3G indicator off: The SIM card is not detected.
Dialing…
1. SYS indicator (a
single color/yellow)
2. ALARM indicator
(a single color/red)
3. 3G indicator (a
single color/yellow)
4. 2G indicator
(a single color/red)
5. Horn
Armed successfully (motion detection and
wired sensor arming and disarming)
Disarmed successfully
Constantly on
Blinking
(once every 0.3s)
Blinking
(off for 1s every 3s)
Off
Constantly on
Off
Blinking!
Constantly on
Off
Blinking
(once every 0.3s)
Constantly on
Off
Blinking
(once every 0.3s)
Two “beep” sounds
(at an interval of 2s)
One “beep”
sound (1.5s)
Three “beep” sounds
(continual, short,
and quick)
The horn sends three “beep” sounds at an
internval of 1s, and howls cyclically every
minute, indicating low power (when a battery
is configured).
● Quick Installation Guide
Interface Description
1. Antenna
2. Button for restoring default settings
3. SIM card slot
4. Power interface
5. Storage card slot
6. Power switch
7. Network cable interface
Quick Installation
Step 1: Install the antenna.
Turn to tighten the antenna clockwise by aligning it with the
antenna interface.
Step 2: Install the SIM card and the storage card.
Use the small resetting tool to press the button of the SIM card
slot, take out the SIM card holder, place in the SIM card, then
insert the SIM card and the card holder into the card slot. Insert
the TF card into the TF card slot.
11 1 2
① ② ③ ④ ⑤ ⑥ ⑦
www.mfshop.ru

Step 3: Connect the device to the power supply .
Remarks: T o reset the device, set the power switch to the OFF
position, and use the small resetting tool to press the resetting
b u t t o n . A t t h e s a m e t i m e , s e t t h e p o w e r s w i t c h t o t h e O N p o s i t i o n .
Release the resetting button after 5s. Then, the device is reset.
Step 4: Start the camera.
Set the camera switch to the ON position to start the camera.
Now , you can use the 3G video surveillance camcorder .
● Operation Guide of the Mobile Phone
Note: Due to the software upgrade or mobile phone model is different,
y o u r c l i e n t i n t e r f a c e m a y d i f f e r f r o m t h a t d e s c r i b e d i n t h e u s e r m a n u a l .
Please refer to the actual interface.
Step 1: Download and install the Ghome client of general version.
First make sure that your mobile phone can access Internet.
Notes:
1) F or the iPhone/iP ad version, first open App Store, log in to
the iT unes account, and search and download
.
2) If you cannot find the corresponding client of your mobile
phone model, your mobile phone model does not support
i n s t a l l a t i o n o f t h e G c l i e n t . P l e a s e c h a n g e y o u r m o b i l e p h o n e h o m e
model. W e will constantly mak e more models adaptive.
.
13 14
1) Enter and
open the
downloading
site.
2) Download
and install the
client.
www.mfshop.ru

Step 2: Connect to view the video.
1) After entering the
client, enter the number
(device ID) and password
to log in the camera.
2) After successful
connection, enter the
video play interface.
Step 3: Use the main functions.
1). Arm, disarm, SM number a settingsand dvanced
Arm, disarm, and
SM number settings Advanced settings
2 . Control functions of the digital camera )
In the live broadcast list, select the digital camera for playing. You
can perform operations such as PTZ control, image control, and
recording.
PTZ control、recording
and snapshot
3 . Change password)
After logging in to the device, you can enter password settings
to change the device access password.
15 1 6
www.mfshop.ru

● IPhone/IPad Operation Guide
Download, install, and use the client through IPhone/IPad according
to the following steps:
Step 2: Select the mobile phone access network.
You can select the 3G/2G network of your iPhone/iPad or the WIFI
network to log in to the 3G video surveillance camcorder.
(1) Select the 3G/2G network.
Enter the setting int erface, The mobile pho ne automatic ally
enables the 3G/2G network. If the 3G video surveillance camcorder
does not use the public network IP address (such as ADSL), you
need to start the proxy server.
(2) Select the WIFI network.
Note: First make sure that your iPhone/iPad supports the WIFI
network.
Enter the setting interface, and enable WIFI. The mobile phone
automatically selects the WIFI network. If the 3G video surveillance
camcorder does not use the public network IP address (such as
ADSL), you need to start the proxy server in both the 3G video
surveillance camcorder and the GHome client software. For the
17 1 8
method of starting the proxy server in the 3G video surveillance
camcorder, see the “Advanced Options” description in the “PC
operation guide”.
Step 1: Download and install the client.
Open App Store, log in to the iTunes account, search and download the
Ghome client.
Step 3: Set the dedicated domain server and proxy server for the 3G
video surveillance camcorder.
(1) Log in to the mobile phone client, and enter the configuration
interface.
(2) Set the domain name used to log in to the 3G video surveillance
camcorder. As shown in the following figure, the domain name is
set to mhomegmcc.com.
(3) Configure the DNS server.
Generally, use the default DNS server. You can also specify a
DNS server according to the dealer.
(4) Configure the proxy server.
When the 3G video surveillance camcorder does not have a public
network IP address, you must start the proxy server. For the
method of starting the proxy server in the 3G video surveillance
camcorder, see the “Advanced Options” description in the “PC
operation guide”.
Step 4: Log in to view the video.
(1) Connect to log in to the 3G video surveillance camcorder.
Ente r the GHome client, a nd add the 3G video su rveil lance
camcorder. Enter the device ID of the 3G video surveillance
camcorder in the number box, and enter the last six digits of the
ID for passaord. After being added, the 3G video surveillance
camcorder is saved in the device list.
dns.g oscamdv r.com
proxy.go scamdvr.c om
www.mfshop.ru

19 2 0
Click surveillance (digital camera) to enter the video surveillance play
interface.
(2) Video play control
Select upward, downward, leftward, or rightward to control video play
accordingly.
(3) Security alarm settings
Set the alarm message receiving number and one-key arming.
When the camera captures an image exception, the system sends
an alarm message to the set number for receiving alarm messages.
(4) View alarm video records.
After you select to view recorded video, the system displays the alarm
video records in recent five weeks by default.
Click one recorded video in the video record list to directly play the record.
www.mfshop.ru

(5) Change the login password.
Enter the original password and the new password, and click Save
to change the login password of the device.
● PC Operation Guide
1. Management Interface
Normally, you can use the mobile phone where the GHome client
is installed to connect the device and view video after the device
operates normally (the SYS indicator and 2G indicator are constantly on,
or the SYS
indicator and 3G indicator are constantly on).
The PC management interface is used by advanced users. Common
u sers a re not ad vi sed to set de vi ce par am eters on the PC
management interface. Before setting, carefully read through this
section.
2. Login Management Interface
Procedure:
1) Modify network settings of the PC:
• Cancel proxy settings.
• Change the IP address: Double-click on the local connection icon,
select 【Properties】, and enter the 【General】column. Find and
select【Internet Protocol(TCP/IP)】in【This connection uses the
following items】, select 【 】→【Use the following IP Properties
address】, and set 【IP address】 to 192.168.1.100. Use the
default value for 【Subnet mask】, enter 192.168.1.1 in 【Default
gateway】, and click【OK】 to complete IP settings for the PC.
2) Connect the PC and the camcorder to the same LAN: Use a
network cable to connect the PC to the camcorder.
3) Login management interface
• O p en t h e br o wse r (IE f or e xam p le) , ent e r the IP ad d res s
(http://192.168.1.120 by default) of the camcorder in the address
bar, and press Enter. The following login dialog box is displayed (the
dialog box varies slightly in different systems and browsers),
prompting you to enter the username and password.
21 2 2
www.mfshop.ru

The default username and the default password are both “admin”.
Enter the in the username box and the password box “admin” 【 】 【 】
in turn, and click OK to log in to the setting page.【 】
After successful login, the following page is displayed. You can click
the left menu to complete related settings.
On the management interface, you can set and query the following
device information:
• Running Status
• Network Options
• Media Options
• Alarm Settings
• Advanced Options
• Device Options
• System Tools
3. Running Status
The running status displays the current operating status and basic
parameter information of the device, such as the local IP address,
3G network status, and connected server status.
4. Network Options
Click the “Network Options” tab. The tab page displays its sub-tabs:
• LAN port
• 3G setting
1) LAN port
Click the “LAN port“sub-tab to set the LAN port. The following
configuration page is displayed:
Set the host name, IP address, and corresponding subnet mask of
the LAN port:
【Subnet Mask】: Set the corresponding subnet mask of the local IP
address. After setting as required, you can handle the configuration
result according to the corresponding operation below.
【Submit】: Save the current settings.
【Cancel】: Cancel the current configuration operation.
The set parameters take effect after the system restarts.
23 2 4
www.mfshop.ru

2) 3G setting
Click the “3G setting” sub-tab, and set the 3G parameters of the
device. The following configuration interface is displayed:
This tab is used to set the parameters used for 3G network dialing.
Please consult the local service provider or mobile operator.
【User】: 3gppp
【Password】: 3gppp
【Phone Number】: *99#
【Access Point Name】: 3gppp
【Mode】: Automatic mode: the WCDMA or GSM mode is selected
automatically. After wireless connection is enabled, GSM dialing starts
automatically. If it is not enabled, the system is accessed in the wired
mode or the manual dialing mode.
After setting as required, you can handle the configuration result
according to the corresponding operation below:
【Submit】: Save the current settings.
【Cancel】: Cancel the current configuration operation.
The set parameters take effect after the system restarts.
5. Media Options
Click the tab. The tab page displays its sub-tabs:
• LiveView
• Image
• Media
• Record
“Media Options”
1 ) LiveView
【PTZ Cortrol】: : resetting; : upward/downward scanning;
: stopping; : horizontal scanning; you can control
the camera turn direction.
【Step angle】: These angles are available: 5°, 10°, 15°, 20°, 25°, and
30°. You can change it as required. The maximum
horizontal rotation angle is 270°, and the maximum
upward/downward angle is 60°.
【PTZ start position】: The position after the device is powered off
and restarts
Note: If you want to play the current video record here, you need to
download the IE plug.
25 2 6
www.mfshop.ru

2) Image
【Mirror】 and 【Flip】: Set the image according to the product position.
When the device is installed reversely, select 【Mirror】 and 【Flip】at
the same time.
【Power frequency】: 50 Hz or 60 Hz; the power supply frequency is
50 Hz in China.
3) Media
Select the channel of audio and video source to be used. This setting
ta kes ef fe ct up on co mp le ti on . C lick 【Submit】 to save th e s et
parameters. These parameters take effect after the system restarts.
Click 【Cancel】 to cancel the medication. The current parameters are
displayed.
4) Record
You can select a date and view the record saved before this day.
Audio parameters
【Bit rate】: the mode used for audio coding; for example, the “0 (7
kbps)” option indicates that mode 0 requires a 7 kbps bandwidth.
The higher the bit rate, the better the audio quality. Select a proper
mode based on the video bit rate and network conditions.
Video parameters
【VBR/CBR】: Click the dropdown list box to select a video coding
mode.
【Resolution】: the resolution of the coded image; the higher the
resolution, the clearer the image.
【Frame rate】: You need to specify the frame rate. The higher the
frame rate, the more smooth the video, but the coder and the player
need to process more data. Usually 8 frames are proper.
【Bit rate】: The higher the bit rate, the better the image quality, but
the higher the occupied network bandwidth. Fill in a proper bit rate
according to the network bandwidth. The bit rate is from 30 kbps to
100 kbps. In the WCDMA mode, the recommended value is 60 kbps.
【I frame interval】: the interval based on which one I frame is generated;
fill in three times of the frame rate, namely, one I frame is generated
every 3s.
27 2 8
www.mfshop.ru

6. Alarm Settings
Click the “Alarm Settings” tab. The tab page displays its sub-tabs:
• Motion
• Alarm IO
• Alarm Scheme
• Alarm SMS
• Alarm Record
1) Motion
Motion detection area settings are not provided temporarily, so they
are not introduced here.
【Sensitivity】: The greater the value, the higher the sensitivity.
【Threshold】: Use the default parameter.
2) Alarm IO
• Outside Input Alarm: means that the e xternal alarm input through
the GPIO interface can trigger alarm reporting of the device. In
addition, the device starts recording and sends a short message
to the user. This function is used by advanced users.
• Motion Detection Alarm: means that the device is triggered to send
an alarm when the camera detects an image change. In addition,
3) Alarm Scheme
the device starts recording and sends a short message to the user.
The user can also set this function in the mobile phone client.
• You can set an alarm time segment. The security alarm functions
such as motion detection of the camera and external alarm are
invalid beyond the set alarm time segment.
• The system provides three groups of alarm plans. Alarm plan 1
(the alarm function is set for 7*24 hours every week) is enabled by
default. You can modify or adjust the plan as actually required. Alarm
plan 2 and alarm plan 3 are disabled by default. You can enable the
plans at the same time as required, and select different time
segments when the alarm function is set.
4) Alarm SMS
Set this function according to local Short Message Center (SMC)
numbers. An SM can be sent to the set mobile phone number. At
most four numbers can be filled in.
29 3 0
www.mfshop.ru

5) Alarm Record
• Pre-recorded time: recording starts 5s-15s (configurable) before
the time when recording is triggered by motion detection of the
camera.
• Time of video file: the total recording time when motion detection
of the camera is triggered each time.
• Video Plan Options: the device can record in the time segment
set by the user. The system provides three groups plans, which are
all disabled by default. You can enable a plan and set time as required.
You can enable a single plan only or enable the three groups of plans
at the same time.
• Memory card status: the capacity and available space prompt of
the current storage card.
• When memory card is full: cyclic recording is selected by default.
W hen cy cl ic r ec ordin g is se le cted, the sy st em a ut omati ca lly
overwrites the previous record and saves the new record if the
storage card is full. When SM notice is selected, the system sends
an SM about the full storage card to the SM receiving numbers set
in Alarm Notice in the above interface.
7. Advanced Options
Click the “Advanced Options” tab. The tab page displays the following
sub-tabs:
• Streamserver
• Device Access
1) Streamserver
You can set the parameters related to the streaming server, including
the following streaming parameters:
【Data port(UDP)】: the default value is 9000.
【Command Port(TCP)】: the default value is 8895.
【IE Live Port(TCP)】: the default value is 9001. On the Web page,
operations such as video browsing are performed through this port.
【Maximum number of users online(1-4)】: the number of PC and
mobile phone clients connected to this device at the same time
【Client Login password】: you can change the password. The new
password takes effect after the system restarts.
31 3 2
www.mfshop.ru

2) Device Access
Equipment access parameters are classified into two types:
• Registered Domain Name Setting:
Function switch (enabled by default):
① Registered Domain Name:
You can select to register a domain name through the mobile phone
number or the device ID. Here, mhomegmcc.com is the default
level-2 domain name.
② Registered IP Address:
When the device accesses the network through ADSL or another
mode and port mapping is required, select the gateway IP address
as the registered IP address of domain name. When the device
uses a public network IP address or is in the same subnet as the
client (for example, the device uses the TD access mode), select
the IP address of this device.
• Access Server Setting (disabled by default):
After the access server is enabled, the “Registered Domain Name
Setting” is invalid. These parameters are uniformly allocated by the
access server set here. The access server function is disabled by
default. To enable this function, contact the local Unicom operator.
• DDNS & Proxy Server Setting:
① DDNS Address and DDNS Port:
The domain name registration and resolution server is provided.
After starting, this device continuously reports the local domain
name and the IP address used for the current access network
to the RBS server. The PC or mobile phone client obtains the
IP address used for this device from the RBS server according
to the domain name of this device, and sets up a bidirectional
network connection with this device. However, the PC or mobile
phone client and this device are in the same subnet (the same
LAN or VPN).
② Enable Proxy (enabled by default):
When the client and the device are not on the same network
and cannot directly communicate with each other, but two ends
can access Internet, the proxy server provides the transparent
transmission function of network relay for the client and the
device, and establishes a point-to-point connection path.
33 3 4
dns.goscamdvr.com
proxy.goscamdvr.com
www.mfshop.ru

Click the “Device Options” tab. The tab page displays the following
sub-tabs:
• Device
• WCDMA Module
1) Device
View the related information of the device.
8. Device Options
2) WCDMA Module
View the related information of the WCDMA module.
9. System Tools
Click the “System Tools” tab. The tab page displays the following
sub-tabs:
• Date&Time
• Update
• Restore
• Admin Settings
• Restart
• System Log
1) Date&Time
Time setting procedure:
Manual setting: First select your time zone, enter the date and time
values according to the presented formats, and click “Submit” to
validate the settings. Alternatively, you can click “Get Computer Time”
behind to set the time of the current management PC to the device
time.
Setting the NTP server:
Enter the NTP server domain name or IP address in the “NTP Server”
box. Click “Get NTP Time”. The device starts to obtain the network
time. After the device is powered on or the NTP time is obtained
manually, the device time is automatically synchronized with the RTC
time every seven days.
2) Update
35 3 6
www.mfshop.ru
Table of contents