manuals.online logo
Brands
  1. Home
  2. •
  3. Brands
  4. •
  5. Grundig
  6. •
  7. TV
  8. •
  9. Grundig ST 72-860 NIC/TOP User manual

Grundig ST 72-860 NIC/TOP User manual

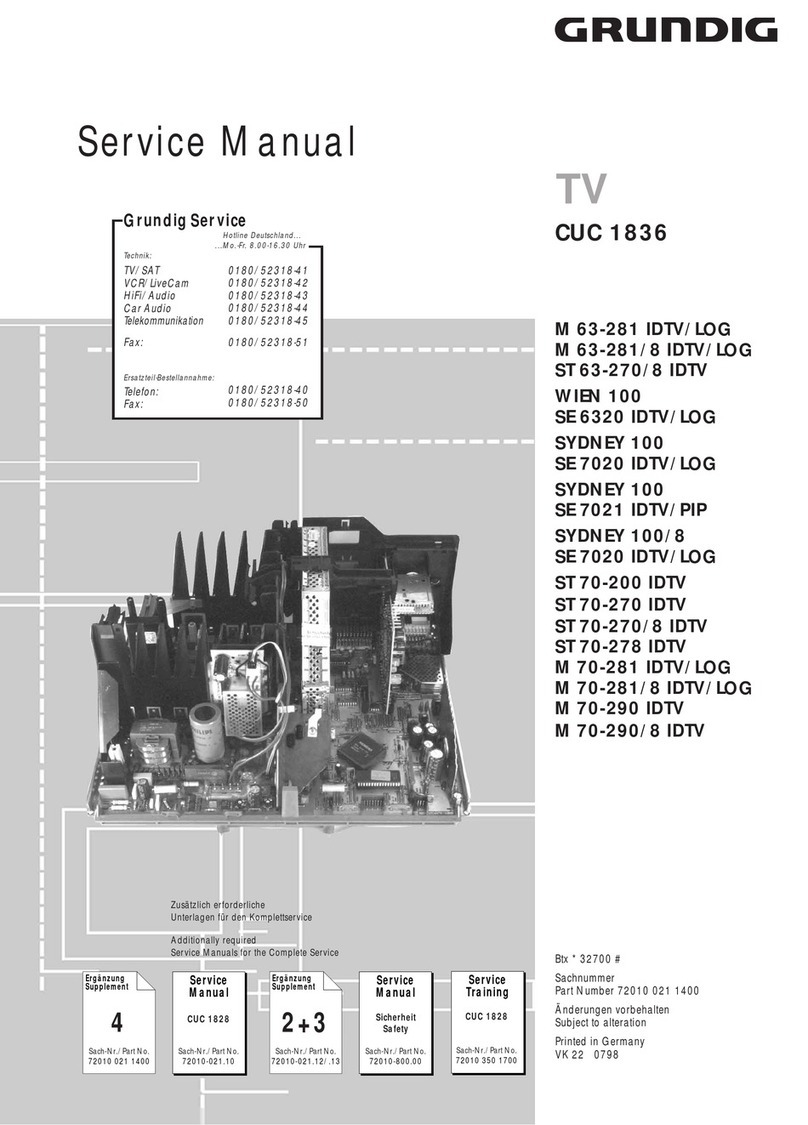
CUC 2030/2030 N
2031/2031 N
Greenville 7003 text
Greenville 7003 NIC/TOP
ST 63-700 text
ST 63-700 NIC/text
ST 63-700 NIC/TOP
ST 63-780 text
ST 63-780 NIC/TOP
ST 70-700 text
ST 70-700 NIC/text
ST 70-700 NIC/TOP
ST 70-780 text
ST 70-780 NIC/TOP
ST 72-860 TOP
ST 72-860 NIC/TOP
Service Manual TV
Zusätzlich erforderliche
Unterlagen für den Komplettservice
Additionally required
Service Manuals for the Complete Service
Service
Manual
Service
Manual
Service
Training
Sicherheit
Safety
Sach-Nr./Part No.
72010-800.00
CUC 2030/N
CUC 2031/N
Sach-Nr./Part No.
72010-020.70
Btx * 32700 #
Sachnummer
Part Number 72010-020.70
Änderungen vorbehalten
Subject to alteration
Printed in Germany
VK22/221 0697
CUC 2000
Sach-Nr./Part No.
72010-350.35
Allgemeiner Teil / General Section CUC 2030 / 2030 N / 2031 / 2031 N
1 - 2 GRUNDIG Service
Es gelten die Vorschriften und Sicherheitshin-
weise gemäß dem Service Manual "Sicherheit",
Sach-Nummer 72010-800.00, sowie zusätzlich
dieeventuellabweichenden,landesspezifischen
Vorschriften!
The regulations and safety instructions shall be
validasprovidedbythe"Safety"ServiceManual,
part number 72010-800.00, as well as the
respective national deviations.
GB
Table of Contents
Page
General Section..................................1-1... 1-26
Technical Data ............................................................................. 1-3
Module List................................................................................... 1-5
Hints to the Oscillograms and the Components........................... 1-7
Service Notes............................................................................... 1-8
Circuit Diagram Symbols ............................................................. 1-9
Operating Instructions (ST 70-700 NIC/TOP) ............................ 1-17
Service and Special Functions................................................... 1-24
Adjustment ........................................... 2-3…2-4
Chassis Board.............................................................................. 2-3
Picture Geometry ......................................................................... 2-4
CRT Panel ................................................................................... 2-4
Layout of the PCBs
and Circuit Diagrams .........................3-1... 3-34
Oscillograms Chassis .................................................................. 3-1
Chassis Board PCBs ................................................................... 3-3
CRT Panel 29305-122.16/.18 .................................................... 3-11
Mains Chassis............................................................................ 3-13
Signal Chassis A ........................................................................ 3-17
Signal Chassis B ........................................................................ 3-21
Panorama View 29305-119.43 .................................................. 3-24
BSO Board (Black Switch On) 29305-119.44 ............................ 3-24
Processor Board 29305-119.37/.39/.40/.46 ............................... 3-25
Mains Switch Board 29305-165.71 ............................................ 3-27
Mains Switch Board 29305-165.73 ............................................ 3-28
Socket Board 29305-008.34/.38 ................................................ 3-29
Phone Socket Board 29305-008.35/.37..................................... 3-30
Alternative Board 29305-119.42/.45 .......................................... 3-31
Keyboard 29501-083.44/.25 ...................................................... 3-32
Control Unit 29501-082.59/.61................................................... 3-33
Spare Parts List..................................4-1... 4-10
General Part
Test Equipment / Aids
Variable isolating transformer Test/Sweep Generator
Colour Generator Oscilloscope
DC Voltmeter AF Voltmeter
AF Generator Frequency counter
Please note the Grundig Catalog "Test and Measuring Equipment"
obtainable from:
Grundig Instruments
Test- und Meßsysteme GmbH
Würzburger Str. 150, D-90766 Fürth/Bay.
Tel.0911/703-4118, Telefax 0911/703-4130
D
Inhaltsverzeichnis
Seite
Allgemeiner Teil .................................1-1... 1-24
Technische Daten ....................................................................... .1-3
Modulübersicht............................................................................. 1-5
Hinweise zu den Bauteilen und Oszillogrammen......................... 1-7
Sicherheitshinweise ..................................................................... 1-8
Schaltplansymbole....................................................................... 1-9
Bedienungsanleitung (ST 70-700 NIC/TOP).............................. 1-13
Service und Sonderfunktionen................................................... 1-22
Abgleich ................................................2-1... 2-2
Chassisplatte ............................................................................... 2-1
Bildgeometrie ............................................................................... 2-2
Bildrohrplatte................................................................................ 2-2
Platinenabbildungen
und Schaltpläne .................................3-1... 3-34
Oszillogramme Chassis ............................................................... 3-1
Chassisplatte PCBs ..................................................................... 3-3
Bildrohrplatte 29305-122.16/.18................................................. 3-11
Netz-Chassis.............................................................................. 3-13
Signal-Chassis A........................................................................ 3-17
Signal-Chassis B........................................................................ 3-21
Panorama View 29305-119.43 .................................................. 3-24
BSO-Platte (Black Switch On) 29305-119.44 ............................ 3-24
Prozessorplatte 29305-119.37/.39/.40/.46................................. 3-25
Netzschalterplatte 29305-165.71 ............................................... 3-27
Netzschalterplatte 29305-165.73 ............................................... 3-28
Buchsenplatte 29305-008.34/.38 ............................................... 3-29
Cinch-Buchsenplatte 29305-008.35/.37..................................... 3-30
Ersatzplatte 29305-119.42/.45................................................... 3-31
Keyboard 29501-083.44/.25 ...................................................... 3-32
Bedieneinheit 29501-082.59/.61 ................................................ 3-33
Ersatzteilliste ......................................4-1... 4-10
Allgemeiner Teil
Meßgeräte / Meßmittel
Regeltrenntrafo Meß-/Wobbelsender
Farbgenerator Oszilloskop
DC-Voltmeter NF-Voltmeter
NF-Generator Frequenzzähler
BeachtenSiebittedasGrundigMeßtechnik-Programm,dasSieunter
folgender Adresse erhalten:
Grundig Instruments
Test- und Meßsysteme GmbH
Würzburger Str. 150, D-90766 Fürth/Bay.
Tel.0911/703-4118, Telefax 0911/703-4130
CUC 2030 / 2030 N / 2031 / 2031 N Allgemeiner Teil / General Section
GRUNDIG Service 1 - 3
ST 72-860 NIC/TOP
(CUC 2031 N)
ST 72-860 TOP
(CUC 2031)
ST 70-700 NIC/text
(CUC 2030N )
ST 63-700 NIC/text
(CUC 2030N)
ST 70-700 text
(CUC 2030)
ST 70-700 NIC/TOP
(CUC 2030N)
ST 63-700 text
(CUC 2030)
ST 63-700 NIC/TOP
(CUC 2030N)
Bildröhre / Picture Tube
Sichtbares Bild
Visible picture 68cm 68cm 66cm 59cm 66cm 66cm 59cm 59cm
Bildschirmdiagonale
Screen diagonale
72cm (29")
Black Line S 72cm (29")
Black Line S 70cm (28")
Black Line D 63cm (25")
Black Line D 70cm (28")
Black Line D 63cm (25")
Black Line D
Ablenkwinkel
Deflection angle 110°110°110°110°110°110°110°110°
Bildwechselfrequenz
Vertical frequency
50Hz 50Hz 50Hz 50Hz 50Hz 50Hz 50Hz 50Hz
Elektronik / Electronic
Programmspeicherplätze
Programme positions
79 TV + 3 AV 79 TV + 3 AV 79 TV + 3 AV 79 TV + 3 AV 79 TV + 2 AV 79 TV + 3 AV 79 TV + 2 AV 79 TV + 3 AV
AV-Auswertung
AV evaluation auf jeden Programmplatz programmierbar / programmable for every programme position
Tuner
PLL-Frequenz synthesizer
tuning UHF/VHF
PLL frequency synthesizer
tuning UHF/VHF
PLL-Frequenz synthesizer
tuning UHF/VHF
PLL frequency synthesizer
tuning UHF/VHF
VST-Spannungs synthesizer
tuning UHF/VHF
VST voltage synthesizer
tuning UHF/VHF
VST-Spannungs synthesizer
tuning UHF/VHF
VST voltage synthesizer
tuning UHF/VHF
VST-Spannungs synthesizer
tuning UHF/VHF
VST voltage synthesizer
tuning UHF/VHF
VST-Spannungs synthesizer
tuning UHF/VHF
VST voltage synthesizer
tuning UHF/VHF
VST-Spannungs synthesizer
tuning UHF/VHF
VST voltage synthesizer
tuning UHF/VHF
VST-Spannungs synthesizer
tuning UHF/VHF
VST voltage synthesizer
tuning UHF/VHF
TV-Normen
TV-Standard
PAL/SECAM/
NTSC 4,43MHz
B/G, I, D/K,K'
PAL
B/G PAL/SECAM
B/G, I, D/K,K' PAL/SECAM
B/G, I, D/K,K' PAL
B/G
PAL
B/G, I, D/K (nur/only PAL),K'
PAL
B/G
PAL
B/G, I, D/K (nur/only PAL),K'
Stereo Systeme
Stereo systems
Deutsch A2 für B/G/D/K
German A2 for B/G/D/K
Nicam 5,85+6,52
Deutsch A2 für B/G
German A2 for B/G
Deutsch A2 für B/G/D/K
German A2 for B/G/D/K
Nicam 5,85+6,52
Deutsch A2 für B/G/D/K
German A2 for B/G/D/K
Nicam 5,85+6,52
Deutsch A2 für B/G
German A2 for B/G
Deutsch A2 für B/G/D/K
German A2 for B/G/D/K
Nicam 5,85+6,52
Deutsch A2 für B/G
German A2 for B/G
Deutsch A2 für B/G/D/K
German A2 for B/G/D/K
Nicam 5,85+6,52
Videotext
Teletext
8 Seiten TOP/FLOF-text,
VPS,
8 pages TOP/FLOF-text,
VPS,
8 Seiten TOP/FLOF-text,
VPS,
8 pages TOP/FLOF-text,
VPS,
1 Seiten Text
1 pages text 1 Seiten Text
1 pages text
8 Seiten TOP/FLOF-text,
VPS,
8 pages TOP/FLOF-text,
VPS,
1 Seiten Text
1 pages text
8 Seiten TOP/FLOF-text,
VPS,
8 pages TOP/FLOF-text,
VPS,
Musikleistung
Music power Stereo 2 X 15W Stereo 2 X 15W Stereo 2 X 8W Stereo 2 X 8W Stereo 2 X 8W Stereo 2 X 8W Stereo 2 X 8W Stereo 2 X 8W
Anschlüsse Front / Connections Front
Kopfhörer
Headphones Stereo 3,5mm Klinkenbuchse, Lautstärke einstellbar / Stereo 3.5mm jacksocket, volume controllable
Video IN 1 x Cinch 1 x Cinch 1 x Cinch 1 x Cinch 1 x Cinch 1 x Cinch 1 x Cinch 1 x Cinch
Audio IN 2 x Cinch 2 x Cinch 2 x Cinch 2 x Cinch 2 x Cinch 2 x Cinch 2 x Cinch 2 x Cinch
Anschlüsse Rückwand / Connections Rear Panel
Euro AV 1 (schwarz/black)
FBAS in-/output,
SBAS input, RGB input
FBAS in-/output, RGB input,
SBAS input
FBAS in-/output, RGB input,
SBAS input
FBAS in-/output, RGB input,
SBAS input
FBAS in-/output, RGB input,
SBAS input
FBAS in-/output,
SBAS input, RGB input
FBAS in-/output, RGB input,
SBAS input
FBAS in-/output,
SBAS input, RGB input
Euro AV 2 (schwarz/black)
FBAS in-/output,
SBAS input, RGB input
Euro AV 2 (orange)
FBAS in-/output, RGB input,
SBAS input
FBAS in-/output, RGB input,
SBAS input
FBAS in-/output, RGB input,
SBAS input
—
FBAS in-/output, RGB input,
SBAS input
—
FBAS in-/output, RGB input,
SBAS input
Netzteil / Mains Stage
Netzspannung (Regelber.)
Mains voltage (variable)
165…265V 165…265V 165…265V 165…265V 165…265V 165…265V 165…265V 165…265V
Netzfrequenz
Mains frequency 50 / 60Hz 50 / 60Hz 50 / 60Hz 50 / 60Hz 50 / 60Hz 50 / 60Hz 50 / 60Hz 50 / 60Hz
Leistungsaufnahme
Power consumption
Daten noch nicht verfügbar
data not yet available
Daten noch nicht verfügbar
data not yet available
ca. 75W ca. 70W ca. 75W ca. 75W ca. 70W ca. 70W
Standby
Daten noch nicht verfügbar
data not yet available
Daten noch nicht verfügbar
data not yet available
< 5W < 5W < 5W < 5W < 5W < 5W
Technische Daten / Technical Data
Allgemeiner Teil / General Section CUC 2030 / 2030 N / 2031 / 2031 N
1 - 4 GRUNDIG Service
ST 70-780 text
(CUC 2030)
ST 70-780 NIC/TOP
(CUC 2030N)
ST 63-780 text
(CUC 2030)
ST 63-780 NIC/TOP
(CUC 2030N)
Greenville 7003 text
(CUC 2030)
Greenville 7003 NIC/TOP
(CUC 2030N)
Bildröhre / Picture Tube
Sichtbares Bild
Visible picture 66cm 66cm 59cm 59cm 66cm 66cm
Bildschirmdiagonale
Screen diagonale
70cm (28")
Black Line D 70cm (28")
Black Line D 63cm (25")
Black Line D 70cm (28")
Black Line D
Ablenkwinkel
Deflection angle 110°110°110°110°110°110°
Bildwechselfrequenz
Vertical frequency
50Hz 50Hz 50Hz 50Hz 50Hz 50Hz
Elektronik / Electronic
Programmspeicherplätze
Programme positions
79 TV + 2 AV 79 TV + 3 AV 79 TV + 2 AV 79 TV + 3 AV 79 TV + 2 AV 79 TV + 2 AV
AV-Auswertung
AV evaluation auf jeden Programmplatz programmierbar / programmable for every programme position
Tuner
VST-Spannungs synthesizer
tuning UHF/VHF
VST voltage synthesizer
tuning UHF/VHF
VST-Spannungs synthesizer
tuning UHF/VHF
VST voltage synthesizer
tuning UHF/VHF
VST-Spannungs synthesizer
tuning UHF/VHF
VST voltage synthesizer
tuning UHF/VHF
VST-Spannungs synthesizer
tuning UHF/VHF
VST voltage synthesizer
tuning UHF/VHF
VST-Spannungs synthesizer
tuning UHF/VHF
VST voltage synthesizer
tuning UHF/VHF
VST-Spannungs synthesizer
tuning UHF/VHF
VST voltage synthesizer
tuning UHF/VHF
TV-Normen
TV-Standard PAL
B/G
PAL
B/G, I, D/K (nur/only PAL),K'
PAL
B/G
PAL
B/G, I, D/K (nur/only PAL),K'
PAL
B/G
PAL
B/G, I, D/K (nur/only PAL),K'
Stereo Systeme
Stereo systems
Deutsch A2 für B/G
German A2 for B/G
Deutsch A2 für B/G/D/K
German A2 for B/G/D/K
Nicam 5,85+6,52
Deutsch A2 für B/G
German A2 for B/G
Deutsch A2 für B/G/D/K
German A2 for B/G/D/K
Nicam 5,85+6,52
Deutsch A2 für B/G
German A2 for B/G
Deutsch A2 für B/G/D/K
German A2 for B/G/D/K
Nicam 5,85+6,52
Videotext
Teletext 1 Seiten Text
1 pages text
8 Seiten TOP/FLOF-text,
VPS,
8 pages TOP/FLOF-text,
VPS,
1 Seiten Text
1 pages text
8 Seiten TOP/FLOF-text,
VPS,
8 pages TOP/FLOF-text,
VPS,
1 Seiten Text
1 pages text
8 Seiten TOP/FLOF-text,
VPS,
8 pages TOP/FLOF-text,
VPS,
Musikleistung
Music power Stereo 2 X 8W Stereo 2 X 8W Stereo 2 X 8W Stereo 2 X 8W Stereo 2 X 8W Stereo 2 X 8W
Anschlüsse Front / Connections Front
Kopfhörer
Headphones Stereo 3,5mm Klinkenbuchse, Lautstärke einstellbar / Stereo 3.5mm jacksocket, volume controllable
Video IN 1 x Cinch 1 x Cinch 1 x Cinch 1 x Cinch 1 x Cinch 1 x Cinch
Audio IN 2 x Cinch 2 x Cinch 2 x Cinch 2 x Cinch 2 x Cinch 2 x Cinch
Anschlüsse Rückwand / Connections Rear Panel
Euro AV 1(schwarz/black)
FBAS in-/output, RGB input,
SBAS input
FBAS in-/output, RGB input,
SBAS input
FBAS in-/output, RGB input,
SBAS input
FBAS in-/output, RGB input,
SBAS input
FBAS in-/output, RGB input,
SBAS input
FBAS in-/output,
SBAS input, RGB input
Euro AV 2(schwarz/black) —
FBAS in-/output, RGB input,
SBAS input
—
FBAS in-/output, RGB input,
SBAS input
——
Netzteil / Mains Stage
Netzspannung (Regelber.)
Mains voltage (variable)
165…265V 165…265V 165…265V 165…265V 165…265V 165…265V
Netzfrequenz
Mains frequency 50 / 60Hz 50 / 60Hz 50 / 60Hz 50 / 60Hz 50 / 60Hz 50 / 60Hz
Leistungsaufnahme
Power consumption
ca. 75W ca. 75W ca. 70W ca. 70W ca. 75W ca. 75W
Standby < 5W < 5W < 5W < 5W < 5W < 5W
Technische Daten / Technical Data
CUC 2030 / 2030 N / 2031 / 2031 N Allgemeiner Teil / General Section
GRUNDIG Service 1 - 5
Modulübersicht / Module List
Sachnummer
Part Number
ST 72-860 TOP
CUC 2031
ST 72-860
NIC/TOP
CUC 2031 N
ST 70-700
NIC/text
CUC 2030N
ST 63-700
NIC/text
CUC 2030N
ST 70-700text
CUC 2030
ST 70-700
NIC/TOP
CUC 2030N
ST 63-700text
CUC 2030
ST 63-700
NIC/TOP
CUC 2030N
Tuner PLL 8140-601-612
••
––––––
Tuner VST 8140-601-610
––
••••••
Bedieneinheit
Control Unit 29501-082.59
––
••••••
Keyboard 29501-083.25
••
––––––
Buchsenplatte
Socket Board 29305-008.38
––––––––
Cinch-Buchsenplatte
Phone Socket Board
29305-008.37
••
––––––
Bildrohrplatte
CRT Panel 29305-122.18
••
––––––
29305-122.16
––
••••••
Ersatzplatte PAL/SECAM
Interchangeable Panel PAL/SECAM
29305-119.42
––––––––
Ersatzplatte PAL
Interchangeable Panel PAL
29305-119.45
••••••••
Prozessorplatte
Processor Panel 29325-119.37
––––
•
–
•
–
29325-119.39
–––––
•
–
•
29325-119.46
••
––––––
29325-119.40
––
••
––––
Netzschalterplatte
Main Switch Panel 29305-165.71
••
––––––
Panorama View 29305-119.43
••
––––––
TP 800 29642-061.01
••
––––––
TP 713 29642-063.04
––
••••••
BSO-Platte
BSO Board 29305-119.44
••
––––––
Allgemeiner Teil / General Section CUC 2030 / 2030 N / 2031 / 2031 N
1 - 6 GRUNDIG Service
Sachnummer
Part Number
ST 70-780text
CUC 2030
ST 70-780
NIC/TOP
CUC 2030N
ST 63-780text
CUC 2030
ST 63-780
NIC/TOP
CUC 2030N
Greenville 7003
text
CUC 2030
Greenville 7003
NIC/TOP
CUC 2030N
Tuner 8140-601-610 ••••••
Keyboard 29501-083.44 ––––••
Bedieneinheit
Control Unit 29501-082.61 ••••––
Buchsenplatte
Socket Board 29305-008.38 ––––••
Bildrohrplatte
CRT Panel 29305-122.16 ••••••
Ersatzplatte PAL/SECAM
Interchangeable Panel PAL/SECAM
29305-119.42 ––––––
Ersatzplatte PAL
Interchangeable Panel PAL
29305-119.45 ••••••
Prozessorplatte
Processor Panel 29325-119.37 •–•–•–
29325-119.39 –•–•–•
Netzschalterplatte
Main Switch Panel 29305-165.73 ––––••
TP 900 29642-061.11 ––––••
TP 800 29642-061.01 ––––––
TP 713 29642-063.04 ••••––
Modulübersicht / Module List
CUC 2030 / 2030N / 2031 / 2031N Allgemeiner Teil / General Section
GRUNDIG Service 1 - 7
Hinweise zu den Oszillogrammen / Hints to the Oscillograms / Note relative agli Oscillogr./
Indications pour les Oscillogrammes / Observaciones con respecto a los Oscilogramas
D
GB
I
F
E
. . . V Gleichspannungswert/DCvoltage/Valoretensionecontinua/Tension
continue / Valor de tensión continua
. . . Vss
. . . ms/cm
. . . Hz
Spitze-Spitze - Wert / Peak to peak value / Valore picco-picco / Crête-
crête / Valor pico a pico
Zeitbasis des Oszilloskops / Time base of the oscilloscope / Base del
tempo dell´oscilloscopio / Base de temps de l´oscilloscope/ Base de
tiempo del oscilocopio
Frequenz / Frequency / Frequenza / Fréquence / Frecuencia
Die Spannungswerte an den Oszillogram-
men entsprechen Näherungswerten!
The voltages indicated in the oscillograms
are approximates!
I valori delle tensioni indicati sugli oscillo-
grammi sono approssimativi !
Les valeurs de tension indiquées pour les
oscillogrammes sont des valeurs approxi-
matives!
Losvaloresde tensión en lososcilogramas
son aproximados!
Metallschichtwiderstände
Metal film resistors
Resistenza a strato metallico
Resistencia de capa metálica
Film métallique
Kohleschichtwiderstände
Carbon film resistors
Resistenza a strato di carbone
Resistencia de capa de carbón
Film carbonique
Metalloxidwiderstand
Metal oxid resistor
Resistenza ad ossido metallico
Resistencia de óxido metálico
Métaloxide
Schwer entflammbarer Widerstand
Flame resistant resistor
Resistenza anti-infiammabile
Resistencia ininflamable
Ininflammable
Hinweise zu den Bauteilen / Hints to Components / Istruzioni sui Componenti /
Observaciones sobre los Componentes / Precautions a observer
K
PTC
NTC
SI-R
SI-R
DIN 0204
DIN 0207
DIN 0414
DIN 0204
DIN 0207
DIN 0414
DIN 0617
Sicherungswiderstand
Fuse resistor
Resistenza di sicurezza
Resistencia con resorte de seguridad
Rés. fusible
Drahtwiderstand m. Wattangabe
Wire wound resistor w. wattage
Resistenza a filo
Resistencia bobinada (Disipación)
Bobinée avec ind. puissance
Heißleiter / NTC resistor
Termistore NTC / Resistencia CNT
Varistor (CTN)
Kaltleiter / PTC resistor
Termistore PTC / Resistencia CPT
Varistor (CTP)
Keramikkondensator
Ceramic capacitor
Condensatore ceramico
Condensador cerámico
Céramique
Kondensator, Capacitor
Condensatore, Condensador
Condensador, 250 V=
+
T
+
Kondensator, Capacitor
Condensatore, Condensador
Condensador, 630 V=
Elektrolytkondensator
Electrolytic capacitor
Condensatore elettrolitico
Condensador electrolitico
Electrolytique
Tantal-Elektrolytkondensator
Tantalum electrolytic capacitor
Condensatore elettro. al tantalio
Condensador de tantalio
Tantale
bipolarer Elektrolytkondensator
bipolar electrolytic capacitor
Condensatore elettrolitico bipolare
Condensador electrolitico bipolar
Electrolytique bipolaisé
Kondensator, Capacitor
Condensatore, Condensador
Condensador, 400 V=
Kondensator, Capacitor
Condensatore, Condensador
Condensador, 1000 V=
Allgemeiner Teil / General Section CUC 2030 / 2030N / 2031 / 2031N
1 - 8 GRUNDIG Service
Sicherheits-Hinweise
DieindenFernsehgerätenauftretendeRöntgenstrahlungentspricht
den Bestimmungen der Physikalisch-Technischen Bundesanstalt
vom 8. Januar 1987.
Die Hochspannung für die Bildröhre und die damit auftretende
Röntgenstrahlung ist abhängig von der exakten Einstellung der
Netzteilspannung +A.
NachjederReparaturimNetzteiloderinderHorizontalablenkungist
die Hochspannung zu messen und ggf. einzustellen.
Schutzschaltungen im Gerät dürfen nur kurzzeitig außer Betrieb
gesetztwerden,umFolgeschädenamChassisoderanderBildröh-
re zu vermeiden.
Beim Austausch der Bildröhre dürfen nur die in den Ersatzteillisten
vorgeschriebenen Typen verwendet werden.
Safety Advices
The X-radiation developing in the sets conforms to the X-radiation
Regulations (January 8, 1987), issued by the Physikalisch-Techni-
sche Bundesanstalt (federal physiotechnical institution).
The high tension for the picture tube and thus the developing X-
radiationdependsonthepreciseadjustmentofthe+Apowersupply.
Aftereveryrepairofthepowersupplyunitorthehorizontaldeflection
stageitisimperativethattheEHTforthepicturetubeischeckedand
re-adjusted if necessary.
To avoid consequential damages to the chassis or the picture tube
the integrated protective circuits are allowed to be put out of
operation only for a short time.
When replacing the picture tube use only the types specified in the
spare parts lists.
D
Servicehinweise
Chassisausbau
BevorSiedieChassis-Verbindungsleitungenlösen,mußdieLeitungs-
verlegungzudeneinzelnenBaugruppenwieNetzschalterplatte,Bedien-
einheit,Bildrohrplatte,AblenkeinheitoderLautsprecherbeachtetwer-
den.
NacherfolgterReparaturistesnotwendig,dieLeitungsführungwieder
in den werksseitigen Zustand zu versetzen, um evtl. spätere Ausfälle
oder Störungen zu vermeiden.
Netzkabel
Diese Geräte dürfen nur mit dem Original-Netzanschlußkabel mit
integrierter Entstördrossel betrieben werden. Dieses Netzkabel ver-
hindert Störungen aus dem Netz und ist Bestandteil der Geräte-
zulassung. Im Ersatzfall bestellen Sie bitte ausschließlich das Netz-
kabel laut Ersatzteilliste.
GB
Service Notes
Disassembly of the chassis
Before disconnecting the chassis connecting leads observe the way
they are routed to the individual assemblies like the mains switch
panel, keyboard control panel, picture tube panel, deflection unit or
loudspeaker.
On completion of the repairs the leads must be laid out as originally
fitted at the factory to avoid later failures or disturbances.
Mains cable
TheTVreceivermustonlybeoperatedwithanoriginalmainsconnecting
cable with an interference suppressor choke integrated in the mains
plug.Thismainscablepreventsinterferencefromthemainssupplyand
ispartoftheproductapproval.Forreplacementpleaseorderexclusively
the mains connecting cable specified in the spare parts list.
F
Information pour la maintenance
Dèmontage de chassis
Avant de défaire les connecteurs du châssis princip, il y a lieu de
repérerauparavantlesliaisonscorrespondantàchaqueplatinecomme
par exemple le C.I. Inter secteur, le C.I. Commande, le C.I. Tube, le
bloc déviation ou les haut-parleurs.
Alafindel'intervention,lesconnexionsdoiventêtreremises dansleur
position d'origine afin d'éviter par après d'éventuelles défaillances ou
perturbations.
Cable dereseau
Cesappareilsnepeuvent êtreutilisésqu'avecun cabledeconnecion
original de réseau avec bobine antiparasite intégré dans la fiche de
secteur. Ce câble de réseau empêche des perturbations de réseau et
est partie de l'autorisation d'appareil. Si nécessaire commandez
uniquement le cable de réseau selon la liste de pièces détachées.
I
Nota di servizio
Smontaggio del telaio
Primadisfilareicavidicollegamnetocoltelaioènecessarioosservare
la disposizione originaria degli stessi verso le singole parti come la
piastraalimentazione,l'unitàcomandi,la piastra cinescopio, il giogo o
l'altoparlante.
Dopo la riparazione è necessario che gli ancoraggi e le guide
garantiscano la disposizione dei cavi analogamente a quella data in
fabrica e ciò per evitare disturbi o danni nel tempo.
Cavo rete
Gliapperechidevonoesseremessiinfunzionisoloconilcavooriginale
ilcollegamento direteelasuaspinadiretedeveesseremunitadiuna
bombina d´induttanza. In causa di sostituzione ordinate solo il cavo di
alimentatore che corrésponde alla lista degli accessori.
E
Nota de servicio
Desmontaje del chassis
Antes de desconectar las conecciones del Chassis hay que observar
ladireccióndedichasconeccionesalosdistintosgruposdeconstrucción
como la placa de conmutación de red, unidad de control, placa del
zócalo del tubo de imagen, unidad de deflección o altavoces.
Después de haber realizado la reparación y para evitar fallos o
pertubaciones posteriores es necesario reponer las conecciones tal
como fueron instaladas originalmente en fabrica.
Cable de red
Elaparatosolosepuedeusarcon elcablede red original con choque
antiparásito integrado en el enchufe de red. Este cable de red evita
perturbaciones de la red y es parte de la autorización del aparato. En
caso necesario puede pedir el cable de red según lista de piezas de
repuestos.
CUC 2030 / 2030N / 2031 / 2031N Allgemeiner Teil / General Section
GRUNDIG Service 1 - 9
+
Feinabst.+/ Fine tuning +/ Réglagefine + /Sint.fine + / Sint. fina +
-
Feinabst. - / Fine tuning - / Réglage fine - / Sint. fine - / Sint. fina -
Lautstärke / Volume / Volume / Volume sonore / Volumen
REF.
Referenz Lautstärke / Volume ref. volt. / Tens. de réf. vol. sonore /
Tens di rif. volume / Tens. ref. volumen
Balance / Balance / Balance / Balanciam. / Balance
Suchlauf / Self seek / Recherche autom. / Sint. autom. / Sintonia
automatica
Farbton / Tint / Teinte / Tinta / Tinte
Helligkeit / Brightness / Luminosité / Luminosita / Brillo
Kontrast / Contrast / Contraste / Contrasto / Contraste
Farbkontrast / Colour contrast / Contraste des coleurs / Contrasto
colore / Contraste de color
Schutzschaltung / Protection circuit / Circuit de sécurité / Circuito di
protezione / Circuito de protección
A-AM
Audio AM
ABK
(BurstKey):Burstaustastimpuls/Burstblankingpulse/Impulsionde
suppress.deburst /Imp.disoppress.delburst/Imp.supresionburst
AUDIO
Ton-Signal/Audiosignal/Signalaudio/Segnaleaudio/Señalaudio
AUDIO-L
Ton-Signal links / Audio signal left / Signal audio gauche / Segnale
audio sinistra / Señal audio izquierda
AUDIO-R
Ton-Signal rechts / Audio signal right / Signal audio droit / Segnale
audio destra / Señal audio derecha
AUDIO
MAC
Tonsignal D2 Mac / Audio signal D2MAC / Signal audio D2MAC /
Segnale audio D2MAC / Señal de sonido D2MAC /
AUDIO
L-MAC
Tonsignal links D2 Mac / Audio signal left D2MAC / Signal audio
gauche D2MAC / Segnale audio sinistro D2MAC / Señal de sonido
izquirdo D2MAC
AUDIO
R- MAC
Tonsignalrechts D2MAC/ Audiosignal rightD2MAC/ Signalaudio
droit D2MAC / Segnale audio destro D2MAC / Señal de sonido
derecho D2MAC /
Audio
Sub
Audio Tieftöner / Audio sub woofer / Audio haut-parleur pour les
frequences basses / Audio toni bassi / Audio sonido bajo
AUDIO
TV
Audio-Signal FS Gerät / Audio signal TV set / Signal audio
téléviseur / Segnale audio TV / Señal audio TV
AUDIO
VCR
Tonsignal VCR Gerät / Audio signal VCR unit / Signal audio
magnetoscope / Segnale audio VCR / Señal audio VCR
A-ZF 1
Audio ZF 1 / Audio IF 1 / Audio FI 1 / Audio FI 1 / Audio FI 1
A-ZF 2
Audio ZF 2 / Audio IF 2 / Audio FI 2 / Audio FI 2 / Audio FI 2
B
Blau-Signal / Blue signal / Signal bleu / Segnale blu / Señal azul
BB
Rechner Stop I2C Bus frei / Computer Stop I2C Bus is free /
Microprocesseur stop I2C Bus disponible / Calcol. stop I2C Bus
libero / Stop micropr. disponible
BB
Basisband/ Baseband/ Bandede base/ Bandabase /Banda base
BEXT
Blau-Signal extern / Signal blue external /Signal bleu externe /
Segnale blu esterno / Señal azul externa
B
OSD
OSD-Einblendung blau / OSD blue / Eblouissement OSD bleu /
Visualizzazione OSD blu / Visualisacione OSD azul
B
PIP
Blau-Signal PIP / PIP Blue signal / Signal bleu PIP / Segnale blu
PIP / Señal azul PIP
B/50
Blau - Signal - 50Hz vert.,15625Hz hor. / Blue signal - 50Hz vert.,
15625Hzhor./Signalbleu-50Hzvert.,15625Hzhor./Segnalebleu
- 50Hz vert., 15625Hz hor. / Señal azul - 50Hz vert., 15625Hz hor.
B/100
Blau-Signal -100Hz vert., 31250Hz hor. / Blue signal -100Hz vert.,
31250Hzhor./Signalbleu-100Hzvert.,31250Hzhor. /Segnaleblu
-100Hz vert., 31250Hz hor. / Señal azul -100Hz vert., 31250Hz hor.
50
B-Y
B-Y -Signal - 50Hz vert., 15625Hz hor. / B-Y -Signal - 50Hz vert.,
15625Hz hor. / Signal B-Y - 50Hz vert., 15625Hz hor. / Segnale B-
Y - 50Hz vert., 15625Hz hor. / Señal B-Y - 50Hz vert., 15625Hz hor.
100
B-Y
B-Y -Signal - 100Hz vert., 31250Hz hor. / B-Y -Signal - 100Hz vert.,
31250Hz hor. / Signal B-Y - 100Hz vert., 31250Hz hor. / Segnale B-
Y-100Hzvert.,31250Hzhor./SeñalB-Y-100Hzvert.,31250Hzhor.
C
Kanalwahl / Channel selection / Sélection de canaux / Selez.
canale / Seleccion canal
CENTER
Mitttelpunkt-Lautsprecher / Center loudspeaker / Haut-parleur de
centre / Alto parlante punto centrale / Altavoz del centro
CHIP
AD
Chip Adresse / Chip adress / Chip direction / Indiri. del chip /
Direccion chip
CINCH
AUDIO L
Ton-Signal Cinch links / Audio signal cinch left / Signal audio cinch
gauche / Segnale audio cinch sinistra / Señal audio cinch izquierda
CINCH
AUDIO R
Ton-Signal Cinch rechts / Audio signal cinch right / Signal audio
cinchdroit /Segnale audiocinch destra/ Señalaudio cinchderecha
CHROMA
Chroma Signal / Chroma signal / Signal dégree / Croma segnale /
Señal croma
CHROMA
S-VHS
Chroma S-VHS-Signal / Chroma S-VHS-Signal / Signal dégree de
S-VHS / Croma segnale S-VHS / Señal croma S-VHS
CLK
CL 1
Clock
CL 2
CSY
CompositeSync.Imp.fürVT/CompositesyncpulseforTT/Imp.de
sync. vidéo-composite pour TXT / Imp. hor. para Video Comp.
100
CS
Kombiniertes Hor./vert. Sync. Signal 31250Hz/100Hz (Composite
Sync.) / Combined hor./vert. sync signal 31250Hz/100Hz (Compo-
site Sync) / Signal synchr. hor./vert. combiné 31250Hz/100Hz
(Synchr. composité) / Segnale sincr. orizz./vert. 31250Hz/100Hz
(Sincr.Composito)/Señalcombinadasincr.hor./vert.31250/100Hz
(Sincr. compuesto)
DATA
Daten / Data / Données / Dati / Datos
DL
Verzögerungsleitung / Delay line / Ligne à retard / Linea di ritardo /
Linea de retardo
ENA
Freigabe / Enable / Autorisation / Consenso / Habilitacion
ENA
ZF
FreigabeZF/IFEnable/ValidationFI/ConsensoFI/Autorizacón FI
ENABLE
FT
FreigabeFT /Finetuning enable/AutorisationRéglagefin /Abilitaz.
Sintonia fine / Habilitacion Sintoinia fina
ENABLE
LED
Freigabe LED / LED enable / Autorisation LED / Abilitaz. LED /
Habilitacion LED
ENABLE
TON
Freigabe Ton / Sound enable / Autorisation son / Abilitaz. audio /
Habilitacion sonido
EURO-AV
AUDIO-L
Audio-Signal EURO-AV links / Audio signal EURO-AV left / Signal
audio EURO-AV gauche / Segnale audio EURO-AV sinistra / Señal
audio izquierda EURO-AV
EURO-AV
AUDIO-R
Audio-Signal EURO-AV rechts / Signal audio EURO-AV right /
Signal audio EURO-AV droit / Segnale audio EURO-AV destra /
Señal audio derecha EURO-AV
EURO-AV
VIDEO
Video-Signal EURO-AV / Video signal EURO-AV / Signal video
EURO-AV / Segnale video EURO-AV / Señal video EURO-AV
F
Farb-Signal / Chroma signal / Signal chroma / Segnale chroma /
Señal croma
FBAS
FBAS-Signal/CCVSsignal/Signalvidéocomposite/Segnalevideo
composito / señal video compuesta
FBAS
CINCH
FBAS-Signal-Cinch Buchse / CCVS signal-cinch socket / FBAS-
prise à cinch / FBAS-presa cinch / FBAS-cinch
D
Schaltplansymbole
GB
Circuit Diagram Symbols
F
Symboles schéma
I
Simboli sullo schema
E
Simbolos en los esquemas
Allgemeiner Teil / General Section CUC 2030 / 2030N / 2031 / 2031N
1 - 10 GRUNDIG Service
FBAS
MAC
FBAS-D2 MAC / D2MAC CCVS signal / Signal vidéo composite-
D2MAC / FBAS-D2MAC / FBAS-D2MAC
FBAS
TON
Basisband/ Baseband/ Bandede base/ Bandabase /Banda base
FBAS
TXT
FBAS-Videotext / CCVS videotext / Signal vidéo composite-
Télétexte / FBAS-Televideo / FBAS-Teletexto
FBAS
TEXT
FBAS
SYNC.
FBAS Sync. Signal / CCVS sync signal / Signal sync. vidéo col.
comp. / Segnal sincr. video col. comp. / Señal sincr. video
compuesta
FBAS
S-VHS
FBASSignalS-VHS / CCVSsignal S-VHS /Signal vidéo col.comp.S-
VHS/Segnalvideo col.comp.S-VHS /SeñalvideocompuestaS-VHS
FH
Hochspg. / EHT voltage / Haute tens. / Alta tens. / MAT
FRM
Rahmensignal / Frame signal / Signal d'encadrement / Segnale
cornice / Señal de marco
FT
Feinabstimmung / Fine tuning / Reglage fin / Sint. fine / Sint. fina
FU
FU-Signal / FU-signal / Signal FU / Segnale FU / Senal FU
FV
FV-Signal / FV-signal / Signal FV / Segnale FV / Senal FV
G
Grün-Signal / Green signal / Signal green external / Signal vert /
Segnale verde / Señal verde
G
OSD
OSD-Einblendung grün / OSD green / Eblouissement OSD vert /
Visualizzazione OSD verde / Visualisacione OSD verde
G
PIP
Grün-Signal PIP / Green signal PIP / Signal green PIP/ Signal vert
PIP / Segnale verde PIP / Señal verde PIP
GEXT
Grün-Signal extern / Green signal vertical / Signal vert externe /
Segnale verde esterno / Señal verde externa
G/50
Grün-Signal - 50Hz vert.,15625Hz hor. / Green signal - 50Hz vert.,
15625Hz hor. / Signal vert - 50Hz vert., 15625Hz hor. / Segnale
verde-50Hzvert.,15625Hzhor./Señalverde-50Hzvert.,15625Hzhor.
G/100
Grün-Signal-100Hzvert.,31250Hzhor./Greensignal-100Hzvert.,
31250Hz hor. / Signal vert -100Hz vert., 31250Hz hor. / Segnale
verde -100Hz vert., 31250Hz hor. / Señal verde -100Hz vert.,
31250Hz hor.
GND - H
Nullpunkt Heizung / Ground filament / Point neutre-Chauffage /
Punto zero-Filamento / Punto medio filamento
HA
Horiz. Sync. Impuls / Horiz. Sync pulse / Impulsion synchro. horiz. /
Impulso sincro orizzontale / Impulso de sinc. horiz.
HDR
Horiz.Ansteuerimpuls/Horiz.drivepulse/Impulsion decommande
horiz. / Impulso comando orizzontale / Impulso de control horiz.
HC
Horiz. Klemmimpuls / Horiz. clamp pulse / Impulsion de serrage
horiz. / Impulso comando orizzontale / Impulso de garras horiz.
H
SYNC
Horizontaler Sync-Impuls / Horizontal Sync impuls / Sync impuls
horizontale / Sinc impulso orrizontale / Impulso sync horizontal
HFB
Horiz. Rückschlagimpuls / Horiz. flyback / Impulsion de retour
horiz. / Impulso rotorno orizzontale / Impulso de retroceso horiz.
HS
Hor.Sync.Implusfür VT/ Hor.syncpulseforTT/Imp.desync.hor.pour
TXT / Imp. sincr. orizz. per Televideo / Imp. hor. para Video Comp.
I2S CL
Digitale Datensignale / Digtital data signals / Signal donneé digital /
Segnali dati digitali / Señal datos digital
I2S TER
I2S IN
I2S WS
IBEAM
Strahlstrom / Current beam / Current rayon / Corrante del irradire /
Corriente de haz
ICL
I2C Bus -Clock
IR
Infrarot-Signal / Signal infrared / Signal infra-rouge / Segnale
infrarosso / Señal infrarojo.
IM
CLOCK
I2C Bus -Clock
IM
IDENT
I2C Bus -Kennung / I2C-Bus Identification / Identification I2C-Bus /
Ident. I2C-Bus, Identification I2C-Bus
IM
RESET
I2C Bus -Reset
IR CLK
Infrarot Clock / Infrared clock / Signal I.R. horloge / Clock segnale
R.I. / Clock infrarojos
IR DATA
Infrarot Signal / Infrared signal / Signal I.R. / Segnale infrarosso /
Data infrarrojos
IR
VIDEO
Infrarot Signal Video / Infrared signal video / Signal I.R. video /
Segnale infrarosso video / Data infrarrojos video
KB
Keyboard
KH
AUDIO-L
Tonsignal Kopfhörer links / Audio signal headphone left / Signal
audiogauchedecasque/Segnaleaudiosinistracuffia/Señalaudio
izquierda auriculares
KH
AUDIO-R
Tonsignal Kopfhörer rechts / Audio signal headphone right / Signal
audio droit de casque / Segnale audio sinistra cuffia / Señal audio
derecha auriculares
L
Lautstärke / Volume / Volume / Volume sonore / Volumen
LED
Leuchtdiode / Light emitting diode / Diode lumineuse / Diodo
luminoso / Diodo luminescente
M
Speicher Taste / Memory button / Touche mémoire / Tasto di
memoria / Puls. memoria
MEGA
LOGIC
Megalogic Daten / Megalogic data / Megalogic dates / Dati
Megalogic / Megalogic datas
MODE
Modus / Mode / Mode / Modo / Modo
NIC CLK
NICAM Clock / Clock NICAM / Horloge NICAM / Clock NICAM /
Clock NICAM
NORM
Norm Taste / TV standard select button / touche de norme / Tasto
norma / Puls. de norma
OWA
Ost-West Ansteuerimpuls / East-west drive impuls / Impulsion de
commande Est-Ouest / Impulso comando Est-Ovest / Impulso de
control Este-Oeste
P
Programm / Program / Programme / Programma /Programa
P/C
Programm-Kanalwahl/Programchannelselection/Progr.sélection
de canaux / Progr. selez.canale / Progr. selec. canal
PIP
Bild im Bild / Picture in picture / Image dans l'image / PIP / Imagen
en la imagen
P1
Progr. Taste / Progr. button / Touche Progr. / Tasto Progr. / Puls.
Progr.
R
Rot-Signal / Red signal / Signal rouge / Segnale rosso / Señal rojo
REMOTE
Fernbedienung / Remote control / Telecommande / Telecomando /
Mando a distancia
R
OSD
OSD-Einblendung rot / OSD red / Eblouissement OSD rouge /
Visualizzazione OSD rosso / Visualisacione OSD rojo
R
PIP
Rot-Signal PIP / Red signal PIP / Signal rouge PIP / Segnale rosso
PIP / Señal rojo PIP
REXT
Rot-Signal extern / Signal red external / Signal rouge externe /
Segnale rosso esterno / Señal rojo externa
50
R-Y
R-Y -Signal - 50Hz vert., 15625Hz hor. / R-Y -Signal - 50Hz vert.,
15625Hz hor. / Signal R-Y - 50Hz vert., 15625Hz hor. / Segnale R-
Y-50Hz vert., 15625Hzhor./ Señal R-Y- 50Hz vert., 15625Hzhor.
100
R-Y
R-Y-Signal -100Hzvert., 31250Hzhor. / R-Y-Signal -100Hzvert.,
31250Hz hor. / Signal R-Y - 100Hz vert., 31250Hz hor. / Segnale
R-Y-100Hzvert.,31250Hzhor./SeñalR-Y-100Hz vert.,31250Hzhor.
S
Sonderkanal / Special channel / Canal special / Canale speciale /
Canal especial
SB
Strahlstrombegrenzung/Beamcurrentlim./Lim.cour.defaisceau /
Lim. corr. di raggio / Corriente media de haz
SCL
I2C-Bus Clock
SCL 100
SchnellerI2C-BusClock/I2C-Busclockhighspeed /I2C-Busgrande
vitesse / I2C-Bus veloce / Clock del I2C-Bus de alta velocida
SDA
I2C-Bus Daten / I2C-Bus data / I2C-Bus données / I2C-Bus dati /
I2C-Bus datos
CUC 2030 / 2030N / 2031 / 2031N Allgemeiner Teil / General Section
GRUNDIG Service 1 - 11
SHIFT
VIDEO
Dynamische vert. Versch. 25Hz, aktiv bei Video u. Mix Betrieb /
Dynam. vert. shift 25Hz, active on video and mix operation / Decal
dynam.del'image25Hz,actifsurvideoetfonction.mixte/Spostam.
vert. dinam. 25Hz, attivo con video e. funzionam. misto / Desplaz.
dinamico vert. 25Hz, activo con video Y funciones mixtas
SHIFT
TEXT
Dynamischevert. Versch. 25Hz,aktiv beiStandbildu. VT/ Dyn.vert.
shift 25Hz, active on freeze-frame and Teletext / Decal dynam. de
l'image25Hz,actifsurarretimmageetVidéotext(Antiope) /Spostam.
vert. dinam. 25Hz, attivo con fermo immag. e Televideo / Desplaz.
dinamico vert. 25Hz, activo con imagen parada Y Videotexto
SS
Schutzschaltung / Protection circuit / Cablage protecteur / Pot. de
prot. / Circuito de proteccion
SSB
Spitzenstrahlstrombegrenzung / Peak beam current limiting / Lim.
de faisceau crete / Lim. corr. catod. di pico / Corrente pico de haz
SSC
Supersandcastle
SSC
PIP
Supersandcastle PIP
100
SSC
Supersandcastle 100Hz vert., 31250Hz hor.
50
SSC
Supersandcastle 50Hz vert., 15625Hz hor.
SUR-
ROUND
Surround
SYNC
Sync.-Signal/Sync.-Signal/Signalsync/Segnalesync./Señaldesync.
SYNC.
BTX
Sync.BTX /ViewdataSync /Sync.Télétext /Sincr.Videotel/Sincr.
Videotexto
SYNC.
VT
Sync.VT/Sync.Teletext/SyncVidéotexte/Sincr.Televideo/Sincr.
Videotexto
SW Schwarzwert/Blacklevel/Niveaudunoir/Livellodelnero/Niveldenegro
TE
TEXT-Freigabe / TEXT enable / Autorisation TEXTE / Abilitaz.
TELEVIDEO / Habilatation TEXTE
T1
Bei Zweiton, Ton 1 / On two channel sound, sound 1 / Pour double
son, son 1 / In bicanale, audio 1 / En dual, sonido 1
T2
Bei Zweiton, Ton 2 / On two channel sound, sound 2 / Pour double
son, son 2 / In bicanale, audio 2 / En dual, sonido 2
T T
Tieftöner / Woofer / Haut-parleur pour les frequences basses / Toni
bassi / Sonido bajo
U
FOC
Fokusspg. / Focussing volt. / Tens. de focalis. / Tens di focalizz. /
Tens focalizacion
U
G1
Spg.GitterG1/Volt.gridG1/TensgrilleG1/Tens.grigliaG1/Tens.
rejillas G 1
U H
Hochspannung / High voltage / Haute tension / EAT / Alte tension
U
SG
SchirmgitterSpg./Screen-gridvolt./Tens.degrille-écran/Tens.di
U G2
griglia schermo / Tens. de rejilla
VA
VertikalerAnsteuerimpuls/Vert.drivepulse/Impulsiondecommande
verticale / Impulso di comando verticale /Impulso de control vertical
VB
VCL
VCR - Clock
VDR
Freigabe Anzeigebaustein / Display enable / Autorisation pour module
indicateur / Modulo indicazione / Habilitacion modulo indicacion
VG
Vert. Gegenkopplung / Vert. feedback / Contre-reaction verticale /
Controreazione vert. / Aliment. neg. vert.
VIDEO
Video Signal / Video signal / Signal vidéo / Segnale video / Señal video
VT DATA
Videotext Daten / Teletext data / Données Teletexte / Linea dati
Televideo / Data Teletexto
VT SCL
Videotext Clock / Teletext clock / Signal horloge Vidéotext / Clock
Televideo / Clock Teletexto
VT SDA
I2C Bus: VT Daten / Teletext data / Données Vidéotext / Dati
Televideo / Data Teletexto
V
SYNC
Vertikaler Sync-Impuls / Vertical Sync impuls / Sync impuls vertical
/ Sinc impulso vertical / Impulso sync vertical
Y
Y-Signal / Y Signal / Signal Y /Segnale Y / Señal Y
50
Y
Y-Signal-50Hzvert.,15625Hzhor./Y-Signal-50Hzvert.,15625Hz
hor. / Signal Y - 50Hz vert., 15625Hz hor. / Segnale
Y - 50Hz vert., 15625Hz hor. / Señal Y - 50Hz vert., 15625Hz hor.
100
Y
Y - Signal - 100Hz vert., 31250Hz hor. / Y -Signal - 100Hz vert.,
31250Hz hor. / Signal Y - 100Hz vert., 31250Hz hor. / Segnale
Y - 100Hz vert., 31250Hz hor. / Señal Y - 100Hz vert., 31250Hz hor
ZF
Zwischenfrequenz / IF / FI / FI / FI
UAFC
Schaltspg.AFC/AFCswitchingvolt./Tens.decommut.AFC/ Tens.
di commut. AFC / Tens. conmut. CAF
UAV
Schaltspg. AV / Switching volt. AV / Tens. de commut. AV / Tens. di
commut. AV / Tens. conmut. AV
U
B1
Schaltspg. Band 1 / Switching volt. band 1 / Tens. de commut.
bande 1 / Tens. di commut. banda 1 / Tens. conmut. de banda 1
U
B2
Schaltspg. Band 3/ / Switching volt. band 3 / Tens. de commut.
bande 3 / Tens. di commut. banda 3 / Tens. conmut. de banda 3
U
BA
Schaltspg. Bildamplitude / Switching voltage vertical amplitude /
Tension de coupure amplitude dìmage / Tensione di commutaz.
ampiezza d'imagine / Tension de conm. amplitude de imagen di
commut. PAL / Tens. conmut. PAL
UBTX
Schaltspg. BTX / Switching volt. BTX (Viewdata) / Tens. commut.
Télétext / Tens. commut. VIDEOTEL / Tens. conmut. Teletexto
U
C-AV
Schaltspg. Camera Wiederg. über Camera-AV Eingang / Switching
volt.cam.playback viaCamera-AVinput /Tensde commutpour lec.
U
CAM
AV
de camera par l'entree Camera-AV / Tens.de commut. in riproduz.
cameratramiteingresso Camera-AV/Tens.deserv.reprod.camera
a traves de la entrada Camera-AV
U
DATA
Schaltspg. Datenbetr. / Switching volt. data mode / Tens. de com-
mut. fonct. données / Tens. di commut. dati / Tens conmut. datos
U
DATA
EXT
Schaltspg. U Data extern / Switching volt Data ext. / Tension de
commutation U Data externe / Tens. di commutazione U-Data
esterno / Tensión de conmutatón externa U
U
DATA
OSD
Schaltspg. für Bildschirm-Einblendung / Switching volt. for On
Screen Display / Tens. commut. pour eblouissement On Screen
Display / Tens. commut. per di visualizzazione On Screen Display /
Tens. conmut. para On Screen Display
U
DEEM
Schaltspg. Deemphasis / Switching volt. deemphasis / Tens. com-
mut.desaccent./Tens.commut.deenfasi/Tens.conmut.deenfasis
U
DS
Schaltspg.Dolby-Surround/Switchingvolt. Dolby-Surround/Tens.
commut.Dolby-Surround/Tens.commut.diDolby-Surround/Tens.
de conmut. Dolby-Surround
U
EURO-
AV
Schaltspg.EURO-AV/Switchingvolt.EURO-AV/Tens.decommut.
EURO-AV/ Tens.di commut.EURO-AV /Tens.conmut.EURO-AV
U
EU-AV
CINCH
Schaltspg. EURO-AV-Cinch-Buchse / Switching volt. EURO-AV-
Cinch socket / Tens. commut. prisa Scart - Cinch / Tens. commut.
presa Scart -Cinch / Tens. conm. EURO-AV - Cinch
UFBAS
Schaltspannung für Video-Ausgang EURO-AV Buchse / Switch.
voltage for video output EURO-AV socket / Tension de commut.
pour sortie vidéo EURO-AV / Tension commut. per presa d'uscita
video EURO-AV / Tension de conmut. para salida EURO-AV
UHIFI
Schaltspg. HIFI / Switching voltage HIFI / Tens. de commut. HIFI /
Tens di commut. HIFI / Tens. conmut. HIFI
UHIFI
MUTE
Stummschaltung HiFi / Muting volt. HiFi / Commutation de silence
HiFi / Silenzametno HiFi / Muting HiFi
UHUB
Schaltspg. HUB / Switching volt. deviation / Tens. commut.
déviation / Tens. commut. deviazione / Tens. conmut. deviacion
UIDENT
Schaltspg.SignalkennungAV3 /Switchingvolt.signalidentification
AV3/Tens decommut.identificationde signalAV3/ Tens.commut.
identificazione segnale / Tens. conmut. identifi. segñal AV3
UKH
MUTE
StummschaltungKopfhörer/Mutingvolt.headphone/Commutation
de silence casque / Silenzamento cuffia / Muting auriculares
U
KLEMM
Gleichspannung für SAT-Basissignal / DC for SAT basic signal /
Tens. continue pour SAT base signal / Tens continua per segnale
SAT base / Tens. continua para segñal SAT base
UKOIN
50/60Hz Schaltspg.Koinz./ Switching volt.coinc./ Tens decommut.coinc. /
Tens di commut. coinc. / Tens. conmut. coinc.
Allgemeiner Teil / General Section CUC 2030 / 2030N / 2031 / 2031N
1 - 12 GRUNDIG Service
U
KOIN
VQ
Schaltspg.Koinz. mitVideoquelleverknüpft /Coinc.switching volt.
linked with video source / Signal de coincid. combiné avec source
video / Tens. di commut. a coinc. combinata con sorg video segñal
de coincidencia combinada con video
ULED
Schaltspg.LED/Switchingvolt.LED/Tensdecommut.LED/Tens.
commut. LED / Conmut. LED
U
Leucht
-
punkt
Schaltspg. Leuchtpunktunterdrückung / Switching volt. beam spot
suppression/Tens. decommut.suppress.duspotlumineux/Tens.
soppr. punto luminoso / Tens. de conmut. filtro supresor del punto
luz
U
LNC
OFF
Schaltspg. LNC "Aus" / Switching volt. LNC "OFF" / Tens. de
commut.LNC"OFF"/Tensionedicommut. "Spento"LNC/Tension
LNC "OFF"
UMAC
Schaltspg. D2MAC / Switching volt. D2MAC / Tension de
commutationD2MAC/Tens.dicommutazioneD2MAC/Tensiónde
conmutación D2MAC
UMUTE
Stummschaltung / Muting / Silencieux / Silenziamento /Muting
UNF 1
Schaltspg.NF1/Switchingvolt.AF1/Tensioncommut.BF1/Tens.
commut BF 1 / Tens. conm. BF 1
UNF 2
Schaltspg. NF 2 / Switching volt. AF 2 / Tension commut. BF 2 /
Tens. commut BF 2 / Tens. conm. BF 2
UNIC
Schaltspg. NICAM / Switching volt. NICAM / Tens. de commut.
NICAM / Tens. commut. NICAM / Tens. de conmut. NICAM
UNORM
Schaltspg. Norm / Switching volt. Norm / Tens. de commut.
standard / Tens. di commut. Norma / Tens. conmut. Norma
UPAL
Schaltspg.PAL/Switchingvolt.PAL/Tens.decommut.PAL/Tens.
di commut. PAL / Tens conmut. PAL
UPOL.
Schaltspg. Polarität / Switching volt. polarity / Tension commut.
polarite / Tens. commut. polarita / Tens. conmut polarizacion
U
POWER
OFF
Schaltspg. Ökoschalter / Switching volt. eco switch / Tens. de
commut. interr. eco. / Tens. commut. interr. ecologico / Tens.
conmut. interr. ecol.
U
PV
Schaltspg.PanoramaView/Switchingvolt.PanoramaView/Tens.
de commut. Panorama View / Tens. commut. Panorama View /
Tens. conmut. Panorama View
U
RESET
Schaltspg. Reset / Switching volt. Reset / Tens. commut. Reset /
Tens. commut. Reset / Tens. conmut. Reset
URGB
Schaltspg. RGB1 - RGB2 / Switching volt. RGB1 - RGB2 / Tens. de
commut. RGB1 - RGB2 / Tens. di commut. RGB1 - RGB2 / Tens.
conmut. RGB1 - RGB2
U
SCHUTZ
Schaltspg.-Schutzfunktion / Switching volt.-protective func. / Tens
de commut.-sécurité / Tens. di commut.-funz di protez. / Tens.
conmut.-proteccion
USEC
Schaltspg. SECAM / Switching volt. SECAM / Tens. de commut.
SECAM / Tens. di commut. SECAM / Tens. conm. SECAM
U
STAND
BY
Schaltspg. Standby / Switching volt. Standby / Tens. commut.
Veille / Tens. commut. Standby / Tens. conmut. Standby
US-VHS
Schaltspg. S-VHS / Switching volt. S-VHS / Tens.de commut.
S-VHS / Tens. de commut. S-VHS / Tens. de conmut. S-VHS
U TON
1/2
Schaltspg.Ton1-2/Switchingvolt.sound1-2/Tens.commut.audio
1-2 / Tens. commut. son 1-2 / Tens. conmut. son 1-2
UUHF
Schaltspg.UHF/UHFswitchingvolt./Tens.decommut.UHF/Tens
di commut. UHF / Tens. conmut. UHF
UVHF
Schaltspg.VHF/VHFswitchingvolt./Tens.decommut.VHF/Tens
di commut. VHF / Tens. conmut. VHF
UVQ
Schaltspg. Videoquelle / Switching volt. video source / Tens. de
commut.sourcevideo/Tens.dicommut.sorg.video/Tensconmut.
video
U
WISCH Schaltspg. Wischerkontakt / Schwitching voltage temp. contact /
Tens.decommut. contactfugitif/ Tens.commut.contatto tempora-
neo / Contacto supresor tens. de conmut.
UW/N
Schaltspg.ZFbreit- schmal/IF switchingvolt.wide -narrow/ Tens.
commut. FI large - etroit / Tens. commut. FI larga - stretta / Tens. FI
ancho - estrecho
UI / III
Schaltspg. Bandwahl / Band sel. switching volt. / Tens. de commut.
select.bande/Tens.dicommut.selez.banda/Tens.conmut.selec.
banda
U
14V
14V Schaltspg. / 14V switching volt. / Tens. commut. 14V / Tens.
commut. 14V / Tens. de conm. 14V
U
22kHz
22kHz Schaltspg. / 22kHz switching volt. / Tens. commut. 22kHz /
Tens. commut. 22kHz / Tens. de conm. 22kHz
0/3/6/9V
0/3/6/9V Schaltspg. / 0/3/6/9V switching volt. / Tens. commut.
0/3/6/9V / Tens. commut. 0/3/6/9V / Tens. de conm. 0/3/6/9V
U
4.5MHz
Schaltspg. 4,5MHz / Switching volt. 4.5MHz / Tens. de commut.
4,5MHz / Tens. di commut. 4,5MHz / Tens conmut. 4,5MHz
U50/60
HZ
Schaltspg. 50-60Hz / Switching volt. 50-60Hz / tens. de commut.
50-60Hz / Tens. di commut. 50-60Hz / Tens. conmut. 50-60Hz
Regelspg. AFC / AFC contr. volt. / Tens. de regul. AFC / Tens. di
contr. AFC / Tens. regul. CAF
U
AFC
SAT
Regelspg. AFC Satellitentuner / AFC contr. volt. SAT tuner / Tens.
de regul. AFC tuner SAT / Tens. di contr. AFC Tuner SAT / Tens.
regul. CAF Tuner SAT
UAGC FeldstärkeabhängigeSpg./Fieldstrength-depentvolt./Contr.auto-
matiquedegain/Tens.dipent.intens.campo/Contr.autom.degain
tens. CAG
U
RE
Regelspg./Contr.volt./Tens.deregul./Tens.dicontr./Tensregul.
UTUN.
Abstimmspg.Tuner/Tuningvolt.tuner/Tens.d'accordtuner/Tens.
di sintonia tuner / Tens. sintonia tuner
Regelspg. Verzög. / Delayed contr. volt. / Tens. de regul. retardee /
Tens. regul. retardada
HOR.
Horizontale Ansteuerung / Horiz. drive / Synchr. lignes / Pilotaggio
orizz. / Exitación horiz.
HOR.2FH
31250Hz Ansteuerimp. für Zeilenendstufe / 31250Hz Triggering
pulse for horiz. output / 31250Hz commande pour l'étage final
lignes /Imp. Pilotaggiodi 31250Hzper stadiofinale diriga /Impulso
de exitación 31250Hz para paso final de lineas
VERT.
Vert. Parabel / Vert. parabolic signal / Signal parabolique vert. /
Segnale parab. vert. / Senal parabolica vert.
VERT.
Vert. Tastimpuls / Vert. Gating pulse / Imp. trame / Imp. a cadenza
vert. / Imp. cuadro
VER. 2FV
Vert. Tastimpuls 100Hz / Vert. Gating pulse 100Hz / Imp. trame
100Hz / Imp. a cadenza vert. 100Hz / Imp. cuadro 100Hz
VERT.
Vert.Sägezahn/Vert.sawtooth/Signaldentdescie/Dentedisega
vert. / Dientede sierra vert.
VERT.
Vert. Tastimpuls / Vert. Gating pulse / Imp. trame / Imp. a cadenza
vert. / Imp. cuadro
VERT.100
Vert Sägezahn 100Hz / Vert saw tooth 100Hz / Signal dent de scie
100Hz / Dente di sega vert. 100Hz / Dientede sierra vert. 100Hz
VERT.100
Vert. Parabel 100Hz / Vert. parabolic 100Hz signal / Signal parabo-
lique 100Hz vert. / Segnale parab. vert. 100Hz / Senal parabolica
vert. 100Hz
Tastimpuls / Gating pulse / Impuls de declenchement / Impulso a
cadenza / Imp. puerta
REF.
Ref. Impuls hor. / Reference impulse hor. / Imp. de refer.hor. / Imp.
di rifer. hor. / Imp. refer. horiz.
Klemmung Ein-Aus / Clamping On-Off / Clampage Marche-Arrêt /
Clamping Ins.-Disins. / Clamping Enc.-Apag.
PULSE
Pulse für Polarotor / Pulses for Polar-Rotor / Impulsions Rotor de
Polariastion / Impulsi per Rotore Polarizzazione / Impulsos dara
Polarrotor
O/W
O-W Amplitude / E-W amplitude / Amplitude E-O / Ampiezza E-O /
Amplitud E-O
CUC 2030 / 2030N / 2031 / 2031 N Allgemeiner Teil / General Section
GRUNDIG Service 1 - 13
Bedienhinweise Dieses Kapitel enthält Auszüge aus der Bedienungsanleitung. Weitergehende Informationen entnehmen Sie bitte der gerätespezifischen Bedienungsanleitung, deren
Sachnummer Sie in der entsprechenden Ersatzteilliste finden.
Vorbereiten
❒Batterie in die Fernbedienung legen
w
!Beachten Sie die Polung im Batteriefach.
Bei verbrauchter Batterie erscheint am Bild-
schirm die Einblendung: »Battery«.
Verbrauchte Batterie unbedingt entfernen.
Entsorgen Sie verbrauchte Batterien umwelt-
gerecht.
❒Gerät einschalten
Taste üam Gerät drücken.
Leuchtet danach die Anzeige, dann befindet sich
das Gerät in Bereitschaft.
Mit den Ziffern-Tasten 1–0AV oder der Taste P+
der Fernbedienung schalten Sie das Gerät voll-
ständig ein.
❒Gerät in Bereitschaft (Stand-by) schalten
Taste 8der Fernbedienung drücken.
Das Gerät ist nicht vollständig abgeschaltet.
Das Gerät kann mit der Fernbedienung wieder ein-
geschaltet werden.
❒❒ Gerät vollständig ausschalten
Wenn Sie das Gerät längere Zeit (zum
Beispiel nachts) nicht benützen, dann schal-
ten Sie das Gerät komplett aus.
Sie sparen damit Energie.
Taste üam Gerät drücken.
1
6
6
1
1
6
Das DIALOG CENTER als
Benutzerführung
Im DIALOG CENTER und den einzelnen Seiten der
Benutzerführung sehen Sie die möglichen Funktio-
nen und mit welchen Tasten der Fernbedienung
diese Funktionen aktiviert werden.
Tastensymbole und Dialogzeilen zeigen die mögli-
chen Bedienschritte.
Die Zeichen am Bildschirm sind Symbole für
folgende Tasten der Fernbedienung:
Symbol Taste Funktion
wP+ P
-
Zum schrittweisen Anwählen
qvon Zeilen oder Funktionen
auf einer Seite.
re r
-
+eZum Ändern von Einstellun-
gen.
66Ruft das DIALOG CENTER auf
(6 und OK) und schaltet von
den Seiten zurück auf das
DIALOG CENTER.
OK OK Bestätigt Funktionen.
Bitte prägen Sie sich diese Tasten ein, sie werden in
den folgenden Bedienschritten immer wieder
benötigt!
6
Vorbereiten
DIALOG CENTER
OK TXT
SPRACHAUSWAHL
KINDERSICHERUNG
SONDERFUNKTIONEN
PROGRAMM SORTIERUNG
MANUELLE ABSTIMMUNG
AUTOMATIC TUNING SYSTEM
SERVICE
Einstellungen
Programmplätze belegen, mit dem
Suchlauf-Speicher-System ATS
Das Gerät ist mit dem automatischen Programm-
suchlauf ATS ausgestattet, der Ihnen die Belegung
der Programmplätze abnimmt.
Sie starten den Suchlauf und können danach die
Programme in der Reihenfolge Ihrer Wahl sortie-
ren.
Sie können auch Programme die mehrmals gefun-
den wurden oder deren Empfangsqualität zu
schlecht ist aus der Programmliste löschen.
Nach dem Einschalten des Gerätes wird die
Seite »SPRACHAUSWAHL« eingeblendet.
Für den Dialog zwischen Ihnen und dem Fernseh-
gerät kann aus mehreren Sprachen gewählt
werden. Die Einblendungen der Benutzerführung
erfolgen in der gewählten Sprache.
Dialogsprache mit Taste P
-
oder P+ auswählen und
mit Taste OK bestätigen.
Die Seite »AUTOMATIC TUNING SYSTEM«
blendet sich ein.
2
6
1
SPRACHAUSWAHL
OK
Deutsch
English
Español
Francais
Italiano
AUTOMATIC TUNING SYSTEM
OK Start TXT
■
Nach dem Suchvorgang schaltet das Gerät auf
Programmplatz 1 und die Seite »SORTIER.« wird
eingeblendet.
❒Programme sortieren
Programm, das umsortiert werden soll, mit Taste
P
-
, P+ anwählen.
Programm mit Taste OK markieren.
Neuen Programmplatz mit Taste P
-
, P+, anwählen.
Einstellung mit Taste OK speichern.
Weiteren Programme sortieren Vorgang ab Pkt.
wiederholen.
Einstellung mit Taste TXT beenden.
❒Programme löschen
Programm, das gelöscht werden soll, mit Taste P
-
,
P+ anwählen.
Programm mit Taste AUX löschen.
Weiteren Programme löschen Vorgang ab Pkt.
wiederholen.
Einstellungen mit Taste TXT beenden.
Die Seiten »AUTOMATIC TUNING SYSTEM«,
»SORTIER.« (unter »Programm Sortierung«) und
»SPRACHAUSWAHL« können auch direkt aus dem
»DIALOG CENTER« aufgerufen werden.
6
3
1
6
2
1
5
1
6
4
3
2
1
6
SORTIER.
OK Sortier.
AUX Lösch.
66Zurück
TXT
TV
P 01
P 02
P 03
P 04
P 05
P 06
P 07
P 08
P 09
P 10
Allgemeiner Teil / General Section CUC 2030 / 2030N / 2031 / 2031 N
1 - 14 GRUNDIG Service
Einstellungen
Fernseh-Programme manuell ein-
stellen
Taste 6und anschließend Taste OK drücken.
Die Seite »DIALOG CENTER« blendet sich ein.
Die Zeile »MANUELLE ABSTIMMUNG« mit Taste
P
-
oder P+ anwählen und mit Taste OK bestätigen.
»Programm« – Platz mit Taste r
-
oder +eoder
den Ziffern-Tasten 0…9wählen.
Zeile »Band« wählen und mit Taste r-oder +edas
benötigte Frequenzband wählen (VHF1 = C2 - C4
und S 1 - S10; VHF 3 = C 5 - C 12 und S 11 - S 39;
UHF = S 40 - S 41 und C 21 - C69).
Zeile »Standard« wählen und mit Taste r
-
oder
+ebenötigte Einstellung wählen.
Zeile »Suchen« wählen und mit Taste r
-
oder
+eSuchlauf starten.
Durch kurzes, wiederholtes drücken der Taste r
-
oder +ekann der Bild- und Toneindruck feinabge-
stimmt werden (Finetuning).
Einstellung mit Taste OK speichern.
Zum Einstellen von weiteren Programmen Vorgang
ab Pkt. wiederholen.
Einstellung mit Taste TXTbeenden.
8
3
6
7
6
5
4
3
2
1
MANUELLE ABSTIMMUNG
66
OK Speich. 0 – 9 Programm TXT
Programm r01 e
Suchen ■
Band UHF
Standard automatisch
❒Begrenzen der Programmplatzwahl
Der ATS-Suchlauf speichert alle gefundenen
Programme und “sperrt“ den ersten nichtbelegten
Programmplatz automatisch. Dadurch können bei
der schrittweisen Programmplatzwahl (“Zappen“)
mit den Tasten P
-
, P+ nur die gefundenen Pro-
gramme angewählt werden.
Sie können diese Begrenzung auch manuell einge-
ben, im Beispiel wurde ab Programmplatz 6
“gesperrt“.
Taste 6und anschließend Taste OK drücken.
Die Seite »DIALOG CENTER« blendet sich ein.
Die Zeile »MANUELLE ABSTIMMUNG« mit Taste
P
-
oder P+ anwählen und mit Taste OK bestätigen.
In der Seite »MANUELLE ABSTIMMUNG« mit Taste
r
-
oder +eProgrammplatz 6 wählen.
Die Zeile »Band« wählen und mit Taste r
-
oder
+e»00« wählen.
Einstellung mit Taste OK speichern und mit Taste
TXTbeenden.
Jetzt können die ersten 5 Programme in schneller
Folge durchgeschaltet werden, die nachfolgenden
Programmplätze sind mit den Tasten P
-
, P+ nicht
mehr anwählbar. Alle Programmplätze können
weiterhin mit den Zifferntasten 0 … 9 angewählt
werden.)
5
4
3
2
1
Die Fernbedienung
Kurzbeschreibung für den Fernseh-
Betrieb
Auf dieser Seite sind die Tasten der Fernbedienung
nur kurz erklärt. Ausführliche Beschreibungen ent-
nehmen Sie bitte den jeweiligen Kapiteln.
ik (Taste – E) = Bildsuchlauf rückwärts
ju (Taste E+) = Bildsuchlauf vorwärts
●(Taste 6) = Aufnahmestart
■(Taste r
-
) = Stop
ii (Taste – R) = schneller Rücklauf
uu (Taste R+) = schneller Vorlauf
e(Taste +e) = Wiedergabestart
P
-
= Programmplatz –
P+ = Programmplatz +
Video-Recorder fernbedienen
Mit der Fernbedienung dieses Fernsehgerätes kön-
nen Sie auch GRUNDIG-Video-Recorder fernbedie-
nen. Welche hierzu geeignet sind, sagt Ihnen Ihr
Fachhändler.
Taste VIDEO drücken und gedrückt halten.
Damit schalten Sie die Fernbedienung auf Video-
Recorder-Betrieb.
Anschließend die gewünschte Taste drücken.
Entnehmen Sie der folgenden Aufstellung, mit
welchen Tasten die Recorderfunktionen ausgelöst
werden können.
0 … 9 Gerät aus Bereitschaft (Stand-by)
einschalten;
oder
Programmplatz wählen.
0AV AV-Stellung wählen.
P+ Programmplatz schrittweise fort-
schalten (1, 2, 3 …).
P
-
Programmplatz schrittweise
zurückschalten (… 3, 2, 1);
oder
P
-
, P+ Cursor-Bewegung nach oben/unten.
r
-
+eLautstärke;
oder
r
-
+eCursor-Bewegung links/rechts.
OK Ändern und Aktivieren verschie-
dener Funktionen;
Schaltet auf Optimal-Werte
(Taste AUX und OK).
aTon ein/aus (stummschalten).
zMenü »Bild« anwählen.
´Uhr EIN/AUS (Anzeige der Uhrzeit
nur bei Fernsehprogrammen mit
Videotext).
SAT GRUNDIG Satelliten-Receiver fern-
bedienen (dazu Taste SAT gedrückt
halten und Satelliten-Programm
mit Taste P+ oder P
-
wählen).
PIP ohne Funktion.
3
6
789
0
AV
OK
E
8
6
+
–
TP713
TXT
–
5
4
1
P–
P+
AUX
2
+
VIDEO
–
R
OK
+
PIPSAT
8Gerät in Bereitschaft (Stand-by)
schalten.
RHelligkeit ändern.
EFarbstärke ändern.
6»DIALOG CENTER« aufrufen
(Taste 6und OK).
AUX Menü »Aux« anwählen;
Tonauswahl (mit AUX und 2).
TXT Videotext/-Betrieb ÇTV-Betrieb.
FMenü »TON« anwählen.
Ohne Funktion.
VIDEO GRUNDIG Video-Recorder fernbe-
dienen (dazu Taste VIDEO gedrückt
halten).
EBildformat-Umschaltung
4:3 – 16:9 (auf AV-Programmplatz).
CUC 2030 / 2030N / 2031 / 2031 N Allgemeiner Teil / General Section
GRUNDIG Service 1 - 15
Ton- und Bildeinstellungen
Ton-Einstellungen
Wollen Sie individuelle Ton-Einstellungen vorneh-
men, können Sie dies mittels der Menüseite »Ton«.
❒»Ton« Menü aufrufen
Taste Fdrücken.
Die Menüseite »Ton« erscheint.
Gewünschte Einstellung mit Taste P+ oder P
-
anwählen.
Die folgenden Einstellungen werden jeweils mit
Taste Fbeendet.
❒Stereobreite
Verbreitert bei Stereo-Sendungen das Klangbild
und verbessert es bei Mono-Sendungen.
Die Zeile »+.. « anwählen und mit Taste r
-
oder
+edie Einstellung »+....... « wählen.
❒Ton (Stereo-/Zweiton, Mono)
Empfängt das Gerät Zweiton-Sendungen – z.B.
einen Spielfilm im Originalton auf Tonkanal B
(Anzeige: DUAL B) und die synchronisierte Fassung
auf Tonkanal A (Anzeige: DUAL A) – so können Sie
den von Ihnen gewünschten Tonkanal wählen.
Empfängt das Gerät Stereo- oder NICAM-Sendun-
gen, schaltet es automatisch auf Stereo-Tonwieder-
gabe (Anzeige: Stereo).
Bei schlechter Stereo-Ton-Empfangsqualität sollte
der Ton auf »Mono« geschaltet werden.
Die Zeile »+Ton P01« anwählen und mit Taste r
-
oder +egewünschte Tonart wählen; »Mono« oder
»Stereo« und bei Zweiton-Sendungen »Dual A«
oder »Dual B«.
Soll die Ton-Wiedergabe eines bestimmten
Programmes ständig in Mono sein, dann die Zeile
»+Ton P..« anwählen und Taste G drücken.
Funktion aufheben, dazu Pkt. wiederholen und
noch einmal Taste G drücken.
❒Höhen, Bässe, Balance
Die Ton-Einstellungen lassen sich nach Ihren indivi-
duellen Wünschen korrigieren.
Die Zeile »u« (Balance), »"« (Bässe) oder »!«
(Höhen) anwählen und mit Taste r
-
oder +e
gewünschten Wert einstellen.
1
2
6
2
1
1
6
2
1
Bild-Einstellungen
Wollen Sie individuelle Bild-Einstellungen vorneh-
men, können Sie dies mittels der Menüseite »Bild«
oder mit den Tasten der Fernbedienung.
❒»Bild« Menü aufrufen
Taste zdrücken.
Die Menüseite »Bild«erscheint.
Gewünschte Einstellung mit Taste P+ oder P
-
anwählen.
Die folgenden Einstellungen werden jeweils mit
Taste zbeendet.
❒Kontrast
Das Gerät wurde mit maximalem Kontrast getestet,
um die Zuverlässigkeit aller Baugruppen zu prüfen.
Abhängig vom Gerätestandort und der Raumhellig-
keit (Umgebungslicht) ist es jedoch sinnvoll, den
Kontrast etwas zu reduzieren um den subjektiv
besten Bildeindruck zu erhalten.
»Kontrast« mit Taste r
-
oder +eeinstellen.
❒Schärfe
Damit können Sie die Bildschärfe nach Ihren Wün-
schen optimal einstellen.
»Schärfe« mit Taste r
-
oder +eeinstellen.
❒Helligkeit und Farbkontrast
Drücken Sie » – « (Minus) oder » + « (Plus) der
entsprechenden Taste solange, bis der gewünschte
Wert eingestellt ist.
»Helligkeit« mit Taste Rändern.
»Farbkontrast« (Farbstärke) mit Taste Eändern.
❒Bildformat-Umschaltung 16:9
Wird dem Fernsehgerät über Video-, Camera-
Recorder oder PALplus-Decoder eine PALplus-Sen-
dung zugeführt, muß auf das Bildformat 16:9
umgeschaltet werden. Dies ist bei einem AV-Pro-
grammplatz oder einem Programmplatz mit Deco-
deraktivierung möglich.
Taste Eso oft drücken, bis die Einblendung
»16:9« erscheint.
1
2
1
6
1
1
6
2
1
BILD
TXT
Kontrast r■■■■■■■■■■■ e
Schärfe ■■■■■
TON
TXT
+.. r+.. e
+Ton P 01 MONO
UTon MONO
u
"
!
Komfortfunktionen
Die Kindersicherung
Mit dieser Funktion können Sie eine Geheimzahl
eingeben, mit der alle Funktionen gesperrt werden
❒Kindersicherung aktivieren
»DIALOG CENTER« mit den Tasten 6und OK aufru-
fen.
Die Zeile »Kindersicherung« anwählen und aufru-
fen.
Geheimzahl mit den Ziffern-Tasten 0 … 9 immer
vierstellig eingegeben (z.B. 1111).
Geheimzahl mit Taste OK speichern.
Der Schlüssel erscheint in “Rot“, die Seite
»KINDERSICHERUNG« mit Taste TXT abschalten.
Nach dem Abschalten des Fernsehgerätes und dem
Wiedereinschalten blendet sich die Seite
»Kindersicherung« ein, alle Funktionen sind
gesperrt.
Bitte die gespeicherte Geheimzahl gut merken!
Falls Sie die Geheimzahl vergessen haben, hilft
Ihnen eine Zahlenkombination auf der letzten Seite
dieser Bedienungsanleitung weiter. Wenn Sie nach-
einander diese Tasten der Fernbedienung drücken,
wird die „Verriegelung“ aufgehoben.
❒Kindersicherung abschalten
Gerät einschalten.
Geheimzahl mit den Ziffern-Tasten 0 … 9 immer
vierstellig eingegeben (z.B. 1111).
Das Gerät schaltet auf das Fernsehbild.
Nach dem erneuten Ausschalten des Gerätes ist die
Kindersicherung wieder aktiviert.
Funktion Kindersicherung aufheben, dazu aus dem
»DIALOG CENTER« die Zeile »Kindersicherung«
anwählen und aufrufen. Geheimzahl vierstellig ein-
geben und die Taste AUX drücken.
6
2
1
6
6
4
3
2
1
KINDERSICHERUNG
66
0 – 9 TXT
Ò
❚
-- - -
Die Möglichkeiten der SERVICE-
Seite
Die folgenden Einstellungen werden mit dem
»DIALOG CENTER« durchgeführt.
»DIALOG CENTER« mit Taste 6und Taste OK aufru-
fen.
Die Einstellungen werden jeweils mit Taste TXT
beendet.
❒Farbnorm manuell einstellen
Beim Belegen der Programmplätze mit dem
Programmsuchlauf wird die Farbnorm automatisch
zugeordnet. Ist die Farbe der verschiedenen
Programme in Ordnung, brauchen Sie diese
Einstellung nicht durchführen.
Aus dem »DIALOG CENTER« die Zeile »SERVICE«
mit Taste P+ oder P
-
anwählen und mit Taste OK
bestätigen.
Die Zeile »Farbe« anwählen und mit Taste r
-
oder
+edie benötigte Farbnorm (PAL, NTSC oder
SECAM) wählen.
❒Tonnorm manuell einstellen
Aus dem »DIALOG CENTER« die Zeile »SERVICE«
mit Taste P+ oder P
-
anwählen und mit Taste OK
bestätigen.
Die Zeile »B/G FM5,5 NIC« anwählen und mit Taste
r
-
oder +edie benötigte Tonnorm wählen.
❒Blauer Bildschirm wählen
Mit dieser Einstellung kann bei verrauschtem Bild
auf ein blaues Bild umgeschaltet werden.
Aus dem »DIALOG CENTER« die Zeile »SERVICE«
mit Taste P+ oder P
-
anwählen und mit Taste OK
bestätigen.
Die Zeile »Blauer Bildschirm« anwählen und mit
Taste r
-
oder +e»ein« wählen.
❒Schwarzer Bildschirm wählen
Mit dieser Einstellung wird störendes Programm-
flimmern während des Umschalten des Programm-
platzes vermieden.
Aus dem »DIALOG CENTER« die Zeile »SERVICE«
mit Taste P+ oder P
-
anwählen und mit Taste OK
bestätigen.
Die Zeile »Schwarzer Bildschirm« anwählen und
mit Taste r
-
oder +e»ein« wählen.
❒Service Code
Die Funktionen dieser Zeile sind dem Fachhändler
vorbehalten.
6
2
1
2
1
2
1
2
1
6
6
Allgemeiner Teil / General Section CUC 2030 / 2030N / 2031 / 2031 N
1 - 16 GRUNDIG Service
Anschlußmöglichkeiten
Bedienung
Programmplatz wählen, mit dem das verschlüsselte
Programm belegt ist;
oder
für den Betrieb mit Satelliten-Receiver Programm-
platz »AV1« mit Taste 0AV anwählen.
❒Videorecorder oder SET-TOP-Box an
Buchse »AV 2« anschließen
Buchse »AV2« des Fernsehgerätes und die entspre-
chende Buchse des Video-Recorders oder SET-TOP-
Box mit einem EURO/AV (Scart)-Kabel verbinden.
Taste 0AV so oft drücken, bis am Gerät »AV2«
angezeigt wird.
Wiedergabe
Videorecorder oder SET-TOP-Box einschalten und
die gewünschte Funktion wählen.
Am Fernsehgerät sehen und hören Sie die Bild- und
Ton-Informationen des externen Gerätes.
❒Überspielen von Videoaufzeichnungen
über das Fernsehgerät
Sie können Aufzeichnungen von einem Video-/
Camera-Recorder zu einem Videorecorder über-
spielen.
Die Möglichkeiten:
Camera-Recorder (AV3) auf Videorecorder (AV1/2)
Videorecorder (AV1) auf Videorecorder (AV2)
Videorecorder (AV2) auf Videorecorder (AV1).
Sie können während des Überspielens auf ein Fern-
sehprogramm schalten.
Das Überspielen von einem SVHS-Video-/Camera-
Recorder zu einem SVHS-Video-/Camera-Recorder
ist nicht möglich.
AV-Programmplatz mit Taste 0AV wählen.
Taste AUXdrücken.
2
1
6
1
2
1
••••••••••••
••••••••••••
••••••••••••
••••••••••••
••••••••••••
••••••••••••
••••••••••••
••••••••••••
••••••••••••
••••••••••••
••••••••••••
••••••••••••
••••••••••••
••••••••••••
••••
•••••••••
•••••••••
••••••••••••
••••
•••••••••
•••••••••
••••••••••••
••••
•••••••••
•••••••••
••••••••••••
••••
•••••••••
•••••••••
••••••••••••
AV1 AV2
EURO-AV
AUDIO
1
Die AUDIO-/VIDEO-Anschlüsse
Das Fernsehgerät ist mit verschiedenen Buchsen
ausgestattet. Daran können verschiedene Zusatz-
geräte – wie z.B. Camera-Recorder, Video-Recor-
der, SAT-Receiver, SET-TOP-Box, Pay-TV-Decoder
usw. – angeschlossen werden.
❒Decoder an Buchse »AV 1« anschließen
Einige Sender – deren Programme über Kabelanla-
gen oder Satelliten-Receiver zugeführt werden –
verschlüsseln ihre Sendungen. Bild und Ton sind
damit unkenntlich. Mit einem Decoder können Sie
derartige Programme entschlüsseln.
An diese Buchse kann alternativ auch ein Satelliten-
Receiver oder ein zweiter Videorecorder ange-
schlossen werden.
Anschließen
Buchse »AV1« des Fernsehgerätes und die entspre-
chende Buchse des Decoders oder Satelliten-Recei-
vers mit einem EURO/AV (Scart)-Kabel verbinden.
Einstellung für den Betrieb mit Decoder
Programmplatz wählen, mit dem das verschlüsselte
Programm belegt ist.
Das Fernsehgerät schaltet automatisch auf Pro-
grammplatz »AV1«.
»DIALOG CENTER« mit den Tasten 6und OK auf-
rufen.
Die Zeile »SONDERFUNKTIONEN« anwählen und
aufrufen.
Die Zeile »Dekoder P ..« anwählen. In dieser Zeile
wird der Programmplatz angezeigt, der zuvor
gewählt wurde.
Taste r
-
oder +edrücken (Wahl zwischen ON1,
ON2, ON3 – dies ist abhängig vom verwendeten
Decoder).
Diese Einstellung kann auch in der Seite
»SERVICE« für alle Programmplätze (1 -79) akti-
viert werden.
Seite mit Taste TXT verlassen.
6
6
5
4
3
2
1
1
6
••••••••••••
••••••••••••
••••••••••••
••••••••••••
••••••••••••
••••••••••••
••••••••••••
••••••••••••
••••••••••••
••••••••••••
••••••••••••
••••••••••••
••••••••••••
••••••••••••
••••
•••••••••
•••••••••
••••••••••••
••••
•••••••••
•••••••••
••••••••••••
••••
•••••••••
•••••••••
••••••••••••
AV1 AV2
Anschlußmöglichkeiten
Taste 0AV so oft drücken, bis am Gerät »AV3«
angezeigt wird.
Wiedergabe
Camera-Recorder einschalten, Cassette einschie-
ben und die Wiedergabe starten.
Am Fernsehgerät sehen und hören Sie die Bild- und
Ton-Informationen vom Camera-Recorder.
❒Kopfhörer
Anschließen
Kopfhörer-Stecker (3,5 mm ø Klinke) in die Kopfhö-
rer-Buchse an der Frontseite des Gerätes stecken.
Die Kopfhörer-Lautstärke können Sie gesondert
einstellen (Kopfhörer-Impedanz max. 32Ω).
Ton (Stereo-/Zweiton, Mono) des
Kopfhörers ändern
Seite »TON« mit Taste Fanwählen.
Die Zeile »UTon« anwählen und mit Taste r
-
oder
+egewünschte Tonart wählen:
Bei Stereo »Stereo« oder »Mono«;
bei Nicam Stereo »Stereo« oder »Analog«;
bei Zweiton-Sendungen »Dual A« oder »Dual B«.
Seite »TON« mit Taste Fabschalten.
Lautstärke des Kopfhörers ändern
Taste AUX drücken und danach mit Taste r
-
oder
+edie Kopfhörer-Lautstärke ändern.
Der geänderte Wert wird auf einer Skala angezeigt.
1
3
2
1
1
P
VIDEO IN
L
AUDIO IN
R
1
2
Mit Taste 0AV die Copier-Funktion aktivieren.
Wiedergabe/Aufnahme an Camera-Recorder/Video-
recorder starten.
Die Überspielung läuft, jetzt können Sie mit dem
Fernsehgerät jedes Programm sehen, ohne die Auf-
zeichnung zu stören.
Kopierfunktion abschalten, dazu die Pkt. bis
widerholen.
Videostandard (VHS oder SVHS) einstellen
Diese Einstellung ist vom angeschlossenen Video-
recorder abhängig.
»DIALOG CENTER« mit den Tasten 6und OK aufru-
fen.
Die Zeile »SONDERFUNKTIONEN« anwählen und
aufrufen.
Die Zeile »Video« anwählen und aufrufen und mit
Taste r
-
oder +e»VHS« oder »SVHS« wählen.
❒Camera-Recorder an Buchse »AV 3«
anschließen
Bildsignal
Buchse »VIDEO IN« des Fernsehgerätes mit der
entsprechenden Bild-Buchse des Camera-Recor-
ders verbinden.
Tonsignal (Stereo oder Mono)
Buchsen »L AUDIO IN R« des Fernsehgerätes mit
den Tonbuchsen des Stereo-Camera-Recorders
verbinden,
oder
Buchse »L AUDIO IN« des Fernsehgerätes mit der
Tonbuchse des Mono-Camera-Recorders verbin-
den.
1
1
P
VIDEO IN
L
AUDIO IN
R
3
2
1
31
6
4
3
CUC 2030 / 2030N / 2031 / 2031 N Allgemeiner Teil / General Section
GRUNDIG Service 1 - 17
Operating Hints This chapter contains excerpts from the operating instructions. For further
particulars please refer to the appropriate user instructions the part number
of which is indicated in the relevant spare parts list.
Technische Daten/Kunden-Informationen
❒Netzspannung:
220-240 V, 50/60 Hz
(Regelbereich des Netzteiles 190 … 264 V)
»Das Gerät darf nur mit dem beiliegenden
Netzkabelset betrieben werden. Es verhindert
Störungen aus dem Netz und ist Bestandteil der
Gerätezulassung«.
Für Ersatzzwecke bestellen Sie bitte bei einer
Kundendienst-Stelle nur das Netzkabelset mit
der Bezeichnung »GWN 9.22/Sachnummer
8290.991-316«.
❒Aufnahme:
ca. 75 W
In Bereitschaft (Stand-by) 5 W
❒Empfangsbereiche:
Kanäle C01 … C99
Sonderkanäle S01 … S41
❒Tonendstufe:
2 x 8 W Musikleistung (2 x 4 W Sinus)
❒Kontaktbelegung EURO-AV-Buchse
Wenn Sie an das Fernsehgerät Zusatzgeräte
anschließen wollen (z. B. Computer, Verstärkeranla-
ge), dann kann Ihr Fachhändler anhand der
folgenden Anschlußtabelle eine normgerechte
Verbindung herstellen:
Stift Signal
11 = Audio Ausgang rechts
12 = Audio Eingang rechts
13 = Audio Ausgang links
14 = Audio Masse
15 = Blau Masse
16 = Audio Eingang links
17 = RGB Blau Eingang
18 = Schaltspannung
19 = Grün Masse
10 = Datenleitung
11 = RGB Grün Eingang
12 = –
13 = Rot Masse
14 = Masse
15 = RGB Rot Eingang (Chroma; S VIDEO)
16 = RGB Schaltspannung
17 = Video Masse
18 = RGB Schaltspannung Masse
19 = Video Ausgang
20 = Video Eingang
21 = Abschirmung/Masse
220
21 119
❒Service-Hinweise für den Fachhandel:
Das Gerät entspricht den VDE-Sicherheitsbestim-
mungen und den Vorschriften der Deutschen Bun-
despost (Zulassungs-Zeichen siehe Typenaufkleber
auf der Geräterückseite), ferner der Verordnung
über den Schutz vor Schäden durch Röntgenstrah-
len. Die Röntgenstrahlung – verursacht durch die
Bildröhre – ist ausreichend abgeschirmt und darum
völlig ungefährlich. Beschleunigungsspannung
max. 27 kV/mittlerer Strahlstrom 1,5 mA.
Unsachgemäße Eingriffe, insbesondere Verändern
der Hochspannung oder Einbau eines anderen
Bildröhrentyps, können dazu führen, daß Röntgen-
strahlung in erheblicher Stärke auftritt. So verän-
derte Geräte entsprechen nicht mehr dieser Zulas-
sung und dürfen nicht betrieben werden.
❒GRUNDIG Kundenberatungszentrum
Haben Sie Fragen?
Unser Kundenberatungszentrum steht Ihnen werk-
tags stets von 8.00 – 19.00 Uhr zur Verfügung.
Haben Sie Fragen zur Umweltverträglichkeit
unserer Geräte, wenden Sie sich an die
GRUNDIG Öko-Technologie,
Fax: 0911/703-9213.
montags bis freitags
von 8.00 – 19.00 Uhr
* Gebührenpflichtig –
in Deutschland und
Österreich möglich
STETS FÜR SIE DA!
DEUTSCHLAND
0180/5302122*
ÖSTERREICH
0660/6699*
GRUNDIG
KUNDENBERATUNGS-
ZENTRUM
Änderungen und Irrtümer vorbehalten!
✁
GRUNDIG
+
P
+
P
-
✁
GRUNDIG
+
P
+
P
-
7 0 3 8
Preparations
❒Inserting batteries in the remote control
w
!Observe polarity in the battery case.
When the batteries are spent a prompt
»Battery« will appear on the screen.
Spent batteries must always be removed.
Dispose of spent batteries in an environ-
mentally safe manner.
❒Switching the set on
Press button üon the set.
If the display lights up, then the set is in standby.
Use number buttons 1–0AV or the P+
button on the remote control to switch the TV set
on completely.
❒Switching the set to standby
Press button 8on the remote control.
The set is not switched off completely.
The set can be switched back on using the remote
control.
❒❒ Switching the set off completely
If you are not using the set for a longer
period of time (e.g. at night), then switch the
set off completely.
This saves energy.
Press button üon the set.
1
6
6
1
1
6
The DIALOG CENTER as a user
guide
The DIALOG CENTER and the individual pages of
the user guide display the possible functions and
the buttons on the remote control with which these
functions may be activated.
Button symbols and dialogue lines display possible
operating steps.
The characters on the screen are symbols for
the following buttons on the remote control:
Symbol Button Function
wP+ P
-
Selects lines or functions
qstep by step on a page.
re r
-
+eChanges settings.
66Calls up the DIALOG CENTER
(6and OK) and switches back
from the pages to the
DIALOG CENTER.
OK OK Confirms functions.
Please memorize these buttons, they are required
repeatedly for the following operating steps!
6
Preparations
DIALOG CENTER
OK TXT
LANGUAGE SELECTION
PARENTAL LOCK
SPECIAL FUNCTIONS
PROGRAM SORT
MANUAL TUNING
AUTOMATIC TUNING SYSTEM
SERVICE
Allgemeiner Teil / General Section CUC 2030 / 2030N / 2031 / 2031 N
1 - 18 GRUNDIG Service
Settings
Assigning programme positions
with the automatic tuning system
ATS
The set is equipped with the automatic programme
position search system ATS which carries out pro-
gramme position assignment for you.
You start the automatic search and may afterwards
sort the programmes in a sequence of your choice.
You may also delete programmes which have been
found more than once or those with bad reception
from the programme list.
After switching on the set the page
»LANGUAGE SELECTION« appears.
A selection can be made from several languages for
the dialogue between you and the TV.
The user guide displays appear in the selected
language.
Select the dialogue language with button P
-
or P+
and confirm with the OK button.
The page »AUTOMATIC TUNING SYSTEM« appears.
The page » AUTOMATIC TUNING SYSTEM « can
also be called up directly from the » DIALOG
CENTER«.
6
2
6
1
LANGUAGE SELECTION
OK
Deutsch
English
Español
Francais
Italiano
AUTOMATIC TUNING SYSTEM
OK Start TXT
■
After searching, the set switches to program posi-
tion 1 and the page »SORT« appears.
❒Sorting programmes
Select the programme which is to be re-sorted by
pressing button P
-
, P+.
Mark the programme with the OK button.
Select a new programme position with button P
-
,
P+.
Save the setting with the OK button.
To sort more programmes, repeat, beginning with
step .
Exit setting by pressing TXT.
❒Deleting programmes
Select the programme to be deleted with button P
-
,
P+.
Delete the programme with the AUX button.
To delete more programmes, repeat, beginning
with step .
Exit setting by pressing TXT.
Pages »AUTOMATIC TUNING SYSTEM«, »SORT«
(under » Programme sorting «) and »LANGUAGE
SELECTION« can also be called up directly from the
»DIALOG CENTER«.
6
3
1
6
2
1
5
1
6
4
3
2
1
6
SORT
OK Sort
AUX Delete.
66Exit
TXT
TV
P 01
P 02
P 03
P 04
P 05
P 06
P 07
P 08
P 09
P 10
Settings
Manual tuning of TV programs
Press 6and then OK.
The page » DIALOG CENTER« will appear on the
screen.
Select the line »MANUAL TUNING « using button
P
-
or P+ and confirm with OK.
Select » Program « position using button r
-
or
+eor use number buttons 0 … 9.
Select the line »Band« and using r–or +eselect
the required frequency band (VHF1 = C2 - C4 and
S 1 - S 10; VHF 3 = C 5 - C 12 and S 11 - S 39; UHF =
S 40 - S 41 and C 21 - C 69).
Select the line »Standard« and select the required
adjustment using r
-
or +e.
Select the line »Tune« and start the tune using r
-
or +e.
Short repeated pressing of button r
-
or +efine
tunes picture and sound (Fine tuning).
Save the setting with OK.
To adjust more programmes, repeat as of step .
Exit setting by pressing TXT.
8
3
6
7
6
5
4
3
2
1
MANUAL TUNING
66
OK Memorize 0 – 9 Program TXT
Program r01 e
Tune ■
Band UHF
Standard automatic
❒Limiting the programme position
selection
The ATS search saves all programmes it has found
and automatically “locks” the first position to which
no program is assigned. In this way, when pro-
gramme positions are selected step by step (“zap-
ping“), using buttons P
-
, P+,only programmes
which have been found can be selected.
You may also enter this limit manually, in the exam-
ple the “lock” has been activated as of programme
position 6.
Press the 6button and then OK.
The page » DIALOG CENTER « will appear on the
screen.
Select the line »MANUAL TUNING « using button
P
-
or P+ and confirm with OK.
Select programme position 6 on the » MANUAL
TUNING« page with the r
-
or +ebutton.
Select the line called »Band «, then select » 00 «
using r
-
or +e.
Save this setting with OK and exit using button TXT.
The first 5 programmes can now be selected in fast
sequence, the following programme positions can
no longer be selected using P
-
or P+. All pro-
gramme positions may still be selected using num-
ber buttons 0 … 9.
5
4
3
2
1
CUC 2030 / 2030N / 2031 / 2031 N Allgemeiner Teil / General Section
GRUNDIG Service 1 - 19
The remote control
Short description for TV operation
On this page the buttons of the remote control are
only briefly explained. Detailed descriptions can be
found in the various chapters.
ik (button – E) = Frame search backwards
ju (button E+) = Frame search forward
●(button 6) = Start recording
■(button r
-
) = Stop
ii (button – R) = Fast wind
uu (button R+) = Fast forward
e(button +e) = Playback
P
-
= Program position –
P+ = Program position +
Remote control video recorder
You may also use the remote control for this TV set
to operate a GRUNDIG video recorder. Your
specialist dealer can inform you on which ones are
suitable.
Press the VIDEO button and keep it depressed.
This converts the remote control to video recorder
operation.
Now press the required button.
The following list tells you which button operates
which recorder functions.
0 … 9 Switch on set from standby;
or
select programme position.
0AV Select AV.
P+ Move forwards from one
programme position to the next
(1, 2, 3 …).
P
-
Move backwards from one
programme position to the next
(… 3, 2, 1);
or
P
-
, P+ Movethe cursor up/down.
r
-
+eVolume;
or
r
-
+eMove the cursor tothe left/right.
OK Changes and activates several
functions,
Switches to optimum values
(button AUX and OK).
aSound on/off (mute).
zSelect »Picture« menu.
´Clock ON/OFF (Time display only for
TV programmes with videotext).
SAT Remote control GRUNDIG satelli-
ten receiver (keep SAT button
depressed and select satellite
program using button P+ or P
-
).
PIP No function.
3
6
789
0
AV
OK
E
8
6
+
–
TP713
TXT
–
5
4
1
P–
P+
AUX
2
+
VIDEO
–
R
OK
+
PIPSAT
8Switch set to standby.
RAdjust brightness.
EAdjust colour intensity.
6Call up »DIALOG CENTER«
(button 6and OK).
AUX Select »Aux« menu;
sound selection (with AUX and 2).
TXT Videotext operatation ÇTV operation.
FSelect »SOUND« menu.
No function.
VIDEO Remote control GRUNDIG video
recorder (keep VIDEO button
depressed).
ESwitch picture format from 4:3 to
16:9 (at AV programme position).
Sound and picture tuning
Sound tuning
To make individual picture adjustments, select the
menu page »Sound«.
❒Select the menu »Sound«
Press button F.
The menu page »Sound« appears.
Select the desired adjustment using button P+
or P
-
.
The following adjustments are all terminated using
button F.
❒Stereo width
Widens the sound effect for stereo transmissions
and improves mono reception.
Select the line »+.. « and using button r
-
or
+eselect the adjustment »+....... «.
❒Sound (stereo/two-tone, mono)
If the device receives two-tone transmissions – e.g.
a film in the original on sound channel B (display:
»DUAL B«) and the synchronized version on sound
channel A (display: »DUAL A«) – then you may se-
lect the desired sound channel.
If the set receives stereo or NICAM transmissions,
it automatically switches to stereo sound (display:
Stereo).
If the stereo reception is bad, then the sound
should be switched to »Mono«.
Select the line »+Sound P01 « and using button
r
-
or +eselect the desired sound type; »Mono«
or » Stereo « and for two-tone transmissions
»Dual A« or »Dual B«.
If the sound for a particular programme is to be
permanently in mono, then select the line » +
Sound P« and press the G button.
To reverse the function, repeat step and press
the G button again.
❒Treble, bass, balance
Tone settings can be adjusted to your individual
wishes.
Select the line »u« (balance), »"« (bass) or
»!« (treble) and make the desired adjustment
using r
-
or +e.
1
2
6
2
1
1
6
2
1
Picture tuning
If you would like to make individual picture adjust-
ments, you may do this using the menu page »Pic-
ture« or using the remote control buttons.
❒Call up the »Picture« menu
Press button z.
The menu page »Picture« appears.
Select the desired adjustment by pressing P+ or P
-
.
The following adjustments are all terminated by
pressing button z.
❒Contrast
The set has been tested using maximum contrast,
in order to check for reliability of all modules.
Depending on the location of the set and the
brightness in the room (surrounding light) it does
however make sense to reduce contrast slightly for
the best possible picture impression.
Adjust »Contrast« using button r
-
or +e.
❒Sharpness
This allows you to adjust optimum picture sharp-
ness according to your wishes.
Adjust »Sharpness« using button r
-
or +e.
❒Brightness and colour contrast
Press » – « (minus) or » + « (plus) of the corre-
sponding button until the desired adjustment is
obtained.
Adjust »Brightness« with button R.
Adjust »Colour contrast« (colour intensity) using
button E.
❒Switching the picture format to 16:9
If the set receives a PALplus transmission via video
recorder, camcorder or a PALplus decoder the pic-
ture format must be switched to 16:9. This is possi-
ble on an AV programme position or a programme
position with an activated decoder.
Press button Euntil the message » 16:9 «
appears.
1
2
1
6
1
1
6
2
1
PICTURE
TXT
Contrast r■■■■■■■■■■■ e
Sharpness ■■■■■
SOUND
TXT
+.. r+.. e
+Sound P 01 MONO
USound MONO
u
"
!
Allgemeiner Teil / General Section CUC 2030 / 2030N / 2031 / 2031 N
1 - 20 GRUNDIG Service
Comfort functions
Parental lock
Using this function, you may enter a number code
which blocks all functions.
❒Activating parental lock
Call up the »DIALOG CENTER«using buttons 6and
OK.
Select and call up the line »Parental lock«.
Enter a number code with the number
buttons 0 … 9, always using four digits (e.g. 1111).
Save the number code with OK.
The key appears in red, switch off the page
»PARENTAL LOCK« with button TXT.
After switching off the set and switching on again
the page »Parental lock« appears, all functions are
locked.
Please take good note of the number code!
If you forget the number code, a number combina-
tion on the last page of this instruction manual will
assist you. If you press these buttons in sequence
on the remote control, the “lock” will be cancelled.
❒Switching off parental lock
Switch on the set.
Enter a number code with the number buttons
0 … 9, always using four digits (e.g. 1111).
The set switches to the TV screen. After switching
off again the parental lock is activated again.
To cancel the parental lock function, select and call
up the line “Parental lock” from the » DIALOG
CENTER«. Enter the number code with four digits
and press button AUX.
6
2
1
6
6
4
3
2
1
PARENTAL LOCK
66
0 – 9 TXT
Ò
❚
-- - -
SERVICE page possibilities
The following adjustments are carried out with the
»DIALOG CENTER«.
Select the »DIALOG CENTER« with button 6and
OK.
Adjustments are always terminated by pressing
TXT.
❒Manually adjusting the colour norm
When the programme search function assigns pro-
gramme positions, an automatic colour norm
assignment is made. If the colour of the various
programmes is satisfactory, you need not carry out
this adjustment.
Select the line » SERVICE « from the » DIALOG
CENTER« with button P
-
or P+ and confirm with
OK.
Select the line »Colour« and using r
-
or +e se-
lect the required colour norm (PAL, NTSC or
SECAM).
❒Manually adjusting the sound norm
Select the line » SERVICE « from the » DIALOG
CENTER« with button P
-
or P+ and confirm with
OK.
Select the line »B/G FM5,5 NIC« and using button
r
-
or +eselect the required sound norm.
❒Selecting a blue screen
This function allows you to switch over to a blue
screen in the case of high visual interference.
Select the line » SERVICE « from the » DIALOG
CENTER« with button P
-
or P+ and confirm with
OK.
Select the line »Blue Screen« and using button r
-
or +eselect »on«.
❒Selecting a black screen
This function avoids screen flickering while chan-
ging programme positions.
Select the line » SERVICE « from the » DIALOG
CENTER« with button P
-
or P+ and confirm with
OK.
Select the line »Black Screen« and using button r
-
or +eselect »on«.
❒Service Code
The functions on this line are reserved for the
service specialist.
6
2
1
2
1
2
1
2
1
6
6
Connection possibilities
Operation
Select the programme position to which the en-
coded programme is assigned;
or
for operation using a satellite receiver programme
position, select »AV1« with button 0AV.
❒Connecting a video recorder or SET TOP
box to the »AV 2« socket
Connect the »AV2« socket of the TV set and corre-
sponding socket of the SET TOP box with a
EURO/AV (Scart) cable.
Press button 0AV repeatedly until the set displays
»AV2«.
Playback
Switch on the video recorder or SET TOP box and
select the desired function.
The TV set will let you see and hear the picture and
sound information from the external device.
❒Copying video tapes via the TV set
You may copy video recorder/camcorder tapes
onto a video recorder.
The possibilities:
camcorder (AV3) to video recorder (AV1/2)
video recorder (AV1) to video recorder (AV2)
video recorder (AV2) to video recorder (AV1).
You may switch over to TV viewing during the
recording.
It is not possible to copy from a SVHS video/cam-
corder to a SVHS video/camcorder.
Select the AV program position with button 0AV.
Press button AUX.
2
1
6
1
2
1
••••••••••••
••••••••••••
••••••••••••
••••••••••••
••••••••••••
••••••••••••
••••••••••••
••••••••••••
••••••••••••
••••••••••••
••••••••••••
••••••••••••
••••••••••••
••••••••••••
••••
•••••••••
•••••••••
••••••••••••
••••
•••••••••
•••••••••
••••••••••••
••••
•••••••••
•••••••••
••••••••••••
••••
•••••••••
•••••••••
••••••••••••
AV1 AV2
EURO-AV
AUDIO
1
AUDIO/VIDEO connections
The TV set is equipped with a variety of socket
connections. Various auxiliary devices – e.g. cam-
corder, video recorder, SAT receiver, SET TOP box,
Pay TV decoder etc. – may be connected here.
❒Connecting a decoder to the »AV 1«
socket
Some stations – whose programs are received by
cable or satellite receiver – encode their broadcasts.
Both picture and sound become unrecognizable.
A decoder will allow you to decode these programs.
Alternatively, a satellite receiver may be connected
to this socket or a second video recorder.
Connecting
Connect the »AV1 « socket of the TV set and the
corresponding socket of the decoder or satellite
receiver with a EURO/AV (Scart) cable.
Adjustment for decoder operation
Select the program position to which the encoded
program is assigned.
The TV set automatically switches to program posi-
tion »AV1«.
Call up the »DIALOG CENTER« with buttons 6and
OK.
Select and call up the line »SPECIAL FUNCTIONS«.
Select the line »Decoder P ..«. This line displays
the programme position which was previously sel-
ected.
Press button r
-
or +e(choice between ON1,
ON2, ON3 – this depends on the decoder used).
This setting can also be activated on the »SERVICE«
page for all program positions (1–79).
Exit with button TXT.
6
6
5
4
3
2
1
1
6
••••••••••••
••••••••••••
••••••••••••
••••••••••••
••••••••••••
••••••••••••
••••••••••••
••••••••••••
••••••••••••
••••••••••••
••••••••••••
••••••••••••
••••••••••••
••••••••••••
••••
•••••••••
•••••••••
••••••••••••
••••
•••••••••
•••••••••
••••••••••••
••••
•••••••••
•••••••••
••••••••••••
AV1 AV2

This manual suits for next models

13

Other Grundig TV manuals

Grundig 55 GUB 8688 A Operating and maintenance manual

Grundig

Grundig 55 GUB 8688 A Operating and maintenance manual

Grundig 32 GHB 5000 User manual

Grundig

Grundig 32 GHB 5000 User manual

Grundig 28 VLE 5700 SN User manual

Grundig

Grundig 28 VLE 5700 SN User manual

Grundig CINEMO 32 User manual

Grundig

Grundig CINEMO 32 User manual

Grundig ST 55-800 text User manual

Grundig

Grundig ST 55-800 text User manual

Grundig 28 VLE 5500 BG User manual

Grundig

Grundig 28 VLE 5500 BG User manual

Grundig FINE ARTS 30 LW 78-8510 DOLBY User manual

Grundig

Grundig FINE ARTS 30 LW 78-8510 DOLBY User manual

Grundig 40 VLE 7040 C User manual

Grundig

Grundig 40 VLE 7040 C User manual

Grundig 22 VLE 4520 BF User manual

Grundig

Grundig 22 VLE 4520 BF User manual

Grundig 32GFB6628 User manual

Grundig

Grundig 32GFB6628 User manual

Grundig 32 GFH 6620B Reference guide

Grundig

Grundig 32 GFH 6620B Reference guide

Grundig GR 22-110 User manual

Grundig

Grundig GR 22-110 User manual

Grundig 32 VLE 4500 BM User manual

Grundig

Grundig 32 VLE 4500 BM User manual

Grundig M82-169 PALplus User manual

Grundig

Grundig M82-169 PALplus User manual

Grundig CUC2130 M User manual

Grundig

Grundig CUC2130 M User manual

Grundig 26 GLX 4000 User manual

Grundig

Grundig 26 GLX 4000 User manual

Grundig CUC 7350 User manual

Grundig

Grundig CUC 7350 User manual

Grundig 55 VLE 6625 BP User manual

Grundig

Grundig 55 VLE 6625 BP User manual

Grundig 43GFB6625 User manual

Grundig

Grundig 43GFB6625 User manual

Grundig THARUS 51 LCD 51-9410 DOLBY User manual

Grundig

Grundig THARUS 51 LCD 51-9410 DOLBY User manual

Grundig 43 GHU 7912B User manual

Grundig

Grundig 43 GHU 7912B User manual

Grundig LENARO 27 User manual

Grundig

Grundig LENARO 27 User manual

Grundig 40 GEF 6930 A Reference guide

Grundig

Grundig 40 GEF 6930 A Reference guide

Grundig CUC 1929 User manual

Grundig

Grundig CUC 1929 User manual

Popular TV manuals by other brands

Beko DPM 28 C7 Service manual

Beko

Beko DPM 28 C7 Service manual

GE GE TV user guide

GE

GE GE TV user guide

Sony Trinitron KV-XA21 operating instructions

Sony

Sony Trinitron KV-XA21 operating instructions

JVC AV-14AG16 instructions

JVC

JVC AV-14AG16 instructions

Toshiba CX35F70 owner's manual

Toshiba

Toshiba CX35F70 owner's manual

Panasonic Viera TX-L32E31B operating instructions

Panasonic

Panasonic Viera TX-L32E31B operating instructions

Panasonic QuintrixF TX-29PS1D operating instructions

Panasonic

Panasonic QuintrixF TX-29PS1D operating instructions

Philips/Magnavox TV user guide

Philips/Magnavox

Philips/Magnavox TV user guide

Planar M Series user manual

Planar

Planar M Series user manual

Tesla T607 Series user manual

Tesla

Tesla T607 Series user manual

Samsung PN51E8000 E- E-manual

Samsung

Samsung PN51E8000 E- E-manual

Curtis LCD2425A instruction manual

Curtis

Curtis LCD2425A instruction manual

Sony Trinitron KV-AR21M81 Service manual

Sony

Sony Trinitron KV-AR21M81 Service manual

Samsung LS05B user manual

Samsung

Samsung LS05B user manual

Samsung HLR5078WX Service manual

Samsung

Samsung HLR5078WX Service manual

Palsonic 6850TGPF owner's manual

Palsonic

Palsonic 6850TGPF owner's manual

Sony TRINITRON AA-2U Service manual

Sony

Sony TRINITRON AA-2U Service manual

Sony BRAVIA KDL-49W750D operating instructions

Sony

Sony BRAVIA KDL-49W750D operating instructions

manuals.online logo
manuals.online logoBrands
  • About & Mission
  • Contact us
  • Privacy Policy
  • Terms and Conditions

Copyright 2025 Manuals.Online. All Rights Reserved.