manuals.online logo
Brands
  1. Home
  2. •
  3. Brands
  4. •
  5. Grundig
  6. •
  7. TV
  8. •
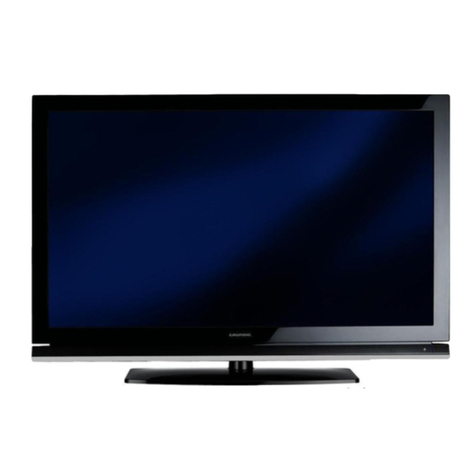
  9. Grundig THARUS 38 LCD 38-9210 TOP User manual

Grundig THARUS 38 LCD 38-9210 TOP User manual

TV Service Manual
2. Ergänzung / Supplement 2
Zusätzlich erforderliche Unterlagen für den Komplettservice
Additionally required Service Documents for the Complete Service
Service
Manual
Sicherheit
Safety
Materialnr./Part No.
720108000000
Grundig Service
Hotline Deutschland…
TV
TV
SAT
VCR/LiveCam
HiFi/Audio
Car Audio
Telekommunikation
Fax:
Planatron
(8.00-22.00 Uhr)
0180/52318-41
0180/52318-49
0180/52318-48
0180/52318-42
0180/52318-43
0180/52318-44
0180/52318-45
0180/52318-51
0180/52318-99
…Mo.-Fr. 8.00-18.00 Uhr
Telefon: 0180/52318-40
0180/52318-50Fax:
Technik:
Ersatzteil-Verkauf: Mo.-Fr. 8.00-19.00 Uhr
Kundendienst/Werkstätten:
0180/52318-52
0180/52318-46
Telefon:
Fax:
gebührenpflichtig
Mo.-Fr. 8.00-18.00 Uhr
THARUS 38
LCD 38-9210 TOP
GBA4800
Dieses Service Manual ist nur in Datenform verfügbar / This Service Manual is only available as data
Änderungen vorbehalten / Subject to alteration
Made by GRUNDIG in Germany • http://www.grundig.com
H-S41 • 0802 • 720100448000
NUR FÜR INTERNEN GEBRAUCH
FOR INTERNAL USE ONLY
Allgemeiner Teil / General Section THARUS 38 – LCD 38-9210 TOP
1 - 2 GRUNDIG Service
Es gelten die Vorschriften und Sicherheitshinweise
gemäß dem Service Manual "Sicherheit", Material-
nummer 720108000000, sowie zusätzlich die eventu-
ell abweichenden, landesspezifischen Vorschriften!
The regulations and safety instructions shall be valid
as provided by the "Safety" Service Manual, part
number 720108000000, as well as the respective
national deviations.
GB
Table of Contents
Page
General Section .................................. 1-2…1-20
Test Equipment / Jigs .................................................................. 1-2
Specifications ............................................................................... 1-3
Service Instructions ...................................................................... 1-4
Operating Hints .......................................................................... 1-13
–WT-AV1 .................................................................................. 1-19
Adjustment Procedures................................ 2-2
Layout of the PCBs
and Circuit Diagrams ......................... 3-1…3-20
Block Circuit Diagram .................................................................. 3-1
–Overview ................................................................................... 3-1
–Main Board ................................................................................ 3-2
Main Board ................................................................................... 3-3
–Power Supply (M1) ................................................................... 3-6
–Main Computer (M2) ................................................................. 3-7
–SVGA Converter (M3) ............................................................... 3-8
–Video Converter (M4) ................................................................ 3-9
–Teletext, EURO-AV Input (M5) ............................................... 3-10
–Image Processor (M6) ............................................................ 3-11
–Memory (M7) ........................................................................... 3-12
–LCD Display Driver (M8) ......................................................... 3-13
–Audio Processor (M9) ............................................................. 3-14
–Audio Amplifier (M10) ............................................................. 3-15
Keyboard (KB) ........................................................................... 3-15
LED Board (LED) ....................................................................... 3-16
Tuner Board (TU) ....................................................................... 3-16
Converter (C) ............................................................................. 3-17
Oscillograms .............................................................................. 3-19
Exploded View and
Spare Parts List .................................... 4-1…4-3
Test Pattern .................................... PDF 46…47
1bit ........................................................................................ PDF 46
Colorbar ................................................................................ PDF 47
D
Inhaltsverzeichnis
Seite
Allgemeiner Teil ................................. 1-2…1-20
Messgeräte / Messmittel .............................................................. 1-2
Technische Daten ........................................................................ 1-3
Servicehinweise ........................................................................... 1-4
Bedienhinweise ............................................................................ 1-7
–WT-AV1 .................................................................................. 1-19
Abgleichvorschriften .................................... 2-1
Platinenabbildungen
und Schaltpläne ................................. 3-1…3-20
Blockschaltplan ............................................................................ 3-1
–Übersicht ................................................................................... 3-1
–Hauptplatte ................................................................................ 3-2
Hauptplatte ................................................................................... 3-3
–Netzteil (M1) .............................................................................. 3-6
–Hauptrechner (M2) .................................................................... 3-7
–SVGA-Konverter (M3) ............................................................... 3-8
–Video-Konverter (M4) ................................................................ 3-9
–Teletext, EURO-AV-Eingang (M5) .......................................... 3-10
–Bild-Prozessor (M6) ................................................................ 3-11
–Speicher (M7) ......................................................................... 3-12
–LCD-Display-Treiber (M8) ....................................................... 3-13
–Audio-Prozessor (M9) ............................................................. 3-14
–Audio-Endstufe (M10) ............................................................. 3-15
Keyboard (KB) ........................................................................... 3-15
LED-Platte (LED) ....................................................................... 3-16
Tuner-Platte (TU) ....................................................................... 3-16
Konverter (C) ............................................................................. 3-17
Oszillogramme ........................................................................... 3-19
Explosionszeichnung
und Ersatzteilliste ................................ 4-1…4-3
Testbilder ........................................ PDF 46…47
1bit ........................................................................................ PDF 46
Colorbar ................................................................................ PDF 47
General Section
Test Equipment / Jigs
Variable isolating transformer Frequency counter
Dual channel oscilloscope Colour generator
Digital multimeter AF generator
Computer with installed "Acrobat Reader"
–Test pattern "1bit"(PDF page 46) and "Colorbar" (PDF page 47)
Diese Testbilder sind nur in der PDF-Version des Service Manuals
verfügbar.
Allgemeiner Teil
Messgeräte / Messmittel
Regeltrenntrafo Frequenzzähler
Zweikanaloszilloskop Farbgenerator
Digitalmultimeter Tongenerator
Computer mit installiertem "Acrobat Reader"
–Testbild "1bit"(PDF-Seite 46) und "Colorbar" (PDF-Seite 47)
Diese Testbilder sind nur in der PDF-Version des Service Manuals
verfügbar.
THARUS 38 –LCD 38-9210 TOP Allgemeiner Teil / General Section
GRUNDIG Service 1 - 3
Technische Daten / Specifications
THARUS 38 –LCD 38-9210 TOP
TFT LCD Panel
Sichtbares Bild
Visible picture 38cm
Bildschirmdiagonale
Screen diagonal 38cm (15.1")
Maximale Auflösung
Resolution max. 1024x768Pixel
Hintergrundbeleuchtung
Back light je 2 CCFL Lampen oben und unten
je 2 CCFL lamps up und down
Kontrastverhältnis
Contrast ratio 350:1
Leuchtdichte
Brightness 400Cd/m2
Betrachtungswinkel
Viewing angel 45/45°oben/unten, 60/60°links/rechts
45/45°up/down, 60/60°left/right
Display-Trägheit
Response time 25ms (typ.)
Elektronik / Electronic
Programmspeicherplätze
Programme positions 99 + 1AV
Tuner 1 terr. PLL Frequenz Synthesizer Tuning, global Pinning
TV-Normen
TV-Standards PAL, SECAM, über/via AV NTSC 4.43MHz,
B/G, L/L', I, D/K/K'
Stereo Systeme
Stereo systems German A2 (B/G/D/K)
Nicam 5.85MHz (BG, L) + 6.52MHz (I)
Videotext
Teletext 10 Seiten TOP/FLOF-text Level 2,5, VPS
10 pages TOP/FLOF-text level 2.5, VPS
Musikleistung
Music power 2 X 1,5W (2x1 W Sinus)
Anschlüsse Rückwand / Connections Rear Panel
Euro AV 1 FBAS Ein-/Ausgang, RGB Eingang, SBAS Ein-/Ausgang
CCVS in-/output, RGB input, SCVS in-/output
Cinch-AV-Buchse Eingang
Cinch-AV socket input FBAS Eingang, 2x Audio Stereoeingang
CCVS input, 2x audio stereo input
Cinch-AV-Buchse Ausgang
Cinch-AV socket output FBAS Ausgang, 2x Audio Stereoausgang
CCVS output, 2x audio stereo output
Standard VGA / Stereoklinkenstecker
Standard VGA / Stereo Minijack Bildschirmauflösung 1024x768, 56-85Hz Vertikal, 31-69kHz Horizontal, 2x Audio Stereoeingang
Screen resolution 1024x768, 56-85Hz Vertikal, 31-69kHz Horizontal, 2x audio stereo input
S-Videoeingangsbuchse
S-Video input socket 4-polige Hosidenbuchse
4-pin mini-Din
Kopfhörerbuchse
Headphone jack Stereoklinkenbuchse mit Lautsprecher Abschaltung (3,5mm)
Stereo Minijack with Speaker cut off (3.5mm)
Netzteil / Mains Stage
Netzspannung (Regelbereich)
Mains voltage (variable) 100-240V AC (AC/DC Adapter 12V, 5A)
Netzfrequenz
Mains frequency 50 / 60Hz
Leistungsaufnahme
Power consumption ca. 45W
Standby < 3W
Allgemeiner Teil / General Section THARUS 38 –LCD 38-9210 TOP
1 - 4 GRUNDIG Service
Servicehinweise
Leitungsverlegung
Nach erfolgter Reparatur ist es notwendig, die Leitungsführung wieder
in den werkseitigen Zustand zu versetzen um evtl. spätere Ausfälle
oder Störungen zu vermeiden.
1. Öffnen des Gerätes
–Vor dem Öffnen des Gerätes dieses vom Netz trennen.
–Sicherheitshinweise beachten (siehe Sicherheit-Service-Manual,
Material Nummer 720108000000).
1.1 Rückwand
Hinweis: TV-Gerät auf eine weiche kratzfreie Unterlage legen.
–Gerätefußausbauen:
–Gerätefußneigen.
–4 Schrauben A(Fig. 1) herausdrehen.
–Abdeckung
B
(Fig. 1) unten anheben und abnehmen.
–8 Schrauben
C
(Fig. 2) herausdrehen.
–Gerätefußabnehmen.
–3 Schrauben D(Fig. 2) herausdrehen.
–Tuner-Platte so weit nach rechts schieben bis die Antennenbuchse
nicht mehr in der Rückwand ist.
–Schraube Pund 7 Schrauben E(Fig. 1) herausdrehen.
–Geräterückwand abnehmen.
Hinweis: Für den Betrieb mit offener Rückwand ist die Tuner-Platte
und der Gerätefußwieder festzuschrauben.
2. Ausbauhinweise
2.1 Hauptplatte
–3 Schrauben F(Fig. 3) herausdrehen.
–Blende abnehmen.
–2 Stehbolzen G(Fig. 3) herausdrehen.
–8 Schrauben
H
(Fig. 3) herausdrehen.
–Abschirmblech abnehmen.
–8 Schrauben J(Fig. 4) herausdrehen.
–Gegebenenfalls Steckverbindungen lösen.
2.2 Konverter
–2 Schrauben I(Fig. 3) herausdrehen.
–Konverter abnehmen und gegebenenfalls Steckverbindungen lösen.
Achtung: Bei der Montage ist darauf zu achten, dass die Schutzab-
deckungen
S
(Fig. 3) der Hochspannungs-Trafos
wieder angebracht sind.
2.3 Display
–3 Schrauben
F
(Fig. 3) herausdrehen.
–Blende abnehmen.
–2 Stehbolzen G(Fig. 3) herausdrehen.
–8 Schrauben
H
(Fig. 3) herausdrehen.
–Abschirmblech abnehmen.
–10 Schrauben L(Fig. 4) herausdrehen.
–Steckverbindungen (CN92M, CN2, CN3, Fig. 4) lösen.
–Trägerblech vorsichtig abnehmen und dabei die Leitungen
(CN92M, CN2, CN3, Fig. 4) durch das Trägerblech schieben.
2.4 Hintergrundbeleuchtung
–Display ausbauen (Punkt 2.3).
–Schrauben
M
(Fig. 5) von der Frontseite herausdrehen.
–Kunststoffteile
N
(Fig. 6) von der Rückseite herausnehmen
–Anschlussleitungen der Hintergrundbeleuchtung ausfädeln.
–Hintergrundbeleuchtungen (Leuchtstäbe) vorsichtig herausziehen.
2.5 Keyboard
–Display ausbauen (Punkt 2.3).
–2 Schauben
K
(Fig. 4) herausdrehen.
–Keyboard nach unten herausnehmen.
2.6 LED-Platte
–2 Schrauben O(Fig. 4) herausdrehen.
–LED-Platte herausnehmen.
Service Instructions
Wiring
On completion of the repairs the leads must be laid out as originally
fitted at the factory to avoid later failures or disturbances.
1. Opening the Set
–Disconnect the set from the mains before opening it.
–Observe the safety instructions (see Safety Service Manual, part
number 720108000000)
1.1 Rear Panel
Note: Place the TV set on a soft surface.
–Remove the foot:
–Tilt the foot.
–Undo the 4 screws A(Fig. 1).
–Lift the cover
B
at the bottom and remove it (Fig. 1).
–Undo the 8 screws
C
(Fig. 2).
–Remove the foot.
–Undo the 3 screws
D
(Fig. 2).
–Slide the tuner board to the right until the antenna socket is exposed
from the rear panel.
–Undo the screw
P
and the 7 screws E(Fig. 1).
–Remove the rear panel.
Note: For the operation with removed rear panel it is necessary
to refit the tuner board and the foot.
2. Disassembly Instructions
2.1 Main Board
–Undo the 3 screws
F
(Fig. 3).
–Remove the panel.
–Undo the 2 stud bolts
G
(Fig. 3).
–Undo the 8 screws H(Fig. 3).
–Remove the sheet metal cover.
–Undo the 8 screws
J
(Fig. 4).
–Disconnect the connectors if necessary.
2.2 Converter
–Undo the 2 screws I(Fig. 3).
–Remove the converter and unplug the connectors if necessary.
Attention: When reassembling the set, make sure that the protec-
tive covers
S
(Fig. 3) of the high voltage transformer are
refit.
2.3 Display
–Undo the 3 screws F(Fig. 3).
–Remove the panel.
–Undo the 2 stud bolts G(Fig. 3).
–Undo the 8 screws H(Fig. 3).
–Remove the sheet metal cover.
–Undo the 10 screws L(Fig. 4).
–Unplug the connectors (CN92M, CN2, CN3, Fig. 4).
–Carefully remove the carrier sheet. In doing that, push the leads
(CN92M, CN2, CN3, Fig. 4) through the sheet.
2.4 Back Light
–Remove the display (Point 2.3).
–Undo the screws M(Fig. 5) from the front side.
–Remove the plastic parts N(Fig. 6) from the rear side.
–Unthread the connection leads from the back light.
–Carefully pull out the back light (fluorescent lamps).
2.5 Keyboard
–Remove the display (Point 2.3).
–Undo the 2 screws
K
(Fig. 4).
–Remove the keyboard to the down side.
2.6 LED Board
–Undo the 2 screws O(Fig. 4).
–Remove the LED board.
THARUS 38 –LCD 38-9210 TOP Allgemeiner Teil / General Section
GRUNDIG Service 1 - 5
Fig. 5 Fig. 6
M
Fig. 1 Fig. 2
Fig. 3
Fig. 4
A
B
E
E
E
C
D
C
N
N
M
J
LL
K
CN92M
CN2
CN3
O
P
F
H
I
G
H
H
R
S
Allgemeiner Teil / General Section THARUS 38 –LCD 38-9210 TOP
1 - 6 GRUNDIG Service
3. Wichtige Masseverbindungen!
Beim Zusammenbau des Gerätes ist darauf zu achten, dass die
Masseverbindungen zwischen den einzelnen Baugruppen (Haupt-
platte, Konverter, Tuner-Platte, Keyboard und LED-Platte) gewähr-
leistet sind. Dabei müssen die Masseschellen
R
(Fig. 3) und das
Abschirmblech der Hauptplatte wieder angebracht sein.
Des Weiteren ist darauf zu achten, dass das Gerät entsprechend dem
werkseitigen Zustand zusammengebaut ist um spätere Störungen
oder Ausfälle zu vermeiden.
4. Durchführen von Messungen
Bei Messungen mit dem Oszilloskop an Halbleitern sollten Sie nur
Tastköpfe mit 10:1 - Teiler verwenden. Außerdem ist zu beachten,
dass nach vorheriger Messung mit AC-Kopplung der Koppelkonden-
sator des Oszilloskops aufgeladen sein kann. Durch die Entladung
über das Messobjekt können Bauteile beschädigt werden.
5. Messwerte und Oszillogramme
Bei den in den Schaltplänen und Oszillogrammen angegebenen
Messwerten handelt es sich um Näherungswerte!
3. WARNING: Chassis Connections!
WhenreassemblingtheTVset, make sure thatthegroundconnections
between the individual componentries (main board, converter, tuner
board, keyboard, and LED board) are restored. In doing that, it is
important to refit the ground straps R(Fig. 3) and the screening sheet
of the main board.
In addition, make sure that the set is reassembled as originally at the
factory to avoid later disturbances and failures.
4. Carrying out Measurements
When making measurements on semi-conductors with an oscillo-
scope, ensure that the test probe is set to 10:1 dividing factor. If the
previous measurement was made on AC input, please note that the
coupling capacitor in the oscilloscope will be charged. Discharge via
the item being checked can damage the components.
5. Measured Values and Oscillograms
The measured values given in the circuit diagrams and oscillograms
are approximates!
THARUS 38 –LCD 38-9210 TOP Allgemeiner Teil / General Section
GRUNDIG Service 1 - 7
Bedienhinweise Dieses Kapitel enthält Auszüge aus der Bedienungsanleitung. Weitergehende Informationen entnehmen Sie bitte der
gerätespezifischen Bedienungsanleitung, deren Materialnummer Sie in der entsprechenden Ersatzteilliste finden.
DEUTSCH
5
AUF EINEN BLICK
__________________________________________________________
Die Bedienelemente des Fernsehgerätes
–
P+Programmwahl
Schaltet das Fernsehgerät aus Stand-by ein
–
z+Lautstärke
AV/OK Wählt zwischen Fernsehbetrieb, AV-Betrieb,
S-VHS-Betrieb, PC-Monitor-Betrieb;
Aktiviert Funktionen im Menü
iRuft das Menüdes Fernsehgerätes auf
Ǽ
Schaltet das Fernsehgerät ein/aus (Stand-by)
Anschlüsse des Fernsehgerätes
DC IN Anschlussbuchse für Netzteil
EURO AV Euro/AV-Buchse (FBAS)
y
Kopfhörerbuchse
S-VIDEO S-VHS-Eingang
IN VIDEO Bild-Eingang
IN L AUDIO R Tonsignaleingang
OUT VIDEO Bild-Ausgang
OUT L AUDIO R Tonsignalausgang
PC IN AUDIO Tonsignaleingang für PC
PC IN VGA VGA Anschluss für PC
AV/OK
P
DC IN L -AUDIO- RVIDEOL -AUDIO- RVIDEOS-VIDEOSCART
OUTPUT
INTPUT
HEAD PHONE
VGA PC-AUDIO-IN
6
AUF EINEN BLICK______________________________________________________________________
Die Fernbedienung
Ǽ
Schaltet das Fernsehgerät ein und aus (Stand-by)
F
Wählt verschiedene Toneinstellungen
zWählt verschiedene Bildeinstellungen
AV Schaltet um zwischen Fernsehbetrieb, AV-Betrieb, S-VHS-Betrieb
Betrieb als PC-Monitor
1 …0 Programmwahl und Einschalten aus Stand-by,
Eingabe der Videotext-Seitennummern
ĭ
Ton ein/aus (stummschalten)
iRuft das Bildschirmmenüauf
ZZappfunktion
P+, P –Einschalten des Fernsehgerätes aus Bereitschaft,
Programmfortschaltung, Cursor nach oben/unten
ǸǷ Lautstärke, Cursor nach links/rechts
OK Ändern und Aktivieren verschiedener Funktionen
TXT Videotext ein
IJ
Videotext aus
ї
Seitenstop bei Mehrfachseiten
O
Sleeptimer
K
Raumklang ein/aus
Ƒ
Antwortfreigabe bei Videotext
ǵǵǵǵ Farbige Tasten für Videotext-Betrieb
VCR/SAT/ Zur Bedienung der Grundfunktionen eines GRUNDIG-Videorecor-
DVD ders, Satellitenreceivers oder DVD-Players Taste »VCR«, »SAT«
bzw. »DVD«drücken und gedrückt halten. Anschließend
gewünschte Taste drücken.
Welche Funktionen Sie ausführen können, hängt von der Ausstat-
tung des Gerätes ab. Probieren Sie es einfach aus.
Tele Pilot 155 C
Audio
Subtitle
Angle
Return
TitleDisc Menu
VCR DVD
SAT
wt
љ
AV
z
TXT
d
Allgemeiner Teil / General Section THARUS 38 –LCD 38-9210 TOP
1 - 8 GRUNDIG Service
8
Das Menü
Das Menüist die Steuerzentrale Ihres Fernsehgerätes.
Hier können Sie vielfältige Einstellungen vornehmen.
Die Bedienung können Sie sowohl mit den Tasten des Fernsehgerätes als auch
mit der Fernbedienung durchführen. Im weiteren Verlauf der Bedienungsanlei-
tung ist die Bedienung mit der Fernbedienung beschrieben.
Untenstehend sehen Sie eine Übersicht über die Bedienung des Menüs mit den
Tasten des Fernsehgerätes bzw. der Fernbedienung.
Fernseh- Fernbe- Funktion
gerät dienung
iiRuft das Menüauf.
–P + –P + Wählt Zeilen oder Funktionen
auf einer Seite des Menüs.
–z+
ǸǷ
Ändert Einstellungen.
AV/OK OK Bestätigt Funktionen.
Hinweis:
–Wird bei eingeblendetem Menüvom Fernsehgerät kein Bedienbefehl emp-
fangen, wird das Menünach ca. 25 Sekunden automatisch ausgeblendet.
EINSTELLUNGEN
_____________________________________________________________
KONTRAST
HELLIGKEIT
SCHÄRFE
FARBE
BILD
zFML
DEUTSCH
9
Sprache wählen
Sie können bei Ihrem Fernsehgerät zwischen mehreren Dialogsprachen wählen.
1Nach dem Einschalten des Fernsehgerätes Menümit »
i
«aufrufen.
2
Menüpunkt »L«mit »Ƿ«wählen und mit »OK«aufrufen.
3
Zeile »SPRACHE«mit »P–«wählen und mit »OK«aufrufen.
4
Gewünschte Sprache mit »Ƿ«oder »Ǹ«wählen.
Fernseh-Programme einstellen –automatisch
Das Fernsehgerät ist mit einem automatischen Programmsuchlauf ausgestattet.
Sie starten den Suchlauf und können danach die Fernseh-Programme in der Rei-
henfolge Ihrer Wahl sortieren.
Es stehen 99 Programmplätze für Fernseh-Programme zur Verfügung, die belie-
big mit Fernseh-Programmen von der Antenne oder vom Kabelanschluss belegt
werden können.
1
Menümit »
i
«aufrufen.
2
Menüpunkt »L«mit »Ƿ«wählen und mit »OK«bestätigen.
3
»SENDERSUCHE«mit »P–«wählen und mit »OK«bestätigen.
EINSTELLUNGEN
________________________________________________________________________
EINSTELLUNG
INFORMATION
SENDERSUCHE
SPRACHE
z
FML
FUNKTION
EINSTELLUNG
INFORMATION
SENDERSUCHE
SPRACHE
z
FML
FUNKTION
THARUS 38 –LCD 38-9210 TOP Allgemeiner Teil / General Section
GRUNDIG Service 1 - 9
10
4
»ATS-SUCHLAUF«mit »P–«wählen und mit »OK«bestätigen.
5
Norm »PAL/SECAM«oder »SECAM L«mit »P–«wählen und mit »OK«
bestätigen.
–Das Menü»ATS-SUCHLAUF«wird eingeblendet und der Suchlauf startet.
–Der Suchlauf kann –je nach Anzahl der zu empfangenden Fernseh-
Programme –eine Minute und länger dauern.
–Nach dem Suchvorgang schaltet das Fernsehgerät auf Programmplatz 1
und das Menü»SORTIERUNG«wird eingeblendet.
Fernseh-Programme sortieren
1
Gewünschtes Programm in der Zeile »VON«mit »
Ǹ
«oder »
Ƿ
«wählen.
2
»NACH«mit »P–«wählen und mit »
Ǹ
«oder »
Ƿ
«gewünschten
Programmplatz, auf dem das Programm gespeichert werden soll, wählen.
3
»SPEICH.«mit »P–«wählen und mit »
Ǹ
«oder »
Ƿ
«Programmplatz spei-
chern.
Hinweise:
–Weitere Fernseh-Programme sortieren, dazu die Pkt.1 bis 3 wiederholen.
–Wird vom Fernsehgerät kein Bedienbefehl empfangen, wird das Menü
nach ca. 25 Sekunden ausgeblendet. Das Menü»SORTIERUNG«kann
dann auch manuell wieder aufgerufen werden. Dazu »i«drücken, mit
»P–«»ABSTIMMUNG«wählen und »SORTIERUNG«mit »OK«aufrufen.
4
Einstellung beenden, dazu »i«sooft drücken, bis das Menüausgeblendet
wird.
EINSTELLUNGEN________________________________________________________________________
SORTIERUNG
ATS-SUCHLAUF
MAN. SENDERSUCHE
FEIN ABSTIMMUNG
PROG ÜBERSP.
ABSTIMMUNG
VON : 1
NACH : 1
SPEICH.
ǸǷ
: KANALAUSWAHL
SORTIERUNG
ATS-SUCHLAUF
PAL/SECAM
UHF
MENU : STOP
ǸǷ
18
Automatisches Ausschalten (Sleep Timer)
Es kann für das Fernsehgerät eine Ausschaltzeit eingegeben werden. Das Fern-
sehgerät schaltet nach Ablauf der eingestellten Zeit (max. 180 Minuten) aus.
1Ausschaltzeit eingeben, dazu »
O
«sooft drücken, bis die gewünschte Aus-
schaltzeit erreicht ist. Mit jedem Tastendruck erhöht sich die Ausschaltzeit wie
folgt: 10 min, 20 min, 30 min, 60 min, 90 min, 120 min, 150 min, 180 min,
aus.
Kindersicherung
Sie können einzelne Programmplätze sperren. Die gesperrten Programmplätze
können nur noch mit »1…0«der Fernbedienung gewählt werden.
Bewahren Sie die Fernbedienung außerhalb der Reichweite Ihrer Kinder auf,
können die Programme nur noch mit »–P +«am Fernsehgerät gewählt wer-
den. Dabei werden die gesperrten Programmplätze übersprungen.
1
Menümit »
i
«aufrufen.
2
Menüpunkt »L«mit »Ƿ«wählen und mit »OK«bestätigen.
3
»ABSTIMMUNG«mit »P–«wählen und mit »OK«bestätigen.
4
»PROG. ÜBERSP.«mit »P–«wählen und mit »OK«bestätigen.
5
»Mit »P–«oder »P+«das Fernsehprogramm wählen, das übersprungen
werden soll.
6
»Mit »Ǹ«das Fernsehprogramm mit ausschließen.
Hinweis:
Soll das Fernsehprogramm wieder hinzugefügt werden, Schritte 1-5 wieder-
holen und im Schritt 6»Ƿ«drücken.
Die gesperrten Programme können auch mit»P–«oder »P+«der Fernbe-
dienung gewählt werden..
KOMFORTFUNKTIONEN
_________________________________________
SLEEP
30
SORTIERUNG
ATS-SUCHLAUF
MAN. SENDERSUCHE
FEIN ABSTIMMUNG
PROG ÜBERSP.
ABSTIMMUNG
KANAL ÜBERSP.
P1 HINZUGEFÜGT
Ǹ:ÜBERSP. Ƿ: ZEIGEN
Allgemeiner Teil / General Section THARUS 38 –LCD 38-9210 TOP
1 - 10 GRUNDIG Service
24
Energieverwaltung
Der Monitor ist mit einem Power Management ausgestattet. Dieses System schal-
tet ihn nach einer bestimmten Zeit ohne Signal in Stand-by. Voraussetzung dafür
ist eine Grafikkarte, die mit dem VESA Standard kompatibel ist. Die Funktion
muss im Betriebssystem des Computers aktiviert werden.
Wird der Monitor vom Computer in Stand-By geschaltet, wird der Bildschirm
dunkel und die Leuchtanzeige an der Vorderseite des Monitors blinkt.
1
Einschalten des Monitors aus Stand-By, dazu Maus bewegen oder eine
Taste an der Tastatur drücken.
Hinweis:
Bevor der Monitor in Stand-by schaltet, erscheint kurzzeitig die Meldung
»ÜNGÜLTIGER MODUS KABEL ODER SIGNAL ÜBERPRÜFEN«.
Bildwiederholfrequenz und Auflösung
Der Monitor ist für folgende Bildwiederholfrequenz und Auflösung geeignet.
Hinweis:
Wurde eine ungültige Bildwiederholfrequenz eingestellt, erscheint am Moni-
tor die Einblendung »UNGÜLTIGER MODUS«.
BETRIEB ALS PC MONITOR
___________________________________
Grafikkarte Auflösung Hor. Frequenz Vert. Frequenz Sync olarität
kHz Hz H/V
720 x 400 31,469 70,087 -/+
VGA 640 x 480 31,469 59,940 -/-
640 x 480 37,500 75,000 -/-
640 x 480 43,269 85,008 -/-
SVGA 800 x 600 46,875 75,000 +/+
800 x 600 53,674 85,061 +/+
1024 x 768 48,363 60,004 -/-
XGA 1024 x 768 60,023 75,029 +/+
1024 x 768 68,677 84,997 +/+
DEUTSCH
25
Anschließen
1
Buchse »VGA«und Monitoranschluss des PC’s mit einem VGA Kabel ver-
binden.
2
Buchse »PC AUDIO IN«und Tonausgang des PC’s mit einem Handelsübli-
chen Audiokabel verbinden.
Bildgeometrie einstellen
1
Menümit »
i
«aufrufen.
2
Menüpunkt »M«mit »Ƿ«wählen und mit »OK«aufrufen.
3
»AUTOPOSITION«mit »P–«wählen und mit »OK«aufrufen.
Das Bild wird automatisch richtig positioniert.
4
Einstellung beenden, dazu »
i
«sooft drücken, bis das Menüausgeblendet
wird.
Hinweis:
Die Position kann auch manuell eingestellt werden. Dazu nach Punkt
2
die
Zeile »H-POSITION«oder »V-POSITION«wählen, mit »OK«aufrufen und
Position mit »Ǹ«oder »Ƿ«korrigieren.
Bildgröße und Bildschärfe einstellen
1
Menümit »
i
«aufrufen.
2
Menüpunkt »L«mit »Ƿ«wählen und mit »OK«bestätigen.
3
»EINSTELLUNG«mit »P–«wählen und mit »OK«bestätigen.
BETRIEB ALS PC-MONITOR
______________________________________________________
H-POSITION
V-POSITION
AUTOPOSITION
GEOMETRIE
EINSTELLUNG
INFORMATION
SENDERSUCHE
SPRACHE
FUNKTION
THARUS 38 –LCD 38-9210 TOP Allgemeiner Teil / General Section
GRUNDIG Service 1 - 11
26
4
»AUTO-EINST.«mit »P–«wählen und mit »OK«bestätigen.
Die Bildgröße und Bildschärfe wird automatisch eingestellt.
5
Einstellung beenden, dazu »i«sooft drücken, bis das Menüausgeblendet
wird.
Hinweis:
Die Einstellung kann auch manuell erfolgen. Dazu nach Punkt
2
die Zeile
»TAKT«(= Horizontale Bildgröße) oder »PHASE«(= Bildschärfe) wählen, mit
»OK«aufrufen und Einstellung mit »
Ǹ
«oder »
Ƿ
«korrigieren.
Kontrast, Helligkeit einstellen
1
Menümit »i«aufrufen.
2
Menüpunkt »z«mit »
Ƿ
«wählen und mit »OK«aufrufen.
–Das Menü»BILD«erscheint.
3
Zeile »KONTRAST«, »HELLIGKEIT«oder »FARBTEMPERATUR«mit »P–«
oder »P+«wählen und mit »OK«aufrufen.
4
Mit »
Ǹ
«oder »
Ƿ
«gewünschten Wert einstellen
BETRIEB ALS PC-MONITOR______________________________________________________
KONTRAST
HELLIGKEIT
FARBTEMPERATUR
BILD
AUTO-EINST.
TAKT
PHASE
EINSTELLUNG
DEUTSCH
27
Farbtemperatur einstellen
1Menümit »
i
«aufrufen.
2
Menüpunkt »
z
«mit »Ƿ«wählen und mit »OK«aufrufen.
–Das Menü»BILD«erscheint.
3
»FARBTEMPERATUR«mit »P–«oder »P+«wählen und mit »OK«aufrufen.
Die Farbtemperatur kann durch abrufen fester Werte oder manuell einge-
stellt werden.
Feste Farbtemperatur-Einstellungen wählen
1
Mit »Ǹ«oder »Ƿ«die Einstellung »9300 K«, »STANDARD«, oder
»6500 K«wählen. (9300 K = Bläuliches Bild, STANDARD = Mittelstellung,
6500 K = rötliches Bild, ).
Farbtemperatur manuell einstellen
1
Mit »Ǹ«oder »Ƿ«die Einstellung »BENUTZER«wählen .
2
Mit »
i
«Menüaufrufen.
3
Farbe, die verändert werden soll mit »P–«wählen, mit »Ǹ«oder »Ƿ«ver-
ändern und mit »
i
«bestätigen. Einstellung für alle Farben wiederholen.
Hinweis:
Die veränderten Werte können durch Wahl von »RESET«wieder zurückge-
stellt werden.
BETRIEB ALS PC-MONITOR
______________________________________________________
MODUS :STANDARD
KONTRAST
HELLIGKEIT
FARBTEMPERATUR
BILD
MODUS: BENUTZER
ANPASSUNG ROT
ANPASSUNG BLAU
ANPASSUNG GRÜN
POLARIS. ROT
POLARIS. BLAU
POLARIS. GRÜN
RESET
FARBTEMPERATUR
Allgemeiner Teil / General Section THARUS 38 –LCD 38-9210 TOP
1 - 12 GRUNDIG Service
28
Fernseh-Programme einstellen –manuell
1
Menümit »i«aufrufen.
2
Menüpunkt »L«mit »
Ƿ
«wählen und mit »OK«bestätigen.
3
»ABSTIMMUNG«mit »P–«wählen und mit »OK«bestätigen.
4
»MAN. ABSTIMMUNG«mit »P–«wählen und mit »OK«bestätigen.
–Das Menü»MAN. ABSTIMMUNG«wird eingeblendet.
5
Gewünschte Farbnorm Norm »AUTO«, »PAL«oder »SECAM«mit »P–«
wählen.
6
Gewünschte Tonnorm »BG«, »DK«, »I«oder »L«mit »P–«wählen.
7
Programmsuche mit »
Ǹ
«oder »
Ƿ
«starten.
–Das Menü»MAN. ABSTIMMUNG«wird eingeblendet und der Suchlauf
beginnt.
–Ist ein Fernsehprogramm gefunden, wird wieder das Menü»MAN.
ABSTIMMUNG«eingeblendet. Ist es das richtige Fernsehprogramm, fah-
ren Sie mit Punkt
8
fort. Ist es nicht das richtige Fernsehprogramm starten
Sie den Suchlauf erneut.
8
»PROG. NR«. mit »P–«wählen und gewünschten Programmplatz mit »
Ǹ
«
oder »
Ƿ
«eingeben.
9
Fernsehprogramm speichern, dazu »SPEICH.«mit »P–«wählen und Fern-
sehprogramm mit »
Ǹ
«oder »
Ƿ
«speichern.
10
Einstellung beenden, dazu »i«sooft drücken, bis das Menüausgeblendet
wird.
SONDERFUNKTIONEN
______________________________________________
MAN. ABSTIMMUNG
P 1 NACH OBEN
UKW-L
ǸǷ
: ABSTIMMUNG
ǸǷ
FARBE : AUTO
TON : BG
SUCHE : -/+
PROG. NR. : P 1
SPEICH.:
ǸǷ
: AUSWAHL
MAN. ABSTIMMUNG
FARBE : AUTO
TON : BG
SUCHE : -/+
PROG. NR. : P 1
SPEICH.:
ǸǷ
: AUSWAHL
MAN. ABSTIMMUNG
DEUTSCH
29
Fernseh-Programme feinabstimmen
1Fernsehprogramm, dessen Feinabstimmung geändert werden wählen.
2Menümit »
i
«aufrufen.
3
Menüpunkt »L«mit »Ƿ«wählen und mit »OK«bestätigen.
4
»ABSTIMMUNG«mit »P–«wählen und mit »OK«bestätigen.
5
»FEIN ABSTIMMUNG«mit »P–«wählen und mit »OK«bestätigen.
–Das Menü»FEIN ABSTIMMUNG«wird eingeblendet.
6
Menümit »
i
«aufrufen.
7
»Fernsehprogramm mit »Ǹ«oder »Ƿ«feinabstimmen.
8
Einstellung beenden, dazu »
i
«sooft drücken, bis das Menüausgeblendet
wird.
Information über den eingestellten Programmplatz
1
Menümit »
i
«aufrufen.
2
Menüpunkt »L«mit »Ƿ«wählen und mit »OK«bestätigen.
3
»INFORMATION«mit »P–«wählen und mit »OK«bestätigen.
Am Bildschirm wird die Information zum Programmplatz angezeigt
(Im Beispiel für den Programmplatz »PC«die eingestellte Bildschirmauflö-
sung)
SONDERFUNKTIONEN
_____________________________________________________________
SORTIERUNG
AUTO-ABSTIMMUNG
MAN. ABSTIMMUNG
FEIN ABSTIMMUNG
KANAL ÜBERSP.
ABSTIMMUNG
FEIN ABSTIMMUNG
P 1
UKW-L
ǸǷ: ABSTIMMUNG
ǸǷ
INFORMATION
1024X768 48,4 KX60.0 HZ
THARUS 38 –LCD 38-9210 TOP Allgemeiner Teil / General Section
GRUNDIG Service 1 - 13
ENGLISH
5
AT A GLANCE
___________________________________________________________________
The TV set controls
–P+Channel selection
Switches on the TV set from standby
–z+Volume
AV/OK Selects between TV mode, AV mode,
SVHS mode, PC monitor mode;
activates functions in the menu
iCalls up the TV set menu
Ǽ
Switches the TV set on/off (standby)
Connections to the TV set
DC IN Connection socket for mains unit
Euro AV Euro/AV jack (CSCC)
yHeadphone socket
S-VIDEO SVHS input
IN VIDEO Picture input
IN L AUDIO R Sound signal input
OUT VIDEO Picture output
OUT L AUDIO R Sound signal output
PC IN AUDIO Sound signal input for PC
PC IN VGA VGA connection for PC
AV/OK
P
DC IN L -AUDIO- RVIDEOL -AUDIO- RVIDEOS-VIDEOSCART
OUTPUT
INTPUT
HEAD PHONE
VGA PC-AUDIO-IN
6
AT A GLANCE ____________________________________________________________________________
Remote control
Ǽ
Switches the TV set on and off (standby)
F
Selects different sound settings
zSelects different picture settings
AV Switches between TV mode, AV mode, SVHS mode operation as a
PC monitor
1 …0 Channel selection and switch on from standby,
input of teletext page numbers
ĭ
Sound on/off (mute)
iCalls up the screen menu
ZZap function
P+, P –Switches on the TV set from standby,
channel advancing, cursor moves up/down
ǸǷ Volume, cursor moves left/right
OK Changes and activates different functions
TXT Teletext on
IJ
Teletext off
ї
Page stop for multiple pages
O
Sleep Timer
K
Spatial on/off
Ƒ
Answer release for teletext
ǵǵǵǵ Coloured keys for teletext mode
VCR/Sat/ To operate the basic functions of a GRUNDIG video recorder,
DVD satellite receiver or DVD player, press the »VCR«, »SAT«or
»DVD«keys and hold down. Then press the desired button.
The functions that are possible depend on the features of your
appliance. Just try it out.
Tele Pilot 155 C
Audio
Subtitle
Angle
Return
TitleDisc Menu
VCR DVD
SAT
wt
љ
AV
z
TXT
d
Operating Hints This chapter contains excerpts from the user manual. For further particulars please refer to the appropriate user manual
the part number of which is indicated in the relevant spare parts list.
Allgemeiner Teil / General Section THARUS 38 –LCD 38-9210 TOP
1 - 14 GRUNDIG Service
8
The menu
The menu is the control centre for your TV set.
Here, you can make a variety of different settings.
You can operate the menu with the buttons on the TV set or with the remote
control. Operating the menu using the remote control is described later in the
operating instructions.
Below, you will find an overview of how to operate the menu using the buttons
on the TV set or the remote control.
TV set Remote control Function
ii
Calls up the menu.
–P + –P +
Selects lines or functions
on one menu page.
–
z+
ǸǷ
Changes settings.
AV/OK OK
Confirms the functions.
Note:
–If no operating command is received by the TV set while the menu is on the
screen, the menu disappears automatically after approx. 25 seconds.
SETTINGS
______________________________________________________________________________
PICTURE
CONTRAST
BRIGHTNESS
SHARPNESS
COLOR
PICTURE
z
FML
ENGLISH
9
Selecting the language
For the TV set, you can select between several dialogue languages.
1After switching on the TV set, call up the menu with »i«.
2Select menu item »L«with »Ƿ«and call up with »OK«.
3Select the »LANGUAGE«line with »P–«and call up with »OK«.
4Select the language required with »Ƿ«or »Ǹ«.
Setting TV channels automatically
The TV set is fitted with an automatic channel position search.
You start the search and can then sort the television channels in an order of your
choice.
There are 99 channel positions available, which can be assigned to television
channels from the aerial or from the cable connection as desired.
1Call up the menu with »i«.
2Select menu item »L«with »Ƿ«and confirmd with »OK«.
3Select »TUNING«with »P–«and confirm with »OK«.
SETTINGS
______________________________________________________________________________
TRACKING
INFORMATION
TUNING
LANGUAGE
z
FML
FUNCTION
TRACKING
INFORMATION
TUNING
LANGUAGE
z
FML
FUNCTION
THARUS 38 –LCD 38-9210 TOP Allgemeiner Teil / General Section
GRUNDIG Service 1 - 15
10
4
Select »AUTO TUNING«with »P–«and confirm with »OK«.
5
Select standard »PAL/SECAM«or »SECAM L«with »P–«and confirm with
»OK«.
–The »AUTO TUNING«menu appears on the screen and the search is started.
–Depending on the number of channels received, the search may take
one minute or longer.
–Following the search, the TV set will switch to channel position 1 and the
»SORT«menu appears on the screen.
Sorting TV channels
1
Select the channel required in the »FROM«line with »
Ǹ
«or »
Ƿ
«.
2
Select »TO«mit »P–«and select the required channel position for the chan-
nel with »
Ǹ
«or »
Ƿ
«.
3
Select »STORE«with »P–«and saved the channel position with »
Ǹ
«or »
Ƿ
«.
Notes:
–To sort additional TV channels, repeat steps 1 to 3.
–If no operating command is received by the TV set, the menu disappears
after approx. 25 seconds. The »SORT«menu can then be called up again
manually. To do this, press »
i
«, select »TUNING«with »P–«and call up
»SORT«with »OK«.
4
Finish the setting, by repeatedly pressing »
i
«until the menu disappears.
SETTINGS
____________________________________________________________________________________
SORT
AUTO-TUNING
MANUAL TUNING
FINE TUNING
CH SKIP
TUNING
FROM : 1
TO : 1
STORE :
ǸǷ
: CH SELECT
SORT
AUTO-TUNING
PAL/SECAM
VHF-L
MENU : STOP
ǸǷ
18
Automatic switch-off (SLEEP TIMER)
A switch off time can be entered for the TV set. The TV set switches itself off after
the set time has passed (max. 180 minutes).
1Enter the switch off time, pressing »O«repeatedly until the switch off time
has been reached. The switch off time increases with each press of the button
as follows: 10 mins, 20 mins, 30 mins, 60 mins, 90 mins, 120 mins,
150 mins, 180 mins, off.
Childproof lock
You can block individual channel positions. The blocked channel positions can
then only be selected with »1…0«on the remote control.
If you keep your remote control in a place to which your children do not have
access, the channels can only be selected with »–P +«on the TV set. The
blocked channel positions are skipped over.
1Call up the menu with »i«.
2Select menu item »L«with »Ƿ«and confirm with »OK«.
3Select »TUNING«with »P–« and confirm with »OK«.
4Select »CH SKIP«with »P–«and confirm with »OK«.
5Select the TV channel which is to be skipped with »P–«or »P+«.
6Exclude the TV channel with »Ǹ«.
Note:
If you wish to include the TV channel again, repeat steps 1-5 and in step 6
press »Ƿ«.
The blocked channels can also be selected with »P–«or »P+«on the re-
mote control.
CONVENIENCE FUNCTIONS
_________________________________
STANDBY
30
SORT
AUTO-TUNING
MANUAL TUNING
FINE TUNING
CH SKIP.
TUNING
CH SKIP
P1 ADDED
Ǹ:
SKIPPED
Ƿ:
NO SKIP
PED
Allgemeiner Teil / General Section THARUS 38 –LCD 38-9210 TOP
1 - 16 GRUNDIG Service
24
Power management
The monitor is equipped with a power management system. After a specific
period of time has passed without a signal, this system switches the screen to
standby. This is only possible with a graphic card which is compatible with the
VESA standard. The function must be activated in the operating system of the
computer.
If the computer monitor is switched to standby, the screen goes dark and the LED
display on the front side of the monitor blinks.
1
Switch the monitor back on from standby by moving the mouse or pressing
a key on the keyboard.
Note:
Before the monitor switches to standby, the message »INVALID MODE
CHECK CABLE or SIGNAL«appears.
Picture repetition frequency and resolution
The monitor is suitable for use with the following picture repetition frequency
and resolution.
Note:
If an invalid picture repetition frequency has been set, the indication
»INVALID MODE«appears on the monitor.
OPERATION AS A PC MONITOR
_____________________
Graphic card Resolution Hor. frequency Vert. frequency Sync polarity
kHz Hz H/V
720 x 400 31,469 70,087 -/+
VGA 640 x 480 31,469 59,940 -/-
640 x 480 37,500 75,000 -/-
640 x 480 43,269 85,008 -/-
SVGA 800 x 600 46,875 75,000 +/+
800 x 600 53,674 85,061 +/+
1024 x 768 48,363 60,004 -/-
XGA 1024 x 768 60,023 75,029 +/+
1024 x 768 68,677 84,997 +/+
ENGLISH
25
Connection
1
Connect the »VGA«jack and the PC monitor connection with a VGA cable.
2Connect the »PC AUDIO IN«jack and the audio output of the PC with a
normal audio cable, available in most electrical stores.
Adjusting the picture geometry
1
Call up the menu with »
i
«.
2Select menu item »M«with »Ƿ«and call up with »OK«.
3Select »AUTOPOSITION«with »P–«and call up with »OK«.
The picture is automatically positioned correctly.
4Finish the setting, by repeatedly pressing »
i
«until the menu disappears.
Note:
The position can also be set manually. To do this, select the »H. POSITION«
or »V. POSITION«line after point 2, call up with »OK«and correct the
position with »Ǹ«or »Ƿ«.
Setting the picture size and sharpness
1
Call up the menu with »
i
«.
2Select menu item »L«with »Ƿ«and confirmd with »OK«.
3Select »SETTING«with »P–«confirm with »OK«.
OPERATION AS A PC MONITOR
___________________________________________
H. POSITION
V. POSITION
AUTO POSITION
GEOMETRY
TRACKING
INFORMATION
TUNING
LANGUAGE
FUNCTION
THARUS 38 –LCD 38-9210 TOP Allgemeiner Teil / General Section
GRUNDIG Service 1 - 17
26
4
Select »AUTO TRACKING«with »P–«and confirm with »OK«.
The picture size and sharpness are set automatically.
5
Finish the setting by repeatedly pressing »
i
«until the menu disappears.
Note:
The setting can also be made manually. To do this, select the line »CLOCK«
(= horizontal picture size) or »PHASE«(= picture sharpness) after point
2
,
call up with »OK«and correct the setting with »
Ǹ
«or »
Ƿ
«.
Setting brightness and contrast
1
Call up the menu with »
i
«.
2
Select menu item »
z
«with »
Ƿ
«and call up with »OK«.
–The »PICTURE«menu appears.
3
Select the »CONTRAST«, »BRIGHTNESS«, or »COLOUR TEMPERAT«line
with »P–«or »P+«and call up with »OK«.
4
Set the required value with »
Ǹ
«or »
Ƿ
«.
OPERATION AS A PC MONITOR
___________________________________________
CONTRAST
BRIGHTNESS
COLOR TEMPERAT
PICTURE
AUTO-TRACKING
CLOCK
PHASE
TRACKING
ENGLISH
27
Setting the colour temperature
1Call up the menu with »i«.
2Select menu item »
z
«with »Ƿ«and call up with »OK«.
–The »PICTURE«menu appears.
3Select »COLOUR TEMPERAT«with »P–«or »P+«and call up with »OK«.
The colour temperature can be set by calling up fixed values or by setting
manually.
Select the fixed colour temperature settings
1
Select the »9300 K«, »STANDARD«, or
»6500 K«setting with »Ǹ«or »Ƿ«9300 K = blue picture, STANDARD =
standard setting, 6500 K = red picture).
Setting the colour temperature manually
1
Select the »USER«setting with »Ǹ«or »Ƿ«.
2Call up the menu with »
i
«.
3Select the colour to be modified with »P–«, modify with »Ǹ«or »Ƿ«and
confirm with »
i
«. Repeat the setting for all colours.
Note:
The modified values can be set back again with »RESET«.
OPERATION AS A PC MONITOR
____________________________________________
MODE :STANDARD
PICTURE
CONTRAST
BRIGHTNESS
COLOR TEMPERAT
PICTURE
MODE: USER
RED GAIN
BLUE GAIN
GREEN GAIN
RED BIAS
BLUE BIAS
GREEN BIAS
RESET
COLOR TEMPERAT
Allgemeiner Teil / General Section THARUS 38 –LCD 38-9210 TOP
1 - 18 GRUNDIG Service
28
Setting TV channels manually
1
Call up the menu with »
i
«.
2
Select menu item »L«with »
Ƿ
«and confirmd with »OK«.
3
Select »TUNING «with »P–«and confirm with »OK«.
4
Select »MANUAL TUNING«with »P–«and confirm with »OK«.
The »MANUAL TUNING«menu appears.
5
Select the required colour standard norm »AUTO«, »PAL«or »SECAM«
with »P–«.
6
Select the required audio standard »BG«, »DK«, »I«or »L«with »P–«.
7
Start the channel search with »
Ǹ
«or »
Ƿ
«.
–The »MANUAL TUNING«menu appears and the search is started.
–If a TV channel is found, the »MANUAL TUNING«menu appears. If the TV
channel is correct, continue with point
8
. If it is not the correct channel,
start the search again.
8
Select »PROG. NO«with »P–«and enter the channel position required
with »
Ǹ
«or »
Ƿ
«.
9
Save the channel position, selecting »STORE«with »P–«and saving the TV
channel with »
Ǹ
«or »
Ƿ
«.
10
Finish the setting, pressing »
i
«repeatedly until the menu disappears.
SPECIAL FUNCTIONS
__________________________________________________
MANUAL TUNING
P 1 UPWARDS
VHF-L
ǸǷ
:TUNING
ǸǷ
COLOR : AUTO
SOUND : BG
SEARCH : -/+
PROG. NO. : P 1
STORE :
ǸǷ
: SELECT
MANUAL TUNING
COLOR : AUTO
SOUND : BG
SEARCH : -/+
PROG. NO. : P 1
STORE :
ǸǷ
: SELECT
MANUAL TUNING
ENGLISH
29
Fine-tuning TV channels
1Select the TV channel for which you wish to change the fine-tuning.
2Call up the menu with »i«.
3Select menu item »L«with »Ƿ«and confirm with »OK«.
4Select »TUNING«with »P–«and confirm with »OK«.
5Select »FINE TUNING«with »P–«and confirm with »OK«.
–The »FINE TUNING«menu appears.
6Call up the menu with »i«.
7Fine-tune the TV channel with »Ǹ«or »Ƿ«.
8Finish the setting, pressing »i«repeatedly until the menu disappears.
Information about the set channel position
1Call up the menu with »i«.
2Select menu item »L«with »Ƿ«and confirm with »OK«.
3Select »INFORMATION«with »P–«confirm with »OK«.
The information regarding the channel position is shown on the screen
(For the »PC«channel position, the set screen resolution).
SPECIAL FUNCTIONS
________________________________________________________________
SORT
AUTO-TUNING
MANUAL TUNING
FINE TUNING
CH SKIP
TUNING
FINE TUNING
P 1
VHF-L
ǸǷ:TUNING
ǸǷ
INFORMATION
1024X768 48,4 KX60.0 HZ
THARUS 38 – LCD 38-9210 TOP Allgemeiner Teil / General Section
GRUNDIG Service 1 - 19
Sender (WT-AV1 Transmitter) anschließen
Hinweis:
Verwenden Sie das Cinch/EURO-AV-Kabel mit der Bezeichnung
„ ransmitter” bzw. „Sender”.
Connecting the WT-AV1 Transmitter
Note:
Use the cinch/EURO-AV cable labelled ” ransmitter” resp. ”Sender”.
Raccordement de l émetteur (Transmitter WT-AV1)
Remarque :
Utilisez le câble Cinch/ EURO-AV portant la désignation ” ransmitter” ou
”Sender”.
Collegamento del trasmettitore (WT-AV1 Transmitter)
Nota
Utilizzare il cavo cinch/EURO-AV con la denominazione ” ransmitter” o
”Sender”.
Zender (WT-AV1 transmitter) aansluiten
Aanwijzing:
Gebruik de Cinch/EURO-AV-kabel met de benaming
” ransmitter” of
”
Sender
” (Zender).
WT-AV 1________________________________________________
ǵXenaro
VIDEO IN
R • AUDIO • L IN
IR CH
DC 9V
DIP ON
I 2 3 4
ANT
CH
DIP ON
I 2 3 4
1
2
3
4
5
6 7
8
Allgemeiner Teil / General Section THARUS 38 –LCD 38-9210 TOP
1 - 20 GRUNDIG Service
THARUS 38 LCD 38-9210 TOP _______________________________________
ĶBetrieb mit WT-AV1
Soll Ihr Fernsehgerät HARUS 38 LCD 38-9210 OP mit dem als Zubehör erhältlichen Sender/Empfänger W -AV1
betrieben werden, muß – entgegen der Bedienungsanleitung (Seite 8) des W -AV1– das dem Fernsehgerät
HARUS 38 LCD 38-9210 OP beiliegende Cinch-Kabel verwendet werden.
1Die farbigen Cinch-Stecker des Kabel mit den entsprechenden Cinch-Buchsen des Empfängers und den Cinch-Buchsen
»INPUT VIDEO L AUDIO R« des Fernsehgerät HARUS 38 LCD 38-9210 OP verbinden.
ķOperation with WT-AV1
If your HARUS 38 LCD 38-9210 OP television is to be operated with the optional W -AV1 receiver/transmitter accessory,
the cinch cable included with the HARUS 38 LCD 38-9210 OP - contrary to the W -AV1's operating instructions (page 8)
- must be used.
1Connect the coloured cinch connectors on the cable to the corresponding cinch sockets on the receiver and the
»INPUT VIDEO L AUDIO R« cinch sockets on the HARUS 38 LCD 38-9210 OP.
ĸUtilisation avec l émetteur-récepteur WT-AV1
Si votre téléviseur HARUS 38 LCD 38-9210 OP doit être utilisé avec l’émetteur-récepteur W -AV1, disponible comme
accessoire, vous devez employer le câble Cinch livré avec le téléviseur HARUS 38 LCD 38-9210 OP conformément à la
notice d’utilisation (page 8) de l’émetteur-récepteur.
1Raccorder les fiches Cinch du câble aux prises Cinch correspondantes du récepteur et aux prises Cinch
»INPUT VIDEO L AUDIO R« du téléviseur HARUS 38 LCD 38-9210 OP.
ńUitrusting met de WT-AV1
Voor het uitrusten van uw V-toestel HARUS 38 LCD 38-9210 OP met de zender/ontvanger W -AV1, dient u, in
tegenstelling tot de informatie in de gebruiksaanwijzing (pagina 8) van de W -AV1, de cinch-kabel te gebruiken die met de
HARUS 38 LCD 38-9210 OP meegeleverd wordt.
1Verbind de gekleurde cinch-stekker van de kabel met de overeenkomstige cinch-bussen van de ontvanger en de cinch-
bussen »INPUT VIDEO L AUDIO R« van de HARUS 38 LCD 38-9210 OP.
ƴFunzionamento con WT-AV1
Se si utilizza il televisore HARUS 38 LCD 38-9210 OP con il trasmettitore/ricevitore W -AV1 disponibile come
accessorio, utilizzare – a differenza di quanto indicato nelle istruzioni per l'uso del W -AV1 (pagina 8) – il cavo Cinch
compreso nel volume di fornitura dell’ HARUS 38 LCD 38-9210 OP.
1Inserire la spina colorata del cavo Cinch nella corrispondente presa Cinch del ricevitore e nella presa Cinch
»INPUT VIDEO L AUDIO R« dell’ HARUS 38 LCD 38-9210 OP.
įServicio con el WT-AV1
Si se emplea el televisor HARUS 38 LCD 38-9210 OP con el emisor/receptor W -AV1 que se puede adquirir como
accesorio, es preciso utilizar el cable de cinc adjunto al HARUS 38 LCD 38-9210 OP, tal y como se describe en las
instrucciones de uso (página 8).
1Conecte la clavija de cinc coloreada del cable a las correspondientes conexiones de cinc del receptor y del »INPUT
VIDEO L AUDIO R« (entradas de vídeo y audio) del HARUS 38 LCD 38-9210 OP.
VIDEO OUT
R • AUDIO • L OUT
CH
DC 9V
DIP ON
I 2 3 4
ANT
L -AUDIO- RVIDEO
OUTPUT
L -AUDIO- RVIDEO
INTPUT
S-VIDEO
HEAD PHONE
SCART

This manual suits for next models

1

Other Grundig TV manuals

Grundig XEPHIA 42 PXW 110-6616 REF User manual

Grundig

Grundig XEPHIA 42 PXW 110-6616 REF User manual

Grundig 55 GFB 6622 User manual

Grundig

Grundig 55 GFB 6622 User manual

Grundig 40 VLE 565 BG User manual

Grundig

Grundig 40 VLE 565 BG User manual

Grundig WF70-3020 User manual

Grundig

Grundig WF70-3020 User manual

Grundig CUC 7350 User manual

Grundig

Grundig CUC 7350 User manual

Grundig DAVIO 14TVD 37-2502 TEXT User manual

Grundig

Grundig DAVIO 14TVD 37-2502 TEXT User manual

Grundig MW 70-2699 FR/TOP User manual

Grundig

Grundig MW 70-2699 FR/TOP User manual

Grundig TORONTO 43 GEF 6955 B Reference guide

Grundig

Grundig TORONTO 43 GEF 6955 B Reference guide

Grundig Xentia MFS 72-4610/8 TOP User manual

Grundig

Grundig Xentia MFS 72-4610/8 TOP User manual

Grundig 40 VLE 525 BG User manual

Grundig

Grundig 40 VLE 525 BG User manual

Grundig 40 GBF 5000 User manual

Grundig

Grundig 40 GBF 5000 User manual

Grundig 32 VLE 786 BL User manual

Grundig

Grundig 32 VLE 786 BL User manual

Grundig T 51-830 Multi/ICN User manual

Grundig

Grundig T 51-830 Multi/ICN User manual

Grundig ST 72-3202/7 TOP User manual

Grundig

Grundig ST 72-3202/7 TOP User manual

Grundig APOLLO 42 PW 110-7505 TOP User manual

Grundig

Grundig APOLLO 42 PW 110-7505 TOP User manual

Grundig 43 GHU 7910 B User manual

Grundig

Grundig 43 GHU 7910 B User manual

Grundig 32 VLE 595 BG User manual

Grundig

Grundig 32 VLE 595 BG User manual

Grundig CUC 2030 N User manual

Grundig

Grundig CUC 2030 N User manual

Grundig 48 VLX 8582 SP User manual

Grundig

Grundig 48 VLX 8582 SP User manual

Grundig 40GUB9773 User manual

Grundig

Grundig 40GUB9773 User manual

Grundig Meglio series User manual

Grundig

Grundig Meglio series User manual

Grundig VISION 2 16-2830 T User manual

Grundig

Grundig VISION 2 16-2830 T User manual

Grundig P 37-070 P 37-730 text/ICN User manual

Grundig

Grundig P 37-070 P 37-730 text/ICN User manual

Grundig 32GFB6629 User manual

Grundig

Grundig 32GFB6629 User manual

Popular TV manuals by other brands

Samsung PN51E8000 E- E-manual

Samsung

Samsung PN51E8000 E- E-manual

Durabrand DCT3203 Service manual

Durabrand

Durabrand DCT3203 Service manual

Samsung UN46C7000WFXZA troubleshooting manual

Samsung

Samsung UN46C7000WFXZA troubleshooting manual

Sony KV-29FQ75A Service manual

Sony

Sony KV-29FQ75A Service manual

Palsonic 6850TGPF owner's manual

Palsonic

Palsonic 6850TGPF owner's manual

Panasonic Viera TC-P65S60 owner's manual

Panasonic

Panasonic Viera TC-P65S60 owner's manual

THOMSON CR14300 Basic service data

THOMSON

THOMSON CR14300 Basic service data

Magnavox MT1331B3 owner's manual

Magnavox

Magnavox MT1331B3 owner's manual

Sanyo DP26648 Service manual

Sanyo

Sanyo DP26648 Service manual

LG RT-29FA65VE Service manual

LG

LG RT-29FA65VE Service manual

JVC AV-29J334/V Service manual

JVC

JVC AV-29J334/V Service manual

Samsung TU43CU7175U C Series user manual

Samsung

Samsung TU43CU7175U C Series user manual

Sanyo 21DN2F Service manual

Sanyo

Sanyo 21DN2F Service manual

JVC I' Art AV-27F802 user guide

JVC

JVC I' Art AV-27F802 user guide

Samsung OH46F user manual

Samsung

Samsung OH46F user manual

Sharp LC-32BD1 quick start guide

Sharp

Sharp LC-32BD1 quick start guide

Panasonic TX-P54Z11E operating instructions

Panasonic

Panasonic TX-P54Z11E operating instructions

ERISSON SF21GA63 Service manual

ERISSON

ERISSON SF21GA63 Service manual

manuals.online logo
manuals.online logoBrands
  • About & Mission
  • Contact us
  • Privacy Policy
  • Terms and Conditions

Copyright 2025 Manuals.Online. All Rights Reserved.