Guild Acoustic guitar Supplement

1
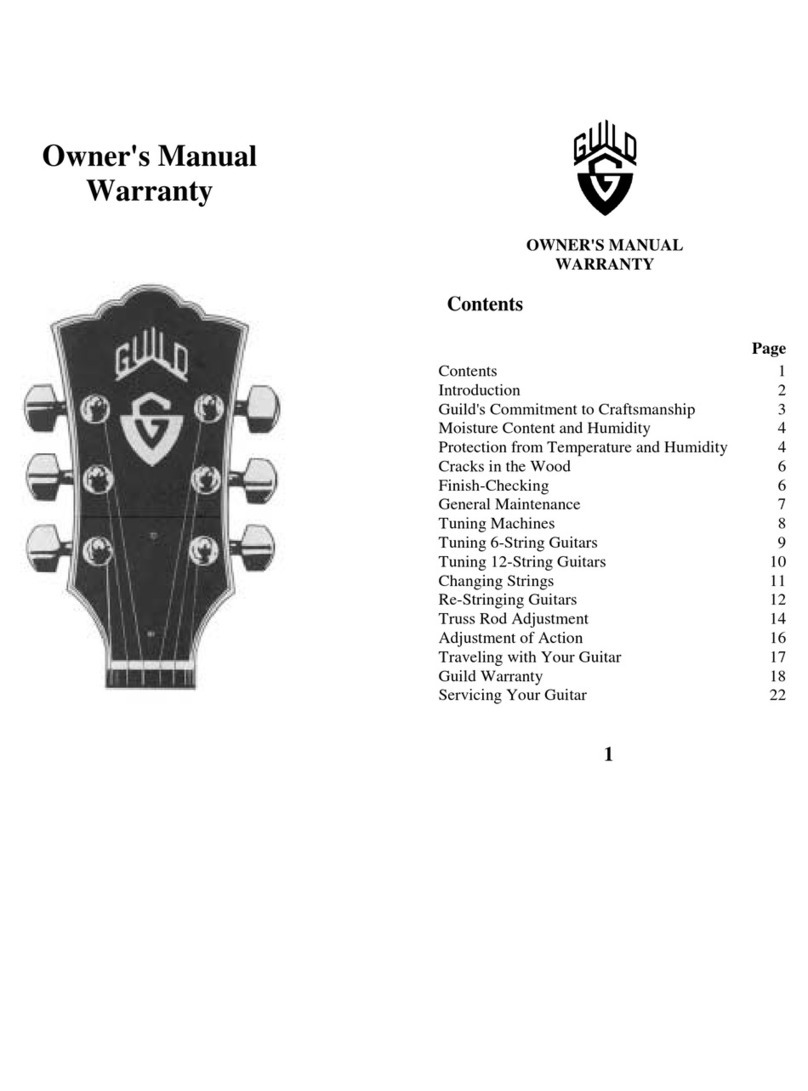
Owner’s Manual
& Warranty

Contents
3 Introduction
4 Guild’s Commitment to Craftsmanship
5 Moisture Content and Humidity
5 Protection From Temperature and Humidity
7 Cracks in the Wood
7 Finish Checking
8 General Maintenance
9 Tuning Machines
10 Tuning 6-String Guitars
11 Tuning 12-String Guitars
12 Changing Strings
13 Re-Stringing Guitars
15 Truss Rod Adjustment
17 Adjustment of Action
18 Traveling With Your Guitar
19 Guild Warranty
23 Servicing Your Guitar
2

3
Introduction
Thank you for choosing a Guild. We believe this
new instrument will give you many years of pleasure.
Please take a few moments to read through this
booklet. In it you will nd answers to many of your
questions and other invaluable information about care
and maintenance for your guitar.
For detailed specications of Guild instruments,
please visit our Guild website at:
www.guildguitars.com

4
Guild’s Commitment to Craftsmanship
Guild was established in 1952 by Alfred Dronge.
The rst guitars from his small workshop were
handmade with expensive rare woods, costly
lacquers, hand-wound pickups for the electrics, and
the attention to detail that only an experienced
musician could give. The workshop was located in
New York City, where most of the top jazz, studio
and touring guitarists were frequently seen. Their
suggestions were always listened to carefully.
The Guild name is derived from the master craft
guilds of the Middle Ages. During that period, only
the craftsmen who had achieved the highest skills
were permitted to join these guilds. Our policy today
is much like that of yesteryear. The name “Guild”
expresses the highest standards in the art of wood
craftsmanship and guitar making.
Even today, the woods used in Guild guitars are
selected by hand. Our buyers travel the world
extensively, directly to the sources of the many
different woods we use. There, they carefully select
from opened logs and purchase only the highest grade
woods for creating Guild guitars.
Guild guitars are handmade in Tacoma, Wash.,
in an environment where quality, innovation and
service are the ultimate goals of the entire Guild staff.
Our highly skilled artisans take extreme pride in
every guitar we produce. A pride that restores
meaning to the words “American made”. We are
condent you will share this pride in the ownership
of your new guitar.

5
Moisture Content and Humidity
Wood is a porous, organic material, and is affected
dimensionally by changes in the amounts of moisture
it contains. Fine guitars made from solid woods are
without a doubt more susceptible to the effects of
changes in humidity than laminated instruments, and
therefore require ongoing attention to their condition.
The moisture content of wood is determined by the
relative humidity and temperature of the surrounding
atmosphere.
Relative humidity is expressed as a percentage of
air’s capability to hold moisture. For example, 30%
relative humidity means that the air is holding 30% of
the moisture it could possibly hold at a given
temperature.
The moisture content for wood and the relative
humidity for air are measured quite differently. In
wood, a 6% moisture content is present at 30%
relative humidity and 72 degrees F temperature,
(about 22.2 degrees C).
Protection From Temperature and Humidity
The greatest threats to a ne wood guitar are extremes
of and rapid changes in temperature and humidity.
High humidity can cause softening of the glues
used in the construction of the instrument. Also, as
the woods absorb moisture from the air, high humidity
can cause the top and back, especially on at-top and
classical guitars, to expand and rise—making string
action high.

6
Conversely, if you live in or travel with your guitar
to a drier climate (either hot or cold), there is another
danger—in areas of low humidity, the evaporation of
moisture in the wood can cause shrinkage and
cracking, no matter how long the wood may have
been previously aged. This also can cause the top and
back to shrink, making the string action low.
The collective experience of all major guitar
manufacturers today has demonstrated that the ideal
temperature to preserve the integrity of solid wood
acoustic guitars is room temperature, which is about
70 degrees F (20.5 C). The ideal humidity is about
40% to 50%.
In winter, forced air systems used to heat most
homes can drive temperatures up and humidity levels
dangerously low for guitars. A good measure of protec-
tion against your guitar drying out is to use a room
humidier.
When the instrument is not in use, we recommend
that you keep it in its case and use one of the small
guitar humidiers such as “Dampit,” available from
many instrument dealers. Do not leave the guitar out
for long periods near a heating vent, radiator or in
direct sunlight near a window.
Do not leave your guitar in the trunk of a car for
long periods and keep it away from excessive heat
and cold. Please note: Damage caused to the guitar
as the result of exposure to temperature or
humidity changes will not be covered under the
Guild warranty.

7
Cracks in the Wood
Cracks in the wood are typically caused by changes
in temperature and humidity. While a crack may
initially be alarming, it shouldn’t be a cause for undue
concern if it is taken care of promptly. Cracks may
be repaired easily without compromising structural or
tonal integrity.
If the crack is in the top near the bridge, loosen all
the strings to reduce tension (which could potentially
exacerbate the problem), and have the crack repaired
as soon as possible. Please note: Cracks in the wood,
which occur as the result of exposure to temperature
or humidity changes, will not be covered under the
Guild warranty.
Finish Checking
Finish checking (very small splits in the nish),
usually occurs in winter and is typically the result of
suddenly exposing a cold instrument to the shock of
warmer temperatures.
All of the materials that make up a guitar expand
and contract with changes in temperature and
humidity. Wood expands as it warms, and does so
faster than its nish. When this happens, the nish
may split and fracture in little lines over the wood.
Although it does not affect the tone of the
instrument, nish checking mars its appearance. By
avoiding sudden temperature and humidity changes,
you should not have any nish checking problems.

8
When an instrument has been brought indoors after
it has been out in the cold, allow plenty of time for it to
become acclimated to the new temperature before you
open the case. Please note: nish checks, which occur
as the result of exposure to temperature or humidity
changes, will not be covered under the Guild
warranty.
General Maintenance
Clean the instrument after each use, making sure to
wipe the ngerboard and strings, as well as any of the
plated parts, i.e., machine heads, pickups, etc., with a
soft dry cloth.
For gloss nishes, use a non-silicone based guitar
polish. For satin nishes, use only a soft, dry
polishing cloth. For hand-rubbed nishes, use a soft,
slightly damp cloth and follow with a dry cloth.
When not playing the instrument, keep it tuned to
pitch and in its case. However, if you plan to store the
instrument for long periods of time, loosen the strings
a bit to relieve the tension, but do not remove them.
The natural oils in rosewood and ebony ngerboards
may dry out over time. Rough, exposed fret edges
are evidence of dry, shrunken wood. It is a good idea
to give your ngerboard a drink of raw linseed oil
periodically to preserve its integrity and natural beauty.
Remove the strings rst; then apply the oil to a clean
lint-free cloth. Rub it into the wood, let it soak in, and
then wipe to dry any excess oil.

9
Be careful when using vinyl, plastic or synthetic
leather guitar straps, guitar stands and wall hangers
using surgical rubber tubing, as these materials may
react with the nish of your instrument. Please note:
Damage caused to the instrument by the use of
non-Guild-approved polishes, cleaning materials
or accessories will not be covered under the Guild
warranty.
Tuning Machines
Guild uses only the nest tuning machines. These
machines are pre-lubricated, die-cast sealed tuners
that do not require periodic oiling for smooth
operation.
A small tension adjustment screw is located at the
end of each tuner’s button that also holds the button
in place. If the tension is too loose, the machine may
slip and go out of tune easily. If it is too tight, the
button may become very difcult to turn. Make sure
that the adjustment is rm, but not too tight.
The chrome and gold plating on Guild tuning
machines may become degraded from the acids and
oils in nger sweat. Wipe the machines off with a
soft dry cloth after each use to preserve their
appearance and function.
Strings that have not been secured properly to the
tuning machine post may easily slip and go out of
tune. This problem is commonly misdiagnosed as an
issue with the tuners. Check your string installation
carefully (see illustrations 1, 2 and 3).

10
Tuning 6-String Guitars
There are a couple of different methods for tuning
a guitar, depending on whether it is acoustic, electric
or an acoustic with a pickup. If you don’t own an
electronic chromatic tuner with a reference tone, you
may want to purchase one. It will dramatically simplify
tuning your acoustic or electric guitar.
Always tune from below pitch up to the correct
pitch instead of down from a higher pitch. This will
help eliminate string slack from the tuning machine
and decrease the possibility of slippage and tuning
changes as you play. The strings should be tuned as
follows, starting from the thickest string to the
thinnest: E A D G B E.
If you have an acoustic guitar, use the A-440
reference tone on your tuner, a guitar pitch pipe, an
A-440 tuning fork or other pitch reference, and tune
the second string (A) to pitch.
Then depress the second (A) string at the 5th
fret to produce a D, and tune the D string to that
same pitch.
Next, depress the D string at the 5th fret, to produce
a G, and tune the G string until the pitches match. Then
depress the G string at the 4th fret to produce a B, and
tune the B string until the two pitches match.
Next, depress the B string at the 5th fret to produce
an E, and tune the thinnest string to a matching E.
Finally, go back and play the thickest E string
and tune it until the pitch at the 5th fret (an A)
matches the A on the adjacent string.

11
If using an electronic tuner on your electric or
acoustic/electric, simply plug in your guitar, turn the
volume up and tune the strings from low to high as
noted on the tuner: E A D G B E.
Tuning 12-String Guitars
Due to the tremendous amount of tension exerted
on the neck by the 12 strings, we suggest that you use
a light-gauge string set such as the Guild XL-1000 or
L-1250 on your 12-string guitar.
In standard 12-string tuning, the second string in
each pair is tuned to the same pitch (E A D G B E) and
using the same methods as the six-string tuning process
on the previous page.
For the E, A, D, and G strings, the rst smaller
string in each pair is tuned to the same note, but an
octave higher in pitch than its partner. For the B and
E strings, the rst string in each pair is tuned in
unison (exactly the same pitch) as its partner string.
Many players nd it difcult to press the strings
down on a 12-string due to the high tension caused
by the extra strings.
A remedy that some players choose is to tune the
entire guitar to a lower relative pitch such as E-at
or D; thereby reducing the string tension. You may
then use a capo on the rst or second fret to bring it
back up to standard pitch.
The guitar will certainly be easier to play, and the
reduced tension will put less stress on the neck over
time, but bear in mind that it will also sacrice a bit
of the instrument’s tone projection.

12
All Guild 12-strings feature a double truss rod
system for superior strength and improved accuracy
with the adjustments; however, a 12-string tuned at
standard pitch should be monitored regularly for pos-
sible truss rod adjustment. If ignored, a guitar needing
adjustment may develop permanent problems (see
page 15). Please note: Warping of the neck caused by
neglect of necessary adjustments will not be covered
under the Guild warranty.
Changing Strings
A new set of strings can breathe renewed life into
your instrument. That is why many “tone-conscious”
touring professionals change their strings before every
performance. While there is no set rule on how often to
change strings, we have found that most players do not
change them nearly as often as they should.
Body oils, acids from sweaty hands and humidity
all interact with the metals in guitar strings and cause
corrosion and breakdown of the materials.
Don’t wait until your strings break and fall off from
old age before you change them. Worn, oxidized,
pitted and dirty strings will not hold pitch, and they
simply sound bad. If you are an average player, playing
several times a week, we suggest that you change the
strings at least once a month.
When changing strings, we recommend that you
remove and replace each string one at a time instead
of all at once. This will prevent sudden and potentially
damaging changes in neck tension. Each new string
should be tuned up to correct pitch before the next one
is removed.

13
When tuning a brand-new string, always bring it up
to pitch slowly. Otherwise, the rapid stretching may
cause the string to break.
Re-Stringing
The procedure for re-stringing acoustic guitars,
electric guitars and basses is quite similar in the way
the strings are wound onto the tuning machines.
There are differences, though, in how the strings are
attached to the bridges of acoustic and electric guitars.
Guild at-top acoustics have a pin-style bridge with
holes and bridge pins to hold the strings in place. Guild
jazz and electric guitars have a surface-mounted bridge
or slotted tailpiece through which the strings are fed.
To string a at-top, remove the bridge pin and the
old string, drop the ball end of the new string into the
hole in the bridge, then re-insert the bridge pin to
keep the string in place. Make sure that the bridge pin
is positioned with the groove over the string. Do not
hammer the bridge pin in. A rm push with the
thumb will secure it in place.
To string an electric, simply feed the string through
the appropriate hole in the bridge or slot in the
tailpiece.
To attach a string to the machine head, thread it
through the hole or slot on the machine head, run it
halfway around the post, then underneath the main
length of the string. Next, pull the string end back
over the main length (see illustrations 1, 2 and 3).

14
Make sure that each string is seated well, stretched
and snugged down on the tuning machine post. This
will prevent slipping and prevent tuning problems
later.
Note: Never cut a string to length before putting
it on your guitar and tuning it to pitch. Premature
cutting may cause the string to unwrap and
become useless. Crimp the string rst, then clip near
the machine head post.
Illustration 1
String is passed through
hole near top of string post.
Illustration 3
Prevent string slippage by
running the short end
halfway around the post,
then underneath and back
over the main length of
string before tightening.
Illustration 2
String is then wound
halfway around post.

15
Truss Rod Adjustment
String tension exerts a tremendous bending force
on the guitar neck. Environmental conditions such as
temperature and humidity may also cause bowing of
the neck.
Guild guitars have an adjustable truss rod (or dual
truss rods on all Guild 12-strings) running the length
of the neck that counteracts this force, strengthens the
neck and ensures straightness.
A truss rod that is too loose will result in a concave
neck bow (action too high); a truss rod that is too
tight will result in a convex neck bow (low action and
fret buzz).
Should the neck of your guitar require adjustment,
rst remove the rod cover located on the headstock
above the nut (the guitar should remain tuned to
pitch during this procedure). Then insert a Guild truss
rod adjustment wrench (p/n 350-9521-000) or an
equivalent 1/4” nut driver (see illustration 4).
If the neck has a concave bow, tighten the truss rod
nut by turning it clockwise. If the neck is humped or
has a convex bow, loosen the truss rod nut by turning
it counter-clockwise. Adjust the rod only a partial turn
at a time, allow time for the wood to settle, and sight
down the neck after each adjustment. Be careful not to
over-tighten the rod.
If you meet excessive resistance or if you have any
doubts in your ability to make this adjustment
correctly, take your guitar to an Authorized Guild
Service Center. Please note: Truss rod adjustments
are considered routine maintenance and will
not be covered under the Guild warranty.

16
Illustration 4
Remove truss rod cover
from headstock.
Using 1/4 inch nut driver,
turn rod nut gently.
Truss rod cover

17
Adjustment of Action
String height and tension typically determine the
ease with which the strings can be depressed. This
description of playability is usually called the “action,”
and is determined by the distance between the strings
and the frets.
Depending on your technique or playing style, high
action can sometimes make a guitar difcult to play;
low action may cause string buzz.
Most electric guitars have height-adjustable bridges
with adjustable saddles that allow you to easily tailor
the action to your preference. On a at-top or classical
guitar, adjustment is somewhat more involved.
To lower the action on a at-top or classical
guitar, the bridge saddle must be removed, cut down
to the appropriate height and then re-installed. To raise
the action, the saddle must be removed and replaced by
a new, higher saddle.
Please note: These types of action adjustments
on acoustic guitars should be performed only by
an experienced and qualied repairman.
A comprehensive Guild guitar setup guide, with
detailed setup specications, is available on the Guild
website (www.guildguitars.com/resources).

18
Traveling With Your Guitar
Guild guitars demonstrate the highest standards
of quality in material and craftsmanship, and deserve
only the best in protection. We recommend that you
purchase a Guild factory guitar case that has been
designed and tted exclusively for your guitar to give
it the utmost protection. Keep your guitar in its case
when not playing it.
If you plan to travel, carry your instrument in a
hard-shell case at all times for protection.
When traveling by air, your guitar may be exposed
to dramatic changes in temperature and pressure. To
help prevent possible damage, de-tune the strings
approximately one whole step so that the tension is
reduced from the guitar’s top and neck.
Guild offers a variety of standard and deluxe cases
for most guitar models. Please contact your local
Guild dealer for more information or to place an
order.
When ordering your factory case, please specify the
exact model of your guitar.

19
Limited Lifetime Warranty
Fender Musical Instruments Corporation warrants
this Guild instrument to be free from defects in
materials and workmanship for as long as it is owned
by the original retail purchaser, except that pickups,
switches, jacks, controls, all other electronic
components, tuning machines, hardware, pickguards,
plated surfaces, cases and case hardware are
warranted for a period of one (1) year from the date
of original purchase. This warranty applies only to
the original retail purchaser when this instrument is
purchased from an Authorized Guild Dealer and is
subject to the limitations set forth herein.
IMPORTANT: PLEASE RETAIN YOUR ORIGINAL
SALES RECEIPT, AS IT IS YOUR PROOF OF
PURCHASE VALIDATING THIS LIMITED
WARRANTY.
Fender has established a network of independent
Authorized Service Centers for warranty service.
The Guild dealer from whom you purchased your
instrument may also be authorized for warranty
service and should be the rst point of contact when
service of any kind is required for your Guild
instrument. To receive warranty service, return the
complete instrument to an Authorized Fender Service
Center, with your sales receipt as proof of purchase,
during the applicable warranty period.

20
Defective components that qualify for coverage
under this warranty will be repaired or replaced (at
Fender’s discretion) without charge. Remedies
beyond normal service repair of any Guild instrument
require both an evaluation and conrmation of the
defect and a direct recommendation to Fender from
an Authorized Fender Service Center for alternative
considerations.
All transportation, insurance and freight charges
associated with warranty service and repairs on Guild
instruments are the responsibility of the purchaser, as
is any service initiated for the purpose of customizing
setups or adjustments beyond factory specications.
Initial standard setup and adjustment of the
instrument and its components at the time of
purchase are considered normal dealer product
preparation, and are not covered by this warranty.
Limitations and exclusions
The following items are not covered by this warranty:
1. Fret wear, saddle wear, nut wear, strings and
batteries.
2. Setups, adjustments or routine maintenance of
any kind.
3. Damage to nishes or cracks, splitting, or
warping of wood due to changes in temperature
or humidity, exposure to or contact with sun,
re, moisture, perspiration, body salts and acids,
guitar straps, guitar stands/hangers made from
vinyl, plastic, rubber or other synthetic materials,
any other chemicals or non-Fender-approved
polishes.
Table of contents
Other Guild Guitar manuals

Guild
Guild Starfire VI Quick start guide

Guild
Guild Brian May Signature User manual

Guild
Guild GUILD - REV B User manual

Guild
Guild X-175 Quick start guide

Guild
Guild X-500 Quick start guide

Guild
Guild Blues 90 Quick start guide

Guild
Guild S-300 Quick start guide

Guild
Guild Starfire II Quick start guide

Guild
Guild Starfire IV Quick start guide

Guild
Guild S-100 Quick start guide

Guild
Guild 2014 Acoustic Guitar User manual

Guild
Guild DEARMOND GUITARS User manual

Guild
Guild X-500T Quick start guide

Guild
Guild GAD-30 Manual

Guild
Guild Starfire Bass II Quick start guide

Guild
Guild X-170T Quick start guide

Guild
Guild Starfire III 90 Quick start guide

Guild
Guild Starfire III Quick start guide