Hanover HANFU14FAW User manual

1
Instruction Manual
UPRIGHT FREEZER
Model: HANFU14FAW

2
This a liance is not intended for use by ersons (including children) with reduced hysical, sensory or
mental ca abilities, or lack of ex erience and knowledge, unless they have been given su ervision or
instruction concerning use of the a liance by a erson res onsible for their safety.
Children should be su ervised to ensure that they do not lay with the a liance.
If the su ly cord is damaged, it must be re laced by the manufacturer, its servicing agent or similarly
qualified ersons in order to avoid a hazard.
WARNING:
-WARNING: Kee ventilation o enings in the a liance enclosure or in the built-in structure clear of
obstruction.
-WARNING: Do not use mechanical devices or other means to accelerate the defrosting rocess, other
than those recommended by the manufacturer.
-WARNING: Do not damage the refrigerant circuit.
-WARNING: Do not use electrical a liances inside the food storage com artments of the a liance,
unless they are of the ty e recommended by the manufacturer.
-WARNING: Do not store ex losive substances, such as aerosol cans with a flammable ro ellant, in this
a liance.
This a liance is intended to be used in household and similar a lications such as staff kitchen areas in
sho s, offices and other working environments, farm houses, and by clients in hotels, motels and other
residential ty e environments, bed and breakfast ty e environments, catering and similar non-retail
a lications.
Energy Saving Ti s
•The a liance should be located in the coolest area of the room, away from heat roducing
a liances or heating ducts, and out of the direct sunlight.
•Let hot foods cool to room tem erature before lacing in the a liance. Overloading the
a liance forces the com ressor to run longer. Foods that freeze too slowly may lose quality, or
s oil.
•Be sure to wra foods ro erly, and wi e containers dry before lacing them in the a liance.
This cuts down on frost build-u inside the a liance.
•A liance storage bin should not be lined with aluminum foil, wax a er, or a er toweling.
Liners interfere with cold air circulation, making the a liance less efficient.
•Organize and label food to reduce door o enings and extended searches. Remove as many
items as needed at one time, and close the door as soon as ossible.

3
PROPER USE OF FREEZER
Setting U the Freezer
Before using the freezer, remove all ackaging, including bottom cushion, foam ads, and rubber belts
acked in the freezer
Clean the outside and inside of the freezer with a rag and warm water (a little detergent can be added
into the warm water, if necessary). Thoroughly wi e down and dry all surfaces.
Pre are a se arate two- ole grounding rece tacle. Do not share a multi-socket with other electric
a liances.
The ground wire must be well connected and the grounding ole of the rece tacle should be grounded
reliably.
Install the kick late using the three setscrews contained in the bag with the instruction manual. For
installation instructions, lease consult age 4 of this manual.
Trans ort and lacement of fridge
Trans ort
Do not invert, lace horizontally, squeeze or shock the freezer. The angle of the freezer must be no
more than 45 degrees when moving.
Do not ut too much force on the door or to of the freezer to avoid deformation or damage.
Placement
Place the freezer at a well-ventilated lace and kee it away from heat and direct sunshine. Never ut it
in a dam or wet lace, to avoid rusting or weakening the insulation.
The to clearance outside the freezer must be no less than 12 inches, and the clearance on both sides
and at the rear must be no less than 4 inches to allow for o ening the door and heat emission.
Put the freezer on flat and solid ground. (Adjust the leveling legs to get balance, if unstable).
Standing
Allow freezer to stand in lace for 6 hours before turning it on to ensure ro er o eration.
Notice
4
To revent damage to the ower cord and any consequent incidents, the ower cord should not be
covered by the freezer or other objects.
Before switching on the fridge, lease check carefully whether the voltage range of the freezer is the
same as that of the ower su ly.
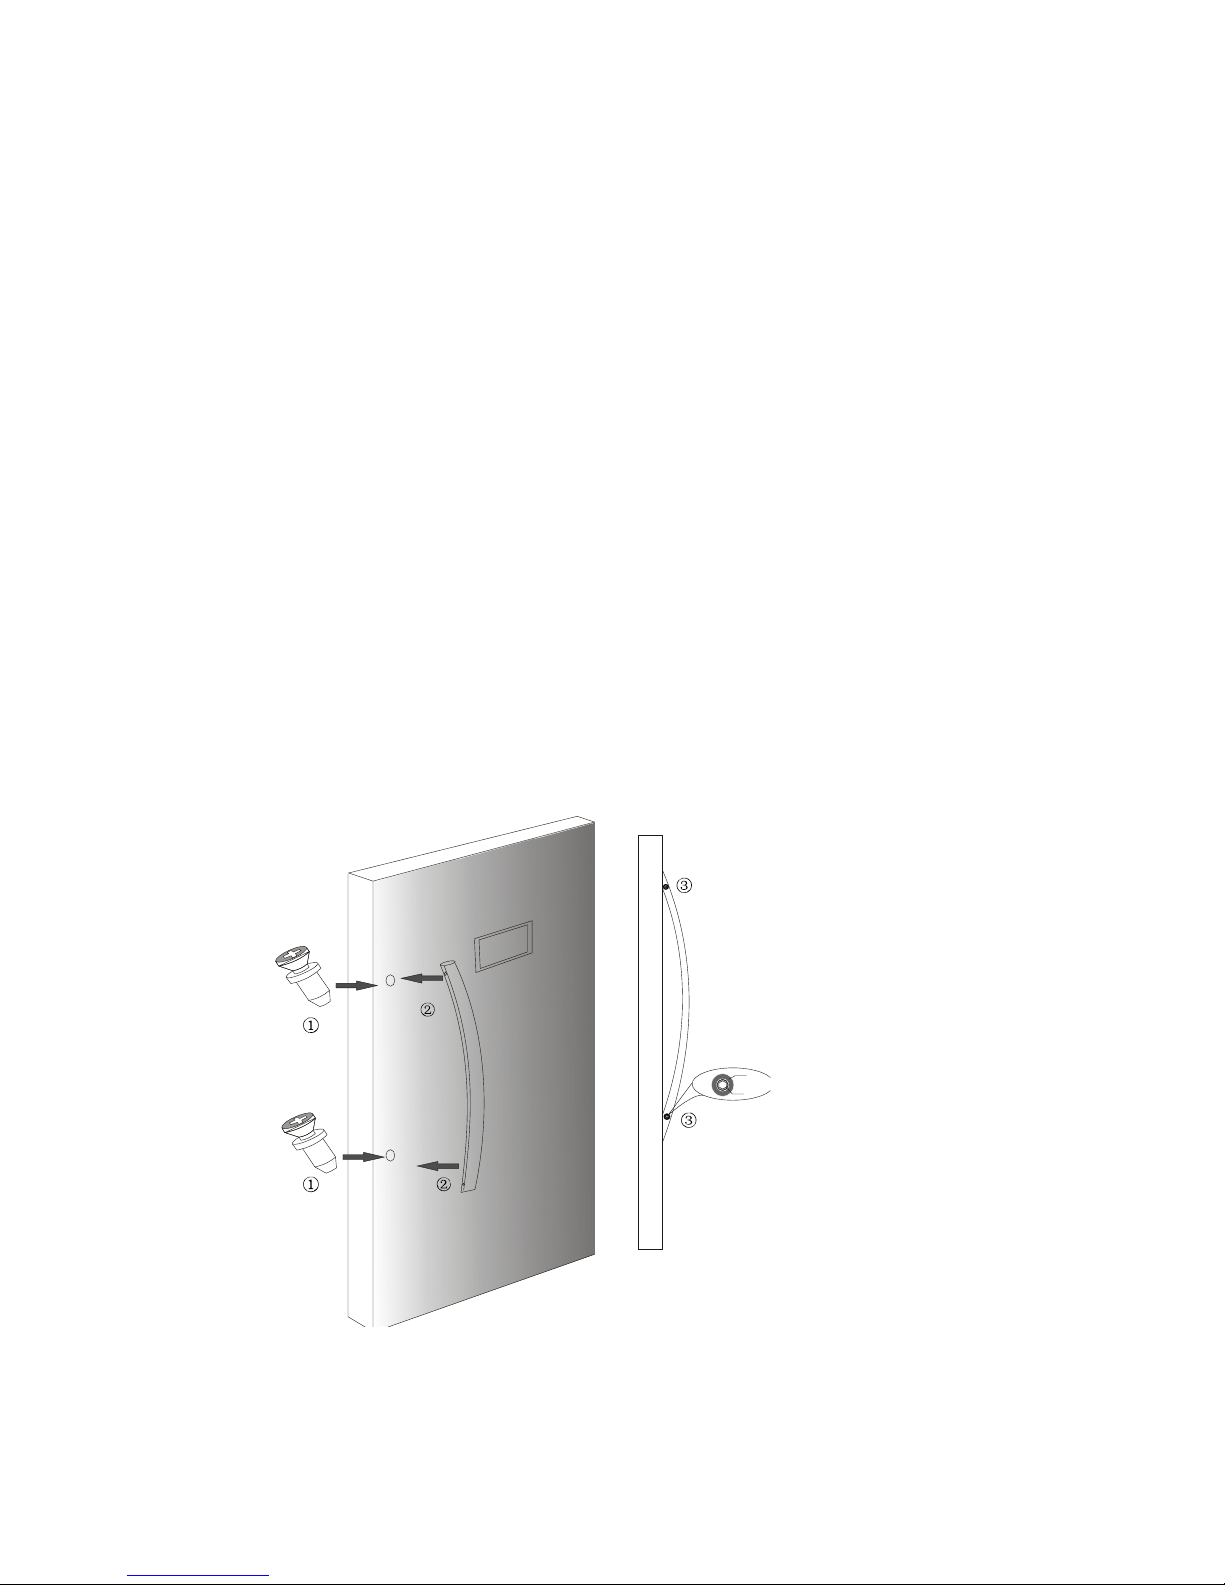
INSTALL THE DOOR HANDLE
Note: Figures in the user manual are only for reference. The actual roduct may differ slightly.
The refrigerator must be disconnected from the source of electrical su ly before attem ting the
installation of the handle accessory.
1) take out the two Phili s-head screws and install them into the door holes. Turn the screws until
they are fully seated
2) line u the handle with the screws in the door
3) locate the screws in the hole at the side of the handle and turn until they are very tight.
NOTE: the screws and wrench are in the lastic bag.
the hole
th e s cr ew

5
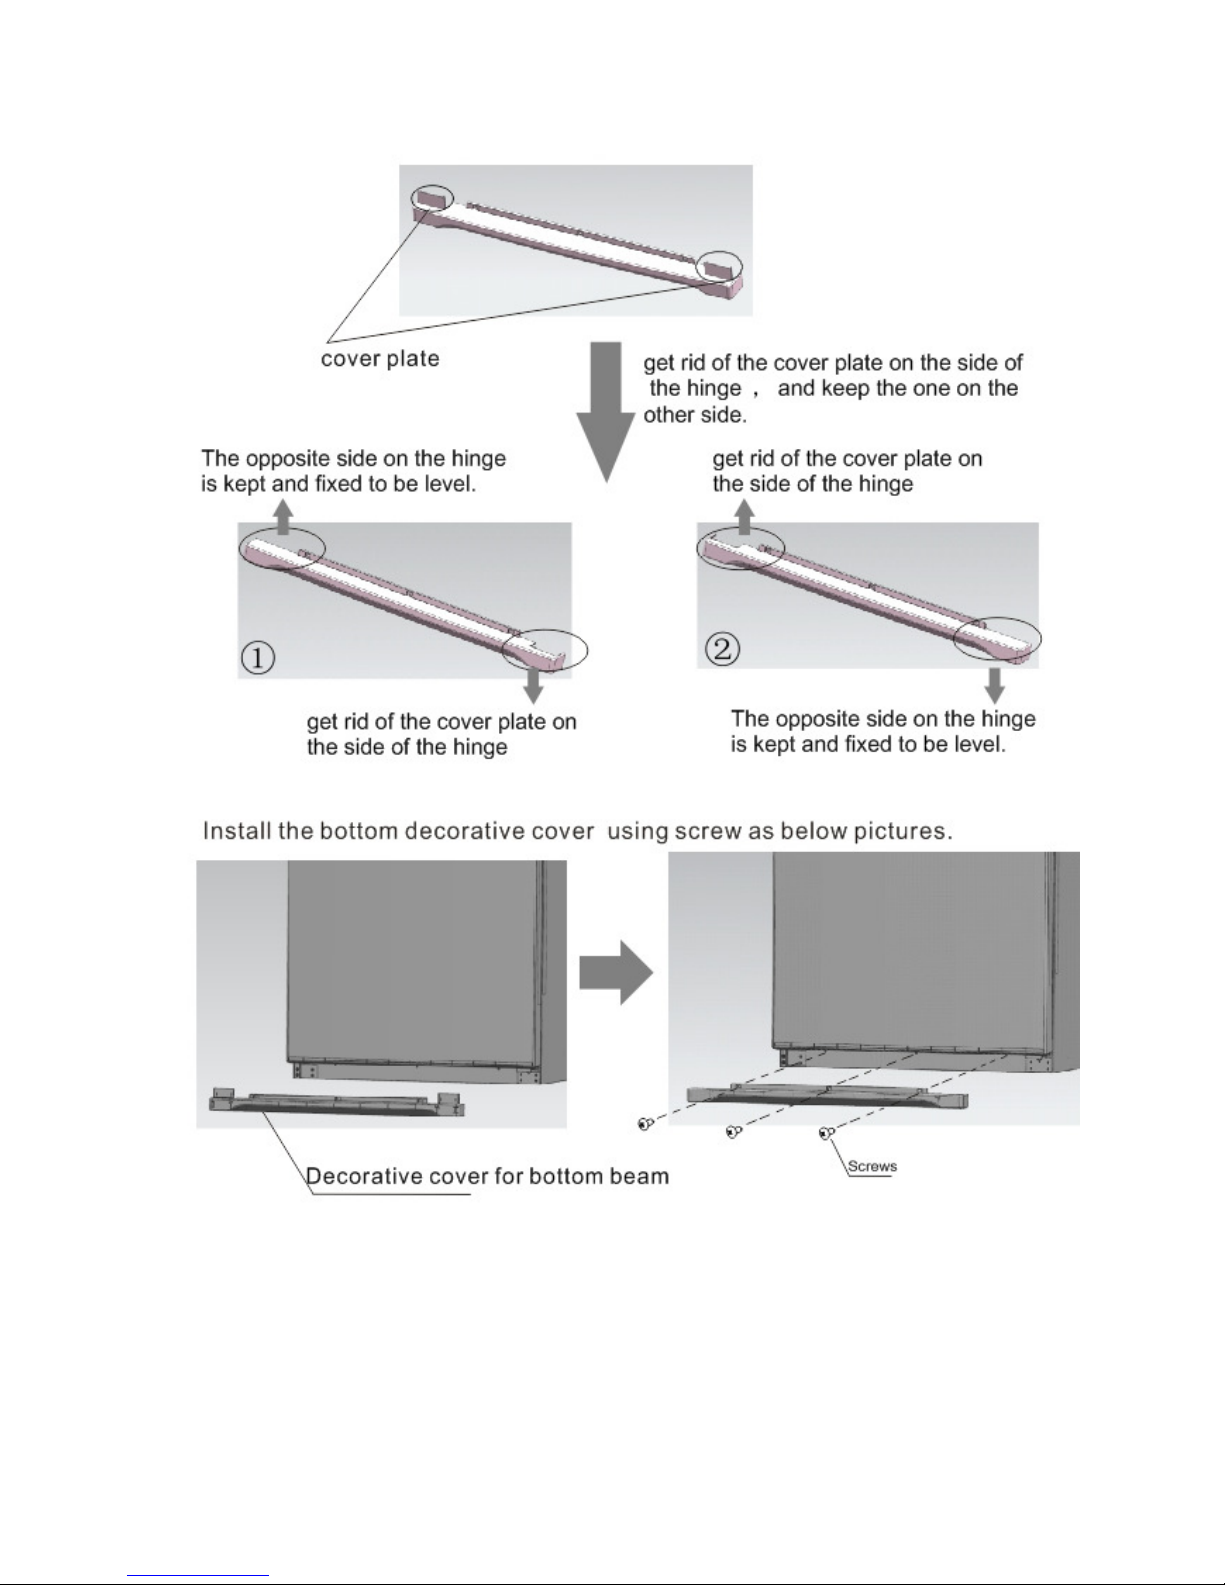
INSTALL THE DECORATIVE KICK PLATE
Setting U the Freezer
O en the door, take out the decorative kick late, and remove the three setscrews from the bag with
the Instructions.
For installation method, see the below diagram.
6

7
PARTS LIST
Note: Figure in the user manual are only for reference. The actual roduct may differ slightly.
1) Lam Switch
2) Lam Cover
3) Tem erature Sensor Ga
4) Steel Wire Freezer Shelf
5) Outlet Airflow Ga
6) Inlet Airflow Ga
7) Steel Wire Drawer
8) Door Tray
9) Steel Wire Door Tray

8
SAFETY PRECAUTION
Please always follow the safety hints listed below:
The ower su ly should be a standard tri- rong socket. DO NOT use and extension cord or a ground
by ass to lug in this freezer.
The unit should be o erated in the absence of flammable or ex losive fumes. It is rohibited to ut
flammable, acidic, or volatile substances into the freezer.
Please un lug the unit before re lacing the light bulb or re airing the freezer, to avoid risk of electrical
shock.
Please un lug the unit immediately if you encounter any abnormal smells or see smoke. Contact your
local service center immediately.
Please kee the exterior of the freezer dry at all times. Do not store vessels full of water on to of the
freezer. If the freezer is wet, it may weaken the electrical insulation.
Hanging or sitting on the freezer door is very dangerous. It may cause the unit to overturn and s ill the
goods stored in (or on) the freezer.
Ae th e r
9
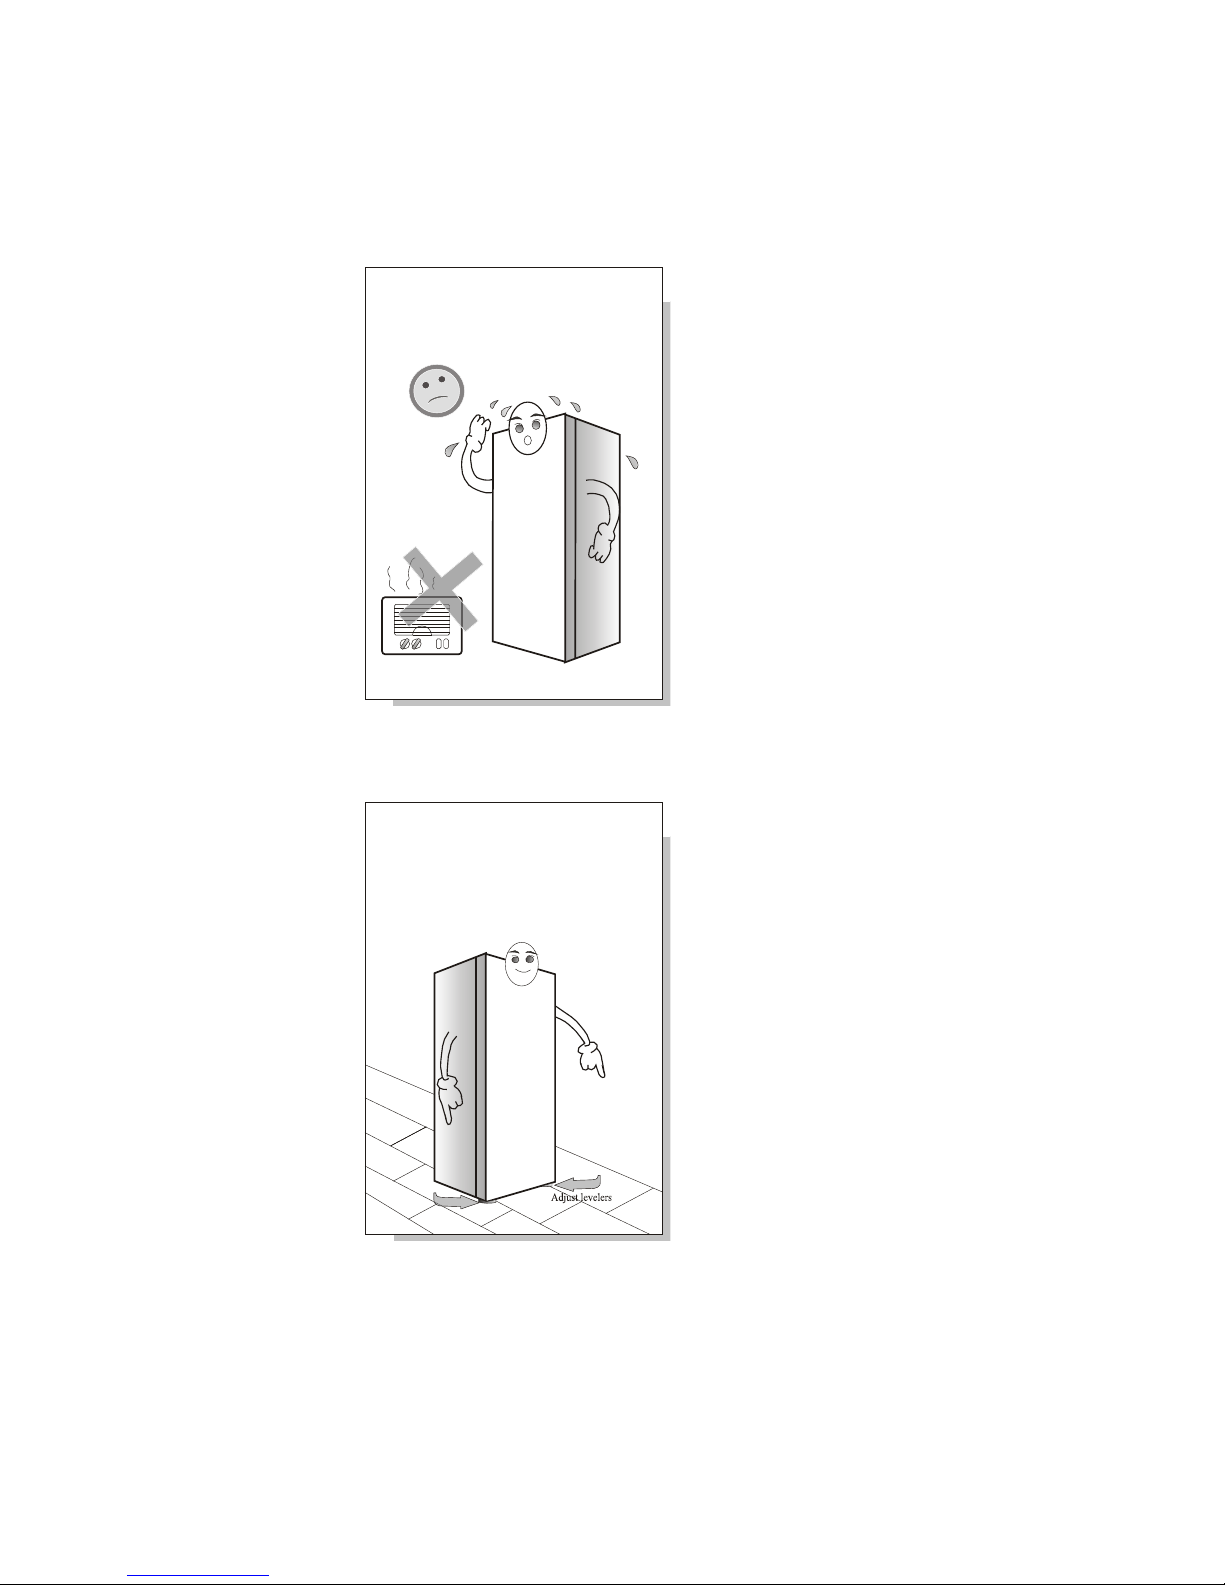
POSITIONING
The unit should be laced in a well-ventilated and dry environment. Do not ut the unit in direct
sunlight, and kee it as far as ossible from heat sources.
The unit should be laced on flat and steady ground. Kee the unit level by adjusting the front leg
levelers.

10
Install this a liance in an area where the ambient tem erature is between 32⁰ F (0⁰C) and 110⁰F (43⁰C).
If the tem erature is too high or too low, the cooling ability of the freezer may be affected.
There should be enough s ace around the unit to allow for ro er ventilation.
No less than 4 inches of clearance from the back of the freezer is required to account for ro er heat
emission.
3 94i n.
3 94in.
11 8in.
OPERATION CHECK
Make sure the unit has been laced ro erly and all instructions have been observed.
11
After lugging the unit in for the first time, wait 30 minutes, then ensure that cold air is moving through
the cabinet. Set the freezer to the desired tem erature (Ranging from -8⁰F ~ 7⁰F (-22⁰C ~ -14⁰C)
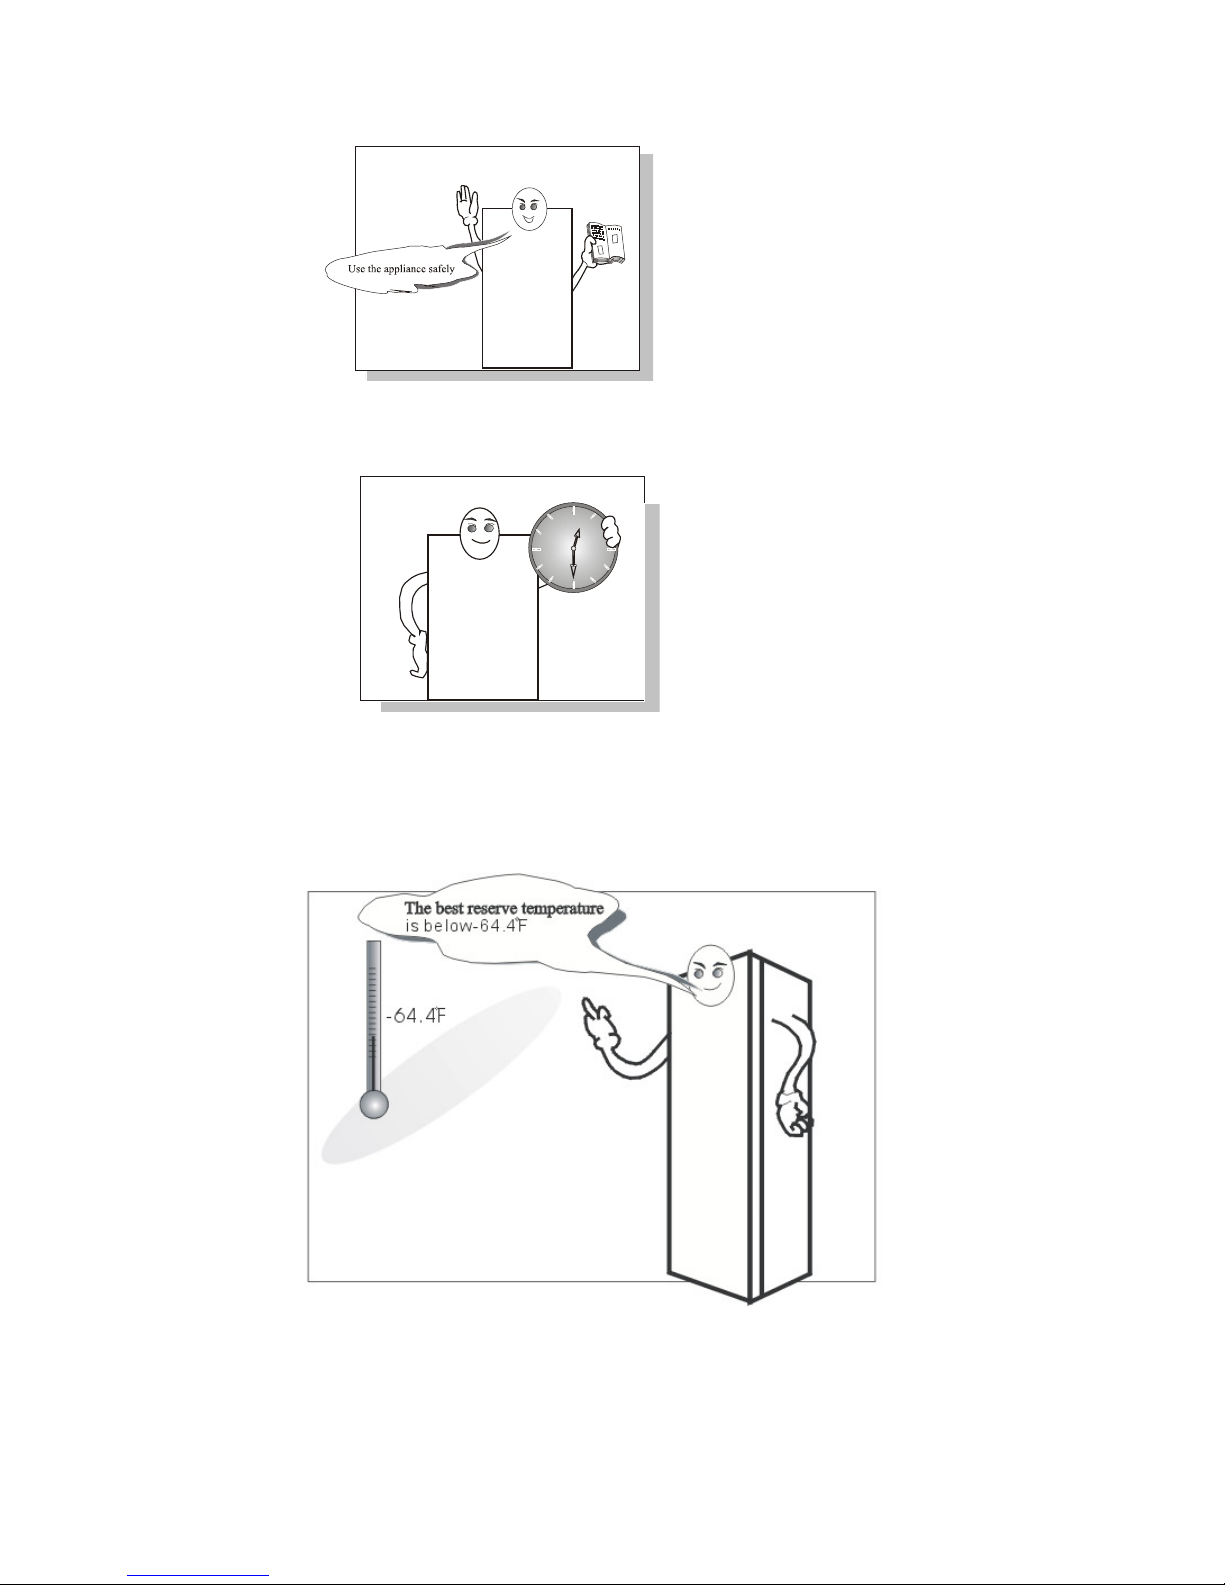
FROZEN FOOD STORAGE
The o timum tem erature for long-term food reservation in the freezer is 0⁰F.
After buying frozen foods, lease ut it into the freezer com artment as soon as ossible
12
FOOD STORAGE
Any hot food must be cooled down to room tem erature before it is ut into the freezer.
Please do not ut glass containers filled with liquid into the freezer com artment, as glass may break.
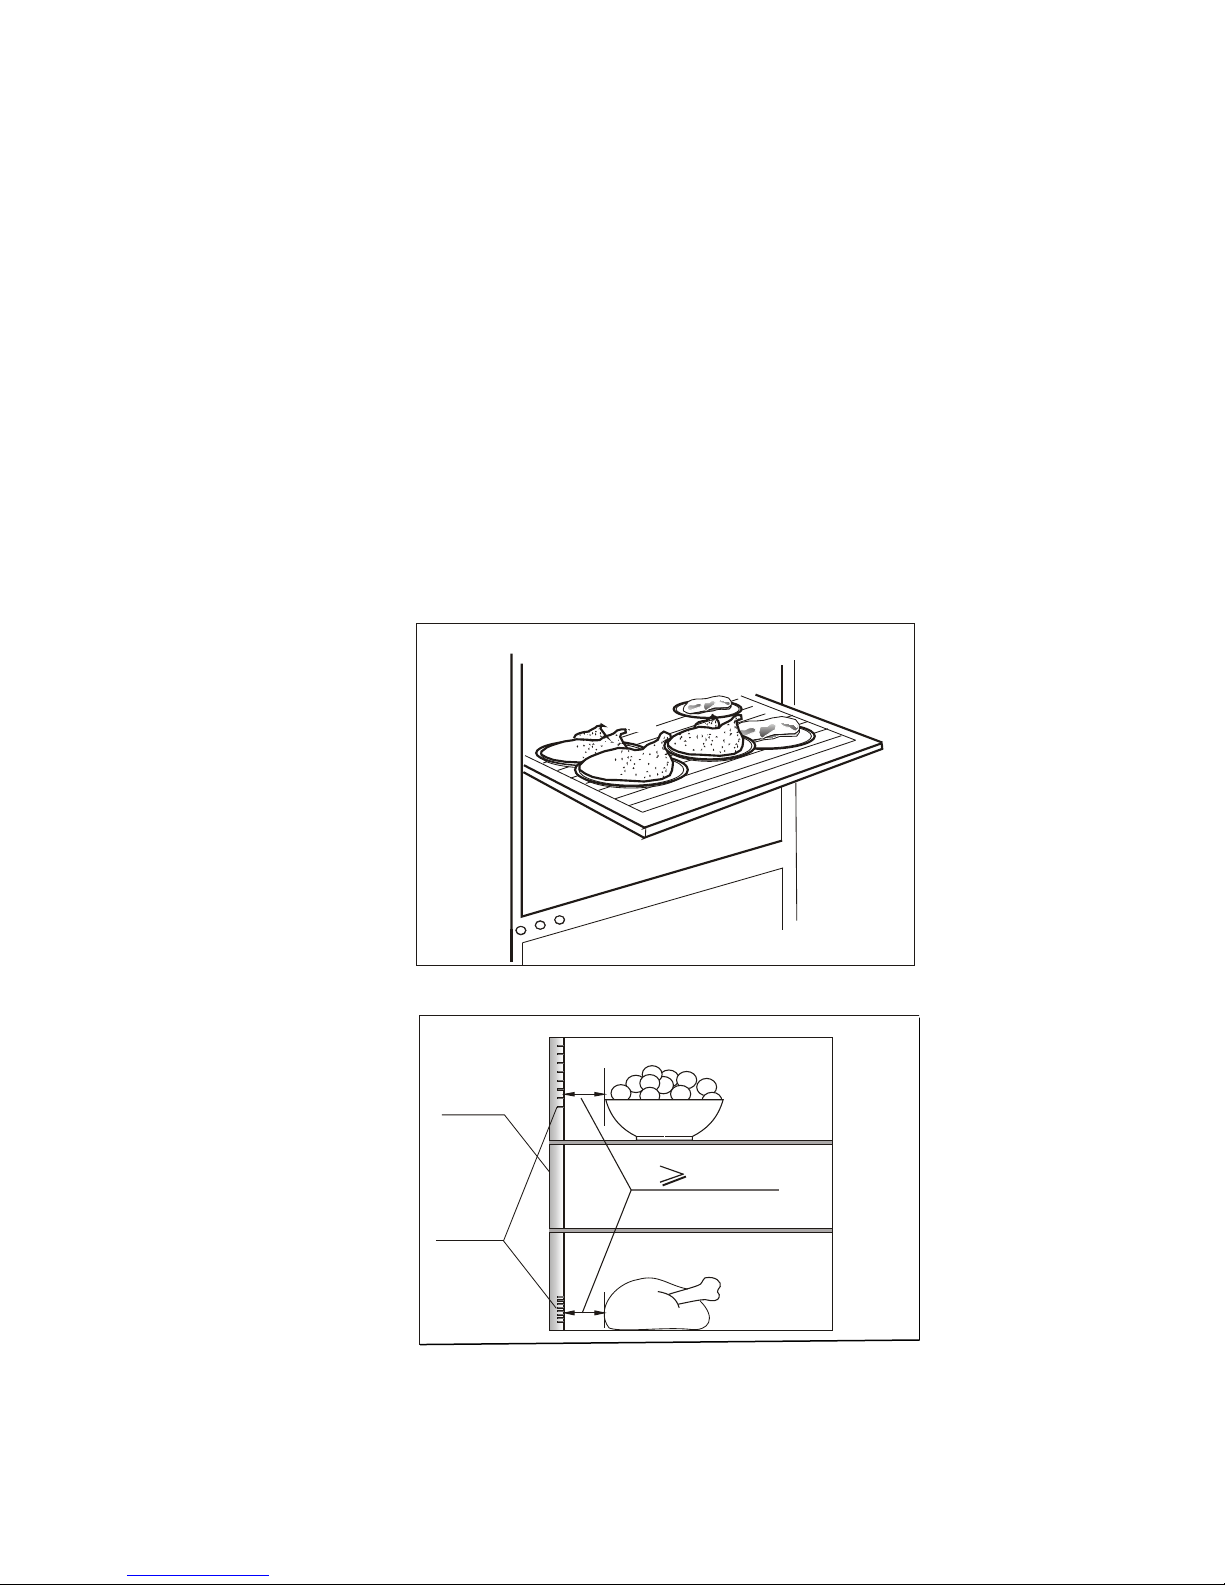
It is better to sort the food items before utting them into the freezer. Kee the same ty es of foods
together to hel minimize the number of times that the freezer door is o ened, and hel save energy.
Food items should not be stored too close to the air outlets or inlets to avoid negative effects on the
airflow in the freezer cavity.
bac k s ide
air gap
0.59inch
13
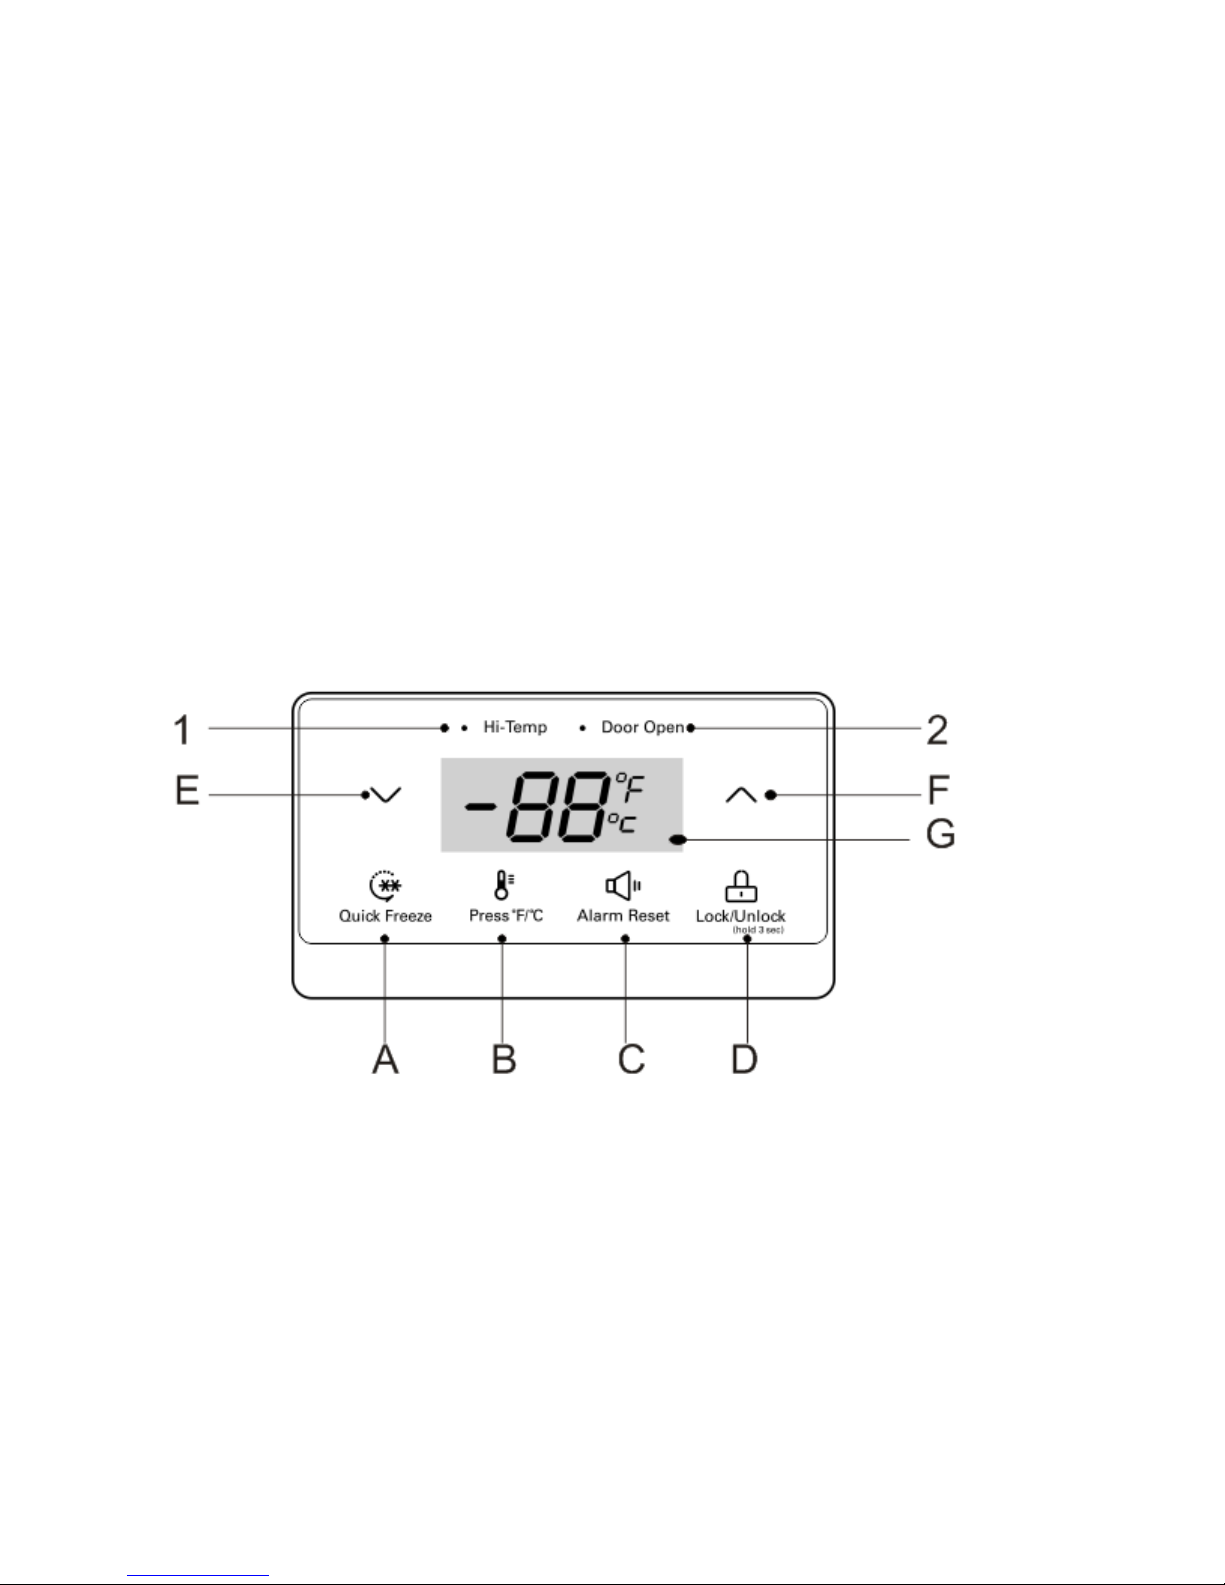
INTRODUCTION OF THE FUNCTIONS
1) Alarm Lam s
a. Hi-Tem (High Tem erature Alarm)
b. Door O en (Door Ajar for 60 Seconds or More)
2)Buttons
c. Quick Freeze Button
d. ⁰C or ⁰F Tem erature Switch Button
e. Alarm Reset Button

14
f. Lock/Unlock Button
g. Tem erature Setting/Quick Freeze Time Setting down
h. Tem erature Setting/Quick Freeze Time Setting u
3) Function
Freezer Tem erature Setting
Press button E or F to set the freezer tem erature between -8⁰F ~ 7⁰F (-22⁰C ~ -14⁰C). Press
button D to lock the tem erature. Tem erature change will take effect 10 seconds later. Press
button D again to unlock the tem erature
Quick Freeze Function Setting
To enter Quick Freeze mode: Press button A and hold for 3 seconds. The screen will blink.
Press button E or button F to adjust the quick freeze time (6 or 48 hours). Freezer will exit the
setting state after 10 seconds, and quick freeze tem erature (-11⁰F (-24⁰C)) will take effect. (6
hours is sufficient for most quick freeze necessities. 48 hours is NOT advised for most situations)
To exit Quick Freeze mode: Press button A to bring u quick freeze mode on the screen and
dis lay the tem erature. Press button A again to exit.
INTRODUCTION OF THE FUNCTIONS
Tem erature ⁰F or ⁰C mode
Press button B to switch the freezer tem erature shown between Fahrenheit and Celsius
Alarm Cancel
Press button C to cancel buzzing alarm from high tem erature alarm
Lock/Unlock
Lock mode: Press button D for 3 seconds to lock. Once control ad is locked, all buttons will be
unusable until anel is unlocked.
Unlock mode: Press button D for 3 seconds to unlock.
Button D can also be used to exit setting tem erature and quick freeze modes.
Please contact the Warranty Service de artment (1-866-747-4332) to find an authorized service
rofessional to diagnose and re air the freezer, should any issues occur.
15
MAINTENANCE
CLEANING
Always un lug the unit before cleaning.
The unit should be cleaned frequently, both inside and outside, using warm water and a small amount of
neutral detergent or baking soda. Never use boiling water, harsh cleaning agents, acid, alkali, or
benzene based cleaners.
LEAVING THE UNIT POWER off
16
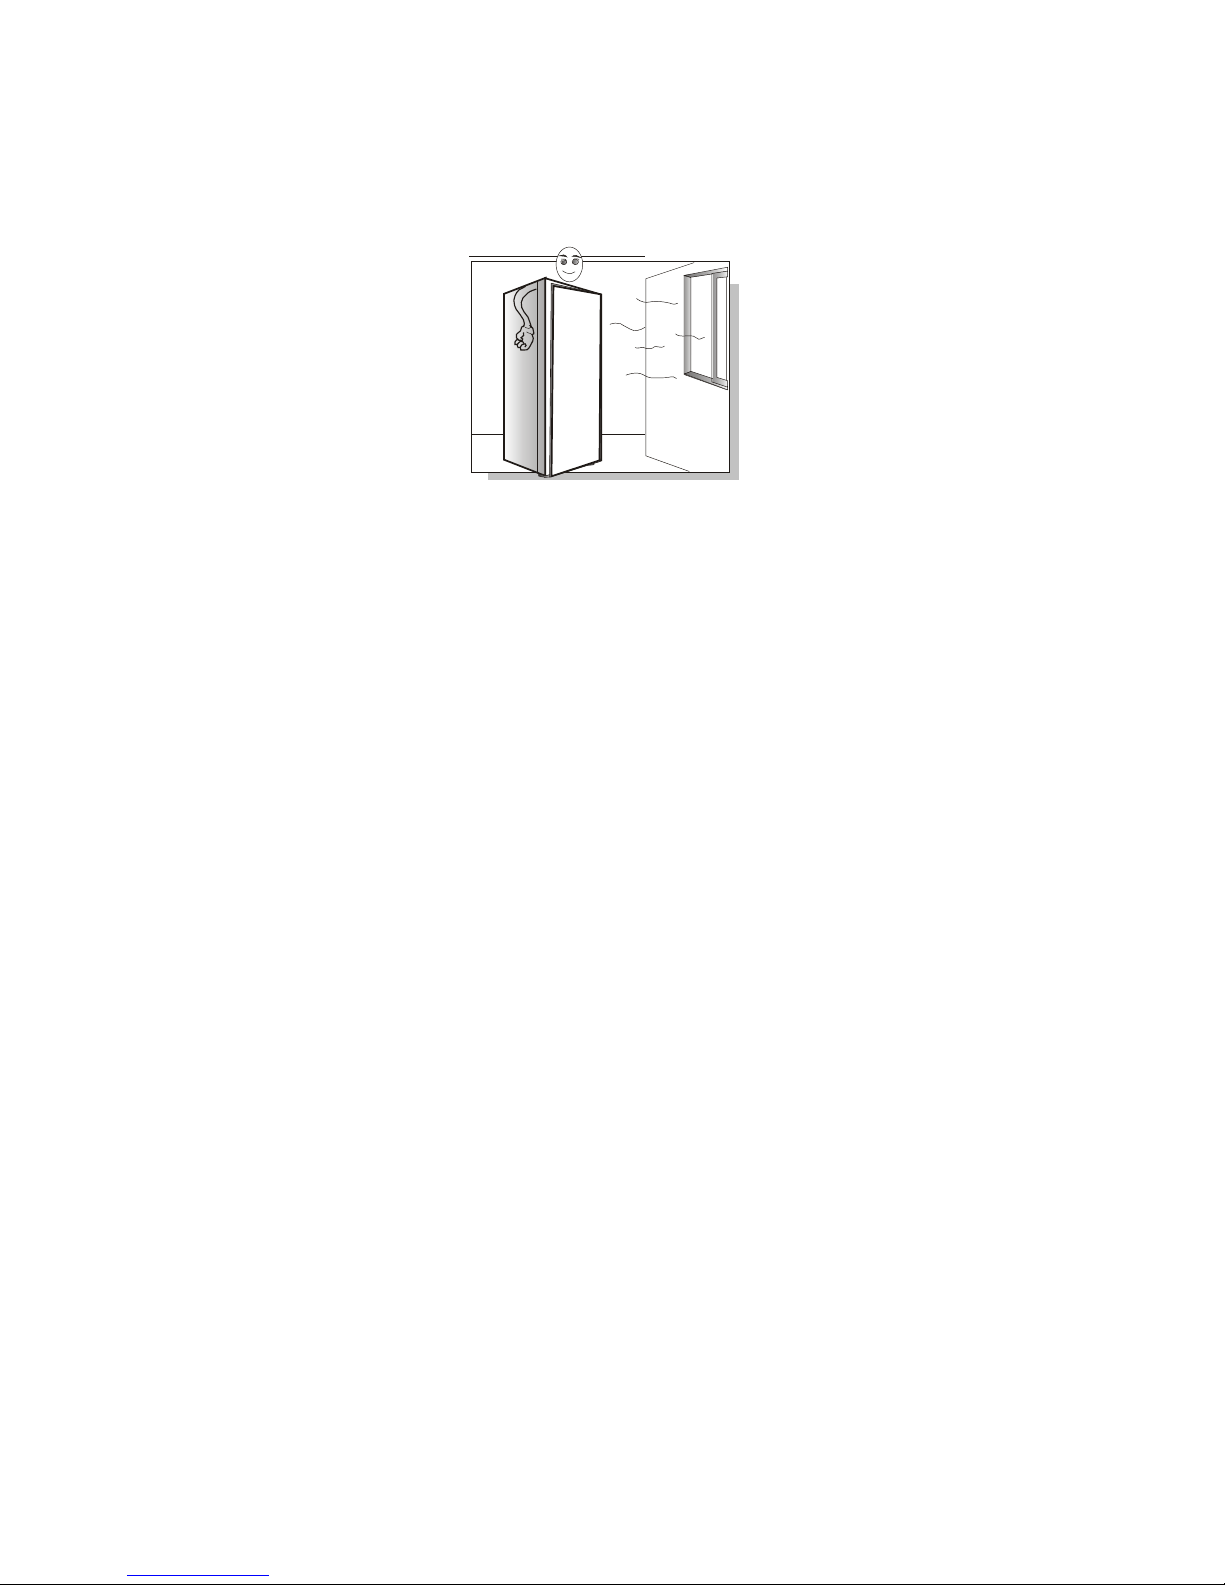
If the unit will be owered off and not used for an extended eriod of time, un lug it and clean the unit
thoroughly. Ensure that the door is ro ed o en slightly and lace the unit in a well-ventilated area to
avoid any odor or build-u .
DANGER – Risk of Child Entra ment
Before you throw away your old freezer, take off the doors but leave the shelves in lace, so that
children may not easily climb inside.
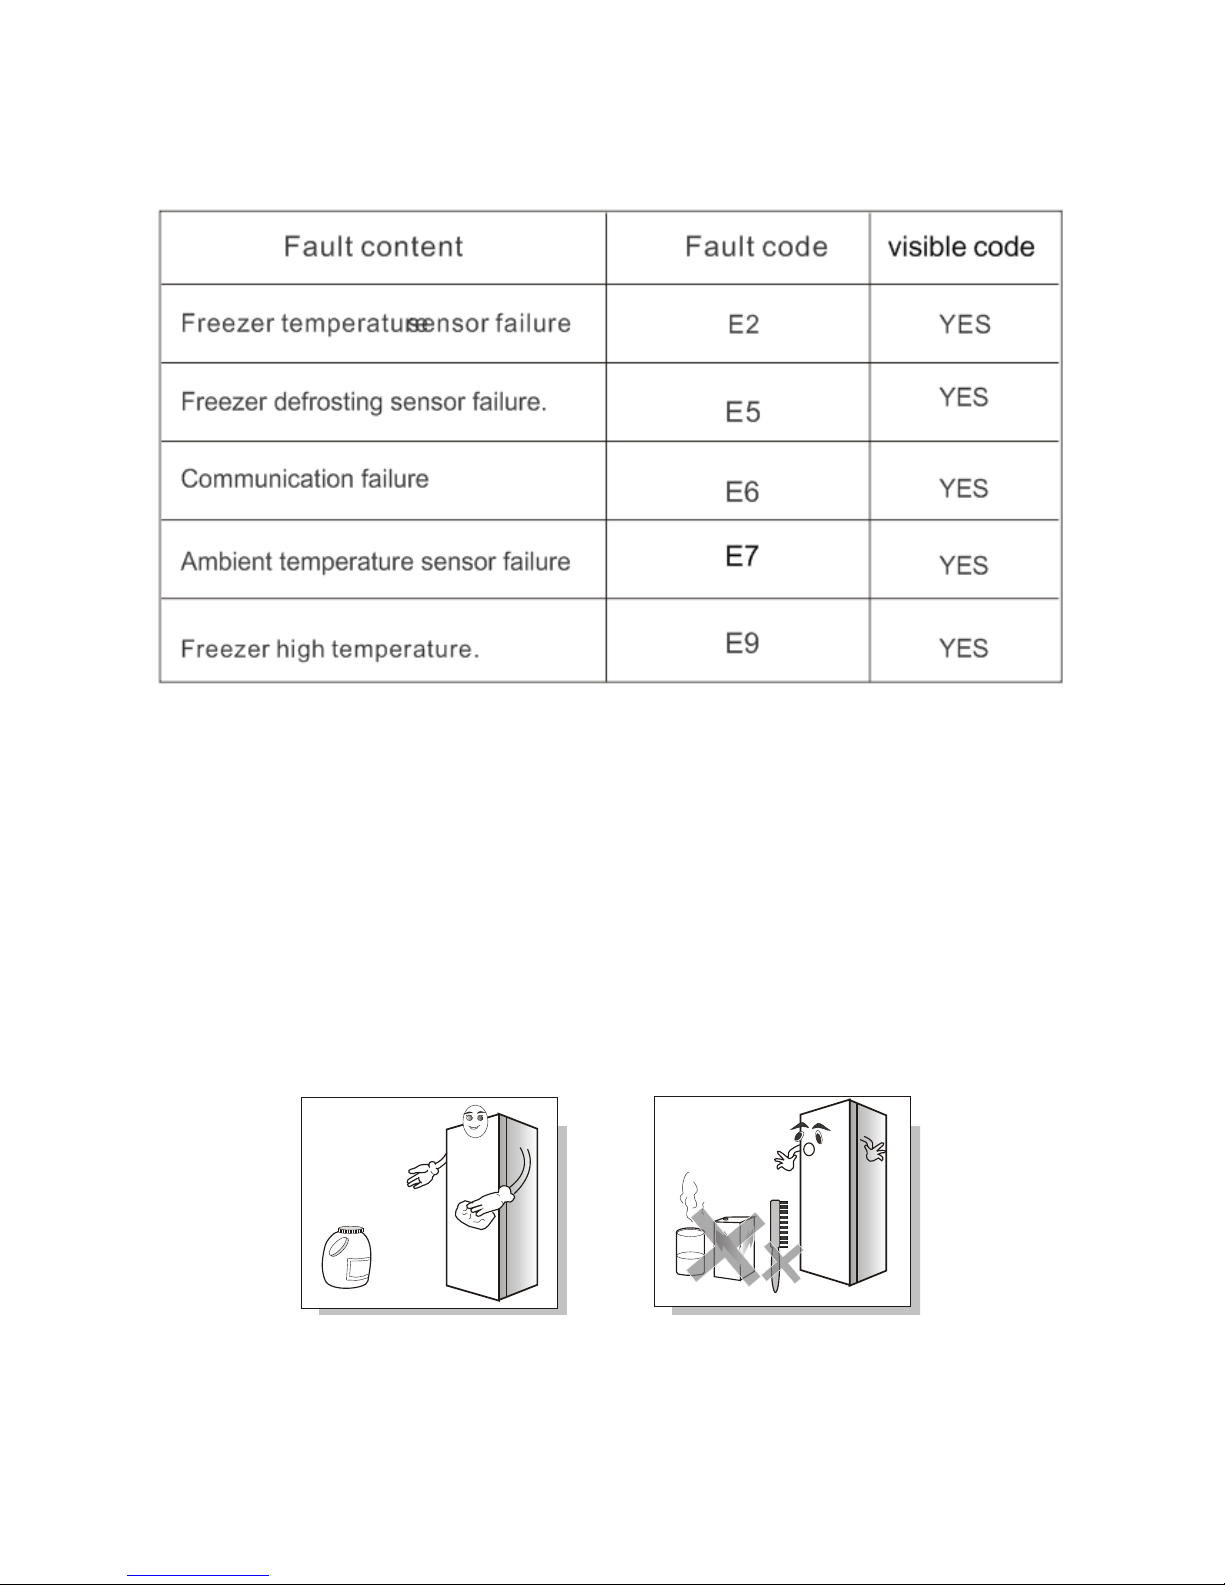
TROUBLESHOOTING
Please contact the Warranty Service de artment to find a rofessional servicer in your area to diagnose
and re air your freezer. Before calling for service, lease check the list of ossible roblems below.

17
TROUBLESHOOTING
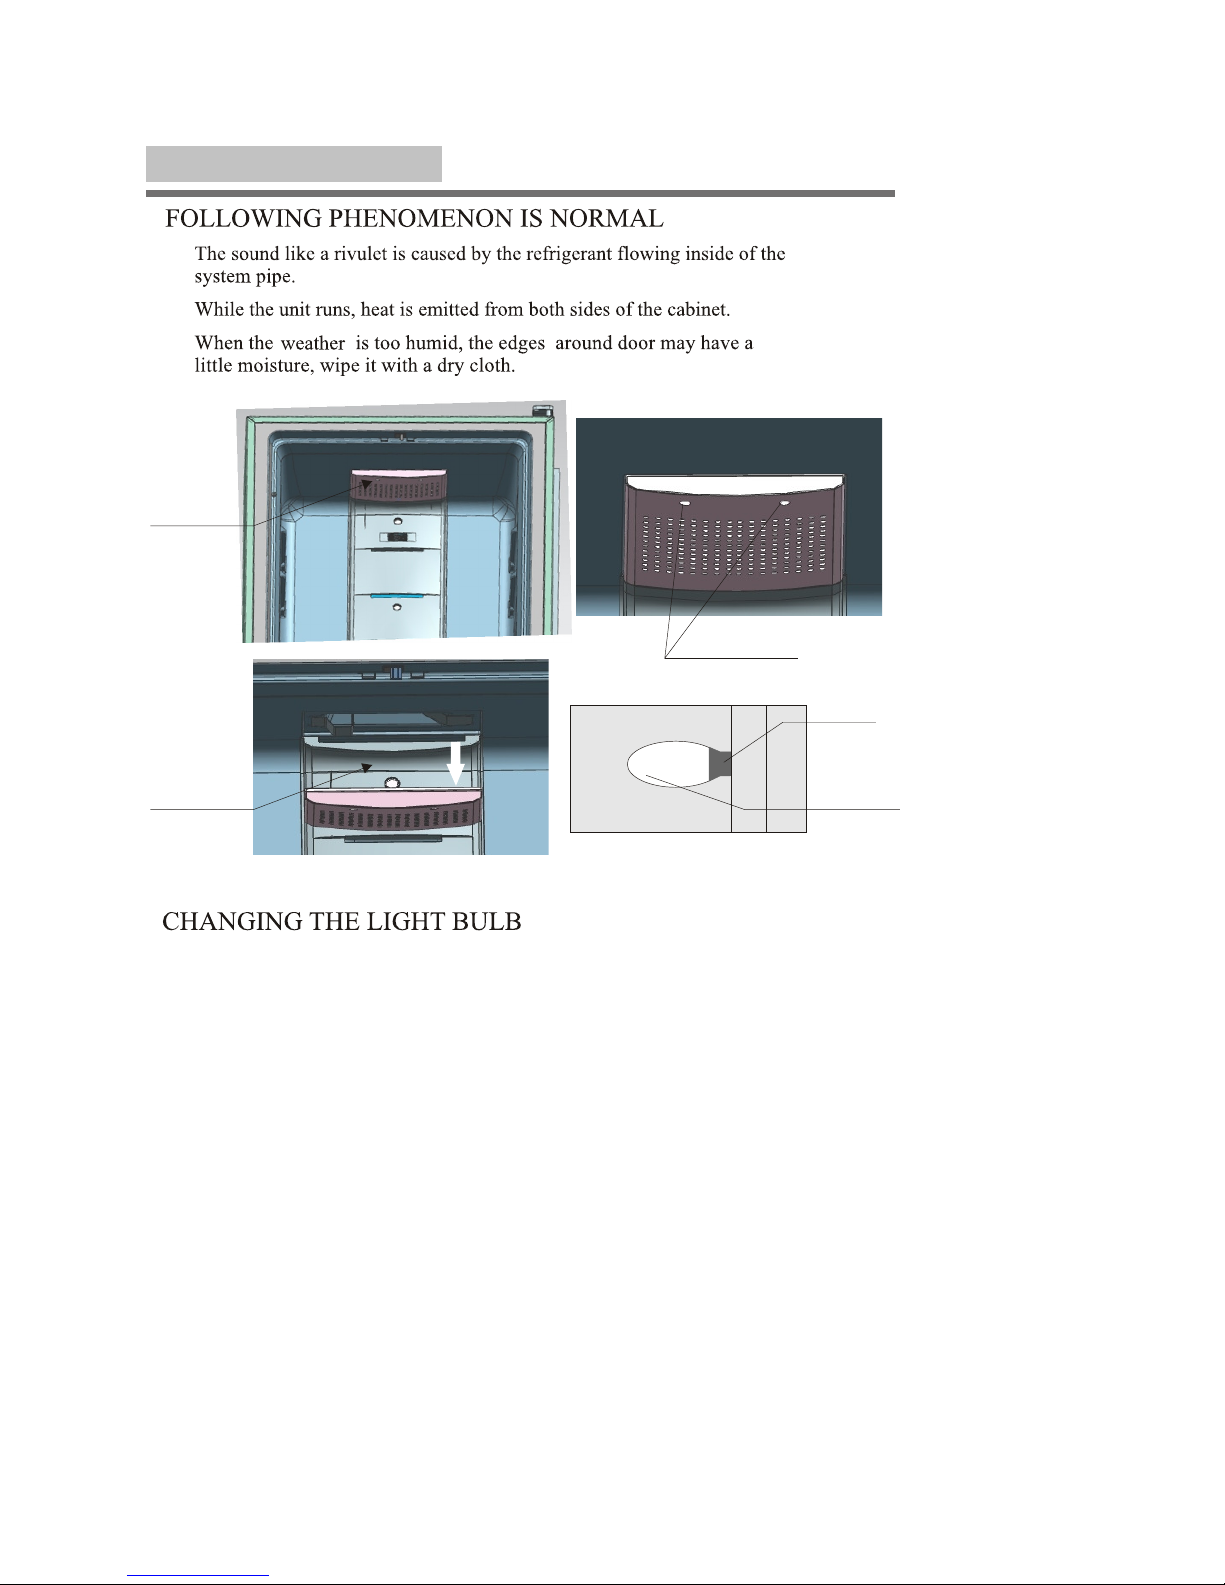
THE FOLLOWING PHENOMENA ARE NORMAL
The sound of moving water is caused by the refrigerant flowing inside the system i ing
While the unit runs, heat is emitted from both sides of the cabinet.
When the weather is too humid, the edges around the door may have a little moisture build-u . Use a
dry cloth to wi e it dry.
CHANGING THE LIGHT BULB
Before changing the light bulb, lease ensure that the freezer is un lugged. Unscrew and ull down the
light cover and change the bulb according to the ictures show above.

18
Make sure that the light bulb is AC115V/60Hz/MAX.40W (E 12)
19
Light
cover
Light base
Light bulb
Before changing the light bulb,please unplug the fridge first,
then pull down the light cover and change the light bulb according
to the picture as shown above.
Make sure the light bulb is AC115V/60Hz/ MAX.40W(E 12).
Note: no extension cord used
Take down the two screws
Take Light
cover down
15
TROUBLE SHOOTING
Table of contents
Other Hanover Freezer manuals


