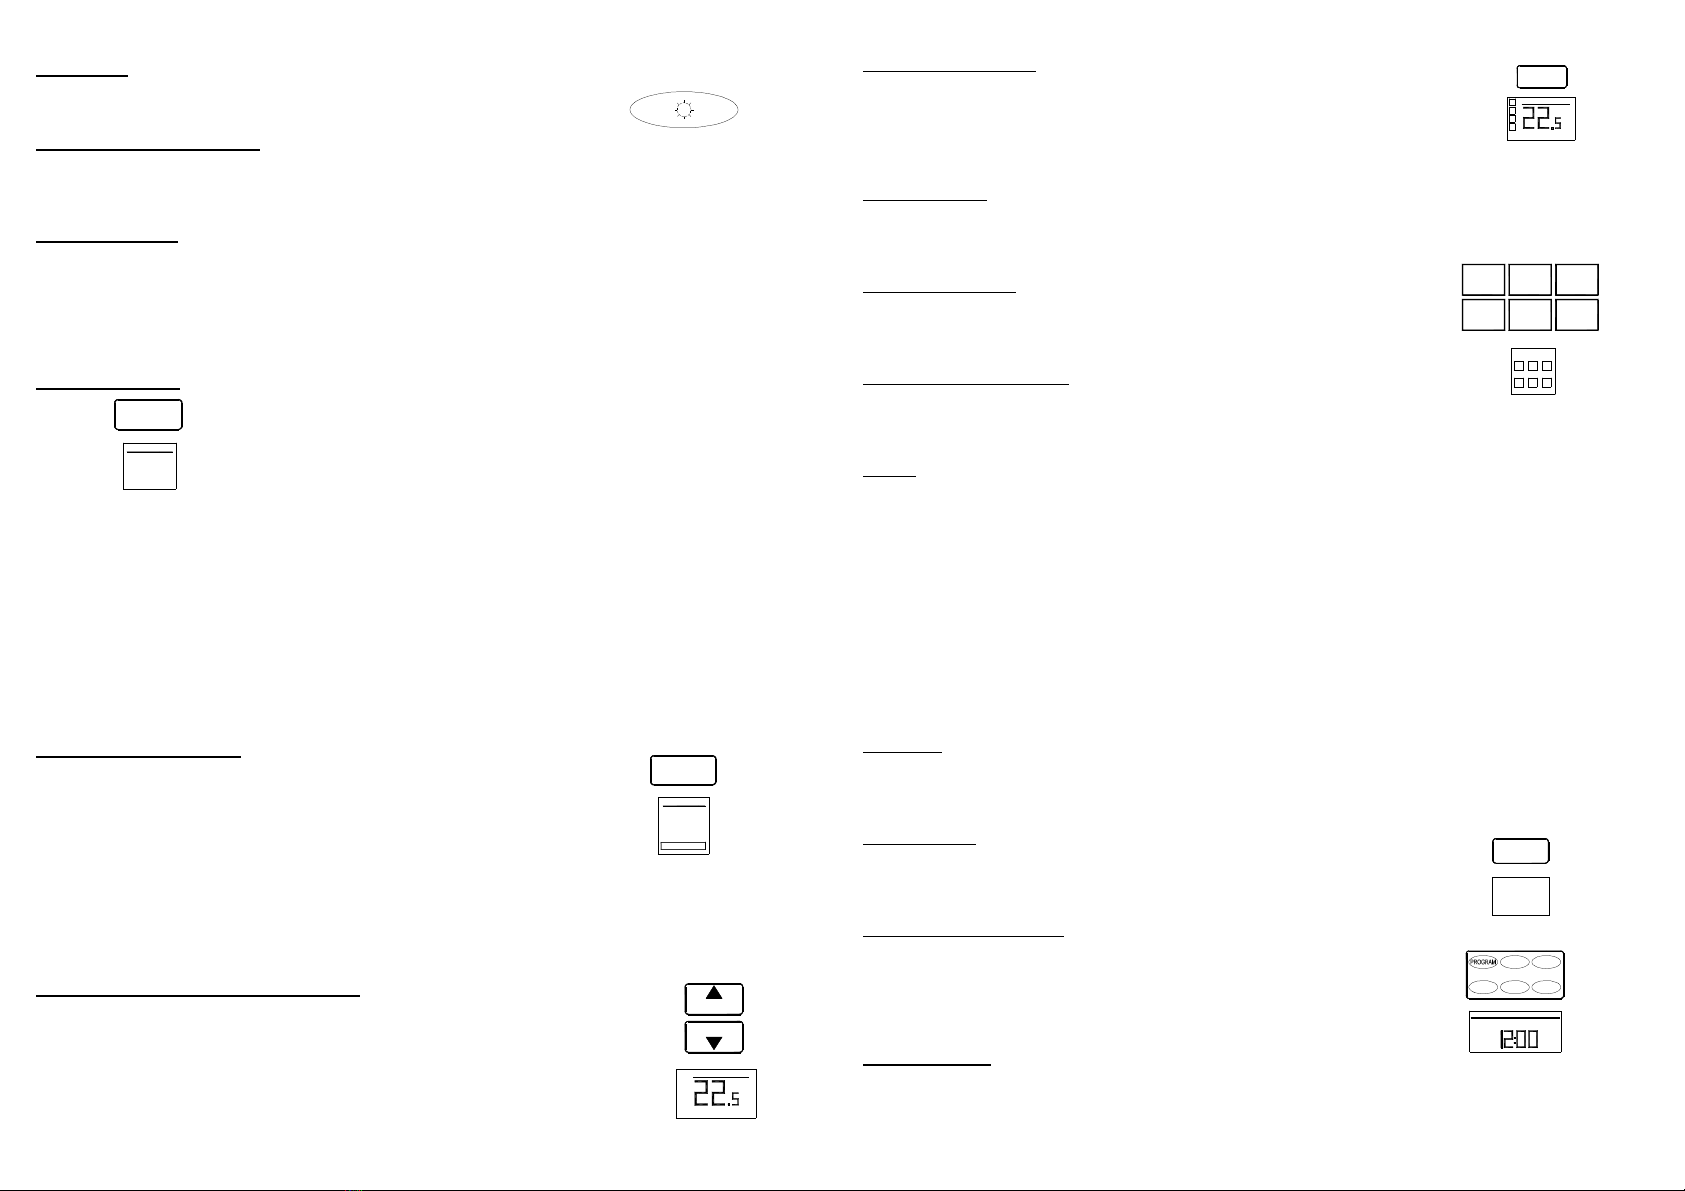
MODE
HEATING
AUTO
DRY
COOLING
OPERATION
FAN
BUTTON
LCD
DISPLAY
SET TEMP.
SET TEMP POINT
°C
BUTTON
LCD
SET TEMP.
DISPLAY
TEMP.
SET TEMP POINT
ROOM TEMP
3
4
1
2°C
BUTTON
LCD
ROOM
DISPLAY
ON OFF
FAN
SPEED BUTTON
AUTO
LOW
CONSTANT
MEDIUM
HIGH
FAN SPEED
DISPLAY
LCD
CLOCK
7 DAY - 6 PROGRAM TIMER
WEEK
RECALL
RESET
MINUTEHOUR
7 DAY PROGRAM TIME CONTROL
Mon Tue Wed Thu Fri Sat Sun
PM
AM
BUTTONS
LCD
DISPLAY
CLEAN
RESET BUTTON
LCD
DISPLAY
CLEAN
ZONE1 ZONE2 ZONE3
ZONE6ZONE5ZONE4
BUTTONS
1 2 3
ZONES
54 6 DISPLAY
LCD
SWITCH ON
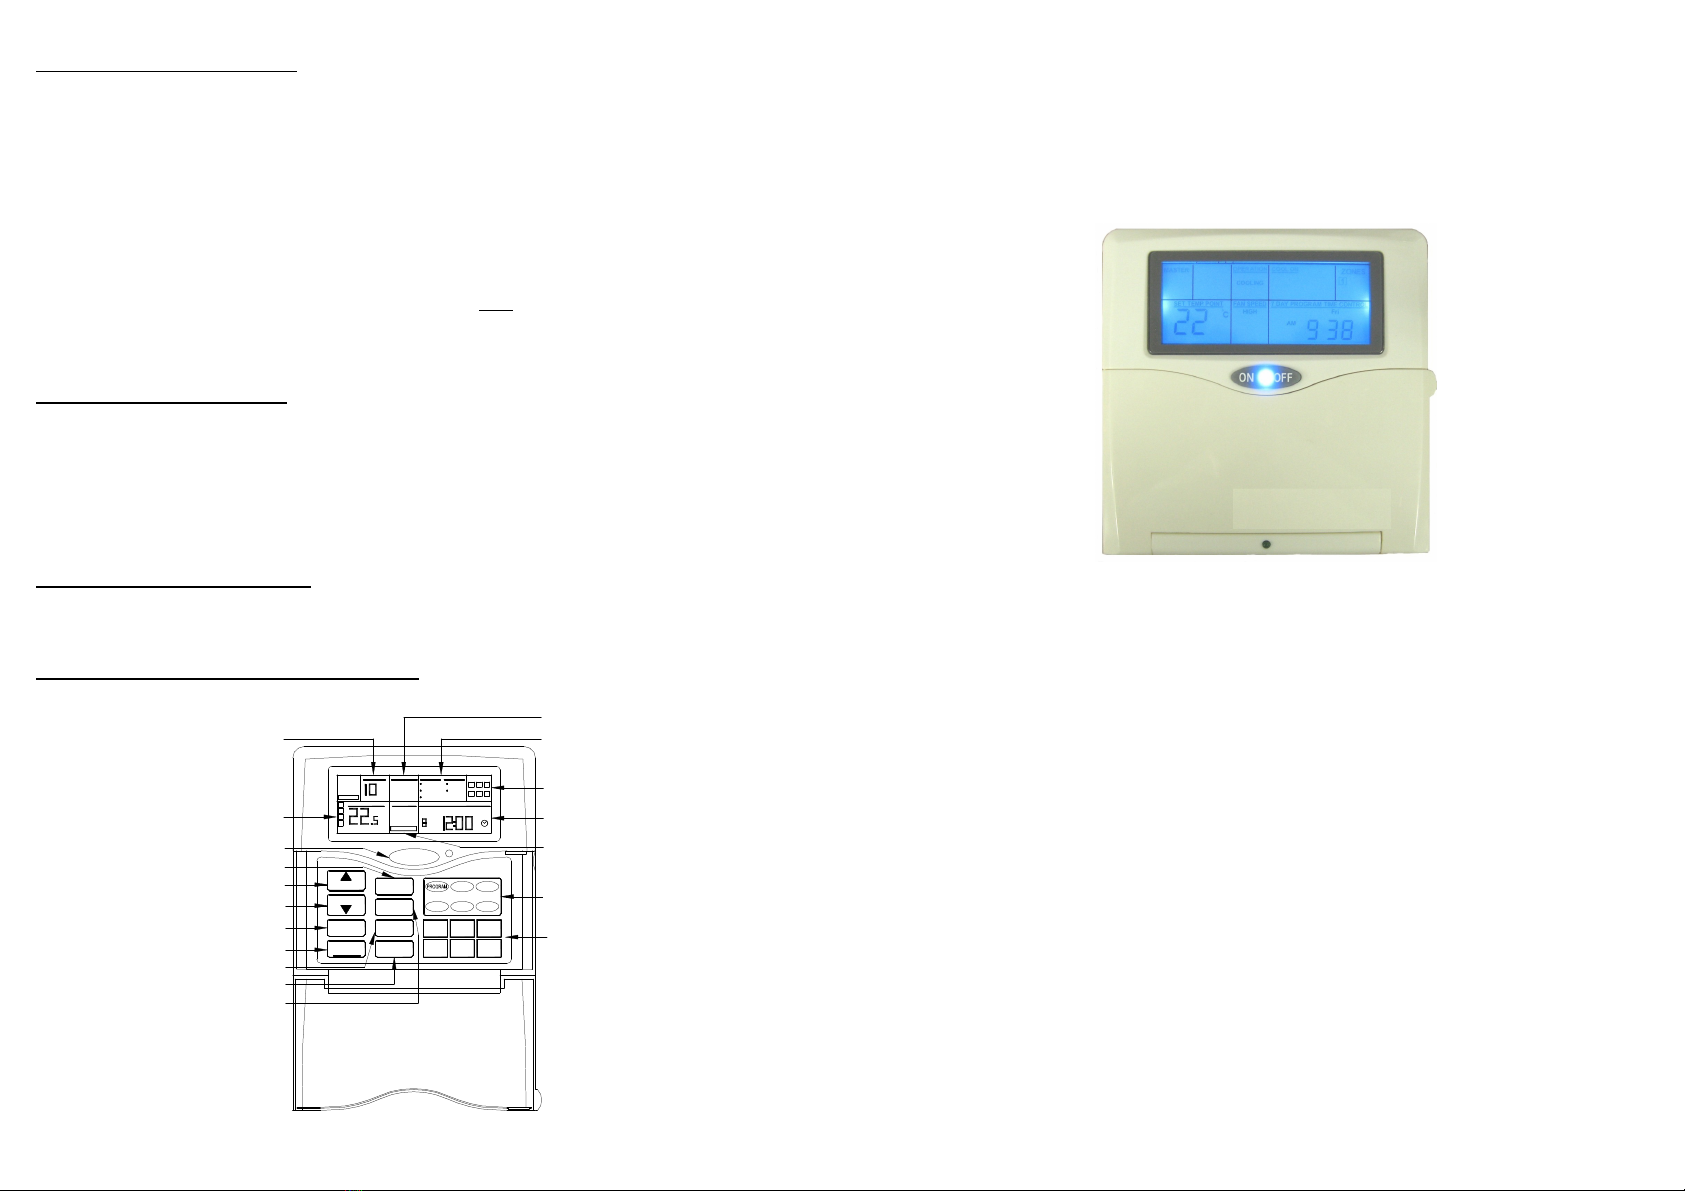
To turn the air conditioning unit on, simply press the ON/OFF button. The LED
display will then be illuminated and the ON/OFF button light will turn on.
SWITCH OFF (Standby Mode)
To turn the air conditioning unit off, simply depress the ON/OFF button. This will place the unit into
“standby mode”. The current set-point and fan speed selection will be stored in the controller’s memory. Do
not restart for several minutes to allow the air conditioning equipment to stabilise before re-starting.
SYSTEM MEMORY
Whether the unit is switched on by means of the ON/OFF key or automatically by the built in 7 day 6
function timer, the control’s set-point and fan speed settings will be the last settings at the time the unit was
switched off.
If the HAN-L62 has been disconnected from the supply voltage, when the control is switched on the
control’s set-point and fan speed settings will be the last settings at the time the unit was switched off.
MODE SELECTION
Press the “MODE” button to select FAN/DRY/COOLING/HEATING or AUTO. Each
mode of operation is described below.
The digital LCD display will indicate the mode while the adjustment is being carried
out.
FAN – With “FAN” selected only, the indoor air circulating fan will run.
DRY – “DRY” operation is used to reduce the humidity without cooling the room too much. In this
mode the fan operates on low speed and the compressor automatically cycles on and off to
reduce the humidity.
COOLING – The system will operate automatically to provide comfort cooling.
HEATING – The system will operate automatically to provide comfort heating.
AUTO – The system will operate automatically on cooling or heating to maintain the set
temperature.
After selecting the mode press the ON/OFF button to start the fan. It is preferable to switch the control off
before changing the mode switch. If the control is switched on when the MODE button is altered, the air
conditioner will not change cycle for 4 minutes to allow the system to stabilise. After this time delay the air
conditioner will operate in the mode selected. (FAN/DRY/COOL/AUTO/HEAT)
FAN SPEED ADJUSTMENT
Select the desired fan speed by pressing the “FAN SPEED” button.
oIn FAN mode, you can only select HIGH – MEDIUM or LOW fan speed.
oIn DRY mode, the fan operates on low fan speed only.
oIn COOLING or the cooling cycle of AUTO mode, you can select from
HIGH – MEDIUM – LOW – AUTO – HIGH CONSTANT MEDIUM
CONSTANT – LOW CONSTANT – AUTO CONSTANT with each press.
oIn HEATING operation (AUTO or HEAT mode) the indoor fan speed is automatically controlled
to ensure the air conditioner operates to its maximum efficiency.
oCONSTANT means continuous operation of the fan speed while the control is in operation even
when the compressor has turned off. When CONSTANT is off, when the set temperature is
reached and the compressor stops, the indoor fan also stops.
SET POINT TEMPERATURE ADJUSTMENT
Press the “SET TEMP” UP or DOWN button to increase or decrease the temperature
set-point as desired. Temperature is selectable in ½ °C increments. The digital LCD
display will indicate the set-point temperature while the adjustment is being carried
out. You can adjust the set-point temperature to different temperatures for Heating or
Cooling mode. Just change the mode selection to “HEATING” or “COOLING” and
adjust temperature as required.
ROOM TEMP DISPLAY
Press “ROOM TEMP.” to display the room temperature of each zone if optional
remote sensors are installed The LCD will display “ROOM TEMP” at the bottom
left hand corner and every time you press the “ROOM TEMP.” button the zone
number will light up (left hand side) with the room temperature of that zone.
To get back to the set-point temp press either the “SET TEMP” UP or DOWN button.
12 HOUR TIMER
The 12 hour timer will only work on the master control. With unit operating press “12H OFF TIMER” button.
Select the number of hours until the control is to switch off. Unit will be placed into Standby mode after the
set number of hours has passed.
ZONES (OPTIONAL)
If the air conditioning installation has zones installed with the auxiliary zone board
connected select the zones to be turned on. Press ZONE1 for zone 1, ZONE2 for
zone 2 etc.
LOCKING UNUSED ZONES
On installations where less than 6 zones are used, zones 3-4-5-6 can be locked off to
prevent unused zones being turned on. To lock the zones off, press the zone button and
hold for 3 seconds. To unlock the zone, press the zone button and hold for 3 seconds.
SLEEP
SLEEP mode is designed to provide a more comfortable environment whilst the occupants of the air-
conditioned area are sleeping. SLEEP mode does not work in AUTO mode. With the air conditioner
operating the following temperature adjustment will automatically occur.
oSLEEP button pressed, start sleep timer. Cooling Heating
oAfter 30 min. temp. set point up 0.5°C down 0.5°C.
oAfter further 30 min. temp. set point up 0.5°C down 0.5°C.
oAfter further 60 min. temp. set point up 1.0°C down 1.0°C.
oTotal set back temperature up 2.0°C down 2.0°C.
Sleep can be cancelled at any time by any of the following methods.
a. Pressing the SLEEP button.
b. Setting the required number of hours on the “12 hour TIMER”.
c. Setting a program off time to repeat daily.
d. Setting a control start “ON” time to repeat daily.
KEYLOCK
The KEYLOCK function prevents unauthorised persons tampering with the control settings. To activate
press and hold “SLEEP” button for 4 seconds. When activated all control setting operations are disabled
with the exception of the ON/OFF key. To disable the keylock function press and hold “SLEEP” button
again for 4 seconds.
CLEAN RESET
The LCD displays “CLEAN” every 250 hours to tell you that the filter needs cleaning.
After cleaning filter, press “CLEAN RESET” button to reset timer. Filter “CLEAN”
display will be turned off.
7 DAY AUTO TIME CLOCK
Clock setting
To set the clock time simply press the “HOUR” button to set the hour & “MINUTE”
button to set the minute.
To set the day of the week press the “WEEK” button. Each time you press the
week button different days will be displayed.
DE-ICE DISPLAY
Should “DE-ICE” be displayed this indicates the indoor coil has formed a layer of ice on the indoor coil that
will affect the units operation. The “DE-ICE” function will melt the ice that has formed. It is recommended to
check the return air filter as if it is blocked with dust, the air flow will be reduced causing the indoor coil to
form ice.