Hape HAPPY HARP User manual

Just like the classical guitar, the string is made of Nylon. Nylon is
much safer than metal string. However, like all professional
instruments, your harp may need to be tuned after you take it home and
will also need to be re-tuned periodically.
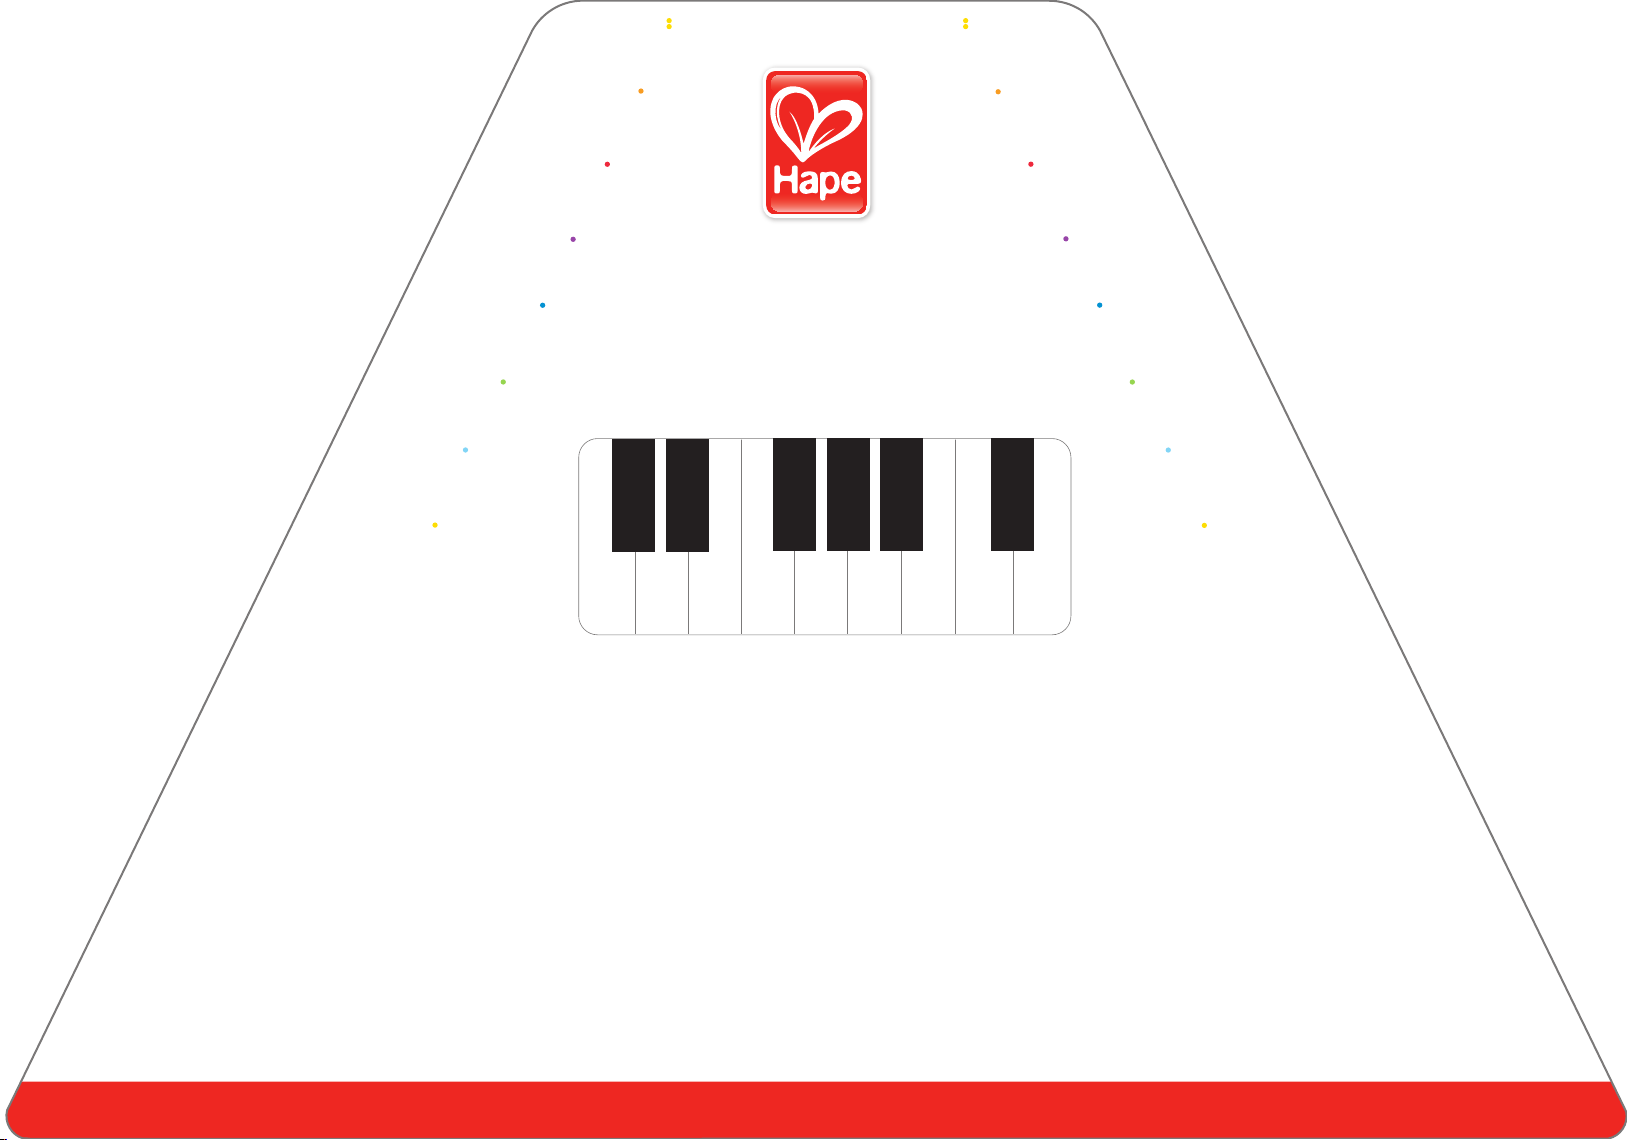
There are many tuning instruments that can be used to tune your harp. You
can use a pitch pipe, tuning fork, piano, electronic keyboard or any other musical
instrument that is already properly tuned. You can also download tuning software
to your cellphone.
To tune, choose a key that you would like to use. Then match the sound from the key to the
sound of the longest string on the harp. Once you have the first string tuned, adjust the other
strings sequentially going up the scale (do, re, mi, etc.).
After tuning all the strings in the correct scale, insert a music sheet and play a song that you are
familiar with (we suggest “Twinkle, Twinkle, Little Star”).
If the song sounds correct, then you have successfully tuned the harp. If it doesn’t sound correct or you
can’t tell the difference, we recommend that you have the harp tuned by a friend or professional (local music
store or music teacher) who is familiar with music.
TUNING TIPS
E0323
1
2
Repeat steps 2 and 3 to tighten another pin.
5
3
HOW TO RE-STRING
YOUR HAPPY HARP
Replacing strings should only be done by an adult. If you are unsure of the
following task, please seek assistance from your local music store or a music
teacher. You will need a set of pliers and wire cutters.
We also recommend that you wear safety goggles.
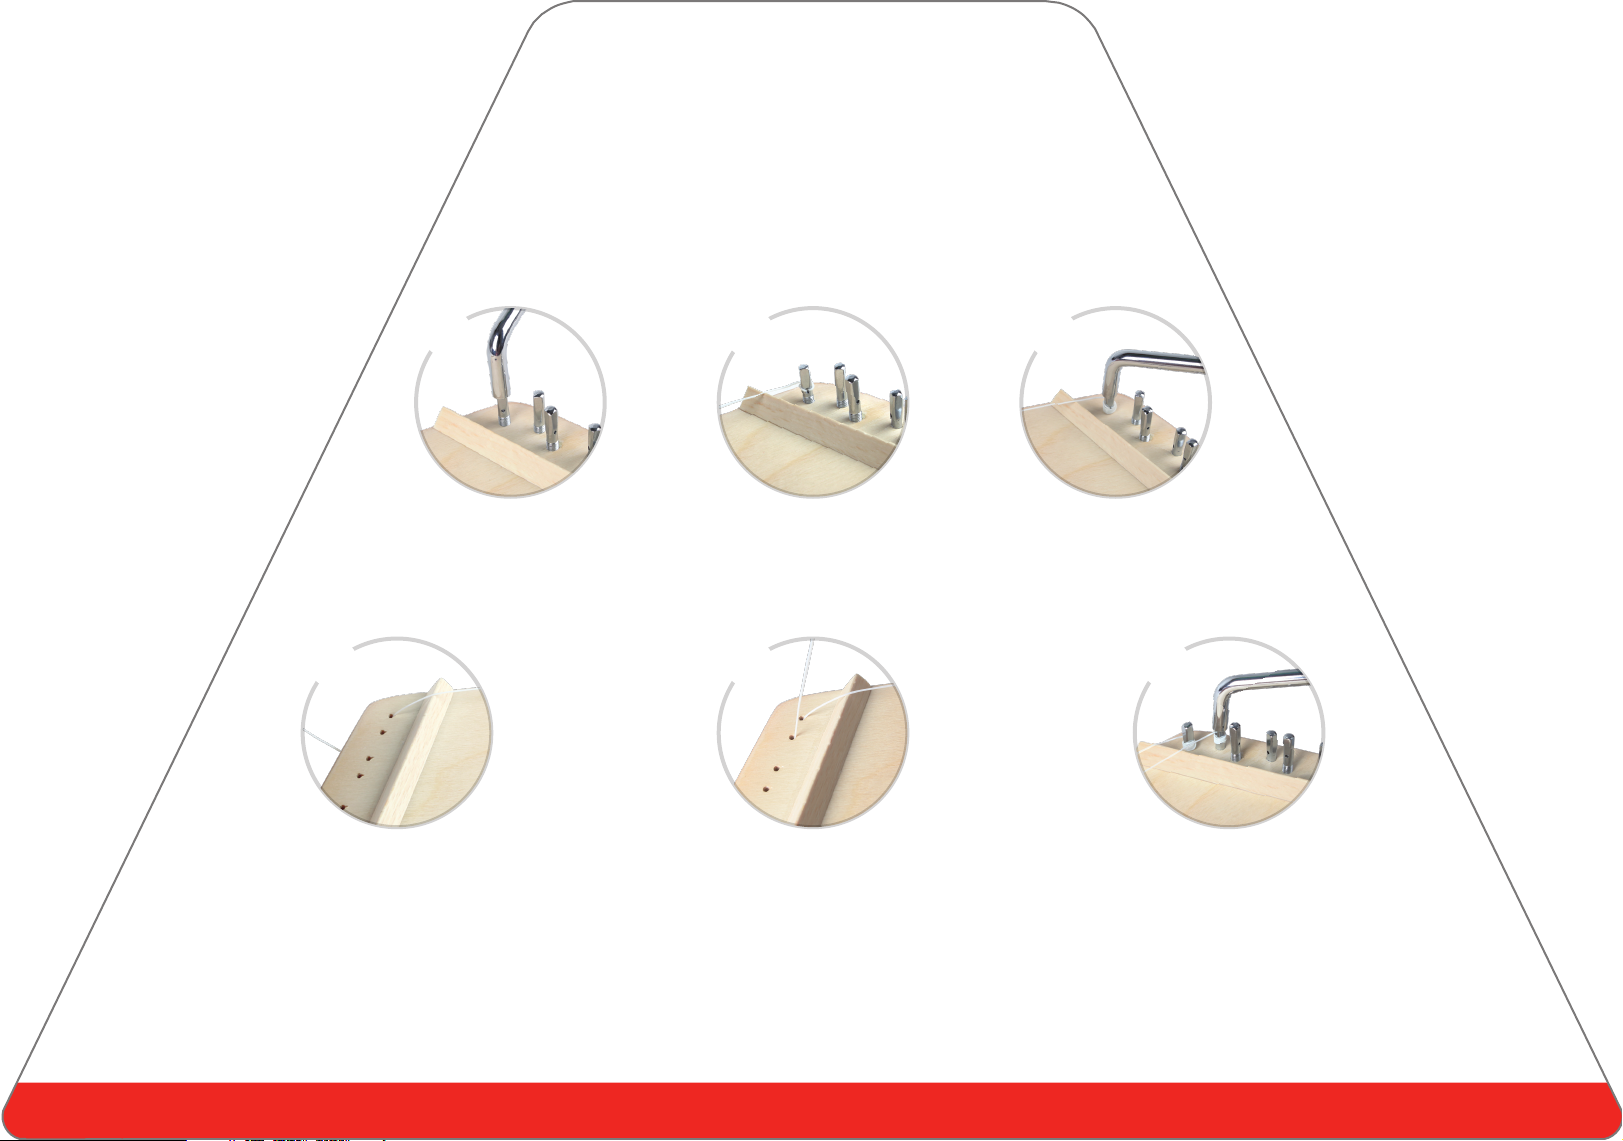
Use wire cutters to remove excess string and carefully bend the end of the string downward to protect players from the tip of the wire.
Use the Happy Harp Tuning Tips regularly to fine tune your instrument.
12
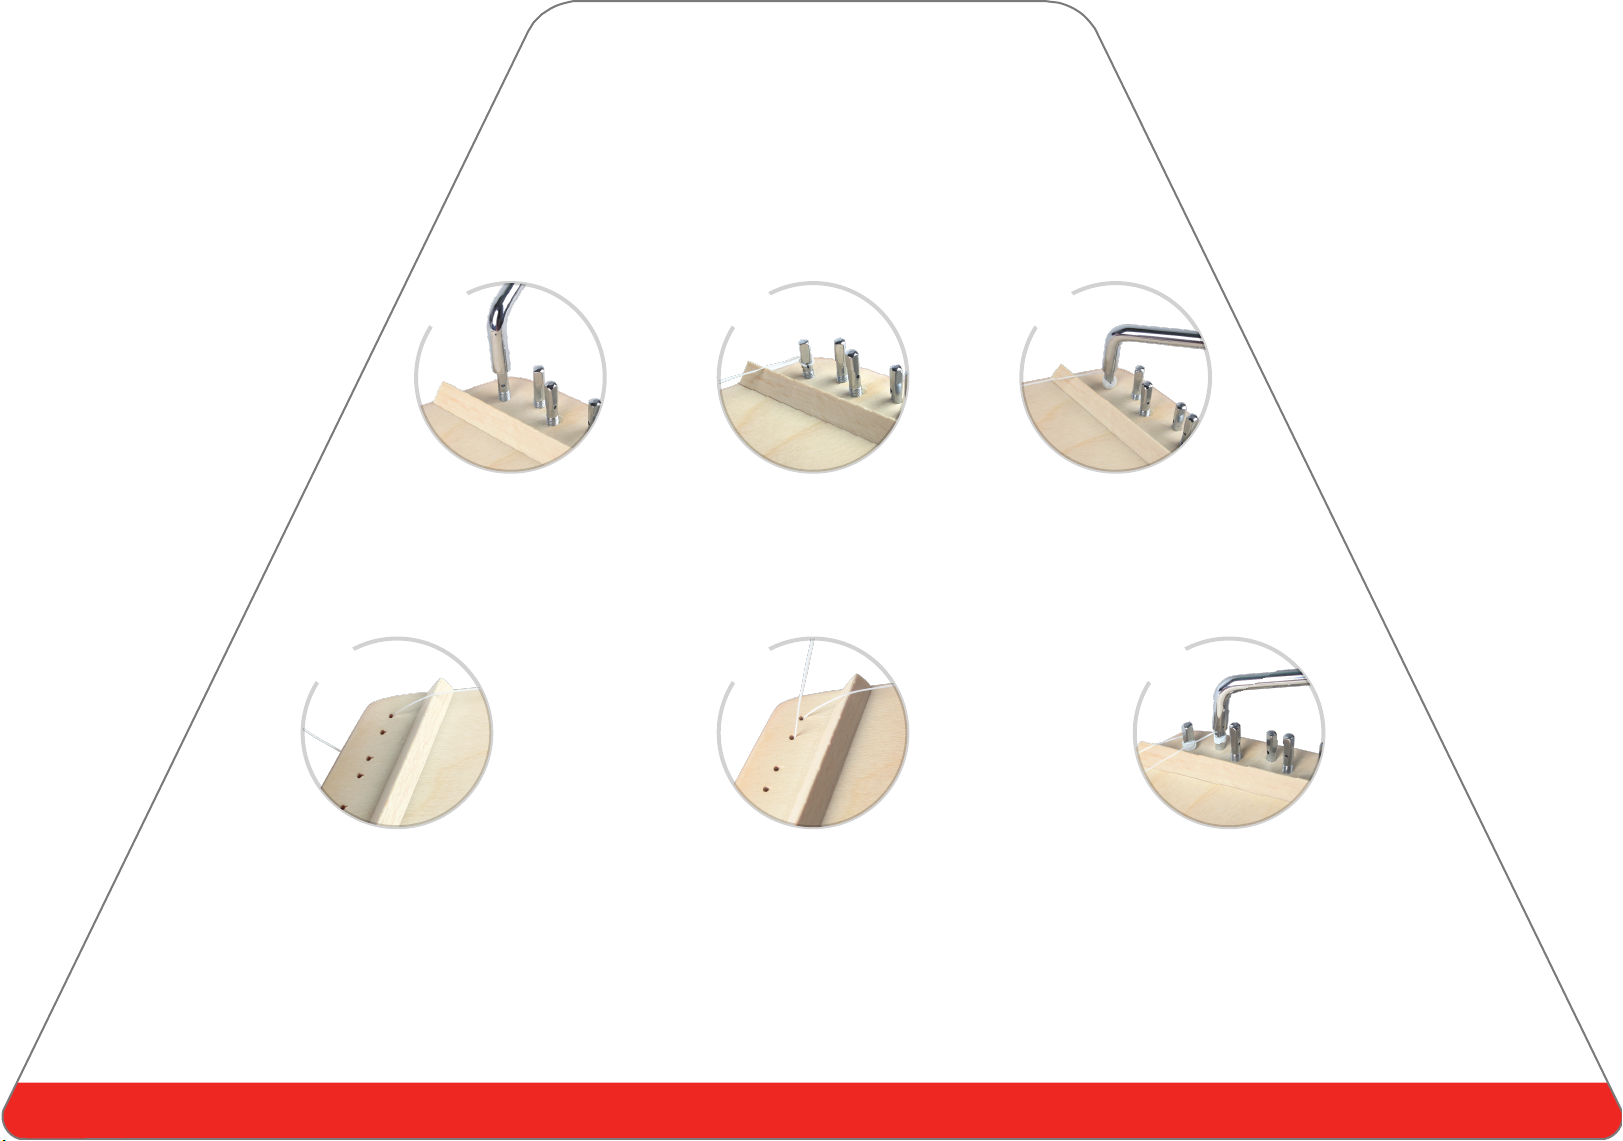
Thread the string through the hole in
the tuning pin. Bend the string after
inserting it through the tuning pin to
keep it in place.
Tighten the tuning pin approxi-
mately five complete turns. Be
sure that the string is being
wound below the hole in the
turning pin.
After the first tuning pin is threaded, thread the string through the parallel hole on the left side of the harp,
bringing the string up through the hole directly underneath. Finish the 2nd row by threading the 2nd
tuning pin from the top on the right side. Continue with threading the rows of strings in the same manner
for any others that need replacing. (Please note that this step is not necessary on the bottom string as it
has only one tuning pin and hole.)
4-1 4-2
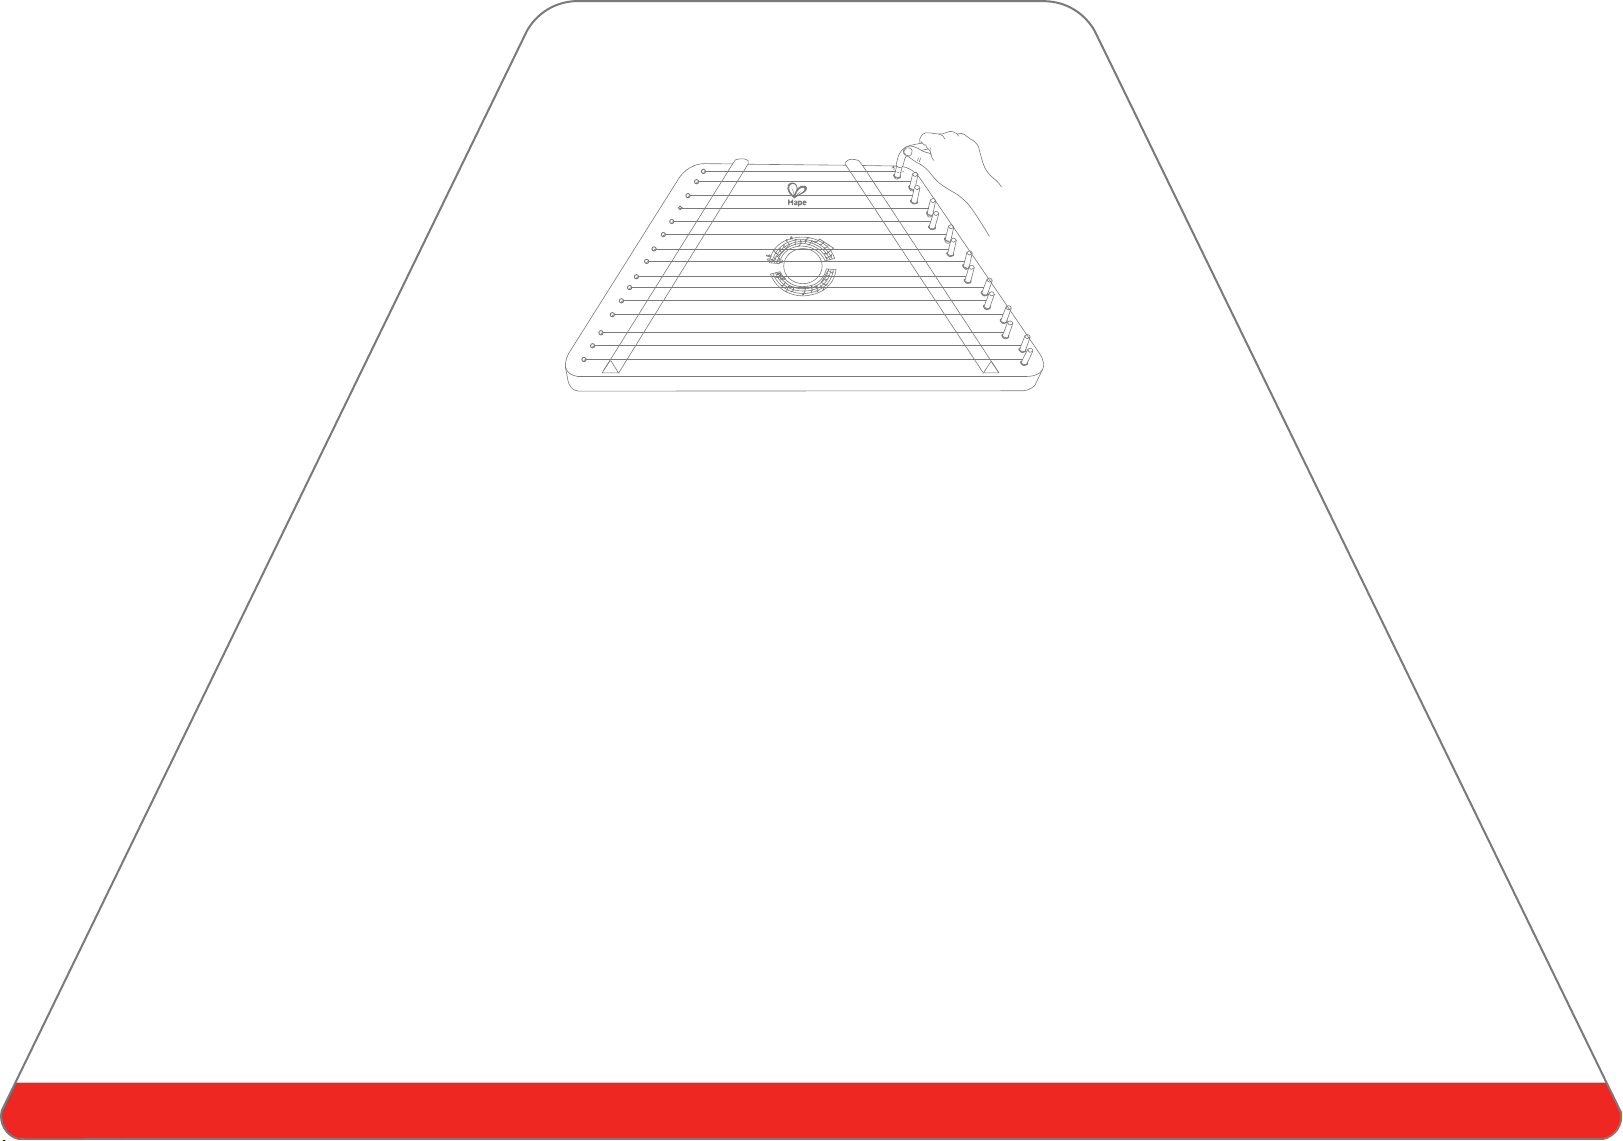
Loosen the pins with
approximately five
complete turns each.

3
TUNED TO KEY OF “G” TUNED TO KEY OF “F”
G
G
GDo FDo
La
Ti
So
Mi
Fa
Re
Ti
Do FDo
La
Do 1
2
3
4
5
6
7
1
2
3
4
5
6
7
Fa
So
Re
Mi
Do
Fa
Re
Mi
A
ARe G
B
F
G
A
BMi A
C
B
b
B
b
CFa
DSo C
DSo C
ELa D
ELa D
F
#
F
#
F
#
Ti E
Ti E
CDEF G A BC
C D E F G A B
KEY OF “C”
#
CD E
#
F G A B
KEY OF “D”
#
C
#
DE
#
F
#
G A B
KEY OF “E”
KEY OF “G”
C D E
#
FG A B
Pitch name
La TiSoMi FaReDo
So-fa syllables
1 2 3 4 5 6 7
Numbered musical notion
Happy Harp
1
2
3
4
5
6
7
1
1
2
3
4
5
6
7
1
B
b
C D EF G A
KEY OF “F”
B
b

Playing the Happy Harp is an ideal parent-child
activity introducing children to music basics and
enabling them to make music on their own. In addition,
the Happy Harp is a great tool for children of all ages for
developing coordination and fine motor skills.
Help your child learn to play using these activities and
exercises:
The songs included with Happy Harp range in difficulty. Pick one or
two of the easier songs that your child is familiar with and sing the song
together introducing the musical scale.
Pluck the strings of the Happy Harp, starting from the bottom string up, and
have your child do the same. This is to help them learn the difference between
the notes.
Starting with the same songs that you sang together, place a music sheet under the
strings of the Happy Harp and play the first phrase of the song. For example, if you sang
“Twinkle, Twinkle, Little Star”, follow the notes on the music sheet to play “Twinkle, Twinkle,
Little Star”. Then have your child do the same.
Play the entire song through to the end, emphasizing the idea of plucking the string above each note
to create the song and then let your child play the whole song.
Help your child understand that it may not sound perfect at first, but that with a little practice, the Happy
Harp can make any child sound like a master musician!
LEARNING TO
PLAY THE HAPPY HARP
4

5
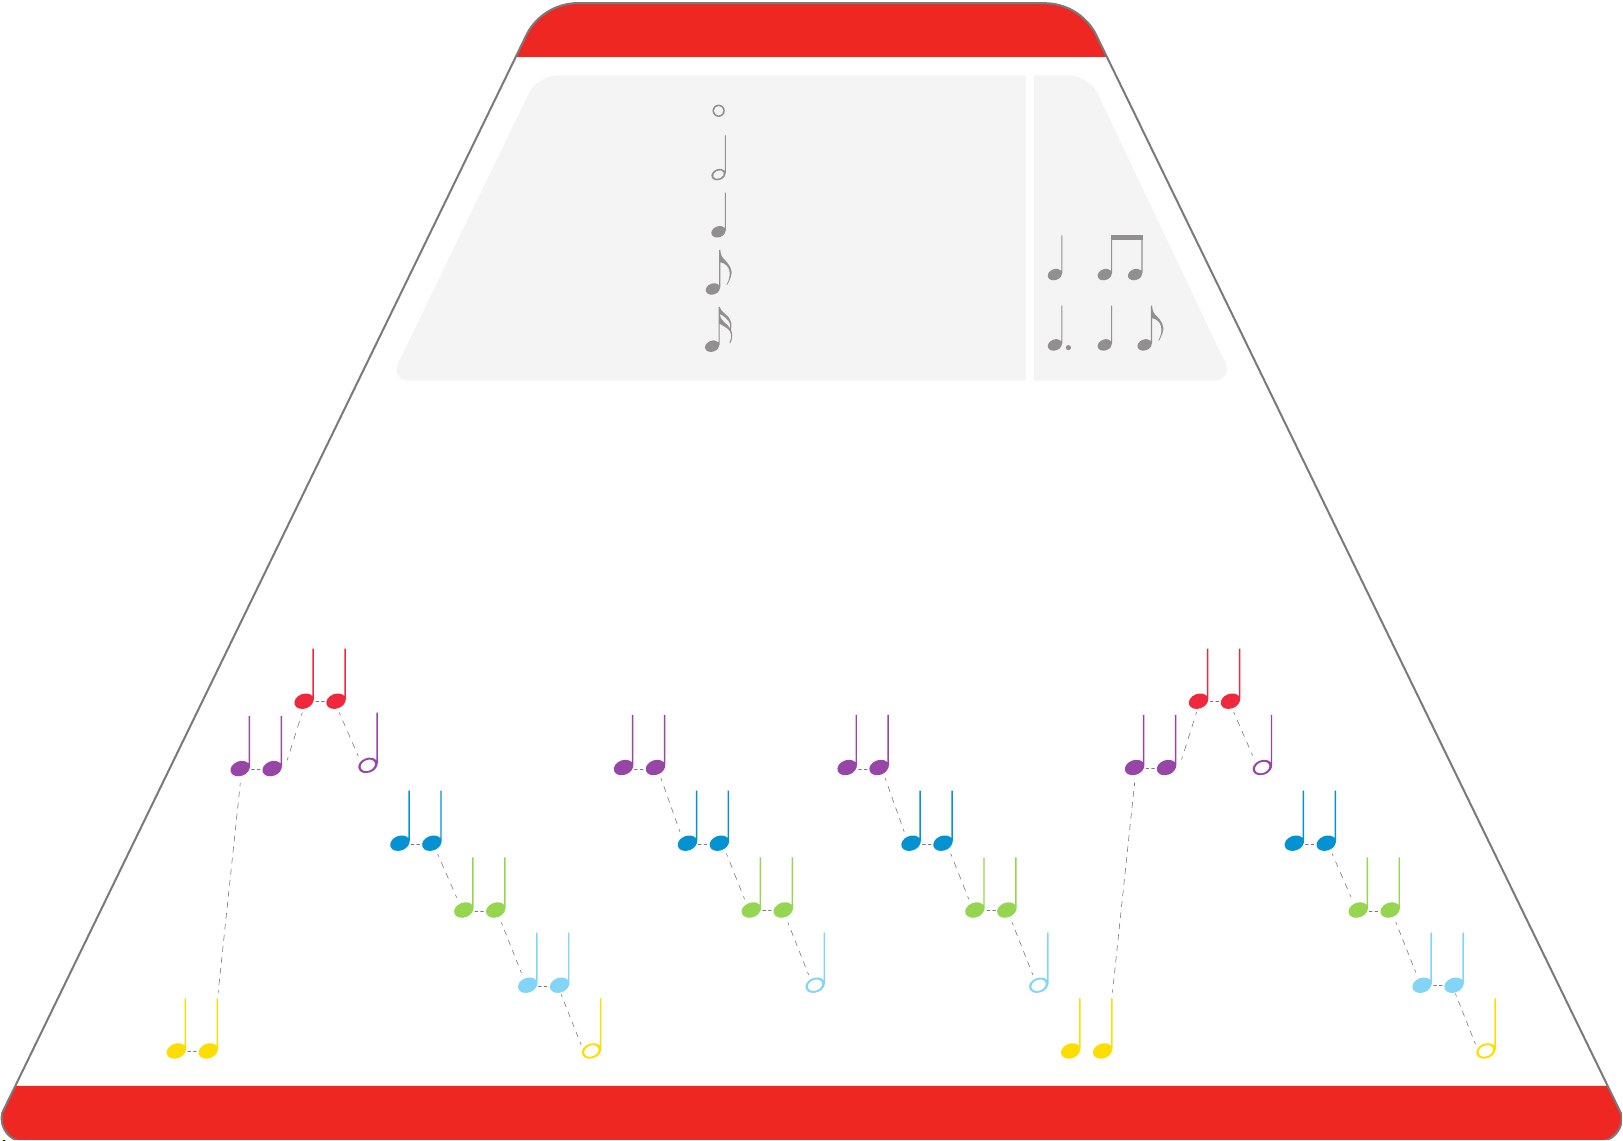
Select a song among the eight Song Sheets included and insert it under the strings and on top of the harp.
Make sure the trapezoid-shaped Song Sheet fits perfectly onto the wooden platform. The strings will be
parallel to the notes on the sheet.
Play the music with the pick included from left to right according to the colored notes. Each note stands for
picking the corresponding string.
Play lightly for a melodic tone with either left or right hand.
Move up or down to the other strings to create a harmonic song.
Practice the rhythm until you make a perfect song.
Perform for your parents to share your wonderful skills.
Happy Harp
6
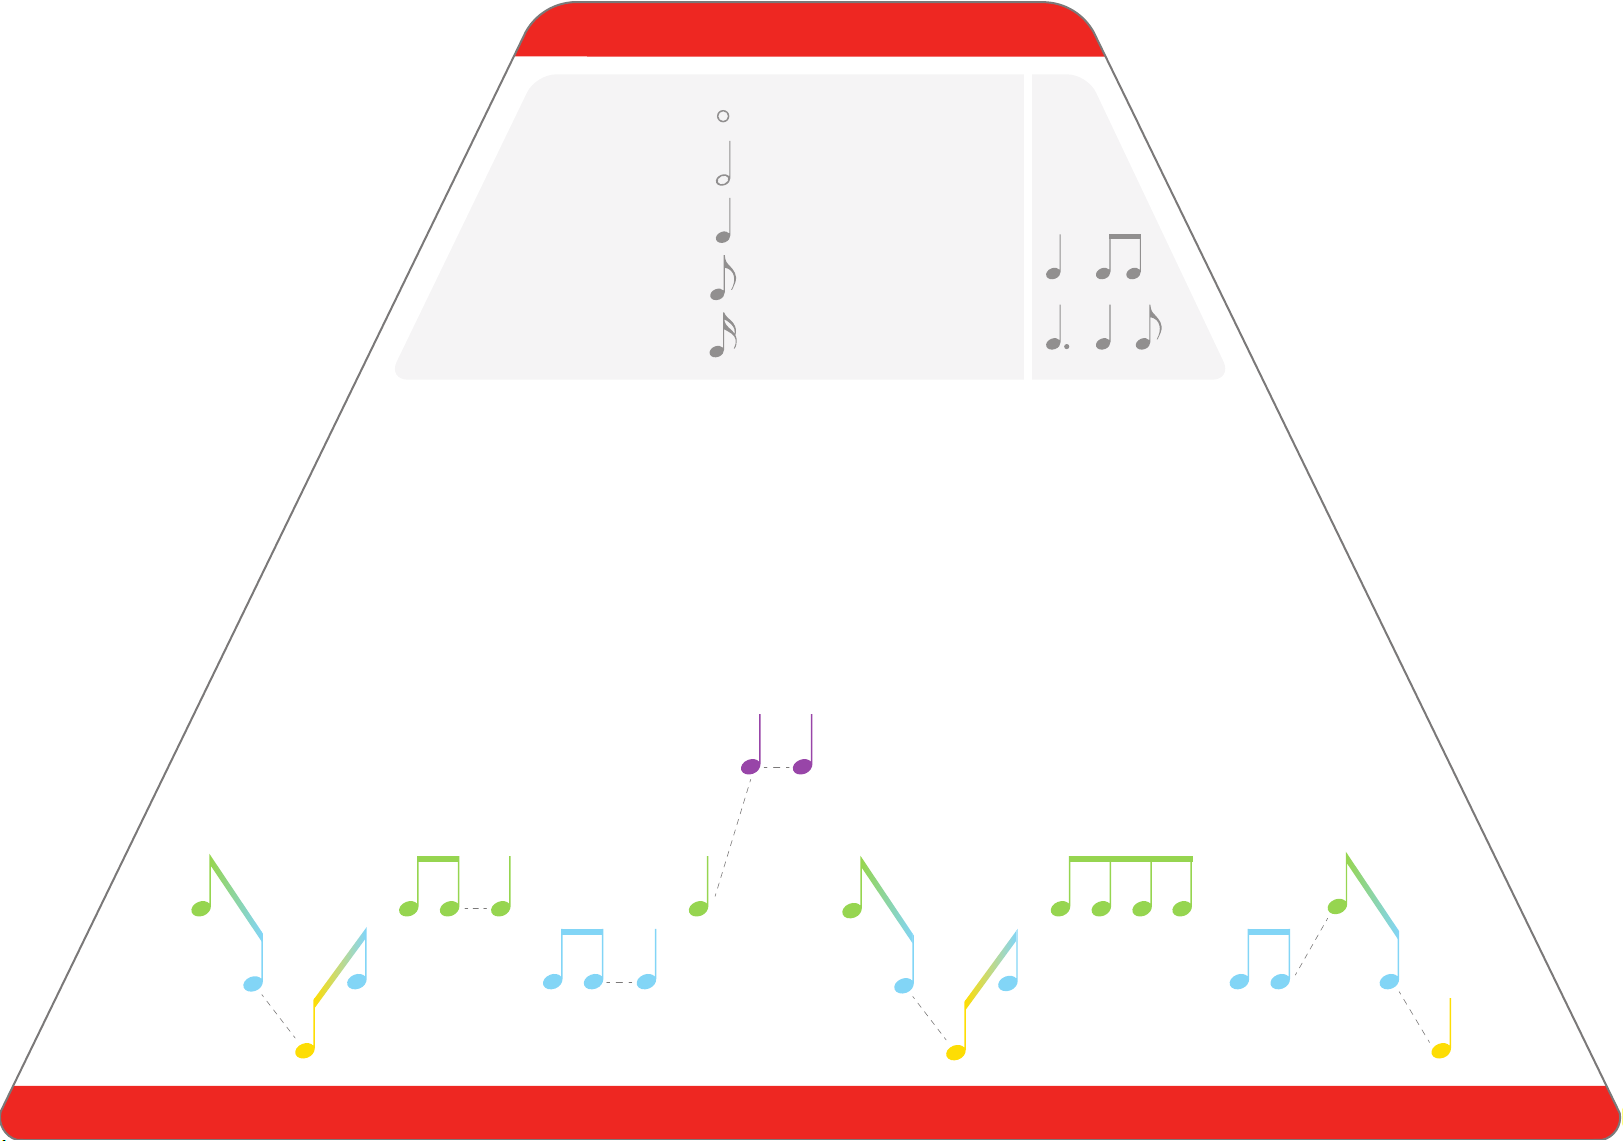
Mary Had a Little Lamb
whole note 4 beats 1- - -
1-
1
_
1
_
_
1
2 beats
1 beat
1/2 beat
1/4 beat
half note
quarter note
eighth note
sixteenth note = +
=
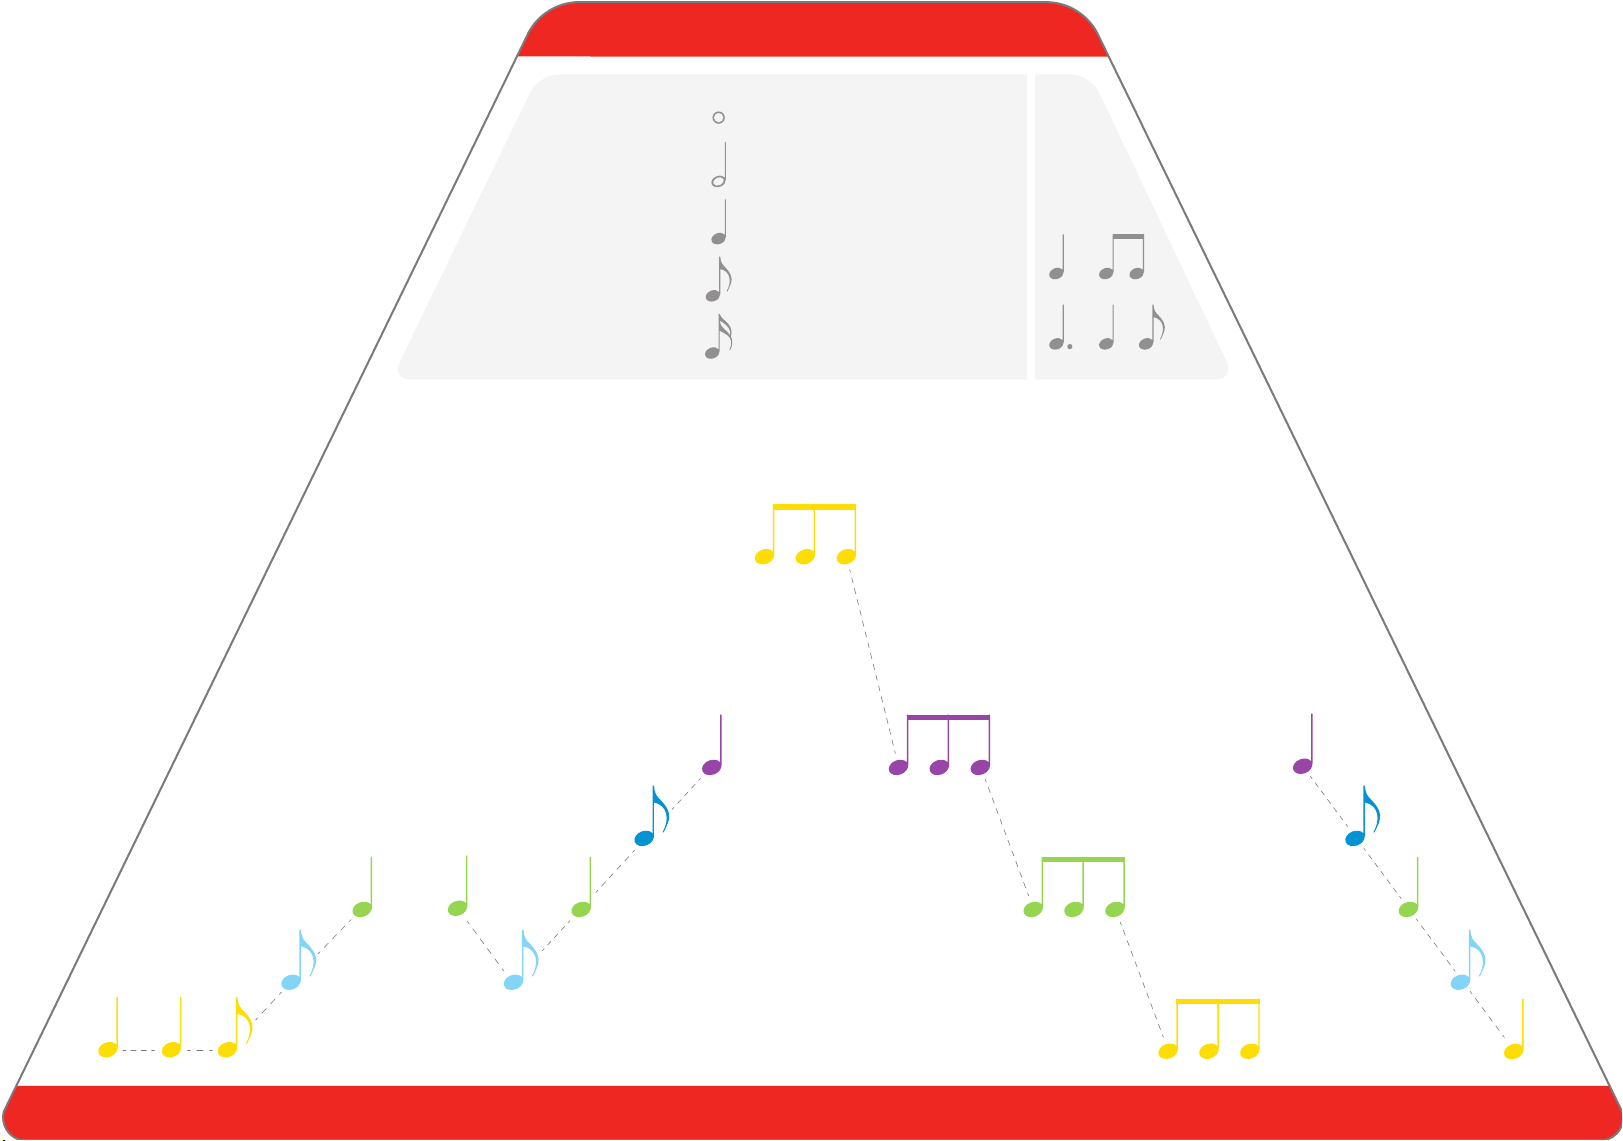
Row, Row, Row Your Boat
7
= +
=
whole note 4 beats 1- - -
1-
1
_
1
_
_
1
2 beats
1 beat
1/2 beat
1/4 beat
half note
quarter note
eighth note
sixteenth note
8
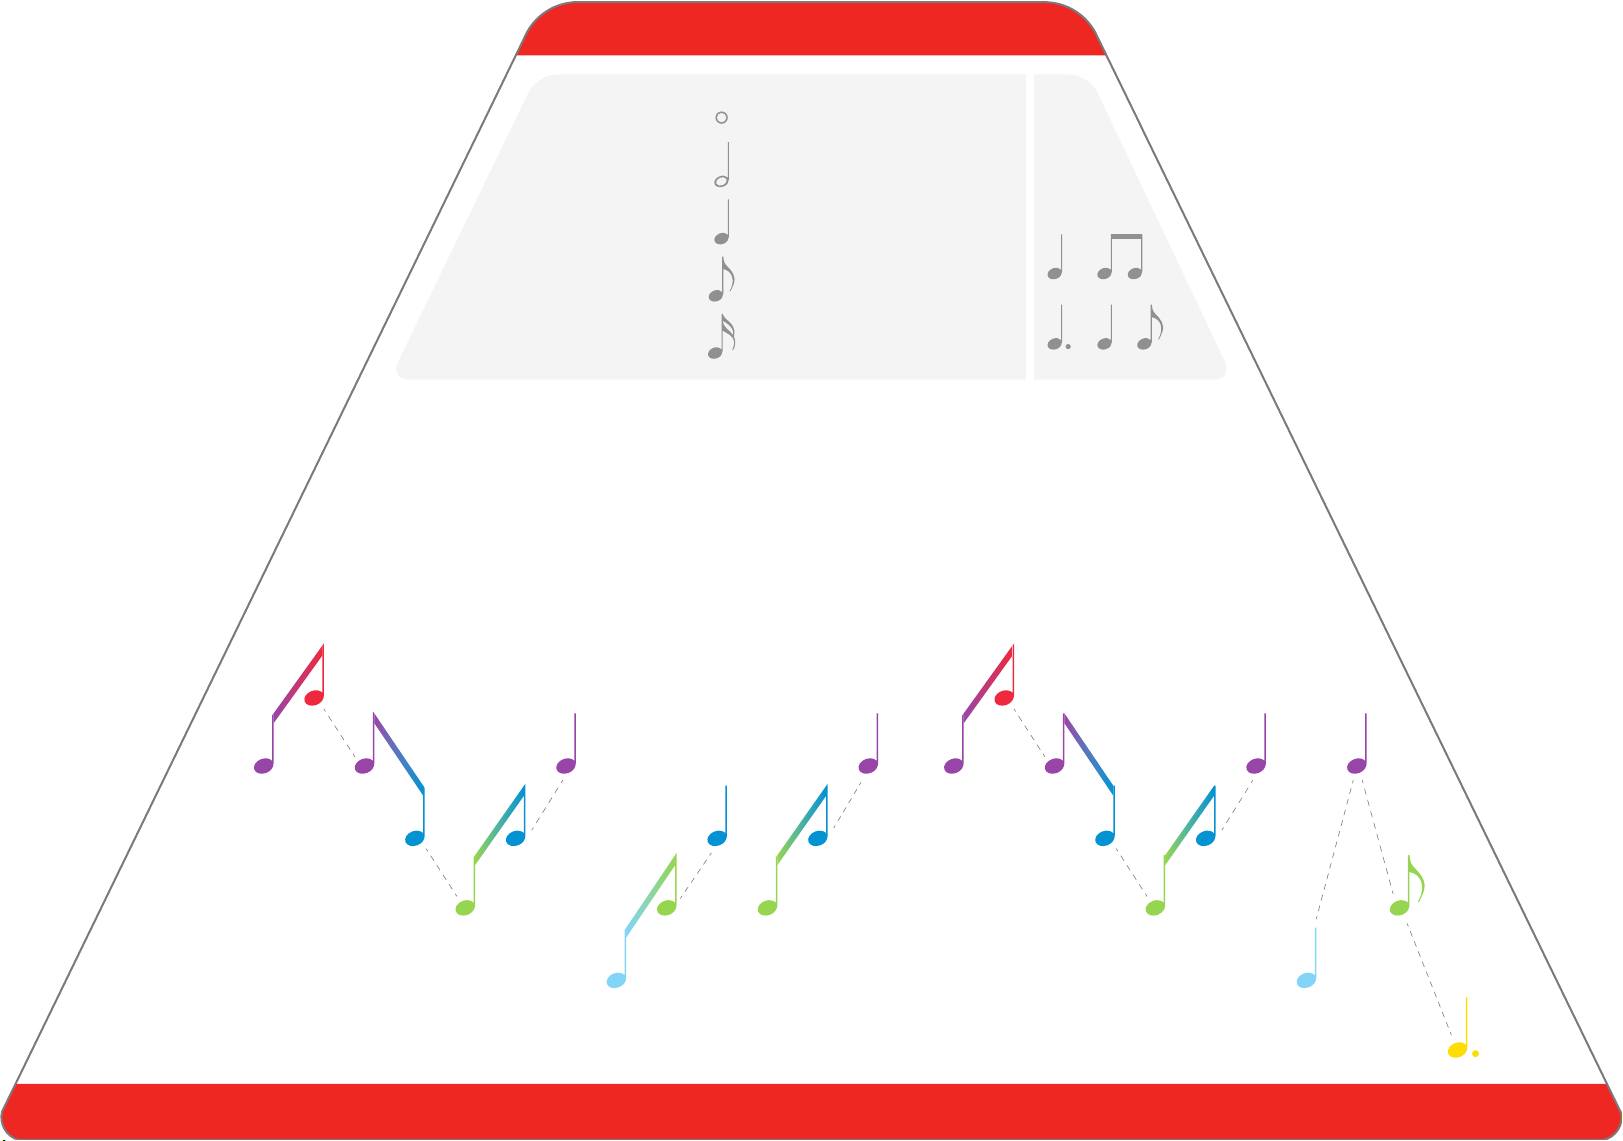
London Bridge Is Falling Down
= +
=
whole note 4 beats 1- - -
1-
1
_
1
_
_
1
2 beats
1 beat
1/2 beat
1/4 beat
half note
quarter note
eighth note
sixteenth note

Happy Birthday to You
9
whole note 4 beats 1- - -
1-
1
_
1
_
_
1
2 beats
1 beat
1/2 beat
1/4 beat
half note
quarter note
eighth note
sixteenth note = +
=
Twinkle, Twinkle, Little Star
10
= +
=
whole note 4 beats 1- - -
1-
1
_
1
_
_
1
2 beats
1 beat
1/2 beat
1/4 beat
half note
quarter note
eighth note
sixteenth note

Copy this page to record new songs. www.hape.com
Do
Do
1
2
3
4
5
6
7
Do
Fa
Re
Mi
Re
Mi
Fa
So
So
La
La
Ti
Ti
1
2
3
4
5
6
7
1
E0323
1
Die Saiten der Happy-Harfe sind wie bei einer klassischen Gitarre aus
Nylon. Alle Saiteninstrumente müssen von Zeit zu Zeit nachgestimmt
werden. So auch Ihre Harfe.
Um Ihre Harfe zu stimmen, können Sie eine Stimmpfeife oder eine Stimmgabel
verwenden. Ebenso geeignet sind ein gestimmtes Klavier, ein Keyboard und
jedes andere Musikinstrument, das bereits richtig gestimmt ist. Es gibt zudem die
Möglichkeit, Stimmsoftware auf Ihrem Handy zu installieren.
Die Happy-Harfe hat 15 Saiten. Sie kann grundsätzlich in jeder Tonart gestimmt werden
(C-Dur, D-Dur, E-Dur, F-Dur-, G-Dur). Die Tonreihenfolge umfasst immer 2 Oktaven. Wenn Sie
die Harfe zum Beispiel in C-Dur stimmen wollen, wählen Sie zum Stimmen der tiefsten Saite ein
C auf Klavier, Keyboard oder Gitarre und drehen Sie den dem Wirbel der Harfe so lange, bis die
Töne identisch sind. Wiederholen Sie das bei allen folgenden Saiten mit den tonartgerechten Tönen
der Tabelle. Bitte beachten: Das B entspricht dem deutschen H. Und das Bb dem deutschen B.
Wenn Sie alle Saiten als Tonleiter über zwei Oktaven gestimmt haben, legen Sie ein Notenblatt ein. Wählen
Sie am besten ein Lied, das Sie gut kennen (wir empfehlen einfache Lieder wie „Twinkle, Twinkle, Little Star“).
Hört sich das Lied richtig an? Dann stimmt Ihre Harfe. Falls das Lied falsch klingt oder Ihnen das Stimmen
schwerfällt, lassen Sie sich von einem Freund, Musiklehrer oder von einem Musikfachgeschäft helfen.
TIPPS ZUM STIMMEN
2
5
3
Das Auswechseln von Saiten sollte nur ein Erwachsener durchführen. Wenn
Sie unsicher sind, lassen Sie sich bitte von einem Musikfachmann helfen. Sie
benötigen eine Zange und einen Seitenschneider.
Wir empfehlen Ihnen, eine Schutzbrille zu tragen.
Entfernen Sie mithilfe des Seitenschneiders die am Wirbel überstehenden Saitenenden und biegen Sie das Ende der Saite vorsichtig nach unten,
um den Spieler vor der Spitze des Drahtes zu schützen. Stimmen Sie das Instrument regelmäßig mithilfe der Tipps zum Stimmen der Happy-Harfe.
12
Fädeln Sie die neuen Saiten durch das
Loch im Stimmwirbel. Biegen Sie
anschließend den überstehenden Teil
der Saite entgegen der Drehrichtung
des Wirbels ab, um ihn zu fixieren.
Ziehen Sie den Stimmwirbel mit
ungefähr fünf
Umdrehungen nach rechts an.
Stellen Sie sicher, dass die Saite
unter dem Loch im Stimmwirbel
aufgewickelt wird.
Fädeln Sie nach dem umwickeln des ersten Stimmwirbels die Seite durch das linke Loch an der Harfe.
Führen Sie die Seite durch das direkt darunter liegende Loch wieder nach vorne. Stellen Sie die zweite
Reihe fertig, indem Sie die Seite auf den zweiten Stimmwirbel von oben rechts auffädeln.
Fahren Sie ebenso mit dem auffädeln weiterer Seitenreihen fort, die ersetzt werden müssen.
(Bitte beachten Sie, dass dieser Schritt für die unterste Saite nicht erforderlich ist, da sie nur einen
Stimmwirbel und Stift hat).
4-1 4-2
Lösen Sie jeden der Wirbel mit
jeweils etwa fünf vollständigen
Umdrehungen und entfernen
Sie die alten Saiten.
Wiederholen Sie Schritt 2 und 3, um einen weiteren
Wirbel festzuziehen.
NEUE SAITEN
AUFZIEHEN
3
G
G
GDo FDo
La
Ti
So
Mi
Fa
Re
Ti
Do FDo
La
Do 1
2
3
4
5
6
7
1
2
3
4
5
6
7
Fa
So
Re
Mi
Do
Fa
Re
Mi
A
ARe G
B
F
G
A
BMi A
C
B
b
B
b
CFa
DSo C
DSo C
ELa D
ELa D
F
#
F
#
F
#
Ti E
Ti E
CDEF G A BC
C D E F G A B
„C“ TONART
#
CD E
#
F G A B
„D“ TONART
#
C
#
DE
#
F
#
G A B
„E“ TONART
„G“ TONART
C D E
#
FG A B
Name der Tonlage
La TiSoMi FaReDo
So-fa-Silben
1 2 3 4 5 6 7
Nummerierter musikalischer Begriff
Happy Harp
1
2
3
4
5
6
7
1
1
2
3
4
5
6
7
1
B
b
C D EF G A
„F“ TONART
B
b
AUF DIE „G“ TONART GESTIMMT AUF DIE „F“ TONART GESTIMMT

Gemeinsam Happy-Harfe zu spielen, ist eine schöne
Eltern-Kind-Aktivität. Denn Kinder werden so in die
Grundlagen der Musik eingeführt und lernen, alleine
Musik zu machen. Darüber hinaus ist die Happy-Harfe ein
tolles Instrument für Kinder aller Altersstufen, um
Koordination und Feinmotorik zu trainieren.
So gehen Sie konkret vor:
Die mit der Happy-Harfe gelieferten Lieder haben unterschiedliche
Schwierigkeitsgrade. Wählen Sie leichte Lieder, die Ihr Kind kennt. Erster
Schritt: Singen Sie das Lieder zusammen, um dabei die Melodie
vorzustellen.
Zweiter Schritt: Zupfen Sie die Saiten der Happy-Harfe von der untersten bis zur
obersten. Lassen Sie Ihr Kind dasselbe tun. Auf diese Weise lernen Kinder die
Unterschiede zwischen den Tönen kennen.
Dritter Schritt: Ein Lied auf der Harfe spielen. Beginnen Sie einem einfachen Lied, das Ihr
Kind kennt. Legen Sie das entsprechende Notenblatt unter die Saiten der Happy-Harfe und
spielen Sie die erste Strophe des Liedes. Gehen Sie anfangs langsam vor. Dann ist Ihr Kind an der
Reihe.
Vierter Schritt: Spielen Sie das ganze Lied bis zum Ende und zeigen Sie dabei, wie die Saiten über jeder
Note gezupft werden, um das Lied zu spielen. Lassen Sie dann Ihr Kind das ganze Lied spielen.
Helfen Sie Ihrem Kind zu verstehen, dass noch kein Musikmeister vom Himmel gefallen. Deshalb kann es sein,
dass am Anfang vielleicht noch nicht perfekt klingt. Aber mit ein wenig Übung kann jedes Kind die
Happy-Harfe schnell schön klingen lassen!
SO SPIELEN SIE DIE
HAPPY-HARFE
4

5
Darauf achten, dass der trapezförmige Liederbogen genau auf die Holzplattform passt. Die Saiten sind
parallel zu den Noten auf dem Bogen.
Spiele die Musik mit dem beiliegenden Plektron von links nach rechts gemäß der bunten Noten. Jede Note
steht für das Zupfen der entsprechenden Saite.
Wichtig: Das Plektron nur leicht über die Saiten führen.
Übe den Rhythmus, bis dein Lied perfekt klingt.
Spiele deinen Eltern vor, um dein wunderbares Können zu zeigen.
Happy Harp

6
Mary Had a Little Lamb
Ganze Note 4 Taktschläge 1- - -
1-
1
_
1
_
_
1
2 Taktschläge
1 Taktschläge
1/2 Taktschläge
1/4 Taktschläge
Halbe Note
Viertelnote
Achtelnote
Sechzehntelnote = +
=

Row, Row, Row Your Boat
7
= +
=
Ganze Note 4 Taktschläge 1- - -
1-
1
_
1
_
_
1
2 Taktschläge
1 Taktschläge
1/2 Taktschläge
1/4 Taktschläge
Halbe Note
Viertelnote
Achtelnote
Sechzehntelnote

8
London Bridge Is Falling Down
= +
=
Ganze Note 4 Taktschläge 1- - -
1-
1
_
1
_
_
1
2 Taktschläge
1 Taktschläge
1/2 Taktschläge
1/4 Taktschläge
Halbe Note
Viertelnote
Achtelnote
Sechzehntelnote
Happy Birthday to You
9
= +
=
Ganze Note 4 Taktschläge 1- - -
1-
1
_
1
_
_
1
2 Taktschläge
1 Taktschläge
1/2 Taktschläge
1/4 Taktschläge
Halbe Note
Viertelnote
Achtelnote
Sechzehntelnote
This manual suits for next models
1
Table of contents
Languages:


