4
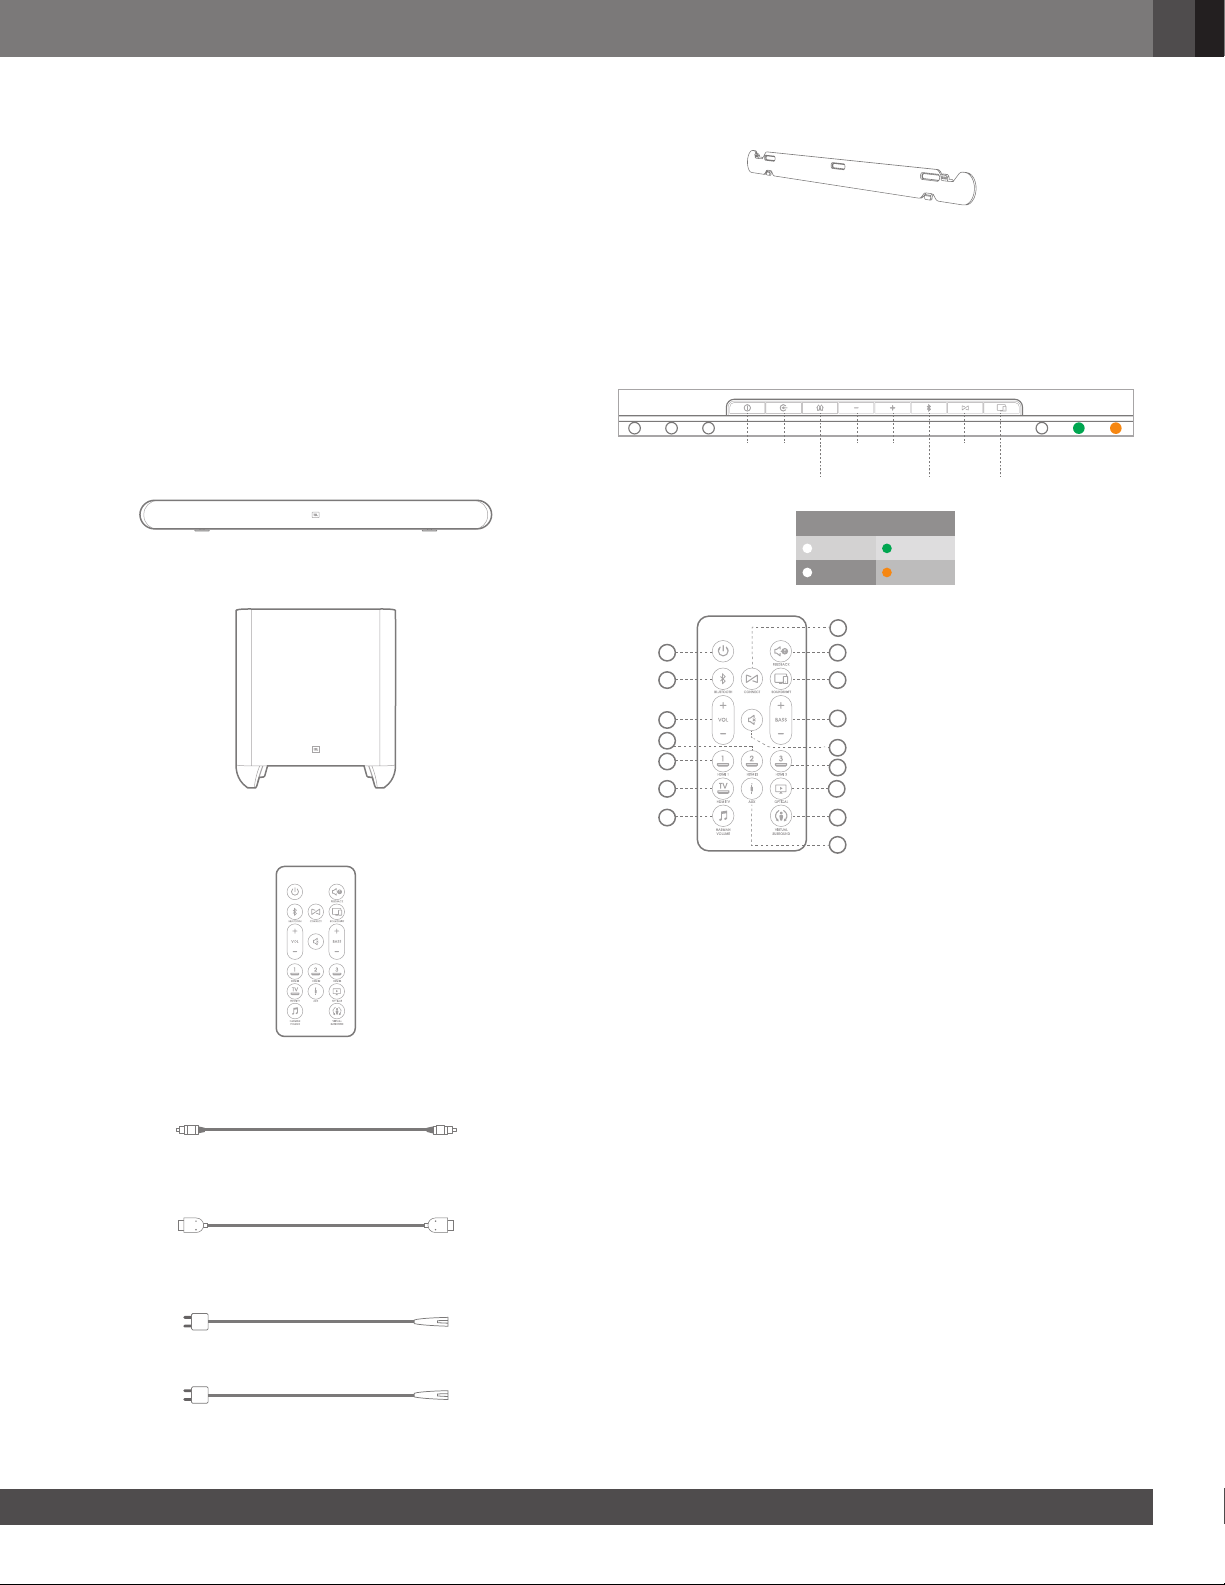
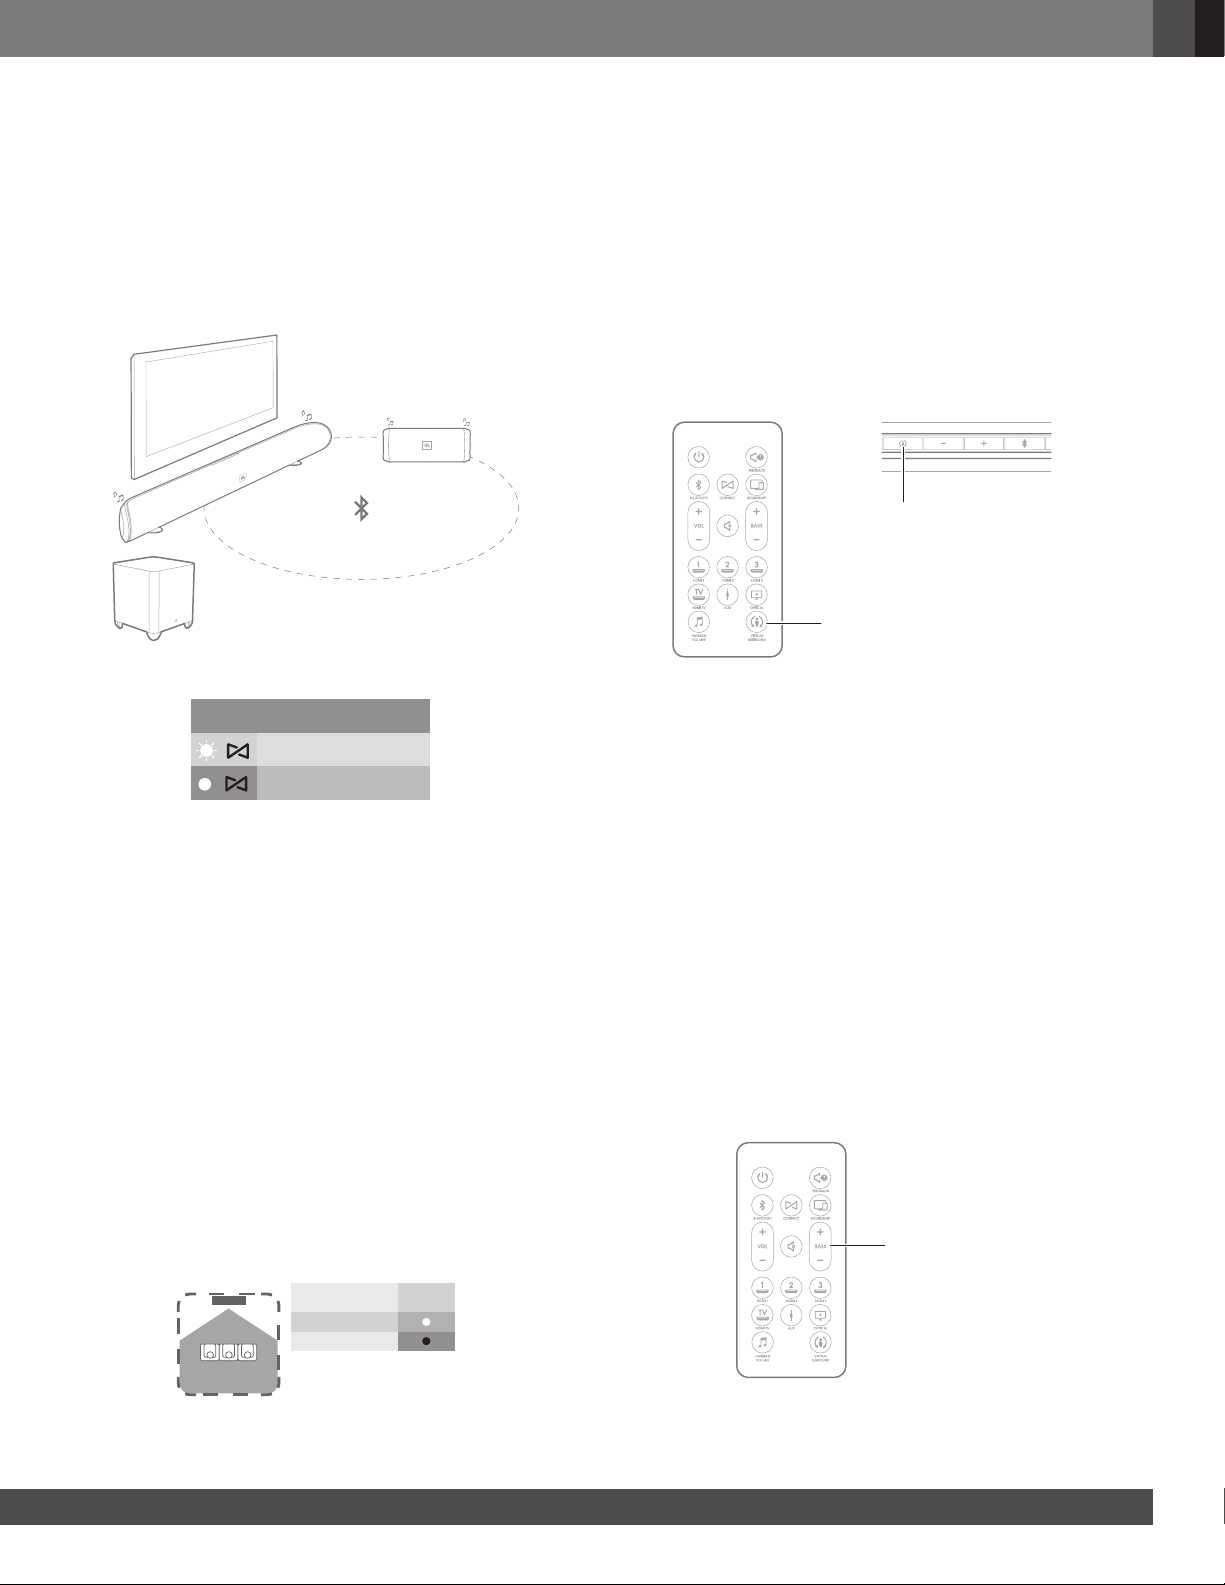
Bass Level Control (remote control only): Press these
buttons to adjust the overall level of the subwoofer to your
preference.
Harman Volume (remote control only): Press this button to
activate Harman Volume. This feature helps to maintain the volume
level constant and minimizes big variations in volume level when
listening to music or watching television. See the “Using Harman
Volume” section for more information.
Audio Feedback (remote control only): Press this button to
activate Audio Feedback. This feature provides audible tones to
indicate when certain functions are active. See the “Using Audio
Feedback section” for more information.
Mute (remote control only): Press the Mute button to mute
the system. (The top-panel Power LED indicator will blink white.)
While the system is muted, press the Mute button again or either
Volume button to restore the sound.
NOTE: Pressing both of the soundbar’s top-panel Volume
buttons at the same time while the system is on will
mute the system. Pressing either Volume button while
the system is muted will restore the sound.
Bluetooth: Press this button to play the audio stream from a
paired Bluetooth device through the soundbar. (The Bluetooth
Source Indicator LED will illuminate when a paired Bluetooth
device is the active source.) Press and hold this button to force
the soundbar into the Bluetooth pairing mode. See the “Using
Bluetooth” Section for more information.
JBL Connect: Press this button to engage JBL Connect pairing
mode. JBL Connect creates a Bluetooth wireless connection
with other compatible JBL Connect products. See “Using JBL
Connect” section for more information.
JBL SoundShift®: Press this button to engage JBL SoundShift.
JBL SoundShift allows you to instantly switch between sound from
your TV and sound from your phone or tablet. See the “Using JBL
SoundShift” section for more information.
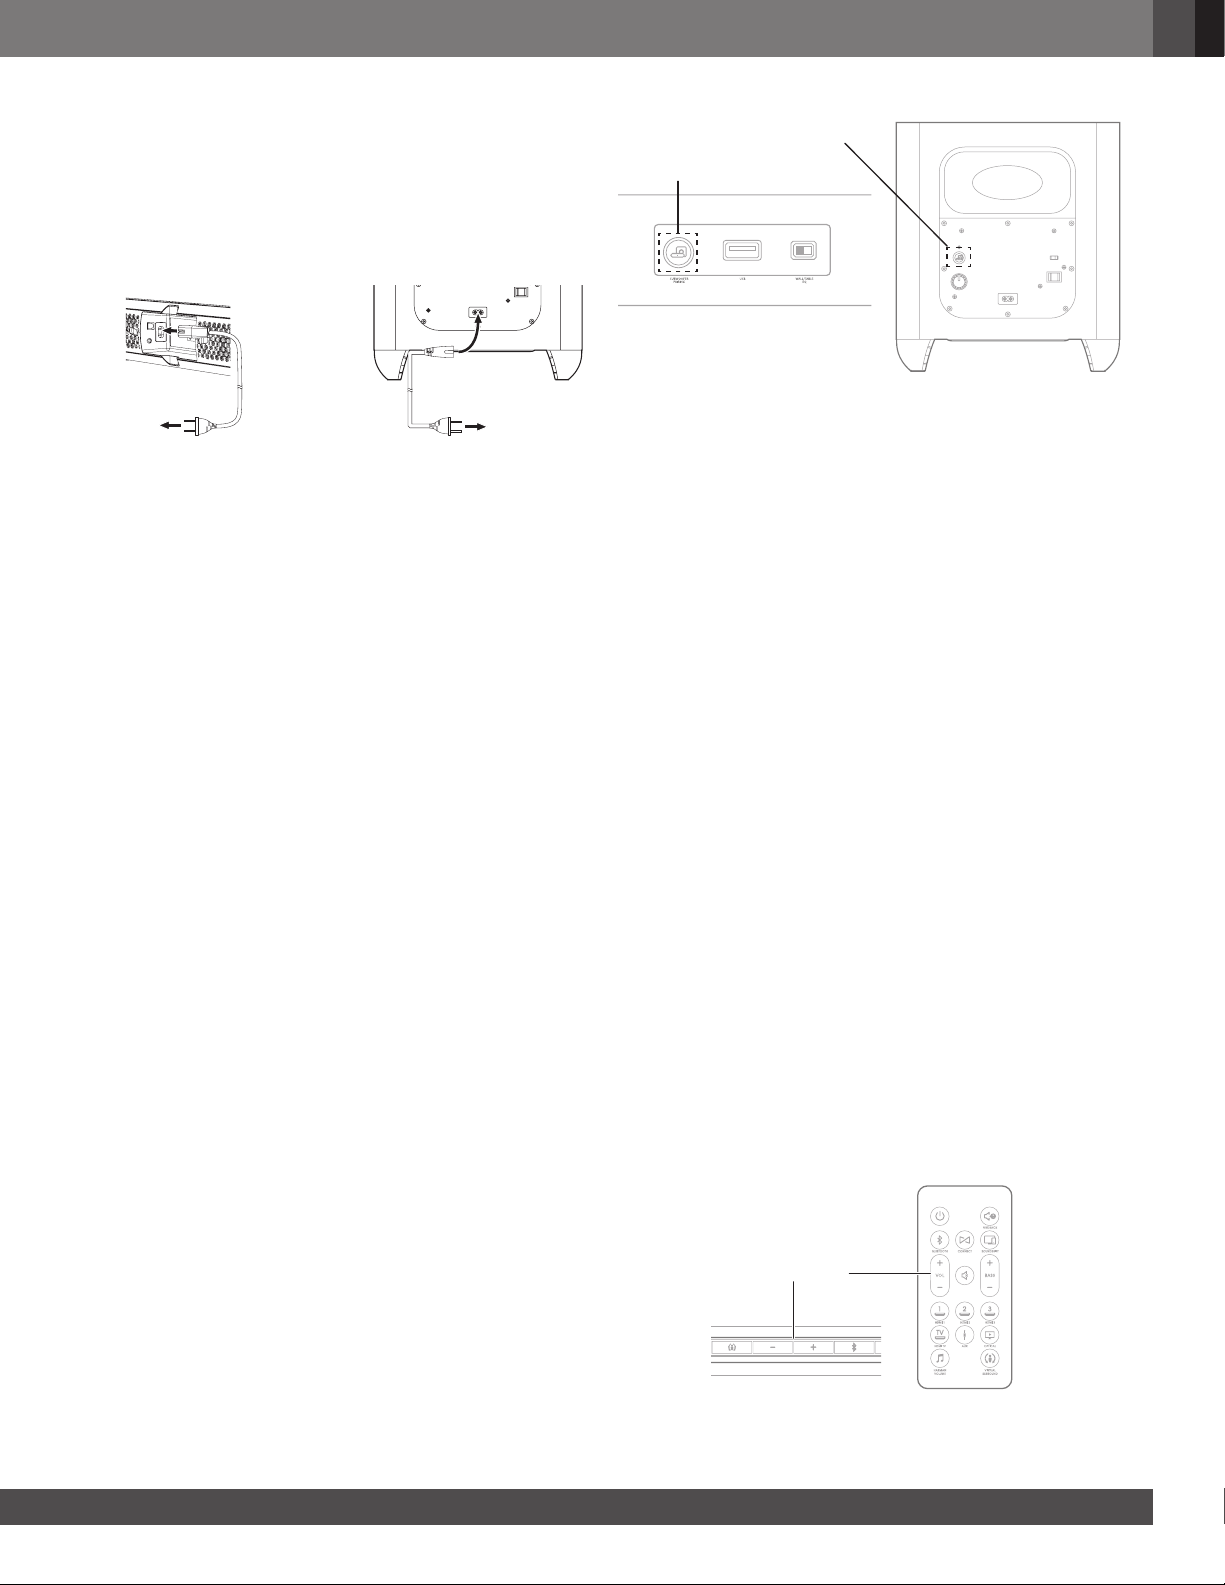
SOUNDBAR REAR PANEL CONNECTIONS AND
CONTROLS
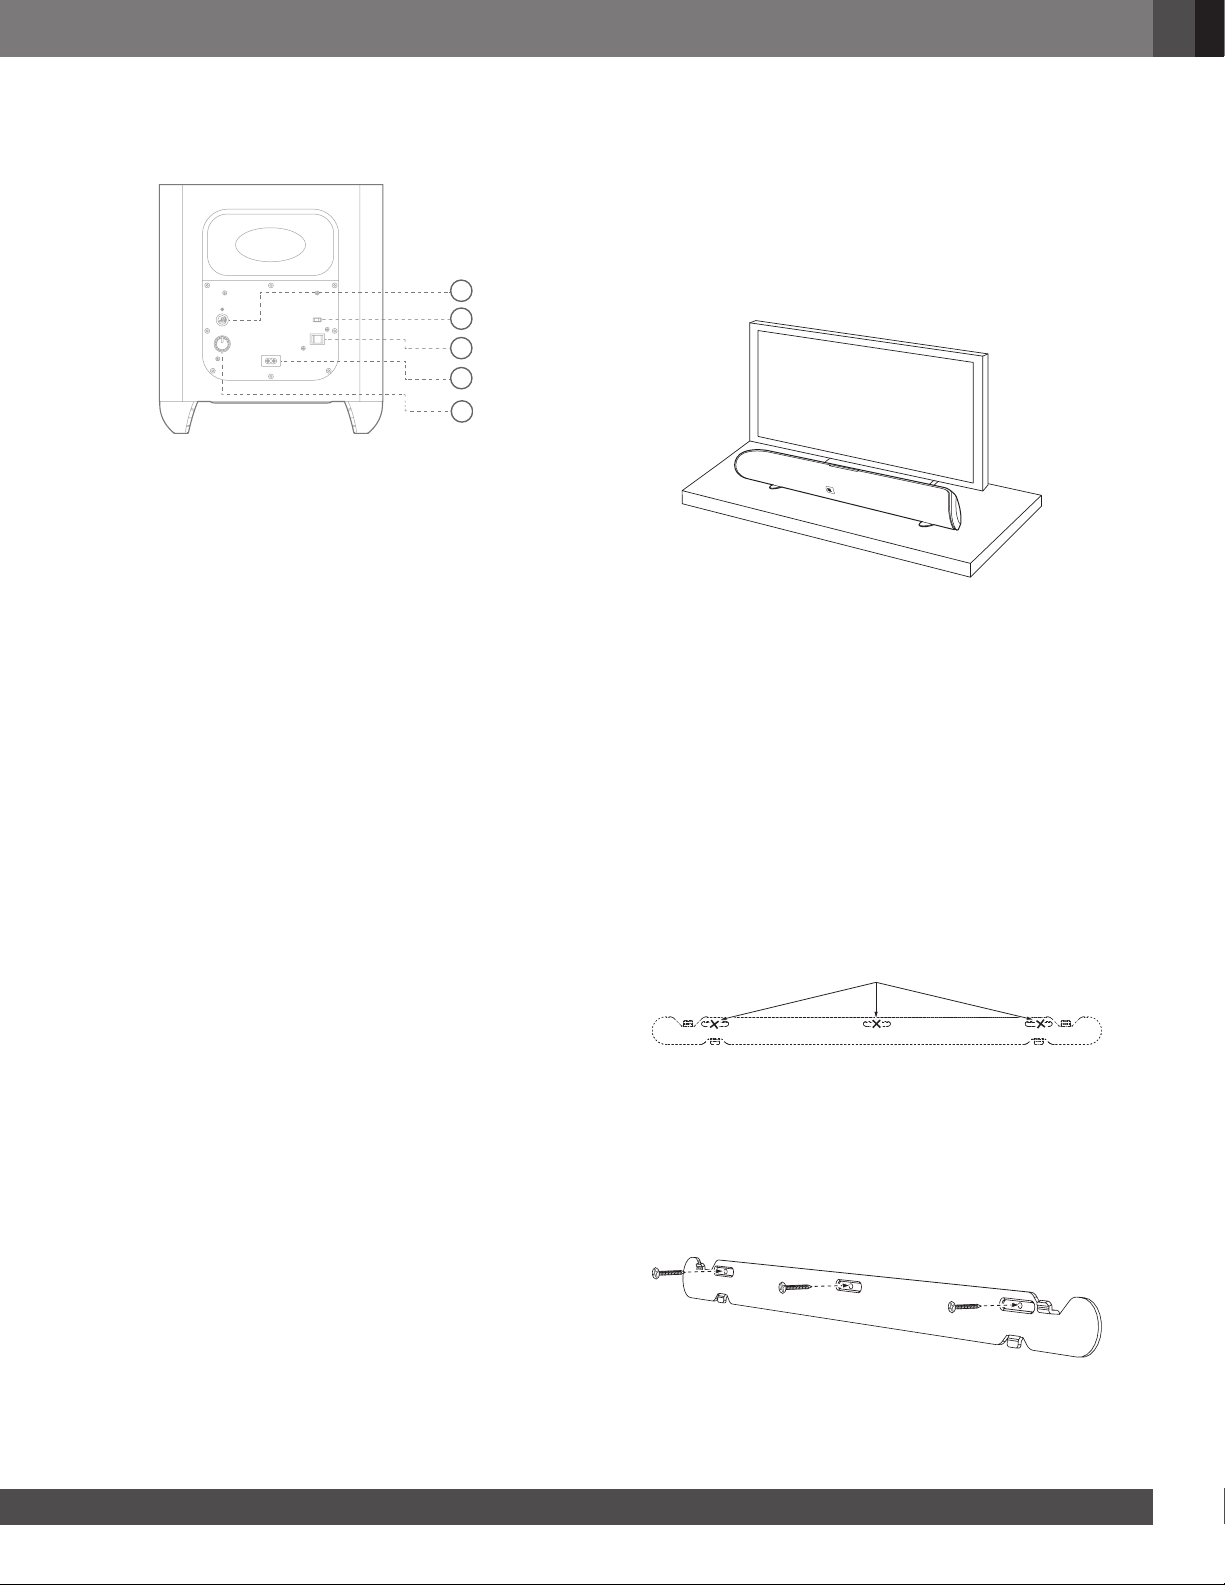
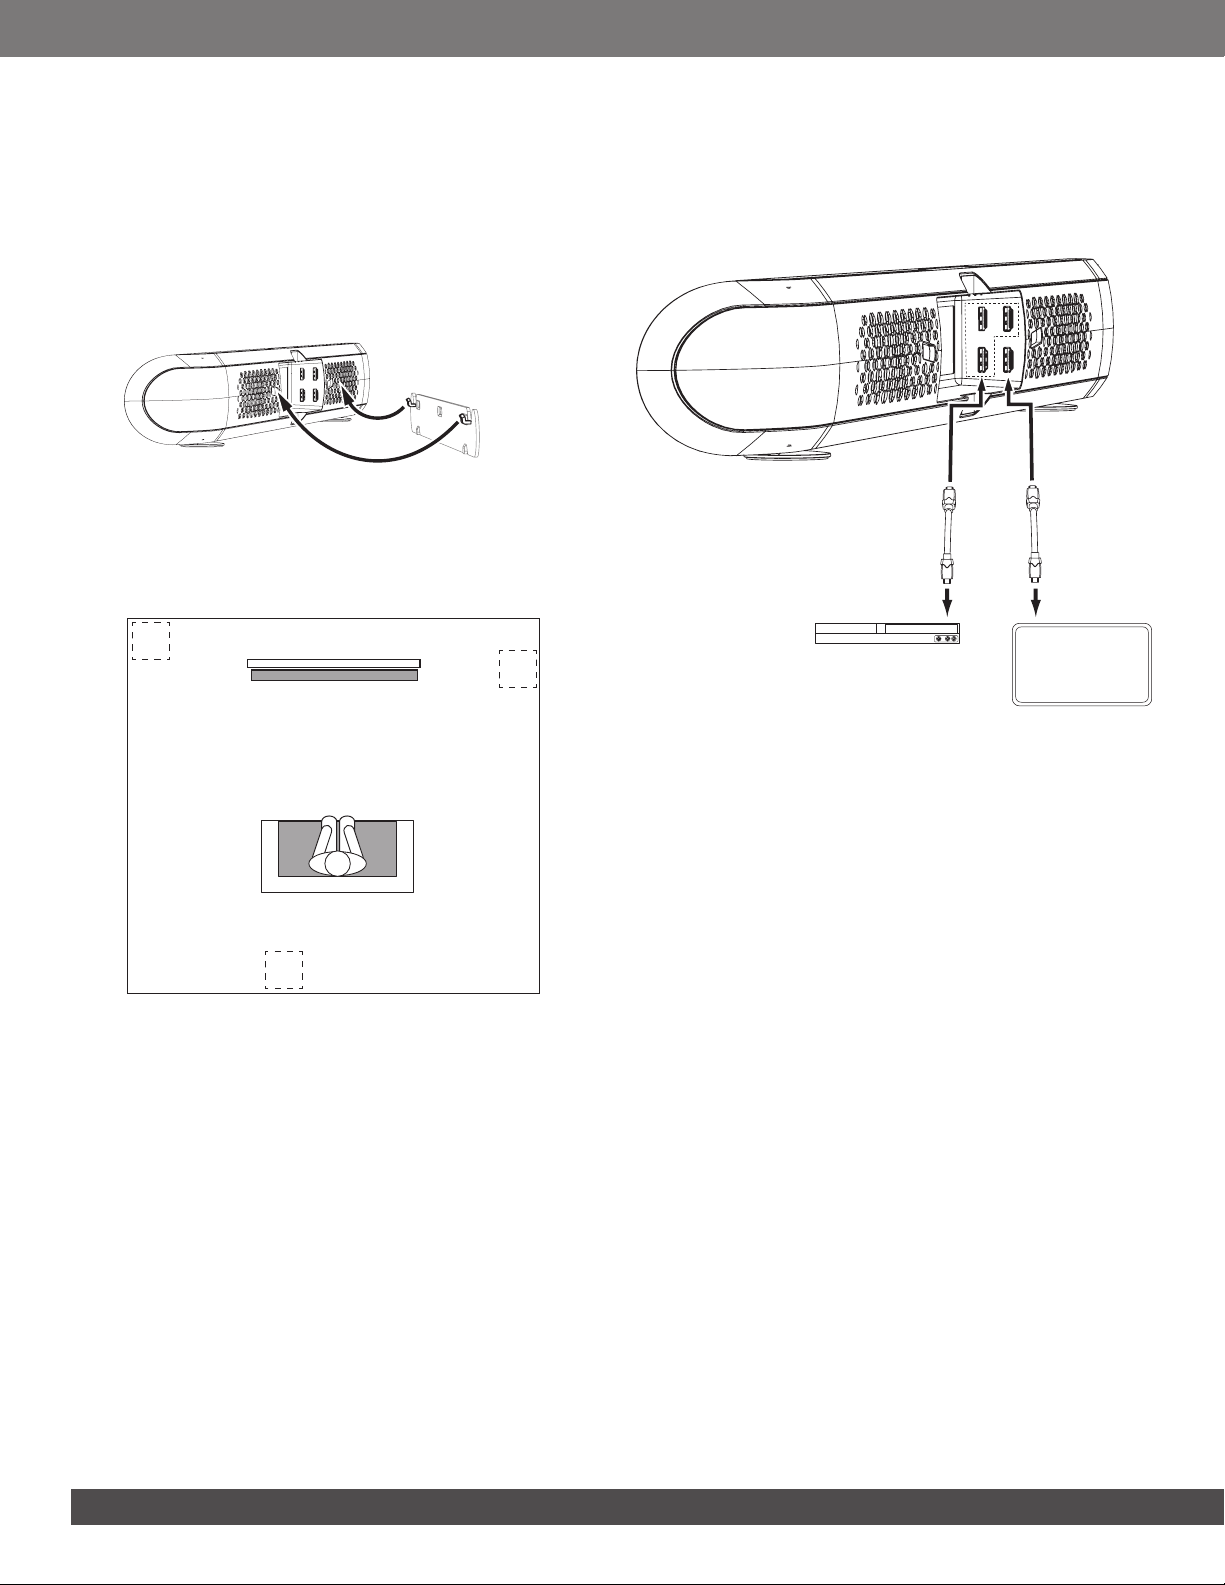
1) USB (Software updates only)
2) Power In
3) Aux IN
4) Optical IN
5) HDMI 1
6) HDMI 2
7) HDMI 3
8)
9)
10)
110
9
2
4
3
5
6
8
7
12
3TV(ARC)
12
3TV(ARC)
Wall Mount / Table Mount EQ switch
Subwoofer pairing button
HDMI TV
Power Input: Connect the included power cord here. See the
“Power Connections” section for more information.
Optical: If your TV, disc player or cable/satellite tuner has an
optical digital output, use the included optical cable to connect it
here.
Aux: Use a 3.5mm audio cable to connect the stereo analog
outputs of your TV, disc player or cable/satellite tuner here.
HDMI 1/2/3: HDMI connections transmit digital audio and video
signals between devices. If you have source devices with HDMI
connectors, using them will provide the best possible audio and
video performance quality.
HDMI TV: If your TV has an HDMI input, use the provided
HDMI cable to connect it to the soundbar’s HDMI ARC TV Out
connector. The soundbar will pass video from source devices
connected to its HDMI Input connectors. If your TV is equipped
with the HDMI Audio Return Channel (ARC) Function, you
can feed its sound to the soundbar via the HDMI ARC TV Out
connection, and it will not require additional audio connections to
the soundbar. The ARC signal is active when the HDMI TV source
is selected.)
Subwoofer Pairing Button: Press the Pairing button to
initiate wireless pairing between the soundbar and the wireless
subwoofer. See the “Pairing the Units for Wireless Operation”
section for more information.
Wall-Mount/Table-Mount EQ Switch: Use this switch to
adjust the soundbar’s equalization (EQ) for either wall or table
mounting. If you’re mounting the soundbar on a wall with the
included wall-mount bracket, set the EQ switch to the “Wall”
position for the most natural-sounding bass performance. If you
are placing the soundbar on a table, set the EQ switch to the
“Table” position for the most natural-sounding bass performance.
Software: The USB connection is for manual software updates
only. If a new software update is released, JBL will notify you if
your product is registered at www.JBL.com
IMPORTANT: Do not connect the power cord to an
AC outlet until you have made and verified all other
connections.