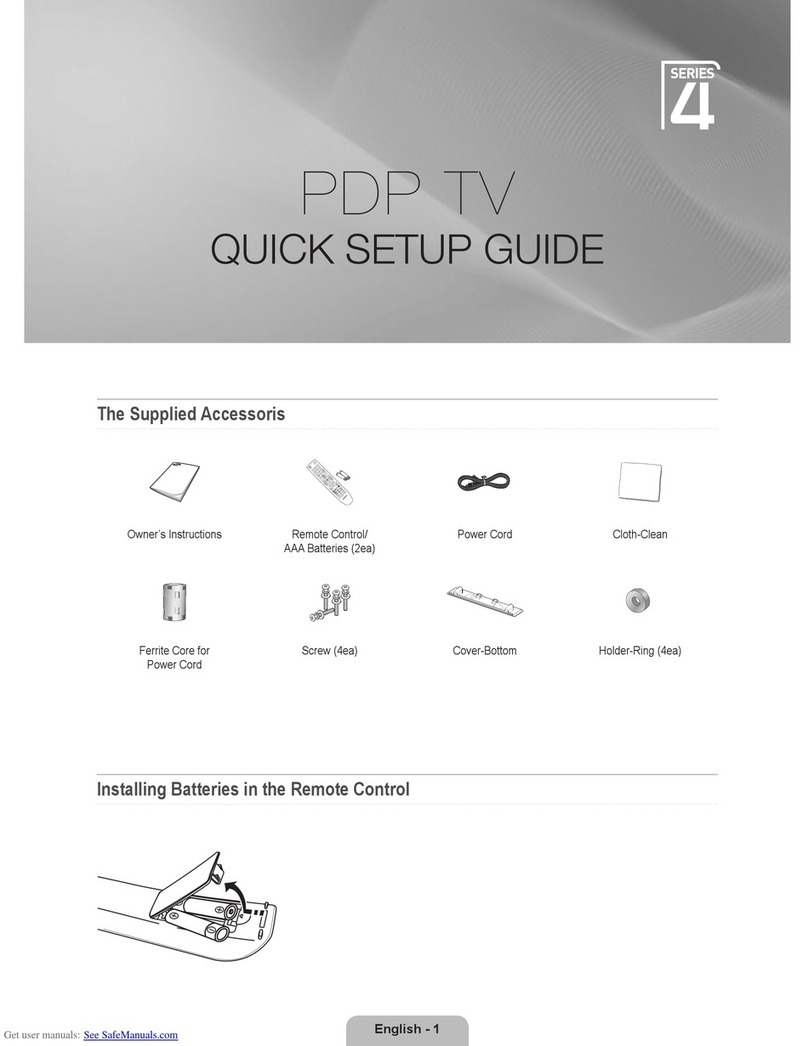
HCT KPP-50SAT User manual

Order Number : GETEC-C1-09-146 FCC Class B Certification
Test Report Number : GETEC-E3-09-080 Page 1 / 1
EUT Type: PDP TV/Monitor
FCC ID.: TGEPT50U7
APPENDIX G
: USER’S MANUAL

50”PDP TV USER’S GUIDE
KPP-50SAT
PLEASE READ CAREFULLY BEFORE USE
Before Connecting, operating or adjusting this product, please read the instructions completely.
Please keep this manual for future reference.
For future reference, record the serial number of your PDP TV.
SERIAL NO.
The serial number is located on the rear of PDP TV.

Warning / Caution
3
TO REDUCE THE RISK OF FIRE AND ELECTRIC SHOCK, DO NOT EXPOSE THIS PRODUCT TO RAIN OR
MOISTURE.
WARNING/CAUTION
This reminder is provided to call the CATV system installer’s attention to Article 820-40 of the National Electric
Code (U.S.A.). The code provides guidelines for proper grounding and, in particular, specifies that the cable ground
shall be connected to the grounding system of the building, as close to the point of the cable entry as practical.
NOTE TO CABLE/TV INSTALLER
Do not attempt to modify this product in any way without written authorization from the dealer.
Unauthorized modification could void the user’s authority to operate this product.
CAUTION
WARNING/CAUTION
TO REDUCE THE RISK OF ELECTRIC
SHOCK DO NOT REMOVE COVER (OR
BACK). NO USER SERVICEABLE PARTS
INSIDE. REFER TO QUALIFIED SERVICE
PERSONNEL.
The lightning flash with arrowhead
symbol, within an equilateral triangle,
is intended to alert the user to the
presence of uninsulated “dangerous
voltage” within the product’s enclosure
that may be of sufficient magnitude to
constitute a risk of electric shock to
persons.
RISK OF ELECTRIC SHOCK
DO NOT OPEN
The exclamation point within an equi-
lateral triangle is intended to alert the
user to the presence of important
operating and maintenance (servicing)
instructions in the literature accompa-
nying the appliance.
WARNING / CAUTION

Warning / Caution
4
WARNING / CAUTION
Class B digital device
This equipment has been tested and found to comply with the limits for a Class B digital device, pursuant to Part 15
of the FCC Rules.
These limits are designed to provide reasonable protection against harmful interference in a residential installation.
This equipment generates, uses and can radiate radio frequency energy and, if not installed and used in accor-
dance with the instructions, may cause harmful interference to radio communications.
However, there is no guarantee that interference will not occur in a particular installation.
If this equipment does cause harmful interference to radio or television reception, which can be determined by turn-
ing the equipment off and on, the user is encouraged to try to correct the interference by one or more of the follow-
ing measures:
- Reorient or relocate the receiving antenna.
- Increase the separation between the equipment and receiver.
- Connect the equipment to an outlet on a circuit different from that to which the receiver is connected.
- Consult the dealer or an experienced radio/TV technician for help.
FCC NOTICE
Changes or modification not expressly approved by the party responsible for compliance could void the user’s
authority to operate the equipment.
Caution
a. The fluorescent lamp used in this product contains a small amount of mercury.
b. Do not dispose of this product with general household waste.
c. Disposal of this product must be carried out in accordance to the regulations of your local authority.
On Disposal
The nationwide transition to digital television broadcasting by full-power TV stations will be completed by June 12,
2009, but your local television stations may switch sooner. After the switch, analog-only television sets that receive
TV programming through an antenna will need a converter box to continue to receive over-the-air TV. Watch your
local stations to find out when they will turn off their analog signal and switch to digital-only broadcasting. Analog-
only TVs should continue to work as before to receive low-power, Class A or translator television stations and with
cable and satellite TV services, gaming consoles, VCRs, DVD players, and similar products.
Information about the DTV transition is available from your local television stations, www.DTV.gov, or 1-888-CALL-
FCC (TTY 1-888-TELL-FCC). Information about government coupons for eligible digital-to-analog converter boxes
is available from www.dtv2009.gov or 1-888-DTV-2009 (TTY 1-877-530-2634).
Digital Television Transition Notice
To prevent fire or shock hazards, do not expose this product to rain or moisture.

Important Safety Instructions
5
Important Safety Instructions
1. Read these instructions.
2. Keep these instructions.
3. Heed all warnings.
4. Follow all instructions.
5. Do not use this apparatus near water.
6. Clean only with dry cloth.
7. Do not block any ventilation openings.
Install in accordance with the manufacturer's instructions.
8. Do not install near any heat sources such as radiators, heat registers, stoves, or other apparatus (including
amplifiers) that produce heat.
9. Do not defeat the safety purpose of the polarized or grounding-type plug. A polarized plug has two blades with
one wider than the other. A grounding type plug has two blades and a third grounding prong. The wide blade or
the third prong are provided for your safety. If the provided plug does not fit into your outlet, consult an electri-
cian for replacement of the obsolete outlet.
10. Protect the power cord from being walked on or pinched particularly at plugs, convenience receptacles, and
the point where they exit from the apparatus.
11. Only use attachments/accessories specified by the manufacturer.
12. Use only with the cart, stand, tripod, bracket, or table specified by the manufacturer, or sold with the apparatus.
When a cart is used, use caution when moving the cart/apparatus combination to avoid injury from tip-over.
13. Unplug this apparatus during lightning storms or when unused for long periods of time.
14. Refer all servicing to qualified service personnel. Servicing is required when the apparatus has been damaged
in any way, such as power-supply cord or plug is damaged, liquid has been spilled or objects have fallen into
the apparatus, the apparatus has been exposed to rain or moisture, does not operate normally, or has been
dropped.
15. Do not expose this apparatus to dripping or splashing and ensure that no objects filled with liquids, such as
vases, are placed on the apparatus.
16. To completely disconnect this apparatus from the AC Mains, disconnect the mains plug from the AC receptacle.
17. The mains plug of the power supply cord shall remain readily operable.
18. This apparatus shall be connected to a Mains socket outlet with a protective earthing connection.

Important Safety Instructions
6
The lightning flash with arrowhead symbol within an equilateral triangle, is intended to alert the user to
the presence of uninsulated "dangerous voltage" within the product's enclosure that may be of sufficient
magnitude to constitute a risk of electric shock to persons.
The exclamation point within an equilateral triangle is intended to alert the user to the presence of
important operating and maintenance (servicing) instructions in the literature accompanying the product.
WARNING: To reduce the risk of fire or electric shock, do not expose this apparatus to rain or moisture.
Prolonged use of headphones at a high volume may cause health damage on your ears.
NN
NNOO
OOTT
TTEE
EE

Contents
7
Contents
3WARNING / CAUTION
5Important Safety Instructions
WARNING
CAUTION
Controls
And
Connectors
Setting up
TV
Channel
Picture
Controls
Installation
Connection
Basic
Operation
On Screen
Menus
10 Front Panel
11 Rear Panel
12 Remote Control
14 Wall mount Installation
14 Desktop Pedestal Installation
15 Antenna Connection
16 VCR Connection
18 DVD Connection
20 HDSTB Connection
22 External A/V Source
22 Digital Audio Out
23 USB in setup
24 PC Connection
25 Resolution
26 Turning On or Off
26 Channel Selection
26 Volume Adjustment
26 Sound Mute
26 Quick View
27 Input Selection
27 Language Selection
28 On Screen Menus
29 Auto Scan
30 Find Channel
31 Add/Delete Channel
32 EPG(Electronic Program Guide)
33 Auto Picture Controls
34 Manual Picture Controls
35 Color Temperature
36 Dynamic Contrast
37 Noise Reduction
38 Flesh Tone Correction
39 Blue Stretch
40 Film Mode
41 Aspect Ratio
42 Reset Picture Mode
43 Auto Sound Controls
44 Manual Sound Controls
45 Speaker On/Off
46 Auto Volume Control
Sound
Controls

Contents
8
47 Digital Output
48 Reset Audio Mode
48 Stereo/SAP Broadcast Setup
Parental
Control
Setting the
PC Mode
Special
Functions
Sound
Controls
Time
Setting
49 Auto Time Setting
50 Manual Time Setting
51 Auto On/Off Time Setting
52 Sleep Timer
Option
Menus
53 Audio Language
54 Input Label
55 Caption Mode
56 Closed Caption-Analog
57 Closed Caption-Digital
58 Closed Caption Options
60 Menu Opacity
61 Enter your password
61 Lock System
62 Set Password
63 Channel Blocking
64 TV Ratings for USA
65 TV (FCC) Age Categories
66 Movie Ratings
67 TV Rating English for Canada
67 TV Rating French for Canada
69 Downloadable Rating
70 Auto Picture Controls
71 Manual Picture Controls
72 Watching PIP(Picture in Picture)
73 Moving the sub picture
74 PIP Audio Output
75 Input Source Selection for sub picture (*Option)
75 Swapping between Main and Sub pictures (*Option)
75 Swapping between Main and Sub pictures audio
75 Channel Selection for Sub Picture
75 Sub Picture Size Adjustment (*Option)
Photos
Functions
76 Before using the Photos Mode
76 Screen Components
77 Slide Show
78 Setup the Slideshow
Music
Functions
79 Before using the Music Mode
79 Screen Components
80 Listen to music
81 Specification
82 Troubleshooting
83 CHILD SAFETY
84 Warranty

Accessories
9
Accessories
Ensure that the following accessories are included with your product.
If an accessory is missing, please contact the dealer where you purchased the product.
User must use shielded signal interface cables with ferrite cores to maintain standard compliance for the product.
Supplied Accessories
Installing Batteries
1
Open the battery cover on
the back side.
2
Insert two batteries in
correct polarity, match
(+ with +), and match
(- with -).
Don't mix old batteries
with new batteries.
3
Close the battery cover.
1.5V
1.5V
123
456
789
_0PRE.CH
FAV.CH
MUTE
EPGSLEEP
MENU EXIT
VOLCH
INFO MTSRATIO CC
PICTURESOUND
PHOTOMUSIC
PIP
PIPINPUT
SWAP
PIPCH-
AUD.SWAPSIZE
POSITIONPIPCH+
SOURCE
OK
Remote &
Batteries
Power cord Owner’s Manual
Adaptor Plug
(UL to VDE)

Controls And Connectors
10
Controls And Connectors
Front Panel
6
SOURCE
MENU
+
VOL
CH
1
2
3
4
5
1. VOL + / VOL -
Adjusts menu setting.
Adjusts sound level.
2. CH / CH
Select a channel.
3. SOURCE
Selects the TV, AV/S-Video, Component-1,Component-2, HDMI 1, HDMI 2, HDMI 3 or VGA mode.
4. MENU
Display on screen menus.
5. POWER
Switches the set on or off.
6. Power Indicator
Illuminates in bright blue when the TV is in standby mode.
Illuminates in dark blue when the TV is switched on.
Remote control sensor
Accepts the IR signal of remote controller.
Here shown may be somewhat different from your set.
NN
NNOO
OOTT
TTEE
EE

Controls And Connectors
11
Rear Panel
!"#
!"#
$
%
Here shown may be somewhat different from your set.
NN
NNOO
OOTT
TTEE
EE
1. RGB IN (PC)
Connect to the video output jack on your PC.
2. AUDIO IN (RGB/DVI)
Connect to the audio output jack on your PC.
3. HDMI/DVI1 IN
Connect to the HDMI jack for device with HDMI out-
put. (This input can also be used as a DVI connec-
tion with an HDMI to DVI adaptor and separate ana-
log audio inputs.)
4. HDMI2 IN
Connect to the HDMI jack for device with HDMI out-
put.
5. HDMI3 IN
Connect to the HDMI jack for device with HDMI out-
put.
6. COMPONENT1 IN (YPbPr1)
Video/Audio inputs for Component1.
7. COMPONENT2 IN (YPbPr2)
Video/Audio inputs for Component2.
8. AV IN
Connect RCA cable to an appropriate external A/V
device such as VCR, DVD or Camcorder.
9. S-VIDEO IN
Connect the output of an S-VIDEO device to the S-
VIDEO input.
10. USB IN
Connect the USB memory stick.
11. DIGITAL AUDIO OUT(OPTICAL)
Connect digital audio to various types of equipment.
12. ANTENNA/CABLE IN
Connect to your antenna or cable box for TV signal.
13. SERVICE
14.EXTERNAL SPEAKER OUT
External Speaker outputs.
15. AC IN
This TV operates on an AC power.

Controls And Connectors
12
- All the functions can be controlled with the remote control handset.
- Some functions can also be adjusted with the buttons on the side panel of the set.
- Before using remote control handset, please install the batteries.
Remote Control
123
456
789
_0PRE.CH
FAV.CH
MUTE
EPG SLEEP
MENU EXIT
VOL CH
INFO MTS RATIO CC
PICTURE SOUND
PHOTO MUSIC
PIP
PIPINPUT
SWAP
PIPCH+
AUD.SWAP SIZE
POSITION PIPCH-
SOURCE
OK
NUMBER BUTTONS
Selects channel numbers.
Hyphen( )
Press to select DTV channels.
For example, to select channel ‘10-1’, press ‘10’ then
press ‘ ’ and ‘1’.
PRE.CH
Switch to the previous channel number.
VOL + / VOL -
Adjusts sound level.
CH + / CH -
Select a channel.
FAV.CH
Display the favorite channel list.
MUTE
Switches the sound on or off.
MENU
Display on screen menus.
EXIT
Clear all on-screen menus and return to TV viewing from any
menu.
Navigational Controls
Adjusts menu settings.
Selects menu item.
OK
Accepts your selection.
EPG
Displays the program guide.
SLEEP
Sets the sleep timer.
POWER
Switches the set on or off.
SOURCE
Selects the TV, AV/S-Video, Component-1, Component-2,
HDMI 1, HDMI 2, HDMI 3 or VGA mode.

Controls And Connectors
13
123
456
789
_0PRE.CH
FAV.CH
MUTE
EPG SLEEP
MENU EXIT
VOL CH
INFO MTS RATIO CC
PICTURE SOUND
PHOTO MUSIC
PIP
PIPINPUT
SWAP
PIPCH+
AUD.SWAP SIZE
POSITION PIPCH-
SOURCE
OK
INFO
Display the current channel information.
MTS
Select MTS sound : Mono, Stereo and SAP in Analog
Channel.
Change the audio language in DTV Channel.
RATIO
Selects your desired picture format.
CC
Select the Caption menu directly.
PICTURE
Recalls your preferred picture setting.
SOUND
Recalls your preferred sound setting.
PHOTO
Select the Photos mode directly.
MUSIC
Select the Music mode directly.
PIP
Switches the sub picture on or off.
PIP INPUT
Not Support.
SWAP
Not Support.
AUD.SWAP
Alternates between main and sub picture audio.
SIZE
Not Support.
POSITION
Moves the sub picture position.
PIP CH +/PIP CH -
Select a channel for the sub picture.

Installation
14
Installation
Wall mount Installation
4 inches
4 inches
4 inches
4 inches
4 inches
The set can be installed on a wall as shown above.
For proper ventilation, allow a clearance of 4 inches on all four sides from the wall.
Detailed instructions are available from your dealer, refer to the optional Wall Mounting Bracket Installation and
Setup Guide. (Wall Mount Sold Separately)
Desktop Pedestal Installation
4 inches
4 inches
4 inches
4 inches
The set can be mounted on a desk as shown above.
For proper ventilation, allow a clearance of 4 inches on each side from the wall.
Detailed instructions are available from your dealer, refer to the optional Desktop Stand Installation and Setup
Guide.
- Do not install the Wall-Mount except the Qualified Service Personnel.
NN
NNOO
OOTT
TTEE
EE

Connections
15
Connections
Antenna Connection
ANTENNA/
CABLE IN
VIDEO
AV
AUDIO
L
R
S-VIDEO USB
DIGITAL AUDIO
OUT(OPTICAL)
SERVICE
Multi-family Dwellings/ Apartments
(Connect to wall antenna socket)
Single-family Dwellings /Houses
(Connect to wall jack for outdoor antenna)
Wall Antenna Socket
RF Coaxial Wire (75 ohm)
VHF
UHF
Outdoor Antenna
Turn clockwise to tighten.
Be careful not to bend the bronze wire when
connecting to an antenna port.
* Separately purchase a RF Coaxial Wire(75 ohm)
-To improve the picture quality in a poor signal
area, please purchase a signal amplifier and
install properly.
-If the antenna is not installed properly, contact
your dealer for assistance.
NN
NNOO
OOTT
TTEE
EE
ANTENNA/
CABLE IN
VIDEO
AV
AUDIO
L
R
S-VIDEO USB
DIGITALAUDIO
OUT(OPTICAL)
SERVICE
VHF UHF
Signal
Amplifier
Rear panel of the set
Rear panel of the set

Connections
16
- To avoid picture noise (interface), leaves an adequate distance between the TV and the VCR.
VCR Connection
ANTENNA/
CABLE IN
VIDEO
AV
AUDIO
L
R
S-VIDEO USB
DIGITALAUDIO
OUT(OPTICAL)
SERVICE
ANT IN
ANT OUT S-VIDEO
IN
OUT
(R) AUDIO (L) VIDEO
1. Connect the Antenna out socket of the VCR to the
Antenna input socket on the TV.
2. Press the POWER button on the VCR and match
the appropriate input selection between the TV
and VCR for viewing.
AAWhen connecting with an antenna
VIDEO
AV
AUDIO
L
R
S-VIDEO USB
COMPONENT 1
LR
VIDEO
YPb Pr
AUDIO
COMPONENT 2
LR
VIDEO
YPb Pr
AUDIO
ANT IN
ANT OUT S-VIDEO
IN
OUT
(L) AUDIO (R)VIDEO
OUTPUT
SWITCH
1. Connect the AUDIO/VIDEO jacks between TV
and VCR. Match the jack colors (Video = yellow,
Audio Left = white, and Audio Right = red)
2. Insert a video tape into the VCR and press PLAY
on the VCR.
3. Select the AV/S-Video input source with using the
SOURCE button on the remote
control.
4. Refer to the VCR manual for operating instruc-
tions.
AAWhen connecting with a RCA cable
VCR
Rear panel of the set
VCR
Rear panel of the set

Connections
17
VIDEO
AV
AUDIO
L
R
S-VIDEO USB
COMPONENT 1
LR
VIDEO
YPb Pr
AUDIO
COMPONENT 2
LR
VIDEO
YPb Pr
AUDIO
ANT IN
ANT OUT S-VIDEO
IN
OUT
(L) AUDIO (R)VIDEO
OUTPUT
SWITCH
1. Connect the S-VIDEO output of the VCR to the S-
VIDEO input on the set. The picture quality is
improved; compared to normal composite (RCA
cable) input.
2. Connect the audio outputs of the VCR to the AV
AUDIO L,Rinput jacks on the set.
3. Insert a video tape into the VCR and press PLAY
on the VCR.
4. Select the AV/S-Video input source with using the
SOURCE button on the remote
control.
5. Refer to the VCR manual for operating
instructions.
AAWhen connecting with a S-Video cable
VCR
Rear panel of the set

Connections
18
DVD Connection
VIDEO
AV
AUDIO
L
R
S-VIDEO USB
COMPONENT 1
LR
VIDEO
YPb Pr
AUDIO
COMPONENT 2
LR
VIDEO
YPb Pr
AUDIO
ANT IN
ANT OUT S-VIDEO
IN
OUT
(L) AUDIO (R)VIDEO
OUTPUT
SWITCH
1. Connect the S-VIDEO output of the DVD to the
S-VIDEO input on the set.
2. Connect the audio outputs of the DVD to the AV
AUDIO L, Rinput jacks on the set.
3. Turn on the DVD player, insert a DVD.
4. Select AV/S-Video input source with using the
SOURCE button on the remote control.
5. Refer to the DVD player's manual for operating
instructions.
AAWhen connecting with a S-Video cable
DVD
Rear panel of the set
VIDEO
AV
AUDIO
L
R
S-VIDEO USB
COMPONENT 1
LR
VIDEO
YPb Pr
AUDIO
COMPONENT 2
LR
VIDEO
YPb Pr
AUDIO
(L) AUDIO (R)
YPb Pr
1. Connect the video outputs (Y, PB, PR) of the DVD
to the COMPONENT1 VIDEO(Y, Pb, Pr1) or
COMPONENT2 VIDEO(Y,Pb,Pr2) jacks on the
set.
2. Connect the audio outputs of the DVD to the
COMPONENT1 AUDIO L, Ror COMPONENT2
AUDIO L, R jacks on the set.
3. Turn on the DVD player, insert a DVD.
4. Select Component-1 or Component-2 source
with using the SOURCE button on the remote
control.
5. Refer to the DVD player's manual for operating
instructions.
AAWhen connecting with a Component Cable
DVD
Rear panel of the set

Connections
19
1. Connect the HDMI output of the DVD to the
HDMI/DVI1 IN, HDMI2 IN or HDMI3 IN jack on
the set.
2. Select HDMI 1, HDMI 2 or HDMI 3 input source
with using the SOURCE button on the remote
control.
3. Refer to the DVD player's manual for operating
instructions.
AAWhen connecting with a HDMI cable
HDMI IN
2
HDMI IN
3
RGB IN
(PC) AUDIO IN
(RGB/DVI)
HDMI/DVI IN
1
HDMI-DVD OUTPUT
DVD
Rear panel of the set

Connections
20
-This TV can receive Digital Over-the-air/Cable signals without an external digital set-top box.
However, if you do receive Digital signals from a digital set-top box or other digital external device, refer to the
figure as shown below.
HDSTB Connection
HDMI IN
2
HDMI IN
3
RGB IN
(PC) AUDIO IN
(RGB/DVI)
HDMI/DVI IN
1
(R) AUDIO (L) RGB-DTV OUTPUT
1. Connect the RGB output of the digital set-top box
to the RGB IN (PC) jack on the set.
2. Connect the audio outputs of the set-top box to
the AUDIO IN (RGB/DVI) jack on the set.
3. Turn on the digital set-top box.
4. Select VGA input source with using the SOURCE
button on the remote control.
5. Refer to the digital set-top box manual for operat-
ing instructions.
AAWhen connecting with a D-Sub 15 pin cable
Digital Set-top Box
Rear panel of the set
1. Connect the HDMI output of the digital set-top
box to the HDMI/DVI1 IN, HDMI2 IN or HDMI3 IN
jack on the set.
2. Turn on the digital set-top box.
3. Select HDMI 1, HDMI 2 or HDMI 3 input source
with using the SOURCE button on the remote
control.
4. Refer to the digital set-top box manual for operat-
ing instructions.
AAWhen connecting with a HDMI cable
HDMI IN
2
HDMI IN
3
RGB IN
(PC) AUDIO IN
(RGB/DVI)
HDMI/DVI IN
1
HDMI-DVD OUTPUT
Digital Set-top Box
Rear panel of the set
Table of contents
Other HCT TV manuals

