Hear and Learn UConnect Flexmike Guide

hearandlearn.com.au
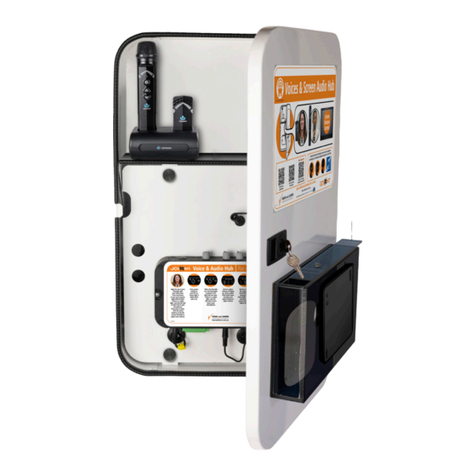
UConnect SoundHouse & Mini, 975 Point to Pair, Redcat Point to Pair & Topcat Point to Pair are part of the Hear and Learn technology family.
Oces Australia wide (03)93709355
1/3
Hear and Learn UConnect Flexmike and Sharemike
Set Up Installation and Troubleshooting Instructions
SETTING UP THE FLEXMIKE
Once the Flexmike is charged, follow these steps for use.
Align with
Collarbone
Tone control
Flexmike
volume
control
Talk/Mute light
Talk
Mute
Remove the Flexmike from the charger and put
it on by connecting the magnetic clasps behind
your neck. Adjust the lanyard so that the top of
the Flexmike aligns with the collarbone.
The Flexmike will automatically power on and
mute when it is removed from the charger.
The microphone volume on the Flexmike is set at
the factory to the midpoint. It is adjusted by the
up / down buttons on the side of the mic.
While speaking in a normal voice, ne tune the
microphone volume. Proper volume level should
be as follows:
• Your voice should be clearly heard by another
person on the other side of the room.
• You should barely be able to hear your
own voice.
• There should not be any audio “feedback” or
squealing outside of 60-90cm (if there is, turn
the volume down slightly).
REMEMBER:
This equipment supplements the user’s voice so
they are able to speak in a conversational tone.
Having the volume set too high will result in
feedback and listener fatigue.
• Once initial volume level is set, walk around the
room and listen for overall audio quality.
• If further ne tuning is required, you may need
to adjust the Tone control on the front of the
975 or the side of the RedCat or TopCat.
CHARGING THE FLEXMIKE
Attach lanyard
Hang the Flexmike on
the lanyard opposite
the magnetic clasp.
Connect cradle charger
Plug power cord into the cradle
charger and then plug into a
power point.
Charge exmike
Place the microphones into the cradle
charger. The power status light will glow
red when it is charging.When charging is
complete, the power status light will glow
green. It takes about 5-6 hours to fully
charge the microphone battery.
Before use, the Flexmike should be charged
It will take 5-6 hours for the Flexmike to
obtain a full charge. A fully charged
Flexmike will last for up to 8 hours of use.
If microphones are used daily,they should
be charged each night.
Replacement lithium polymer
battery packs may only be
purchased through
Lightspeed (part # L3.7V).
REDCAT
SIDE PANEL CONTROLS AND CONNECTIONS
975
FRONT CONTROLS
TOPCAT CONTROLS
(INSIDE SPEAKER DOOR)
Tone control:
Adjusts the audio
tone, adding more
bass or treble for a
more rich or crisp
sound.
Tone control:
Select tone for
adjustment
Got a SoundHouse? Open its door
to see the controls on top of the 975
PLEASE NOTE: The 975 and microphone(s) are paired together at the factory and all components should be kept together as a system.
Moving them from one system, or room, to another will result in the need to re-pair.
1
2
3
4
hearandlearn.com.au
USHMHG0522 ©Hear and Learn®

hearandlearn.com.au
UConnect SoundHouse & Mini, 975 Point to Pair, Redcat Point to Pair & Topcat Point to Pair are part of the Hear and Learn technology family.
Oces Australia wide (03)93709355
2/3
DAILY USE OF THE FLEXMIKE
At the start of the day, remove Flexmike
from the charger
• The microphone will default to the Mute position,
the status light will turn to white.
• Place the microphone around your neck.
• Press the power/mute button. The light will turn blue,
indicating the microphone is active and ready to use.
• Adjust volume with the UP/DOWN buttons if
necessary.
• If Flexmike needs to be powered down for some time,
press and hold the power button. To power Flexmike
again, press and hold the power button until the
power status light turns white.
Private conversations
• Mute the Flexmike during private conversations by
momentarily pressing the power button. When muted,
the blue light turns white.
• When conversation is over, momentarily press the
power button again to unmute the Flexmike.
End of the day
• Place the Flexmike into the cradle charger and make
sure the Power Supply is plugged in to an electrical
outlet.
• The Flexmike will stay powered on during charging,
but will automatically be muted.
• It is not necessary to turn o the 975 at end of day,
but you may do so by pressing the power button on
the front panel.
• If you do want to power it down, when Flexmike is
removed from charging the next day, it will
automatically power the 975, RedCat or TopCat on.
Power button
Power light
Status light
RedCat TopCat
Power / mute
button &
status light
Volume
control
Status light Power light Status light
Power light
CHARGING THE SHAREMIKE
Before use, the Sharemike should be charged
It will take 5-6 hours for the Sharemike
to obtain a full charge. A fully charged
Sharemike will last for up to 8 hours of use.
If microphones are used daily, they should
be charged each night.
Replacement lithium polymer battery packs
may only be purchased through Lightspeed
(part # L3.7V).
Connect cradle charger
Plug power cord into the cradle charger and then plug the AC
end into an electrical outlet.
Charge Sharemike
Place into the cradle charger. The power status light
will glow red when it is charging.When charging is
complete, the power status light will glow green.
It takes about 5-6 hours to fully charge the micro-
phone battery. Sharemike and Flexmike can be
charged together.
1
2
2
975
Set up installation and troubleshooting instructions
for Flexmike and Sharemike
hearandlearn.com.au
USHMHG0522 ©Hear and Learn®

hearandlearn.com.au
UConnect SoundHouse & Mini, 975 Point to Pair, Redcat Point to Pair & Topcat Point to Pair are part of the Hear and Learn technology family.
Oces Australia wide (03)93709355
3/3
DAILY USE OF THE SHAREMIKE
At the start of the day, remove Sharemike
from the charger
Ensure the 975 is on. The white power light will glow.
Turn on the Sharemike by pressing and holding the
power button until the LED lights.
Grip the barrel in the center section.
While speaking in a normal voice, increase the volume
with the Sharemike until your voice is barely audible.
Power button
Power light
Status light
975
975
Back Front
RedCat
Flexmike
Power Power
Mic 1
Mic 1
Mic 2
Mic 2
IR Transmitter
IR Transmitter
Sharemike
TopCat
Power
button Volume
controls
PAIRING YOUR MICROPHONE TO 975, REDCAT OR TOPCAT
PAIRING THREE MICROPHONES HELP VIDEO
From a powered o state, point the IR
transmitter lens toward the IR sensor
(marked with red rings on illustrations
below) on the 975, RedCat or TopCat
(for Sharemike, the transmitter lens is
located on the back of the microphone).
Press and hold the power button for 5
seconds until the mic 1 and mic 2 lights
start ashing, then release the button
and let the pairing process nish.
The ”status” light on 975, RedCat and
TopCat will light up indicating the pair-
ing process is complete. The mic 1 or
mic 2 light on the microphone will stay
illuminated.
Your system is shipped with microphones and base units pre-paired for quick and easy use. If, for any reason, you need to pair new components, follow this pairing process:
IR transmitters on microphones &
IR sensors on 975, RedCat & TopCat
(marked with red ring)
REPLACING BATTERIES IN FLEXMIKE & SHAREMIKE
(Battery part #L3.7V)
FLEXMIKE
1. Push down on the latch
and carefully pull the battery
pack away from the
Flexmike.
2. Insert new battery pack as
shown and make sure the
latch is secure.
3. Place the Flexmike in a
cradle charger to charge
the battery pack.
SHAREMIKE
1. Push down on the latch
and carefully pull the battery
pack away from the
Sharemike.
2. Insert new battery pack as
shown and make sure the
latch is secure.
3. Place the Flexmike in a
cradle charger to charge
the battery pack.
1
1 2 3
2
3
4
Click on the image to watch the help video
Set up installation and troubleshooting instructions
for Flexmike and Sharemike
hearandlearn.com.au
USHMHG0522 ©Hear and Learn®
This manual suits for next models
1
Other Hear and Learn Speakers System manuals
