Hear+Hi Acuity ITC User manual

There are two dierent methods to charge the hearing aid:
Charging by Battery or by AC Adapter
Step 1: Make sure the hearing aid is switched ON (Check volume
adjustment dial is not set in the Low / O position)
Step 2: Place the hearing aid vertically
on the charging slot as shown.
Step 3: Gently insert the hearing aid by guiding it into the charging case
as shown.
Step 4: Insert AAA batteries or plug in
the AC Adapter.
WELCOME
Congratulations and thank you for choosing the Hear+Hi Acuity Wireless
Stereo Assistive Hearing Amplied Headset! You’ve made an excellent
decision and you will enjoy using this product for many years to come!
This guide will help you get started and show you all the great features, so
that you get the most out of your investment.
QUESTIONS? VISIT Hear+Hi.com/support OR
EMAIL US AT info@Hear+Hi.com
• In-The-Canal • Rechargeable over AC & Battery
• Discreet and Invisible • Charging Case with Night LED
FEATURES
ACCESSORIES
*Note: Prior to using your hearing aid, make sure that the unit is fully
charged.
OPERATNG INSTRUCTIONS
DESCRIPTION
Step 5: Ensure that the night light is ON and that the hearing aid is
securely placed in the charging case. Check the status indicator
lights to conrm that the hearing aid is charging properly. Close
the charging case cover to protect the hearing aid from dust and
damage.
Charging Case x 1
Hearing Aid x 2
Earbuds (Tiny*2, Small*2,
Medium*2, Large*2)
Cleaning Brush x 1
AC Adapter
AcuityITC
Digital Hearing
Amplifier Earphones
NOTE:
Not for users under 18 years of age.
Always consult your hearing healthcare professional for any hearing
loss conditions.
Any serious hearing conditions should be examined and diagnosed by
a licensed physician (preferably an ear specialist).
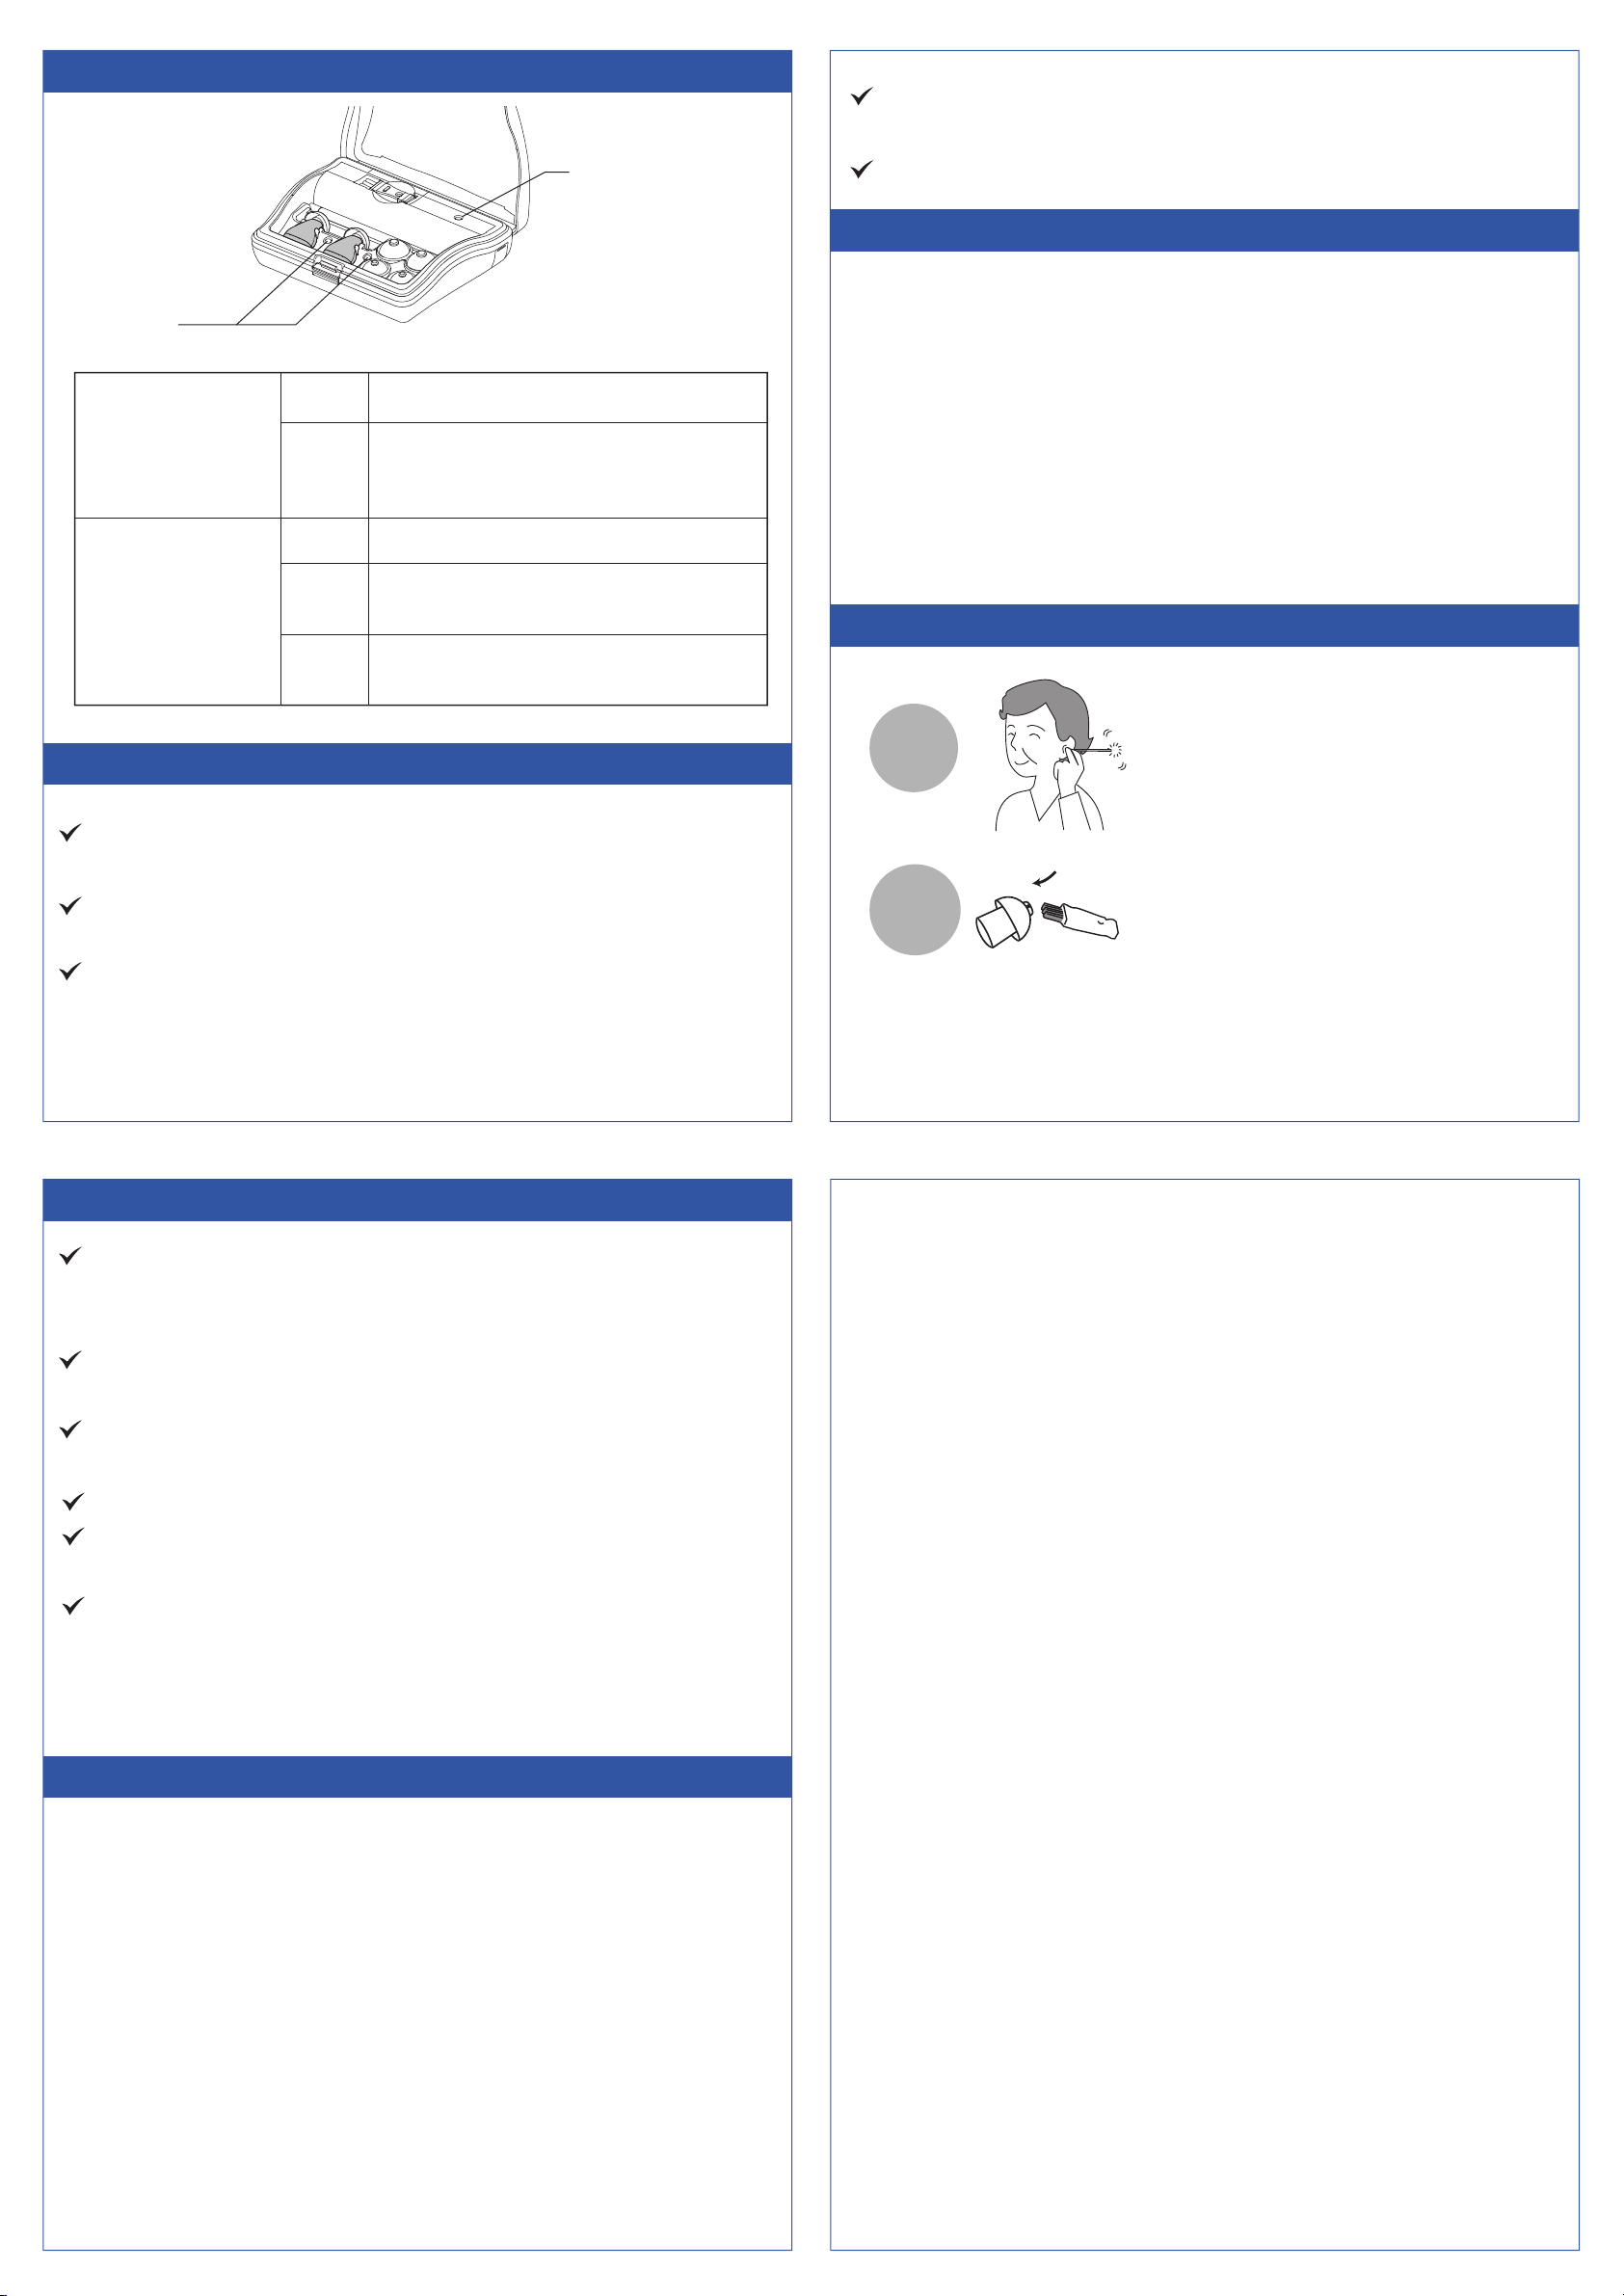
Hearing Aid Speaker Earbud
Microphone
Volume
Adjustment Dial
Charging Case
Battery / AC Power
Indicator
Cleaning Brush
AC Adaptor Input
Charging Status Indicator
Night Light
Charging Slot
(OFF)
LOW
(ON)
HIGH
Step 2: Make sure the eartip is securely attached to the hearing aid.
Step 3: Use your nger to cover the microphone, then gently
insert the hearing aid inside your ear.
Step 4 : Use the volume adjustment dial to adjust the level so that it’s
comfortable. Rotate clockwise to increase the volume and
counter-clock wise to reduce it.
CHARGING INSTRUCTIONS
Step 1: Switch ON the aid
by turning the
volume adjustment
dial clockwise.
INDICATOR LIGHT STATUS
ONE YEAR LIMITED WARRANTY For a period of ONE (1) YEAR from the date of
retail purchase by the original end-user purchaser ("Warranty Period"), Hear+Hi
warrants (1) this product against defects in materials and workmanship, and (2)
that each Product unmodied and under normal use and conditions, will
substantially comply with Hear+Hi's applicable written technical documentation
for the Product. Hear+Hi reserves the right to make substitutions and modica-
tions from time to time in the specications of Products sold by Hear+Hi, provid-
ed that such substitutions or modications do not materially aect overall
Product performance. WARRANTY COVERAGE If a defect exists and a valid
claim is received within the Warranty Period, at its option and to the extent
permitted by law, Hear+Hi will (1) repair the product at no charge, using new or
refurbished replacement parts. (2) exchange the product with a product that is
new or which has been manufactured from new or serviceable used parts and is
at least functionally equivalent to the original product, or (3) refund the
REPLACING EARTIPS
Three dierent sizes of eartips are provided to ensure a snug and
comfortable t. To replace the earbud:
Step 1: Gently pinch the eartip and pull it o.
You should see the axis protruding from the eartip.
Step 2: Select an eartip, align the central hole of the tip with the axis and
gently push the tip toward it until the eartip is fully inserted onto
the axis.
CLEANING INSTRUCTIONS
NOTICE
WARRANTY
BATTERY INSTRUCTION
An audible sound will alert the user that the battery is low and needs
to be charged.
A full charge takes about 8-12 hours, and will provide 6-10 hours of
usage.
The rechargeable battery is designed for approximately 500 recharge
cycles. Then the battery will need to be serviced and/or the hearing
aid may need to be replaced. With proper care, the battery can last for
up to or more than 1,000 charge cycles.
To extend the rechargeable battery life, fully charge the hearing aid
and switch it o when not in use for an extended period of time.
Keep both your ears and the hearing aid free from earwax.
With proper care, the rechargeable battery can last for up to or more
than 1,000 charge cycles.
When the sound decreases (without adjusting the volume), the
battery is low and needs to be charged.
Keep this product away from infants, children and pets.
Please read instructions carefully to ensure proper operation, care and
handling of your hearing aid before using it.
To avoid damage to your and your hearing aid, do NOT use this prod-
uct under the following conditions : while using a mobile phone,
sleeping, showering, washing your hair or face, swimming, or any
vigorous exercise.
To extend the life of the battery, keep the hearing aid in its case and
charge when not in use.
Make sure you switch ON the aid before charging.
purchase price of the product. A replacement product/part assumes the remain-
ing warranty of the original product or thirty (30) days from the date of replace-
ment or repair, whichever provides longer coverage for you. When a product or
part is exchanged, any replacement item becomes your property and the
replaced item becomes Hear+Hi's property. When a refund is given, your prod-
uct becomes Hear+Hi's property. OBTAINING WARRANTY SERVICE If you
purchased the product in the U.S., deliver the product, at your expense, to any
Hear+Hi Service Center located in the U.S. If you purchased the product outside
of the U.S., deliver the product to any Hear+Hi Authorized Importer in the
country where you purchased the product. Be aware, however, that not all
countries have Hear+Hi Authorized Service Providers (NASP) and not all Autho-
rized Service Providers outside the country of purchase have all parts or replace-
ment units for the product. If the product cannot be repaired or replaced in the
country it is in, it may need to be sent to a dierent country or returned to the
country of purchase at your expense for repair or replacement. You can always
deliver the product to Hear+Hi's U.S. main service center for obtaining warranty
service. EXCLUSIONS AND LIMITATIONS This Limited Warranty applies only to
hardware products manufactured by or for Hear+Hi that can be identied by the
'Hear+Hi' trademark trade name, or logo axed to them. The Limited Warranty
does not apply to any non-Hear+Hi hardware products or any accessories, even
If packaged or sold with Hear+Hi hardware. THIS WARRANTY AND REMEDIES SET
FORTH ABOVE ARE EXCLUSIVE AND IN LIEU OF ALL OTHER WARRANTIES, REME-
DIES AND CONDITIONS, WHETHER ORAL OR WRITTEN, EXPRESS OR IMPLIED.
HEAR+HI SPECIFICALLY DISCLAIMS ANY AND ALL IMPLIED WARRANTIES,
INCLUDING, WITHOUT LIMITATION, WARRANTIES OF MERCHANTABILITY AND
FITNESS FOR A PARTICULAR PURPOSE. IF HEAR+HI CANNOT LAWFULLY
DISCLAIM IMPLIED WARRANTIES UNDER THIS LIMITED WARRANTY, ALL SUCH
WARRANTIES, INCLUDING WARRANTIES OF MERCHANTABILITY AND FITNESS
FOR A PARTICULAR PURPOSE ARE LIMITED IN DURATION TO THE DURATION OF
THIS WARRANTY. No Hear+Hi reseller, agent or employee is authorized to make
any modication, extension, or addition to this warranty. HEAR+HI IS NOT
RESPONSIBLE FOR DIRECT, SPECIAL, INCIDENTAL OR CONSEQUENTIAL DAMAG-
ES RESULTING FROM ANY BREACH OF WARRANTY OR CONDITION, OR UNDER
ANY OTHER LEGAL THEORY, INCLUDING BUT NOT LIMITED TO LOST PROFITS,
DOWNTIME, GOODWILL, DAMAGE TO OR REPLACEMENT OF EQUIPMENT AND
PROPERTY. HEAR+HI
Battery / AC Power
Indicator
Hearing aid is charging normallyGREEN
Hearing aid is fully charged or Hearing
aid is not correctly inserted in the
charging case
OFF
Power supply is normal
GREEN
AAA batteries power is low
(insert new battery or use AC adapter)
RED
Charging Status
Indicator
OFF No power
(insert new battery or use AC adapter)
Battery / AC Power
Indicator
Charging Status
Indicator
Before
each
use
After
each
use
Clean your ear thoroughly
before each use.
Remove all remaining debris from
the earbud and ensure that the hole
on the side is also free from any debris
after each use.
※Use the Cleaning Brush to clean any earwax adhered on the
hearing aid, especially in and around the hearing aid and earbud
tip.
Other Hear+Hi Headphones manuals


