Helm Welding Lucknow 72" User manual

InstructionBook
RotaryMowers
Manufactured By:
Helm Welding (1983) Limited
86386 Lucknow Line
PO Box 158
Lucknow, Ontario, Canada
NOG 2HO
TEL: (519) 529-7627 or 529-7000
FAX: (519) 529-3260
Email: [email protected]
Website: www.lucknowproducts.com

RotaryMowers
Documentation
©
2017 by Helm Welding (1983) Limited. All rights reserved.
No parts of this manual may be reproduced or transmitted in any form of by any means,
electronic or mechanical, including photocopying and recording, or by any information
storage retrieval system, without permission in writing from Helm Welding (1983) Limited
Helm Welding (1983) Limited
86386 Lucknow Line
PO Box 158
Lucknow, Ontario, Canada
N0G 2H0
Email: [email protected]
Website: www.lucknowproducts.com
Printed in Canada 2017

RotaryMowers
WarrantyInformation
Helm Welding (1983) Limited warrants to the original user that goods & equipment of its manufacture are
free from defects in material and workmanship under normal use and service for a period of one year from
the date of shipment, or where applicable from the date of installation by the dealer.
Helm Welding (1983) Limited will, at its option, repair or replace parts (f.o.b. point of shipment) that are
found to be defective.
This warranty is on these further terms and conditions:
1. The equipment must be installed (when applicable), operated and maintained in accordance with
Helm Welding's instructions.
2. The equipment will fulfill the function it is designed to perform but due to wide variation in soil
conditions, management practices on farms and other conditions beyond the equipment manufacturer’s
control, no specific level of performance is guaranteed.
3. Excluded from the warranty are damages caused by late delivery, ordinary wear and tear, erosion or
corrosion, lightning and other acts of God, accident or alteration, repair or attempted repair or
adjustments made by persons not authorized by Helm Welding (1983) Limited, by misuse, abuse or
improper handling or operation of the equipment by the purchaser or any third party or poor or no
servicing of machine.
4. Helm Welding (1983) Limited shall in no event be responsible for any consequential damages of any
nature whether special or general, direct or indirect.
5. Equipment, parts or accessories manufactured by others and not sold under Helm Welding (1983)
Limited trademark(s) carry the warranty and remedy provided by their manufacturer only.
6. Any warranty or claim which differs from that herein set out is unauthorized by Helm Welding (1983)
Limited and is the warranty solely of the party making it. Helm Welding (1983) Limited makes no other
warranty express or implied and the original user's sole remedy for breach thereof is as set forth above.
The warranty registration card must be completed and mailed within thirty (30) days of delivery or
installation of the equipment to validate this warranty.
Note: Credits or replacements will not be issued unless documentation is complete and correct.
Date of installation Serial Number
Your Luck//Now Dealer
Name
Address
Telephone Number

RotaryMowers
Important Information
Thismanualhasbeenpreparedtoprovidetheownerandoperatorwiththeinformationrequiredtoproperly
operateandmaintaintheunit.Itisimportantthatyou,theowneroroperator,readthismanualpriorto
operatingorperforminganymaintenanceworkontheunit.Thismanualisforallrotarymowermodels.
Dateofpurchase:
SerialNumber:
Informationneededfororderingparts.
ModelNumber:
SpecialOptions:

RotaryMowers
This Copy Must Helm Welding (1983) Limited
Be Returned To P.O. Box 158
HELM WELDING (1983) LIMITED Lucknow, Ontario, Canada
N0G 2H0
RotaryMower
Pre‐DeliveryCheckList&WarrantyRegistration
1. Inspect machine for loosened bolts during transit.
2. Check oil level in gearbox.
3. Ensure that PTO drive is fitted properly.
4. Grease all bearings (where applicable).
5. Run Machine and make sure all functions work properly before delivery to user.
6. Check to ensure all safety equipment is in place.
Dealer Signature: Date:
Client Signature: Date:
Client Address:
Model # Serial #

RotaryMowers
Purchaser Retains Helm Welding (1983) Limited
This Copy P.O. Box 158
Lucknow, Ontario, Canada
N0G 2H0
RotaryMower
Pre‐DeliveryCheckList&WarrantyRegistration
1. Inspect machine for loosened bolts during transit.
2. Check oil level in gearbox.
3. Ensure that PTO drive is fitted properly.
4. Grease all bearings (where applicable).
5. Run Machine and make sure all functions work properly before delivery to user.
6. Check to ensure all safety equipment is in place.
Dealer Signature: Date:
Client Signature: Date:
Client Address:
Model # Serial #

RotaryMowers
HELM WELDING (1983) LIMITED
86386 Lucknow Line
PO Box 158 ATTENTION:
Lucknow, Ontario, Canada Technical Customer Service
N0G 2H0
Tel: (519) 529-7627 or (519) 529-7000 Number of pages
Fax: (519) 529-3260 including front-page ______
Reader's comments
Helm Welding (1983) Limited is committed to providing excellent documentation. Please,
fax or write us your comments on this manual.
Your suggestions help us improve our technical information.
General
Please check appropriate square.
Agree Disagree
* I can find the information I want
* The table of contents is thorough
* Instructions are complete
* There are enough illustrations
* Illustrations are clear and helpful
Comments:
Name & Address

RotaryMowers
HELM WELDING (1983) LIMITED
5Jun15
1
TableofContents
1.Safety....................................................................2
2.Assembly..............................................................5
3.Start‐Up................................................................7
4.Maintenance.......................................................11
5.MaintenanceSchedule........................................13

RotaryMowers
Safety
HELM WELDING (1983) LIMITED
5Jun15
2
1.Safety
SAFETY TIPS!
TAKE NOTE! THIS SAFETY ALERT SYMBOL FOUND THROUGHOUT THIS MANUAL IS USED TO
CALL YOUR ATTENTION TO INSTRUCTIONS INVOLVING YOUR PERSONAL SAFETY AND THE
SAFETY OF OTHERS. FAILURE TO FOLLOW THESE INSTRUCTIONS CAN RESULT IN INJURY OR
DEATH!
THIS SYMBOL MEANS
ATTENTION!
BECOME ALERT!
YOUR SAFETY IS INVOLVED!
DANGER: Indicates an imminently hazardous situation that, if not avoided, will result in death or
serious injury. They are limited typically to hazards, which cannot be guarded for functional
purposes.
WARNING: Indicates a potentially hazardous situation that, if not avoided, could result in death
or serious injury, and includes hazards that occur when guards are removed. Also used to alert
against unsafe practices.
CAUTION: Indicates a potentially hazardous situation that, if not avoided, may result in minor or
moderate injury. It may also be used to alert against unsafe practices.
If you have any questions not answered in this manual or require additional copies or the manual
is damaged, please contact your dealer or
Helm Welding (1983) Limited, PO Box 158 Lucknow, Ontario Canada, N0G 2H0.
TEL: (519) 529-7627 or (519) 529-7000
FAX: (519) 529-3260
RotaryMowers
Safety
HELM WELDING (1983) LIMITED
5Jun15
3
Before operating the Luck//Now Rotary Mower, carefully
read the instructions provided in the following chapters. Proper
handling of the equipment is the basis of trouble-free functioning.
SAFETY SUGGESTIONS:
- Make sure that anyone operating the Rotary Mower has received proper instructions.
- Make sure that everyone is clear of machine before starting and during operation.
- Completely shut down Rotary Mower and tractor before greasing, adjusting, or unclogging the
mower.
- Keep hands, feet, and clothing away from moving parts.
- Make sure that your tractor has adequate ballast for stability as prescribed in your tractor
operator's manual.
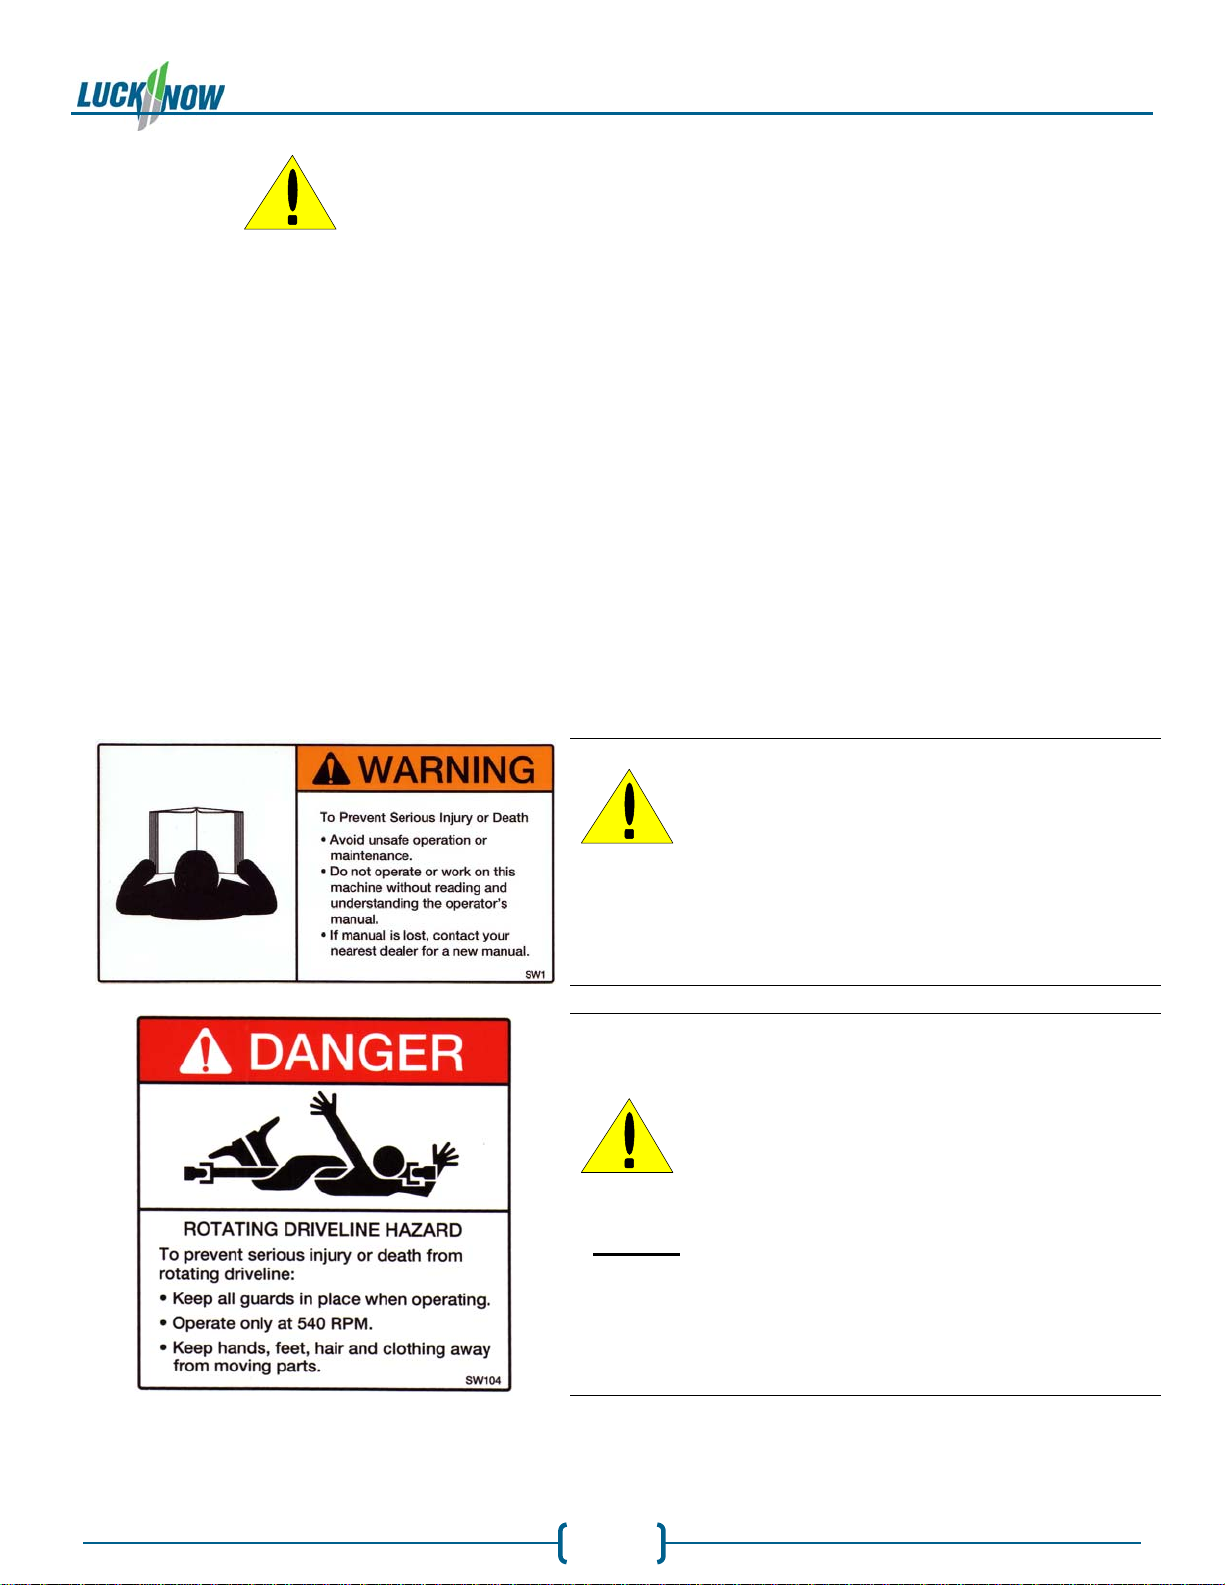
SW1: Proper handling of the equipment is the basis
of trouble - free functioning. The equipment MUST
be used only for the intended application.
SW104: Observe the correct PTO speed.
DO NOT exceed the correct PTO speed.
RotaryMowers
Safety
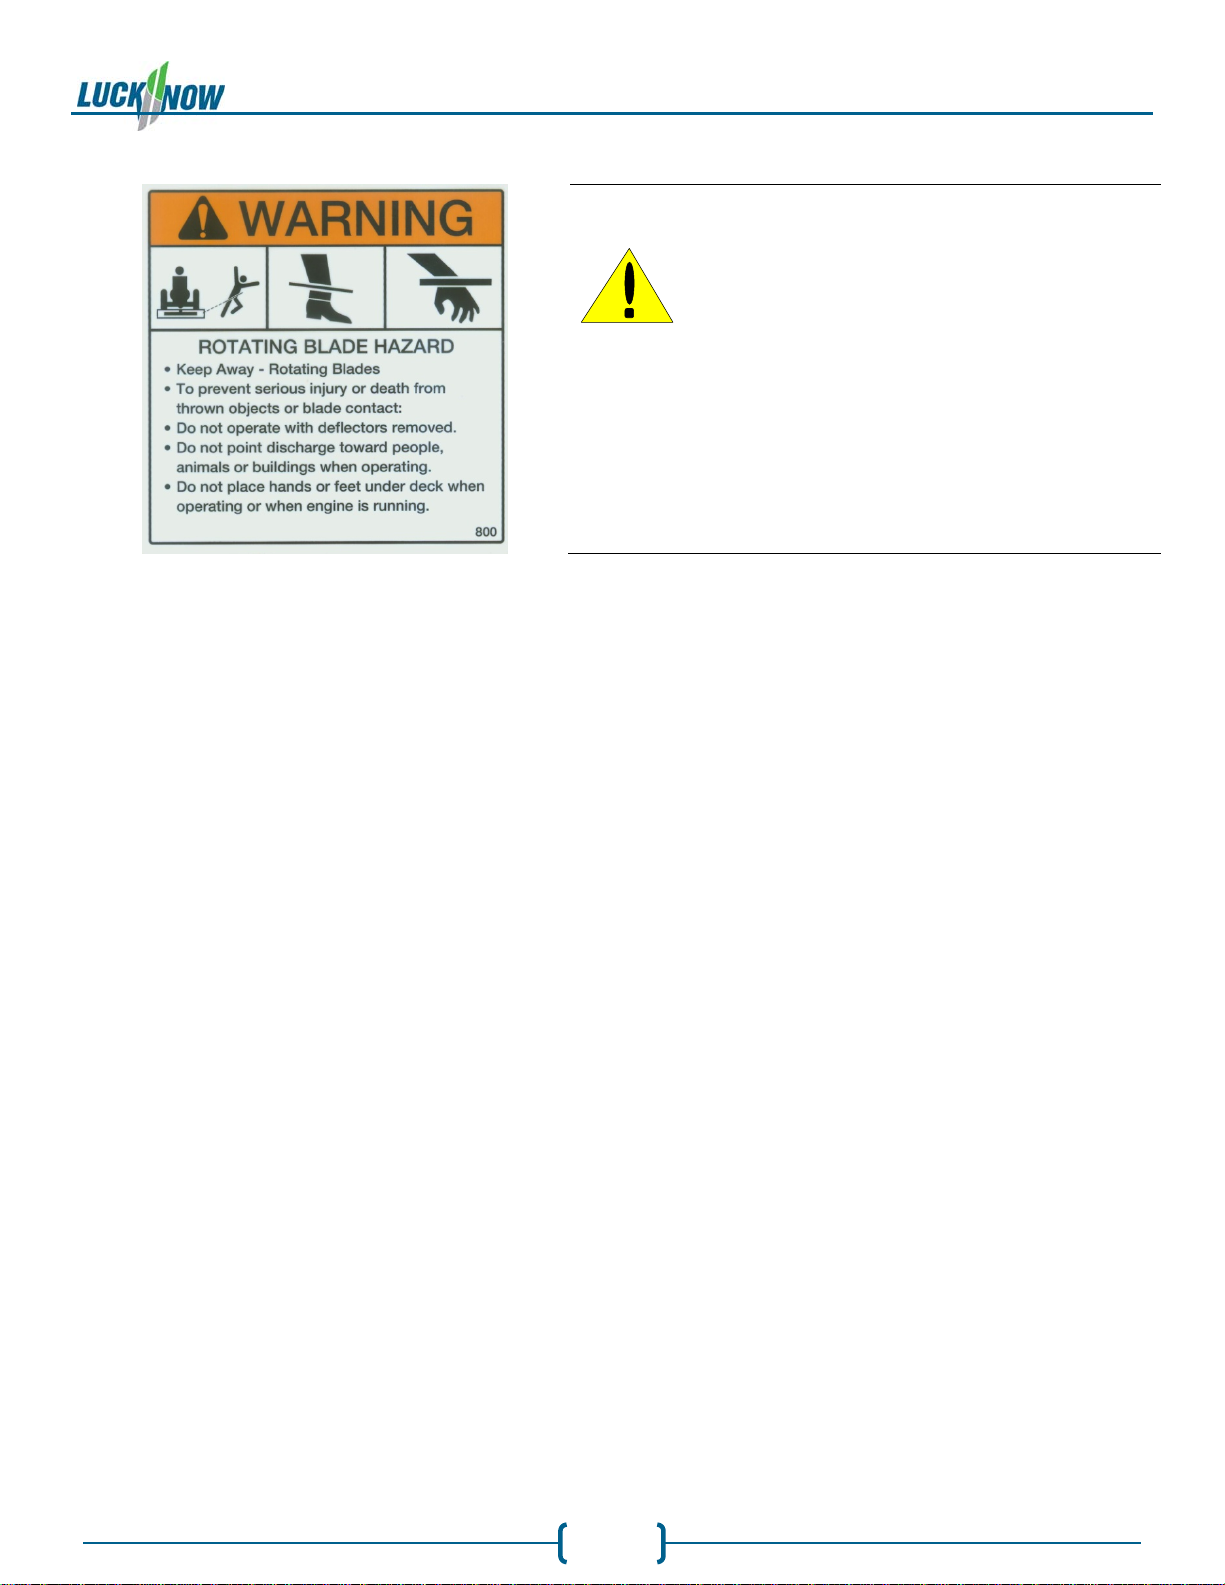
SW800: Mower blades are very aggressive.
NEVER operate when there is anything in front of
the mower. Completely shut down the power unit
and set the brake before proceeding in front of the
mower.
- Children should not be allowed on the product. Clear the area of small children and
bystanders before moving the mower.
- Make sure you are in compliance with all local and provincial regulations regarding
transporting equipment on public roads and highways. Lights and slow moving vehicle signs
must be clean and visible by overtaking or oncoming traffic when the mower is transported.
- Be especially observant of the operating area and terrain. Watch for holes, rocks or other
hidden hazards. Always inspect the area prior to operation.
- Do not operate near the edge of drop-offs or banks
- Do not operate on steep slopes as overturn may result
- Operate up and down (not across) intermediate slopes. Avoid sudden starts and stops.
HELM WELDING (1983) LIMITED
5Jun15
4

RotaryMowers
Assembly
HELM WELDING (1983) LIMITED
5Jun15
5
2.Assembly
See section 5 of this manual for lubrication specifications.
Fill the gearbox with oil according to the following instructions.
1. Be sure the mower is stable and on
level ground.
2. Locate the plugs on the side of the
gearbox (bottom drain, centre
check level). Remove the top
breather plug and the centre check
plug, then fill the gearbox with
gear oil through the top hole until
oil runs out of the centre check
plug. Put both plugs tightly back
in the gearbox and wipe off any
spilled oil.
Grease the PTO shaft and Tail Wheel;
1. Put grease into the following spots:
a. The tail wheel grease fittings
(2 grease fittings)
Breather Plug
CentreCheckLevel
BottomDrain
(openonlytodrain)
RotaryMowers
Assembly
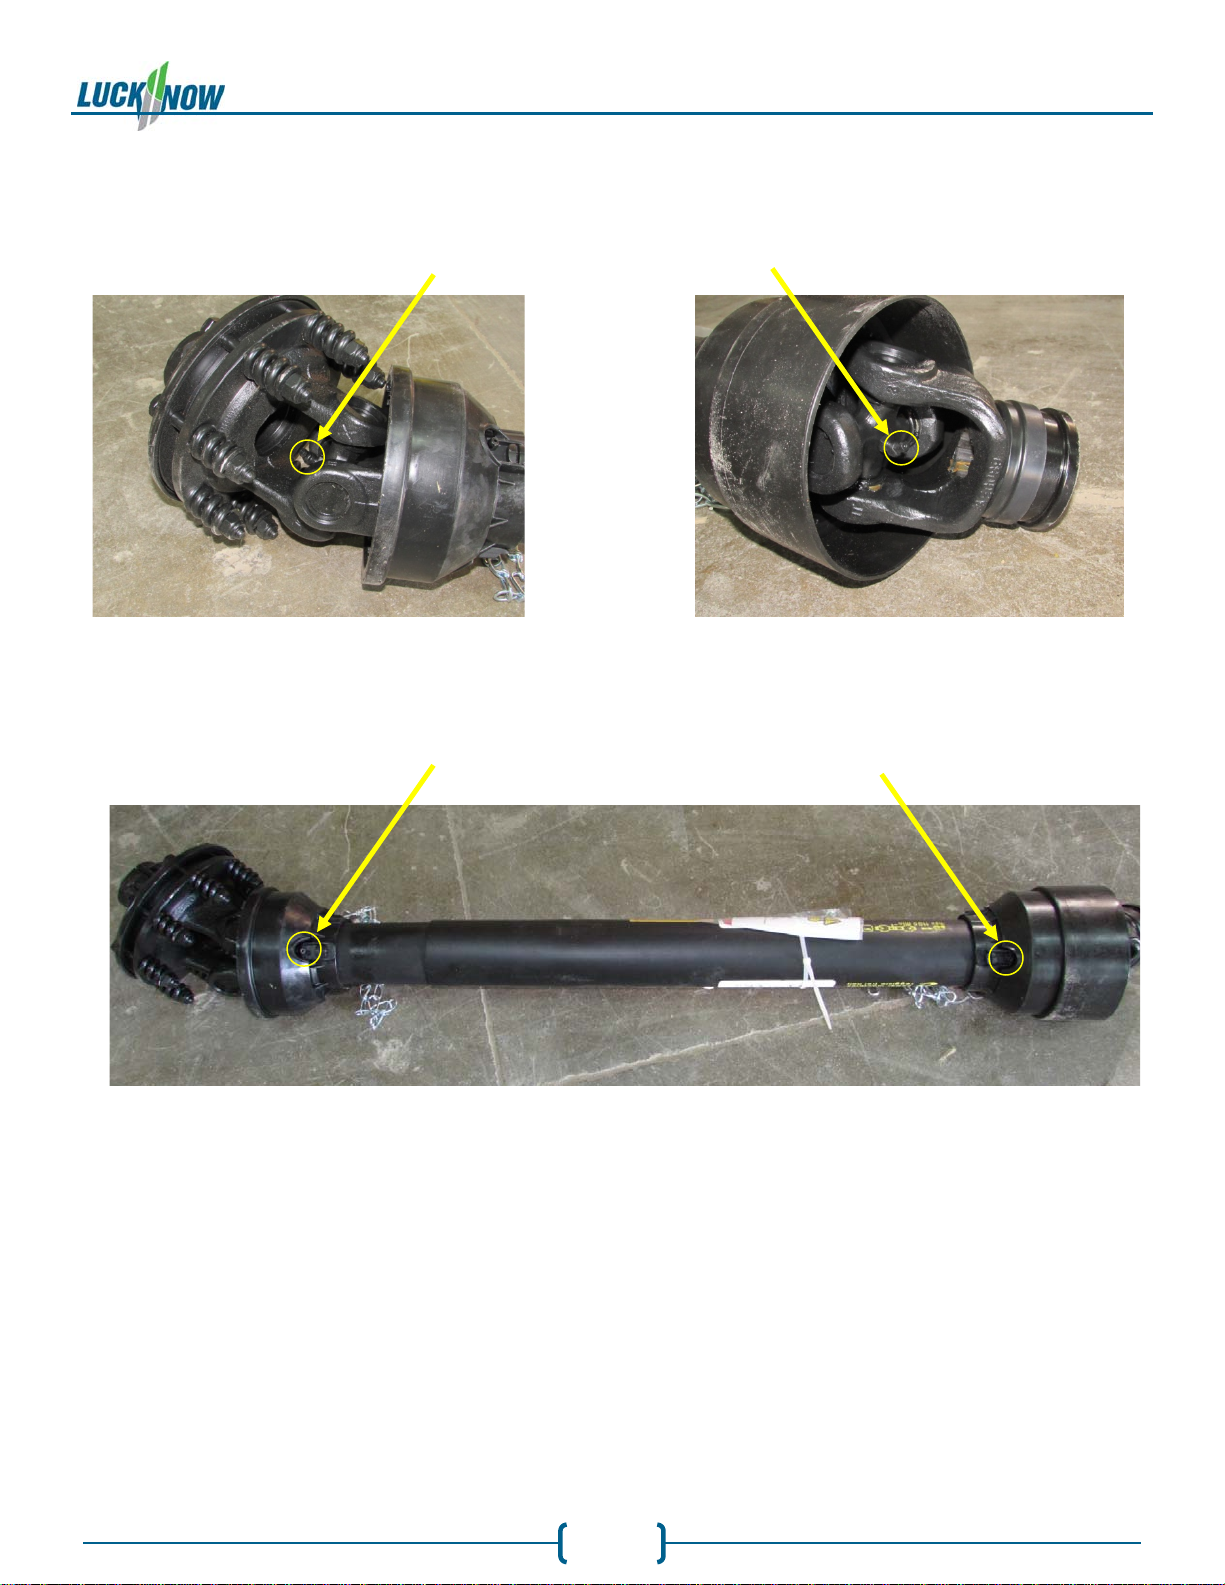
b. The two grease fittings on the universal joints on the PTO
c. The two grease fittings on the safety shield and the inner portion of the PTO
HELM WELDING (1983) LIMITED
5Jun15
6

RotaryMowers
Start‐Up
HELM WELDING (1983) LIMITED
5Jun15
7
3.Start‐Up
TractorRequirements
Use only an adequately sized tractor that can handle the PTO and maneuverability of the unit.
The PTO speed requirements of the units are 540 rpm. The PTO horsepower required to operate
the units will vary according to the volume of the load, and will be determined by actual use.
Recommended horsepower is shown in the chart below.
ModelRecommendedHorsepower
MinimumMaximum
72”4085
84”5085
InstallationInstructionsforBetter
PTOShaft&GearboxOperation
A proper initial installation will give you years of satisfactory service on your equipment. Please
read the following instructions carefully, which have been specially made to help you maintain
satisfaction with your purchase.
Danger:TractorTooLarge
It is dangerous to use a tractor, which is too big or too powerful. The tractor may be able to
overload the mower, even if the machine is already at maximum capacity. If the tractor PTO shaft
is too high above the ground extreme angles at PTO shaft universal joints will result and the life of
these u-joints will be shortened dramatically.
Danger:PTOSplineAdaptors
It is dangerous to use a PTO spline adaptor to change your tractor PTO shaft spline to
accommodate a different implement PTO spline. Match the right tractor PTO spline and speed
with the PTO driveshaft provided with the implement. *Use of a PTO spline adaptor will void the
warranty on your implement PTO shaft and driveline*.

RotaryMowers
Start‐Up
HELM WELDING (1983) LIMITED
5Jun15
8
PTOShaftAngles
PTO shafts are made to transmit power with angles at universal joints. However, these angles
should be kept to a minimum, the larger the angle, the shorter the life of the PTO shaft. Take for
example a mower made for a tractor capacity of 60-75 HP, which would be attached to a 60 HP
tractor, operating at maximum capacity (60 HP continuous).
HPPTOAnglesEstimatedLifeinHours
60@540rpm
5
0
450hours
10
0
195hours
15
0
90hours
20
0
40hours
25
0
20hours
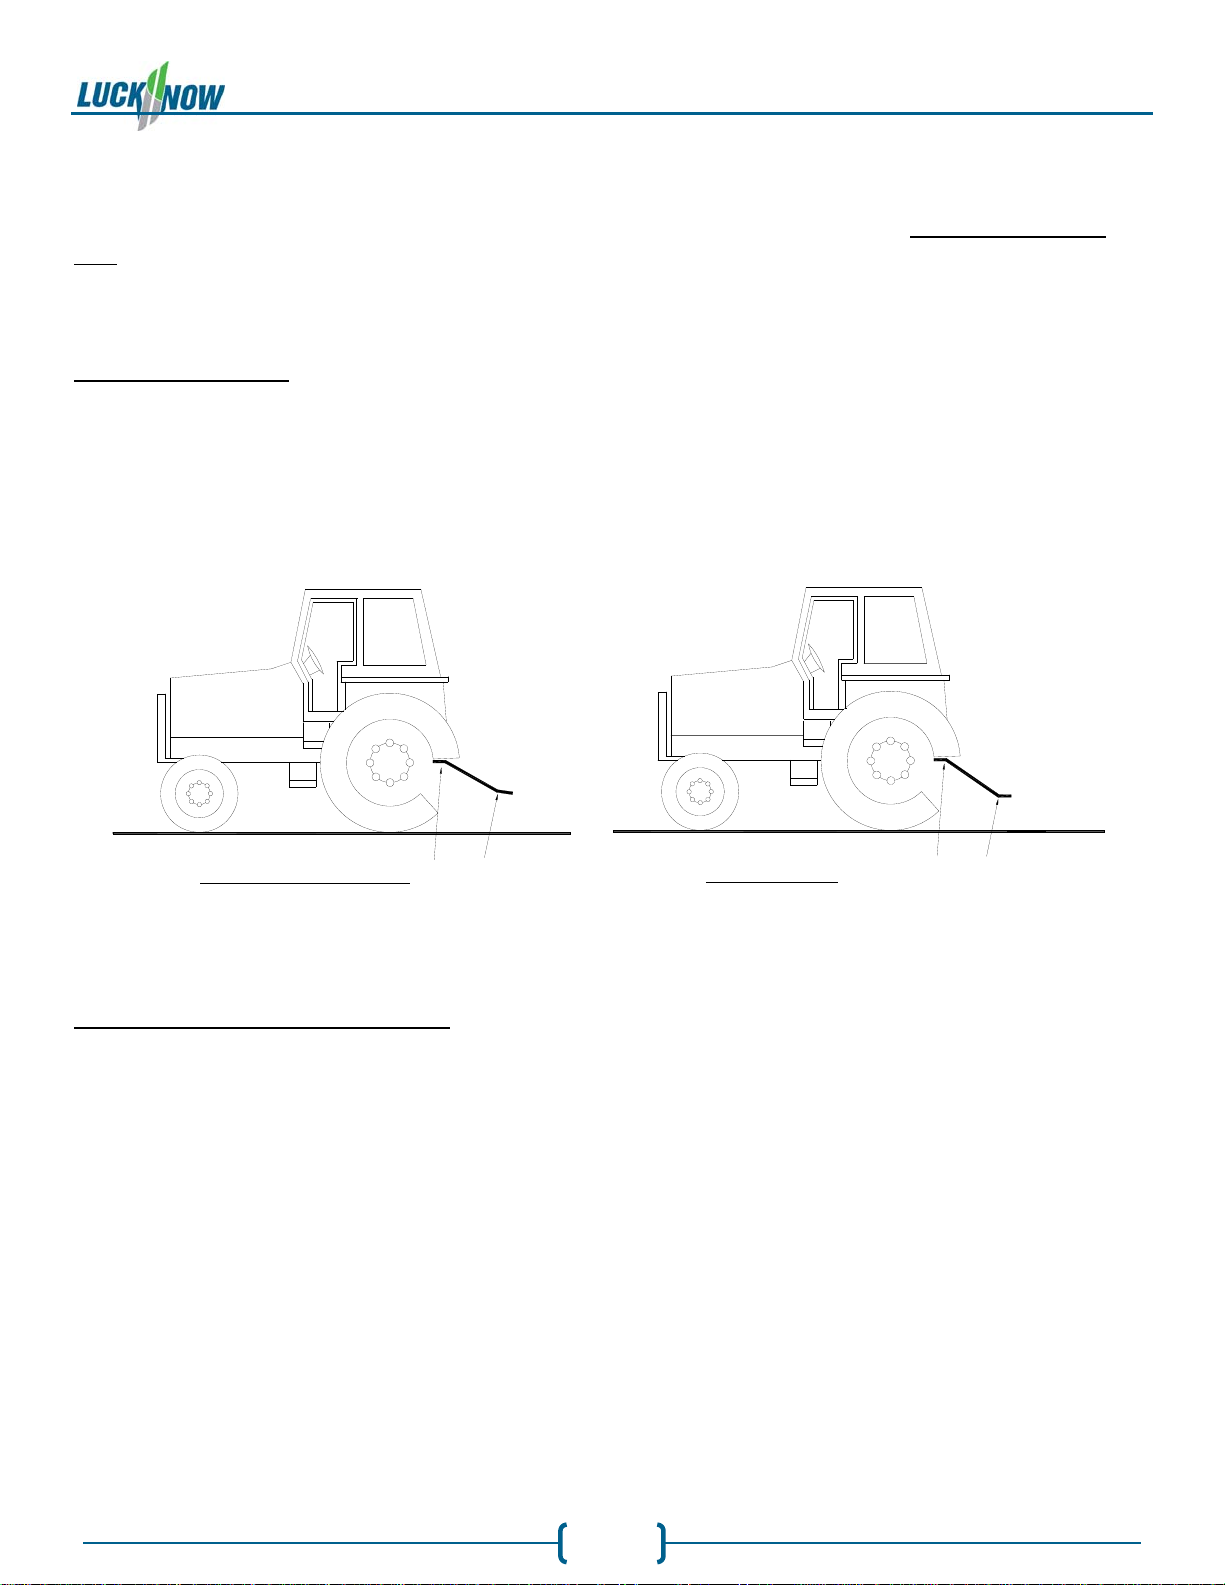
HowtoDeterminePTOAngle
Previous examples clearly demonstrate that universal joint angle is directly related with life of
your PTO shaft and u-joints. In order to reduce angle, it is necessary to increase the distance
between your mower and tractor.
REASONABLE ANGLES @ PTO JOINTS
AVOID TOO LARGE ANGLES @ PTO JOINTS
RotaryMowers
Start‐Up
HELM WELDING (1983) LIMITED
5Jun15
9
If it is impossible to increase the distance between mower and tractor, in order to maintain a
reasonable angle at the PTO, it is recommended to use a larger PTO, that is, a greater capacity
PTO (please refer to your dealer for more details).
EqualPTOAngles
Changing the mower angle can become harmful to the PTO. With the angle at each end being
unequal, there will be drastic increase of load on cross-kit and bearings. To avoid these problems,
it is recommended to keep tractor PTO shaft and mower input shaft always parallel.
MaximumLengthofPTOShaft
WARNING- Telescopic tubes of a PTO should be set to minimum length to meet ideal conditions
for power transmission.
The minimum overlap between PTO tubes should be equal to 1/3 of the length of one half of the
tube by itself.
EQUAL ANGLES @ PTO JOINTS RECOMMENDED
AVOID UNEQUAL ANGLES @ PTO JOINTS
RotaryMowers
Start‐Up
AdjustingCuttingDepth
It is necessary to perform all maintenance work on the Rotary Mower before every use as well as
clearly understanding the safety information. Remember to NEVER make any adjustments to the
Rotary Mower while the tractor is running.
1. Once the Rotary Mower is attached to the tractor, adjust the tractor lift arms so that the
frame of the mower is parallel to the ground.
2. Raise the mower and support it accordingly.
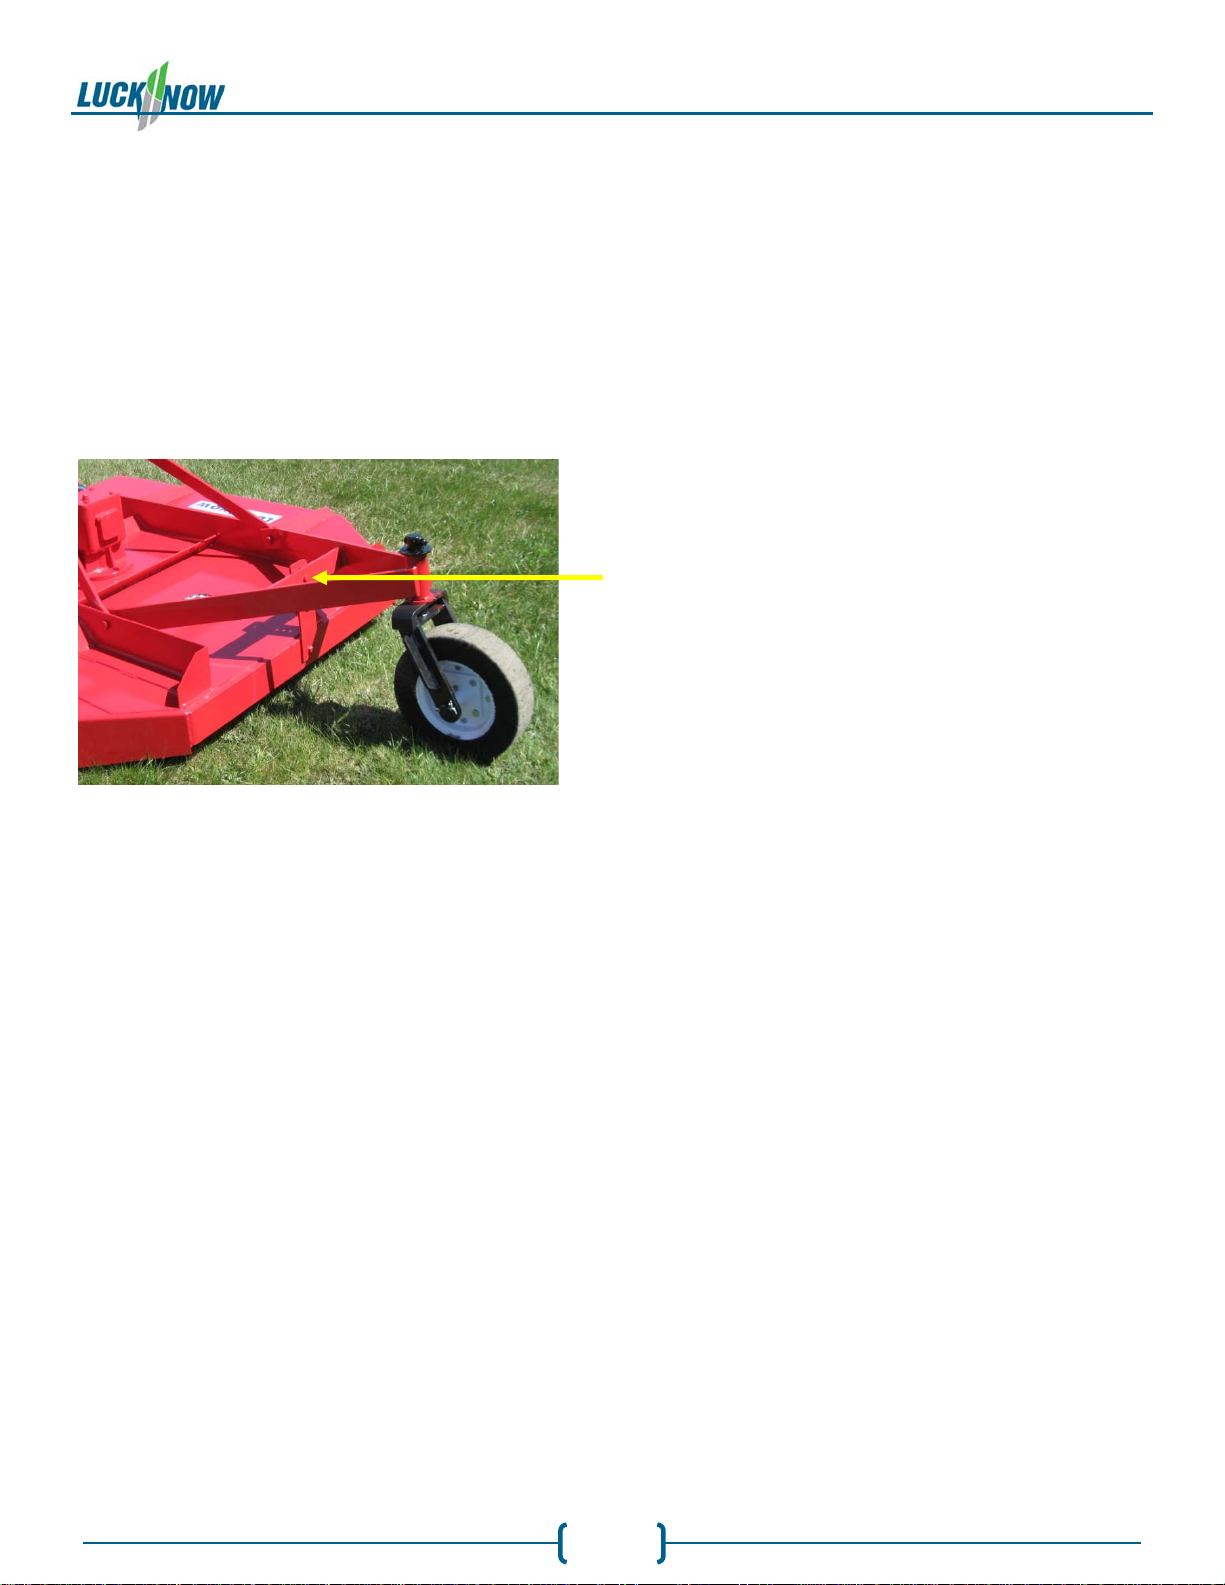
3. Support the tail wheel assembly to keep it
from falling when adjusting. Remove the
adjustment bolt on the tail wheel arm height
adjuster plate. Move the tail wheel up or
down to the appropriate cutting depth and
reinstall the height adjustment bolt.
4. Raise the mower, remove the support and place the mower onto the ground.
Operation
5. Let your tractor idle and slightly lift the mower off the ground, engage the PTO and
gradually increase the RPM to 540 (PTO RPM), the speed which the Rotary Mower is designed
to run at. Putting the tractor into a lower gear and beginning to move forward, slowly
lower the mower and allow the blades to begin cutting.
6. It is highly recommended that you clean all the debris from the blades and bottom of mower
deck after every use, as well as replace any missing or unreadable safety decals. Store
mower in a dry environment.
Attention:
Allowing the tractor engine or rotary mower to stall or bog down will cause unnecessary wear
on both the mower and the tractor. In the event that this happens, decrease speed and raise
the mower. NEVER ATTEMPT TO REMOVE OBJECTS FROM BLADES WHILE TRACTOR IS RUNNING
AND BLADES ARE STILL MOVING.
Damage could be caused to the Rotary Mower if the speed is too fast.
HELM WELDING (1983) LIMITED
5Jun15
10

RotaryMowers
MaintenanceSchedule
HELM WELDING (1983) LIMITED
5Jun15
11
4.Maintenance
Note: Stop the unit, disengage PTO drive and completely shut down the tractor engine, or
completely unhook from the tractor before making any adjustments or doing any service.
GreaseBearings
For the best results, the grease should be pumped into the bearings slowly until a very slight bead
of grease forms around the bearing seals on the shaft. This bead, in addition to acting as an
indication of adequate lubrication, provides additional protection against the entry of foreign
matter. To prevent premature bearing failure, always ensure that the grease nipple, grease gun
end, and the grease itself, is clean and free of any dirt, grit, paint or foreign matter.
PTODriveShaft
It is important that the owner/operator read this section and the information supplied by the PTO
manufacturer. The unit incorporates a PTO coupling shaft containing several important features
and warnings:
1. Safety Shields - These shields should be left in place at all times to prevent injury.
2. Slip Clutch - The PTO shaft used on current model uses a slip clutch mechanism to protect
the tractor and mower from serious damage.
3. Do not wear loose clothing when operating the PTO, or when near any rotating equipment.
4. To avoid injury, do not clean, adjust, unclog or service PTO driven equipment when tractor
is running.
5. Never exceed the recommended operating speed for the particular equipment in use.
6. PTO shafts must only be used for their intended purpose and are designed for only that
machine.
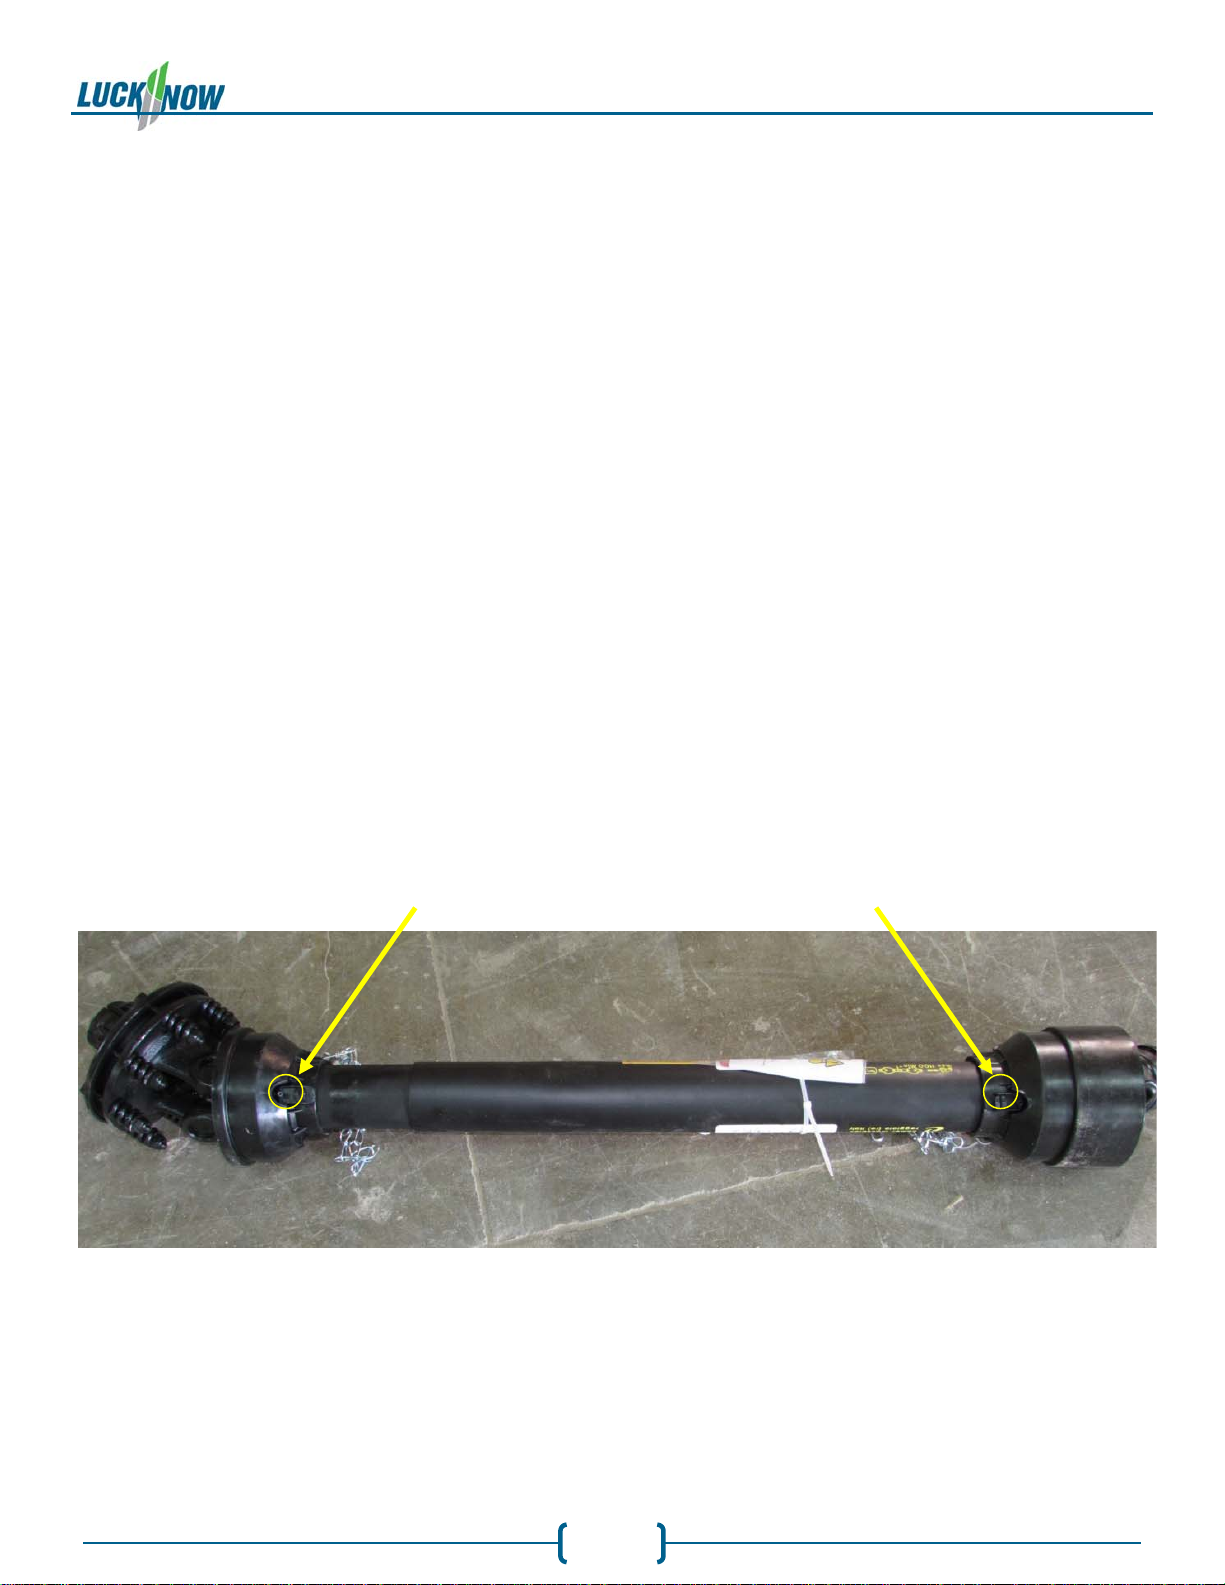
7. Push locking pin and simultaneously push PTO drive shaft onto PTO shaft until the locking
device engages. Ensure that the PTO shaft is securely connected before use.
RotaryMowers
MaintenanceSchedule
HELM WELDING (1983) LIMITED
5Jun15
12
8. The maximum joint angles must be observed or serious injury and damage could occur.
a. Continuous Operation- 25 deg.
b. Short duration- 45-50 deg.
c. Non-rotating- 80 deg.
9. Avoid contact between the PTO shaft and tractor or implement.
10. The chain is intended to prevent the shield from rotating against non-moving parts,
preventing shield damage. A properly installed chain will increase the service life of the
shield.
11. Chains must be fitted so as to allow sufficient rotation of the shaft in all positions. Be sure
that chain does not become entangled with drawbar hitch or other restrictions during
operation or transport.
12. The PTO drive shaft must not be suspended from the chain.
13. Using quality grease, pump grease in the grease zerks before starting work, and every 8
operating hours. Clean and grease the PTO drive shaft before each period of prolonged non-
use. The molded nipples on the shield near each bearing are intended as grease fittings and
should be lubricated every 8 hours of operation. Telescoping members must have
lubrication to operate successfully regardless of whether a grease fitting is provided. Those
without fittings should be pulled apart and grease should be added manually. Check and
grease the guard tubes in winter to prevent freezing.
14. Slip clutch regular maintenance (every 50 hrs) – remove the bolts and springs and
disassemble the two slip clutch halves. Clean all rust, dirt and debris from the steel plates
and slip clutch discs (do not lubricate). Inspect the slip clutch discs for wear, replace if
necessary. Retighten the bolts according to the measurements given in item 2. on the
previous page.

RotaryMowers
MaintenanceSchedule
HELM WELDING (1983) LIMITED
5Jun15
13
5.MaintenanceSchedule
The following items are to be checked and, if necessary, corrective action taken. This schedule is
designed for units operating under normal conditions. If the unit is operating in adverse or severe
usage conditions, it may be necessary for the items to be checked and serviced more frequently.
Check & Inspect the Following:
8 Hrs. 25 Hrs. 50 Hrs. 100 Hrs.
PTO bearings, slides & crosses –
lube X*
Disassemble PTO shaft - wash
and lube steel tubes X
Disassemble PTO slip clutch –
clean plates and check wear X
Blade bolts
– check tightness X
Gearbox Oil Level X
Tail Wheel Lubrication X*
Gearbox – drain & refill
X†
*In severe conditions these items may require more frequent service.
†Drain & Refill after the first 100 hours.
OffSeason
During the off season, when the mower is not to be used for a prolonged period of time, it is
recommended that the bearings are filled with grease and the PTO is well greased as well.
LubricationSpecifications
Bearings
Splined Drive Line Yokes
Shear Bolt Yokes
PTO Shaft……… NLGl #2 or #3 Lithium Base Grease
Gearbox ………………………….40/50 or 80/90 Gear oil
This manual suits for next models
1
Table of contents


