Hi-Target Qpad User manual

Qpad Fully Rugged Tablet GIS product manual
1
Qpad Fully Rugged Tablet GIS
product manual

Qpad Fully Rugged Tablet GIS product manual
1
Using this manual
Thank you for purchasing this Q-pad. This device will provide you with high
quality mobile communication and entertainment based on Hi-Target’s
exceptional technology and high standards.
◎This user manual has been specially designed to guide you through the
functions and features of your device.
◎Please read this manual carefully before using your device to ensure safe and
correct use.
◎The descriptions in this manual are based on the default settings of your
device.
Please keep this manual for future reference.
Instructional icons
Before you start, familiarise yourself with the icons you will see in this manual:
Warning—situations that could cause injury to yourself or others
Note—notes, usage tips, or additional information

Qpad Fully Rugged Tablet GIS product manual
2
CONTENTS
Assembling .......................................................................................................................................1
Unpack......................................................................................................................................1
Charge the battery.....................................................................................................................1
Getting started...................................................................................................................................2
Turn your device on and off......................................................................................................2
Get to know your device...........................................................................................................2
Product Appearance..........................................................................................................2
Use the touch screen .................................................................................................................3
Add items to the idle screen......................................................................................................4
Move items on the idle screen...........................................................................................5
Remove items from the idle screen...................................................................................5
Use the shortcuts panel......................................................................................................5
Add or remove panels to the idle screen...........................................................................6
Access applications...................................................................................................................6
Customise your device..............................................................................................................7
Set the current time and date.............................................................................................7
Turn on or off the touch tone.............................................................................................7
Install an application.........................................................................................................7
Uninstall an application.....................................................................................................8
Download files from the web....................................................................................................8
Synchronise data ...............................................................................................................9
Set up a server account......................................................................................................9
Activate automatic sync....................................................................................................9
Synchronise data manually ...............................................................................................9
Entertainment..................................................................................................................................10
Camera....................................................................................................................................10
Capture a photo...............................................................................................................10
Capture a video ...............................................................................................................10
Music Player ...........................................................................................................................11
Personal information.......................................................................................................................12
Calendar..................................................................................................................................12
Create an event................................................................................................................12
View events.....................................................................................................................12
Connectivity....................................................................................................................................13
Bluetooth.................................................................................................................................13
Turn on the Bluetooth wireless feature ...........................................................................13
Find and pair with other Bluetooth enabled devices.......................................................14
Send data using the Bluetooth wireless feature...............................................................14
Receive data using the Bluetooth wireless feature..........................................................14
Wi-Fi.......................................................................................................................................14

Qpad Fully Rugged Tablet GIS product manual
3
Activate the WLAN feature ............................................................................................15
Find and connect to a WLAN .........................................................................................15
Add a WLAN manually ..................................................................................................16
Connect to a WLAN using a Wi-Fi Protected Setup (WPS)...........................................16
Settings............................................................................................................................................17
Access the Settings menu........................................................................................................17
Wireless and network..............................................................................................................17
Location and security..............................................................................................................17
Applications............................................................................................................................18
Privacy ....................................................................................................................................19
SD card and phone storage......................................................................................................20
Locale......................................................................................................................................20
Safety and usage information..........................................................................................................21
Safety warnings.......................................................................................................................21
Safety precautions...................................................................................................................21
Important usage information...................................................................................................22

Qpad Fully Rugged Tablet GIS product manual
1
Assembling
Unpack
Check your product box for the following items:
Mobile device
Battery
Travel adapter (charger)
User manual
Use only Hi-Target-approved software. Pirated or illegal software may cause damage
or malfunctions that are not covered by your manufacturer's warranty.
◎The items supplied with your device may vary depending on the software and
accessories available in your region or offered by your service provider.
◎You can obtain additional accessories from your local Hi-Target dealer.
◎The supplied accessories perform best for your device.
Charge the battery
Before using the device for the first time, you must charge the battery.
You can charge the device with the provided travel adapter or by connecting the
device to a PC with a PC data cable.
Use only Hi-Target-approved chargers and cables. Unauthorised
chargers or cables can cause batteries to explode or damage your
device.
◎When your battery is low, the device will emit a warning tone and
display a low battery message. The battery icon will also be empty
and turn red.
◎If the battery level becomes too low, the device will automatically
power off. Recharge your battery to continue using your device.

Qpad Fully Rugged Tablet GIS product manual
2
Getting started
Turn your device on and off
To turn on your device, press and hold power button. Your device will automatically
connect to the cellular network.
If you turn on your device for the first time, tap the Android image on the screen and
follow the on-screen instructions to set up your device.
To turn off your device, press and hold power button and then select
Power off.
Follow all posted warnings and directions from official personnel when in areas
where the use of wireless devices is restricted, such as aeroplanes and hospitals.
To use your device's non-network services only,switch to Flight mode. Press and hold
power button and select Flight mode.
Get to know your device
Product Appearance

Qpad Fully Rugged Tablet GIS product manual
3
①Touch screen ②Battery indicator ③Satellite signal indicator ④Network
signal indicator ⑤Power button ⑥Return key ⑦Main Menu key ⑧Function
key ⑨Custom key ⑩Power cord jack ⑪USB Port ⑫Headphone jack
⑬Camera ⑭High-precision module interface ⑮Battery turnbuckle ⑯Battery
⑰Battery turnbuckle ⑱Speaker
Use the touch screen
Your device’s touch screen lets you easily select items or perform functions. Learn
basic actions to use the touch screen.
◎To avoid scratching the touch screen, do not use sharp tools.
◎Do not allow the touch screen to come into contact with other
electrical devices. Electrostatic discharges can cause the touch screen
to malfunction.
◎Do not allow the touch screen to come into contact with water. The
touch screen may malfunction in humid conditions or when exposed
to water.
Control your touch screen with the following actions:
◎Tap: Tap once with your finger to select or launch a menu, option, or application.
◎Tap and hold: Tap an item and hold it for more than 2 seconds to open a pop-up
option list.
◎Scroll: Tap and drag your finger up, down, left, or right to move to items on lists.
◎Drag and drop: Tap and hold your finger on an item, and then drag your finger to
move the item.

Qpad Fully Rugged Tablet GIS product manual
4
◎Double-tap: Tap twice quickly with your finger to zoom in or out while viewing
photos or web pages.
Get to know the idle screen
When the device is in Idle mode, you will see the idle screen. From the idle screen,
you can view your device’s status and access applications.
The idle screen has 7 panels. Scroll left or right to a panel of the idle screen. You can
also select a dot on the top of the screen to move to the corresponding panel of the
idle screen directly.
Add items to the idle screen
You can customise the idle screen by adding shortcuts to applications or items in
applications, widgets, or folders. To add items to the idle screen:
Press →Add or tap and hold the empty area on the idle screen.
Select the item category → an item:
◎Hi-Target Widgets Add Hi-Target widgets to the idle screen.
◎Android Widgets Add Android widgets to the idle screen.
◎Shortcuts Add shortcuts to items, such as applications, bookmarks, and contacts.
◎Folders Create a new folder or add folders for your contacts.
◎Wallpapers: Set a background image.
Available items may vary depending on the current idle screen mode.

Qpad Fully Rugged Tablet GIS product manual
5
Move items on the idle screen
Tap and hold an item to move.
Drag the item to the location you want when the item is magnified.
Remove items from the idle screen
Tap and hold an item to remove. The item is magnified and the trash icon appears on
the application area, meaning that the application area at the bottom of the idle screen
changes to the trash.
Drag the item to the trash.
When the item and the trash turn red, release the item.
Use the shortcuts panel
In Idle mode or while using an application, tap the indicator icons area and drag your
finger down to open the shortcuts panel. You can activate or deactivate wireless
connection features and access a list of notifications, such as messages, calls, events
or processing status. To hide the list, drag the bottom of the list up.
From the shortcuts panel, you can use the following options:
◎Wi-Fi: Activate or deactivate the WLAN connection feature.
◎Bluetooth: Activate or deactivate the Bluetooth wireless connection feature.
◎Silent: Activate or deactivate the silent mode.
◎GPS: Activate or deactivate the GPS feature.
◎Vibration: Activate or deactivate Vibration mode.
Available options may vary depending on your region or service provider

Qpad Fully Rugged Tablet GIS product manual
6
Add or remove panels to the idle screen
You can add or remove panels of the idle screen to organize widgets according to your
preferences and needs.
In Idle mode, press → Edit .
Select minus to remove a panel or plus to add new panels.
Press → Save.
Access applications
To access your device’s applications
In Idle mode, selectApplications to access the application list.
Scroll left or right to another application screen.You can also select a dot on the top of
the screen to move to the corresponding main menu screen directly.
Select an application.
◎When you use applications provided by Google, you must have a
Google account. If you do not have a Google account, sign up for a
Google account.
◎You can add a shortcut to an application by tapping and holding the
application icon from the application list. You can move the icon to
the location you want on the idle screen.
Press to return to the previous screen; Press the Home key to return to the idle
screen.
Your device has a built-in motion sensor that detects its orientation. If
you rotate the device while using some features, the interface will
automatically switch to landscape view. To set the interface to keep
the orientation when you rotate the device, select Settings→Sound
and display→Orientation.

Qpad Fully Rugged Tablet GIS product manual
7
Customise your device
Get more from your device by customising it to match your preferences.
Set the current time and date
In Idle mode, open the application list and select Settings→Date and time.
Set the time and date and change other options.
Turn on or off the touch tone
In Idle mode, open the application list and select Settings→Sound and
display→Audible selection.
Install an application
In Idle mode, open the application list and select Market.
Select Accept when the terms and conditions appears.
Select an item category→an item.
Select Install (for free items) or Buy. If you select Install, select OK to download the
item immediately. If you select Buy, you need to enter your credit card information.
Follow the on-screen instructions.

Qpad Fully Rugged Tablet GIS product manual
8
Uninstall an application
From the Android Market home screen, press →Downloaded.
Select the item you want to delete.
Select Uninstall→OK.
Download files from the web
When you download files or web applications from the web, your device saves them
in a memory card.
Files you download from the web can include viruses that will
damage your device. To lessen your risk, only download files from
sources you trust.
Some media files include Digital Rights Management to protect
copyrights. This protection may prevent you from downloading,
copying, modifying, or transferring some files.
To download files from the web,
In Idle mode, open the application list and select Internet.
Search for a file or application and download it.
To install applications downloaded from websites other thanAndroid Market, you
must select Settings→Applications→Unknown sources.

Qpad Fully Rugged Tablet GIS product manual
9
Synchronise data
You can synchronise data with various web servers and back up or restore your data.
Once the synchronisation is completed, your device stays connected to the web. If any
change is made on the web, the updated information will appear on your device and
will automatically begin synchronisation, and vice versa.
This feature may be unavailable depending on your region.
Set up a server account
In Idle mode, open the application list and select Settings→Accounts and sync.
Select Add account→an account type.
Follow the on-screen instructions to complete the account setup. For online
community services, such as Facebook or MySpace, enter your user name and
password and select Log in.
Activate automatic sync
In Idle mode, open the application list and select Settings→Accounts and sync.
Select Auto-sync.
Select an account.
Select the applications you want to synchronise.
To exclude applications from automatic synchronisation, clear the check boxes next to
the applications you want.
Synchronise data manually
In Idle mode, open the application list and select Settings→Accounts and sync.
Select an account.
Press →Sync now. Your device will start synchronising the data you set for
synchronization.
Qpad Fully Rugged Tablet GIS product manual
10
Entertainment
Camera
Learn how to capture and view photos and videos.
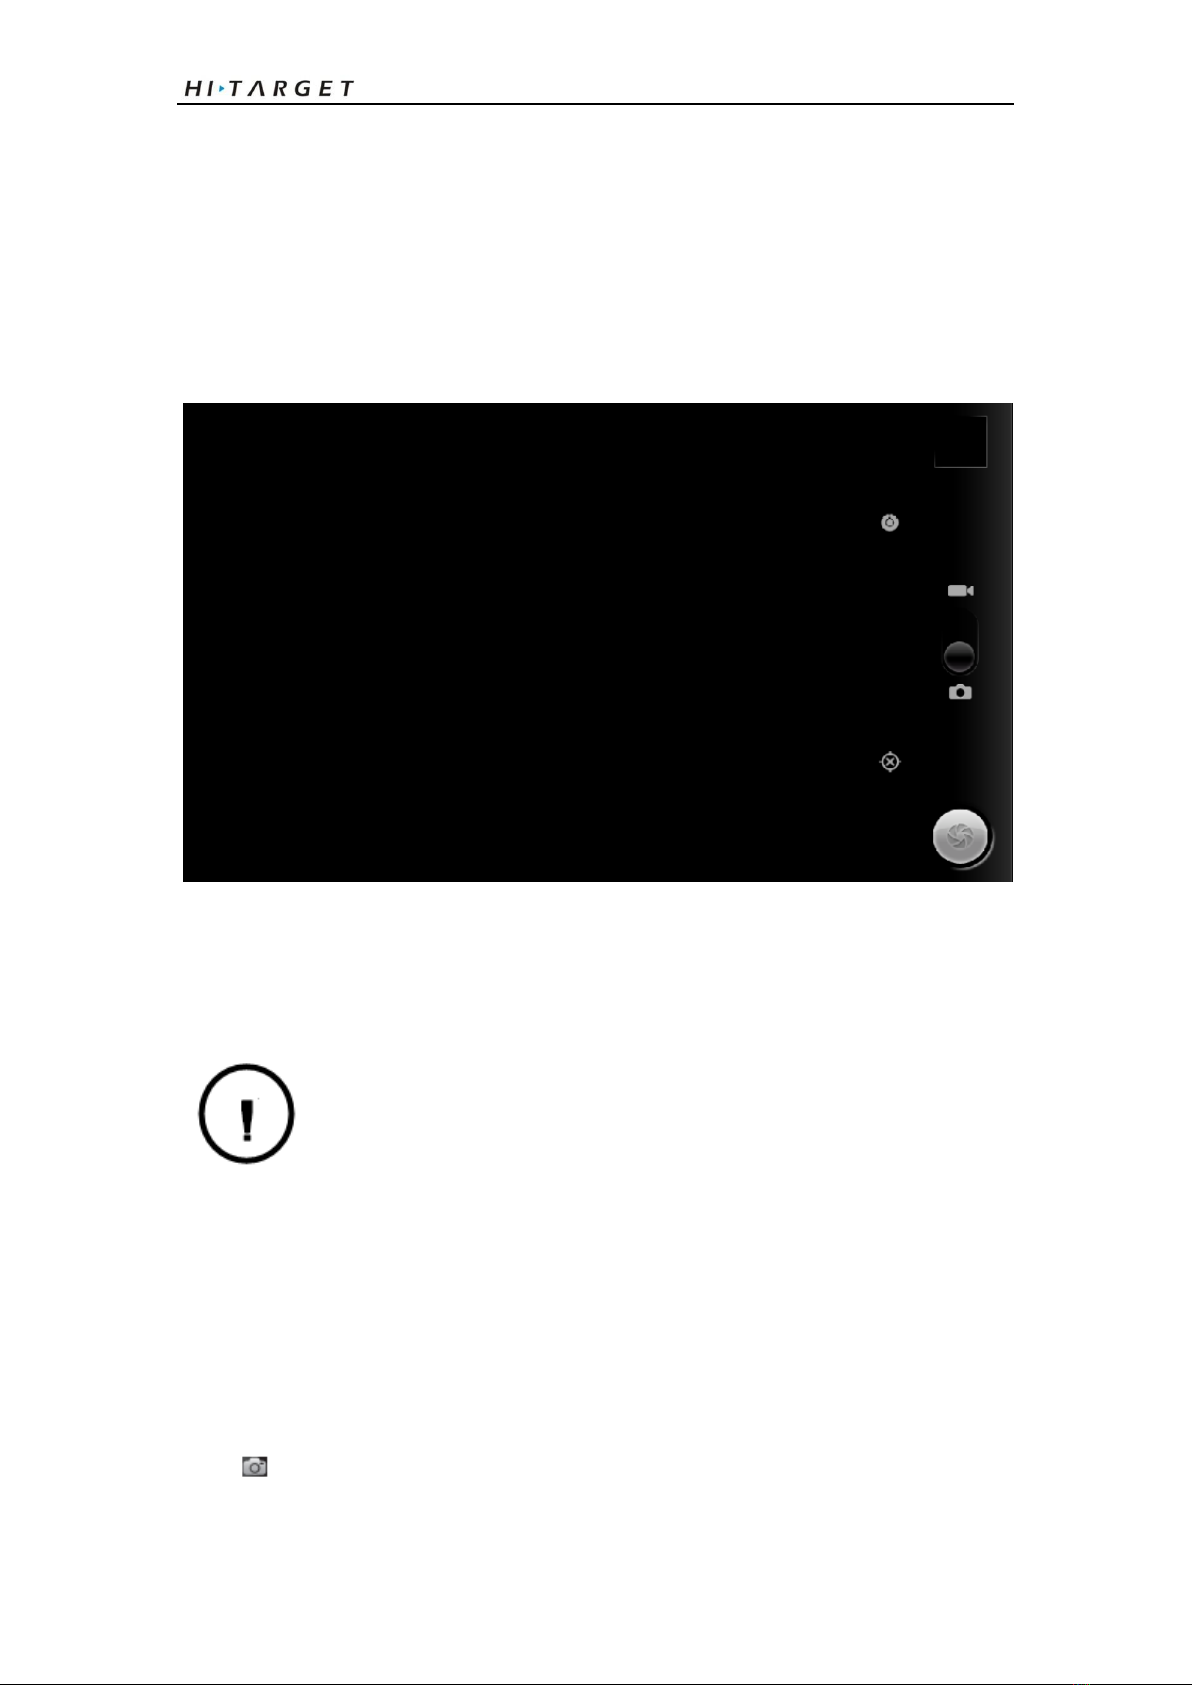
Capture a photo
In Idle mode, open the application list and select Camera.
Rotate the device anti-clockwise to landscape view.
◎The camera interface appears only in the landscape orientation.
◎The camera automatically turns off when you do not use it for a
specified period.
◎The memory capacity may differ depending on the shooting scene or
shooting conditions.
Aim the lens at the subject and make any necessary adjustments.
Capture a video
In Idle mode, open the application list and select Camera.
Rotate the device anti-clockwise to landscape view.
Select to switch to the camcorder.
Aim the lens at the subject and make any necessary adjustments.

Qpad Fully Rugged Tablet GIS product manual
11
Press the Volume key to zoom in or out.
Select to start recording.
Select to stop recording.
◎The video is saved automatically.
◎The camera may not be able to properly record videos to a memory
card with a slow transfer speed.
After capturing videos, select to view the captured videos.
◎To view more videos, scroll left or right.
◎To play a video, select Play.
◎To delete a video, select Delete.
◎To send a video to others, select Share.
Music Player
Learn to listen to your favourite music while on the go with the music player.
◎Some file formats are not supported depending on the software of
the phone.
◎If the file size exceeds the available memory, an error can occur
when you open files.

Qpad Fully Rugged Tablet GIS product manual
12
Personal information
Calendar
Learn to create and manage daily, weekly or monthly events, and set alarms to remind
yourself of important events.
Create an event
In Idle mode, open the application list and select Calendar.
Press →Create.
Enter the details of the event as required.
Select Save.
View events
To change the calendar view,
In Idle mode, open the application list and select Calendar.
Select a view mode from the top of the calendar.
To view events of a specific date,
In Idle mode, open the application list and select Calendar.
Select a date on the calendar. In month view, days with scheduled events are indicated
by a small triangle. To move to a specific day by entering a date manually, press
→Go to, enter the date by selecting + or -, and select Set.
To select today's date, press→Today.
Select an event to view its details.
You can send the event to others by pressing →Send via→ an
option.

Qpad Fully Rugged Tablet GIS product manual
13
Connectivity
Bluetooth
Bluetooth is a short-range wireless communications technology capable of
exchanging information over a distance of about 10 meters without requiring a
physical connection.
You do not need to line up the devices to beam information with Bluetooth. If the
devices are within range of one another, you can exchange information between them
even if they are located in different rooms.
◎Hi-Target is not responsible for the loss, interception, or misuse of
data sent or received via the Bluetooth wireless feature.
◎Always ensure that you share and receive data with devices that are
trusted and properly secured. If there are obstacles between the
devices, the operating distance may be reduced.
◎Some devices, especially those that are not tested or approved by
Bluetooth SIG, may be incompatible with your device.
Turn on the Bluetooth wireless feature
1. In Idle mode, open the application list and select Settings → Wireless and

Qpad Fully Rugged Tablet GIS product manual
14
network → Bluetooth settings .
2. Select Bluetooth to turn on the Bluetooth wireless feature.
Find and pair with other Bluetooth enabled devices
1. In Idle mode, open the application list and select Settings → Wireless and
network → Bluetooth settings → Scan devices.
Select a device.
2. Enter a PIN for the Bluetooth wireless feature or the other device’s Bluetooth PIN,
if it has one, and select OK. Alternatively, select Accept to match the PIN
between your device and the device.
3. When the owner of the other device enters the same PIN or accepts the connection,
pairing is complete. If the pairing is successful, the device will automatically
search for available services.
Some devices, especially headsets or hands-free car kits, may have a
fixed Bluetooth PIN, such as 0000. If the other device has a PIN, you
must enter it.
Send data using the Bluetooth wireless feature
1. Select a file or item, such as a contact, calendar event, memo, or media file, from
an appropriate application or My Files.
2. Press →Share, Send via , or Send namecard via→Bluetooth.
3. Search for and paired with a Bluetooth-enabled device.
Receive data using the Bluetooth wireless feature
1. In Idle mode, open the application list and select Settings→Wireless and
network→Bluetooth settings→Visible.
Your device is visible to other Bluetooth devices for 120 seconds.
2. When prompted, enter the PIN for the Bluetooth wireless feature and select OK
(if necessary).
3. Select Accept to confirm that you are willing to receive data from the device (if
necessary).
Received data is saved to an appropriate application or folder according to its type.
For example, a music or sound clip is saved to the sound folder and a contact to the
phonebook.
Wi-Fi
Learn to use your device’s wireless networking capabilities to activate and connect to
any wireless local area network (WLAN) compatible with the IEEE 802.11 b/g/n
standards.

Qpad Fully Rugged Tablet GIS product manual
15
You can connect to the internet or other network devices anywhere an access point or
wireless hotspot is available.
Your device uses non-harmonised frequency and is intended for use in
all European countries. The WLAN can be operated in the EU without
restriction indoors, but cannot be operated outdoors in France.
Activate the WLAN feature
In Idle mode, open the application list and select Settings→Wireless and network→
Wi-Fi settings→Wi-Fi.
An active WLAN running in the background will consume battery
power. To preserve battery power, activate the WLAN only when
needed.
Find and connect to a WLAN
1. In Idle mode, open the application list and select Settings → Wireless and
network → Wi-Fi settings.
2. The device will automatically search for available WLANs. Select a network
under Wi-Fi networks.
3. Enter a password for the network (if necessary).
4. Select Connect .

Qpad Fully Rugged Tablet GIS product manual
16
Add a WLAN manually
1. In Idle mode, open the application list and select Settings→Wireless and
network→Wi-Fi settings→Add Wi-Fi network .
2. Enter the SSID for the network and select the security type.
3. Set the security settings depending on the selected security type.
4. Select Save.
Connect to a WLAN using a Wi-Fi Protected Setup (WPS)
Using WPS, you can connect to a secured network. To connect to a WLAN with a
WPS button,
1. In Idle mode, open the application list and select Settings→Wireless and
network→Wi-Fi settings.
2. Select WPS button connection.
3. Press a WPS button on the access point within 2 minutes.
To connect to a WLAN with a WPS PIN,
1. In Idle mode, open the application list and select Settings→Wireless and
network→Wi-Fi settings.
2. Select a network indicated by the WPS icon and select WPS PIN.
3. On the access point, enter the PIN and press the start button.
Table of contents


