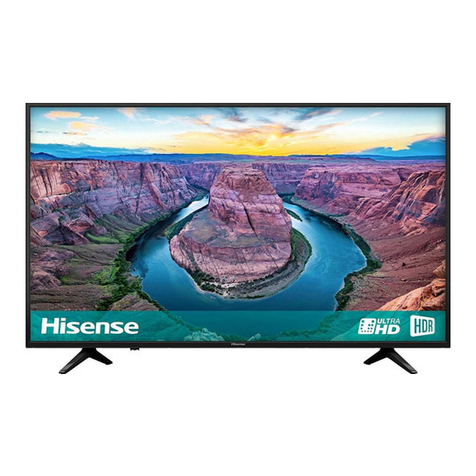
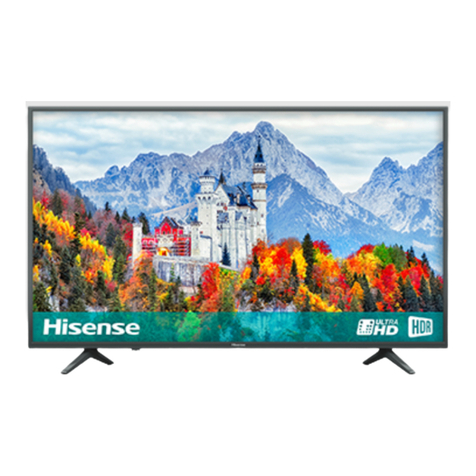
Hisense HL55T36PZL User manual

User’s manual
Please read this manual carefully before
operating your TV set and retain it for further reference.
Model Number:
Part Number:
Http://www.hisense.com.au
series
T36
HL55T36PZL
ES-G112612

Ver 2011-2
HISENSE WARRANTY
TERMS AND CONDITIONS
1. HISENSE Australia will provide parts and labour to you the
Customer as set out herein.
2. Nothing in the warranty, limits any rights you may have under the
trade practices act or any other Commonwealth or State Legislation.
Such rights cannot be changed by the conditions in this warranty.
Subject to the conditions below this appliance is warranted by
Hisense and/or its Agents to be free from defects in materials and
workmanship for a period of 36 months and 12 months on Remote
& 3D glasses from the date of purchase (the “Warranty period”)
3. This warranty: -
a. covers products purchased as NEW, manufactured for use in Mainland
Australia and Tasmania;
b. commences from the date of purchase as listed on the Customers
invoice;
c. provides for the labour and replacement parts necessary to maintain your
product in good operating condition as specified in this warranty however,
if repair is needed because of product failure during normal usage,
Hisense has the option to repair or replace the defective product or part
of the product with a product or part of the product of like kind and quality
and a replacement part may be new or reconditioned of like kind and
quality and may cost less than the original product purchased and no
charges or refunds will be made based on the replacement product cost
difference;
d. applies only to the original purchaser and cannot be transferred;
e. Covers product for commercial purposes for a period of 90 days
EG signage and/or advertising usage.
4. Product Identification
a. Hisense reserves the right to reject claims for any services or work where
the Customer requesting such work or services from Hisense and/or its
agents cannot produce for verification the serial number and the proof of
purchase as per original purchase invoice.
b. The warranty will be voided if any Serial Number sticker provided to be
placed on the equipment is damaged, modified or removed.
c. In the event that a request for repair is made against a warranty where
the Serial Number sticker is not attached to the product or the customer
cannot produce for verification the original invoice, the repairer will not
affect any repairs on the product and the Customer will be charged a
service call-out fee.
5. What is covered by this warranty
a. The equipment is covered for faulty workmanship on parts that have
failed under normal use which are contained within the product.
b. Hisense and/or its Agents will decide if there are any defects in the
material and/or workmanship
c. This warranty is only applicable for repairs on declared equipment carried
out within Mainland Australia and Tasmania
6. What is not Covered by this warranty (excluded):-
a. any damage or failure:
i. of equipment due to the product being inadequately serviced to
manufacturer’s recommendations;
ii. resulting from environmental conditions including and not limited to
dirt, dust, rodents, insects, rust, corrosion, salt built-up, of any part
of the product including its parts; or
iii. resulting from excessive use “fair wear and tear”;
iv. resulting from poor installation including and not limited to
positioning and externally fitted equipment such as plumbing and
drainage, cabling, antennae or due to Incompatibility of connected
equipment;
v. to the product caused by overheating as a result of siting or
positioning of the equipment, where there is not provision for
adequate ventilation or a dust free environment;
vi. caused if your appliance has been dismantled, repaired or serviced
by any person other than someone authorised by Hisense;
vii. to a product or components, caused by power surges or spikes,
including and not limited to, mains power and telecommunications
connections, or to other unspecified sources, incorrect power
current, voltage fluctuation, amperage fluctuation, rust or corrosion;
viii. due to a dropped product; collision with another object, use of which
is not designed, negligence, accident or deliberate misuse, theft,
abuse, vandalism, flood, fire, earthquake, electrical storms or any
other act of God or any war related events;
b. costs of attendance and testing where no mechanical or electrical
failure is identified;
c. initial setup and installation of the product;
d. Normal maintenance costs and costs incurred through the installation
of items listed as requiring periodic replacement;
e. products with removed or altered serial numbers;
f. consumables such as but not limited to bulbs/globes, batteries, remote
controls;
g. removal and reinstallation of an internal component not performed by a
factory authorised service centre;
h. cosmetic or structural items;
i. Any failures due to the interference from or to other products and/or
sources;
j. Inability of the product to read or output damaged or copied media;
7. The Warranty Ceases if: -
a. The product ceases to carry the original manufacturer’s serial number
or is sold at an auction;
b. The product is rented;
c. Damage to the product has occurred as listed in point 6b.
d. Failure to pay monies owing on invoices as a result of non warranty
work been carried out at the request of the end user as per point 15.
8. Neither Hisense nor its representatives provide loan equipment under the
terms of this warranty.
9. Our goods come with guarantees that cannot be excluded under the
Australian Consumer Laws. You are entitled to a replacement or refund
for a major failure and for compensation for any other reasonably
foreseeable loss or damage. You are also entitled to have the goods
repaired or replaced if the goods fail to be of acceptable quality and the
failure does not amount to a major failure.
10. Any unauthorised access to the internal hardware of the product will void
this warranty.
11. Replacement items are “Like for like” and is not “new for old” and does
not indicate in any way that a faulty product will be replaced with a new
part or unit. “Like for like” may either be a quality checked (QC)
refurbished or reconditioned unit of the same or later
batch of model/size/specifications
12. If you reside outside of the service coverage area of your nearest
authorised service agent, this warranty does not cover the costs of
transportation or travel expenses to and from your home.
13. Hisense accepts no liability for items that are lost, damaged, or stolen as
a result of freight, transport or storage. If you are required to transport the
appliance to an authorised service centre, you must ensure that it is
securely packed and insured.
14. On Public Holidays or other periods when regular business and
wholesale operations are temporarily ceased, repairer availability and
warranty response times may extend beyond the standard response
times due to the availability of repairers and parts.
15. Special Conditions relating to Plasma TV’s, LCD TV’s, Panels, Projection
Television and Projections Equipment
a. All LCD and Plasma Panels exhibit some bright, dark or partially lit
pixels, a normal limitation of these technologies, and the
manufacturing processes involved and are usually not noticeable when
viewing normal screen images and defective pixels are not a warranty
issue unless they exceed the manufacturer’s specifications for pixel
defects. Where there are no manufacturer specifications, Hisense
covers the screen provided for 12 or more pixels that are failing to
display
b. Image retention or burn-in can be a problem for all phosphor based
displays. In extreme cases, permanent phosphor burn can occur if
still/repetitive images are left on the screen for extended periods of
time. Such damage to the screen is not covered by the warranty.
Please ensure that the precautions in any documentation supplied with
your product are followed in order to avoid permanent damage to your
display.
c. Where a product is positioned higher than 1.2m from the lowest mount
point, is wall/ceiling mounted or where aftermarket mounts and/or
stands are used, or where the unit has not been installed by a
professional installer, an extra service charge will apply to unfix and
refix this product.
16. Any repair performed on a product under the warranty where no fault can
be found, or the item is deemed by Hisense, or an authorised Hisense
agent, to be not faulty under this warranty, or the repair or fault is not
covered under the warranty, a No Fault Found fee is payable by the
warranty holder of a minimum of $125 inc GST.
17. Any repairs or services required that are outside of the terms and
conditions of the warranty can be carried out at the request of the
customer or due to site attendance were fault is not covered under
warranty as the product not been installed or setup correctly; a credit
card may be required prior to the commencement of such services.
Congratulations on your purchase, This Document sets out terms
and conditions of your product warranty. Please Keep it with your
proof of purchase information in a safe place for future reference
should you require service to your product.
NAME OF PURCHASER _______________________________________________
ADDRESS __________________________________________________________
___________________________________________________________
CITY ______________________________ STATE _______ POSTCODE ________
PHONE (_____)_____________________
MOBILE (_____)_____________________
FAX (_____)_____________________
The Undersigned hereby acknowledges receipt of the Hisense
warranty service provided. I have read and understand the
conditions and terms of the warranty in its entirety.
SERIAL NUMBER
____________________________________________________________
STORE PURCHASED FROM
____________________________________________________________
CITY _______________________ STATE _______ POSTCODE ________
INVOICE NO. _______________________________________
MODEL NO. _______________________________________
DATE OF PURCHASE _________/___________/__________
SIGNATURE _________________________________________________
WARRANTY REGISTRATION
In order to register your warranty, please fill out and return with a copy of your invoice to:
Hisense Warranty Registration
PO BOX 360 Ferntree Gully VIC 3156 Australia
WARRANTY CLAIMS PROCEDURE
Please retain this portion for your records
Before making a claim, please make sure that you understand the terms and conditions of the warranty
• Check and ensure the installation of all power cables to the power point are secure and power is turned on, all cables
leads and connectors are connected properly and that all switches are turned on and functioning
• Check that there is power at the power point by using a small appliance
• Check that all settings are set according to the instruction manual
• Please keep this certificate in a safe place together with your product receipt. Should you need to make a claim, the
responsibility of proof of ownership of the equipment is on you. If a claim is made that is found not to be covered un-
der this warranty, or no faulty hardware components are found, you will be charged at Hisense or Hisense Authorised
Service Center's standard service charge plus an administration fee.
PLEASE REFER TO THE TROUBLESHOOTING GUIDE
AT THE END OF THIS MANUAL
Service Procedure
Please have your original invoice, model, and serial number ready. To receive service, you are required to:
•
Call 1800 447 367. Service claims may be made between 9:00am and 5:00pm AEST
weekdays excluding public holidays where a call representative will log your claim for processing.
•
You will be provided a JOB NUMBER
•
You are required to fax or email your original invoice prior to a replacement been shipped
•
Normally under 24 hours of logging and receiving your proof of purchase for your claim, an Authorised
Service Agent will contact you to proceed with claim.
12 MONTHS IN HOME REPLACEMENT LCD WARRANTY*
Hisense Australia will provide its nearest service centre for repairs or replacement under warranty. You will need to ensure that you have already called
Hisense Warranty Centre and have received a JOB NUMBER.
* Excludes DVD Drive related faults which Hisense Australia provides a separate service stated below
12 MONTHS COURIER HOTSWAP DVD DRIVE WARRANTY*
Hisense Australia will provide a replacement removable DVD Drive, should you be experiencing DVD related faults, via courier which can easily be
replaced by following the instructions for replacement within this manual.
*The faulty DVD drive must be returned to Hisense Australia or you may be liable for the cost of the part and freight
36 MONTHS IN HOME REPLACEMENT WARRANTY*
Hisense Australia will provide its nearest service centre for repairs under warranty. You will need to ensure that you have
already called Hisense Warranty Centre and received a JOB NUMBER.
*Non Combination Models only

This page has been left blank intentionally.
3

4
Table of Contents
Table of Contents
Hisense Declaration...................................................................................
Important safety precautions.....................................................................
Safeguards.....................................................................................
Warning..........................................................................................
Setting Up.................................................................................................
Accessories...................................................................................
Installing theStand........................................................................
TV Front.........................................................................................
TV Rear..........................................................................................
RearTV Connectors......................................................................
Connection Instructions.................................................................
Using theRemoteControl.......................................................................
Installing batteries.........................................................................
TheRemoteControl Panel............................................................
Quick starts....................................................................................
Changing theTV Settings........................................................................
Using theChannelMenu...............................................................
Using thePicture Menu.................................................................
Using theSound Menu..................................................................
Using theOption Menu...............................................................
Using theLock Menu.......... ..........................................................
Using theScreenMenu.................................................................
PC Setting .....................................................................................
Using theDMP Menu.....................................................................
Appendix...................................................................................................
Troubleshooting.............................................................................
Specifications..................................................................................
If you haveany queries please contact ph 1800 447 367.
5
6
6
9
10
10
10
11
12
13
14
16
16
17
18
20
20
22
23
24
25
26
27
28
31
31
32

5
Any content and serviceaccessedthrough this device,whileonly intendedforindividual non-commercial use,
shall betheproperty of theapplicablethirdparty and subject to protection by regulationsand lawson copyright,
patent, trademark and other intellectual property rights.Nopartofsuch content and servicemay bemodified,
duplicated, published, uploaded, distributed, translated, marketed, orusedtomakeand distributeproducts
derivedfrom itwithout thepriorpermission of thecontent owner or serviceprovider.
You acknowledgeand agree explicitly that you will solely bearthe riskassociatedwith theuse of this device,
and further you will solely bearany riskrelatedtosatisfactory quality, performanceand accuracy forany content
and serviceaccessedthrough this device.Tothemaximum extent permitted by applicablelaw,this deviceand
any thirdparty'scontent and serviceisprovidedasitis without any guarantee,express orimplied.
Hisense hereby declare explicitly that Hisense shall not beheld liableforany guarantee and conditions,express
orimplied, relatedtothis deviceand any content and service,including but not limittowarranty on marketability,
satisfactory quality, fitness foraparticularpurpose, accuracy, quietuse and non-violation of any thirdparty’s
rights;tothemaximum extent permitted by applicablelaw, Hisense gives no guarantee on theaccuracy, validity,
timeliness,legitimacy and completeness of any content or serviceprovidedthrough this device,orthefitness of
such device, content or serviceforyourparticularrequirement, ortheprotection from interruption and error
during operation of such device, content or service;tothemaximum extent permitted by applicablelaw, in any
case,including fault orneglect, Hisense shall not beheld liableforlegal actionsorindemnity obligation arising
from any consequenceasaresult of orrelated to any information loadedinthis deviceoruse of such device,
content or serviceby you orany thirdparty .
Any content and serviceprovidedasitis together with this deviceshall betheproperty of theapplicablethird
party, therefore Hisense gives no declaration orwarranty on modification, suspension, cancellation, termination
orabortion thereof, and shall not beheld liableforlegal actionsorindemnity obligation arising thereof.
Hisense reserves therightsto restrict theuse oraccess of certain content or service.Asthecontent and service
are transmittedthrough thirdparty’snetwork and transmission facilities,Hisense undertakes no customer
servicethereof ortheobligation forsuch customer service.
Hisense Declaration
Hisense Declaration

6
Important safety precautions
Safeguards
This symbol alertsuser about thepresenceof
a dangerousvoltagenot isolatedinsidethe
product which can besufficiently powerful to
constituteariskofelectrocution.
ATTENTION
RISK OF SHOCK
ELECTRIC
This symbol alertsuser about thepresenceof
important operating instructionsand
maintenanceinthedocument enclosedinthe
package.
Do not opentheback cover
In no case theuser is allowedtooperateinsidetheTV
set.Only a qualifiedtechnician is entitledtooperate.
Disposal of Used Electrical & Electronic Equipment
Packaging and electrical goodsshould berecycled appropriately, and not treatedas
household waste.Please dispose of this equipment at yourapplicablecollection point for
therecycling of electrical & electronicequipment waste.Byensuring thecorrect disposal
of this product, you will help prevent potentially hazardousto theenvironment and to
human health, which could otherwise becausedbyunsuitablewastehandling of this
product. Therecycling of materialswill help conservenatural resources.Please do not
therefore dispose of yourold electrical and electronicequipment with yourhousehold
waste.Formore detailedinformation about recycling of this product, please contact your
local city office, yourhousehold wastedisposal serviceortheshop where you purchased
theproduct.
IMPORTANT INFORMATION
Ifatelevision is not positionedinasufficiently stablelocation, it can bepotentially hazardousdueto falling. Many
injuries,particularly to children, can beavoided by taking simpleprecautionssuch as:
●Using cabinetsorstandsrecommendedbythemanufacturer of thetelevision.
●Only using furniture that can safely supportthetelevision.
●Ensuring thetelevision is not overhanging theedgeof thesupporting furniture.
●Not placing thetelevision on tall furniture (forexample, cupboardsorbookcases)without anchoring both the
furniture and thetelevision to a suitablesupport.
●Not standing thetelevisionson cloth orother materialsplacedbetweenthetelevision and supporting furniture.
●Educating children about thedangers of climbing on furniture to reach thetelevision oritscontrols.

7
Important safety precautions
Safeguards
Please read thefollowing safeguardsforyourTV and retainforfuture reference.
Alwaysfollow all warningsand instructionsmarkedonthetelevision.
1. A noteabout safety and operating instructions
Read and follow all safety and operating instructions, and retainthemsafely forfuture reference.
2. HeedWarnings
Adhere to all warningson theapplianceand intheoperating instructions.
3. Cleaning
Unplug theTV from thewall outletbefore cleaning. Do not use liquid, abrasive,oraerosol cleaners.Cleaners can permanently
damagethecabinet and screen. Use alightly dampened cloth forcleaning.
4. Wall Bracket
Wall bracketsare not suppliedwith this product. After marketbracketsmay beavailableto purchase locally. Please refer to
thespecification pagefordimensions.
5. Water and Moisture
Avoiddripping orsplashing of liquidsonto theproduct. Objectsfilledwith liquids,such asvases,should not beplacedonthe
product.
6. Setting
Do not placethis TV on an unstablecart, stand ortable. Placing theTV on an unstablebase can cause theTV to fall, resulting
inseriouspersonal injuries aswell asdamageto theTV. Use only a cart, stand, bracketortablerecommendedbythe
manufacturer orsalesperson.
7. Ventilation
Slotsand openingsinthecabinetare providedforventilation, to ensure reliableoperation of theTV and to protect itfrom
overheating. Do not cover theventilation openingsinthecabinet and never placethesetin a confinedspacesuch asbuilt-in
cabinet unless proper ventilation is provided. Leaveaminimum 10cm gap all around theunit.
8. Power Source
This TV should beoperated only from thetypeof power sourceindicatedonthemarking label. If you are not sure of thetype
of power supplied to yourhome, consult yourappliancedealer orlocal power company.
9. Grounding orPolarization
This TV is equippedwith a polarized alternating current lineplug. This plug will fitinto thepower outlet only oneway. This is a
safety feature. If you are unableto inserttheplug fully into theoutlet, tryreversing theplug. If theplug should still failtofit,
contact yourelectrician to replaceyourobsoleteoutlet. Do not defeat thesafety purpose of thepolarized plug. A warning that
an apparatuswith CLASSⅠconstruction mustbeconnected to a MAINS socket outletwithaprotectiveearthing connection.
10. Power-CordProtection
Power-supply cordsshould ber
outedso that theyare not likely to bewalkedonorpinchedbyitemsplaced upon oragainst
them, paying particularattention to cordsat plug, wall outlets, and thepoint where theyexitfrom theTV. MAIN plug is used
asthedisconnect device,thedisconnect deviceshall remainreadily operable.
11. Lightning
Foraddedprotection forthis TV during a lightning storm, orwhenitis left unattended and unusedforlong periodsof time,
unplug itfrom thewall outlet and disconnect theantenna orcablesystem. This will prevent damageto theTV dueto lightning
orpower-linesurge.

8
Important safety precautions
Safeguards
12.Power Lines
An outsideantenna systemshould not belocatedinthevicinity of overhead power lines orother electriclight orpower
circuits,orwhere it can fall into such power lines orcircuits.Where installing an outsideantenna system, extremecare should
betakentokeepfrom touching such power lines orcircuitsascontact with themmight befatal.
13.Overloading
Do not overload wall outletsand extension cordsasthis can result inariskoffire orelectricshock.
14.Object and Liquid Entry
Never push objectsof any kind into this TV through openingsasthey may touch dangerousvoltagepointsorshort-out parts
that could result infire orelectricshock. Never spill liquid of any kind on orinto theTV.
15.OutdoorAntenna Grounding
If an outsideantenna orcablesystemis connectedtotheTV, besure theantenna orcablesystemis groundedsoasto
providesomeprotection against voltagesurges and built-up static charges.Section 810 of theNational Electric Code,
ANSI/NFPA No. 70-1984,provides information with respect to proper grounding of themast and supporting structure,
grounding of thelead inwire to an antenna dischargeunit, connection to grounding electrodes, and requirementsforthe
grounding electrode.
16.Servicing
Do not attempt to servicethis TV yourself asopening orremoving covers may expose you to dangerousvoltageorother
hazards.Refer all servicing to qualifiedservicepersonnel.
17.DamageRequiring Service
Unplug theTV from thewall outlet and refer servicing to qualifiedservicepersonnel under thefollowing conditions:
(a) Whenthepower -supply cordorplug is damaged.
(b) If liquidhasbeenspilled, orobjectshavefalleninto theTV.
(c) If theTV hasbeenexposedtorainorwater.
(d) If theTV does not operatenormally by following theoperating instructions. Adjust only those controlsthat are coveredby
theoperating instructionsasan improper adjustment of other controlsmay result in damageand will oftenrequire extensive
work by a qualifiedtechnician to restore theTV to itsnormal operation.
(e)IftheTV hasbeendroppedorthecabinethasbeen damaged.
(f) WhentheTV exhibitsadistinct changeinperformance-this indicates aneedfor service.
18.Replacement Parts
Whenreplacement partsare required, besure the servicetechnician hasusedreplacement partsspecifiedbythe
manufacturer orhavethesamecharacteristicsastheoriginal part. Unauthorizedsubstitutionsmay result infire,electricshock
orother hazards.
19.Safety Check
Upon completion of any serviceorrepair to theTV, askthe servicetechnician to performsafety checksto determinethat the
TV is insafeoperating condition.
20.Heat
Theproduct should besituated away from heat sources such asradiators,heat registers,stoves,orother products(including
amplifiers) that produceheat.

9
Important safety precautions
Warning
If a television is not positionedinasufficiently stablelocation, it can bepotentially hazardousdueto falling. Many injuries,
particularly to children, can beavoided by taking simpleprecautionssuch as:
●Using cabinetsorstandsrecommendedbythemanufacturer of thetelevision.
●Only using furniture that can safely supportthetelevision.
●Ensuring thetelevision is not overhanging theedgeof thesupporting furniture.
●Not placing thetelevision on tall furniture (forexample, cupboardsorbookcases)w
ithout anchoring both thefurniture and
thetelevision to a suitablesupport.
●Not standing thetelevisionson cloth orother materialsplacedbetweenthetelevision and supporting furniture.
●Educating children about thedangers of climbing on furniture to reach thetelevision oritscontrols.

AAA
AAA
ALCD101
10
1
Use thefourscrews ('"4-X)
which inaccessories bag to fixthe base plate
and upright.
Use the TWoscrews˄GB/T818-2000
M4X12˅which inaccessories bag to fixthe
cover plate and upright
Use the TWO screws.(SJ2822-87ST4X14)
which inaccessories bag to fixthe cover plate
and upright.
Use thefourscrews(GB/T818-2000 M5X12)
which inaccessories bag to fixthe base stand
and TV set.
1
2
3
4
Setting Up
Accessories/Installing the Stand
Accessories list
Manual Book Remote Batteries
Installing the Stand

11
Setting Up
TV Front
TV Front
No. Com
p
onent
Component Description
1POWER Switch
2
3
RemotesensorReceives signalsfrom theremotecontrol. Do not block.
4Standby button Press to turn yourTV on oroff (standby mode).
5CH▼Press to go to thepreviouschannel.
6CH▲Press to go to thenext channel.
7
POWER Indicator
VOL▼
8
Press to turnthemain power ON orOFF.
Redindicates standby mode. Blueshowsthat theunitis on.
Press to decrease thevolume.
VOL▲Press to increase thevolume.
9SOURCE button
Press to select thesi
g
nal sourcefor
y
ourTV.
10 MENU button
Press to activatetheon-screendisplay (OSD).

12
AC INPUT
Setting Up
TV Rear
TV Rear

14
Setting Up
Rear TV Connectors
TV Cables Brief Description
Connect an outdoorVHF/UHF antenna
Connect a compositevideo cableand left-right audio cables from optical
equipment.
ANT 75Ω
Connect a compositevideo cableand left-right audio cables from optical
equipment.
Connectors
Y
e
ll
ow
Video
Output
Video
L
R
Connect a compositevideo cableand left-right audio cables to optical
equipment formonitoring orrecording video.
HDMI Connect a HDMI High Definition Multimedia cablefrom optical equipment.
VGA
Input
VGA
VGA
AUDIO
Connect a VGA cablefrom yourPC to use theTV asa monitor. Connect an
audio cablefrom theoptical PC audio out.
OPTICAL
Connect an optical cableto an external digital audiosystem.
USB
Connect a USB deviceforbrowsing photos,music and movies.
HEADPHONE
White
White
Y
e
ll
ow
Green
Red
Blue
Red
Red
Red
Connect a compositevideo cableand left-right audio cables from optical
equipment.
White
Yellow
White
Red
Connect Headphoneforaudio out.

14
■Connecting an Aerial (Foranalogueand Digital signals)
To viewtelevision channelscorrectly, a signal mustbereceivedbythesetfrom thefollowing source:
-An outdoorVHF/UHF antenna
-Before connecting any external deviceplease connect thesupplied15pin VGA to RCA adaptor.
■Connecting External A/V Devices
-Connect a Video RCA cableto an appropriateexternal A/V devicesuch asa VCR, DVD orCamcorder.
- Connect RCA audio cables to “R -AUDIO - L” and Videoontherearof yourset and theother endsto
corresponding audio and Video out connectors on theA/V device.
■Connecting Component Devices (DVD/PVR)
-Connect Component video and audio cables to Component inputs(“PR”, “PB”, “Y”) on therearof yourset and
theother endsto corresponding component video out connectors on thePVR orDVD.
-TheY, PB and PR connectors on yourcomponent devices (PVR orDVD) are sometimes labeled Y, B-Y and
R-Y orY, CB and CR. (Colours forinputsand cables mustcorrespond on both devices.)
NOTE: Somedevices such asa PVR orDVD player require a ‘Component/YPBPR’signal to beset to output in
thedevices settings-please consult yourdeviceuser manual forinstructions.
■Connecting HDMI
-Supportsdigital connectionsbetween HDMI - enabledAVdevices such as(PVRs, DVD, BluRay, HDDVD, AV
receivers and digital devices.).
-No sound connection is neededforHDMI to HDMI connection.
NOTE: Somedevices such asa PVR orDVD players require a HDMI signal to beset to output inthedevice's
settings.
-Please consult yourdeviceuser manual forinstructions.
What is HDMI?
- HDMI, orhigh-definition multimediainterface,is anext-generation interfacethat enables thetransmission of
digital audio and videosignalsusing a singlecablewithout compression.
-“Multimediainterface”is amore accuratenameforitespecially because it allowsmultiplechannelsof digital
audio (5.1 channels).Thedifferencebetween HDMI and DVI is that theHDMI deviceissmaller insize,hasthe
HDCP (High Bandwidth Digital Copy Protection) coding feature installed, and supportsmulti- channeldigital
audio.
-Use theHDMI terminal forHDMI connection to a compatibledevice. If yourexternal devicehasDVI only, you
should use a DVI-to-HDMI cable(oradapter)fortheconnection, and the“R -AUDIO - L” terminal on DVI for
sound output.
■Connecting a Computer
-Connect theD- Sub cableto “VGA” on therearof yourset and theother end to theVideoCard of your
computer.
-Connect thestereo audio cableto “PC AUDIO ” on therearof yourset and theother end to “Audio Out” of the
sound card on yourcomputer.
-Primarily this unitis intendedforuse asan LCD TV. If using asa monitor, and compatibility is aproblem. Please
contact themanufacturer of thePC Video/Graphic'scardforfurther support. Perfect compatibility is not warranted.
Setting Up
Connection Instructions

15
■Connecting AUDIO
-Connect RCA audio cables to “R -AUDIO - L” thecablesuppliedontherearof yourset and theother endsto
corresponding audioin connectors on theAmplifier orDVD HomeTheater.
■Connecting USB data Devices
-Connect a USB deviceforbrowsing photos,listening music, watching movie,reading text files.This USB port
also can beusedfor servicing and updating software on yourTV.
■Optical Audio
Connect an optical audiodeviceto this jack (Toslink optical cableisneeded).
■Headphones
-Headphones can beconnectedtotheheadphoneoutput on thesideof yourset. (Whiletheheadphoneis
connected, thesound from thebuilt-inspeakers will bedisabled. )
Setting Up
Connection Instructions

16
1 2 3
gently
push
Using the remote Control
Installing batteries
Installing theremotecontrol batteries
1. Slideopenthebattery cover on theback of theremotecontrol.
2. Install two AAA size(1.5V) batteries. Match the“+” and “-” signson thebatteries to thesignson thebattery
compartment.
3. Close thebattery cover.
Note:
1. Dispose of yourbatteries inadesignateddisposal area. Do not throw thebatteries into fire.
2. Do not mix battery types orcombineused batteries with newones.
3. Removedepleted batteries immediately to prevent batteryacidfrom leaking into thebattery compartment.
4. If you do not intend to use theremotecontrol fora long time,removethebatteries.
5. Theeffectiverangeof remotecontrol is suggestedinthefigure below.
Remotecontrol range
1. Theremotecontrol rangeis8meters infront of theTV set.
2. Theremotecontrol angle: taking thetelevision infraredlight receiver window asan apex,6meters away, its
controlled angle(left to right) is within30degrees,whilethevertical angle(up to down)is within15degrees.

1
4
2
6
7
11
16
17
21
18
23
29
31
24
25
26
27
8
5
3
9
10
12
13 14
15
19
20
22
28
30
EN-31611A
Sleep
Text
Size
Reveal
Cancel
Hold
Index
Sub.Code
Setup
Mix
I/II
Subtitle
Audio
Zoom
PVR
T.Shift
Still
EPG
Page
up
Page
down
Play/Pause
D/EMP
Media Stop
Radio
Browse Rotate
+
-
Internet
+
-
17
Using the Remote Control
The Remote Control Panel
(1) Remotesensing Window.
(2) Indicatorglowsfrom whiteto orangewhen buttonsare pressed.
(3) D/A: Digital /Analog TV.
(4) Power Standby: Power button(Theredbig button).
(5) Source: Availablesourceselection.
(6) 1,2,... numbers:Fordirect channel access.
(7) Last: To returntothelastviewprogram.
(8) Info: Display current informations.
(9) Picture:Picture Modeselection.
(10) Sound: Sound Modeselection.
(11) FAV: Fast access to yoursaved favoriteprograms.
(12) Mute: Mutethesound.
(13) VOL+/VOL-: VolumeUp/VolumeDown
(14) CH+/CH-: Channel Up/Channel Down
(15) Menu:Display themainmenu/Back menu
display.
(16) EXIT: Exit all menu display.
(17) OK: Enter orconfirmtheoperation
[▲/▼/◄/►]:Up/Down/Left/Right
(18) Zoom:Zoom image.
(19) EPG:ElectronicProgram Guide
(20) Still: Picture Freeze.
(21) I/II: Mono/Stereooperation,Audioselect button.
(22) Rotate:Rotation of images on theUSB device.
(23) Radio/Browse:Switch to DTV Radioprogram.
(24) Audio/Pageup: select Audio languagein DTV Mode/pageup
(25) Subtitle/Pagedown: Display thesubtitlecontent of thesignal/pagedown
(26) Play/Pause: Play button - to enter and openthefile-alsoused
forPAUSING thedisplay.
(27) Stop: stopsplaying theslideshow.
(28) Media: DMP Media
(29) DMP: Enter theDMP mode.
(30) In DMP mode:
[◄◄ ] button - press to fast back invideo playing.
[►► ] button - press to fastforwardinvideo playing.
[I◄◄ ]button-press to play thepreviousvideo
[►►I] button-press to play thenext video
Theyalso haveother special use'sinsomefiles.
(31) Sleep: setsthesleeptimer of yourTV.
Theother keysare not supportedinthis TV.
Note:Thedesign of theremotecontrol is subject to changeand may be
different from theactual one. Those buttonswithout comment'shaveno
relation with this TV.
The Remote Control Panel Buttons instructions(from up to down)

18
Using the Remote Control
Quick starts
■Turning yourTV on and off
To turn yourTV on: Connect theTV to an AC power outlet and an external antenna, thenturnonthepower via
switch locatedbelow thefront right hand sideof unit. A fewsecondslater an imagewill appearon thescreen.
Setup wizard-select yourstateand press OK, Thenpress OK againtostarttheTuning process.
●Turning off to standby mode:Press [Power Standby ] on theback RHS paneloron theremotecontrol to
switch to standby mode. You can activatetheunitagainbypressing [Power Standby ].
●Power indicator:Light indicates standby mode.There will beno light whenthepower switch is intheoff
position.
Notes:
Turnthepower switch off when you do not intend to use theTV forlong periods,forexampleovernight. Remove
theconnection from thewall power outletif you do not intend to use theunitforlonger periods,forexampleif
you plan to beaway a few days.Waitatleast5secondsafter turning off if you want to re-starttheTV.
■Selecting thevideosource
●Selecting thevideosourcedepending on thevideodeviceyou haveconnectedtoyourTV.
●To select thevideosource:
Press [Source].Whenthelistofvideosources appears,press [▲/▼]toselect thesource,thenPress [OK] to
enter.
[D/A] button: press the[D/A] button to switch betweentheDigital/Analog TV signal input.
■Adjusting thevolume
●To adjustthevolume:
Press [VOL+/VOL- ] to increase ordecrease thevolume.Press [Mute]toturnthesound off. Press [Mute]
againtoturnthesound back on.
■Changing channels
●To changechannels:
Press [CH+/CH-] to go to thenext higher orlower channel. Or,Press thenumber buttonsto select a channel.
Forexample,toselect channel 12, press 1, then2.Or,press [last] to go to thelastviewed channel.
■Selecting thesound mode
●To select thesound mode:
Press the[Sound] button to select between4different pre-adjustedsound modes:
Standard, Music,movie,Speech, and User(configurablemode). TheUser modepreserves yourpreferred
sound settingsafter using theEqualizer availableunder theSound submenu.

19
Using the Remote Control
Quick starts
■Selecting thepicture mode
●To select a picture mode:
Press the[Picture] button to select between5different pre-adjustedpicture modes: Dynamic, Bright,
Standard,Soft and User (configurablemode). TheUser modeautomatically preserves yourpersonal
settingsafter adjusting brightness, colourand contrastetc.
■Selecting theaspect ratio
●To select theaspect ratio:
Press the[Zoom ] button to changethescreenaspect ratio among Auto, 16:9, 4:3, Zoom1 ,Zoom2 ,
panorama and 1:1.
■Freezingapicture
●To freezeapicture:
Press the[Still] button to snapshot thepresent Viewing picture, and press againtoreturntonormal.
■Setting thesleeptimer
You can specify theamount of timeyou want yourTV to waitbefore it automatically turnsoff.
●To setthesleeptimer:
Pressing [ Sleep] button repeatedly will allow you to changethesleeptimer mode: Off, 10 minutes,20
minutes,30minutes,60minutes,90minutes, 120minutes, 180minutes and 240minutes.
■Display channelinformation
●To display channelinformation.
Press [Info] viewcurrent channelinformation in TV/DTV source.
Press [EPG] to view channelinformation in DTV mode,There are INFO, Schedule, DATE and Reminder
items, you can look orsetthem.
Press theGREEN button to enter INFO.
Press theYellow button to enter DATE menu.
Press theBLUE button to enter Reminder menu.
Onceareminder is set, itwill appearintheSCHEDULE list.
■Audio function
●Pressing[I/II]buttontheTV screenwill display theAudiomenu, you can adjusttheMono/Stereo
operation and thesound channels(L/R) .
■Displaying channellists
●Press [OK] to display thechannellist.
Table of contents
Other Hisense LED TV manuals

Hisense
Hisense LHD32K3500HK User manual

Hisense
Hisense 55U8K User manual

Hisense
Hisense LHD32K370WTEU K370 User manual

Hisense
Hisense 55U8QF User manual

Hisense
Hisense A7100F User manual

Hisense
Hisense 40H3E User manual

Hisense
Hisense AE6100 User manual

Hisense
Hisense 65N6 User manual

Hisense
Hisense H19K15E User manual

Hisense
Hisense LASER TV 100L5H User manual

Hisense
Hisense 43H8E User manual

Hisense
Hisense 43H6040F User manual

Hisense
Hisense 55A70GQ User manual

Hisense
Hisense LCDD0041 User manual

Hisense
Hisense 65U8QF User manual

Hisense
Hisense 24D33 User manual

Hisense
Hisense 32H3B Series User manual

Hisense
Hisense 43M3000 User manual

Hisense
Hisense 40E5100EE User manual

Hisense
Hisense H40M2100T User manual