4
DP23/23G/24
Models: 51UWX20B 51GWX20B
57UWX20B 57GWX20B
43FWX20B
Cathode-Ray Tube:
51/57UWX20B R=P16LXL00RFA(U)
51/57GWX20B G=P16LXL00HHA(U)
B=P16LXL00BMB(U)
43FWX20B R=P16LXS00RFA(U)
G=P16LXS00HHA(U)
B=P16LXS00MBM(U)
Power Input: 120 volts AC, 60 Hz
Power Consumption:
•Stand-By Power
51/57UWX20 . . . . . . . . . . . . . . . . . . .0.96W
43FWX20B/51/57GWX20B . . . . . . . . .0.96W
•Power Consumption (operating)
51/57UWX20 . . . . . . . . . . . . . . . . . . .188W
43FWX20B/51/57GWX20B . . . . . . . . . .203W
•Power Consumption (maximum)
51/57UWX20 . . . . . . . . . . . . . . . . . . .227W
43FWX20B/51/57GWX20B . . . . . . . . . .248W
Antenna Impedance: 75 Ohm Unbalanced
VHF / UHF / CATV
Receiving Channel: BAND CH
VHF 2~13
UHF 14~69
EXT. Mid (A-5)~(A-1), 4+
CATV Mid. A~I
CATV Super J~W
CATV Hyper (W+1)~(W+28)
CATV Ultra (W+29)~(W+84)
Intermediate Frequency: Picture l-F Carrier 45.75 MHz
Sound l-F Carrier 41.25 MHz
Color Sub Carrier 42.17 MHz
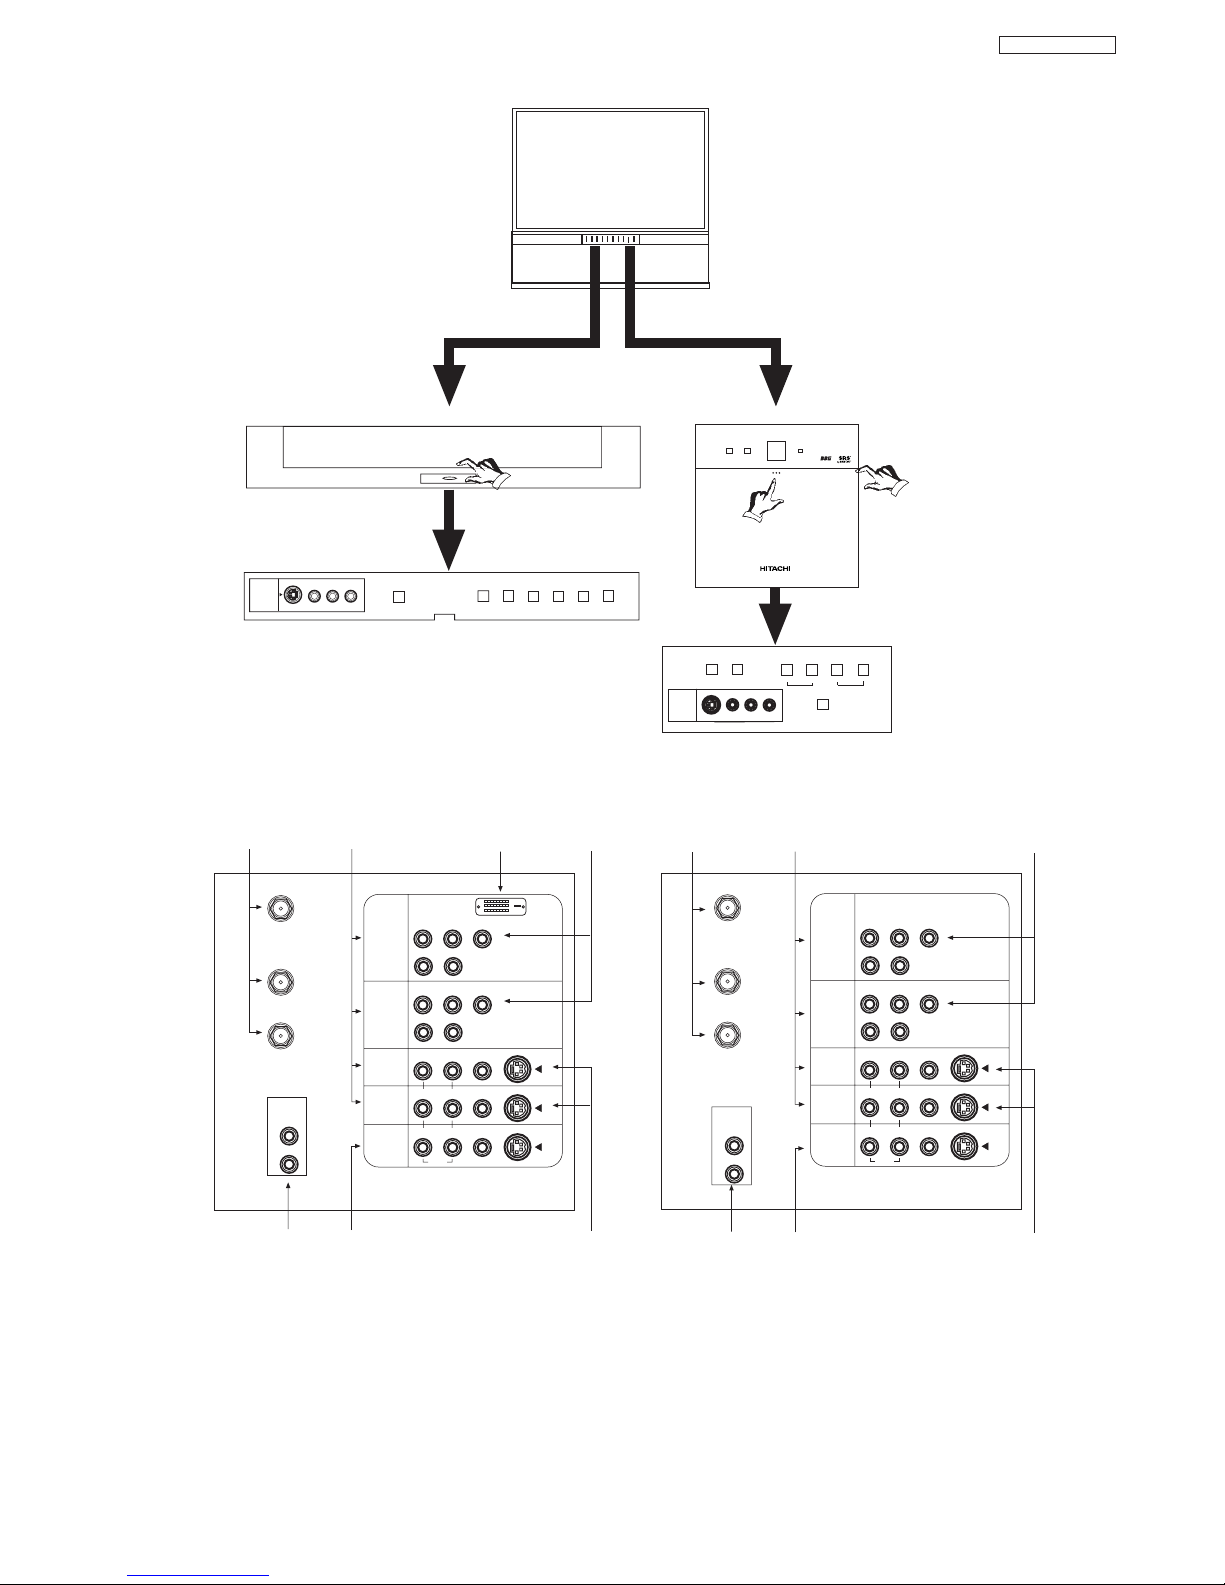
Video Input: 1 Volt p-p, 75 Ohm
Video Output: 1 Volt p-p, 75 ohm
Audio Input: 470 mVrms, 47 k Ohm
Stereo Audio Output: 470 mVrms, 1 k Ohm
Audio Output Power:
Front: 12 watts per channel at 10% distortion,
8 ohm Impedance. Max output – 24 watts.
Anode Voltage:
DP23/DP23G/DP24 30.2±0.3kv (1.20±0.2mA)
Brightness: 51” 57” 43”
(white screen) 220cd/m2180cd/m2300cd/m2
Speakers: 2 Woofers - 5 inch (12 cm) round
Dimension:
43” 51” 57”
Height (in.) 38 31/32 50 1/8 54 3/16
Width (in.) 41 7/32 44 1/2 54 1/64
Depth (in.) 20 5/8 25 1/32 25 1/32
Weight (Ibs.) 153 238 265
Circuit Board Assemblies:
C.P. T. (B) P.W.B. IR P.W.B.
C.P. T. (G) P.W.B. IR Sub P.W.B.
C.P. T. (R) P.W.B. Terminal P.W.B.
Power Supply P.W.B. Signal P.W.B.
Control P.W.B. Def/Convergence P.W.B.
Sensor Distribution P.W.B.
CIRCUIT PROTECTION
CAUTION: Below is an EXAMPLE only. See Replacement Parts List for details. The following symbol near the fuse
indicates fast operation fuse (to be replaced). Fuse ratings appear within the symbol.