HKC 32F1D User manual

User Manual
HKC 32F1D

2
Introduction
Installation ...............................................3
Safety ........................................................ 3
Warning/Caution ......................................... 4
Main unit descrription................................. 7
Monting ......................................................... 8
CI-module ..................................................... 9
Remote control ........................................ 10
Invoerbron en kanaalontvangst ............ 12
First Time Installation ............................... 14
Menu Chanel ............................................. 15
Channels ............................................... 15
Auto tuning ......................................... 15
Satellite ................................................. 16
ATV Manual Tuning ........................... 16
DTV Manual Tuning ............................ 17
Channel edit......................................... 17
Delete channels .................................. 17
Skip channels....................................... 17
Move channels .................................... 17
LCN ........................................................ 18
CI card information ............................ 18
Picture settings .......................................... 19
Sound settings .......................................... 22
Time settings ............................................... 24
Lock settings .............................................. 26
Hotel Mode ................................................ 28
Set-up .......................................................... 29
OSD-language .................................... 29
Teleteksttaal ........................................ 30
Audio languages................................. 30
Subtitle languages ............................. 30
Favorietezenderlst........................... 31
Programma-informatie ..................... 31
Electronic Program Guide (EPG) .......... 32
USB ............................................................... 33
Photo ..................................................... 34
Music ..................................................... 35
Movie .................................................... 36
Specications ............................................. 37
Troubleshooting ........................................ 38
Useful Information and Licences........... 40
Index

3
Introduction
Thank you very much for purchasing your LED TV. It serves as a normal colour
TV and a PC monitor. To enjoy your set fully from the very beginning, read this
manual carefully and keep it handy for future reference.
INSTALLATION
1. Locate the TV in the room where direct light does not strike the screen. Total darkness
orareectiononthepicturescreencancauseeyestrain.Softandindirectlightingis
recommended for comfortable viewing.
2. Allow enough space between the TV and the wall to permit ventilation.
3. Avoid excessively warm locations to prevent possible damage to the TV or premature
component failure.
4. This TV can be connected to AC 100-240V~ 50/60Hz.
5. Do not install the TV in a location near heat sources such as radiators, air ducts, direct
sunlight, or in closed compartments and closed areas. Do not cover the ventilation
openings when using the TV.
6. The indicator light will last for about 30 seconds after the power has been tumed off.
Wait until the indicator light goes out before repowering the TV.
SAFETY
1. DO NOT expose the television to extremely high temperatures (below 5° C and above
35° C) or extreme humidity (less than 10% and more than 75%).
2. DO NOT expose the television to direct sunlight.
3. Prevent the television from coming into contact with liquids.
4. Make sure that no objects get into the television and do not place vases of water on
the television.
5. Unplug the power cord and remove the antenna cable during a lightning storm
(especially during lightning).
6. Do not walk on the cable and ensure that the cable is fully unrolled.
7. Donotoverloadoutletsorextensioncords,asthismayresultintheriskof re or
electric shock.
8. Use a soft, dry cloth (without volatile substances) to clean the television.
9. Do not attempt to repair the television yourself if it is defective. Contact us by sending

4
Warning
CAUTION: TO AVOID THE RISK OF ELECTRIC SHOCK. DO NOT
REMOVE COVER (OR BACK).
NO USER- SERVICEABLE PARTS INSIDE.
REFER SERVICING TO QUALIFIED SERVICE PERSONNEL.
This symbol is intended to alert the user to avoid the risk
of electric shock, do not disassemble this equipment by anyone
exceptaqualiedservicepersonnel.
This symbol is intended to alert the user to the presence of
important operating and maintenance instructions in
the literature accompanying the equipment.
Class I Connect the plug to an earthed wall socket.
CAUTION
RISK OF ELECTRIC SHOCK
DO NOT OPEN

5
Caution
Caution
High voltages are used in the operation of this
product.
Do not open the product’s casing. Refer
servicingtoqualiedservicepersonnel.
Caution
Topreventreorelectricalshockhazard,do
not expose the main unit to moisture. Do not
placeobjectslledwithliquids,suchasvases,
on the TV.
Caution
Do not drop or push objects into the television
cabinet slots or openings. Never spill any kind
of liquid on the television receiver.
Caution
Avoid exposing the main unit to direct sunlight
and other sources of heat. Do not stand the
television receiver directly on other products
which give off heat: e. g. video cassette
playersandaudioampliers.Donotblockthe
ventilation holes in the back cover. Ventilation
is essential to prevent failure of electrical
components. Do not squash power supply
cord under the main unit or other heavy
objects.
-
-
-
-

6
Caution
Caution
Never stand on, lean on or suddenly push the
product or its stand. You should pay special
attention to children.
Caution
Do not place the main unit on an unstable
cart stand, shelf or table. Serious injury to an
individual, and damage to the television, may
result if it should fall.
Caution
When the product is not used for an extended
period of time, it is advisable to disconnect the
AC power cord from the AC outlet.
Caution
The LED panel used in this product is made of
glass and is therefore breakable. This product
must not be dropped or banged. If the LED
Panel breaks be careful ofbeing injured by
broken glass.

7
tekst
Control Panel Button Function
TV Connections
Connect the USB to the USB jack on the set
Beschrving van de TV
VOL+ : Volume up.
VOL- : Volume down
CH+: TV channel up.
CH- : TV channel down.
MENU : Press to select the main menu.
SOURCE : Select the input signal.
POWER : Switch on when in standby mode or to enter the standby mode.
NOTE
• It is only 500 mA MAX of DC current output when you connect
with USB jack.
• To ensure the mobile HD works well, you should use other
power supply for the mobile HD and don’t use the USB jack in
the same time.
• It supports mobile HD by connecting with USB jack (must be
more than 2 Gb). The partitions of the mobile HD can’t be
more than 4 partitions. The max partition is 2 Tb. It supports
FAT/FAT32les.ThemaxFATleis4GbandthemaxFAT32
leis2Tb.
1. VGA
2. PC audio
3. Scart
4. DVB-S2
5. RF antenne
6. HDMI-1
7. HDMI-2
8. HDMI-3
9. Coaxial
10. Mini AV & AUDIO
11. Mini YPBPR
12. CI-slot
13. USB
14. Earphone
12
1 2
3
4 5 6 7 8
9
10 11 13 14

8
tekstMounting
The TV on a surface
Attach the feet to the device as
described in the illustration and
screw them down with the sup-
plied mounting screws.
Hang the TV on the wall
Attach your wall bracket to the
appropriate threads on the back
and pay attention to the distance
between the holes.
4x M4x20mm

9
tekstCI+ module
Dit apparaat is uitgerust met een Cl+ -sleuf voor gebruik van
eenmodulesvooreensmartcarddiedigitaleweergavemogelk
maakt zonder een decoder (kastje van provider). We raden voor
onze tv’s de SMiT-module aan.
Het installeren van een CI+ module
1. Zorg dat de tv in de fabrieksinstellingen staat. Als de tv nog
niet is gebruikt staat deze automatisch in de goede instelling.
Heeft u de tv al langer in gebruik dan moet u deze eerst terug
zetten in de fabrieksinstelling. Zet daarna uw tv weer uit.
2. Sluit uw tv aan op de coax kabel. Deze kabel geeft de digitale zenders door.
3. Zet de tv weer aan. Laat hem automatisch naar de digitale zenders zoeken (zie pagina
14).VergeethiernietLCNaantezetten.Ditkanenigetdduren.
4. Controleeroferzenderszngevonden.
5. Zet de tv weer uit.
6. Steek nu uw smartcard in de CI-module. Steek nu de module met smartcard in de
CI-slot. Zet nu de tv weer aan. De tv en CI-module gaan elkaar nu controleren. Dit kan
soms wel meer dan 20 minuten duren.
7. Nu is uw tv klaar voor gebruik.
Het verwderen van de CI+ module
1. Zet uw tv uit.
2. Verwdervoorzichtigdemodule.
Alseenmodulebeschikbaaris,znermeeroptiesbeschikbaaropdeCl-informatiepagi-
na van de OSD.
1. Druk op
OK EXIT
MENU to enter the system setting.
2. Use / to select the CI information and press OK
EXIT MENU
to enter the settings.
3. Wait until the submenu is closed.
4. Use / to select an option and press OK
EXIT MENU
to edit or open the selected function.
5. Press
OK
EXIT
MENU
to save the changes and exit the menu.
Some menu options and settings depend on the corresponding CA module. We recom-
mend the SMiT module.
The CA module (not included) is required when using a smart card (not included) to
receive encrypted channels.
Ensure that the CA module and the smart card are compatible with each other. This
device can read Cl + compatible modules.
The available channels depend on the CA module used, the Smart Card and of course
your provider.

10
tekstRemote Control
1Indicator light.
Theredindicatorlightashesredtoshowthat
the remote is working and sending a signal.
2Switch the TV between on and standby mode.
3ASPECT: Watch the screen in various formats:
Auto/4:3/16:9/Zoom/Subtitels/Smart-zoom.
4MUTE. Mute and restore your TV sound.
50-9 numbers.
Press to select a programme.
6LIST. Display the channel list (ATV/DTV mode).
7REPEAT. Return to the previous viewing channel
(ATV/DTV mode)
8SUBTITLE: Display subtitles which are broadcast
with the programme (DTV mode).
9VOL: Adjust the volume (+ higher, - lower).
10 CH: Select a channel (up/down).
11 Turn on/off the Audio Description (AD) function
(DTV mode). Select sterio/dual sound reception
(ATV mode).
12 Display the present channel information such as
current time and channel name (ATV/DTV mode).
13 Displays the EPG (Electronic Programme Guide)
(DTV mode).
14 No function.
15 Displays the OSD menu (On Screen Display).
16 Select among the different input signal sources:
DTV / ATV / AV / SCART / YPbPr / HDMI1 / HDMI2
/ HDMI3 / PC / USB.
17 Allows you to navigate trough the OSD menus
and adjust the system settings to your preference.
OKconrmtheselectionintheOSDmenus.
18 Return to the previous menu in the OSD menus.
19 Exit the OSD menu.
2
13
46
5
789
0
OK
MENU
INPUT
BACK
PROG
INDEX HOLD SIZE
REVEAL
FAV
MENU ANGLE
TITLE SLOW ZOOM
TEXT
CANCEL
TV.RD
MIX
S.PAGE
STEP GOTO A-B
EXIT
DVD SETUP
GUIDE
ASPECT
LIST
S
AUDIO
REPEAT
VOL CH

11
tekstRemote Control
20 Corresponds to the different colored themes
21 INDEX:
To select the page number of the index in
teletext (TV Teletex mode).
Stop the playback (USB)
22 HOLD:
Freeze a multi-page passage on screen in
Teletekst (TV teletekst mode).
Start playing or pause (USB)
23 REVEAL:
Shows the top, bottom or entire page for
easy reading in video text mode.
Fast rewind (USB)
24 SIZE:
To enlarge the picture on the TV in teletext
(TV teletex mode).
Fast forward (USB)
25 Display the favourite channel list (ATV/DTV
mode).
26 A short cut to switch input source tot TV/
Digital radio channels.
27 TV and TXT pictures are mixed together
(TV teletext mode).
To skip to the beginning of the previous
chapter/track/photo (USB)
28 S.PAGE:
To open a subpage if existing in teletext
(TV teletext mode).
Go to the beginning of the next chapter/
track/photo (USB)
29 No function.
30 No function.
31 TEXT:
Turn on and off the teletext function (TV
mode).
ZOOM:
Zoom in on the displayed frame (USB)
32 No function.
2
13
46
5
789
0
OK
MENU
INPUT
BACK
PROG
INDEX HOLD SIZE
REVEAL
FAV
MENU ANGLE
TITLE SLOW ZOOM
TEXT
CANCEL
TV.RD
MIX
S.PAGE
STEP GOTO A-B
EXIT
DVD SETUP
GUIDE
ASPECT
LIST
S
AUDIO
REPEAT
VOL CH

12
tekst
Use the TV
Make the connection with the desired receiving mode. The connection for
DVB-C (cable / Coax) and DVB-T (antenna) can be found at the rear. For DVB-S
reception (satellite), use the corresponding connection on the rear panel.
DVB-T (antenna)
Whether and how many DVB-T channels can be received by this device is highly
dependent on the location and DVB-T signal strength in the area. DVB-T radio
in particular is very limited and not available at most locations. Please note that
if you use the TV in a different area than before, you must reset the channels.
This is because the frequencies of the channels are very different from region to
region. Channels marked with (internet) are linked to the internet and cannot be
used.
DVB-C (cable / coax)
The programs can be received analogue or digital via DVB-C. If possible, prefer
the digital receive mode. In this mode, more channels are available with better
picture quality.
Coded channels (via provider or satellite)
You can also receive coded TV channels via satellite or DVB-C. That is why you
need a box or Cam module and a SMART CARD from your service provider.
Which programs can be used depends on the contract.
Module and smart card are not included in the delivery. Activating the card
cantakeafewminuteswhenitisusedforthersttime.Thedevicecontrolsthe
module after each activation. Note the manual for CI + module and smart card.
Only CI + modules and cards can be used. Other models are not supported.
Indication for CI +
Please note that the recording and time shift function may be limited on
somechannels.RecordedlesfromchannelsencodedviaCI+Cardcan
only be played on this device. This is limited by the program and we as the
manufacturer are not responsible for this.
Invoerbron en kanaalontvangst

13
tekstInvoerbron en kanaalontvangst
Source
Select the correct input source on your TV (eg antenna, satellite cable, HDMI
port) by pressing the SOURCE button on your remote control.
Conrmyourchoicewith OK
EXIT MENU
Input Source
Satellite
DVB-T/C
ATV
AV
PC
SCART
YPbPR
HDMI1
HDMI2
HDMI3
USB
Selec
tE
xitMove OK EXIT
14
Installation Guide
IfthisisthersttimeyouareturningontheTVandtherearenoprogramsinthe
TV memory, the installation Guide menu will appear on the screen.
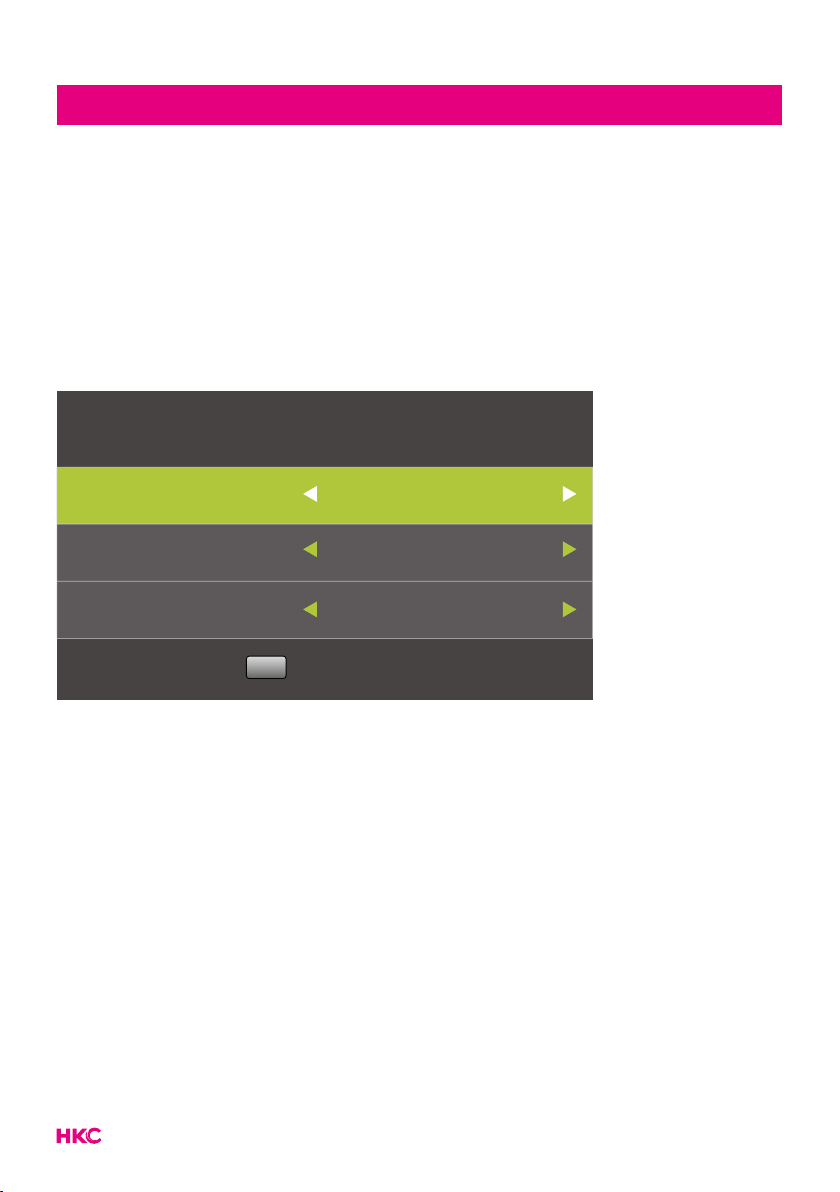
1. Press the /buttons to select the language.
2. Press the /buttons to select the local country
3. Press the /om hem op Home mode te zetten. Indien de tv in een
omgeving met veel licht gebruikt wordt (bv winkel) zet hem dan in store mode.
First Time Installation
OSD Language English
Country Netherlands
Environment
Auto Tuning
Home mode
OK
Note:
Searching for platform will take a long time, please be patient and don’t turn
off the TV.
First Time installation

15
Channels
Press
OK EXIT
MENU to display the main menu. Press to select ‘CHANNEL’ in the
main menu.
Auto Tuning
ATV Manual Tuning
DTV Manual Tuning
Programme Edit
Signal Information
CI Information
LCN
CHANNEL
On
ReturnMENU SelectOK ExitEXIT
Move
Auto Tuning
Press to select ‘Auto Tuning’.
Press to select the country and use to select ‘Tune Type’ and ‘Digital
Type’. Put this on DTV + ATV. Select the type (DVB-T / S / C). Press OK
EXIT MENU
to start
the search. Press
OK EXIT
MENU to skip
OK
EXIT
MENU
to stop. Turn on “LCN” to put the channels in
logical order (not possible with Satellite).
Tuning Setup
Country Netherlands
Tune Type ATV + DTV
Digital Type
Start
DVB-C
Scan Type Full
Network ID Auto
Frequency Auto
Symbol Rate Auto
OK
Back
MENU
Tuning Setup
LCN On
Start
OK
Back
MENU
OSD Menu CHANNEL

16
OSD Menu CHANNEL
Channel Tuning
TV :0Programme
0% 46.25 MHz TV
Please press MENU key to skip
DTV: 0 Programme
Radio :0Programme
Data :0Programme
Channel Tuning
TV :1Programme
54% VHF CH 6 (DTV)
Please press MENU key to exit
DTV: 4 Programme
Radio :0Programme
Data :0Programme
Note:
Searching for platform will take a long time, please be patient and don’t turn off
the TV.
Satellite
IfyouaregoingtowatchTVviayoursatellite,youmustrstsearchforthe
Satellite source input source (see page 13) before searching for channels. Then
you can choose your satellite at Autotuning.
Analog Manual Tuning
Press to select ‘Manual scan’ and
press to ‘ATV Manual Tuning’.
Press
OK
EXIT MENU
to start with searching.
Press
OK EXIT
MENU to return to the previous
menu. Press
OK
EXIT
MENU
to exit the menu.
ATV Manual Tuning
Current CH 1
Color System Auto
Exit
Sound System DK
-+
Fine-Tune
Search
Frequency Unregistered
EXIT
Back
MENU
Move

17
OSD Menu CHANNEL
DTV Manual Tuning (digital)
Press to select ‘Digital Manual
scan’ and press OK
EXIT MENU
to start.
Press
OK EXIT
MENU to return to the previous
menu. Press
OK
EXIT
MENU
to exit the menu.
DTV Manual Tuning
VHF CH 5
-+
NO SIGNAL
Freq: 177.50MHzBad Good
Channel Edit
Press to select ‘Programme Edit’ and press OK
EXIT MENU
to select.
Delete channels
Press to select the channel and
press the red button to delete the
channel.
Skip channels
Press to select the channel and
press the blue button to skip the
channel. Press the blue button again
to cancel the setting.
Programme Edit
1 Programme
Select
Delete Move Skip
1/1 Fav
OK
FAV
DTV
2 Programme DTV
3 Programme DTV
4 Programme DTV
Back
MENU
Move channels
Press to select the channel and press the yellow button to move the
channel.Presstheyellowbuttonagaintoconrm.

18
OSD Menu CHANNEL
The 3 colored buttons are shortcut keys.
Press to select the channel to change, and then press the colored buttons to:
Delete Delete the selected channel
Move Change the order of the selected
channel
Skip Skip the selected channel
Press the FAV button to add or remove the channel from your favorite list. (Your
TV connection will automatically skip the channel while CH +/- is used to watch
the channels).
LCN (Logical channel number)
Turn on “LCN” to put the channels in logical order (not possible with Satellite).
CI information
Press to select ‘CI info’. Press OK
EXIT MENU
to check CI card information.

19
OSD Menu PICTURE
The second item in the OSD menu is “PICTURE”. You can adjust the image effect
here, such as contrast, brightness, etc.
Press
OK EXIT
MENU to enter the OSD menu. Than press to select the ‘PICTURE’
menu. Press to select ‘Picture Mode’. Press OK
EXIT MENU
to select.
Picture Mode
Contrast
Brightness
Colour
Tint
Sharpness
Colour Temp
Noise Reduction
HDMI Mode
Standard
50
50
50
50
50
Normal
Middle
Auto
PICTURE
ReturnMENU SelectOK ExitEXIT
Move
Picture Mode
Press to select the picture mode and then press OK
EXIT MENU
to enter the submenu.
You can change the contrast, brightness, color, sharpness and hue values when
the image is in Personal mode.
Contrast/Helderheid/Kleur/Tint/Scherpte.
You select the item with the buttons
that you want to change. By the
buttons set the desired setting.
Then press OK
EXIT MENU
toconrm.
Picture Mode
Dynamic
Standard
Mild
Select
Personal
OK Back
MENU

20
OSD Menu PICTURE
Contrast Adjust the light intensity of the image, but the shadow of the
image is not variable.
Brightness Adjusts the brightness of the image, making the dark area
brighter
Colour Adjusts the saturation of the color.
Tint The use of color compensation has changed with the sending of
the NTSC code.
Sharpness Adjusts the level of the details in the image
Colour Temp
Changes the temperature of the colors.
Use the buttons to select the
desired temperature.
Then press OK
EXIT MENU
toconrm.
Colour Temp
Cold
Normal
Warm
Select
OK Back
MENU
Cold Increases the blue tone in the white.
Normal Increases the average colors in white.
Warm Increases the red color in the white.
Table of contents
Other HKC LED TV manuals


