2
INTRODUCTION
SPECIFICATIONS
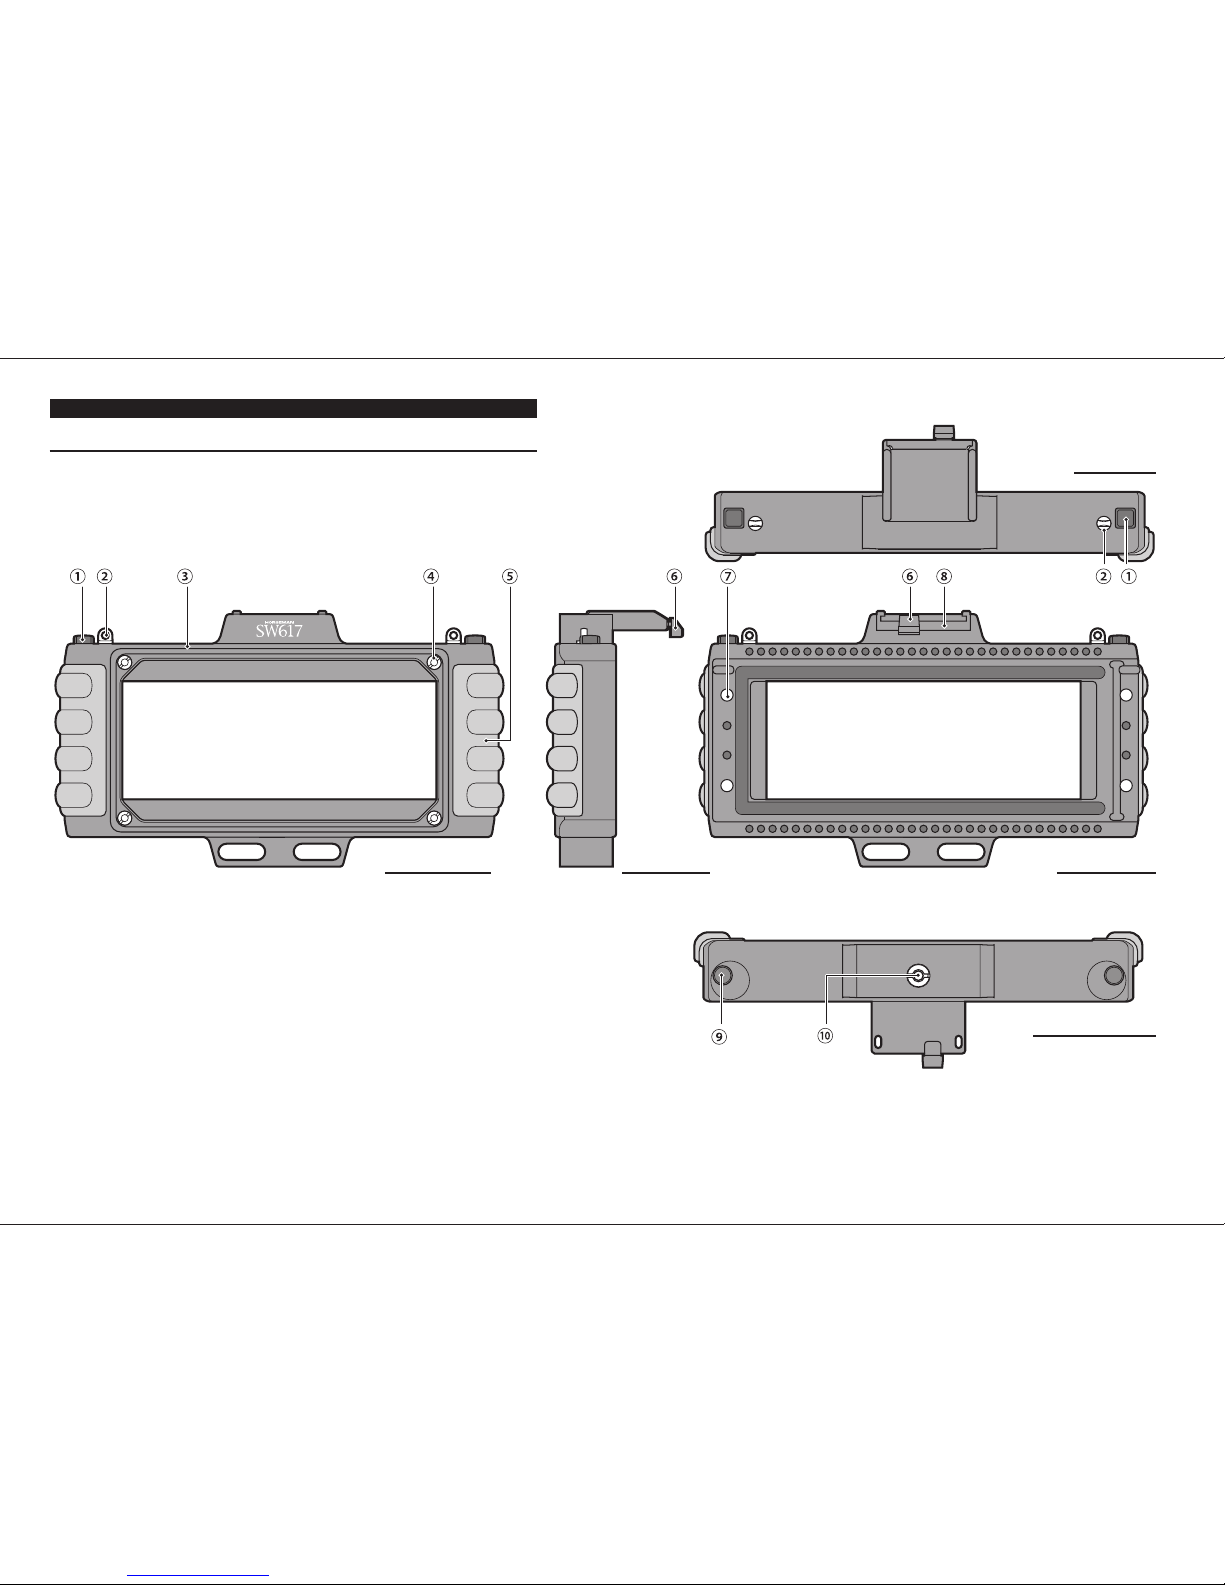
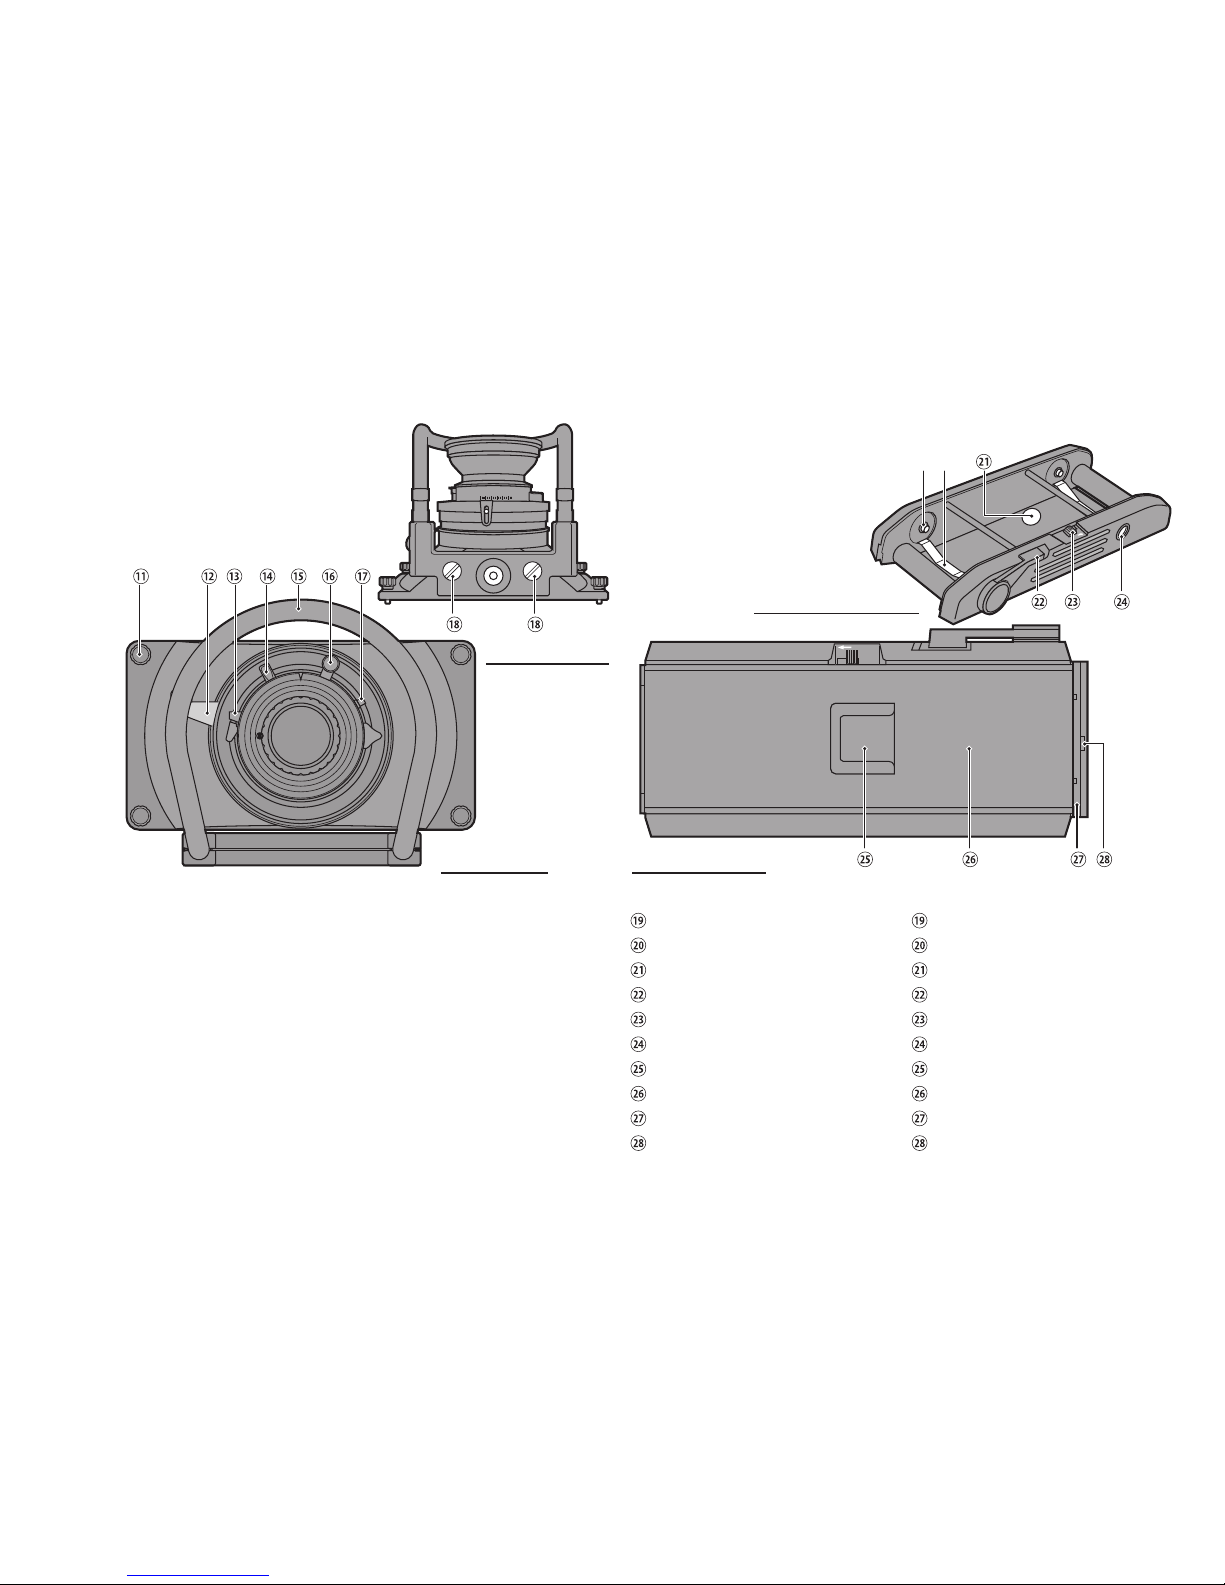
NAME OF PARTS
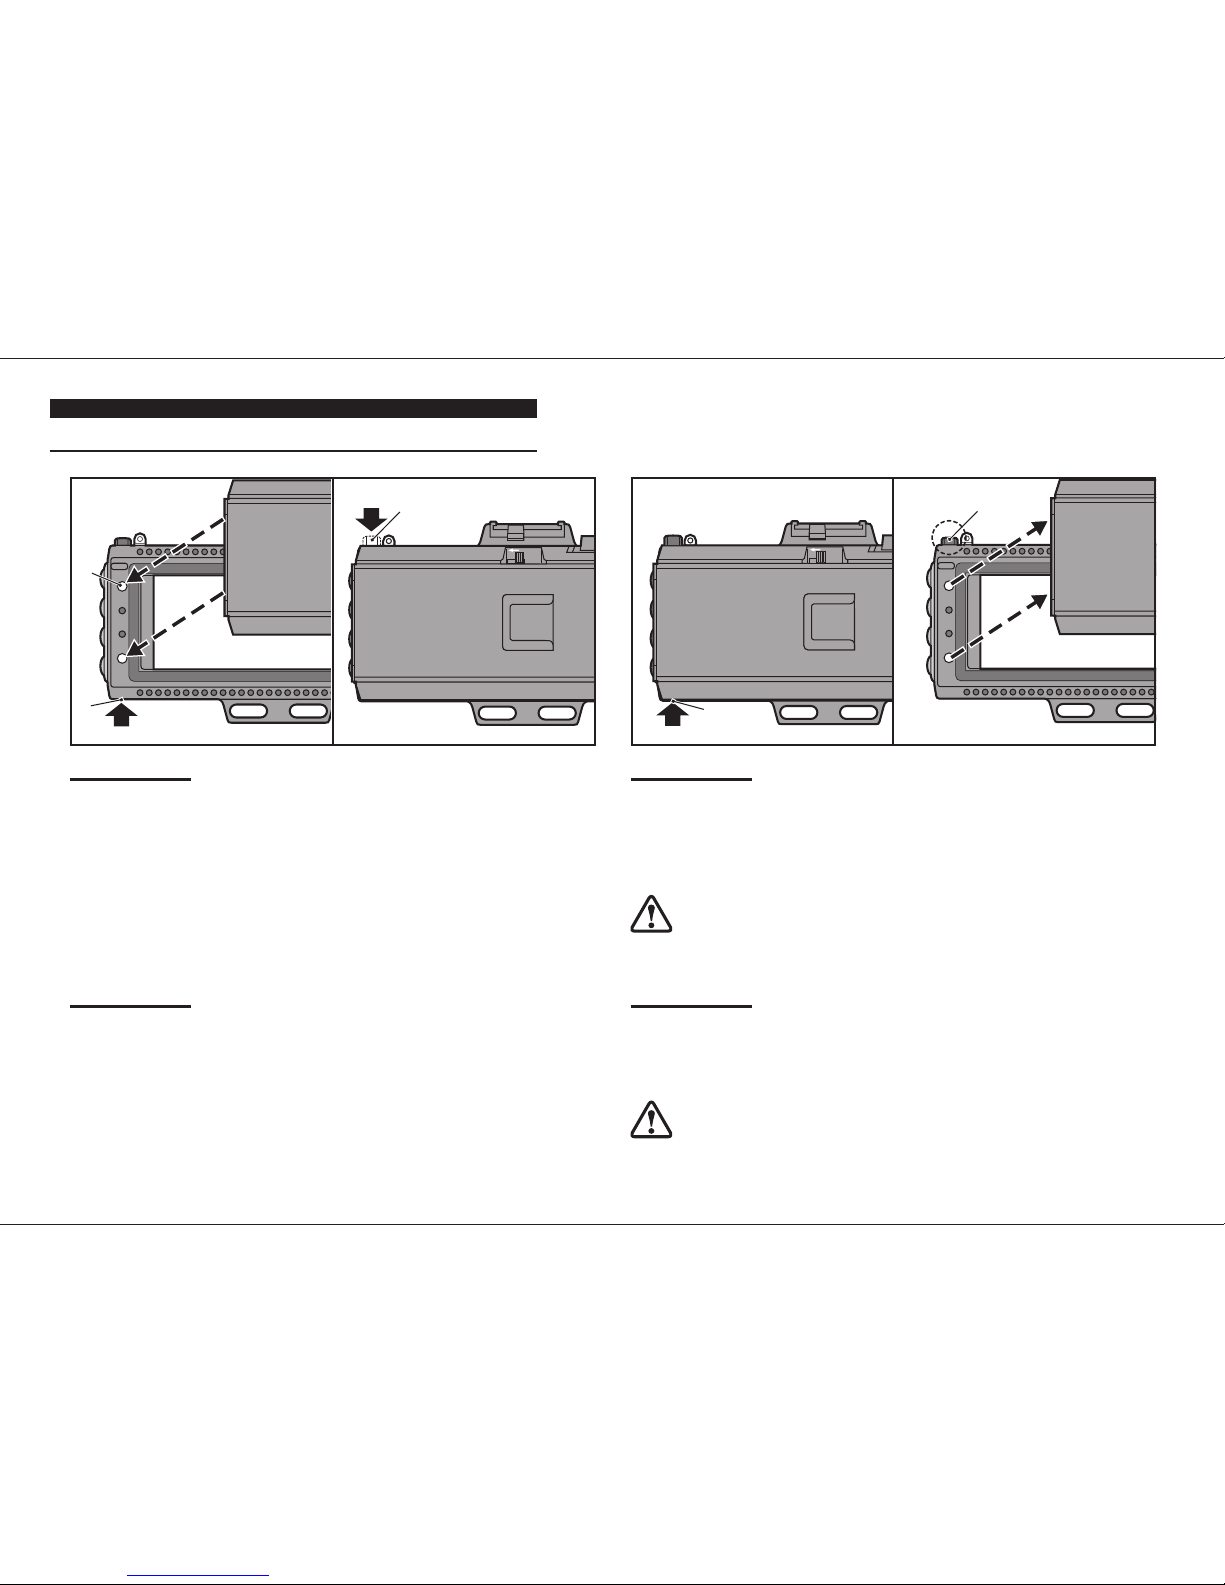
ATTACHING / DATACHING FILM HOLDER
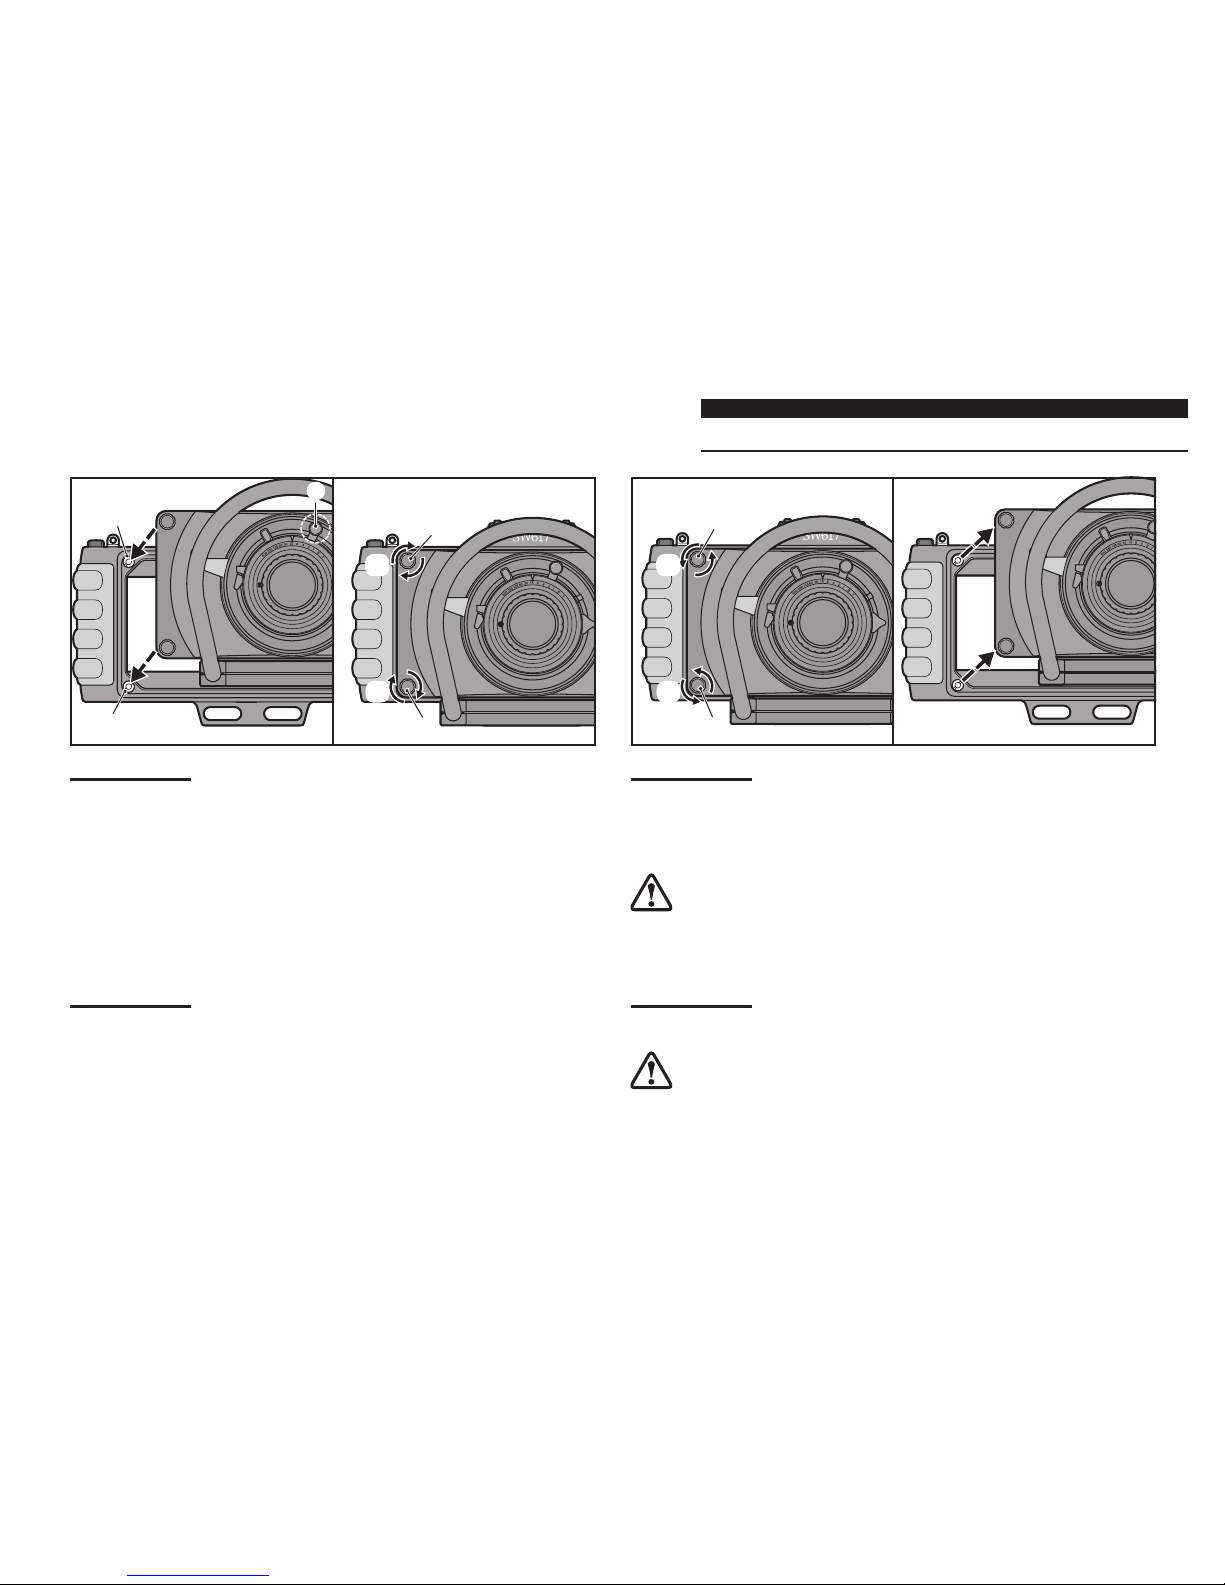
ATTACHING / DATACHING LENS UNIT
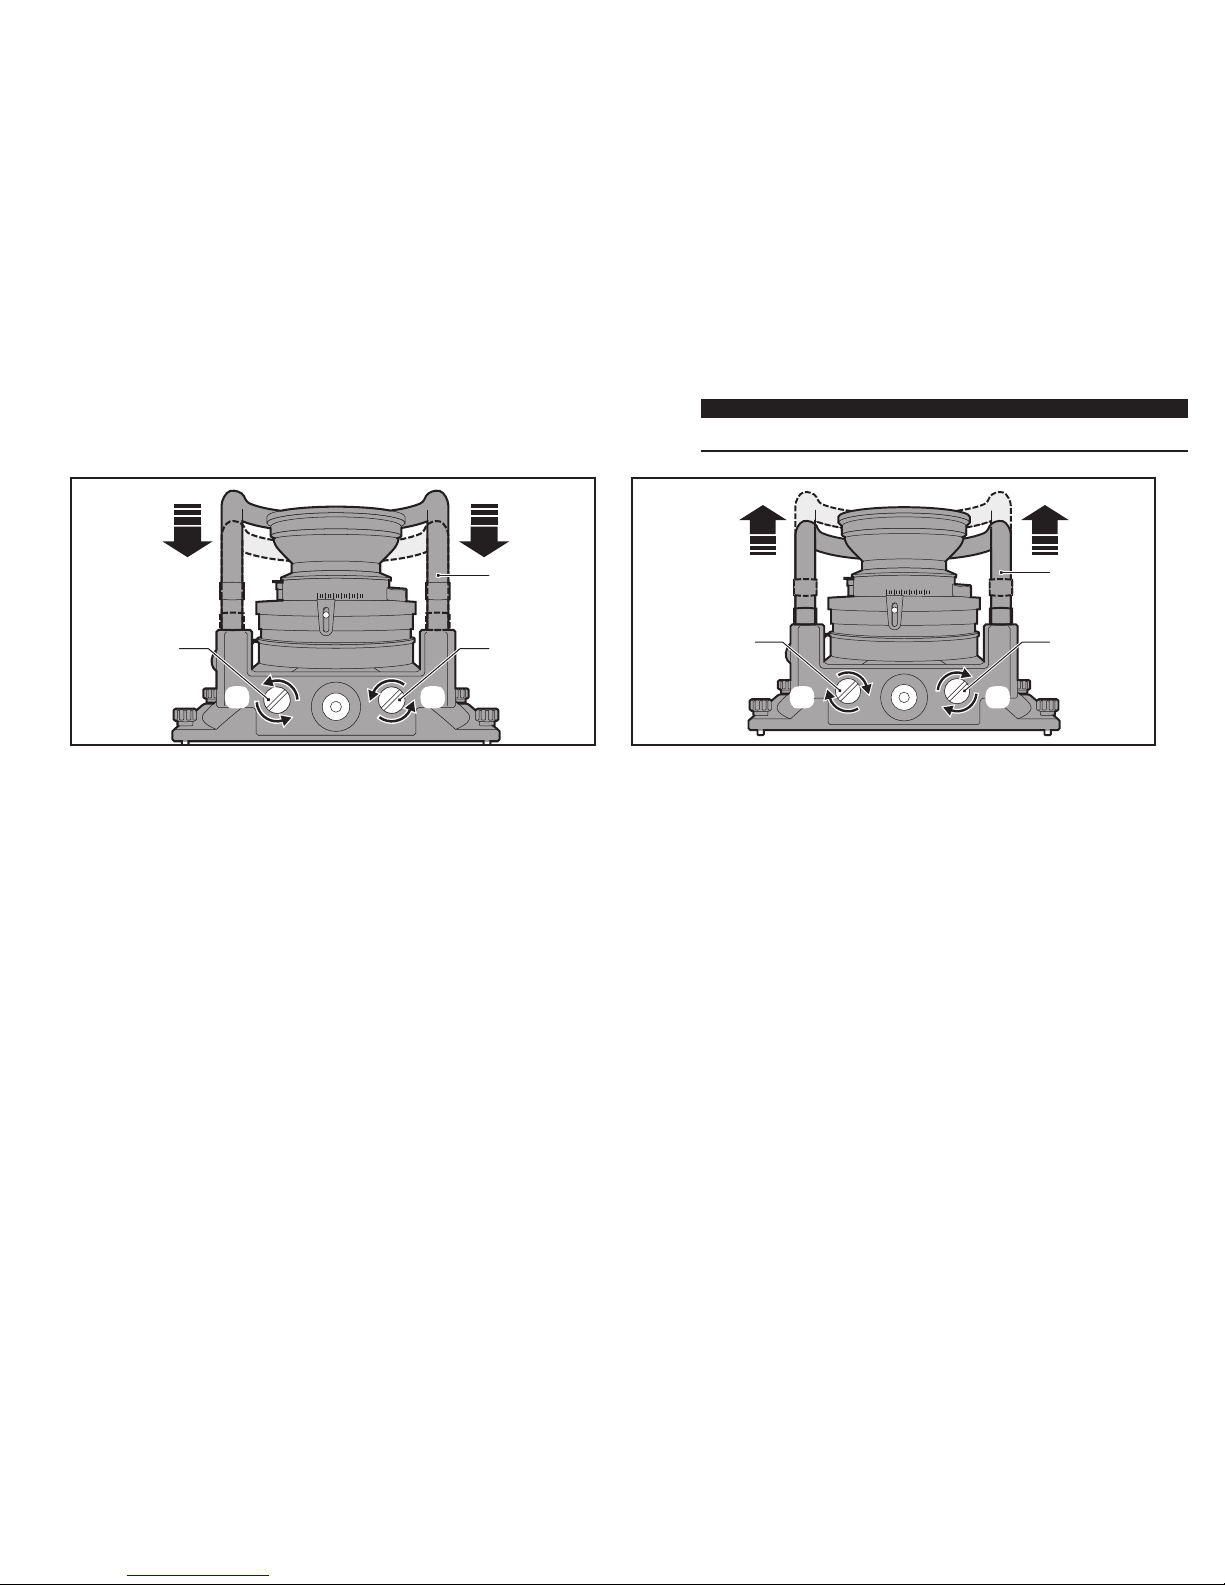
ATTACHING / DATACHING VIEWFINDER
USING A CENTER FILTER
TO LOAD THE ROLL FILM HOLDER
はじめに
仕様
各部の名称
フィルムホルダーの取付け・取外し
レンズの取付け・取外し
ビューファインダーの取付け・取外し
センターフィルターを使用する場合
フィルムの装填
絶対に自分でカメラを分解しないでください。また内部に触れ
ないよう十分ご注意ください。
カメラで直接、太陽や強い光源を見ないでください。目を傷め
る危険性があります。
自動車等の運転者は運転中絶対にカメラを操作しないでくださ
い。交通事故の原因となります。
本機は精密機械です。大きな振動や衝撃を与えないでください。
液体やその他の異物が入らないように十分ご注意ください。
カメラは乳幼児の手の届かないところに置いてください。
極端な高温・低温下、高い湿度下での使用、保管は避けてくださ
い。直射日光の当たる場所での保管、自動車内への長時間の放
置は温度上昇の原因となります。
Avoid operation and/or storage at extremely high or low temperatures. Long
term use or storage in direct sunlight should likewise be avoided. Due to
potentially high temperatures, do not leave the camera in your car for any long
periods. Avoid exposure to high humidity during use or storage.
Do not attempt to disassemble the camera. To avoid damage
to the camera, do not touch internal components.
Never direct the camera to the sun or other intense light
sources. It could seriously hurt your eyes.
Never operate the camera while driving a car, which could lead
to a trac accident.
The SW617 is a precision instrument and should not be
exposed to excessive vibration or shock.
Don't let foreign matter get into the camera. Liquids such as water
and solid foreign objects can seriously damage the camera.
Keep the camera out of the reach of infants and small children.
この度は、ホースマンSW617をお買い上げいただき、誠にあり
がとうございます。
製品を正しくお使いいただくために、ご使用になる前に必ずこ
の取扱説明書をよくお読みいただき、正しくお使いください。
はじめに
INTRODUCTION
ご注意 Caution
2
3
4-5
6
7
8
9
10-11