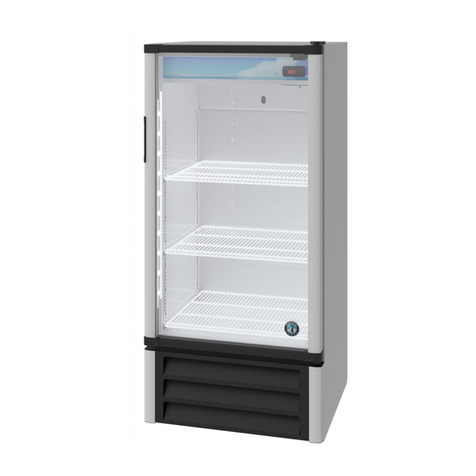
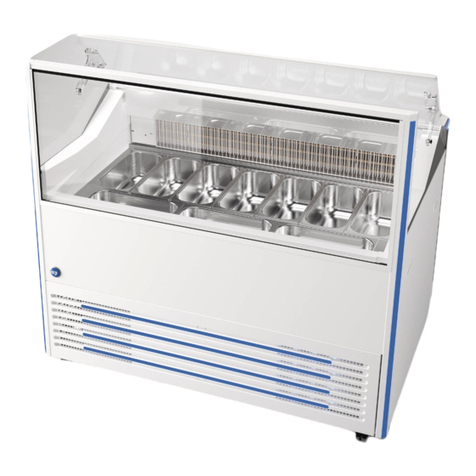
Hoshizaki HNC-120BE-R-BLH User manual

HNC-120BE-L/R-BLH
HNC-150BE-L/R-BLH
HNC-180BE-L/R-BLH
HNC-210BE-L/R-BLH
HNC-120BE-L/R-BH
HNC-150BE-L/R-BH
HNC-180BE-L/R-BH
HNC-210BE-L/R-BH
COUNTER SHOWCASE
SERVICE MANUAL
S051-1106 (051421)

1
IMPORTANT
This manual should be read carefully before the appliance is serviced. Read the warnings
and guidelines contained in this manual carefully as they provide essential information for
the continued safe use, service, and maintenance of the appliance. Retain this manual
for any further reference that may be necessary.
CONTENTS
Important Safety Information ................................................................................................2
I. Construction and Refrigeration Circuit Diagram................................................................5
A. Model Name ................................................................................................................5
B. Construction.................................................................................................................6
C. Refrigeration Circuit Diagram ......................................................................................7
II. Operating Instructions and Service Diagnosis..................................................................8
A. Operating Instructions..................................................................................................8
B. Service Diagnosis ........................................................................................................9
III. Refrigeration Circuit and Component Service Information ............................................10
A. Refrigeration Circuit Service Information (R600a) ..................................................... 11
B. Component Service Information ................................................................................15
C. Constant Pressure Expansion Valve .........................................................................17
IV. Preparing the Appliance for Periods of Non-Use...........................................................19
V. Disposal..........................................................................................................................20
VI. Technical Information ....................................................................................................21
A. Dimensions/Specications.........................................................................................21
B. Wiring Diagram ..........................................................................................................37

2
Important Safety Information
Throughout this manual, notices appear to bring your attention to situations which could
result in death, serious injury, damage to the appliance, or damage to property.
DANGER Indicates a hazardous situation that, if not avoided, will
result in death or serious injury.
DANGER Indique un risque imminent qui causera la mort ou de
graves blessures, s’il n’est pas évité.
WARNING Indicates a hazardous situation which could result in
death or serious injury.
NOTICE Indicates a situation which could result in damage to the
appliance or property.
IMPORTANT Indicates important information about the installation,
use, and care of the appliance.
DANGER
Risk of Fire or Explosion Flammable Refrigerant Used
• Follow handling instructions carefully in compliance with national or local regulations.
• Do not use mechanical devices to defrost.
• Do not puncture refrigerant tubing. Risk of fire or explosion due to puncture of
refrigerant tubing; follow handling instructions carefully.
• Component parts shall be replaced with like components.
• Servicing shall be done by factory authorized service personnel to minimize the risk
of possible ignition due to incorrect parts or improper service.
• Consult instruction manual/service manual before attempting to install or service this
product. All safety precautions must be followed.
• Dispose of properly in accordance with national or local regulations.
• Do not place any potential ignition sources in or near the appliance.

3
WARNING
The appliance should be destined only to the use for which it has been expressly
conceived. Any other use should be considered improper and therefore dangerous. The
manufacturer cannot be held responsible for injury or damage resulting from improper,
incorrect, and unreasonable use. Failure to install, operate, and maintain the appliance
in accordance with this manual will adversely aect safety, performance, component
life, and warranty coverage.
To reduce the risk of death, electric shock, serious injury, or re, follow basic
precautions including the following:
• Only qualied service technicians should install and service the appliance.
• Wear appropriate personal protective equipment (PPE) when servicing the appliance.
• The appliance must be installed in accordance with applicable national and local laws
and regulations.
• Appliance is heavy. Use care when lifting or positioning. Work in pairs when needed
to prevent injury or damage. Do not lift using the top section.
• To reduce the risk of electric shock, do not touch the plug with damp hands.
• Unplug the appliance before servicing.
• The appliance requires an independent power supply of proper capacity. See the
nameplate for electrical specications. Failure to use an independent power supply of
proper capacity can result in a tripped breaker, blown fuse, damage to existing wiring,
or component failure. This could lead to heat generation or re.
• Do not use an extension cord.
• Do not use an appliance with a damaged power cord. The power cord should not
be altered, jerked, bundled, weighed down, pinched, or tangled. Such actions could
result in electric shock or re. To unplug the appliance, be sure to pull the plug, not
the cord, and do not jerk the cord.
• The GREEN/YELLOW earth wire in the factory-installed power cord is connected to
the appliance. If it becomes necessary to remove or replace the power cord, be sure
to connect the power cord’s earth wire.
• Do not splash, pour, or spray water directly onto or into the appliance. This might
cause short circuit, electric shock, corrosion, or failure.
• Do not make any alterations to the appliance. Alterations could result in electric
shock, injury, re, or damage to the appliance.
• The appliance is not intended for use by persons (including children) with reduced
physical, sensory, or mental capabilities, or lack of experience and knowledge, unless
they have been given supervision or instruction concerning use of the appliance by a
person responsible for their safety.
• Children should be properly supervised around the appliance.
• Do not climb, stand, or hang on the appliance or allow children or animals to do so.
Do not climb into the appliance or allow children or animals to do so. Death or serious
injury could occur or the appliance could be damaged.
• Be careful not to pinch ngers when opening and closing the doors. Be careful when
opening and closing the doors when children are in the area.
4
WARNING, continued
• Open and close the doors with care. Opening the doors too quickly or forcefully may
cause injury or damage to the appliance or surrounding equipment.
• Do not use combustible spray or place volatile or ammable substances in or near
the appliance. They might catch re.
• Keep the area around the appliance clean. Dirt, dust, or insects in the appliance
could cause harm to individuals or damage to the equipment.
• Do not throw anything into the unit. The glass parts could be broken, which may
result in injury.
• The appliance is designed only for temporary display of food. Employ sanitary
methods. Use for any other purposes (for example, storage of chemicals or medical
supplies such as vaccine and serum) could cause deterioration of stored items.
• Do not block air inlets or outlets, otherwise cooling performance may be reduced.
• Do not tightly pack the unit. Allow some space between items to ensure good cooling
performance. Also allow space between items and interior surfaces.
• Do not put warm or hot foods in the unit. Store only pre-refrigerated items, or they will
raise the interior temperature and could deteriorate other foods in the unit or overload
the appliance.
• Food display and handling must comply with applicable codes and regulations.
• All foods should be wrapped in plastic lm or stored in sealed containers. Otherwise
foods may dry up, pass their smells onto other foods, cause frost to develop, result
in poor appliance performance, or increase the likelihood of cross-contamination.
Certain dressings and food ingredients, if not stored in sealed containers, may
accelerate corrosion of the evaporator, resulting in failure.
• Do not store items in contact with the interior bottom or the evaporator at the interior
top. Otherwise, items may freeze up and crack or break causing a risk of injury or
contamination of other food.
NOTICE
After servicing, follow the instructions below:
• Keep ventilation openings, in the appliance enclosure, clear of obstruction. Do not
place anything on top of the appliance. Blockage of airow could negatively aect
performance and damage the appliance.
• Do not allow the appliance to bear any outside weight.
• To prevent deformation or cracks, do not spray insecticide onto the plastic parts or let
them come into contact with oil.
• Use only the door handle when opening and closing the sliding doors.

5
I. Construction and Refrigeration Circuit Diagram
A. Model Name
HNC - 120 B E - L/R - B L H
H: Hydrocarbon
refrigerant
Counter Showcase
L: LED
Width (cm)
120, 150, 180, 210 Exterior
B: Black plastic
Development Order
Starts from A
Unit Location
HE Model L: Unit on left
R: Unit on right
Unit on right
Unit on left

6
B. Construction
Slider
Sliding Glass DoorAir Inlet
Drain Pipe
LED Switch
(Only for BLH models)
Air Outlet
Nameplate
Power Switch
(Earth Leakage
Circuit Breaker)
Louver, Air Filter
Evaporator
Power Cord
Machine Compartment
Plug**
Thermometer*
Food MountJointHose
Note:
* The thermometer shows the maximum interior temperature.
** Always attach the plug(s) to the drain holes located in the showcase.

7
Refrigerant: R600a
Heat Exchanger
Drier
Expansion
Valve
Evaporator
(Upper)
Evaporator
(Lower)
Fan Motor
Compressor
C. Refrigeration Circuit Diagram
Condenser

8
II. Operating Instructions and Service Diagnosis
A. Operating Instructions
IMPORTANT
Hoshizaki Counter Showcase is intended for temporary food display. Constructed
with glass, this showcase gives relatively insucient heat insulation and poor cooling
performance compared with refrigerators in general. For safe and ecient operation,
be sure to follow the instructions below.
1) Do not leave foods in the showcase after service hours, or they may dry or spoil. Foods
that should not dry must be covered or wrapped up in a plastic lm.
2) Store only pre-refrigerated items in the showcase. It takes longer for foods to cool in the
showcase than in a refrigerator.
3) Do not leave the doors open or open them too frequently. The interior temperature may
rise, resulting in food deterioration.
4) Do not pack the showcase with foods. The cooling performance may reduce, resulting in
food deterioration.
5) The showcase should not be exposed to direct sunlight or located next to ovens, grills
or other high heat producing equipment. The interior temperature may rise, resulting in
food deterioration.
6) The ambient temperature should not exceed 30°C. The cooling performance may
reduce, resulting in food deterioration.
7) The food mount can be used on either side. The food temperature is controllable by
turning over the food mount to change the distance from the interior bottom.
Normal condition When food freezes
8) The maximum safe height for displaying food products is 9 cm above the interior bottom.
Food products should not be placed above this height as they may not remain cold
enough to avoid spoilage.

9
B. Service Diagnosis
PROBLEM POSSIBLE CAUSE REMEDEY
[1] Showcase will not
start.
1. Power switch (earth leakage circuit
breaker) in OFF position.
1. Turn ON.
2. Unplugged. 2. Plug in.
3. Supply voltage too low. 3. Plug into a properly earthed,
independent wall outlet of 220 -
240V ± 6%.
4. No power supply to the wall outlet.
(Breaker or fuse blown.)
4. Correct.
5. Electrical circuit open or bad
contacts.
5. Correct.
6. Motor protector tripped. 6. Allow to cool. If fan motor does not
energize, replace fan motor.
[2] Poor cooling
performance
1. Gas leaks. 1. Repair the leaks and recharge.
2. Fan motor defective. 2. Replace.
3. Condenser and/or air lter clogged. 3. Clean.
4. Condenser air inlet blocked. 4 - 9. Instruct the user on
characteristics and proper use
of the showcase. See "II.A.
Operating Instructions."
5. Exposed to direct sunlight or high
wattage lamps shining on the case.
6. Located next to a high heat
producing equipment.
7. Doors opened too frequently or left
open.
8. Packed with foods, or warm or hot
foods inside.
9. Ambient temperature exceeding
30°C.
10. Frost formed. 10. See (*) below for characteristics
and proper use of the showcase.
[3] Dry foods 1. Foods have been stored from the
previous day.
1 - 2. Instruct the user on
characteristics and proper use
of the showcase.
2. Foods have been stored for a long
time.
[4] Condensation
formed.
1. [Exterior] Relative humidity
exceeding 60%.
1. Wipe o excessive frost with a soft
cloth.
* During operation, moisture inside the showcase causes frost to build up on the
evaporator pipe inside. Frost has an insulating effect on the evaporator pipe and
reduces refrigeration performance. Every time the door is opened, warm and humid
air comes in and raises the interior temperature to accelerate frost formation. Opening
of the doors should be kept to a minimum to maintain proper operating temperatures.
Do not leave the doors open continuously. Since frost on the evaporator pipe reduces
refrigeration performance, the showcase cannot be used continuously. After business
hours, return sushi materials to a refrigerator and turn off the showcase. Leave the
showcase o for at least 1 to 2 hours to defrost. Failure to defrost the showcase will
result in improper operating temperatures. In some conditions, frost may build up in a
short time and reduce cooling performance. In these conditions, defrost the showcase
as needed during the day. While defrosting the showcase, move sushi materials to a
refrigerator to prevent deterioration.

10
III. Refrigeration Circuit and Component Service Information
DANGER
Risk of Fire or Explosion Flammable Refrigerant Used
• Follow handling instructions carefully in compliance with national or local regulations.
• Do not use mechanical devices to defrost.
• Do not puncture refrigerant tubing. Risk of fire or explosion due to puncture of
refrigerant tubing; follow handling instructions carefully.
• Component parts shall be replaced with like components.
• Servicing shall be done by factory authorized service personnel to minimize the risk
of possible ignition due to incorrect parts or improper service.
• Consult instruction manual/service manual before attempting to install or service this
product. All safety precautions must be followed.
• Dispose of properly in accordance with national or local regulations.
• Do not place any potential ignition sources in or near the appliance.
WARNING
• Wear appropriate personal protective equipment (PPE) when servicing the appliance.
• Technician must utilize a combustible gas leak detector at all times.
• Notify everyone in the immediate area that you are working with flammable
refrigerant.
• Do not work on appliance in a conned space. Conrm area is well ventilated.
• Identify and eliminate all possible ignition points in a 3 m area around service area.
• Do not use mechanical devices to defrost.
• Use non-sparking tools.
• A dry chemical re extinguisher or equivalent must be available.
• Do not pressurize system above 1.4 MPa during leak check procedure or prior to
evacuating refrigeration system.
• This appliance should be diagnosed and repaired only by qualied service personnel
to reduce the risk of death, electric shock, serious injury, or re.
• To reduce the risk of electric shock, do not touch the plug with damp hands.
• Move the power switch (earth leakage circuit breaker) to the “OFF” position, then
unplug the appliance from the electrical outlet before servicing.
• Make sure all food zones in the appliance are clean after the appliance is serviced.

11
A. Refrigeration Circuit Service Information (R600a)
WARNING
• Repairs requiring the refrigeration circuit to be opened must be performed by properly
trained service personnel.
• Use an electronic leak detector or soap bubbles to check for leaks. Add a trace of
refrigerant to the system (if using an electronic leak detector), and then raise the pressure
using nitrogen gas 1 MPa. Do not use R600a as a mixture with pressurized air for leak
testing.
NOTICE
• Do not leave the system open for longer than 15 minutes when replacing or servicing
parts. The Polyol Ester (POE) oils used in R600a appliances can absorb moisture
quickly. Therefore it is important to prevent moisture from entering the system when
replacing or servicing parts.
• Always install a new drier every time the sealed refrigeration system is opened.
• Do not replace the drier until after all other repair or replacement has been made. Install
the new drier with the arrow on the drier in the direction of the refrigerant ow.
• When brazing, protect the drier by using a wet cloth to prevent the drier from overheating.
Do not allow the drier to exceed 121°C.
Refrigerant leaks must be repaired as soon as they are discovered. If not, refrigerant charge
should be recovered from the system until the leak can be repaired. When repairing a leak:
• Repair the leak properly – Remove the refrigerant, examine the leak source, determine the
reason for the leak, and carry out the proper course of action.
• Before repairing the leak, ensure that the refrigerant has been recovered and the system
purged with nitrogen when brazing.
• Be sure to remove piercing valves attached to the system after repairs are made.
1. Refrigerant Recovery
Using proper refrigerant practices, place piercing valves toward the end (crimped area) of
the high and low-side process tubes, then recover the refrigerant into an approved container
or device.

12
2. Brazing
DANGER
Risk of Fire or Explosion Flammable Refrigerant Used
• Servicing shall be done by factory authorized service personnel to minimize the risk of
possible ignition due to incorrect parts or improper service.
WARNING
• Wear appropriate personal protective equipment (PPE) when servicing the appliance.
• You must have a combustible gas leak detector in the immediate work area at all times.
• You must have a chemical re extinguisher available at all times.
• Notify all persons in the immediate area that you are working with a ammable refrigerant.
• Do not use silver alloy or copper alloy containing arsenic.
• Be sure the area is clear of refrigerant vapor before brazing.
1) Braze/repair/replace damaged component or tting.
2) Purge with nitrogen gas for 2 min. Then braze all ttings while purging with nitrogen gas
owing at a pressure of 0.02 to 0.03 MPa.
NOTICE
• Always install a new drier every time the sealed refrigeration system is opened.
• Do not replace the drier until after all other repair or replacement has been made. Install
the new drier with the arrow on the drier in the direction of the refrigerant ow.
• When brazing, protect the drier by using a wet cloth to prevent the drier from overheating.
Do not allow the drier to exceed 121°C.
3) Use soap bubbles to check for leaks. Raise the pressure using nitrogen gas (1 MPa). Do
not use any refrigerant as a mixture with pressurized air for leak testing.
4) Once leak checking is complete, release the nitrogen gas from the system.

13
3. Evacuation
1) Attach a vacuum pump to the system. Be sure to connect the charging hoses to both high
and low-side refrigerant piercing valves.
IMPORTANT
The vacuum level and vacuum pump may be the same as those for current refrigerants.
However, the rubber hose and gauge manifold to be used for evacuation and refrigerant
charge should be exclusively for POE oils.
2) Turn on the vacuum pump, then open the gauge manifold valves. Never allow the oil in
the vacuum pump to ow backwards.
3) Allow the vacuum pump to pull down to a 760 mmHg vacuum. Evacuating period depends
on pump capacity.
4) Close the low-side valve and high-side valve on the gauge manifold.
5) Disconnect the gauge manifold hose from the vacuum pump and attach it to refrigerant
service cylinder. Remember to loosen the connection and purge the air from the hose. For
the required refrigerant charge, see the nameplate.
4. Recharge
6) R600a can be charged in either the liquid or vapor state. Liquid charge is preferred. If
refrigerant charging is done in the liquid state, place the service cylinder on the scales; if
the service cylinder is not equipped with a dip tube, invert the service cylinder, then
place it on the scales. Open the high-side valve on the gauge manifold.
7) Allow the system to charge with liquid until the proper charge weight is met.
8) Close the high-side valve on the gauge manifold. If charging is complete, skip to step 10.
9) If necessary, add any remaining charge to the system through the low-side. NOTICE!
To prevent compressor damage, use a throttling valve or liquid dispensing device
to add the remaining liquid charge through the low-side refrigerant access valve
with the compressor running. Close the refrigerant cylinder valve and let the low-
side refrigerant equalize to the system, then close the low-side manifold gauge. Move
the power switch (earth leakage circuit breaker) to the “OFF” position, then unplug the
appliance from the electrical outlet.
10) Pinch o (crimp down) the process tubes just below the piercing valves.
11) Remove the piercing valves. Cut the process tubes to remove the piercing valve holes
then braze the process tubes closed. Note: Be sure there is no refrigerant leak before
brazing.

14
12) Use a combustible gas leak detector or soap bubbles to check for leaks again.
13) Place red sleeves over the process tubes.
14) Plug the appliance back into the electrical outlet.

15
B. Component Service Information
WARNING
• Be sure to move the power switch (earth leakage circuit breaker) to the “OFF” position,
then unplug the showcase before removing or replacing the parts.
• Handle the glass parts with care.
1. Side Cover
Remove the two machine screws at the bottom,
lift up the side cover, and unhook the top.
2. Top Cover
Remove the sliding door and side cover.
1) The top cover is hooked and xed on the top
frame (aluminum).
2) Lift up and unhook the rear end of the top
cover.
3) When the rear part is lifted o, move it forward
to unhook and remove the front part.
The top cover is tightly hooked on the top frame
and will not come o easily. Remove it with care
to avoid injury. To replace, reverse the removal
procedure.
3. Front Glass
Remove the sliding door, side cover and
top cover. Lift the front glass o the bottom
joint.
The bottom and side interior of the front
glass is sealed with silicone sealant (black).
Be sure to re-seal it with food grade silicone
sealant at replacement.
4. Side Frame
Remove the sliding door, side cover and top
cover. Unbind the wiring on the side frame.
Remove the two screws securing the top
frame and the top of the side frame. Lift the
side frame o the bottom joint.
Top Cover
Top Frame
Fig. 1
Fig. 2
Top Frame
Front Glass

16
5. Center Frame (Except HNC-120 Type)
Remove the two flat head machine screws (black)
securing the center frame to the rear and the two
machine screws securing the center frame to the top
frame. Tilt the center frame and release it from the
joint.
6. Holder - Evaporator Pipe
Remove the truss head tapping screw (4 x
30) from the bottom of the top frame. Take
off the center frame. Be careful with the
evaporator pipe. It will be released and hang
down. Remove the truss head tapping screw
(4 x 10) from the bottom of the top frame.
7. Refrigeration Assembly
IMPORTANT
Follow the instructions in “DANGER” and
“WARNING” for ammable refrigerant use
and “III. A. Refrigeration Circuit Service
Information”.
Remove the sliding door, side cover, top
cover, top frame and side frame. Take o the
compressor terminal cover and remove the
starter and motor protector. Uninsulate the
expansion valve and unbraze the outlet pipe
(see “C. Constant Pressure Expansion Valve”).
Unbraze the joint indicated. Remove the four
machine screws securing the refrigeration
assembly. The whole refrigeration assembly
can be pulled out.
Fig. 3
Fig. 4
Truss Head Tapping
Screw 4 x 30
Truss Head Tapping
Screw 4 x 10
Holder -
Evaporator Pipe
Evaporator Pipe
Fig. 5
Outlet Pipe
Joint
Expansion Valve

17
C. Constant Pressure Expansion Valve
IMPORTANT
Follow the instructions in “DANGER” and “WARNING” for ammable refrigerant use
and “III. A. Refrigeration Circuit Service Information”.
1. Specications
Model: HYP2-5VHD-1
Manufacturer: Fuji Koki
Part Number: P04945-01
Refrigerant: R600a
Adjustment Range: 0.01 - 0.29MPaG
Pressure Rise by Adjusting Screw: 0.039 - 0.049MPa/tum
2. Function
When the low side pressure drops, the constant pressure expansion valve opens and lets
the refrigerant ow to keep a constant pressure.
3. Construction
Fig. 6
IN (High Pressure)
Needle Valve
Cap
Adjusting
Screw
Adjusting
Spring Diaphragm
Working
Bar
Inner Spring
OUT (Low Pressure)
Low Pressure
Close Open
DOWN UP

18
4. Replacement
NOTICE
Always protect the valve body by using a damp cloth to prevent the valve from overheating.
Do not braze with the valve body exceeding 110°C.
IMPORTANT
Always install a new drier every time the sealed refrigeration system is opened. Do not
replace the drier until after all other repairs or replacement have been made.
1) Follow the instructions in “III. A. Refrigeration Circuit Service Information (R600a)”.
2) Remove the insulation cover and cap from the expansion valve.
3) Remove the expansion valve by unbrazing the inlet and outlet pipes.
Fig. 7
Wet Cloth
Unbraze
Unbraze
Drier
Evaporator

19
IV. Preparing the Appliance for Periods of Non-Use
When shutting down the appliance for more than one week, follow the instructions below.
WARNING
When preparing the appliance for long storage, prevent the doors from closing to
reduce the risk of children getting injured.
NOTICE
When preparing the appliance for long storage, clean the appliance. See “III.
Maintenance and Cleaning Instructions” in the instruction manual for details.
1) Before shutting down the appliance, move all foods into another clean refrigerator or
freezer.
2) Move the power switch (earth leakage circuit breaker) to the “OFF” position, then unplug
the appliance. WARNING! To reduce the risk of electric shock, do not touch the
plug with damp hands.
This manual suits for next models
25
Table of contents
Other Hoshizaki Merchandiser manuals

Hoshizaki
Hoshizaki KD-90C User manual

Hoshizaki
Hoshizaki KD-90C User manual

Hoshizaki
Hoshizaki RM-7-HC User manual

Hoshizaki
Hoshizaki KD-90A User manual

Hoshizaki
Hoshizaki KD-90D User manual

Hoshizaki
Hoshizaki KD-90B User manual

Hoshizaki
Hoshizaki RNC-150A-LA User manual

Hoshizaki
Hoshizaki HNC-120AA-L User manual

Hoshizaki
Hoshizaki COUNTER SHOWCASE HNC-120AA-L/R User manual

Hoshizaki
Hoshizaki KD-90D User manual