manuals.online logo
Brands
  1. Home
  2. •
  3. Brands
  4. •
  5. Hotpoint
  6. •
  7. Range
  8. •
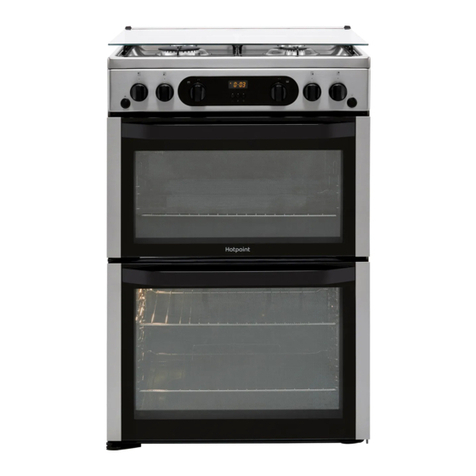
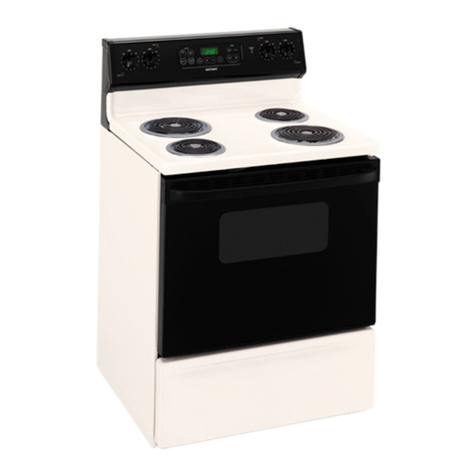
  9. Hotpoint RGB744H Installation instructions

Hotpoint RGB744H Installation instructions

This manual suits for next models

1

Other Hotpoint Range manuals

Hotpoint RB761G Installation instructions

Hotpoint

Hotpoint RB761G Installation instructions

Hotpoint RGB524EN Installation guide

Hotpoint

Hotpoint RGB524EN Installation guide

Hotpoint RB525BH User instructions

Hotpoint

Hotpoint RB525BH User instructions

Hotpoint HDM67G0CCX/UK User manual

Hotpoint

Hotpoint HDM67G0CCX/UK User manual

Hotpoint RGB751GEL User manual

Hotpoint

Hotpoint RGB751GEL User manual

Hotpoint RGB533CEH User manual

Hotpoint

Hotpoint RGB533CEH User manual

Hotpoint RB557 User manual

Hotpoint

Hotpoint RB557 User manual

Hotpoint EG94X User manual

Hotpoint

Hotpoint EG94X User manual

Hotpoint RGB532BEAAD Service manual

Hotpoint

Hotpoint RGB532BEAAD Service manual

Hotpoint RGB526DETBB User instructions

Hotpoint

Hotpoint RGB526DETBB User instructions

Hotpoint RB524 Installation guide

Hotpoint

Hotpoint RB524 Installation guide

Hotpoint RGB745 Original instructions

Hotpoint

Hotpoint RGB745 Original instructions

Hotpoint RGB508 Installation guide

Hotpoint

Hotpoint RGB508 Installation guide

Hotpoint RGB740BEHCT Manual

Hotpoint

Hotpoint RGB740BEHCT Manual

Hotpoint C120E User manual

Hotpoint

Hotpoint C120E User manual

Hotpoint FK 93J X/HA S User manual

Hotpoint

Hotpoint FK 93J X/HA S User manual

Hotpoint RGB530DEP User manual

Hotpoint

Hotpoint RGB530DEP User manual

Hotpoint RA720 Original instructions

Hotpoint

Hotpoint RA720 Original instructions

Hotpoint RB536BCAD Service manual

Hotpoint

Hotpoint RB536BCAD Service manual

Hotpoint JKP65WV Quick reference guide

Hotpoint

Hotpoint JKP65WV Quick reference guide

Hotpoint RB754N User manual

Hotpoint

Hotpoint RB754N User manual

Hotpoint RGB501 Installation guide

Hotpoint

Hotpoint RGB501 Installation guide

Hotpoint RB731 Installation instructions

Hotpoint

Hotpoint RB731 Installation instructions

Hotpoint RGB845WEC Service manual

Hotpoint

Hotpoint RGB845WEC Service manual

Popular Range manuals by other brands

Maytag MGR5875QDW - 30 Inch Gas Range Use and care guide

Maytag

Maytag MGR5875QDW - 30 Inch Gas Range Use and care guide

Frigidaire FFGF3024SS use & care

Frigidaire

Frigidaire FFGF3024SS use & care

Capital Precision Series GCR484W Specifications

Capital

Capital Precision Series GCR484W Specifications

Officine Gullo GGS8P Installation and use instruction

Officine Gullo

Officine Gullo GGS8P Installation and use instruction

LG LSD4913 Series owner's manual

LG

LG LSD4913 Series owner's manual

Kenmore 4101 - Elite 30 in. Slide-In Electric Range installation instructions

Kenmore

Kenmore 4101 - Elite 30 in. Slide-In Electric Range installation instructions

Moffat Blue Seal Evolution G576 Technical data sheet

Moffat

Moffat Blue Seal Evolution G576 Technical data sheet

CornuFé C1NF user guide

CornuFé

CornuFé C1NF user guide

GE JGS650SEFSS Dimensions and installation information

GE

GE JGS650SEFSS Dimensions and installation information

LG LDG3015ST Manual De Propietario

LG

LG LDG3015ST Manual De Propietario

Whirlpool RF350PXP Use and care guide

Whirlpool

Whirlpool RF350PXP Use and care guide

Samsung FCQ321HTUW Service manual

Samsung

Samsung FCQ321HTUW Service manual

Kenmore 790.45712 Use & care guide

Kenmore

Kenmore 790.45712 Use & care guide

Wolf CHR CHSSR owner's manual

Wolf

Wolf CHR CHSSR owner's manual

Smeg Built-in Microwave Oven Instructions for the user

Smeg

Smeg Built-in Microwave Oven Instructions for the user

Zanussi ZCG054G user manual

Zanussi

Zanussi ZCG054G user manual

GE JCSS630 quick start guide

GE

GE JCSS630 quick start guide

Samsung NX58M9960P series installation manual

Samsung

Samsung NX58M9960P series installation manual

manuals.online logo
manuals.online logoBrands
  • About & Mission
  • Contact us
  • Privacy Policy
  • Terms and Conditions

Copyright 2025 Manuals.Online. All Rights Reserved.

“[togetthebestfmm-’-A‘ ,..
X-a%
use’andcareOf
‘gasmodel
RGB744GEH ——
Features–p(i
surfaceCooting plill
ovenCooting plo
Howtousethe
self-cleaningoven p20
All manuals and user guides at all-guides.com
all-guides.com
BeforeUsingYourRange. ......2
hwtaHingtheRange ...........3
Levelingthe Rmge ............3
SafetyInstructions..........3-5
FeaturesofYourRange ......6.7
SurfaceCooking............8.9
UsingYourOven ............10
Clockand Timers ............11
Baking . . . . . . . . . . . . . . . . . . ..l2
13akingChart . . . . . . . . . . . . . ..l3
Roasting,Chart. . . . . . . . . . . . ..l4
Broiling,Chart . . . . . . . . . . . . . .15
CareandCleaning . . . . . . ...16-21
Operatingthe
Self-CleaningOven ......20.21
CleaningChart . . . . . . . . . . . ...22
Problem Solver .............23
IfYouNeedService. . . . . . . ...23
Warranty ...........13ackCover
Read this book Carefully.
Itisintendedtohelp youoperateand
maintainyournew rangeproperly.
Keepithandyfor answerstoyour
questions.
]fyoudon’tunderstand something
orneedmorehelp, write(include
yourphonenurnber):
ConsumerAffairs
Hotpoint
AppliancePark
Louisville,KY40225
writedown the model
‘andsaid numbers.
You’llfindthemonalabellocatedin
theburner boxunderthecooktop.
Seepage6.
These numbersare alsoonthe
Consumer ProductOwnership
RegistrationCard thatcamewith
yourrange. Beforesendinginthis
card, pleasewrite thesenumbers
here:
Model Number
Serial Number
Use these numbers inany
correspondenceorservicecalls
concerningyourrange.
IMyou!rweived
adamagedrange. e *
Immediatelycontactthedealer(or
builder)thatsoldyoutherange.
Sin%’timeamd.money.
Beforeyaw. request
service.a e
Check theProblemSolveron
page23. It listsminor causes of
operating problems thatyoucan
correct yourself.
All manuals and user guides at all-guides.com
YourEmqy?, likesomany other
~“l~:.
..-z..l-y~L*=
{(-)h
-g:*&--
‘&9- 0W4KIMitems,isheavyand can
settle intosoftfloor coverings
such ascushionedvinyl or
carpeting. Whenmovingtherange
onthistypeofflooring,usecare.
Donot install the rangeover
kitchen carpeting unlessyou
placean insulatingpador sheetof
l/4-inch-thickplywoodbetween
therangeandcarpeting.
Whenthefloor coven”ngendsat the
Jwzt oftherange, theareathatthe
rangewillrestonshouldbebuiltup
withplywoodorsimilarmaterialto
thesamelevelorhigherthanthe
floorcovering.Thiswillallowthe
rangetobe movedforcleaningor
servicing.
-_....C>.-. ..: -.< —.L...
,.
.--J
urrangemustbelevelinorderto
produce~roper cookingandbaking
results.After itisinitsfinal
location,placeaIevelhorizontally
onaneve; shelfandcheck the
Ievelnessfronttobackand sideto
side.Leveltherangebyadjusting
thelevelinglegsor byplacingshims
underthecornersas needed.
when lih..lGet Your Range
@
Havethe installer showyou
the kwtkm of’the B%mgegas
cut-offvalveand howtoshut it
offifnecessary.
@Haveyour range instdkd and
properly grounded byaqualified
ins~i]er~inaccordancewiththe
InstallationInstructions.Any
adjustmentand serviceshouldbe
performedonlybyqualifiedgas
rangeinstallersor service
technicians.
@Plug your rangeintoa
KM-voltgmmk!d outletdye
Donotremovetheround
groundingprongfromtheplug.If
indoubtaboutthegroundingof
thehomeelectricalsystem,it is
yourpersonalresponsibilityand
obligationto haveanungrounded
outletreplacedwith aproperly-
groundedthree-prongoutletin
accordancewiththe National
ElectricalCode. Do notusean
extensioncordwiththisappliance.
@Be sure all packing nmteriak
am?removed fromthe range
beforeoperatingit, toprevent
fire or smokedamageshould
thepackingmaterial ignite.
@Besure your rangeiscorrectly
adjustedbyaquaiifiedservice
technicianor installerforthe
typeofgas(Natlmdor W) ‘on
whichitistobeused.Gascan
beconvertedfrom one typeto the
other.SeeInstallationInstructions.
~After prolonged WWof a
!r&3nge9high floor temperatures
may EWNRltand many floor
coverings will motwithstand
this kind of use. Neverinstallthe
rangeovervinyltile or linoleum
thatcarmo[withstandsuch type of
3
use. Never installitdirectlyover
interiorkitchencarpeting.
using YOtl!rRange
@Dm19tleavechildren alomlor
unattended where arange is hot
or in operation, Theycouldbe
seriouslyburned.
eDon’tallowanyoneto Chrdb,
stand or hang on the door or
range top. Theycoulddamage
therangeandeventip itover
causingseverepersonalinjury.’
~CAUTION:DO N~ smm
rTEMsOFINTEWSTlo
cHILDmNINcABINEm
ABOVEARANGEatONTm
BACKSPLASH‘a?ARANGE–
CHILDRENCLIMBINGON
THE RANGETOREACH
ITEMSCOULDBE
SERIOUSLYHW?JRED
@Mburner grates and other
surfaces cod. ibefon? touching
them or leaving them where
Chikhn Uvilt reach them.
eNever wear hxse fitting or
i!-mginggm’mmt$Whileising
the appliance. Flammable
materialcouldbe ignitedif
broughtin contactwith flameor
hotovensurfacesand maycause
severeburns.
eNever use your appliance for
warming or heating the room.
Prolongeduse ofthe range
withoutadequateventilationcan
behazardous.
@Do Kmtwsewater on gM%3se
fires. Neverpick up aflaming
pan. Turn offburner, then
smother flamingpan by covering
pan completelywith wellfitting
lid,cookiesheetorMtray.
1
!.
All manuals and user guides at all-guides.com
Flaminggreaseoutsideapancan
beputoutbycoveringwithbaking
sodaor,ifavailable,amulti-purpose
drychemica~or foam,
@Donotstoreflammable
materials in an oven or near the
Cooktop.
@Do not Mcooking grease
or other flammablematerials
accwdak inorMheali’h? range.
@when cookingpork9follow
ourdirectionsexactlyandalways
cookthemeatto atleast 170°E
Thisassuresthat, in theremote
possibilitythattrichinamaybe
presentinthemeat,itwillbekilled
andmeatwillbe safetoeat.
surface cooMng
9A~~aysuse the MIX pOSitiOll!
when igniting top burners and
makesuretheburnershaveignited.
~Never~ea~e~@’~e b~~~e~~
unattended at HIGH flame
settings. Boilovercauses
smokingandgreasyspillovers
thatmaycatchon fire.
sAdjust top burnerfkme size
soit doesnot(?Xkd beyondthe
edgeofthecookingutensil.
Excessiveflameishazardous.
euse only dry .pothoMers—
moistor damppotholderson hot
surfacesmayresultin burns from
steam.Do notletpotholderscome
nearopen flameswhen lifting
utensils.Donotuseatowelorother
bulkyclothin placeofpotholder.
sTOm~~imizebUFnS9ignitionof
flammablematerials,andspillage,
turn the handleofacontainer
towardthe sideor back ofthe
rangewithoutextendingover
adjacentburner.
~.~]w&Jys~~ynSwface h.mm’ $0
OIFFbefore renloviElg IM%lisilo
oCIM%fidly VYimk fiwds being
iMi?d at EUGH fkme Smhge
‘@Neverblockthe vents(air
openi~~gs)
ofthe range. They
providetheairinletandoutlet
whichisnecessaryfortherange
tooperateproperlywithcorrect
combustion.
@~~ ~~~~~~~~()~~~~~~
Cclokingsurfaceif’thewokhas
arolmdmetalringwhichis
placedovertheburnergrateto
supportthewok.Thisringacts
asaheattrapwhichmaydamage
theburnergrateandburnerhead.
Also,itmaycausetheburnerto
workimproperly.Thismaycause
acarbonmonoxidelevelabove
currentstandards,resultingina
healthhazard.
~~OOdS for hyillf!j $h(ldd bea$
dry as possible.Frostonfrozen
foodsormoistureonfreshfoods
cancausehotfattobubbleupand
oversidesofpan.
@Useleastpossibleamount of
fat for effective shallow or deep-
fat frying. Fillingthepantoofull
offatcancausespilloverswhen
foodisadded.
@M’acombinationofoilsor
fatsVWbewwdinfrying,stir
togetherbeforeheating,oras
fatsmeltslowly.
@Alwaysheatfatslowly9and
watchasitheats.
0use deepfat thermometer
wheneverpossibletoprevent
overheatingfatbeyondthe
smokingpoint.
@UseProperPanSize—Avoid
pansthatareunstableoreasily
tipped.Selectutensilshavingflat
bottomslargeenough.toproperly
containfoodavoidingboi~overs
andspillovers,butlargeenough
tocoverburner+grate.Thiswill
bothsavecleaningandprevent
hazardousaccumulationsoffood,
simxheavyspatteringorspikwers
leftonrangecanignite.Usepans
withhandlesthatcanbeeasily
graspedandremaincool.
@Useonlygkasscookware
that
is recommended foruseongas
Cooktops.
~Keepall plastics away from
top Ilmnwrs.
@TO avoidthepossibilityda
burn,always be certain that the
controls for ail burners are w
OFF position and all grates are
coolbeforeattemptingto
removeagrate.
@VWWIIflamingfoodsunder
thehood,?h.wnthefanoff. The
fan, if operating,mayspread
the flame.
@If rangeiskited neara
wirdow9donotuseIongcurtains
whichcouldblowoverthetop
burnersandcreateafirehazard.
@
-=,-““.
@If yousmeilgas9turnoffthe ‘:.=
gastotherangeandcallaqualified
servicetechnician.Neverusean
openflametolocatealeak.
Baking, Broilingand
Roasting
eDo notUlw Owen for‘astorage
area.
@
Stand awayfromthe range
when openingoven.door. IIW
hot airor st&mRwhidh escapes
can cause hums @kmds~ fmx
amhr eyes.
eKeep ‘oven fm. fromg!r%%ase
buildup.
QPlace Qwen skhms indksbt?d.
positionwhile (fNw41is(xd!o
All manuals and user guides at all-guides.com
g$pD?fJ#theat unopened food
Umtainws in!the (Nw?l ePressure Qwhen broiling9if mew istoo
dose tothe’flame, the fatE-BMW @Removethe broiler pan ‘and
other fxdware before self-
cleaningtheoven.
f$f= CotBidbuildUp am!‘thecontainer ignite.Trimexcessfattoprev&t
excessiveflare-ups. -
*mrit l.lse ahmimm foil
anywhere in the oven except as
described in this book. Misuse
COLM
resultinafirehazardor
damagetotherange.
~~~eonlygkwscookwarethat is
recommended foruseingas
ovens.
~when Usingcookingor
roasting bags in oven,follow
themanufacturer’sdirection.
~Aiwaysremovebroilerpan
fromtheovenmsoonasyou
finishbro;ling.Greaseleftinthe
@Make sure broiler pan is in
place correctly toreducethe
possibilityofgreasefires. @ckm onlypartswed inthis
Useand Cam llook.e
@if’you should haveagrease
fireinthebroilerpan,turnoff
oven,andkeepovendoorclosed
tocontainfireuntilitburnsout.
@Keeprangedean andfree
ofaccumulationsofgrease or
Spih%?rswhichmay ignite.
Iflibu Need service
self-cleani~ oven @Read TM! Pdh’n soh’er99
mpage23 ofthis bock
~DOnotdean thedoorgasket.
Thedoorgasketisessentialfora
goodseal.Becarefulnotto rub,
damageor moveit. ~Don’tattempttorepair
or replace anypartofyour
rangeunlessitisspecifically
recommendedinthishmkcAH
otherservicingshouldbe referred
toaqualifiedtechnician.
~Do notuse oven ckaners. No
commercialovencleaneror oven
linerprotectivecoatingofany
kindshouldbeusedinoraround
anypartoftheoven.
pancancatchfireifovenisused
withoutremovingthegreasefrom
thebroilerpan.
5
All manuals and user guides at all-guides.com
j
;
i
;
@$_
Modd [email protected]
6
(T
,)
......)’
,.-.%
[’
(’j
All manuals and user guides at all-guides.com
all-guides.com
,
‘!
\
-.
.-.,
.
., ExpMmd
Fk!at$meIndex on page RGB74GEH
1Modeland SerialNumbers 2*
(inburner boxundercooktop)
2SurfaceBurner Controls 84
3SurfaceBurners, Gratesand Chrome 16, 17 4
Drip Pans
4OVEN TEMP Control 10 e
5OVEN SET Control 10 @
6AutomaticOvenTimer,
Clock and MinuteTimer 11 @
7Door I.atch 20 0
8Door Locked Light 20 @
9Oven Cleaning Light 20 63
0Oven Vent 11 e
1OvenInterior Light 11 e
2Oven Shelves 10, 17 2
(easdy removedor repositionedon
shelf SU~pWtS)
13 Oven ShelfSupports 10 e
14 Broiler Pan and Rack 15 e
15 RemovableOven Door 17 @
(easily removed forovencleaning)
16 Lift-Up Cooktop 16 e
(locksin up position to simplifi cleaning
underneath)
7RemovableOven Bottom 18 e
7
.r,
h...
,,
All manuals and user guides at all-guides.com
*,.r
.- ... :’ . . -,.. ~
,l.LU>’F’,’
.~-) ~... ~,:7!‘i:.:.:L’ .x, :.:. ;+: ,.->:-.
kl+,-~.vi<%
.2.,,.. ,? 3a,... *L f
.. .?
Yoursurfaceburnersare lighted
byelectricignition,eliminatingthe
needforstandingpilotlightswith
constantlyburningflame.
In case ofapower outage, youcan
lightthe surfaceburners onyour
rangewithamatch. Hold alighted
matchtotheburner, then turn the
knobto theLITE position.Use
extremecautionwhen lighting
burnersthis way.
SWf’%ceBuimeiv Gmtmk
Knobsthatturn the surfaceburners
on and offare locatedon thelower
frontpaneland are marked asto
whichburners theycontrol.
Push thecontrolknob in and turn it
to LITE. Youwill hear alittle
clickingnoise—thesoundofthe
burner lighting.
I
After the burner ignites, turn the
knobto adjust the flame size.
Note:
~Alwayshaveacooking utensil on
thegratebeforeturningonaburner.
The-finishon the grate may chip
without autensilto absorb the heat.
~Check to be sure the burner you
turned on is theoneyou wantto use.
@Be sure the burners and grates are
cool beforeyouplaceyourhand,a
potholder,cleaningclothsor other
materialsonthem.
The flame sizeon agasburner
shouldmatchthecookwareyou
are using.
NEVER LET THE FLAME
EXTEND UP THE SIDES OF
THE COOKWARE.Any flame
larger than the bottomofthe
cookware is wastedheat and only
servesto heat the handles.
whenIllsing ahmimnm or
.ah.miimrn-dad staink?sssteel
pots and pans, adjustthe flame so
the circle it makesis about 1/2inch
smaller than thebottomofthe
cookware.
When boiling9use this same flame
size—1/2inch smallerthan the
bottomof the cookware—nomatter
whatthecookwareismadeof. I&&
cookjust as quickly at agentk boil
as they do at afurious rollingboil.
Ahigh boil creates steamand.cocks
awaymoisture, flavorand nutrition.
Avoidit except for the fewcooking
processeswhichneedavigorousboil.
whenfryingor warmingfoods
instainless !WN?!19castironOJr
enamekware~keep the flame down
lower—toabout 1/2the diameter
ofthe pan.
when frying h‘@assor =m%wmk
~
i
CCBOBLVWW7lowerthe flame even
more.
1
:
1
8
All manuals and user guides at all-guides.com
-,==r Anair adjustmentshutterforeach
~
~&# surfaceburner regulatestheflowof
2air tothe flame.
when the right mw.Hllntof air
flowsinto the burner, theflame
willbe steady,relativelyquietand
haveapproximately3/4”sharpblue
cones. This usuallyresultswhen
theshutterisabouthaMwayopen.
With too much air=,the flamewill
beunsteady,possiblywon’tburn all
thewayaround, and will be noisy,
soundinglikeablowtorch.
With not enoughah-,youwon’t
seeany sharp blue conesinthe
flame,you mayseeyellowtips, and
sootmayaccumulateon cookware.
Air adjustm&t shutter Uf I
Air Adjustment Shutter UI
The air adjustmentshuttersset on
thehood of the valveand are either
lockedin place with Phillipshead
screwsor positioned on theburner
tubesby friction fit.
Toadjust the flow of air to the
burners, ~oosenthe Phillipshead
screwsand rotatethe shutters(or
apply ablade-type screwdriver
againstthe friction-fit shuttersand
push)to allow more or less air into
ihe burner tubesas needed.
,.
.+)
‘:i~
: -; ~,, ~, :r..+,-
f--
1.’’’...
~,,,,-
;,, -
,
r :. ,,* -
:.j=j “
:. .-,,
, ,,. ,
(:-:;,:;::..:-
:-;p,*... e-; .
~:,:;x’l <- ,:., ,.
.:i,f:.. --i.yz
*.:L,.~~;.T: i? f~=,~j; :]]:: ~,-+i~:’ “~) [L,:,,,:;‘- ~“__
d“b ~~. ;---– :
$.-. -<
Muminum: Medium-weight ,’.,..-‘.,
F!-.;-.,!-
~;:=------
-—
cookwm isrecommendedbecauseit !!~--.s;
~:”::..,.
heatsquicklyandevenly.Mostfds f...:..-.,._,,~,:.
;.;-y-::,
brownevenlyinanaluminumskillet. p:j.’;:::-~.
;;--;’:i’*:7
Mineralsinfoodandwaterwillstain
~:.:.:-:;:~;
;_
F...,.-.A,e?-
butwillnotharm aluminum.A;.+;::,~.,-;-
E-3$:+’:-
quickscourwithasoap-filledwool ~~.,..
~;i..;-..-..1,.
~f=.-.,~,,.-=
pad aftereach usekeepsaluminum ~..—.
;,.,.3:-:.
,.1.<,:..
cookwarelookingshinynew.Use
saucepanswithtight-fittinglidsfor !+:... ---.
!-. .
.
cookingwith minimumamountsof ,/..:,!,
_...=
r.B~. --
..—
:.-,..1,.
water. :,...,
r-
,-.
Cast Iron: If heatedslowly,most i<!’%:>-
-
,~....’
:‘.:-‘-s-
killets willgivesatisfactory !7-:J*.1.-.:\
;,--.
:.,-.-..-.-,.’, .
h:-+..- -
results. ~?..?:,-----
.... .. ..-
~.~,—,,,
~..>..,<.2..
Enamelware: Under some ;--.
~t;.::.:.~.!
~--t,:..,-”,
conditions,the enamelofsome ~j:+-~L::7~
cookwaremaymelt.Followcookware .-.....
~.,;{-<s.-:..
~-..-.t,,
gm
P,-’.’”.-
manufacturer’srecommendations F.-
forcookingmethods. [;:[q---,
-:-
A.
~‘.::?v-._,-
[.g:<;!
GkRss:There are twotypesofglass f:
;,><$>?:
}:-_.2::_::
utensils—thoseforovenuseonly $:;.
~:!$>i-!
~$3~:
and thosefor top-of-rangecooking ~~
-:,\JQ.:-
_
(saucepans,coffeeand teapots). ;:>q;p:?;
r~..’
,.-,-7-..
Glassconductsheat very slowly. ..-
~..-:-./,.-. :
:~:.-.?.~,.~:
f.
~:,,;....<
Heatproof Glass Ceramic: Can \,~’(f::;.-
..
;,‘:(cc:,;
be used foreither surfaceor oven !..,-
&“,.’_
;.._-,
_<-:...::;
cooking.It conductsheatvery ..
k
;.—-”.
.
.Gr.a>
.; -
;. ‘::.:3/
slowlyand coolsvery slowly. ~-++
-
Check cookwaremanufacturer’s f::f@.
--
;.-’.
i-”:”-
directionsto be sure it can be used ~.,::
.,-. .
on gas ranges. i,”~’.’-
i, ..’
l,-
}-
Stiinless Steel: This metalalone !.
I
has poor heatingproperties, and I
/
is usuallycombined with copper,
,.
aluminumor other metalsfor
improvedheat distribution.
Combinationmetalskilletsgenerally
.
worksatisfactorilyif usedatmedium
:
>
heatasthemanufacturerrecommends.
~
!
All manuals and user guides at all-guides.com
., 1, *,*
‘‘~ i;~’~:~n$llf-ifm
--\*_..\ ,,y} f!%:?fi-;a
..-..~i.-..,-.!.r. ..x :. !.’:,. :.. ’=.,...& L
The Ow’enlE9REH?M3’and broil
burner on ymmrange are liginted
byekctrncignition.
CAUTION:DO Nm MAKEANY
ATTENHTTO OPERATETHE
ELECTRXCIGNITION OVEN
DURING AN ELECTRICAL
POWERFAILURE, Resumption
of.electricalpowerwhen OVEN
TEMP and OVENSET controls
are in anypositionother thanOFF
willresult in automaticignitionof
theovenor broiler burner and
couldcause severeburnsif, atthe
timeyou were attemptingto light
theburner with amatch.
Before Usiag l’ur oven
LLook at the controls. Besure
youunderstandhowto setthem
properly.
2. Check the insideof theoven.
Look at the shelves.Practice
removingand replacing them
whilethe oveniscool.
3. Read the informationand tips
on the followingpages.
4. Keep this book handy where you
can refer to it—especiallyduring
the first fewweeksofgetting
acquainted with your oven.
,-. <Tl:;--..kZ*{J<:
‘~$’:j~;~$:tdrLk:,L.p,,~
The controls for your ovenare
marked OVEN T’EMPand OVEN
SET.
‘H’!kCWET4SET ixmtird hassettings
forPREW54T,EM&m,BROIL,
‘H~ED BAKE,CLEAN and OFF.
%Yhenyou turn the knob to the
desired setting, the proper bu.1-mms
are activated for that opemtion.
PR.EHEAT-Use thissettingto
prel-wattheovenforcakesand
delicatefoodswhererecipescall
forpreheatingtheoven.The
top (broil)burner comesonfirst.
In about8minutesit shutsoff
automatically.Then thebottom
ovenburner comesorIand
maintainsthetemperatureset
on theOVENTEMP control.
Do not place food in the oven
during the first 10‘minuteswhen
preheating because the broiler
burner ison during preheat.
BAKE-Use thissettingforall
normal ovenoperationswhere
preheatingtheovenisnotrequired—
for example,for cookingroastsor
casseroles. Only thebottomoven
burner operatesduringbaking.
BllOI&Use this settingfor
broiling. Only thetop (broil)
burner will operate.
TllMllD BAKE-Use thissetting
to turn the ovenon and offat
specifiedtimes when you want
cookingto start and stop. See
AutomaticOven Timer on next
page.
CLEAN—Use this settingforthe
self-cleaningfunction only.
Ol?F’-Shuts offpowerto theoven
controls and ovenwill notoperate.
The OVEN TEMP and OVEN SET
controls shouldbe turned to OFF
whenever the ovenisnot in use.
The OVEN TE2WPcontrol
maintainsthe temperature you set
for normal ovenoperation as well
as for broiling and self-cleaning
the oven.
For normal oven ofperatima9turn
the knob to the desired temperature
which is marked in 250 increments.
It will normally take30 to 60
seconds before the flame comes on.
Afier the ovenreaches the selected
temperature, the ovenburner cycles
—offcompletely, then cmwith a
full flame—-tokeep the oven
temperature controHed.
Caution:DOInotturn the‘knob
pastBROILwhenbroiling.If
youdo, the broilburner willnot .
operate. o
B&rself-cleaningoperation,turn
theknobpastthetemperature
markingsall thewayto the
CLEAN position.Alwavsturnthe
OVENT~MP andOVENSET
controlsto OFF whenoven
operationis completed.
OWEIshdws
The shelvesaredesignedwith
stop-locksso whenplaced correctl
on the shelfsupports,they will sto
beforecoming completelyoutof
the ovenand will nottilt when you
are removingfoodorplacingfood
on them.
When placingcookwareon ashelf,
.=
pullthe shelf outto the “stop”
position. Place the cookware on
the shelf, then slidethe shelfback
intothe oven. This will eliminate
reaching into thehot oven.
Toremovethe shelvesfrom the
ovenfor cleaning, pull outto stop I
position, lifl.up on front and pull
~
~
them out. j
r
(
The ovenhas four shelf supports—
.
A(bottom), B, Cand D(top). Shelf
I
positions for cooking are suggested
i
on Baking and Roastingpages. To
removethe shelf supports, merely
lift them off the “U’%haped
brackets at the top ofthe oven. /..
()
.>,
J
All manuals and user guides at all-guides.com