manuals.online logo
Brands
  1. Home
  2. •
  3. Brands
  4. •
  5. Hotpoint
  6. •
  7. Range
  8. •
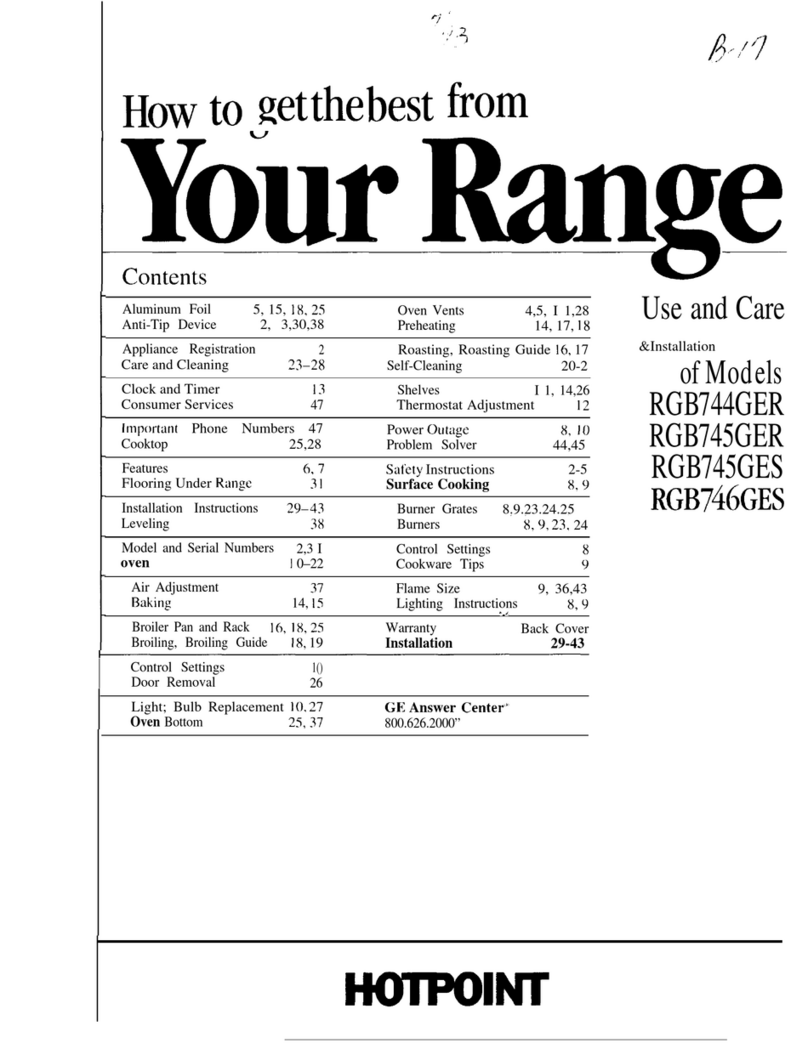
  9. Hotpoint RGA5121 Installation instructions

Hotpoint RGA5121 Installation instructions

This manual suits for next models

10

Other Hotpoint Range manuals

Hotpoint RGB790SERSA User guide

Hotpoint

Hotpoint RGB790SERSA User guide

Hotpoint RB525DPCT - 30" Electric Range User manual

Hotpoint

Hotpoint RB525DPCT - 30" Electric Range User manual

Hotpoint RS734GP Specification sheet

Hotpoint

Hotpoint RS734GP Specification sheet

Hotpoint RB792SRSA User instructions

Hotpoint

Hotpoint RB792SRSA User instructions

Hotpoint RGB528BEACT Service manual

Hotpoint

Hotpoint RGB528BEACT Service manual

Hotpoint RB536DPWW - 30" Electric Range User manual

Hotpoint

Hotpoint RB536DPWW - 30" Electric Range User manual

Hotpoint RGB526DETBB User instructions

Hotpoint

Hotpoint RGB526DETBB User instructions

Hotpoint RGB528PEN - 30 Inch Gas Range User guide

Hotpoint

Hotpoint RGB528PEN - 30 Inch Gas Range User guide

Hotpoint RA824DDWW Programming manual

Hotpoint

Hotpoint RA824DDWW Programming manual

Hotpoint RGB508 Installation guide

Hotpoint

Hotpoint RGB508 Installation guide

Hotpoint HDM67G0CCX/UK User manual

Hotpoint

Hotpoint HDM67G0CCX/UK User manual

Hotpoint RGA720PKWH - R 20 Inch Gas Range Manual

Hotpoint

Hotpoint RGA720PKWH - R 20 Inch Gas Range Manual

Hotpoint RGB518PCH Service manual

Hotpoint

Hotpoint RGB518PCH Service manual

Hotpoint RB757BH User instructions

Hotpoint

Hotpoint RB757BH User instructions

Hotpoint RS778GJ Installation instructions

Hotpoint

Hotpoint RS778GJ Installation instructions

Hotpoint RGB735WELWW Manual

Hotpoint

Hotpoint RGB735WELWW Manual

Hotpoint RB526CWW User instructions

Hotpoint

Hotpoint RB526CWW User instructions

Hotpoint RGB524PPH Manual

Hotpoint

Hotpoint RGB524PPH Manual

Hotpoint RB525DDCC User guide

Hotpoint

Hotpoint RB525DDCC User guide

Hotpoint RGB735DEP User manual

Hotpoint

Hotpoint RGB735DEP User manual

Hotpoint RF43 Installation instructions

Hotpoint

Hotpoint RF43 Installation instructions

Hotpoint RGA720 Operating instructions

Hotpoint

Hotpoint RGA720 Operating instructions

Hotpoint RA720 Operating instructions

Hotpoint

Hotpoint RA720 Operating instructions

Hotpoint RB740BHCT User instructions

Hotpoint

Hotpoint RB740BHCT User instructions

Popular Range manuals by other brands

Maytag MGR5875QDW - 30 Inch Gas Range Use and care guide

Maytag

Maytag MGR5875QDW - 30 Inch Gas Range Use and care guide

Frigidaire FFGF3024SS use & care

Frigidaire

Frigidaire FFGF3024SS use & care

Capital Precision Series GCR484W Specifications

Capital

Capital Precision Series GCR484W Specifications

Officine Gullo GGS8P Installation and use instruction

Officine Gullo

Officine Gullo GGS8P Installation and use instruction

LG LSD4913 Series owner's manual

LG

LG LSD4913 Series owner's manual

Kenmore 4101 - Elite 30 in. Slide-In Electric Range installation instructions

Kenmore

Kenmore 4101 - Elite 30 in. Slide-In Electric Range installation instructions

Moffat Blue Seal Evolution G576 Technical data sheet

Moffat

Moffat Blue Seal Evolution G576 Technical data sheet

CornuFé C1NF user guide

CornuFé

CornuFé C1NF user guide

GE JGS650SEFSS Dimensions and installation information

GE

GE JGS650SEFSS Dimensions and installation information

LG LDG3015ST Manual De Propietario

LG

LG LDG3015ST Manual De Propietario

Whirlpool RF350PXP Use and care guide

Whirlpool

Whirlpool RF350PXP Use and care guide

Samsung FCQ321HTUW Service manual

Samsung

Samsung FCQ321HTUW Service manual

Kenmore 790.45712 Use & care guide

Kenmore

Kenmore 790.45712 Use & care guide

Wolf CHR CHSSR owner's manual

Wolf

Wolf CHR CHSSR owner's manual

Smeg Built-in Microwave Oven Instructions for the user

Smeg

Smeg Built-in Microwave Oven Instructions for the user

Zanussi ZCG054G user manual

Zanussi

Zanussi ZCG054G user manual

GE JCSS630 quick start guide

GE

GE JCSS630 quick start guide

Samsung NX58M9960P series installation manual

Samsung

Samsung NX58M9960P series installation manual

manuals.online logo
manuals.online logoBrands
  • About & Mission
  • Contact us
  • Privacy Policy
  • Terms and Conditions

Copyright 2025 Manuals.Online. All Rights Reserved.

How toget
thebestfrom
-— .. ............
“----
f ,?
‘...--..,
useandcm-wofGasModels
with with
standing ElectricIgnition
Pilot RGA5121
RGA512 IRGB5241
lRGB52~ RGEH281
RGB528 RGB528GI
RGB528G RGB628GI
RGB628G RGH646GI
Featuresof’-yourrange pti
Lightinginstructions p8-’=lo
surfaceCooting pll
ovencooking -pU!!
‘.
—
...
Betore LJsingYour Range . . . . . . 2
Safety Instructions ...........4-5
Features of Your Range . . . . ...6-7
Lighting Instructions
—Standing Pilot .............8
Lighting Instructions
—Eiectric ignition Pilot ...... 9
Air Shutter Adjustment . .. . . . . 10
Surface Cooking . . . . . . .. . . . . . 11
Using Your Oven ...........o .12
How To Bake................. 13
How To Roast ................14
How To Broil ................. 15
How To Care For
Your Range . . . . . . . . .. . . . . ..l6
Continuous Cleaning
Oven Care . . . . . . . . . . . . . . . . . 17
Baking Chart . . . . . . . . . . . . . . . . .18
Roasting Chart . . . . . . . . . . . . . . .19
Broiling Chart . . . . . . . . . . . . . . . .20
Cleaning Chart ............... 21
The Problem Solver . . .. . . . . . . 22
if YouNeedSewice ............23
Warranty .............Back Cover
Pilot Sys?e!ms
Yourgas rangeis equipped with
either aStanding Pilot or Electric
Pilot ignition System. Be familiar
with which type of system your
range is equipped.
McMHsRGB524, RGB528,
RGB528G, RGB628G, RGA532
Standing Pilot System has aeon-
tinuous flame glowing atall times.
Models RGB5241, F?GB5281,
RGE1528GI,RGB628GI,
13GH646GI, RGA5121
Electric Pilot Ignition System uses
an electric spark to ignite the
burners and does not require use
ofa match unless electrical cur-
rent to your range is interrupted.
—
;
&
..
$gi#yk!aid“mki Ehmk carefully
/rwili help youoperateand
maintainyour newRangeproperly.
Keepit handyfor answerstoyour
questions.
Ifyoudon?understandsomething
orneed morehelp,write (include
yourphone number):
ConsumerAffairs
Hotpoint
Appliance Park
Louisville,W40225
.!odelNo.
if l?fx.1Received
aDamaged Range
Immediatelycontactthe dealer(or
builder)that soldyouthe Range.
save timeandnmm?y.
Before you request service,
check the Problem Solver on
page22. Hlistsminorcausesof
operating problemsthat youcan
correctyourself.
writeDown the Mow and
serial Numbers
You’llfind them on a label located
underthe cooktop.
Thesenumbers arealso onthe
Consumer ProductOwnership
RegistrationCardthat camewith
yourRange. Beforesending in this
card,please write these numbers
here:
SerialNo.
Usethese numbers in any
correspondence or service calls
concerning your Range.
FOR YOUR SAFETY
(mm OFF allrange
controls)
ifyousmellgas:
1. open lwindows
2= Don’ttouch
electrical swmhi?s*
3. Extinguishany open
flame
4. Immediatelyfcal!
yourgas supplier
‘Don’t turn electric
SWvittmeson or off
because sparks may
ignitethe gas.
/-“’.->
..
j
i.. ..J
._..
3
1,
0
~!Hafe the irnstaikr dwnv you
the hxxtkm dthe range gas
cut-off valve and how to shut
HGMif nfxx.?ssm’y.
~Have Nimstalkxiland prop”
edy grounded by aqualified
ikwtakr, in accordance with
the installation instructions.
Any adjustment and service
should be performed only by
qualified gas range installers
or service technicians.
@Locate range out of “kitchen
traffic path” and out of drafty
locations to prevent pilot out-
age and poor air circulation.
~Be sure your range is cor-
rectly adjusted by aqualified
service technician or installer
for the type of gas (Natural or
LP) on which it is to be used.
Gas can be converted from
one type to the other. See
Installation Instructions.
QAfter prolonged use of a
range, high floor temperatures
may result and many floor
coverings will not withstand
this kind of use. Never install
the range over interior kitchen
carpeting, vinyl tile or linoleum
that cannot withstand such
type of use.
Be sure electrical power
cord is not touching or draped
over the oven vent located in
the center of the back of the
range.
.r.“ ? ,..+ ~.,
!,.:$,jlij#g $ffy.!! ;>Q .W,“~’‘~g::IE
“Don’t k?aveCI-iikiremalone or
unattended where arange is
bat or in operation. They could
be seriously burned.
~~Don’t allow anyone !0 climb,
stand or hang on the door,
broiler compartment or range
top. They couid damage the
range and even tip it over
causing severe personal injury.
~CAUTBON: Do NOT STORE
ITEMS OF INTEREST TO
CHILDREN IN CABINETS
ABOVE ARANGE OR ON THE
BACKSPLASH OF ARANGE—
CHILDREN CLIMBING ON
THE RANGE TO REACH
ITEMS COULD BE
SERIOUSLY lNJURE~.
QLet burner grates and other
surfaces cod before touching
them or leaving them where
children can reach them
@Wear proper clothing. Loose
fitting or hanging garments
should never be worn while
using the appliance. Flam-
mable material could be
ignited if brought in contact
with flame or hot oven sur-
faces and may cause severe
burns.
c;’Never use your appliance for
warming or heating the morn.
Prolonged use of the range
without adequate ventilation
can be hazardous.
‘=’DO not use water on grease
fires. Never pick up a flaming
pan. Turn off burner, then
smother flaming pan by cov-
ering pan completely with well
fitting lid, cooking sheet or flat
tray. Flaming grease outside a
pan can be put out by covering
with baking soda or, if avail-
able, amultipurpose dry chem-
ical or foam.
“Do nc$tstore f!ammab!e
materials in an oven or near
?he Cclokhclpm
Do not let Coo!{ing grease
or other W/ntmable Imaterials
acxumu!eie in We range W
~j~~~~~m
4
unattended at I=+!(3HIflame w3t-
tings. Boilover causes smoking
and greasy spillovers that may
catch on fire.
~~Top Burner flame size
should be adjusted so it does
not extend beyond the edge of
the cooking utensil. Excessive
flame is hazardous.
Guse only dry pclthohWrs—
moist or damp potholders on
hot surfaces may result in
burns from steam. Do not let
potholders come near open
flames when lifting utensils.
Do not use atowel or other
bulky cloth.
~To minimize burns, ignition
of flammable materials, and
spillage, the handle of acon-
tainer should be positioned so
that it is turned toward the side
or back of the range without
extending over adjacent
burner.
G~~~’~ ~~~ ~~~~~~~~ f~~~
anywhere in Me oven except
as described in this book.
Misuse could result in afire
hazard or damage to the
range.
~Always turn surface burner
to OFF before removing
utensil.
oWatch foods being fried at
HIGH flame setting.
r, Never block the vents (air
openings) of the range. They
provide the air inlet and outlet
which is necessary for the
range to operate properly with
correct combustion.
1
Keep meappmmaearea 1dear and ikwefrom‘corm” ,]
/--’”1
(.%
,,
...J —.- .-.. -., ,,
f%;~ !!%xds forfryingS1’m.ildbe
k%$jasc&y as possible. Frost on
-%$+{rozenfoods or moisture on
c>
z!!’?
~esh foods can cause hot fat
to bubble up and over sides
of pan.
~Use least possible amount
of fat for effective shallow or
deep-fat frying. Filling the pan
too full of fat can cause spill-
overs when food is added.
~~If acombination of oils or
fats will be used in frying, stir
together before heating, or as
fats melt slowly.
GAlways heat fat slowly, and
watch as it heats.
‘; Use deep fat thermometer
whenever possible to prevent
over-heating fat beyond the
smoking point.
~~Use Proper Pan Size—Avoid
pans that are unstable or easily
tipped. Select utensils having
flat bottoms large enough to
properly contain food avoiding
boilovers and spiiiovers, but
arge enough to cover burner
rate. This will both save
cleaning and prevent hazard-
ous accumulations of food,
since heavy spattering or spill-
overs left on range can ignite.
Use pans with handles that can
be easily grasped and remain
cool.
-Use only glass cookware that
is recommended for use on gas
cooktops or gas ovens.
LI If range is located near a
window, do not use long cur--
tains which could blow over
the top burners and create
afire hazard.
@When apilot goes out, you
will detect afaint odor of gas
as your signal to relight pilot.
When relighting pilot, make
sure burner controls are in
“OFF” position and follow
instructions described on fol-
lowing pages to relight.
~If you smell gas and you
have already made sure pilots
are lit, turn off the gas to the
range and call aqualified ser-
vice technician. Never use an
open flame to locate aleak.
E3ddng, BnmmJ and Rhxx?mwJ!
~Do not use oven for astorage
area.
QWand away from the range
when opening cwen door. The
hot air or steam which escapes
can cause burns to hands, face
and/or eyes.
oKeep oven free from grease
build up.
~Place oven rack in desired
position while oven is cool.
‘Pulling out shelf to the shelf
stop is aconvenience in lifting
heavy foods. It is also apre-
caution against burns from
touching hot surfaces of the
door or oven walls.
Don’t heat unopened food
containers in ‘ii-w oven. Pres”
sure could build up and the
container Could burst causing
an !k@N’y.
-When using cooking or
roastin~ bags in oven, follow
the manufacturer’s directions.
~~When cooking pc@Yfollow
our directions exactly and
always cook the meat to at
least 170°. This assures that,
in the remote possibility that
trichina may be present in the
meat, it will be killed and meat
will be safe to eat.
@Always remove broiler pan
from broiler compartment as
soon as you finish broiling.
Grease left in the pan can
catch fire if oven is used
without removing the grease
from the broiler pan.
~When broiling, if meat is too
close to the flame, the fat may
ignite. Trim excess fat to pre-
vent excessive flare-ups.
GMake sure broiler grill pan is
in place correctly to reduce the
possibility of grease fires,
~If you should have agrease
fire in the broiler grill pan, turn
off oven, keep drawer closed to
contain fire until it burns out.
Cx%mkag Ycw Range
QClean only parts listed in
this Use and Care Book.
Keep range clean and free
accumulations of grease
spillovers which may ignite.
You R!c?edservice!
Read “The Problem Solver”
on page 22 of this book.
oDon’t attempt to repair or
replace any part of your range
unless it is specifically recom-
mended in this book, All other
servicing should be referred
to aqualified technician.
I,
:0
,
I
!,
5
... ,
1.
2.
3.
4.
?5?
6.
7.
8.
film
12.
14.
15.
16.
17=
18.
re
o
pc
cc
Ust
on
BN
cat
foo
int[
Brc
Opc
Bro
Wol
suri
i
Clock, Minute Timer, (See page 12for
information on setting.)
Hinged Gmktop. Lifts for easeof
cleaning under burners and lighting of
surface pilot.
Surface Burners.
Burner Grates. Must be secure~yseated
in cooktop before cooking. Remove
before cleaning or lifting cooktop.
Chrome Drip Pans.
ModeJ and Serial Number Plate. Lift
hinged cooktop and locate plate on bar in
middle of burners. (Seepage 3.)
Controls for Surface Burners. Push in to
turn and adjust cooking flame.
OvenTemp Control. Push in and turn
:0desired oven temperature or to broil
oosition to turn oven or broiler com-
partment on.
Jpper Oven Temp ControL Turn to
jesired oven temperature.
Iwen Light Button. Push in to turn on
~terior oven light during cooking when
‘oor is closed. (On Model RGH646GI,
Iis button operates the interior oven
ght in both ovens simultaneously.)
Iterior Oven Light.
WenShelves. May be easily removed or
positioned on shelf supports.
ven Shelf Supports. Allow different
]sitions for cooking flexibility. See
~okingcharts for recommended
)sitions.
fen Frame.
movable Oven !Panel.This panel
;ated in bottom of the oven can be
moved for cleaning.
mDoor. May be removed for cleaning.
oihw Compartment. Separate cavity
adfor broiling. Pan can be positioned
one of three levels.
>iier Pan and Rack. Pan is used to
ch drippings, rack is used to support
Idand insure proper drainage of juices
]pan. (See page 15 for instructions. )
)iler Compartment Docw. Hinged to be
med and closed for easy access to
tiler Pan and Rack.
rk Light. Push in to turn on light over
‘ace cooking area.
@
.
—ModelRGB524
ModelRGB5241
—
\i
-..
3
.,.-
ModelRGB528G ModelRGB628G
ModelRGB528G4ModelRGB628GI
(Have Shmiard Ovens) (Have Continuous Clean Ovens)
Model RGH646GI
ModelIWEUW5%2
Mack4RGA5V!I
Sianding Pibt Models
@%x.teisRGA512,RGWXM,RGB528,
FiGB528G,and RGB628G)
HCnJ?f%3L@--itst-l&Kx? E3urnef’s
Your range is equipped with a
standing pilot light that must be
match lit initially.
Usethe following steps to light
your standing pilot range. BE
SURE the burner control knobs
are in the “OFF” position.
Step 1:Lift up cooktop and raise
the support rod and set it under
Frontedge of cooktop.
Step 2: Locate the two pilots.
Step 3: Light each pilot with a
match.
Step 4: Return support rod to
down position and lower the
cooktop.
Your burners are now ready for
use. When you want to use the
burner-s,simply turn the burner
knob and the burner will light.
if the burnersfail toignite,see
hi? Problem solver cmpage22 i
HCw !0 LicJMthe OW?ITPilot
To light the oven pilot on standing
pilot models, usethe following
steps. BE SURE OVEN TEMP
Knob is at OFF position.
Note: You may haveto remove the
entire broiler compartment. To do
this, lift the broiler compartment
slightly until it dislodges. Then
gently pull it toward you and out
of oven.
Step 1: Hold alighted match over
the opening in the top of the pilot
located at the rear of the oven
broiler compartment. (Note: A
long match or match holder
should be used to light pilot.)
Step 2:When the oven pilot is lit,
turn the OVEN TEMP Knob from
OFF position to any temperature
setting. You will see the flame
increase in size. If you see no
flame, pilot is not lit. Turn Knob
to OFF and begin lighting Steps
again.
NOTE: It may take up to 30
seconds for the oven burner to
light after the OVEN TENIP Knob
has been turned on. The begin-
ning of gas flow will be indicated
by aslight hissing sound and
oven burner ignition will occur
almost immediately.
Replace the broiler compartment.
To do this, insert the broiler com-
partment in alevel position, lift
slightly and then drop in position.
Push the broiler compartment into
the oven.
I!/%x’Air shutter Adjustment,
See Page 10. I
K.-,
.,- —----=.=-=.--—! ‘“--
.
(On Model RGH646G1 Only)
cJ~q-) j: Turn the burner control
knob to the LITE position.
S~ep~: The burner will then light.
(You will hear adistinct popping
noise at surface burners and in
the oven. This is normal. )
.Turn the burner control
~~:.,m,- ~
~-’~’=”t~J“
knob to the desired setting or to
“OFF”. The noise will then stop.
-~+...~.~...~ ;,..,,;~.:>...!.* ,.= f--=j~fp+ ~=h.”
-,, ,4..
k.- L.’ s,f:,: L. Lt””$i:, iiib .=.‘,#,
~,)j:c~~
To light the oven pilot on electric
ignition models, use the following
steps.
Ste~ 1: Depress the OVEN TEMP
Kn; b and turn to the desired tem-
perature setting. (You will hear a
ciistinct popping noise at all sur-
face burners and in the oven.)
.-—aSN?p2: The oven pilot will light in
‘“”’‘] ~~-~~seconds+ (The noise at the
~...~’
‘-”” sUrffI~e !JLlrTIeIT5 will s~c)p.)
....
‘-’-%tq: 3: Your oven pilot is now lit.
ij
\-L-=..,-”
Pwwifm’ Light weL@yw-w’Ch@n
!(mxkd RGH646GI)
The upper oven is equipped with
aglow bar igniter rather than a
pilot. To iight the glow bar igniter,
proceed asfollows.
Step 1: Depress the UPPER OVEN
TEMP CONTROL and turn to the
desired temperature setting. (This
will energize the glow bar igniter
and ignite the oven burner.)
Step 2: After abrief delay, the
oven burner will light.
1
If the burners fail to ignite, see
the Problem Solver on page 22. I
operatingYCNJrF&N%geDuring
an Electrical Pcw?m”!Faik4E’e
NOTE: These instructions are for
electric ignition models only.
The upper oven on Model
RGH646GI will not operate
during apower failure.
Ligi%ting meSwface BUl”rw%
During an electrical power failure,
use the following steps to light
surface burners,
$$~~~“j: Hold alighted match to
the’desired burner head.
step 2: Turn the burner control
knob to LITE. (The burner will
then light. )
,.3: Adjust the flame to the
:~,~<+f?
desired position.
.,—.
-.~!; r., ~ ...-..,~ .
–:, :L+.”:”iL‘.=.”E‘:
When lighting pilots or top
burners be sure all controls are
in OFF position.
Strike match first and hold in
position before turning knobs
ON. .-— .,,.“..-
%
Light!ng U’K?CY#enBurner m
~ts
Ed
During an electrical power failure, ~fi:
*+
usethe following steps to light the &-i
~b
oven pilot. ~~
Es
NOTE: You may haveto remove k.
the entire broiler compartment. ~
I
To do this, lift the broiler compart- ~
ment slightly until it dislodges.
Then gently pull it towards you
and out of the oven.
(On Model RGH646GI Only)
Step 1: Turn the OVEN TEMP
Knob past the 140degree setting.
Wep 2: Hold alighted match to
the pilot and when lit, quickly re-
move your hand from the broiler
compartment. (A long match or
match holder should be used to
light pilot.)
NOTE: After the oven pilot is lit,
the oven burner will ignite in 30-
40 seconds. Therefore, you must
quickly remo~e your hand from
the broiler compartment.
Replace the broiler compartment.
To do this, insert the broiler com-
partment in alevel position, lift
slightly and then drop in position.
Push the broiler compartment into
the oven.
For Air S13uma’AdjLMm2!rdi,
seePage 10. —1 ,
Ir
(
(<
g
—.—.-—...-—...————-..—.—-----.. .... .. .... -.-------
.———— ——-
—- ......_
.—.—————..—. ...—.-——-—.-—.—
.
GxMclp Burners
The normal flame should be
steady, relatively quiet and have
approximately 1/2”sharp blue
mm. if this is not the case, the
air shutter needs adjusting.
To adjust air, lift hinged cooktop
and rest cooktop on support rod.
The air shutter adjustment for
each burner is located at the open
end of the venturi tube and rests
on the hood of the valve. Simply
rotate the air shutter to allow
more or less air into burner tube
as needed.
Pilol
Ad”uslment
A!crew~
lter
wpipe
If the pilot needs adjusting, simply
turn the adjusting screw located
on the pilot filter.
,...!!.. ,.,.,,$, c
l-foodOrific8hmerMm
The oven burner flame should be
adear blue with distinct inner
cones 1/4to %inch long. Asoft
flame requires more air, anoisy
blowing flame requires less air. If
adjustment is needed, you must
remove broiler compartment.
Next, loosen the screw located at
the top of air shutter, then rotate
air shutter to correct setting.
Retighten screw asshown in
illustration.