Houzetek AOK-5006K User manual

AOK-5006B/2039B English manual (US)
Please read the operating instructions carefully to familiarize yourself with the features and modes of
operation before using the instrument.
Keep the manual for future reference and pass it on with the device, if you pass on the device to
other users.
NOTE: Always remember to use high quality batteries & change them at least once per year.
PACKAGING CONTENTS
1 x weather station
1 x outdoor sensor
1 x AC adaptor
1 x instruction manual
LCD DISPLAY


Overview of icons and buttons
Front side and display:
1. Weather 2. Channel recycling icon
3. Channel 4. Comfort face
5. Trend for indoor temperature 6. RF symbol
7.Trend for outdoor temperature 8. Max/Min for outdoor temperature and humidity
9. Indoor temperature 10. Max/Min for indoor temperature and humidity
11.Low battery for indoor unit 12. Indoor humidity
13.Trend for indoor humidity 14. Alert for outdoor temperature
15.Trend for outdoor humidity 16. Outdoor humidity
17.Low battery for outdoor sensor 18.Time
19. WEEKS 20.Day of week
21. Month 22. Alarm
23. Date 24. Hour of history
25. Air pressure 26. Moon phase
27.Light a/b/c mode 28.Outdoor temperature
29.Icy alert 30. Trend for air pressure
Top side:
Press
button
Press and hold
(3
se
c
onds)
(A)
MODE
Time/Alarm1/Alarm 2 switching
S
etting
the time
f
or
m
a
t
,
time zone
shi
f
t
,
hour
s
,
year,
d
a
t
e
,
day
of the
week
language ,,air pressure unit, C/F .
(B) CH
Channel 1、2、3 switching
Re- registration the CHANNEL data
(C) ALERT
ON/OFF temperature ALERT
Setting the temperature ALERT
(D) SNOOZE
LIGHT
1. Activates alarm snooze
2. Display black light (when without
power adaptor plugged in)
Air pressure reading adjust

.G
= DC 5.0V adaptor power jack
Wireless sensor
H= Outdoor temperature and humidity
I = LED of signal transmission from the sensor
J= A hole to hang the device on the wall
K= channel switch
Getting Start with Power Supply
Insert Batteries
1. Gently remove the stand downwards and remove battery compartment cover from the main unit.
2. Insert the batteries, matching the polarities (+/-).
DC Power :
1. Put the power cable pass through the hole in the stand, plug the power cable to the power
jack and plug the power adapter into a suitable power outlet.
NOTE —It is recommended to insert the battery as a backup power.
Remote Sensor
1. Open the remote sensor battery door, insert the batteries, matching the polarities (+/-)
Note: To prevent water from entering the sensor, it is important to make sure the battery lid closes
tightly.
(E)
∧•
MEM
Check the MAX/MIN temperature and
humidity data ; One step forward in
setting
Clear the MAX/MIN temperature and
humidity data
(F)
∨•
HISTORY
Check the history of air pressure
One step back in setting

2. Place the sensor near the main unit in order to establish an effective wireless transmission. Do not
place the sensor outside until the transmission have be confirmed.
3. Observe the indoor unit LCD screen to see OUT temperature and humidity displayed to confirm the
transmission completed
NOTES:
•First plug in the adaptor or insert the batteries of main unit, then insert the batteries of the outdoor sensor
in 3 minutes after the main unit is powered on, to assure of the sensor data received well.
In case of the outdoor sensor data received failure, please press “CH”key for more than 3 seconds to
synchronize the RF signal.
•Every time the power adaptor unplugged and with no batteries inserted, the main unit will lose all the
weather data.
•Every time the outdoor sensor batteries are replaced, the sensor will synchronize with the main unit again.
You must press the “CH”key for more than 3 seconds to synchronize the RF signal.
Mounting the main unit
The main unit can be placed onto any flat surface or wall mounted at the desired location by hanging hole, It is
important to check that the radio signals (from the sensors and from the DCF77 time signal) can be received
before mounting.
Mounting the outdoor sensor
Suggest the outdoor sensor to be hung on as below showing, better not stand it at outside place,try to
avoid direct sun shine or rain as much as possible.
Initial Operation
•After inserting the batteries or adaptor plugged in, the altitude flashing in meters, press “
∧
•MEM
“or
“
∨
•HISTORY
“to set the altitude of your position, then press ”SNOOZE
•
LIGHT”to confirm

•The weather icon flashing, press “
∧
•MEM
“or “
∨
•HISTORY”
to choose the weather, then
press ”SNOOZE/LIGHT” to confirm
•The main unit will connect with the outdoor sensor by RF signal.
The RF signal symbol at the out area will flash.
•This process takes about 3 minutes. Then the display shows the outdoor temperature /humidity, in case of
failure of reception , please press “CH“for more than 3 seconds to receive again.
Information
•Please observe a minimal distance of 2.5m to sources of interference such as televisions or computer
screens.
•The radio signal is weaker in rooms with concrete walls (e.g. in the basement) and in office buildings. For
extreme cases, please put the main unit near a window.
•There are less atmospheric disturbances at night. A radio time signal reception is usually possible at that
time. One synchronization per day is sufficient to keep the time display accuracy at 1 second.
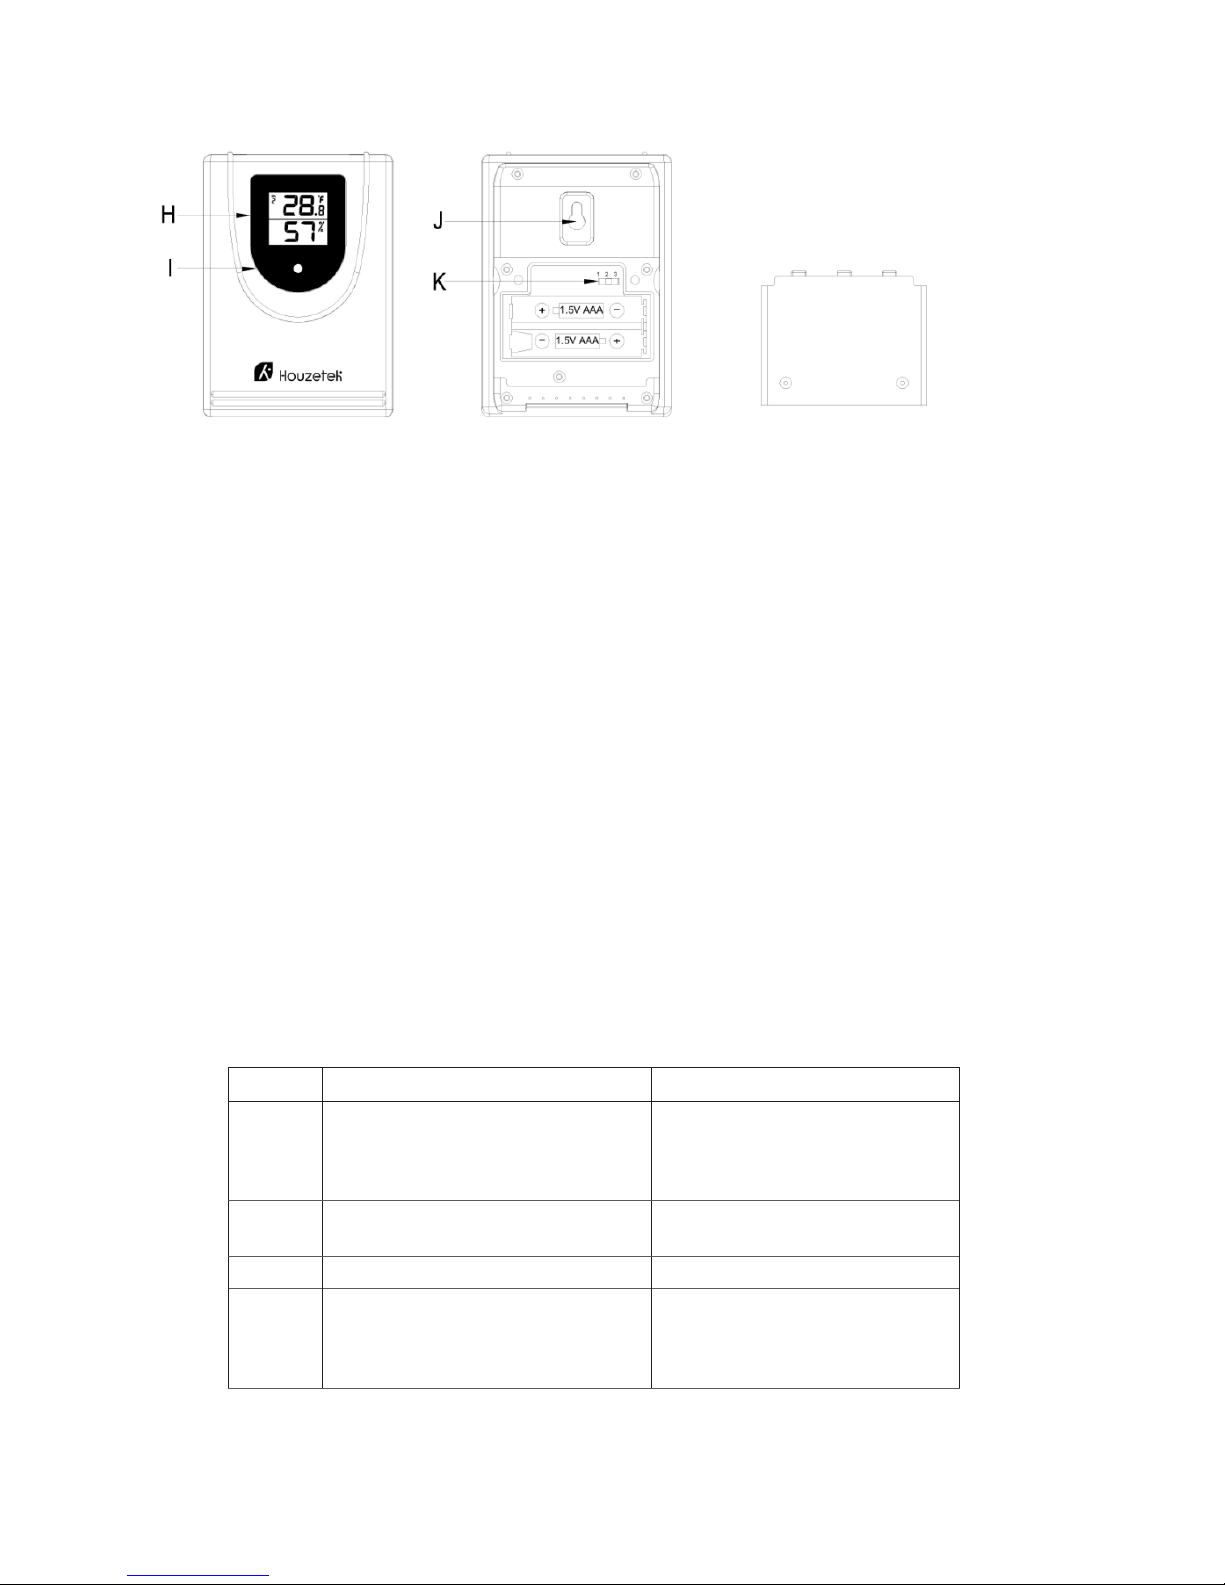
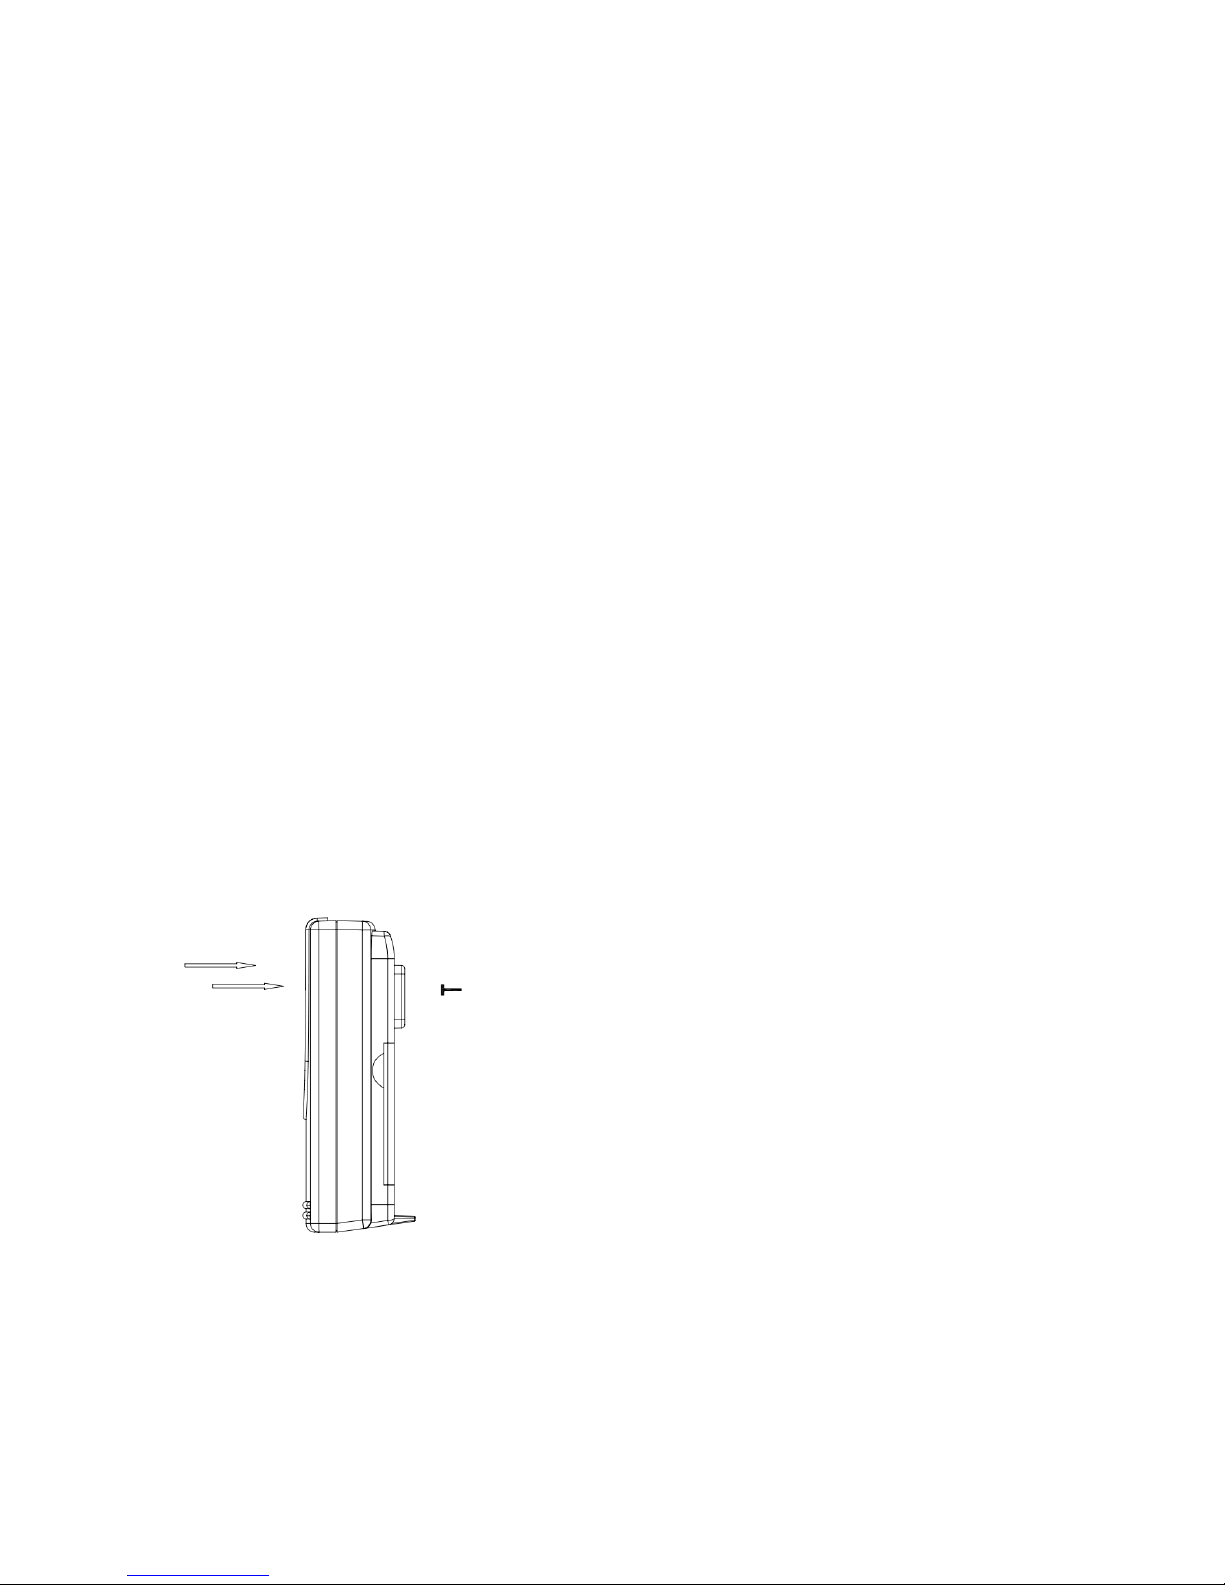
Wireless connection to the outdoor sensor
You can read the data of up to 3 sensors at one weather station.
Use the sliding switch for each outdoor sensor to select the outdoor sensor channel
Press the key “CH“ in main unit to select a channel.
Press and hold the key “CH“ in main unit for 3 seconds to search for outdoor sensor .
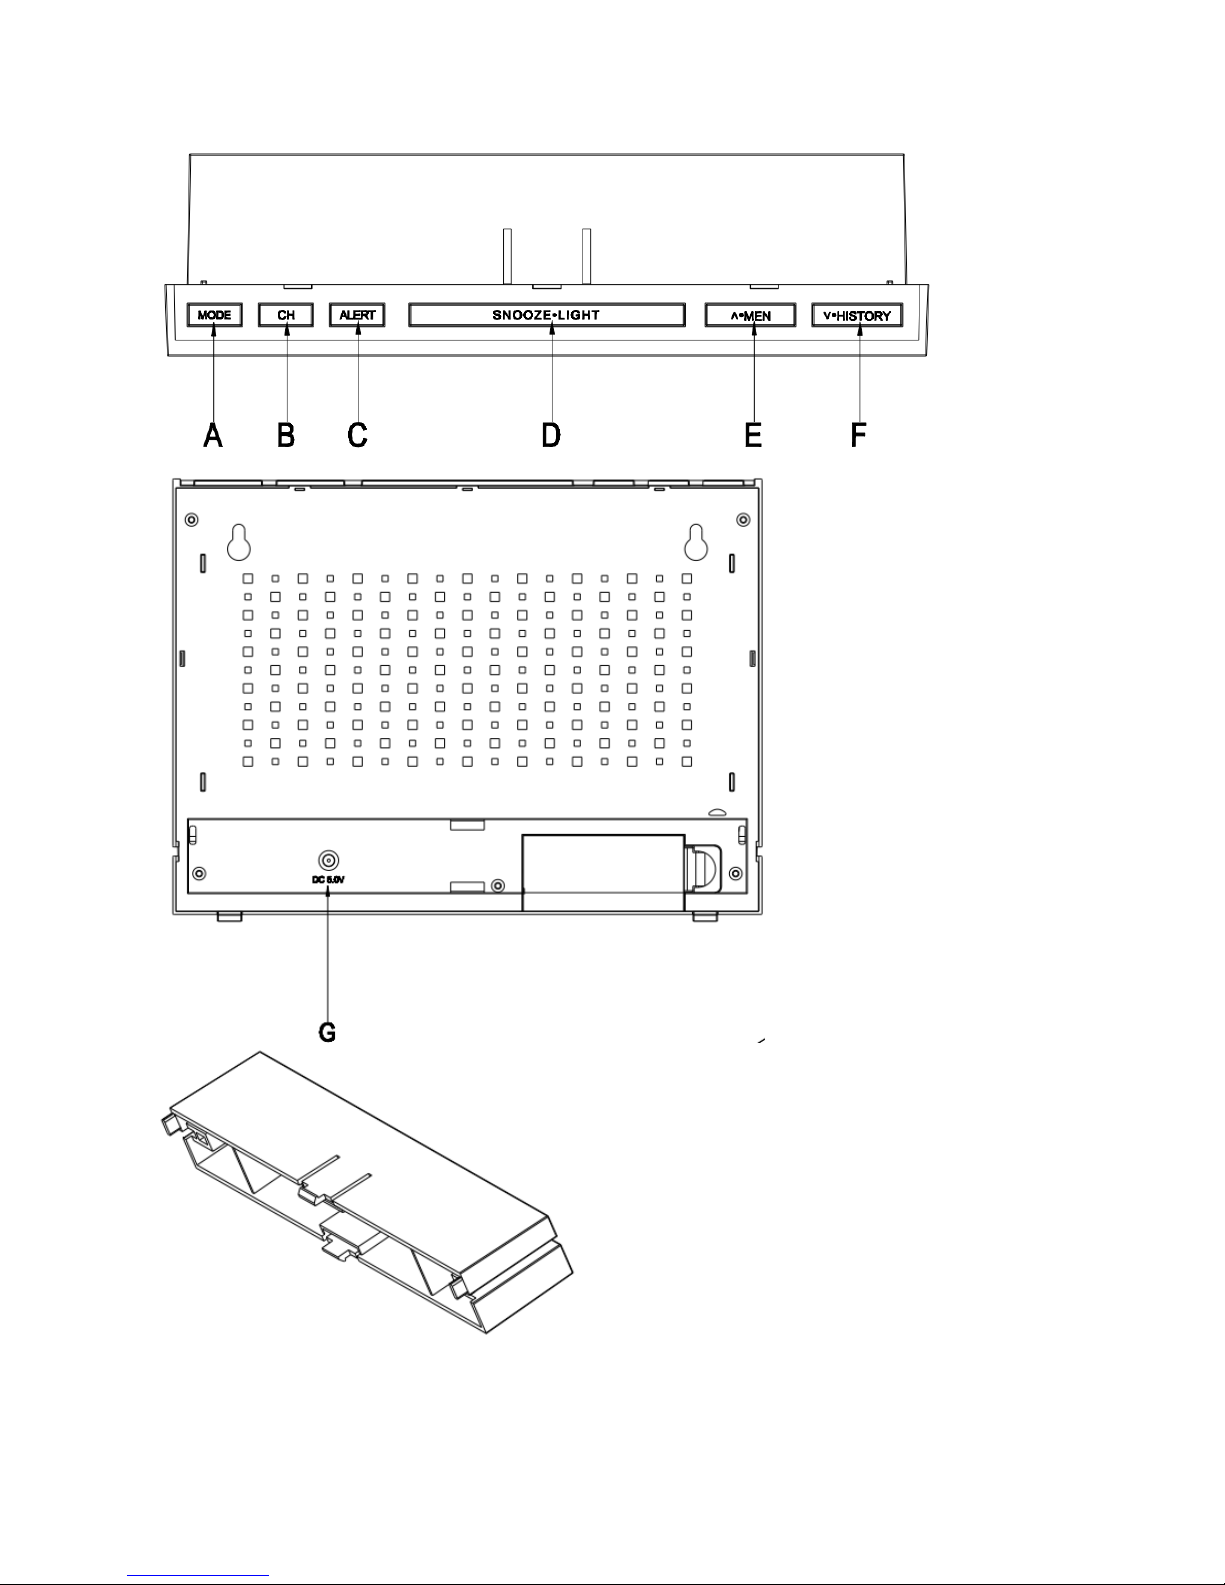
Manual set-up
•In standard mode, press and hold key “MODE“for 3 seconds.
•The 12/24 hour flashing. Use “
∧•
MEM
“or “
∨•
HISTORY”
to select
•Press “MODE “to confirm.
•The display for the time zone is flashing. Use “
∧•
MEM
“or “
∨•
HISTORY”
to select the time zone
(-12 to +12).
•Press “MODE “to confirm.
•The DM/MD flashing, Use “
∧•
MEM
“or “
∨•
HISTORY”
to select
•Press “MODE “to confirm.
•The display for the year is flashing. Use “
∧•
MEM
“or “
∨•
HISTORY”
to select the year.
•Press “MODE “to confirm.
•The display for the month is flashing. Use“
∧•
MEM
“or “
∨•
HISTORY”
to select the month.
•Press “MODE “to confirm.
•The display for the date is flashing. Use “
∧•
MEM
“or “
∨•
HISTORY”
to select the date.
•Press “MODE “to confirm.
•The display for the hour is flashing. Use “
∧•
MEM
“or “
∨•
HISTORY”
to select the hour.
•Press “MODE “to confirm.
•The display for the minutes is flashing. Use “
∧•
MEM
“or “
∨•
HISTORY”
to select the minutes..
•Press “MODE “to confirm.

•The language selection for the display of the weekdays is flashing. Use “
∧•
MEM
“or “
∨•
HISTORY”
to select
the language (GE- German, EN - English, IT - Italian, FR - French, DU - Dutch, SP - Spanish, DA -
Danish).
•Press “MODE “to confirm
•The hPa/inHg for air pressure flashing, Use “
∧•
MEM
“or “
∨•
HISTORY”
to select .
•Press “MODE “to confirm.
•The C/F for temperature flashing, Use “
∧•
MEM
“or “
∨•
HISTORY”
to select.
•Press “MODE “to confirm.
Information:
•The clock automatically exit the set-up mode if no keys are pressed for 20 seconds.
DST (Daylight saving time)
1.Set up DST ON first ( turn on Daylight saving function)
2.The unit will exit the Winter time and enter the Summer time at 2AM on the second Sunday of March
3. The unit will exit the Summer time and enter the Winter time at 2AM on the first Sunday of November
Daily alarm set-up
•Press “MODE” to switch to “Alarm1” mode, “A1” and the alarm time displayed
•Press and hold the key “MODE”for 3 seconds ,the flashing alarm time are shown
•The hour display of the alarm time is flashing. Use “
∧•
MEM
“or “
∨•
HISTORY”
to select the hour.
Press “MODE”to confirm.
•Then follow the minutes. Use “
∧•
MEM
“or “
∨•
HISTORY”
to select the minutes,
•Press “MODE”to confirm.
•Then press “MODE” to switch from A1 display to A2 display
•The same setting as for A2.
Information
•The clock automatically exit setting mode if no keys are pressed for 20 seconds, value already set will be
save.
Daily alarm on/off
•Press “MODE” to switch from time display to “Alarm 1” or “Alarm 2” mode
•When showing A1 or A2 alarm time, press “
∧•
MEM
“or “
∨•
HISTORY”
to activate the alarm with alarm
symbol showing.
•Press “
∧•
MEM
“or “
∨•
HISTORY”
again to cancel the alarm
Information:

•The clock automatically exit setting mode if no keys are pressed for 20 seconds, value already set will be
save.
Snooze function
To activate the snooze function, follow the steps below
•Press the key “SNOOZE
•
LIGHT”, while the alarm sounds, to activate the snooze function.
•If the snooze function is activated, alarm symbol is flashing.
•The alarm repeat after 5 minutes.
•The snooze function can be stopped by pressing any key.
Outdoor Temperature alert set-up
•Press the key “ALERT” to ON / OFF “Temperature alert” When the alert is on, icon displayed
•Press and hold the key “ALERT”for 3 seconds to enter alert setting, temperature alert upper limit and the
icon displayed.
•Press “
∧•
MEM
“or “
∨•
HISTORY”
to set the upper alert temperature.
•Pess the key “ALERT”to confirm.
•Temperature lower limit and the icon displayed, press “
∧•
MEM
“or “
∨•
HISTORY”
to set the lower alert
temperature.
•Pess the key “ALERT”to confirm.
Information
•The clock automatically exit setting mode if no keys are pressed for 20 seconds, value already set will be
save.
•The lower alert temperature selected must at least be 1°C below the upper alert selected temperature.
Temperature alert ring:
•When the temperature reach the alert level and when alert turned on, the alert symbol flash with
alert sound
•Press “SNOOZE/LIGHT”key to stop the alert sound, the alert symbol and corresponding temperature still
flash until the temperature is out of alert range or when turn off the ALERT
Max. / Min. for the indoor/outdoor temperature and humidity
•Press “
∧•
MEM
“to display indoor and outdoor max temperature and humidity,
•Press “
∧•
MEM
“again to display indoor and outdoor min temperature and humidity
•Hold “
∧•
MEM
“for more than 3 seconds to clear up the max./min.

Weather forecast
Remarks:
As the weather forecast is calculated by air pressure only, the display will have discrepancy with the actual
weather.
Currently displayed icon means the forecast for the next 12–24 hours. It may not reflect the current state
of the weather.
Altitude setting and barometer
•After inserting batteries or plugged in adaptor into the weather station, or by pressing and holding the
“SNOOZE
•
LIGHT”button, set your altitude for more precise pressure calculation.
•Use the “
∧•
MEM
“or “
∨•
HISTORY”
buttons to set a value in the range -190 m to 2000 m (10 m
increment). , press “SNOOZE
•
LIGHT” to confirm.
•After setting the altitude, use “
∧•
MEM
“or “
∨•
HISTORY”
buttons to set the weather forecast icon, press
“SNOOZE
•
LIGHT” to confirm
•For accurate barometric pressure trends, the weather station should operate at the same altitude for
recordings (i.e. it should not be moved from the ground to the second floor of the house). When the unit
is moved to a new location, discard readings for the 12 hours history
Temperature, humidity and air pressure trends
The arrow shows the trends of values of the temperature and humidity measurements on sensor or
station.
Indications on the
display
Temperature and air
humidity trends
Rising
Constant
Falling
Moon phase display
Icons for the main phases of the moon are as follows:

New
moon
Waxing
crescent
First
quarter
Waxing
gibbous
Full moon
Waning
gibbous
Last
quarter
Waning
crescent
Ice Alert
•Indoor temperature is lower than 39.2℉(+4°C),there is ice alert symbol showing on LCD.
That means the weather start to be icy.
Temperature and humidity function
·Indoor temp detection range:32℉—122℉(0℃—+50℃)
·RF temp range:4℉- 140℉(-20℃- 60℃)
·Humidity detection range:20% - 95%
·Detection cycle:30s
·Temp resolution +/- 0.1℃,humidity resolution +/- 1%
Comfort face for living room
The weather station uses saved data to determine the indoor humidity in the living space to show the
respective symbols for your health and home environment.
Comfortable
If the indoor humidity is within 40–70 % RH and the temperature
within 20–28 °C, the icon (comfortable environment) will be
displayed
Dry
If the indoor humidity is lower than 40 % RH, the icon (dry
environment) will be displayed.
Wet
If the indoor humidity is higher than 70 % RH, the icon (wet
environment) will be displayed.
If the temperature is not within 20–28 °C and humidity is within 40–70% RH, no icon will be displayed.
Low battery condition display
The weather station displays the low battery condition symbol to remind the batteries of the weather station or
the outdoor sensor need to be exchanged.
•Weather station low battery condition display: within indoor area of the display
•Outdoor sensor low battery condition display: in the outdoor area of the display

Backlight
•Press and hold key “
∨
•HISTORY”
for 2 seconds to enter the a/b/c mode setting .
•Press the key“
∨
•HISTORY” to
choose the a/b/c mode (Default mode a).
•In “a”mode ,need to manual select the backlight color .
Press ”SNOOZE
•
LIGHT”to switch the backlight color: REDGREENBLUELIGHT
GREENPURPLELIGHT BLUEWHITERED......
•Press “MODE “to confirm
•In “b”mode , the backlight color changed with the weather forecast :
LIGHTGREEN(Sunny)RED(Partly Cloudy)GREEN(Cloudy)BLUE(Rainy)PURPLE
(Rain Storm)
•Press “MODE “to confirm
•In “c”mode , the backlight color changed with the :outdoor temperature:
•Above 86 ℉(30 ℃)(RED)77~85.82 ℉(25~29.9 ℃) (LIGHT GREEN)68~76.82 ℉
(20~24.9 ℃)(GREEN)50~67.82 ℉(10~19.9 ℃)(WHITE)32~49.82 ℉(0~9.9 ℃)(LIGHT
BLUE)31.82~49.82 ℉-0.1℃~-9.9℃(BLUE)Below14℉(-10℃) (PURPLE)
•Press “MODE “to confirm
Default :Without RF ,the backlight color display RED; When the RF is received, the corresponding color is
displayed.
In any mode, press the ”SNOOZE
•
LIGHT”and “
∨
•HISTORY”
keys at the same time enter into
automatic color changed ,.Each color shows 7S, automatic cycle, Manually press “MODE “to
confirm the color, and quit the automatic change mode (the program does not set the automatic exit).
Backlight color switch :REDGREENBLUELIGHT GREENPURPLELIGHT
BLUEWHITERED......
Troubleshooting
Display screen not working
•Check the batteries in main unit are inserted and power
adaptor is plugged in correctly
No outdoor sensor
reception
•Check the batteries in sensor are inserted correctly
•Battery may need to be replaced
•Relocate the weather station and the sensor. The
maximum transimission range is 30m without obstriction
•Press and hold “CH“key for RF reception again
•Try to reset the units, take the sensor near the weather
station, reinstall the batteries and replug power adaptor,
place the sensor outdoor until reception success
•Check the distance of the weather station and the sensor
from the sources of interference (computer monitors or
television sets). It should be at least 1.5 to 2 m during the
reception of the signal.
Inaccurate weather
forecast
•Currently displayed icon means the forecast for the next
12–24 hours. It may not reflect the current state of the
weather.
•Set the correct air pressure reading

•For accurate barometric pressure trends, the weather
station should operate at the same altitude for recordings
(i.e. it should not be moved from the ground to the second
floor of the house). When the unit is moved to a new
location, discard readings for the next 12 hours and
correct the height adjustment if needed
Wrong temperature
•Check whether the sensor is exposed to direct sunlight.
Technical data
a) Main Unit
Barometer unit: hPa / inHg
Barometer pressure measuring range: 850hPa to 1050hPa
Weather display: Sunny, Slightly Cloudy, Cloudy, Rainy, Storm
Temperature unit: °C / °F
Temperature measurement range: 32℉—+122℉(0°C to +50 °C)
Indoor temperature / humidity trend and max / min function
Moon phase
Humidity measurement range: 20 to 95%
Comfort face display
Time display: 12/24 hour format
Calendar: DD/MM or MM/DD
Weekday in 7 languages: German, English, French, Italian, Dutch, Spanish, Danish
Dual alarm with snooze function (5 minutes alarm interruption)
Power supply : 3 X AAA, UM-4, LR03 1.5V batteries, DC 5.0V power adapter
7 colors back light display :REDGREENBLUELIGHT GREENPURPLELIGHT BLUEWHITE
b) Outdoor sensor
Transmission frequency: 433 MHz
Transmission range: up to 30 m in open area with no obstruction
Temperature measurement range:4℉- 140℉(-20 °C to +60 °C)
Humidity measurement range: 20 to 95%
Outdoor temperature / humidity trend and max / min function
Power supply: 2 X AAA, UM-4, LR03 1.5V batteries
Care and maintenance
Read carefully the manual before using this product.
Do not expose the main unit to direct sunlight, extreme cold and moisture, and sudden changes in
temperature. This would reduce the accuracy of detection.
Do not place the product in locations prone to vibration and shocks –these may cause damage.
Do not expose the product to excessive force, impacts, dust, high temperatures or humidity - these may
cause malfunction, shorter battery life, damage to batteries and deformation of plastic parts.

Do not expose the main unit to rain or moisture, if it is not intended for outdoor use.
Do not place any open flame sources on the product, e.g. a lit candle, etc.
Do not place the product to places with inadequate air flow.
Do not insert any objects in the product vents.
Do not tamper with the internal electric circuits of the product –you may damage it, which will
automatically terminate the guarantee. The product should only be repaired by a qualified professional.
To clean the product, use a slightly moistened soft cloth. Do not use solvents or cleaning agents - they
could scratch plastic parts and damage electric circuits.
Do not immerse the product in water or other liquids.
The main unit may not be exposed to dripping or splashing water.
In the event of damage or defect of the product, do not perform any repairs by yourself.
The transmitter of the wireless indoor/outdoor thermometer works down to -20°C, but at low temperatures,
especially for a long period of time, the batteries may freeze, which may prevent the transmitter from
transmitting the signal to the receiver and at the same time the transmission range is reduced at very low
temperatures.
This device is not intended for use by persons (including children) whose physical, sensory or mental
disability or lack of experience and expertise prevents safe use, unless they are supervised or instructed
regarding use of the appliance by a person responsible for their safety. It is necessary to supervise
children to ensure they do not play with the device.
Safety warnings
Read the safety warnings carefully and only use the article as described in these instructions to avoid
accidental injury or damage. Keep this manual for future reference . If you pass this product on to someone
else , remember to give them these instructions.
Intended use
The weather station for domestic use and is not suitable for commercial purposes.
Danger to Children
Batteries can be highly dangerous if swallowed. Therefore ,keep batteries and weather station out of the reach
of infants. If a battery has been swallowed, seek medical advice immediately.
Keep packing material away from children. Risk of suffocation !
Warning-risk of injury
If a battery has leaked, avoid contact with your skin, eyes and mucous membranes. If applicable, rinse the
affected parts with water and consult a doctor at once.
Batteries must not be charged, taken apart, thrown into fire or short-circuited.
Caution-material damage
Never expose the weather station to severe temperature fluctuations, moisture, direct sunlight, dust or impacts.

Protect the batteries from intense heat. Remove the exhausted batteries from the weather station. This will
avoid damage that can be caused by leakage.
Always replace all the batteries simultaneously. Do not use different types or brands of batteries or batteries
with different capacities.
When inserting the batteries, ensure correct polarity (+/-).
Suggest not use rechargeable batteries which not providing the required voltage.
Do not use abrasive or solvent-based products to clean the weather station
FCC STATEMENT
This device complies with Part 15 of the FCC Rules. Operation is subject to the
following two conditions: (1) This device may not cause harmful interference, and (2)
This device must accept any interference received, including interference that may
cause undesired operation.
WARNING Changes or modifications not expressly approved by the party responsible for
compliance could void the user’s authority to operate the equipment.
NOTE This equipment has been tested and found to comply with the limits for
a Class B digital device, pursuant to Part 15 of the FCC Rules. These limits are
designed to provide reasonable protection against harmful interference in a
residential installation.
This equipment generates, uses and can radiate radio frequency energy and, if not
installed and used in accordance with the instructions, may cause harmful interference
to radio communications. However, there is no guarantee that interference will not
occur in a particular installation. If this equipment does cause harmful interference
to radio or television reception, which can be determined by turning the equipment
off and on, the user is encouraged to try to correct the interference by one or more
of the following measures:
Reorient or relocate the receiving antenna.
Increase the separation between the equipment and receiver.
Connect the equipment into an outlet on a circuit different from that to which the
receiver is connected.
Consult the dealer or an experienced radio / TV technician for help.
This manual suits for next models
1
Table of contents
Popular Weather Station manuals by other brands

Bresser
Bresser WIFI 4Cast instruction manual

ACU-RITE
ACU-RITE 01033W instruction manual

Vaisala
Vaisala Beacon Station BWS500 Setup guide

La Crosse Technology
La Crosse Technology WEATHER DIRECT WD-3103U owner's manual

La Crosse Technology
La Crosse Technology WS-2813U-IT Operation manual

Vaisala
Vaisala HAWS user manual