- 2 -
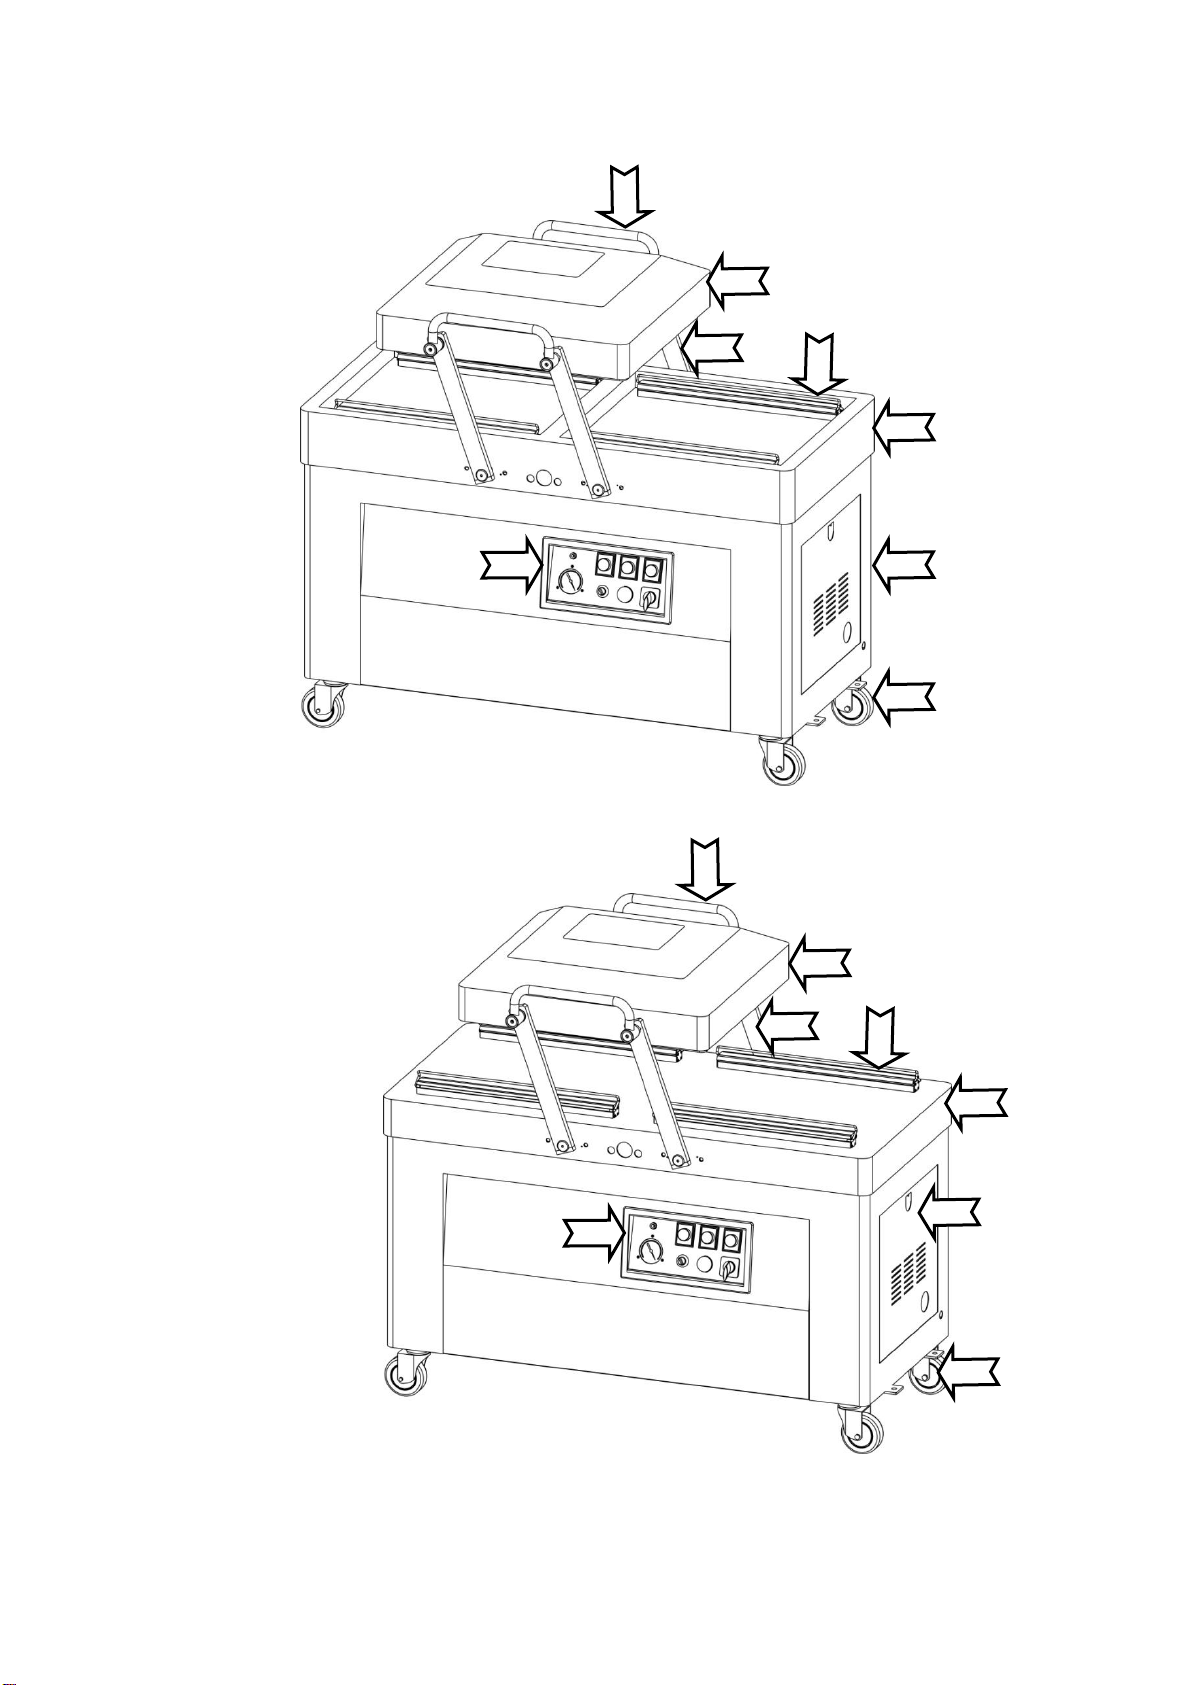
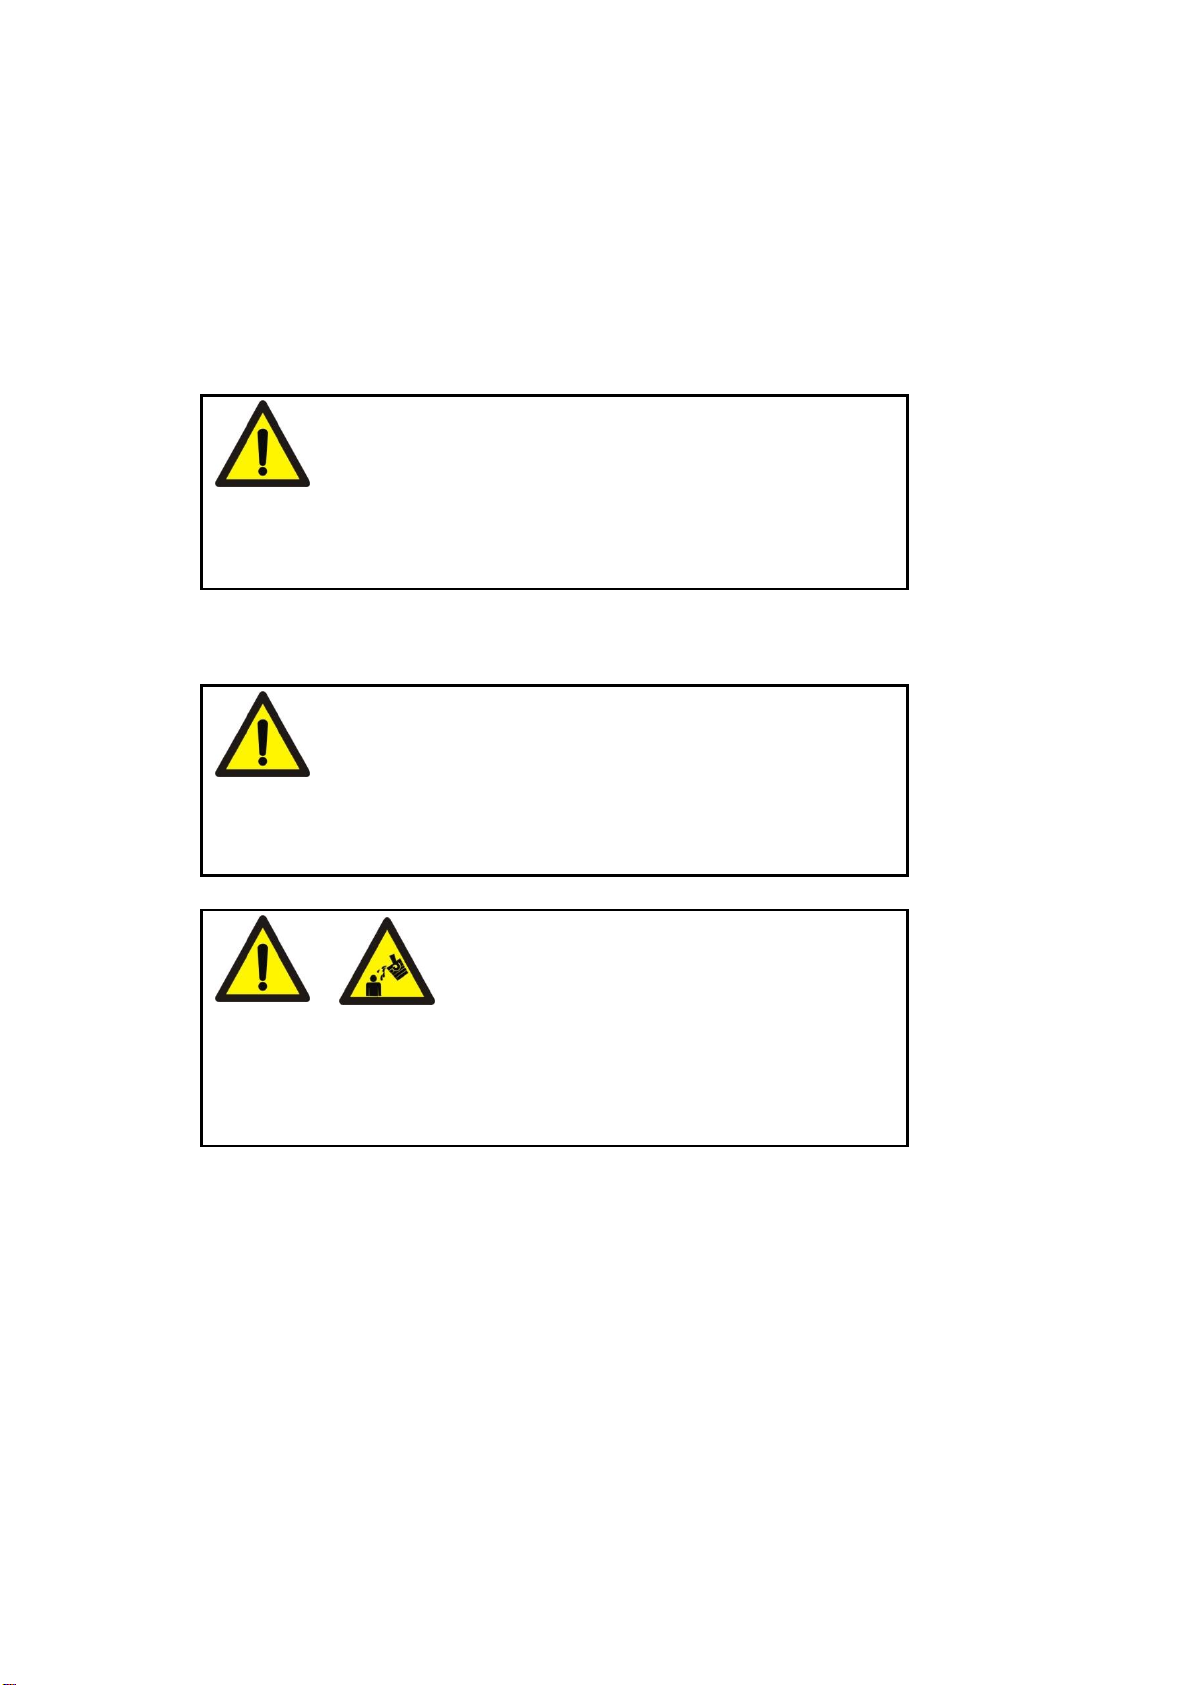
1. Product Description
1.1 Usage and Application
HVC series vacuum packaging machine possesses the advantages of superior function, easy
operation, simple maintenance, wide application etc. It applies to the soft packing material such as
composite film or aluminum-plastic composite film and so on. It can pack grain, food, fruit, seed,
medicine, chemical product, electronic product, precision instrument and meter, rare expensive
metal solid etc in liquid, powder or paste shape. The products after packing can be prevented from
oxidization, mildew, moth, rot and damp, so quality and freshness is guaranteed to prolong the
food’s storage period.
1.2 Product Features
The machine possesses oil-mist removing function, so it unnecessary to connect a pipe for
exhaust.
It is easy to operate this machine. The whole procedure, including lowering the synthetic glass
vacuum lid, vacumizing, gas-filling (if any), heat-sealing, label printing, cooling, air intake and
lifting the vacuum lid, is completed automatically.
The wide range of the temperature of sealing mouth can be applied to the packing bags with
different materials and thickness
There is an emergent stop switch in the control panel. If any exception in the extracting
process, press STOP can interrupt the packing procedure and return to standby state.
1.3 Operating Principle
Put the bags in the vacuum chamber and lower the vacuum lid. Startup the machine, the vacuum
pump runs and will form a vacuum space between the vacuum lid and the vacuum chamber.When
the vacuumizing finished, fill the gas to the vacuum chamber if it is needed. Then the airbag or the
cylinder will force the heating block to lift to hold down the bags in the effect of the pressure
difference inside the vacuum chamber and the outside. The flat heating wire in the heating plate
will become hot and the seal the bag when it is connected with low-voltage heavy current.
Consequently, fill the vacuum chamber with air after cooling down. The whole vacuum packing is
completed