Icemoon Wi-Fi Camera SmokeDetector User manual

User Manual
Wi-Fi Camera Smoke Detector

Contents
1. BUTTONS AND LIGHTS .................................. 1
2. CONDITIONS AND PREPARATIONS ................ 2
2.1 INSERT MICRO SD CARD ...................................... 2
2.2 POWER ON/OFF THE CAMERA ............................... 2
2.3 RESET............................................................... 2
3. PRIMARY FUNCTIONS ................................... 3
3.1 SCAN THE QR TO DOWNLOAD THE APP ICEMOON. .... 4
3.2 OPEN THE APP,CHOOSE WI-FI CAMERA. ................ 5
3.3 TAP CONNECT CAMERA,AND CONNECT THE CAMERA TO
YOUR SMARTPHONE VIA HOTSPOT (UID)....................... 6
3.4 PLEASE CHOOSE THE WAY OF CONNECTING............... 7
3.5 DEVICE LIST ..................................................... 11
3.6 DEVICE SETTINGS.............................................. 12
3.7 LIVE VIDEO...................................................... 18
4. TROUBLESHOOT ......................................... 20

Here come some tips for you. Please go
through the following items before setup.
Users should be responsible for any damage
and abnormalities due to improper operation.
1. No battery built in, please keep it
plugged in.
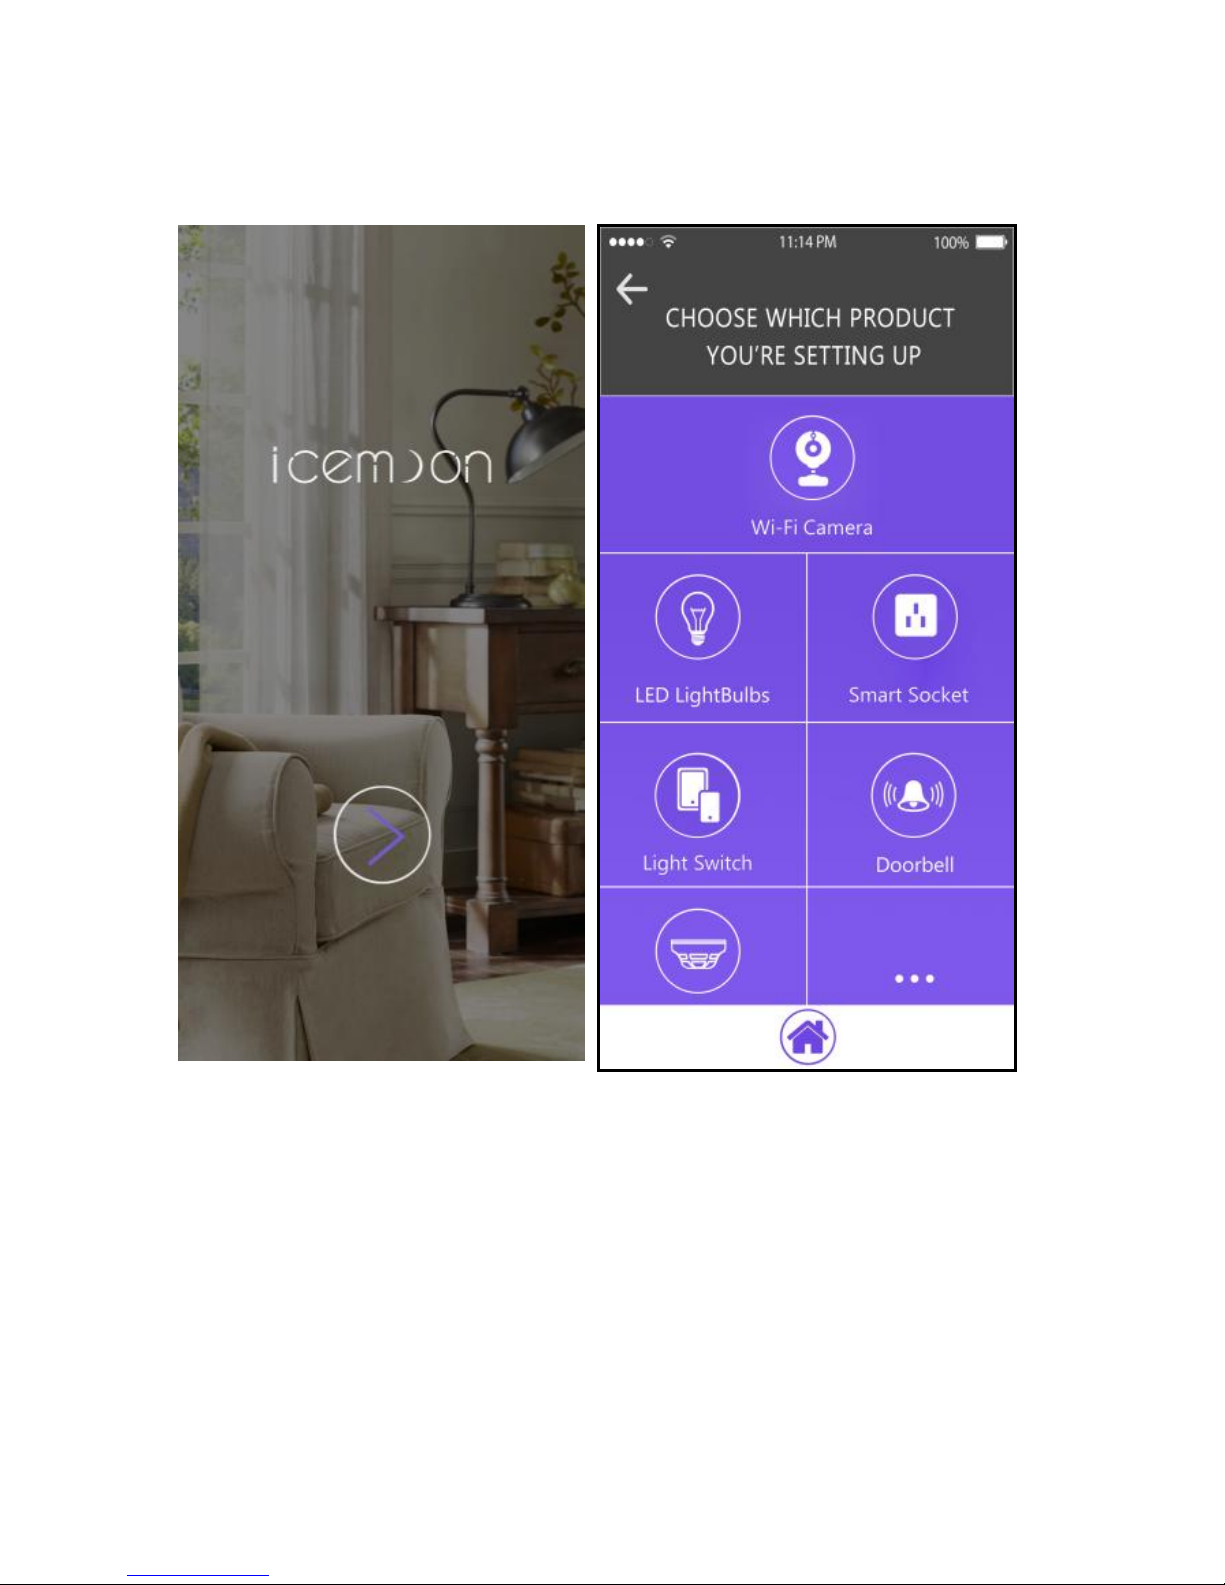
2. Make sure you have connected your
icemoon Wi-Fi camera to your
smartphone via hotspot (named the
camera’s UID pasted on the camera)
before connecting it to a Wi-Fi.
3. Make sure your Wi-Fi is in 2.4G mode.
Ask the router manufacturer for help if
you need.
4. Simply reset it if your icemoon Wi-Fi
camera performs abnormally (such as
your smartphone couldn’t find the
hotspot, it can’t connect to Wi-Fi, or it
goes offline frequently).
5. Simply turn off indicator lights in App
live video interface if you want.
For details, please refer to instructions below.
icemoon Customer Care

1
1. Buttons and Lights

2
2. Conditions and Preparations
2.1 Insert Micro SD card
If you want to record video into micro SD card,
please insert it first. Hold golden fingers of the
Micro SD card downwards, and then insert it
into the slot. Note that no micro SD card is
included.
2.2 Power on/off the camera
2.2.1 Power on: Slide the slide switch to “ON”
and connect device to socket through adapter
(DC 5V), it will create a hotspot (named the
camera’s UID pasted on the camera).
2.2.2 Power off: Slide the switch to “OFF” or
pull adapter out from socket directly.
2.3 Reset
Simply reset it if the camera performs
abnormally. When the camera is on, just use a
pin to press and hold “Reset”button for about
5s until indicator lights turn off, it will create
the hotspot (named the camera’s UID pasted

3
on the camera) within 15s.
3. Primary Functions
Functions stated below are primary features of
this item. Download the App icemoon, go step
by step to set it up.
Please notice: 1. It only supports 2.4G Wi-Fi
network. 2. The default password of the
camera is 8888.
To set it up, simply go through the following
process:
Download the App
Connect your smartphone to the device via
hotspot (named the camera’s UID pasted on
the camera)
Connect the device to Wi-Fi through the App
Congratulations. Enjoy this gadget
For details, please follow the steps below.

4
3.1 Scan the QR to download the App
icemoon.
You can also download the App icemoon from
Google Play Store (for Android) or Apple Store
(for iOS).

5
3.2 Open the App, choose Wi-Fi Camera.

6
3.3 Tap Connect Camera, and connect the
camera to your smartphone via hotspot
(UID).
Important Notice
Here, you should choose the network
named UID pasted on the camera
(beginning with CM or PQ), NOT YOUR
HOME WI-FI. For iOS devices, please go to
your device’s “Wi-Fi Settings” manually to
connect, and then back to App to continue.

7
3.4 Please choose the way of connecting.
Way1 Connect device to wireless router
In this way, you can view real-time video
anywhere.

8
Choose your Wi-Fi, enter its password and
then join.

9
Tap the icon to enter Device List. And then
go directly to item 3.5.
Way2 Connect directly by Point-to-Point
Your smartphone can connect directly by
Point-to-Point (hotspot) when your
smartphone is near.
In this way, it can’t support viewing real-time
video remotely.

10
Tap the icon right to enter Device List.
If you want to connect your camera to Wi-Fi,
please go to Device list> Settings>Device
Settings>Wi-Fi Settings.

11
3.5 Device list
Tap it to add a new device
Tap it to add as many as 4 cameras in one
page
Motion detection is enabled
Motion detection is disabled
Tap it to enter Settings

12
Tap it to view real-time video
Tap it to view snapshots captured in the
real-time video interface
Tap it to view videos recorded in the
real-time video interface or Micro SD card
Tap it to view photos taken when it is
alarming
3.6 Device Settings
Tap to enter Settings>Device Settings.
3.6.1 Alarm Settings
Motion detection sensitivity: When
motion detection is enabled, the device
will send you an alarm automatically if
motion is detected. You can choose a
sensitivity level for Motion detection. It
has 7 levels. When you choose “disabled”,
motion detection will be closed.
Gas-Sensor: Tap it to enable or disable
smoke/carbon monoxide detection.

13
Alarm schedule: You can set a time period
only in which it sends alarm information to
you.
Warming Tone: After enabling motion
detection (Motion detection sensitivity is
not set to “disabled”), you can enable the
camera to send out alarm sound or not.
This function applies to certain types. For

14
some types, if smoke/gas detection is
available, the alarm also can be triggered.
When it sounds an alarm, you can tap the
icon to stop it.
E-mail Alert: After enabling motion
detection, you can enable or disable the
E-mail alarm. Just go to “Email Settings”to
set it, then it will send you photos shot at
the moment it detects movement. For
some types, if smoke/gas detection is
available, the alarm also can be triggered.
Alarm interval: After enabling motion
detection, if motion is detected, the
camera will perform alarm. You can type in
a number between 30 and 300 to set the
time interval between two alarms.
Push notifications: You can enable or
disable this functionality. If you enable it,
the App will send you push notifications
even if you exit the App in
iOS-powered devices, or run the App in

15
background in Android-powered devices.
On-Screen Display: If you enable this
functionality, current time stamp will show
up in the real-time video.
Certain types with smoke/gas detection
functionality have a more item to enable
or disable smoke/gas detection alarm.
After setting, please tap “OK”to save.
3.6.2 SD Card Record Settings

16
Record: If you want to record all the time,
please choose “All day”. If you choose
“On alarm”, you need to enable motion
detection. You can also choose “Timing
Record”to set a time only in which it
records videos into Micro SD card.
Resolution: You can choose the resolution
of video recorded in the Micro SD card
(not live video).
File length (minute): It generates a file
every 3 minutes by default (that means it
will automatically generate a video file
every 3 minutes and continue recording).
You can type in a number to set file length
between 1 and 60 minutes.
Record sound: When you enable this
functionality, it will record sound while
recording video.
Loop recording: When you enable this
functionality, it will override the oldest file
and continue recording even if the Micro

17
SD card is full.
After setting, please tap “OK”to save.
3.6.3 Email Settings
Type in E-mail addresses for a sender and as
many as 4 recipients. Fill in “User”and
“Password”with the sender’s E-mail addresses
and corresponding password, respectively.
Then tap “OK”to save.
Table of contents
Other Icemoon Camcorder manuals