Icy Box IB-550StUS2-B-BL User manual

550 Series
External case of aluminium for
5.25" SATA drives with LED
ICY BOX – User's Manual IB-550
External case of aluminium for 5.25" SATA drives with LED
ICY BOX – Handbuch IB-550
Externes Gehäuse für 5,25" SATA Laufwerke mit Beleuchtung
ICY BOX – Manuel IB-550
Boîtier externe en aluminium pour 5.25" SATA avec LED
ICY BOX – Manual IB-550
Caja externa de aluminio para SATA cajas 5,25" con LED
ICY BOX – Manuale IB-550
Alloggiamento in alluminio per cassettes 5,25" con LED
550 Series
Modello Cassetta Host Interface Colour
IB-550StUS2-B-BL SATA USB 2.0 & eSATA Nero
1. Modello – Cassetta - Extern collegamento - Colour
2.Contenuto della confezione
1x IB-550StUS2-B-BL, 1x adattatore di alimentazione e cavo, 1x cavo USB,
1x cavo eSATA, 1x bracket eSATA, 1x manuale
3. Caratteristiche
• Materiale:Alluminio
• Unitàsupportate:5.25"e3,5"SATA
• LEDblu:Sutrelati
• Displaydiaccesso:TramitelampeggiamentodelLEDfrontale
• Interfacciainterna:StandardSATA
• Interfacciaesterna:USB2.0oeSATA
• Alimentazione:Esterna,24W
• TensioneAC:100–240V
4. HDD installazione
Staccare tutti i cavi di connessione con il computer durante il montaggio e lo
smontaggiodeldiscosso.
1. Togliere le viti sugli angoli e aprire il coperchio superiore.
2. Collegareall'unitàdainserirel'alimentazioneeilcavoSATA.
3. Bloccaresaldamentel'unitàtramiteleviti.
4. Rimettereilcoperchiosuperiore.
5. Collegare i cavi e accendere il box.
6. Premere il tasto argentato per aprire lo sportello frontale.
1. 2.
3. 4.
5. + 6.
550 Series
Módulo Caja Host Color
IB-550StUS2-B-BL SATA USB 2.0 & eSATA Negro
1. Módulo - Caja – Interfaz -Color
2. Contenido del embalaje
1xIB-550StUS2-B-BL,1xadaptadorycabledealimentación,1xcableUSB,
1x cable eSATA, 1x bracket eSATA, 1x manual
3. Característica
• Material:Aluminio
• Unidadessoportadas:5¼"y3½"SATA
• Diodosluminososazules:Sobrelostreslados
• Indicacióndelacceso:Luzintermitentedeldiodoluminosofrontal
• Interfazinterna:EstándarSATA
• Interfazexterna:USB2.0oeSATA
• Alimentación:Aparatoalimentadorexterno24W
• Entradadecorrientealterna:100–240V
4. Ensamblaje de disco duro
Antes de instalar o desinstalar un disco duro se debe desdesconectar los
cablesdeconexión/alimentaciónalordenador.
1. Soltelastornillasenlosrinconesyabralatapa.
2. ConecteelcableeléctricoyelcableSATA.
3. Fijeeldiscoduroseguramente.
4. Retapelatapa.
5. Conecteloscablesyencienda
6. Pulseelbotónplateadoparaabrirlapuertafrontal.
1. 2.
3. 4.
5. + 6.
©Copyright2008byRaidSonicTechnologyGmbH.AllRightsReserved
Theinformationcontainedinthismanualisbelievedtobeaccurateandreliable.RaidSonicTechnologyGmbH
assumesnoresponsibilityforanyerrorscontainedinthismanual.RaidSonicTechnology GmbH reserves
the right to make changes in the specications and/or design of the above mentioned product without
prior notice. The diagrams contained in this manual may also not fully represent the product that you
areusingandare thereforillustrationpurposes only.RaidSonicTechnologyGmbHassumesno responsi-
bilityforanydifferencesbetweentheproductmentionedinthis manual and the product you mayhave.
550 Series550 Series 550 Series
Model Drive Host Interface Colour
IB-550StUS2-B-BL SATA USB 2.0 & eSATA Black
Modell Laufwerk Anschluss Farbe
IB-550StUS2-B-BL SATA USB 2.0 & eSATA Schwarz
1. Modell - Laufwerk - Anschluss - Farbe
2. Verpackungsinhalt
1x IB-550StUS2-B-BL, 1x Netzteil und Kabel, 1x USB Kabel, 1x eSATA Kabel,
1xeSATABracket,1xHandbuch
3. Merkmale
• Material:Aluminium
• Laufwerke:5,25“und3,5“SATA
• Beleuchtung:DreiSeitenmitBlauenLEDs
• Zugriffanzeige:BlinkendeFront-LED
• SchnittstelleIntern:SATAStandard
• SchnittstellenExtern:USB2.0odereSATA
• Stromversorgung:ExternesNetzteil24W
• Eingangsspannung:100–240V
4. Festplattemontage
BeimEin-undAusbauderFestplattemüssenalleKabelverbindungenzum
Computer gelöst werden.
1. Lösen Sie die Schrauben und öffnen Sie den Oberdeckel.
2. Schließen Sie die Kabel des Laufwerks an.
3. BefestigenSiedasLaufwerkamBoden.
4. SchließenSiedenOberdeckelwieder.
5. Schließen Sie das Netzteil und Datenkabel an.
6. ZumÖffnendrückenSiediesilberneTasteanderFront.
1. 2.
3. 4.
5. + 6.
1. Model – Drive – Interface - Colour
2. Package contents
1x IB-550StUS2-B-BL, 1x power adapter and cord, 1x USB cable, 1x eSATA
cable, 1x eSATA bracket, 1x manual
3. Key Features
• Material:Aluminium
• Supporteddevice:5.25"and3.5"SATA
• BlueLEDs:Onthreesides
• Accessdisplay:FlashingofthefrontLED
• Interfaceinternal:SATAstandard
• Interfaceexternal:USB2.0oreSATA
• Power:externaladapter24W
• ACinput:100–240V
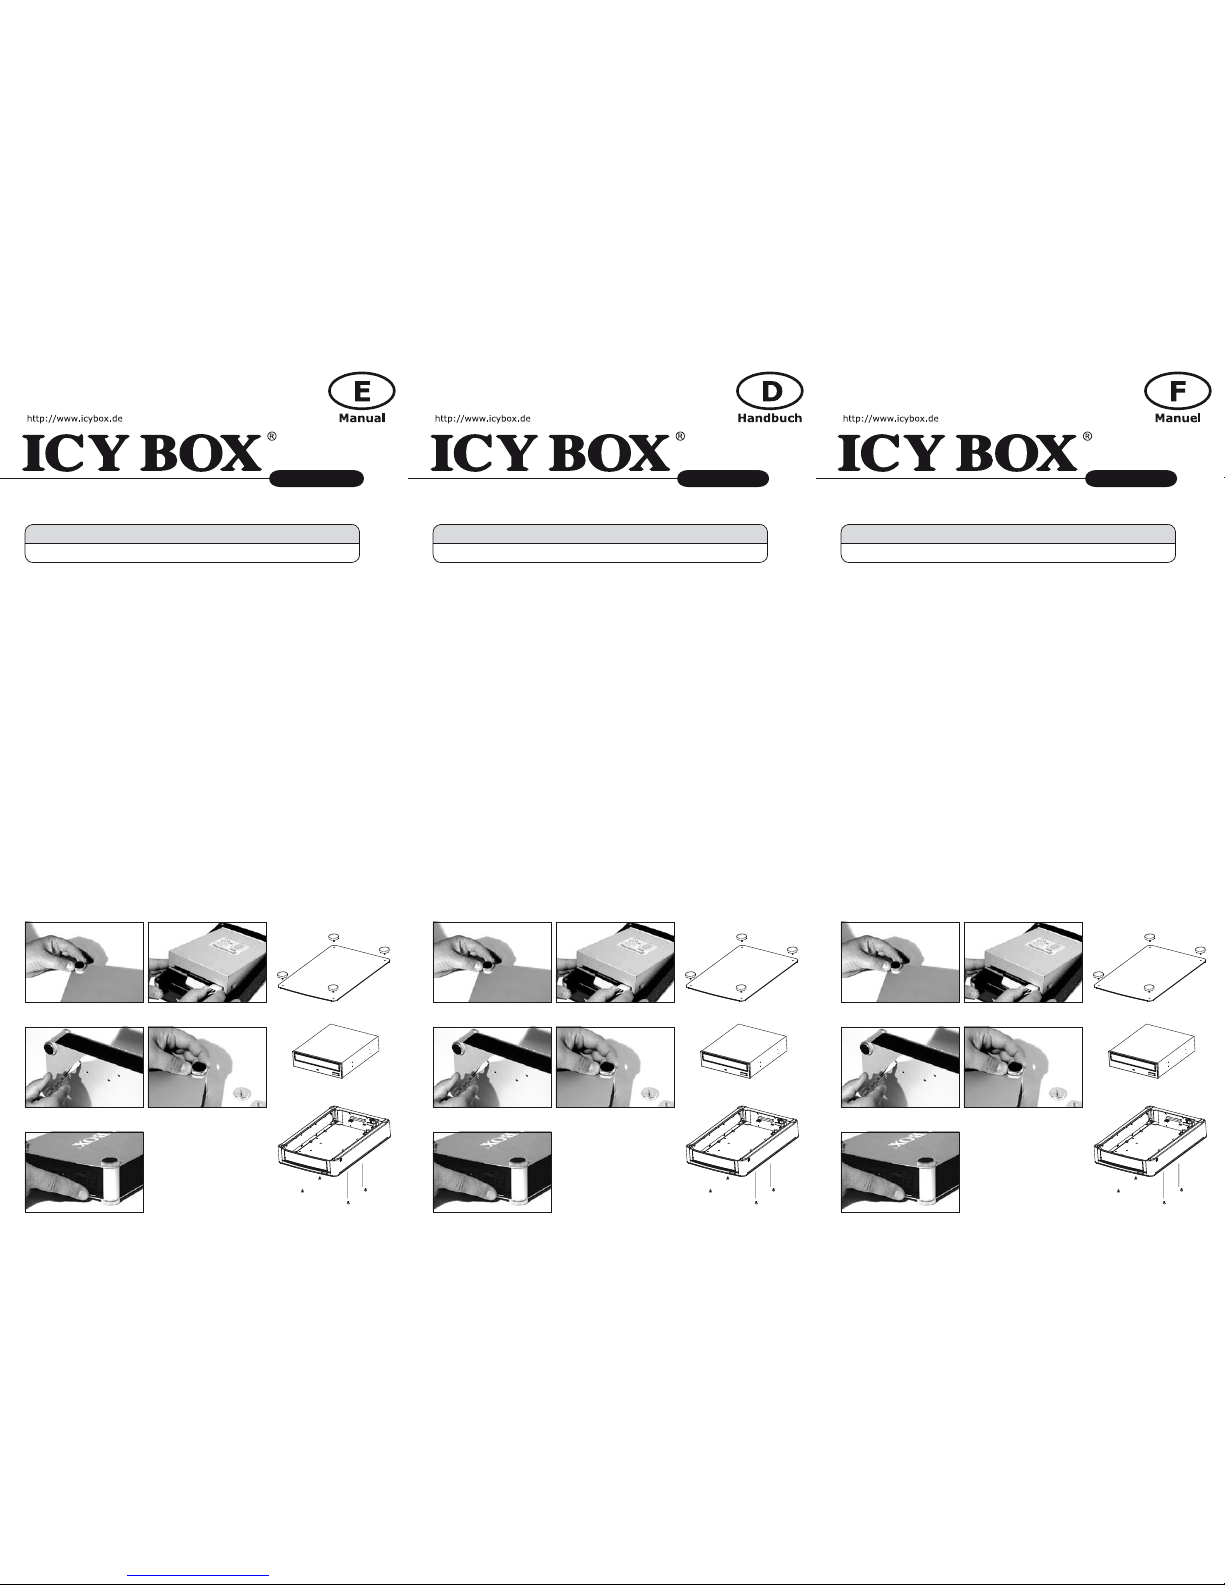
4. Drive Installation
Duringthedriveassemblyallcablinghastobedisconnectedfromthe
computer.
1. Uninstall the corner screws and open the top cover.
2. Connect the SATA power cable and SATA data cable.
3. Screwthedrivermly.
4. Relockthetopcover.
5. Connect the cables and switch on the power.
6. Press the silver button to open the front door.
1. 2.
3. 4.
5. + 6.
Modèle Dispositif Host Couleur
IB-550StUS2-B-BL SATA USB 2.0 & eSATA Noir
1. Modèle - Dispositif – Interface - Couleur
2. Contenui de la livraison
1x IB-550StUS2-B-BL, 1x adaptateur et câble, 1x câble USB2.0 1x câble
eSATA, 1x eSATA bracket, 1x manuel
3. Spécialités principales
• Matériau:Aluminium
• Dispositifintégré:SATA5,25"et3,5"
• LEDbleu:lestroiscôtés
• Afchaged'accès:FaçadeduLEDclignote
• Interfaceinterne:Normed'SATA
• Interfaceexterne:USB2.0oueSATA
• Alimentation:AdaptateurExterne24W
• Courantalternatifd'entrée:100–240V
4. Installation HDD
Devant l'installation ou la désinstallation d'un disque dur il faut débrancher
touscâblesdeconnexionàl'ordinateur.
1. Dévissezlesvisdes4coinsetouvrezlecouverclesupérieur.
2. Reliezleld'alimentationetlecâbled'SATA.
3. Vissezfermementlelecteur.
4. Refermezlecouverclesupérieur.
5. Reliezlescâblesetmettezl'appareilsoustension.
6. Appuyezleboutonargentépourouvrirlaportefaçade.
1. 2.
3. 4.
5. + 6.
Popular Host Adapter manuals by other brands

Adaptec
Adaptec AVA-2822 user guide

ATTO Technology
ATTO Technology UL4D PCI Installation and operation manual

ATTO Technology
ATTO Technology 6-Gb SAS/SATA Host Adapter H60F Specification sheet

Adaptec
Adaptec APA-348 installation guide

HighPoint
HighPoint RocketRAID 2760 user guide

Exsys
Exsys EX-6605E manual

Savant
Savant Smart Host Quick reference guide

Emulex
Emulex LPe15004 installation manual

Digi
Digi Neo Series Usage Guide

ATTO Technology
ATTO Technology ExpressSAS R608 RAID Installation and operation manual

Tekram Technology
Tekram Technology DC-390U user manual

ATTO Technology
ATTO Technology ATTO ExpressPCI FC 3321 Specification sheet


