iDTRONIC BLEUBOX R-IN-UHF-5239U User manual

Product Name: BLEUBOX UHF 1CH Mid Range Controller
Model: R-IN-UHF-5239U

Initial Operation
BlueBox Quick Start Guide
iDTRONIC GmbH
Donnersbergweg 1
67059 Ludwigshafen
Germany/Deutschland
Issue 0.1
– 16. November 2018 –
Phone:
Fax:
E-Mail:
Web:
+49 621 6690094-0
+49 621 6690094-9
info@idtronic.de
idtronic.de
Subject to alteration without prior notice.
© Copyright iDTRONIC GmbH 2018
Printed in Germany
Page 2 of 12
OEM RFID Modules

BlueBox RFID Devices
Initial Operation
Contents
1
Initial Operation ....................................................................................................................................................... 4
1.1
1.2
1.3
1.4
Connecting the Cables ....................................................................................................................................... 4
USB Driver Installation ....................................................................................................................................... 4
Installation of Test/Demo Software “BLUEBOX SHOW” .................................................................................... 5
Establish Connection to a BLUEBOX .................................................................................................................. 5
2
Operating BLUEBOX Show for Testing ...................................................................................................................... 6
2.1
2.2
2.3
2.4
Overview ............................................................................................................................................................ 6
Automatic Mode, Continuous Mode, Auto-Read .............................................................................................. 6
Adjusting the RF TX Power ................................................................................................................................. 7
Test If RFID Tags Are Detected........................................................................................................................... 7
3
4
Driver Installation on Windows 8 OS ........................................................................................................................ 8
Table of Figures ...................................................................................................................................................... 12
OEM RFID Modules
Page 3 of 12

Initial Operation
BlueBox Quick Start Guide
1
Initial Operation
1.1
Connecting the Cables
Antenna Connection
USB Connection
The BlueBox will accept all
commands on all interfaces.
So you can perfom all tests
using the USB connection.
Power Connection
Figure 1.1
Connection Overview
1.2
USB Driver Installation
After Plug-In windows may request the USB driver. Please navigate the installation wizard to the file
\04_USB_Driver\BB2VCP.inf
Finally the device shall connect as VCom Port. The number may vary depending on previous VCP installations on the PC.
Page 4 of 12
OEM RFID Modules

BlueBox RFID Devices
Initial Operation
1.3
Installation of Test/Demo Software “BLUEBOX SHOW”
Unzip the file package “BLEUBOX-SDK-x.yy.z.rar” and start setup. This will not only install the SDK, but also the test/demo
software “BLUEBOX SHOW” to operate all features of the device.
1.4
Establish Connection to a BLUEBOX
Figure 1-2
BLUEBOX Show screenshot. RS232 connection configuration.
Click on the toolbar connect button (Figure 1-3) to connect with the reader. After opening the connection the software
reads the firmware release of the reader.
Figure 1-3
BLUEBOX Show connect button in the toolbar.
OEM RFID Modules
Page 5 of 12

Operating BLUEBOX Show for Testing
BlueBox Quick Start Guide
2
Operating BLUEBOX Show for Testing
2.1
Overview
Figure 2-1
Start screen that appears after connecting to a BLUEBOX first
2.2
Automatic Mode, Continuous Mode, Auto-Read
On factory default, the BlueBox automatically scans for RFID tags. That means it automatically emits UHF frequencies.
Figure 2.2
BLUEBOX Show Screen Section: Configuration with automatic mode
Page 6 of 12
OEM RFID Modules

BlueBox RFID Devices
Operating BLUEBOX Show for Testing
2.3
Adjusting the RF TX Power
Navigate to this configuration page. Change the value of “RF output power” to the desired test value. Larger numbers will
result in more RF TX Power.
Figure 2-3
Parameters RF Configuration
2.4
Test If RFID Tags Are Detected
Open the screen “Inventory”. Now press [ Request ] on the bottom of the screen. In every operation mode the device will
scan for tags and show them.
Figure 2-4
Inventory Test Function
For continuous update of this list, you can checkmark “Infinite Request”.
OEM RFID Modules
Page 7 of 12
Driver Installation on Windows 8 OS
BlueBox Quick Start Guide
3
Driver Installation on Windows 8 OS
Windows 8 does not allow installing drivers that are not signed by Microsoft. Below is described how to de-activate the
driver signing check.
First, select "Settings" on the right side of your screen:
Select "Change PC Settings":
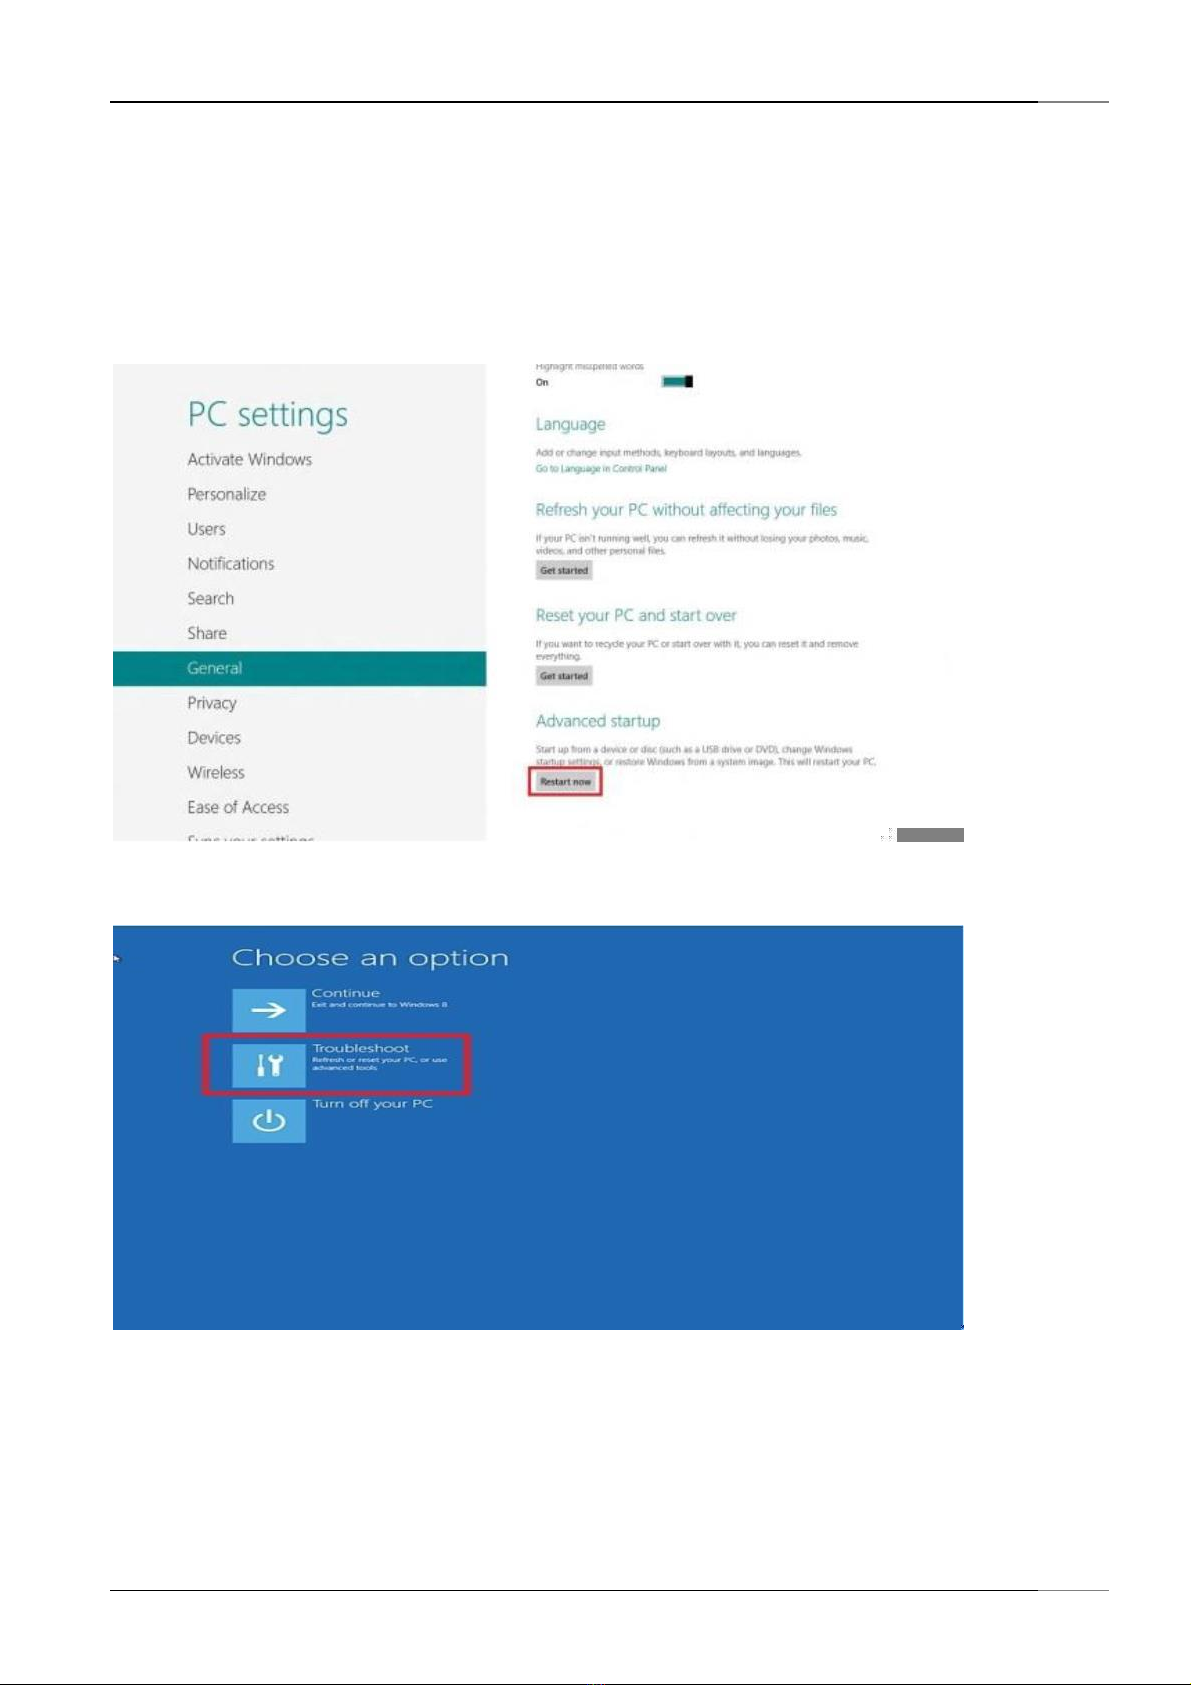
Navigate to "General" settings and then scroll down to "Advanced Startup". Click on "Restart":
After that, Click on "Troubleshoot":
On the next screen, choose "Advanced Options":
Page 8 of 12
OEM RFID Modules

BlueBox RFID Devices
Driver Installation on Windows 8 OS
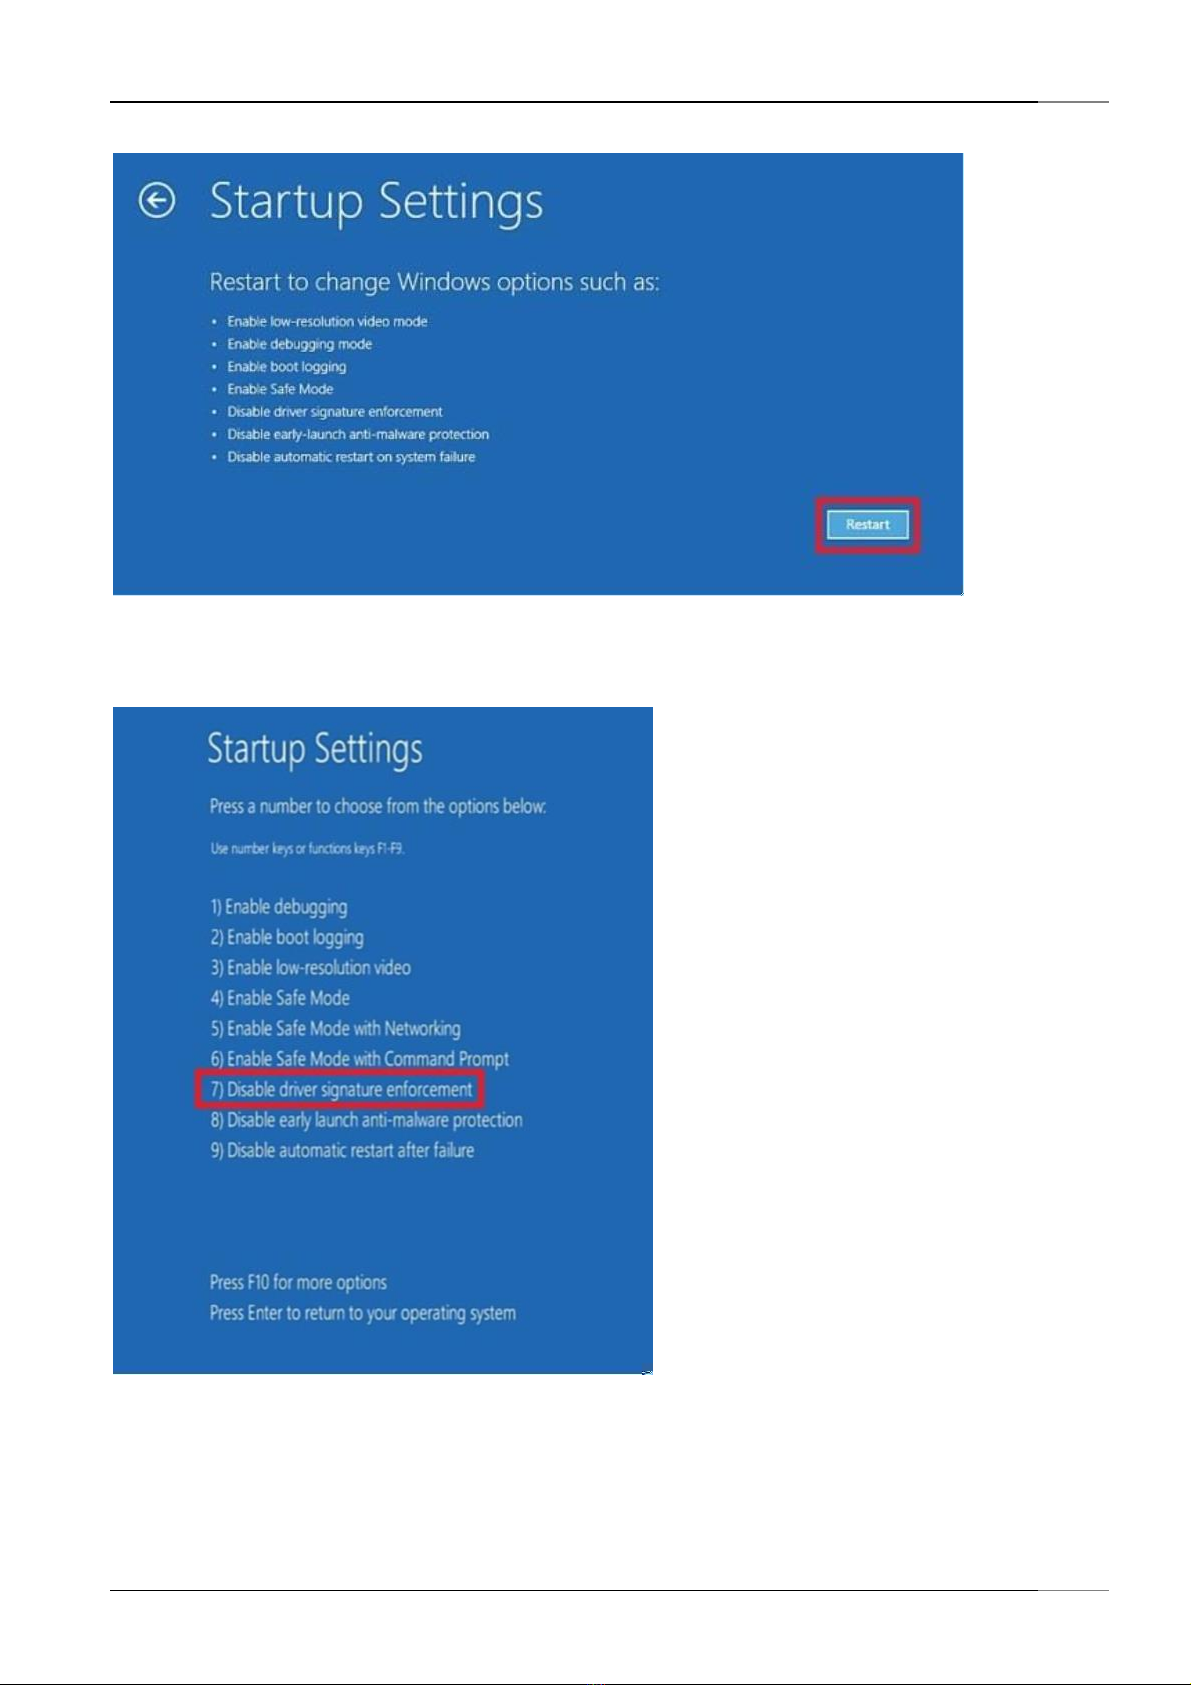
Then click on "Startup Settings":
Then click on the "Restart" button:
OEM RFID Modules
Page 9 of 12
Driver Installation on Windows 8 OS
BlueBox Quick Start Guide
After your computer reboots, another screen will appear where you will be asked to press a number to choose an option.
So press 7 or F7:
When you install the driver, this prompt will appear on screen. Select "Install this driver software anyway":
Page 10 of 12
OEM RFID Modules

BlueBox RFID Devices
Driver Installation on Windows 8 OS
OEM RFID Modules
Page 11 of 12

FCC STATEMENT :
This device complies with Part 15 of the FCC Rules. Operation is subject to the following
two conditions:
(1) This device may not cause harmful interference, and
(2) This device must accept any interference received, including interference that may cause undesired operation.
Warning: Changes or modifications not expressly approved by the party responsible for compliance could void the user's
authority to operate the equipment.
NOTE: This equipment has been tested and found to comply with the limits for a Class B digital device, pursuant to Part 15
of the FCC Rules. These limits are designed to provide reasonable protection against harmful interference in a residential
installation. This equipment generates uses and can radiate radio frequency energy and, if not installed and used in accordance
with the instructions, may cause harmful interference to radio communications.
However, there is no guarantee that interference will not occur in a particular installation. If this equipment does cause
harmful interference to radio or television reception, which can be determined by turning the equipment off and on, the
user is encouraged to try to correct the interference by one or more of the following
measures:
Reorient or relocate the receiving antenna.
Increase the separation between the equipment and receiver.
Connect the equipment into an outlet on a circuit different from that to which the receiver is connected.
Consult the dealer or an experienced radio/TV technician for help.
FCC Radiation Exposure Statement:
This equipment complies with FCC radiation exposure limits set forth for an
uncontrolled environment. This equipment should be installed and operated
with minimum distance 20cm between the radiator & your body.

Connection Overview ........................................................................................................................................ 4
BLUEBOX Show screenshot. RS232 connection configuration. ........................................................................ 5
BLUEBOX Show connect button in the toolbar. ................................................................................................ 5
Start screen that appears after connecting to a BLUEBOX first ........................................................................ 6
BLUEBOX Show Screen Section: Configuration with automatic mode ............................................................. 6
Parameters RF Configuration ............................................................................................................................ 7
Inventory Test Function .................................................................................................................................... 7
FCC Statement .................................................................................................................................................. 8
Table of Figures
4
Figure 1.1
Figure 1-2
Figure 1-3
Figure 2-1
Figure 2.2
Figure 2-3
Figure 2-4
Figure 2-5
Table of contents


